
Search results for "Adequately" in Home Design Ideas
 i.fromkin interiors
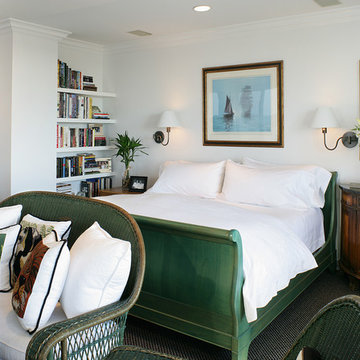
A king seize sleigh bed with pure white bedding against white walls highlight the master bedroom space. The vintage green wicker provides a comfortable seating area for reading or watching TV. Wall sconces sit above the antique tables and provide adequate lighting for reading in bed. Two inch thick wall shelves store books and photographs.
Peter Rymwid, Photographer
 Emcy Interior Design
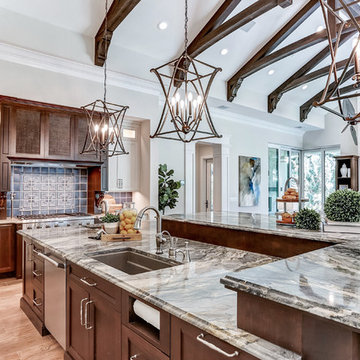
Inspiration for a large transitional l-shaped light wood floor and brown floor open concept kitchen remodel in Tampa with an undermount sink, recessed-panel cabinets, beige cabinets, granite countertops, gray backsplash, ceramic backsplash, paneled appliances, an island and multicolored countertops

Find the right local pro for your project

 Northern Roof Tiles
Architect: Andre Tchelistcheff Architects New York. NY
Builder: Xhema of Greenwich CT
Installer: TRM Enterprises Bridgehampton NY
Back story.
Northern has worked with both Xhema and TRM many tiles. We have worked with Andre before he branched out on his own.
Originally Xhema’s contact was to replace the roof and repair the garage, which as some point had been made into an indoor swimming pool without adequate ventilation. The budget was about $8m and there were 20 drawings.
By the time the job was 6 months old the scope of work has expanded to over $30m and over 200 drawings had been produced.
Northern was contacted to visit the site and evaluate the existing roof. Although the house had been added to over the years the same tile was used but due to the location of the house the color of the tile varied considerably from the front to the back.
Northern identified a large number of custom details which would require us to:
1) Match the existing Field tile in size, thickness (it was actually thicker at the butt and reduced to ½” where the tile is overlapped) , surface texture and the color.
2) Make tiles that are curved in their length to suit the curved rafter on the gabled dormers.
3) Make the curved tiles to suit the low slope octagonal tower.
4) Make the curved tiles and Arris style hips to suit the hipped dormers with the curved rafters.
5) Make the segmented tiles to suit the round turret.
6) Make the custom arris style hip tiles for the octagonal tower.
7) Make the custom Arris style hip to suit the different roof pitches as well as the varying splays at the eaves.
8) Make the custom pieces to suit the swept valleys
Simon broke down each section of the roof. He indented all items for each section and agreed the measure etc with the installers. This ‘Project Bible’ became an invaluable tool for the installer, our tile makers and us.
We shipped some samples from the original roof to Sahtas who replicated tall the details. I was visiting factory and delayed my return to the Saturday so that the tiles coming out of the kiln late Friday night could be wrapped and packed into newly purchase suit cases. I arrived home late Saturday evening and Simon picked me up Sunday afternoon and drove us down to Greenwich for an 8 am meeting with the clients. When we unpacked the tiles they were still warm and Hilfiger signed off on the color, although his wife suggested we make them a bit darker a ‘as he has a dreadful sense of color!’
We took Vincent Liot, owner of TRM to the factory twice so that he could oversee the prototyping of all the myriad custom pieces. This was an invaluable move as he pre-approved all the pieces before they were shipped.
The installation was completed and everyone was very pleased with the final outcome.
The Hilfiger’s estate manager told me that a group of friends who were staying the weekend after all the work was completed were heard to ask Mr. Hilfiger ‘I thought you were having a new roof’…to which he responded ‘we did but you can’t tell, which as the plan” …perfect!
In refection this is probably the most complicated roof Northern has ever had the pleasure to supply. We learned a lot of very valuable lessons but in future when we are asked how did we do it we will answer ‘that is for us to know and for you to pay for!’
 Gilmans Kitchens and Baths
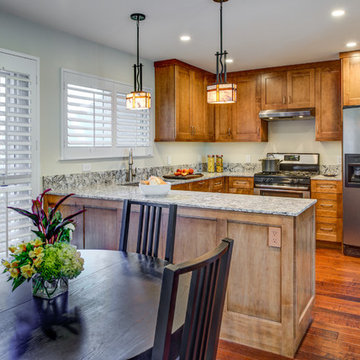
This kitchen project was for a first time home buyer and new Doctor. It was important to the client to maximize the space in the kitchen and to create adequate storage for his plates, pots and pans. Sufficient countertop space was also important in order to accommodate guests during parties and game nights.
Medium brown tones were used throughout the space in order to create warm and inviting feeling in the kitchen and guest bath.
Schedule an appointment with one of our Designers!
http://www.gkandb.com/
DESIGNER: JANIS MANACSA
PHOTOGRAPHY: TREVE JOHNSON PHOTOGRAPHY
CABINETS: DURA SUPREME CABINETRY
COUNTERTOP: CAMBRIA BELLINGHAM
 Steller Construction
When buying the house, the homeowners loved the location, but needed to make the space more open and functional for their family. Having three young children, they wanted to make sure adequate sight lines were included between the kitchen and great room since they knew that’s where they would spend most of their time.
The homeowners also wanted to update the space to match their modern design tastes. The home was a traditional design, but coming from New York City, these homeowners sought to bring a city vibe to their home while making it more functional for their needs.
The opening between the great room and kitchen was enlarged by adding a 13’ beam to the home. The kitchen design was modified to get rid of an awkward and small pantry along with eliminating a window to allow for more cabinetry. The custom island includes a microwave, sink and dishwasher. Outlets were hidden under the upper cabinets to give the backsplash a clean look and feel.
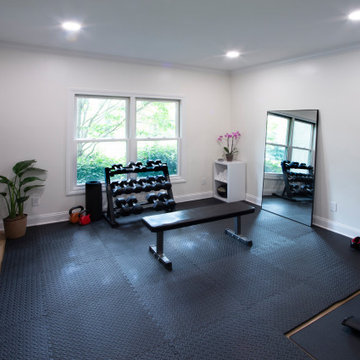
The home had two home offices, one of them was converted to a workout space. Custom millwork was completed to modernize the two-way fireplace. Additional hardwood flooring was added to the first floor, and all was refinished to match. New lighting was installed throughout the first floor as well.
The small laundry room was reconfigured to allow more storage including adding a pocket door to save on real estate. Removing the kitchen pantry, gave the laundry more storage space for hanging laundry and storing supplies.
All these remodeling decisions took place from afar while the homeowners still lived in NYC.
 RAJ Kitchen and Bath, LLC
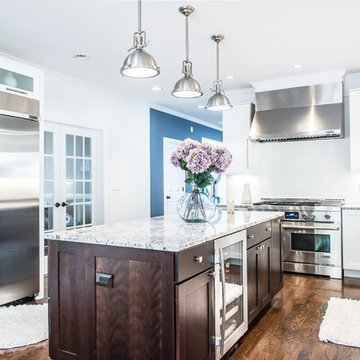
Ever think about cooking in style and comfort? then look no further. This transitional Kitchen design is not only modern but is also practical. This home was built from the ground up, so we were fortunate to design this kitchen from a blank slate. Features of the kitchen includes: White paint grade Maple wood Cabinet, Island from Maple wood with espresso finish, big Island with tons of space and outlet on side panel, airy with natural lighting, adequate counter space, huge built-in Pantry, kitchen nook, stainless steel built-in appliances, plenty of
 K Lilia Interior Design
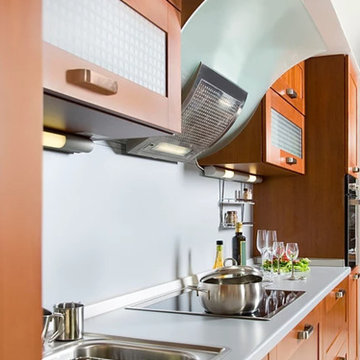
Kitchen renovation project. Updated cabinets and installed new high-end appliances. Galley kitchen with maple cabinets. Installed a bar fixed behind the worktop to hang spices and small food containers on to shelves to clear the worktop. Undercabinet lighting provides ample adequate lighting to illuminate the worktops.

 Ruth Consoli Design
My favorite tree is a Serviceberry (Amelanchier), a native to the northeast and beyond. There are few trees that can produce delicate white flowers in the spring, edible fruit in the summer, beautiful fall foliage and a serene winter silhouette. Part shade to full sun with adequate moisture. Matures to approx. 25' high and wide. Ruth Consoli Design
 Rogan Adams Design
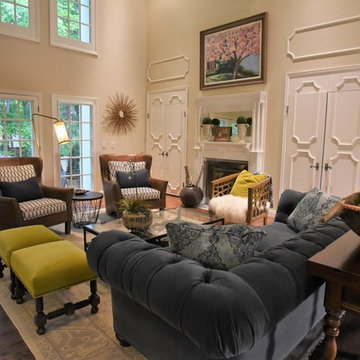
Its hard to imagine that this beautiful french country home was once covered in wall to wall green shag carpet! The hardwood floors and the large wood beams helped us create a warm and welcoming feeling in this enormous living room. We added soft colors and textures to continue the welcoming vibe and selected large scale furniture and art to adequately fill the space.
 Candice Keilin & Bonnet Designs
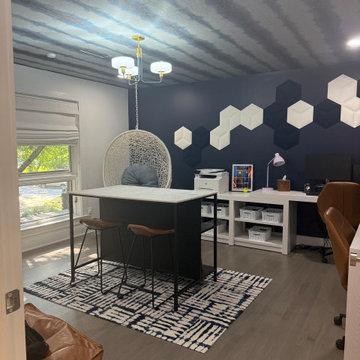
Home Kids office, notice the wallpaper on the ceiling to make the space feel energized, acoustical wall tiles as part of the design element the small space home office has more than adequate storage and work station areas with multiple seating spaces for learning, reading, collaborating
 Thomae Lumber | Mead Lumber
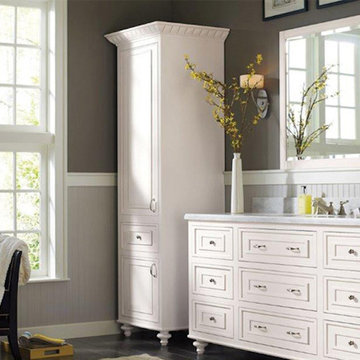
Mead features quality cabinetry from major manufacturers, including Custom Wood, Embassy, Omega, Merillat, Woodland Cabinetry, and Rushmore Countertops to provide our customers with an extensive selection of styles, options, and great craftsmanship. Customers can choose between cabinet door styles, wood types, and stain finishes, as well as our excellent selection of countertops, to find the look that will fit their style, home, and budget.
Our professional sales and design personnel will be pleased to help you with the 20/20 computerized design, product selections, on-site measurements, and any other assistance the project requires. Meet with one of our associate's today to find the perfect cabinets and countertops for your kitchen, bath, den, study, great room, wet bar, laundry area, or wherever.
 J.T. McDermott Remodeling
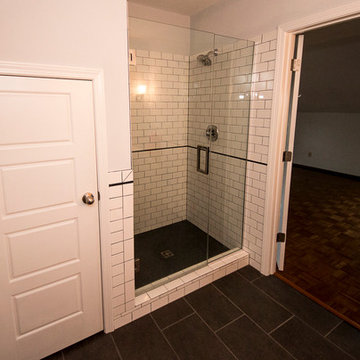
The third floor of this historic home had angled ceilings, something that can make designing a bathroom difficult. We had to be sure to plan for adequate ceiling height at all the fixtures. This meant that the shower got pushed toward the bathroom entry. We then created a linen closet with a custom sized door under the shorter angled ceiling. The black and white color palette is consistent with the rest of the home. Photo Credit: Jeff Smyth

 My LA Organizer
My Client didn't have enough shelving for her shoes. Though she had a spectacular walk in closet, the architect (I blame them) didn't build adequate shelving for today's woman. So, rather than knocking down walls and starting from scratch, I brought in these stylish acrylic shoe drawers. With these drawers I was able to expand my clients storage more than 5 times. The drawers look like glass and compliment the most exquisite interiors. In this case, I labeled the drawers by designer, style and color.
 highland
Renovating a bathroom is one of the most rewarding home improvement projects you can undertake. It adds immediate value to your property and elevates your daily routine. However, designing the perfect space requires balancing aesthetics with practical utility. At the heart of this balance is the vanity — it is the functional hub where you get ready each morning, a vital storage unit, and the visual centerpiece of the room.
To ensure you make the right investment, here is an in-depth look at choosing a bathroom vanity that blends style, longevity, and everyday functionality.
1. Assessing the Layout and Space Constraints
Before you fall in love with a specific design or finish, you must determine what your bathroom can physically handle. Scale is everything. A vanity that is too large disrupts traffic flow, while one that is too small gets lost visually and lacks adequate storage.
The next major step is determining the scale of your plumbing fixtures. Understanding how to choose a bathroom sink and vanity setup comes down to a simple choice: single or double sinks. Your choice will depend on who uses the bathroom and the overall footprint of the space.
Single Sink Vanities
Typically ranging from 20 to 48 inches (50–120 cm) in width, single vanities are the ideal choice for powder rooms, guest bathrooms, or small master suites. For very compact spaces, you can find narrower options starting around 16 inches (40 cm). The major advantage of a single-sink layout is that it provides more usable countertop space for cosmetics, toiletries, and decorative items. If you want to skip the guesswork and invest in a premium, beautifully handcrafted fixture, explore the luxury collections at Willow Bath and Vanity. From elegant single vanities to spacious double setups, their masterfully built furniture combines solid wood construction with elite styling to transform any bathroom into a spa-like retreat.
Double Sink Vanities
Usually starting at 48 inches (120 cm) and extending up to 72 inches (180 cm) or more, double vanities are a lifesaver for shared master bathrooms. They allow two people to get ready simultaneously without fighting for sink space. Keep in mind that a double vanity naturally reduces both cabinet storage space and countertop real estate since a second sink basin and plumbing lines take up substantial interior room.
Sink Types to Consider
The countertop is the workhorse of the bathroom. It regularly comes into contact with running water, toothpaste, soapy residue, and high-heat styling tools. Knowing how to choose a bathroom vanity top requires evaluating how much maintenance you are willing to perform against the look you want to achieve. Material Pros Cons Maintenance Level Quartz Highly durable, non-porous, stain and scratch-resistant. Offers the look of stone without the hassle. Premium pricing; can show seams on very large custom layouts. Low (No sealing required) Marble Timeless, elegant, and luxurious. Every slab features a completely unique veining pattern. Porous; prone to scratching, etching from acids, and water stains. Requires careful daily use. High (Requires regular sealing) Granite Naturally strong, heat-resistant, and chemically stable. Unique earthy patterns. Porous; can chip if subjected to heavy impacts. Medium (Requires occasional sealing) When coordinating your countertop, ensure it complements your bathroom’s floor tiles, shower surround, and plumbing hardware to maintain visual harmony.
4. Selecting the Core Vanity Style and Finish
Once the functional components are locked in, you can focus on the architectural style of the vanity base. The base dictates the design theme of the entire room.
Conclusion
Choosing the perfect vanity is a step-by-step process that combines precise measurements with your personal design taste. By taking careful measurements, choosing between a single- or double-sink setup, and picking a durable counter material like quartz or granite, you can transform your bathroom into a beautiful, organized retreat. Prioritize high-quality materials and smart craftsmanship, and your new vanity will look spectacular and serve your household reliably for years to come.
1. Assessing the Layout and Space Constraints
Before you fall in love with a specific design or finish, you must determine what your bathroom can physically handle. Scale is everything. A vanity that is too large disrupts traffic flow, while one that is too small gets lost visually and lacks adequate storage.
- Take Precise Measurements: measure the available width, depth, and height. Remember to account for surrounding fixtures.
- Check Clearance Zones: ensure there is enough clearance for the bathroom door to swing open, for shower glass doors to clear the vanity, and for drawers and cabinet doors to extend fully without hitting the toilet or walls.
-
Locate Existing Plumbing: moving pipes can significantly increase renovation costs. If you want a seamless installation, look for a vanity configuration that aligns easily with your current plumbing setup.
The next major step is determining the scale of your plumbing fixtures. Understanding how to choose a bathroom sink and vanity setup comes down to a simple choice: single or double sinks. Your choice will depend on who uses the bathroom and the overall footprint of the space.
Single Sink Vanities
Typically ranging from 20 to 48 inches (50–120 cm) in width, single vanities are the ideal choice for powder rooms, guest bathrooms, or small master suites. For very compact spaces, you can find narrower options starting around 16 inches (40 cm). The major advantage of a single-sink layout is that it provides more usable countertop space for cosmetics, toiletries, and decorative items. If you want to skip the guesswork and invest in a premium, beautifully handcrafted fixture, explore the luxury collections at Willow Bath and Vanity. From elegant single vanities to spacious double setups, their masterfully built furniture combines solid wood construction with elite styling to transform any bathroom into a spa-like retreat.
Double Sink Vanities
Usually starting at 48 inches (120 cm) and extending up to 72 inches (180 cm) or more, double vanities are a lifesaver for shared master bathrooms. They allow two people to get ready simultaneously without fighting for sink space. Keep in mind that a double vanity naturally reduces both cabinet storage space and countertop real estate since a second sink basin and plumbing lines take up substantial interior room.
Sink Types to Consider
- Undermount: installed beneath the counter for a smooth, seamless surface that is incredibly easy to wipe down.
- Vessel: sits atop the counter like a decorative bowl. It makes a bold style statement but raises the overall height of the counter surface.
- Drop-In: features a lip that rests on the counter cutout. It is easier to install, but its edges can catch dirt.
-
The countertop is the workhorse of the bathroom. It regularly comes into contact with running water, toothpaste, soapy residue, and high-heat styling tools. Knowing how to choose a bathroom vanity top requires evaluating how much maintenance you are willing to perform against the look you want to achieve. Material Pros Cons Maintenance Level Quartz Highly durable, non-porous, stain and scratch-resistant. Offers the look of stone without the hassle. Premium pricing; can show seams on very large custom layouts. Low (No sealing required) Marble Timeless, elegant, and luxurious. Every slab features a completely unique veining pattern. Porous; prone to scratching, etching from acids, and water stains. Requires careful daily use. High (Requires regular sealing) Granite Naturally strong, heat-resistant, and chemically stable. Unique earthy patterns. Porous; can chip if subjected to heavy impacts. Medium (Requires occasional sealing) When coordinating your countertop, ensure it complements your bathroom’s floor tiles, shower surround, and plumbing hardware to maintain visual harmony.
4. Selecting the Core Vanity Style and Finish
Once the functional components are locked in, you can focus on the architectural style of the vanity base. The base dictates the design theme of the entire room.
- Freestanding vanities: sit directly on the floor, supported by legs or a solid kickboard base. This is a traditional, stable configuration that offers the maximum hidden cabinet and drawer storage space.
- Wall-Mounted (Floating) vanities: anchored directly onto the wall studs, leaving the floor underneath completely clear. Floating vanities are staples of modern, minimalist design. They create an illusion of space, making small rooms look larger, and make cleaning the bathroom floor incredibly easy.
- Console vanities: feature an open shelving design supported by a metal or wood frame. It offers a light, airy look reminiscent of a boutique hotel, though it sacrifices hidden storage.
Conclusion
Choosing the perfect vanity is a step-by-step process that combines precise measurements with your personal design taste. By taking careful measurements, choosing between a single- or double-sink setup, and picking a durable counter material like quartz or granite, you can transform your bathroom into a beautiful, organized retreat. Prioritize high-quality materials and smart craftsmanship, and your new vanity will look spectacular and serve your household reliably for years to come.

 Peak Custom Remodeling Corporation
Removed original 4" gutters and downspouts and installed seamless 6" gutters using an angled screw hidden hanger system to allow for maximum stability and aesthetics. Installed 3 additional downspouts to maximize drainage as the property's drainage system did not allow for adequate flow.
 Carter Fox Design Build
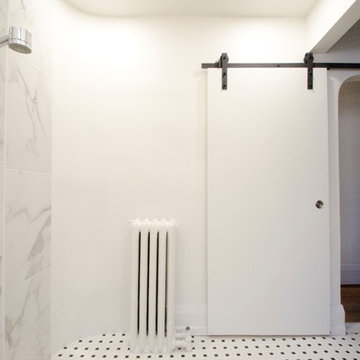
For this Wychwood Park complete bathroom rebuild, Carter Fox was hired to create a functional, accessible bathroom that did not look institutional or boring.
We opened up the original powder room/tub room layout, removing the interior doors to allow adequate space to maneuver, and created a wheelchair-accessible curbless shower room with a second sink (re-purposing the original) at bench height.
Photo credit Julie Carter

 Tile Doctor Ltd
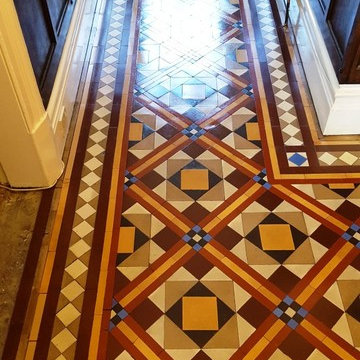
The colourful and diverse geometric patterns of a Victorian tiled floor can give a property a regal, elegant and timeless feel, making it a popular choice even in the 21st century. However, as time passes without regular care and maintenance, Victorian tiles can quickly lose their colour and appear deadened by the buildup of dirt and dust over several months (and sometimes years).
This property owner in Hebden a very small village in North Yorkshire of less than 300 people, had this common problem. Her Victorian tiled hallway had not been adequately maintained and was now more difficult to keep clean than ever. To add to the problem, most of the tiles along the edges were either broken, cracked, or filled with holes, probably I suspect from the installation of carpet grippers at some point in the past.
At this point, the property owner turned to Tile Doctor to see what could be done.
Before beginning a deep clean of the entire length of the hallway, it was first necessary to source and install replacement tiles for those that had been broken and damaged. I also relaid any that were loose.
When finished, I left the tiles to set and returned the next day to start the clean. My choice of cleaner in this situation was Tile Doctor Pro Clean, which was scrubbed into the floor with a special pad fitted to a rotary machine to break down ingrained dirt and stains. Pro Clean does this very effectively on all types of tile, including natural stone and of course Victorian tiles.
The floor was then rinsed with water and the soiled cleaning solution extracted from the floor using a vet vacuum. Stubborn areas were re-treated with more Pro Clean, and when I was satisfied with the condition of the tiles the floor was given a final but thorough rinse to remove any trace of cleaning product.
The floor was then left to dry completely overnight to ensure all excess moisture had disappeared, leaving it fresh to be sealed. I returned in the morning for a third day of work to seal the Victorian tiles with four coats of Tile Doctor Seal and Go, a topical sealer which provides a rich satin finish to really add depth to the colours in the tile while protecting it against dirt and stains.
The customer was delighted with the restoration and couldn’t quite believe the huge improvement in the appearance of the tiles, especially in regards to the enhancement in the different colours. Another satisfied customer!
Nigel Stoker
North West Yorkshire Tile Doctor
 Chromatics Interior Decor
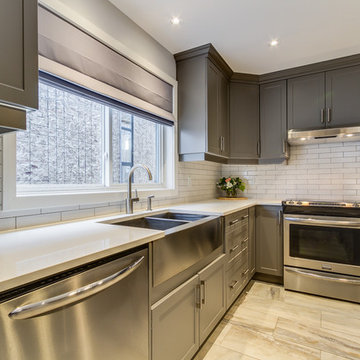
The home owners love to bake so a good oven and adequate storage for bake-ware was needed. Large drawers were integrated into the island for this purpose. The farmhouse sink was on the wishlist from the beginning, the look was updated by choosing one in a stainless finish.
47