
Search results for "Afterward" in Home Design Ideas

 Infinite Home
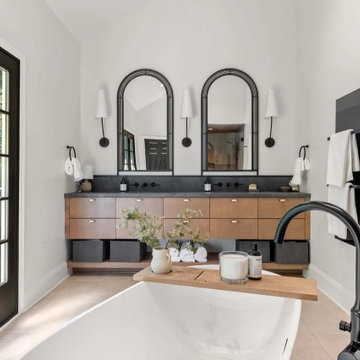
The most transformative part of the project was the addition of the primary suite. Our clients wanted this space to be more than just a bedroom—it needed to become an integral part of their daily routine, where they could truly unwind after a long day and start each morning with intention. Because they worked from home, we connected the suite to their lounge office through a private seating room, allowing them to ease into the workday feeling refreshed and retreat just as easily afterward without ever leaving their sanctuary.
Designed as a retreat, the suite features exposed wood beams that add character and warmth, while the walls are painted in White Flour by Sherwin-Williams for a soft, airy backdrop. Overhead, a Williams Sonoma Ingrid chandelier serves as a warm focal point, bringing elegance with a modern edge. A walk-in closet with glass-and-iron doors provides a boutique-like entrance, while the bedroom flows seamlessly into the spa bathroom.
The bathroom walls are painted in that same Swiss Coffee by Sherwin-Williams, creating a light and calming foundation for the warm wood tones of the floating double vanity. At the heart of the room, the freestanding Kohler tub rests on a bed of smooth river stones, creating a grounding focal point that welcomes our clients to truly unwind. The zero-entry shower, finished with Kenridge Ribbon Maple Matte porcelain tile, adds an organic warmth, while Kohler matte black fixtures provide a modern contrast.
This balance of natural warmth and modern refinement turned the suite into more than just a functional addition—it became the personal retreat our clients had envisioned, perfectly supporting their lifestyle of working, resting, and recharging at home.
 Grout Works of Central NJ
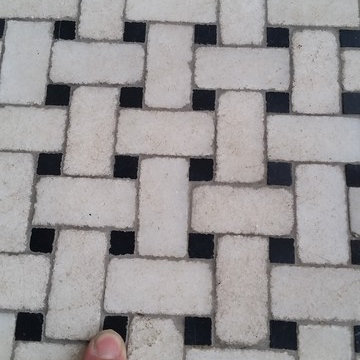
This basket weave marble floor was in the entry way of the house in Chatham NJ. First we leveled and flattened the marble so all the little tiles were perfectly flat and level. This is called grinding to produce a grind in place floor. This means that all the tiles are level and there are no lips and dips from uneven tile edges. Afterward we diamond honed the marble to remove all scratches and marks. Finally we powder polished the marble to a beautiful shine with clarity and clear reflection. You can see the reflection of the trees from outside. What a tremendous difference from the marble beforehand.
Find the right local pro for your project
 Infinite Home
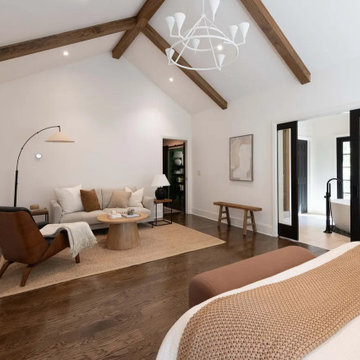
The most transformative part of the project was the addition of the primary suite. Our clients wanted this space to be more than just a bedroom—it needed to become an integral part of their daily routine, where they could truly unwind after a long day and start each morning with intention. Because they worked from home, we connected the suite to their lounge office through a private seating room, allowing them to ease into the workday feeling refreshed and retreat just as easily afterward without ever leaving their sanctuary.
Designed as a retreat, the suite features exposed wood beams that add character and warmth, while the walls are painted in White Flour by Sherwin-Williams for a soft, airy backdrop. Overhead, a Williams Sonoma Ingrid chandelier serves as a warm focal point, bringing elegance with a modern edge. A walk-in closet with glass-and-iron doors provides a boutique-like entrance, while the bedroom flows seamlessly into the spa bathroom.
The bathroom walls are painted in that same Swiss Coffee by Sherwin-Williams, creating a light and calming foundation for the warm wood tones of the floating double vanity. At the heart of the room, the freestanding Kohler tub rests on a bed of smooth river stones, creating a grounding focal point that welcomes our clients to truly unwind. The zero-entry shower, finished with Kenridge Ribbon Maple Matte porcelain tile, adds an organic warmth, while Kohler matte black fixtures provide a modern contrast.
This balance of natural warmth and modern refinement turned the suite into more than just a functional addition—it became the personal retreat our clients had envisioned, perfectly supporting their lifestyle of working, resting, and recharging at home.
 Decor & More, LLC
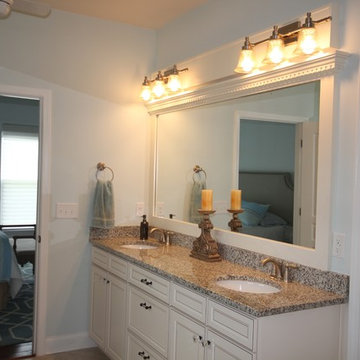
Exisitng plain mirror was trimmed to accomdate the fixture
Debbie Slovin
I was hired to work with this couple on a new home. A standard home was built and the work came in customizing it afterward. Custom built-ins were added in the great room. Custom wainscoting was designed for the entry foyer and office. Window treatments, light fixtures, fans, paint and back splash were selected.
The owners wanted a comfortable, casual home blending existing pieces with new to create a coastal feel.
 FirePit Outfitter
Customer: Jason Kay
Location: Los Angeles, California
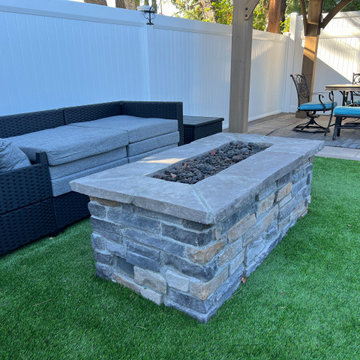
Product: 61″ x 31″ Rectangle Custom Stone Gas Fire Pit
"I love that the gas firepit saves time both with a quick start and not having to wait for the fire to extinguish. It turns on with the flip of a switch instead of having to start a fire each time. By being a natural gas fire pit, there are no embers to damage the synthetic lawn or furniture. Best of all there are no odors on your clothes afterward, so it is great for entertaining guests.
I purchased a custom stone fire pit because I wanted a unique electric start fire pit. I also wanted to be able to choose the stone to match my outdoor decor. Before reaching out to Fire Pit Outfitter, I considered different shapes, sizes, gas types, and burner shapes."

 Inspired Closets Central Florida
Experience the transformation of an Inspired Closet. Before, its a functional space with bit of clutter. Afterwards, it's functional, beautiful, easily accessible, and a joy to utilize.
 Taragano Design and Build
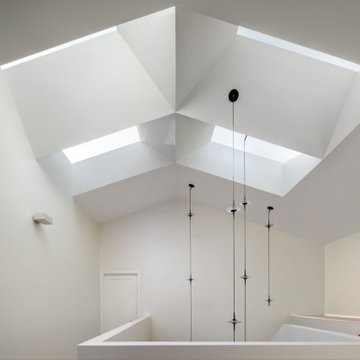
Taragano Design & Build completed this stair landing as part of a
whole house remodel in Contra Costa County, California.
Stairwells are the darkest part of most houses. They sit in the
center of the plan with no exterior wall, and the standard answer
is a fixture that runs all day. Here the roof was opened instead
and the ceiling folded into planes that carry light down from four
recessed skylights.
The geometry is doing work, not decoration. Each plane catches
light at a different angle and bounces it toward the floor below,
so the landing receives indirect daylight rather than a hard shaft
falling in one spot. Angled surfaces distribute what a flat ceiling
would concentrate.
Every skylight is recessed with no visible frame from inside. That
detail requires the opening to be framed and finished as part of
the ceiling assembly rather than trimmed out afterward, which is a
framing decision made months before any drywall goes up.
Finishes were held to nothing at all. White plaster on every
surface, so the only thing the eye reads is the light and the form
holding it.
Licensed general contractor, CSLB #1143420. Diamond Certified.
 Inspired Closets Central Florida
Experience the transformation of an Inspired Closet. Before, its a functional space with bit of clutter. Afterwards, it's functional, beautiful, easily accessible, and a joy to utilize.
 Four Elements Construction
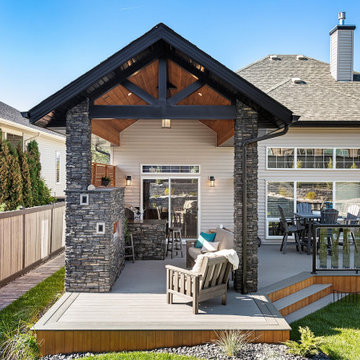
Our clients wanted to create a backyard area to hang out and entertain with some privacy and protection from the elements. The initial vision was to simply build a large roof over one side of the existing deck while providing a little privacy. It was important to them to carefully integrate the new covered deck roofline into the existing home so that it looked it was there from day one. We had our partners at Draw Design help us with the initial drawings.
As work progressed, the scope of the project morphed into something more significant. Check out the outdoor built-in barbecue and seating area complete with custom cabinets, granite countertops, and beautiful outdoor gas fireplace. Stone pillars and black metal capping completed the look giving the structure a mountain resort feel. Extensive use of red cedar finished off the high ceilings and privacy screen. Landscaping and a new hot tub were added afterwards. The end result is truly jaw-dropping!

 Tile Doctor Ltd
The pictures showed are of an Encaustic Cement tiled floor that had been installed in the bathroom of a property in Twickenham. At the time the tiles were installed, they did not seal them and had since accumulated dirt, especially in the grout lines.
Encaustic cement tiles have become extremely popular in the last few years with many beautiful artistic often geometric patterns available to choose from. The very nature of the cement-based tile however does make it slightly porous, and if left unsealed dirt will become ingrained in the tile making it difficult to remove and keep clean. Like grout they do therefore need to be sealed in order to keep them looking at their best for longer.
Now we normally recommend using diamond encrusted burnishing pads when renovating Encaustic Cement tiles however in this case the face of the tiles were not too bad and it was really the grout that needed the most attention. So, to cut the cost for customer, I advised a straightforward alkaline scrub clean and seal.
To clean the tile and grout I sprayed the floor with a strong dilution of Tile Doctor Pro-Clean and left it to soak into the dirt for ten minutes. Space in the bathroom was quite tight so instead of using a mechanical floor scrubber I scrubbed the tile and grout by hand working the alkaline cleaning solution into the pores to release the grout in dirt.
After scrubbing the floor was rinsed with a little water and the soil removed with a wet vacuum. Afterwards the floor was inspected, and any stubborn areas retreated with repeat of the process. After a final rinse, the floor was dried as much as possible with the wet vacuum.
Fortunately, the weather has been amazing of late and so it did not take long for the floor to dry, being a small space and a little encouragement from a heat gun always helps. Removing excess moisture before sealing is essential as even a small amount can cloud the sealer resulting in an uneven appearance.
Once satisfied that the floor was dry, I proceeded to seal it by applying a couple two coats of Tile Doctor Colour Grow across the Encaustic tile and grout. As an impregnating sealer Colour Grow penetrates the pores of the cement occupying the space and thus prevent any dirt from becoming ingrained there. Colour Grow’s colour intensifying properties also helped to deepen the black colour of the tile enhancing the contrast between the tiles and grout.
Now the floor has been properly sealed it will be far easier for the customer to keep them clean in future. For maximum longevity of the sealer I recommend maintenance cleaning with Tile Doctor Neutral Cleaner. Don’t be tempted to use supermarket cleaning products without reading the label first, many are simply too strong for cleaning sealed surfaces and will strip off the sealer prematurely leaving the tiles unprotected.
Jonathan Oldham
South Middlesex Tile Doctor
 Tile Doctor Ltd
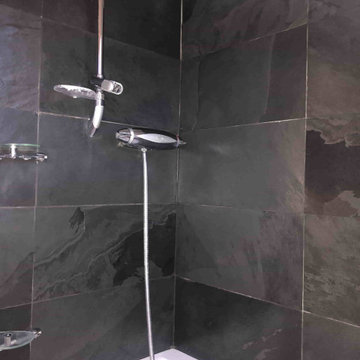
The photographs below are from a bathroom in Maida Vale W9 which had a lovely Slate tiled wall over a bath with shower. Unfortunately, the Slate tiles had been ruined by the use of harsh cleaning chemicals in an attempt to remove the limescale caused by hard water. The slate had now lost all its natural colour and looked completely washed out. The property had recently changed hands and the new owner was keen to have it renovated.
I went over to take a look and work out a solution, this in itself is a lot trickier these days with all the COVID precautions we need to take when working in someone’s house. It was clear that a strong acidic limescale remover had been used on the slate and this had etched the stone, leached all the natural oils away and generally ruined its appearance.
Fortunately, we have a solution for this (see below) and after conducting a small test I was able to confirm the problem could be resolved and gave them a quote which included a day’s labour, abrasive pads, stone oil and sealer. Our quote was gratefully accepted, and we booked a time in to carry out the work.
I returned to the property and I set about burnishing the slate wall tiles using a very coarse 200-grit six-inch burnishing pad fitted to a handheld buffing machine. This process resurfaces the stone slightly to remove the etching caused by the limescale remover. I used a medium dilution of Tile Doctor Grout Clean-up to lubricate the process and to remove the remaining limescale. Once done the slurry that is generated is rinsed off with more water. In a bathroom, it is easy the slurry can just be drained away. In other areas we would use a wet vacuum.
After the 200-grit pad the surface of the Slate was further refined using a 400-grit pad and then an 800-grit pad, this time only using water and giving the stone a thorough rinse after each pad to remove the soil.
The slate was then left to dry off over lunch and given more encouragement with a heat gun afterwards so I could move onto the next step. This involved applying a coat of Tile Doctor Stone Oil which puts back the natural oils back into the stone improving its appearance.
Once the Stone Oil had fully dried, I moved onto sealing for which I applied two coats of Tile Doctor Ultra-Seal; this is penetrating sealer that soaks into the stone to provide maximum stain protection without changing the colour of the stone. It is also an excellent grout sealer which is a bonus.
Before leaving I talked the client about how best to maintain the Slate and left them a complimentary bottle of Tile Doctor Aqua Pro tile cleaner which will help keep the limescale at bay. It is gentle enough to use every day but will help prevent the previous build-up and unlike the previous products used will not damage the newly applied sealer.
Jackson Davis
Central London Tile Cleaning
 User
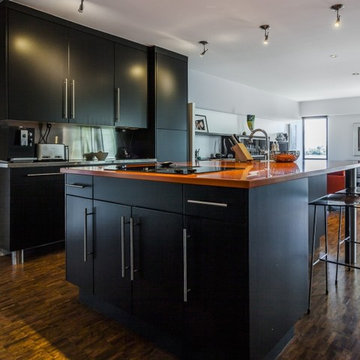
UserLuxurious "cube" of the historic building Habitat 67, our mandate consisted in designing both kitchen and bathroom and propose a design linked with the new owners taste.
Afterward, our mission was stretched in the research and the specification of furnitures and accessories to finalize the layout of this apartment. Regarding the kitchen, we decided to go with a black matte finish cupboard doors which offers a wonderful constast with the orange counter top.
It brings dynamism, youth and style in the entire space. In the same way, stainless steel appliances bring shine and light to this space.
Furthermore, we can find different orange touches everywhere in this apartment, such as in the two armchairs, the bathroom furniture or with the Foscarini Lamp, ''Fly''. Sculptural, it shines brightly in the dining room and is highlighted by a black metal furniture and slate floor. A new fire place was also placed on a wall so that it could be seen from both the dining and the living room.
Photo credit: Guillaume Gorini | Studio Point de vue
 Tile Doctor Ltd
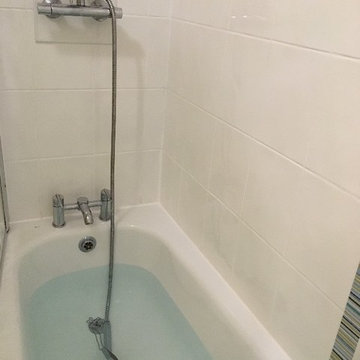
A client with a high-rise apartment in Manchester city centre contacted us in relation to the look of their bathroom tiles. The grout had become grubby and black with mould and it was clear from their message that they were considering have the grout replaced in order to freshen up the bathroom.
We discussed the problem over the telephone, and they emailed a picture of the bathroom across so I could get a better idea of what needed doing. It turns out that the apartment had been rented out previously and they needed the bathroom renovating so they could start letting it again. Clearly, they were keen to have the work completed as soon as possible. Fortunately, we are sometimes able to come out on short notice, especially for small jobs like this and so were able to do the work the following week
Re-grouting is a lot of work and very time consuming so I explained the benefits of Grout Colouring which is much quicker and results in a more practical finish as I will explain. There was a small issue with parking as one would expect from the city centre, but we were able to use one of the parking spaces of a neighbour in the basement of the building.
My first task was to get the grout as clean as possible before applying the colourant and given the amount of mould I decided to apply Tile Doctor Duo-Clean which is a Tile Cleaner/Mould Remover and ideal for use on ceramic tile and grout. The product was sprayed onto the tiles and grout and then scrubbed in by hand to get the grout as clean as possible. I also used a powerful steam cleaner to get the grout as clean as possible before rinsing the soil off with water. This process went well, and the grout looked much cleaner afterwards but was now a little patchy in places due to deep staining.
It’s worth noting that mould thrives in damp warm conditions and can easily be controlled by ensuring the bathroom has adequate ventilation. Some modern showers have a function that cool the bathroom down after use by running the shower on a cold setting. Improving cross-ventilation by leaving the bathroom door and a window open can also improve the situation and of course you can always apply Tile Doctor Duo-Clean on a regular basis.
Once the grout was dry and as clean as it could be, I applied a White Tile Doctor Grout Colourant along the grout lines with a small brush taking care to wipe off any excess from the tiles as I went. Only one bottle of colourant was needed, and I have found baby wipes work well when wiping off the excess.
The last step in the bathroom renovation was to strip out all the old mouldy silicone between the bath and the tiles and replace with new mould resistant silicone.
The cleaning and grout colour completely transformed the look of the bathroom leaving it looking fresh. The grout which was previously dark and patchy was now a consistent white colour giving the impression it had only been recently tiled. The colourant also forms an epoxy barrier over the grout that will prevent dirt from becoming ingrained in the grouts surface going forward, it’s also much easier to clean.
The customer was most impressed with the result and has informed us since that they will back in touch about renovating the grout in their own home! They left the following comment on the Tile Doctor website.
“Kamila made a wonderful job cleaning my grout and silicone. The bathroom looks like new. She was also easy to deal, very friendly and professional. Thank you!”
Alex Logozny
Greater Manchester Tile Doctor

 Classic Installations
We supply and install a variety of air conditioning systems (HVAC).
You may do a DIY installation, or we can do the installation for you.
Our most basic system is a 9000 BTU mid-wall split system with fixed speed. Suitable for up to approximately 30 m2 living area
The most popular option is a 12000 BTU mid-wall split system, inverter type (variable speed, power saving) and a remote control. Suitable for approximately 45 to 50 m2 of living area
The largest unit in this range is a 32000 BTU mid-wall split system, variable speed and remote control. Suitable for approximately 140 m2 of living area
We also supply and install a variety of domestic and light commercial air conditioning units, including compact cassette splits, under ceiling splits, ducted splits etc and air curtains. Fixed speed, as well as inverter type air conditioners are available.
We offer a complete service, should you require it. Supply and delivery of material, complete product installations, construction work (including chasing and plaster work), finishing touches (including painting), site clean-up and rubble removal afterwards.
We service the Greater Johannesburg area, including Sandton, Roodepoort, Randburg, and surrounding areas.
For more information or a quotation, please contact us.
Contact: Tom le Grange
Cell Phone / WhatsApp: 084 502 4164
Email: legrange.tom@gmail.com
 Jola Landscaping
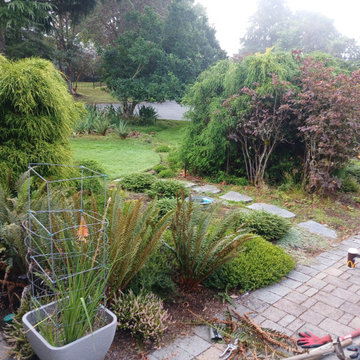
From the owner afterwards:
Outstanding ! Jonnah & Kyla came out to walk around my property and LISTENED to my concerns and ideas, making suggestions that made sense. I gave them a wish list and a set budget and they came up with a plan before the end of the day. The end result is exactly the vision that I had in mind. Years of weeds completed cleared; my flower beds look brand new. Special shout out to Joe who worked steadily and carefully and was so good natured and dedicated throughout the project. I’m so looking forward to my next list of wishes and will be signing up for ongoing maintenance, too. Everything I hoped for and more…
 Tile Doctor Ltd
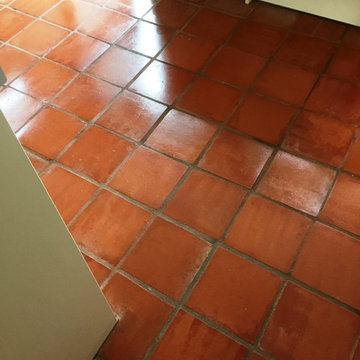
Newly built properties are not without their problems and often take a while to resolve all the snagging which occasionally extends to resolving problems with newly laid tiled floors. At this new property in the village of Malvern, and overlooked by the Malvern hills, the builders had left the Terracotta tiled kitchen floor covered in grout smears (also known as Grout Haze) following installation. They had also neglected to seal the tiles, which was actually quite fortunate in this case as they would have sealed in the grout haze, making it more difficult to remove.
Naturally, the property owner wanted the problem to be resolved as soon as possible, and for me to make the tiles easy to keep clean in future, which can be achieved by sealing the tile.
Before starting work, I made sure to fully protect any exposed woodwork with a plastic sheet covering to protect them from potential damage. I then proceeded to give the floor a thorough clean, using Tile Doctor Remove and Go to clean the floor and eradicate some stains that had been left behind as a result of the building work.
Next, I paid special attention to the grout, where the very visible problem of grout haze had arisen. To neutralise these smears I used Tile Doctor Grout Clean Up, a concentrated phosphoric acid cleaner that can also remove alkaline mineral deposits and efflorescence. Grout Clean Up is only to be used on acid resistant stone, as sensitive stone can suffer from irreparable etching if it comes into contact with the product.
Once completely clean and free of grout smears the floor was thoroughly rinsed with water to remove any trace of product and then dried as much as possible with a wet vacuum, afterwards an air mover was installed to speed up the drying process.
Later that afternoon the floor was dry and I was able to apply a sealer. To do this I opted to use several coats of Tile Doctor Seal and Go Extra, a topical, fully breathable sealer that works really well on Terracotta.
The sealer builds up a layer of protection on the surface of the tiles, protecting against ingrained dirt and stains. Seal and Go Extra also provides a high quality sheen finish which really did well to enhance the look of the Terracotta.
The property owner was exceptionally pleased with the results, and to have this problem dealt with quickly and efficiently, additionally the sealer will ensure the Kitchen floor is easy to keep clean in the future.
 Lagois Design Build Renovate
They always loved their house – its shape and size, and the piece of land it sits on; but the interior left a lot to be desired. In fact, they hated it. They wanted it to be aesthetically more pleasing and to have much more function and flow.
These homeowners challenged Lagois to make it the home of their dreams, and that’s exactly what happened. One of the homeowners loves to cook, but the kitchen was dark. The space was difficult and frustrating. The new kitchen is bigger, brighter, and more functional. It now has all the prep space he needs and the task lighting he always wanted.
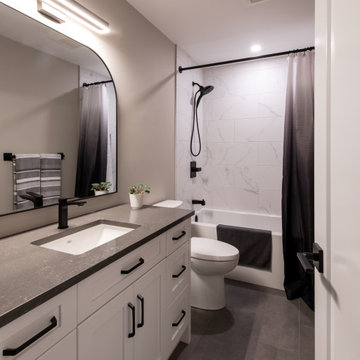
They also love their new spa bathroom, which is beautiful and warm and exactly what they had in mind. One of the homeowners describes himself as fussy and impatient, and at first he had been anxious about the whole prospect of renovation. He said afterwards that the team made him feel comfortable, listened to, and unconcerned.
One factor that made them so at ease with choosing Lagois was the “in house” aspect of their services. The person who designed their home, the one who did the drawings, and the person who managed the construction are all Lagois employees. The homeowners liked knowing those critical functions weren’t outsourced.
Another thing they love about their home is the finishes that are exactly to their taste. The homeowners are delighted with the new interior of their home. It is now something they love – both outside and inside.
 Lagois Design Build Renovate
They always loved their house – its shape and size, and the piece of land it sits on; but the interior left a lot to be desired. In fact, they hated it. They wanted it to be aesthetically more pleasing and to have much more function and flow.
These homeowners challenged Lagois to make it the home of their dreams, and that’s exactly what happened. One of the homeowners loves to cook, but the kitchen was dark. The space was difficult and frustrating. The new kitchen is bigger, brighter, and more functional. It now has all the prep space he needs and the task lighting he always wanted.
They also love their new spa bathroom, which is beautiful and warm and exactly what they had in mind. One of the homeowners describes himself as fussy and impatient, and at first he had been anxious about the whole prospect of renovation. He said afterwards that the team made him feel comfortable, listened to, and unconcerned.
One factor that made them so at ease with choosing Lagois was the “in house” aspect of their services. The person who designed their home, the one who did the drawings, and the person who managed the construction are all Lagois employees. The homeowners liked knowing those critical functions weren’t outsourced.
Another thing they love about their home is the finishes that are exactly to their taste. The homeowners are delighted with the new interior of their home. It is now something they love – both outside and inside.
 Stairworks
Martins Avenue is a beautiful, curved staircase made out of steel as the base material. Curved stairs are a challenge because you need to get the soffit (the underside of the staircase) curved and twisted around the base of the stairs to get the nice flowing lines. And because the timber work was outsourced to other builders, we had to work closely alongside them in order to get the soffit curved just right and ensure everything matched the flooring.
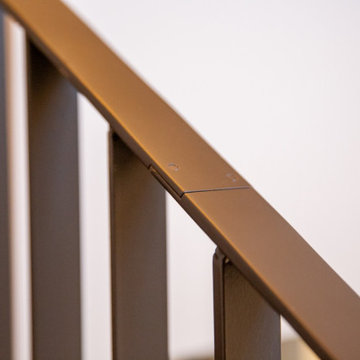
The other big challenge was that the curved balustrade needed to be an identical match to the staircase and have a nice, smooth, curved line. In order to achieve this, we built both the steel stairs and balustrade in the shop at the same time and match drilled the balustrade through. Therefore when we brought it to site we knew it would fit perfectly. The angle on the bottom of the balustrade was designed to cover the junction or zig zag angle between the steel and the timber.
Because of how this staircase had to be designed and built, it was extremely heavy and a challenging install. Additionally, as the walls of the site were all finished, we had to take all the necessary precautions to get the stairs installed without causing any damage or leaving any markings. Afterwards, the builders covered the underside with gib and closed risers to hide the cladding underneath.
There was absolutely no room for error with this staircase and we at Stairworks, the builders and the clients are all extremely happy with the end result!
12