
Search results for "Appearance" in Home Design Ideas
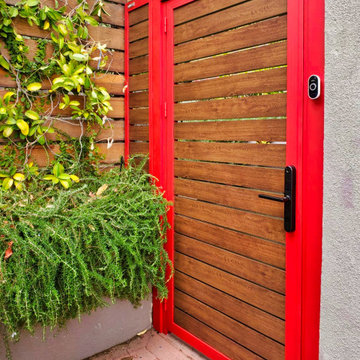
 MULHOLLAND BRAND
Using a sublimation process, we coat aluminum with a very durable film that gives the appearance of wood. Our customer requested the frame be powder-coated red. We are all pleased with the outcome.
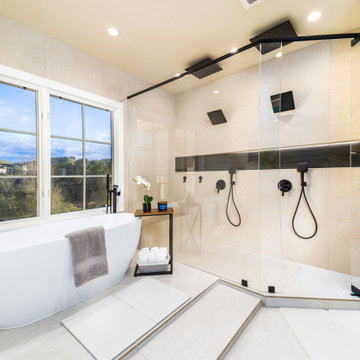
 Redeemed Construction
Large format tile installation for a cleaner and more modern appearance
Inspiration for an asian bathroom remodel in San Francisco
Inspiration for an asian bathroom remodel in San Francisco
 Wine Cellar Specialists
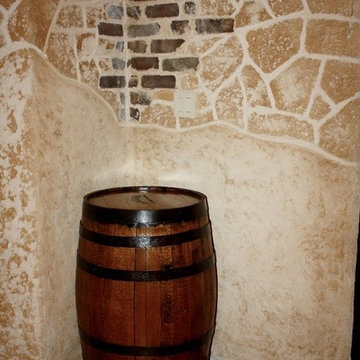
The walls were given a stone and brick appearance in this wine cellar design in Texas.
They add to the overall aesthetics and traditional appeal of the space nicely.
The barrel was also included in the spirit of decor.
Wine Cellar Specialists
1134 Commerce Drive
Richardson
(972)454-0480
75081
https://winecellarspec.com/
Find the right local pro for your project
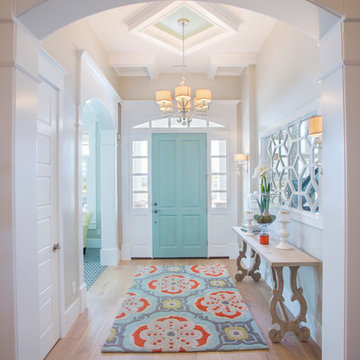
 Carrick Custom Home Design
Built by Highland Custom Homes
Single front door - mid-sized transitional medium tone wood floor and beige floor single front door idea in Salt Lake City with beige walls and a blue front door
Single front door - mid-sized transitional medium tone wood floor and beige floor single front door idea in Salt Lake City with beige walls and a blue front door
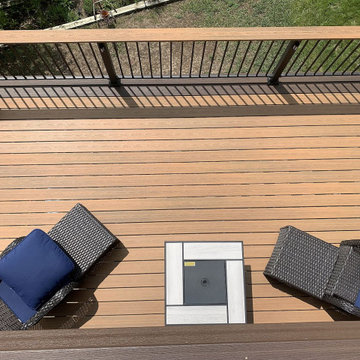
 Decks by Schmillen LLC
Our clients wanted to create a deck that would be a comfortable place for friends and family alike. They chose Fiberon Sanctuary Moringa decking because it provides a warm, rich appearance.
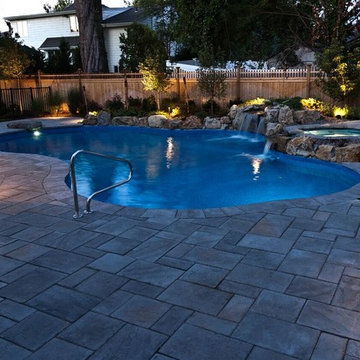
 Deck and Patio Company "Outdoor Living Experts"
Manipulating the grades by adding different levels (upper and lower patios, raised spa. etc.) is one of the things we do to create a larger sense of space. Such gradations are not only attractive and spatially functional, but, when done correctly, they can make smaller yards appear considerably more expansive. www.deckandpatio.com
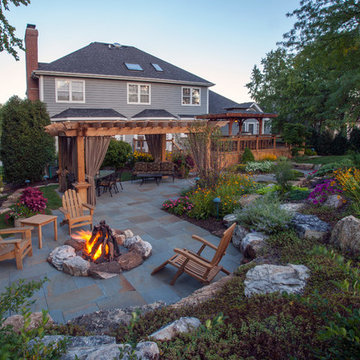
 Rolling Landscapes Inc.
Photo by: Linda Oyama Bryan
Example of a classic backyard stone patio design in Chicago with a fire pit and a pergola
Example of a classic backyard stone patio design in Chicago with a fire pit and a pergola
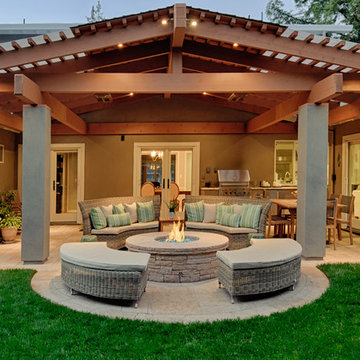
 Kankel Conroy Rose & Hill Landscape Architecture
The homeowners desired an outdoor space that felt more rustic than their refined interior spaces, but still related architecturally to their house. Cement plaster support arbor columns provide enough of visual tie to the existing house exterior. Oversized wood beams and rafter members provide a unique outdoor atmosphere. Structural bolts and hardware were minimized for a cleaner appearance. Structural connections and supports were engineered to meet California's stringent earthquake standards.
Ali Atri Photography
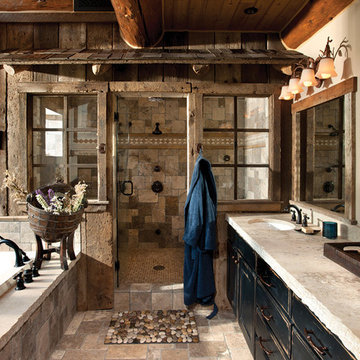
 M.T.N Design
Weathered wood panels and barn-style additions, make this master bathroom's appearance simulate an old western outhouse.
Produced By: PrecisionCraft Log & Timber Homes
Photo Cred: Heidi Long, Longview Studios
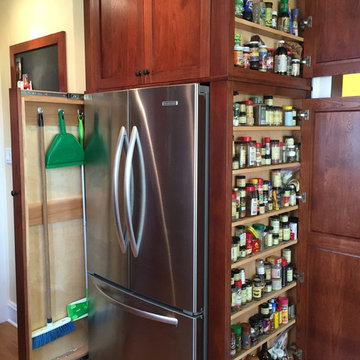
 Diskin Designs
Encasing full depth fridge in paneling gives built-in appearance with greater storage. Hidden spice cabinets as side panel of refrigerator. Pull out broom storage.
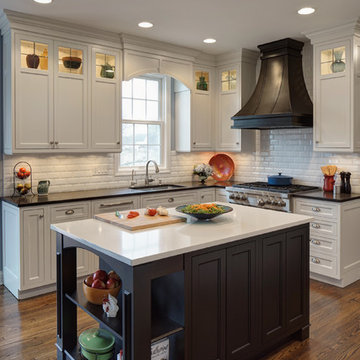
 Drury Design
Arched valances above the window and on the island bookshelf, along with the curved custom metal hood above the stainless steel range, contrast nicely with the overall linear design of the space. The leaded glass cabinet doors not only create a spot to display the homeowner’s favorite glassware, but visually it helps prevent the white cabinets from being overbearing. By installing recessed can lights uniformly throughout the space instead of decorative pendants above the island, the kitchen appears more open and spacious.
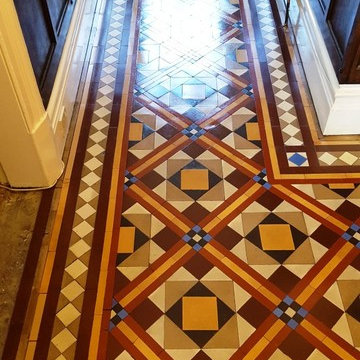
 Tile Doctor Ltd
The colourful and diverse geometric patterns of a Victorian tiled floor can give a property a regal, elegant and timeless feel, making it a popular choice even in the 21st century. However, as time passes without regular care and maintenance, Victorian tiles can quickly lose their colour and appear deadened by the buildup of dirt and dust over several months (and sometimes years).
This property owner in Hebden a very small village in North Yorkshire of less than 300 people, had this common problem. Her Victorian tiled hallway had not been adequately maintained and was now more difficult to keep clean than ever. To add to the problem, most of the tiles along the edges were either broken, cracked, or filled with holes, probably I suspect from the installation of carpet grippers at some point in the past.
At this point, the property owner turned to Tile Doctor to see what could be done.
Before beginning a deep clean of the entire length of the hallway, it was first necessary to source and install replacement tiles for those that had been broken and damaged. I also relaid any that were loose.
When finished, I left the tiles to set and returned the next day to start the clean. My choice of cleaner in this situation was Tile Doctor Pro Clean, which was scrubbed into the floor with a special pad fitted to a rotary machine to break down ingrained dirt and stains. Pro Clean does this very effectively on all types of tile, including natural stone and of course Victorian tiles.
The floor was then rinsed with water and the soiled cleaning solution extracted from the floor using a vet vacuum. Stubborn areas were re-treated with more Pro Clean, and when I was satisfied with the condition of the tiles the floor was given a final but thorough rinse to remove any trace of cleaning product.
The floor was then left to dry completely overnight to ensure all excess moisture had disappeared, leaving it fresh to be sealed. I returned in the morning for a third day of work to seal the Victorian tiles with four coats of Tile Doctor Seal and Go, a topical sealer which provides a rich satin finish to really add depth to the colours in the tile while protecting it against dirt and stains.
The customer was delighted with the restoration and couldn’t quite believe the huge improvement in the appearance of the tiles, especially in regards to the enhancement in the different colours. Another satisfied customer!
Nigel Stoker
North West Yorkshire Tile Doctor
 USI Design & Remodeling
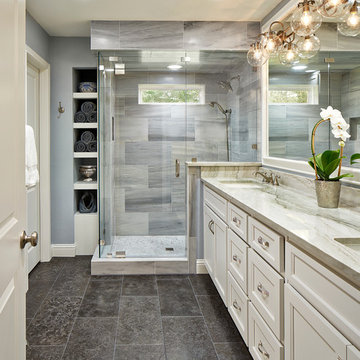
Master bath featuring a long vanity and Quartzite countertops. The flooring of dark limestone was paired with the showers light grey marble to convey a more modern appearance via the higher contrasting shades.
 Advance Design Studio, Ltd.
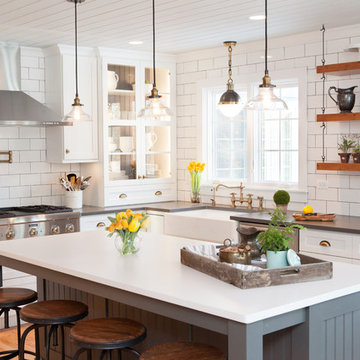
When this suburban family decided to renovate their kitchen, they knew that they wanted a little more space. Advance Design worked together with the homeowner to design a kitchen that would work for a large family who loved to gather regularly and always ended up in the kitchen! So the project began with extending out an exterior wall to accommodate a larger island and more moving-around space between the island and the perimeter cabinetry.
Style was important to the cook, who began collecting accessories and photos of the look she loved for months prior to the project design. She was drawn to the brightness of whites and grays, and the design accentuated this color palette brilliantly with the incorporation of a warm shade of brown woods that originated from a dining room table that was a family favorite. Classic gray and white cabinetry from Dura Supreme hits the mark creating a perfect balance between bright and subdued. Hints of gray appear in the bead board detail peeking just behind glass doors, and in the application of the handsome floating wood shelves between cabinets. White subway tile is made extra interesting with the application of dark gray grout lines causing it to be a subtle but noticeable detail worthy of attention.
Suede quartz Silestone graces the countertops with a soft matte hint of color that contrasts nicely with the presence of white painted cabinetry finished smartly with the brightness of a milky white farm sink. Old melds nicely with new, as antique bronze accents are sprinkled throughout hardware and fixtures, and work together unassumingly with the sleekness of stainless steel appliances.
The grace and timelessness of this sparkling new kitchen maintains the charm and character of a space that has seen generations past. And now this family will enjoy this new space for many more generations to come in the future with the help of the team at Advance Design Studio.
Photographer: Joe Nowak
Dura Supreme Cabinetry
 WIDORF&CO Flooring Distributors
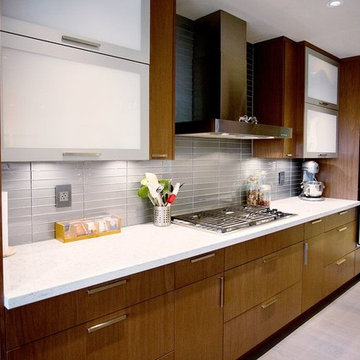
2"x12" rectangular glass tile backsplash.
Call us today for a free estimate!
(778) 317-5014
Designed by 9Design
Inspiration for a huge modern galley light wood floor open concept kitchen remodel in Vancouver with an undermount sink, flat-panel cabinets, medium tone wood cabinets, quartz countertops, gray backsplash, glass tile backsplash, stainless steel appliances and an island
Inspiration for a huge modern galley light wood floor open concept kitchen remodel in Vancouver with an undermount sink, flat-panel cabinets, medium tone wood cabinets, quartz countertops, gray backsplash, glass tile backsplash, stainless steel appliances and an island
 Tile Doctor Ltd
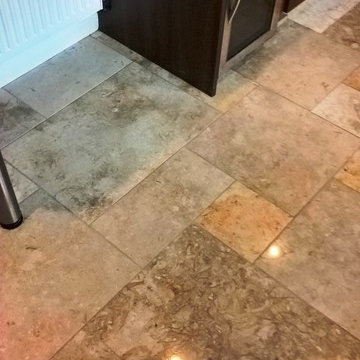
The photographs below are of a Polished limestone floor that had been installed in the Kitchen of a house in Cheltenham approximately eight years prior. The polish and sealer had worn off over that time allowing dirt to become ingrained into the pores of the stone making it difficult to clean.
This is a common problem with all types of porous stone and tile which need to be sealed to maintain their appearance. Sealers do wear down over time with use however and need to be maintained, this is why Tile Doctor have created a maintenance program whereby we pop by every 12 months to give the floor a light clean and top-up the sealer, it only takes a few hours, but it keeps your sealer in good condition.
Cheltenham by the way is a lovely town situated on the edge of the Cotswolds which is an area of Outstanding Natural Beauty. It has a racecourse and is well known for the mineral springs which were discovered here in 1716.
My first job was to protect the wooden kitchen units from any splashes by covering them some cotton sheets. Next, I set about restoring the Limestone’s appearance using a set of Burnishing Pads which is a form of polishing which involves the sequential application of four diamond encrusted pads of different grit levels.
The first pad applied is a Coarse 400 grit pad which is applied to the floor with a buffing machine and lubricated with water. This process grinds away the top layer of dirt and staining from the stone, along with any old sealer, the floor is then rinsed to remove the soil that is generated. I then move through the system, applying the Medium and then Fine pads using less and less water as you go but rinsing in-between and extracting the water with a wet-vac machine.
Once I was happy with the stone I scrubbed the grout lines to remove any soiling that the pads had failed to pick up. The floor was then given a final rinse and the wet vacuum used to extract as much moisture as possible. The floor was then left to dry out completely overnight.
The next day I gave the floor a polish with the Very Fine 3,000 grit diamond burnishing pad, this is applied using a technique we call a “spray burnish” due to the fact that very little water is used during its application.
The next step was to seal the stone using for which I used Tile Doctor Colour Grow which is an impregnating sealer that protects the stone from within by occupying its pores. Colour Grow also has the added benefit of intensifying the natural colours in the stone. The floor was then left to dry for an hour before I gave it one final dry polish using the Very Fine burnishing pad.
My customer was very happy with the final result and made the comment that they thought the floor looked brand new.
Malcolm Crowther
Gloucester Tile Doctor
 Change Your Bathroom©
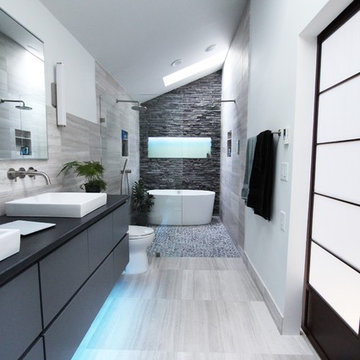
The goal of this project was to upgrade the builder grade finishes and create an ergonomic space that had a contemporary feel. This bathroom transformed from a standard, builder grade bathroom to a contemporary urban oasis. This was one of my favorite projects, I know I say that about most of my projects but this one really took an amazing transformation. By removing the walls surrounding the shower and relocating the toilet it visually opened up the space. Creating a deeper shower allowed for the tub to be incorporated into the wet area. Adding a LED panel in the back of the shower gave the illusion of a depth and created a unique storage ledge. A custom vanity keeps a clean front with different storage options and linear limestone draws the eye towards the stacked stone accent wall.
Houzz Write Up: https://www.houzz.com/magazine/inside-houzz-a-chopped-up-bathroom-goes-streamlined-and-swank-stsetivw-vs~27263720
The layout of this bathroom was opened up to get rid of the hallway effect, being only 7 foot wide, this bathroom needed all the width it could muster. Using light flooring in the form of natural lime stone 12x24 tiles with a linear pattern, it really draws the eye down the length of the room which is what we needed. Then, breaking up the space a little with the stone pebble flooring in the shower, this client enjoyed his time living in Japan and wanted to incorporate some of the elements that he appreciated while living there. The dark stacked stone feature wall behind the tub is the perfect backdrop for the LED panel, giving the illusion of a window and also creates a cool storage shelf for the tub. A narrow, but tasteful, oval freestanding tub fit effortlessly in the back of the shower. With a sloped floor, ensuring no standing water either in the shower floor or behind the tub, every thought went into engineering this Atlanta bathroom to last the test of time. With now adequate space in the shower, there was space for adjacent shower heads controlled by Kohler digital valves. A hand wand was added for use and convenience of cleaning as well. On the vanity are semi-vessel sinks which give the appearance of vessel sinks, but with the added benefit of a deeper, rounded basin to avoid splashing. Wall mounted faucets add sophistication as well as less cleaning maintenance over time. The custom vanity is streamlined with drawers, doors and a pull out for a can or hamper.
A wonderful project and equally wonderful client. I really enjoyed working with this client and the creative direction of this project.
Brushed nickel shower head with digital shower valve, freestanding bathtub, curbless shower with hidden shower drain, flat pebble shower floor, shelf over tub with LED lighting, gray vanity with drawer fronts, white square ceramic sinks, wall mount faucets and lighting under vanity. Hidden Drain shower system. Atlanta Bathroom.
 place architecture:design
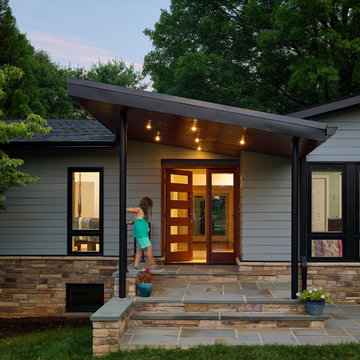
The shape of the angled porch-roof, sets the tone for a truly modern entryway. This protective covering makes a dramatic statement, as it hovers over the front door. The blue-stone terrace conveys even more interest, as it gradually moves upward, morphing into steps, until it reaches the porch.
Porch Detail
The multicolored tan stone, used for the risers and retaining walls, is proportionally carried around the base of the house. Horizontal sustainable-fiber cement board replaces the original vertical wood siding, and widens the appearance of the facade. The color scheme — blue-grey siding, cherry-wood door and roof underside, and varied shades of tan and blue stone — is complimented by the crisp-contrasting black accents of the thin-round metal columns, railing, window sashes, and the roof fascia board and gutters.
This project is a stunning example of an exterior, that is both asymmetrical and symmetrical. Prior to the renovation, the house had a bland 1970s exterior. Now, it is interesting, unique, and inviting.
Photography Credit: Tom Holdsworth Photography
Contractor: Owings Brothers Contracting
 Vertebrae Art and Architecture
Art Gray
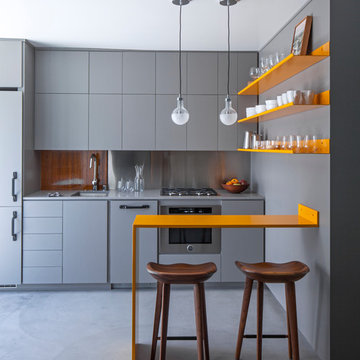
Open concept kitchen - small contemporary single-wall concrete floor and gray floor open concept kitchen idea in Los Angeles with an undermount sink, flat-panel cabinets, gray cabinets, metallic backsplash, paneled appliances, solid surface countertops and gray countertops
Open concept kitchen - small contemporary single-wall concrete floor and gray floor open concept kitchen idea in Los Angeles with an undermount sink, flat-panel cabinets, gray cabinets, metallic backsplash, paneled appliances, solid surface countertops and gray countertops

1