
Search results for "Apply recommendations" in Home Design Ideas

 Tile Doctor Ltd
This ground floor flat in the City of Oxford had been converted from a shop which as you can imagine, was quite complex. One significant element involved in the conversation was the restoration of an old Quarry tiled floor which ran through the main hallway and had for many years been covered in a commercial linoleum covering.
When the linoleum covering was removed, the sheer amount of glue which had been used to affix it had completely ruined the appearance and condition of the Quarry tiles. There was also a lot of concrete in the bathroom, and our client was keen to have this removed in the hope that the tiles beneath were salvageable.
My first task at the property was to deal with the adhesive. I covered the entire floor area with Tile Doctor Remove and Go and then covered it with a plastic sheet and leaving it to soak into the glue and break it down overnight. Remove and Go is powerful stripper with a long-dwell time, formulated to break down adhesives and paint stains, amongst other coatings.
I returned the next day and, removing the plastic sheeting, I scrubbed the floor with a carbon brush attached to a rotary floor scrubber to remove the huge glue deposits. I worked in sections, rinsing each area of the floor with water after it had been scrubbed. Once I had finished the entire floor there was still some glue remaining, so I covered it again with a solution of Remove and Go combined with Tile Doctor HBU Nanotech, which utilises nano-sized particles to get underneath tough stains, dissolve them, and lift them out. I left this solution on the floor for about two hours to dwell and scrubbed it again.
During the next day of work, I used a very coarse 100 grit diamond burnishing pad to manually grind away the remaining stubborn bits of glue. Paying attention to the bathroom, I used a 50-grit coarse milling pad followed up with a 100-grit diamond burnishing pad to do the same to the area of concrete.
The next part of the process was to use Tile Doctor Grout Clean Up to acid wash the floor. This was successful in removing the last bits of cement and the remaining residue of the glue. To complete the cleaning process, I then rinsed the floor with plenty of water and vacuumed up any soiled solution.
I opted to leave the floor alone for a couple of days to fully dry off so that it could be sealed upon my return. This is crucial as any moisture or damp issues can damage the performance of the sealer and expose the floor to further ingrained dirt and staining.
To seal the floor, I used Tile Doctor Colour Grow. This is an impregnating sealer that also enhances the natural reddish shades in the Quarry. I applied two coats of the sealer, giving the floor the natural look matte finish the customer desired.
The customer was very impressed with the results of this thorough restoration. She even left the following feedback:
“I cannot recommend this service enough. The Oxford Tile Doctor (Barry) was a superstar: he cleaned up the tiles in my hallway, which were covered in a very thick layer of glue, and removed concrete from the tiles. They now look superb and I’m really happy with the outcome. Barry was always on time, considerate, and kept me up to date. The quote for the job was exactly right. I would not hesitate to recommend him.”
 AAA Distributor, LLC
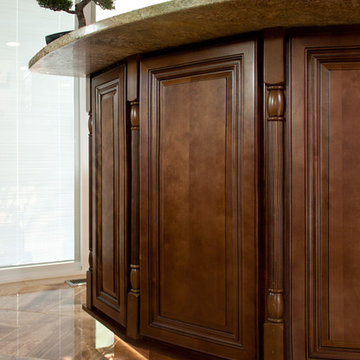
One of our favorite collections, the Geneva Cabinetry Collection, will easily catch the eye of visitors with its traditional and skillfully crafted custom appearance. Emerging with an unprecedented hand applied rich chocolate glaze and charming contour boundaries, our Geneva kitchen and bath cabinetry collection was formulated for universal application to any room - bathroom, bedroom, office, laundry, or kitchen.
As with all of our products, our natural wood interior finish is smoothly illusive throughout and can be contrasted by of some of the lighter color palettes. To further our suggestions, we recommend selecting pure chrome and elite, silver accents. Any of the indirect tones such as playful pearl or even sophisticated mosaic backdrop will joyfully consent to the newly installed Geneva kitchen and bath cabinetry collection.
Specifications:
- Full overlay
- All wood construction
- Hand applied rich dark chocolate glaze
- Natural wood interior finish
- Solid wood frame
- 1/2" plywood box
- 3/4" 5-piece drawer front raised solid wood panel
- 3/4" plywood half-depth adjustable base cabinet shelve
- Dead-lock shelve clip technology
- Quiet smooth-close door hinges on all doors
- Full extension dovetailed drawer with soft-close glides
Click the link below to build and order your kitchen with our convenient online ordering system.
 G & S Floor Service
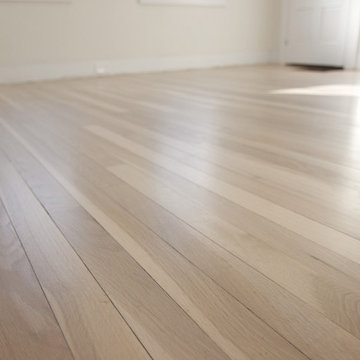
Scandinavian look with Bona NordicSeal and Traffic HD
Dining room - transitional light wood floor and beige floor dining room idea in Boston
Dining room - transitional light wood floor and beige floor dining room idea in Boston
Find the right local pro for your project
 Tile Doctor Ltd
The pictures showed are of an Encaustic Cement tiled floor that had been installed in the bathroom of a property in Twickenham. At the time the tiles were installed, they did not seal them and had since accumulated dirt, especially in the grout lines.
Encaustic cement tiles have become extremely popular in the last few years with many beautiful artistic often geometric patterns available to choose from. The very nature of the cement-based tile however does make it slightly porous, and if left unsealed dirt will become ingrained in the tile making it difficult to remove and keep clean. Like grout they do therefore need to be sealed in order to keep them looking at their best for longer.
Now we normally recommend using diamond encrusted burnishing pads when renovating Encaustic Cement tiles however in this case the face of the tiles were not too bad and it was really the grout that needed the most attention. So, to cut the cost for customer, I advised a straightforward alkaline scrub clean and seal.
To clean the tile and grout I sprayed the floor with a strong dilution of Tile Doctor Pro-Clean and left it to soak into the dirt for ten minutes. Space in the bathroom was quite tight so instead of using a mechanical floor scrubber I scrubbed the tile and grout by hand working the alkaline cleaning solution into the pores to release the grout in dirt.
After scrubbing the floor was rinsed with a little water and the soil removed with a wet vacuum. Afterwards the floor was inspected, and any stubborn areas retreated with repeat of the process. After a final rinse, the floor was dried as much as possible with the wet vacuum.
Fortunately, the weather has been amazing of late and so it did not take long for the floor to dry, being a small space and a little encouragement from a heat gun always helps. Removing excess moisture before sealing is essential as even a small amount can cloud the sealer resulting in an uneven appearance.
Once satisfied that the floor was dry, I proceeded to seal it by applying a couple two coats of Tile Doctor Colour Grow across the Encaustic tile and grout. As an impregnating sealer Colour Grow penetrates the pores of the cement occupying the space and thus prevent any dirt from becoming ingrained there. Colour Grow’s colour intensifying properties also helped to deepen the black colour of the tile enhancing the contrast between the tiles and grout.
Now the floor has been properly sealed it will be far easier for the customer to keep them clean in future. For maximum longevity of the sealer I recommend maintenance cleaning with Tile Doctor Neutral Cleaner. Don’t be tempted to use supermarket cleaning products without reading the label first, many are simply too strong for cleaning sealed surfaces and will strip off the sealer prematurely leaving the tiles unprotected.
Jonathan Oldham
South Middlesex Tile Doctor
 Tile Doctor Ltd
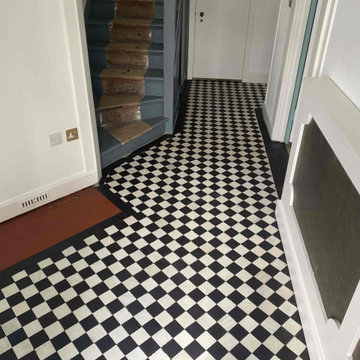
This client from North London had recently bought a property in Highgate N6 and during renovation had discovered an original Victorian tiled floor in the hallway. The floor was laid in a classic black and white diamond pattern but unfortunately a large section was missing and had been filled with concrete. Furthermore, most of the remaining floor had been covered in cement and glue.
I carried out a survey of the floor to determine the main issues and was then able to email over a quote later that day that included rebuilding the missing section of flooring. I suspect the floor had been excavated at some point in the past to install central heating and then rather than have the excavated section restored it was simply back filled and then levelled with a cement screed before finally gluing down a carpet on top.
Once the quote was accepted, I sourced replacement tiles from the Vintage Floor Tile company. Situated in Kent they are a reclamation yard that specialises in supplying original geometric and encaustic tiles including the major historical makers such as Minton and Craven Dunnill.
Armed with replacement tiles I started by removing the concrete that had been used to backfill the missing section and prepare a new surface for tiling with quick drying cement. When ready I was able to carefully build back the original pattern using the replacements. The tiles were secured with tile adhesive and once that had gone off, they were grouted.
The floor was left to set fully overnight and then the next day I was able to return and clean the whole floor using a strong dilution of Tile Doctor Remove and Go. As usual this was left to soak into the tiles for a good ten minutes before being scrubbed into the tiles using a black scrubbing pad. The Tile Doctor Remove and Go did a good job of cleaning the floor and the cleaning solution soon turned black with dirt during the scrubbing. The floor was rinsed with water and the soil extracted with a wet vacuum. After inspecting the floor any areas that needed further work were hand scrubbed and rinsed again until I was happy the floor was clean.
The last part of the cleaning process was to give the tiles an acid wash using Tile Doctor Acid Gel which further cleans the floor by removing old cement residue and grout haze. It also neutralises efflorescent salts in the tiles which are a common issue with floors of this age with no damp proof membrane. After another rinse and extraction, the floor was given a final rinse and then dried as much as possible using the wet vacuum.
I left the floor to dry out for a couple of days before returning to apply a protective sealer. Tile and Stone should be dry before sealing so I use a damp meter first to double check. All was well so to seal the tiles I proceeded to apply the first of what would be three coats of sealer. I used Tile Doctor Colour Grow for this, it works by impregnating the tile occupying the pores and thereby preventing dirt from becoming ingrained there. This product also enhances the black and white colour of the tiles and makes the floor much easier to clean.
Once done the floor was transformed and needless to say my customer was very pleased with the result. For the aftercare of Victorian Tiled floors, I recommend the use of a ph neural tile cleaner such as Tile Doctor Neutral Cleaner; most supermarket tile cleaners are simply too strong for use on sealed floors and can strip off the sealer prematurely.
Andrew Newstead
North London Tile Doctor
 Stone Action
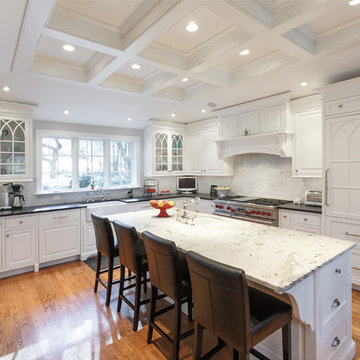
This kitchen was fabricated by Lapptops and the cabinets were done by King's Woodwork!
http://lapptops.net/
This kitchen features Calacatta marble with a polished finish on the island. The surrounding countertops are absolute black granite with a honed finish. This kitchen is so clean and bright!
Search "calacatta" or "black", see variations of this marble & granite, or other stone options: http://www.stoneaction.com
Learn more about granite to see if it’s right for you:
Granite countertops can last a lifetime. It contains no harmful chemicals and do not emit harmful radiation or gasses. Granite is heat resistant and is one of the most heat-resistant countertops on the market. You can place a hot pan out of the oven directly onto the countertop surface. Experts do recommend the use of a trivet when using appliances that emit heat for long periods of time, such as crockpots. Since the material is so dense, there is a small possibility heating one area of the top and not the entire thing, could cause the countertop to crack.
Granite is scratch resistant. You can cut on it, but it will dull your knives! Granite scores a seven on Moh’s hardness scale.
Granite countertops are considered to be a low maintenance countertop surface. The likelihood of needing to be repaired or resurfaced is low. Granite is a porous material. Most fabricators will apply a sealer to granite countertops before they are installed which will protect them from absorbing liquids too quickly. Many sealers last more than 10 years before needing to be reapplied. When they do need to be reapplied, it is something that most homeowners can do on their own as the process is similar to cleaning. Darker granites are very dense and sometimes don’t even require a sealer.
When it comes to pricing, there are a lot of variables such as edge profile, total square footage, backsplash, etc. Don’t be fooled by the stereotype that all granite is expensive. Lower-range granites will cost less than high-range laminate. Though granite countertops are not considered “low range” in pricing, there are a lot of affordable options.
If you are looking for something truly unique, consider an exotic granite. Some quarries are not easily accessible and/or only able to be quarried for short periods of time throughout the year. If these circumstances exist in a quarry with gorgeous stone, the price will be driven upward.
You won’t find a lot of solid patterns or bright colors, but both do exist. Also, watch for a large range of color and pattern within the same color of stone. It’s always a good idea to view the exact slab(s) that will be fabricated for your kitchen to make sure they are what you expected to see from the sample. Another factor is that many exotic types of granite have huge flowing waves, and a small sample will not be an accurate representation of the whole slab.
Granite countertops are very resistant to chemicals. Acids and bases will not harm the material.
Understanding Marble:
Marble is a porous, high-maintenance surface.
Be prepared to see some scratches. Marble is a softer stone. However, marble is still so beautiful with the scratches! If you’ve ever gone to Italy, you can see the beautiful marble on floors and many restaurants. It’s a classic lasting look. Even with scratches.
If you don't mind the extra work, they are a beautiful addition. Marble has a multifaceted ability to work with so many different design styles. If you're a homeowner looking for a wipe-and-go countertop, though, you'll probably want to skip this one.
It's cost-effective, depending on the type of marble you buy. Carrara marble (a grayer version with softer veins from Carrara, Italy) is one of the least expensive natural countertop materials on the market, mainly because it's readily available. Calacatta marble, which offers a whiter surface and more dramatic veining, and the price tag goes up.
Marble is heat-resistant — which is great — but you still need to be careful. Marble is heat resistant. Despite its ability to withstand high temps, you never want to place a piping hot pot on for risk of discoloring or burning the surface. We recommend always using a pot holder anyways.
We don’t want to dissuade you from using marble. In fact, I personally have a marble island in my kitchen. Stone Action solely wants you to be informed so that you’re choosing the right material for your project.
We hope you personally come check out our marble or other stone selection!
See more marble or other types of Stone Action’s stone selection:
http://www.stoneaction.com

 Custom Concrete Prep & Polish
The White Pie restaurant was a remodeled space. We worked on the area in behind the bar and in the dining room. The total space treated is a little over 1,000 sf. We applied an industrial polish to a 200 grit resin, and sealed and burnished the floor. We used LS densifier and polish guard from Prosoco. No color was applied.
The kitchen is an existing epoxy floor. We recommend a urethane cement for all kitchen floors.

 Windy City Painters
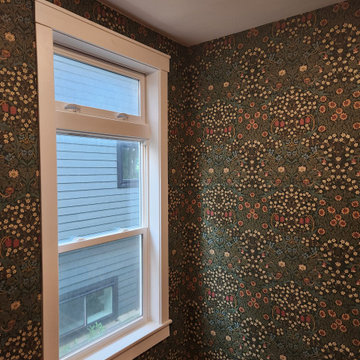
## Professional Wallpaper Installation Lincoln Park Project
Wallpaper installation Lincoln Park requires expert techniques for this stunning greystone renovation. Lincoln Park's architectural heritage includes beautiful greystones, vintage condos, and historic buildings that demand specialized installation approaches respecting original craftsmanship.
## Materials and Products Used
We utilized premium vinyl wallpaper with fabric backing for durability. Additionally, commercial-grade adhesives from Benjamin Moore ensure long-lasting application. Furthermore, we applied specialized primers designed for vintage plaster surfaces common in Lincoln Park homes.
## Four-Step Installation Process
First, complete removal of existing wallpaper and surface preparation. Second, repair any wall imperfections and apply appropriate primer. Third, precise measurement and cutting with careful pattern matching. Finally, professional installation with seamless application and detailed finishing.
## Chicago Home Challenges
Chicago's harsh winters create expansion and contraction issues requiring flexible adhesives. Moreover, older Lincoln Park buildings often have uneven plaster walls needing extensive preparation. Additionally, potential lead paint concerns in vintage homes require certified safe work practices.
## Results and Quality Standards
Perfect pattern alignment across all seams creates seamless appearance throughout the space. Furthermore, moisture-resistant materials ensure longevity against Chicago's humidity fluctuations. The finished installation enhances the home's architectural character while providing modern durability.
## Professional Tips
Always test adhesive compatibility on small areas first. Moreover, control room temperature and humidity during installation for optimal results. Additionally, choose wallpaper appropriate for Chicago's climate conditions.
See more work and request free estimate at windypainters.com.
## Frequently Asked Questions
Q: How long does wallpaper installation Lincoln Park typically take for one room?
A: Most single rooms completed within one to two days including preparation, removal, and professional wallpaper installation Lincoln Park application.
Q: What wallpaper types work best in Chicago's climate conditions?
A: Vinyl and fabric-backed wallpapers offer superior durability against humidity and temperature changes affecting wallpaper installation Lincoln Park projects.
Q: Can you install wallpaper over existing painted walls in older homes?
A: Yes, with proper surface preparation and primer application, wallpaper installation Lincoln Park works excellently over previously painted surfaces.
Q: Do you handle complete wallpaper removal before new installation?
A: Absolutely, comprehensive wallpaper removal and surface preparation included in all wallpaper installation Lincoln Park project estimates and services.
Q: What preparation is required for vintage Lincoln Park home wallpaper installation?
A: Surface cleaning, repairs, lead paint testing if applicable, and proper primer application essential for successful wallpaper installation Lincoln Park.
Q: How do you ensure perfect pattern matching across large walls?
A: Expert measuring, cutting, and installation techniques guarantee seamless pattern alignment throughout every wallpaper installation Lincoln Park project we complete.
Q: What warranty coverage do you provide for wallpaper installation work?
A: All wallpaper installation Lincoln Park projects include comprehensive warranty coverage protecting your investment and ensuring long-lasting beautiful results.
Q: Can wallpaper installation work in Lincoln Park condos and smaller spaces?
A: Yes, we specialize in all housing types including condos, requiring precise wallpaper installation Lincoln Park techniques for optimal results.
Q: How do Chicago weather conditions affect wallpaper installation timing and materials?
A: We schedule wallpaper installation Lincoln Park during optimal conditions and recommend climate-appropriate materials for Chicago's challenging weather patterns.
Q: What makes Windy City Painters different for wallpaper installation Lincoln Park projects?
A: Local Chicago expertise, understanding of neighborhood architecture, and proven wallpaper installation Lincoln Park experience delivering exceptional quality results.
 Tile Doctor Ltd
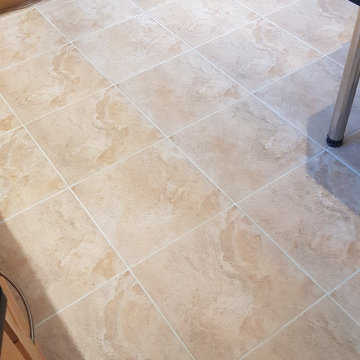
This Ceramic Tiled kitchen floor at a property in Wickersley was proving to be a pain for our clients, whatever they did the grout just looked dark, dirty, and unsightly. No amount of scrubbing would make a difference and eager to find a solution they wasted a lot of money on various products trying to clean the grout lines, but nothing had worked. Ceramic tiles are glazed which makes them very easy to clean, grout however is a different story.
Wickersley is in Rotherham close to the 3 main motorways in South Yorkshire, the M1, M18 and A1. The village took its’ name from the Wickersley family who eventually moved to Sheffield and built the famous Broom Hall, incredibly we restored 100sqm of stone flooring in that very house not too long back. It was a beautiful restoration.
On the first visit we tried a few of our products to clean the grout lines up but sometimes grout just can’t be cleaned, if the staining has penetrated the surface layer and gone right down into the grout it is stained forever. Grinding the grout out and putting in new grout is a big messy expensive job. For this reason, our grout recolouring service is an ideal option and the best thing about it is once it is recoloured the grout is protected and stain resistant.
Tile Doctor have a range of ten grout colours to choose from and in this case our client chose the light grey colour. They were happy to go ahead with our quote and just thankful that we were able to do it relatively inexpensively and without making a huge mess!
Work started by treating the grout lines with an acidic pre-treater that comes with the Grout Colourant kit that Tile Doctor sell, Tile Doctor Grout Colourant Pre-Treat cleaner, this gets rid of any contamination and prepares the grout for the colourant, so you get a superior bond.
Once dry the Light Grey Grout Colourant was applied the grout lines with a small brush. A steady hand is required, and you need to ensure any excess is immediately wiped away before it dries. It is quite a slow job, but very satisfying when you see the difference it makes. Glazed tiles are sealed during manufacture, so we do not need to apply a sealer like we do on most of our jobs.
The customer was over the moon with the transformation, the grubby grout lines had been irradicated and because the grout colourant forms a barrier over the grout, they will remain looking good for a long time to come. For aftercare cleaning I recommended using Tile Doctor Neutral Tile Cleaner which is pH neutral and gentle enough to use on a regular basis, it also has a nice fresh smell.
Matthew Lovett
South Yorkshire TIle Doctor
 Dixie Belle Paint Company
Now you are ready for a Top Coat! We suggest using Gator Hide our most durable top coat. It is water repellent which makes it perfect for kitchen cabinets, counter tops, bathrooms, and floors. Simply brush on a thin layer of Gator Hide, let dry, after 2 hours re-apply, repeat this up to 3 thin layer to get the water repellent finish. We like to use a dry blue sponge to apply Gator Hide. A 48-hour dry time is recommended, but once again allow 21-30 days to full cure. Gator Hide Priced at $24.95, Blue sponge Priced at $3.00.
 AAA Distributor, LLC
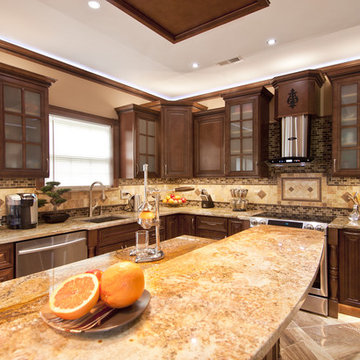
One of our favorite collections, the Geneva Cabinetry Collection, will easily catch the eye of visitors with its traditional and skillfully crafted custom appearance. Emerging with an unprecedented hand applied rich chocolate glaze and charming contour boundaries, our Geneva kitchen and bath cabinetry collection was formulated for universal application to any room - bathroom, bedroom, office, laundry, or kitchen.
As with all of our products, our natural wood interior finish is smoothly illusive throughout and can be contrasted by of some of the lighter color palettes. To further our suggestions, we recommend selecting pure chrome and elite, silver accents. Any of the indirect tones such as playful pearl or even sophisticated mosaic backdrop will joyfully consent to the newly installed Geneva kitchen and bath cabinetry collection.
Specifications:
- Full overlay
- All wood construction
- Hand applied rich dark chocolate glaze
- Natural wood interior finish
- Solid wood frame
- 1/2" plywood box
- 3/4" 5-piece drawer front raised solid wood panel
- 3/4" plywood half-depth adjustable base cabinet shelve
- Dead-lock shelve clip technology
- Quiet smooth-close door hinges on all doors
- Full extension dovetailed drawer with soft-close glides
Click the link below to build and order your kitchen with our convenient online ordering system.

 walldecal
Family Photo Wall Decal set is a beautiful centerpiece for your interior space! It is the perfect way to showcase beautiful family photos, prints, art, and more! See the color examples image and choose a color from the color chart image above.
How did your family grow? We all love our memories!
Everyone want to design a family photo wall. Our family photo wall decal will help you to reate a family photo wall by applying it and filling all of your family member photo, Easy to position,surprisingly easy to achieve a creative look.
All of our wall decals are made from high quality vinyl film that is made in the USA. The vinyl we use is beautiful matte vinyl, which looks like paint when applied to the wall. The vinyl is removable and won't damage your wall or leave any residue after removal. Wall decals are not recommended for textured walls. Wall decals adhere best to smooth and untextured walls, but they may adhere to lightly textured walls.
 Tile Doctor Ltd
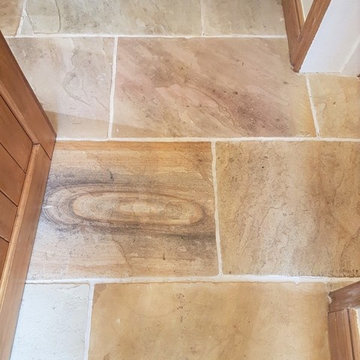
The pictures below are of a multi coloured sandstone floor installed at a property in East Keswick which is a village approximately halfway between Harrogate and Leeds. (Not to be confused with the more famous Keswick in the Lake District)
The stone floor had not been cleaned professionally for ten years and although the grout looked clean It was clear that any sealer that was once present had long since worn off leaving the stone unprotected. The result was dirt had become deeply ingrained in the Sandstone leading causing the stone to darken and hide its true beauty and rich colouring. The client had tried lots of different products to clean the floor but had not had any luck.
I visited the property and carried out a few successful patch tests resulting in the floor becoming much cleaner. They were happy to go ahead with my quote and we arranged a time to return and complete the work.
I prepared the area before starting, taping up the skirting boards and doors to protect them from the splashing that can happen during the intensive cleaning process.
To get the sandstone clean I applied a medium dilution of Tile Doctor Pro-Clean to the floor and allowed it to soak in for ten minutes. The solution was then worked into the Sandstone using a rotary floor machine fitted with a black scrubbing pad. More Pro-Clean was applied with a hand-held scrubbing brush to get deep into the grout lines and to reach into the corners.
Once done the floor was rinsed with water and the soil extracted with a wet vacuum. The floor was inspected, and the process repeated until I was satisfied that the stone and grout had released all the trapped dirt. After a final rinse, the wet vacuum was used to get as much moisture out of the stone as possible and then the floor left to dry out fully overnight.
Returning the following morning, I first checked that the floor was dry using a damp meter. The sealer won’t cure if there is any moisture in the stone and I’ve been known to reschedule sealing a floor if the readings are too high. On this occasion I was satisfied that the floor was within acceptable levels, so I was ready to seal the floor.
I used three coats of Tile Doctor Colour Grow to seal the floor, this is an impregnating sealer which intensifies natural colours whilst providing durable protection against stains, an essential feature in an area such as a hallway which is subject to constant foot traffic.
As you can see from the photos the transformation was quite impressive, the floor became much lighter and almost unrecognisable, the natural colours of the stone were now visible, and the floor looked beautiful. The client was very happy with the end result and has said they would not hesitate to recommend me to others.
Nigel Stoker
North West Yorkshire Tile Doctor
 Water Street Brass
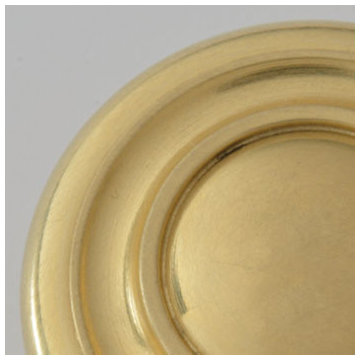
This finish gives solid brass hardware the desirable, time-worn patina of authentic antiques. The brass is gently rubbed to give it a vintage look which boosts the warm glow of the finish and adds depth. The final step of applying a Decorative Hardware Wax brings out additional patina and protects the finish while allowing it to age naturally over time.
Cleaning with mild soap and water then buffing the surface with a soft cloth is recommended. Applying a coat of Decorative Hardware Wax will protect the finish.
 Tile Doctor Ltd
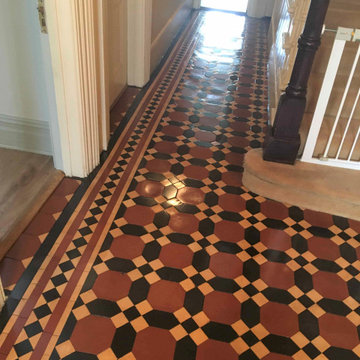
This Victorian tiled hallway floor at a property in Twickenham was in great physical condition considering its age but just hadn’t been cleaned or sealed in quite a few years. Over the years the protective sealer has worn away and dirt tracked in from outside had sunk deep into the pores of the tile. The floor looked dull, and my customer was finding it hard to clean and maintain effectively.
To remove the ground in dirt from within the pores of the tile I needed to apply a strong cleaning product that would breakdown the dirt and deal with any remaining sealer left on the floor. Usually, I find the sealer down the center of the hallway is worn away with use, but you still find traces towards the wall. To do the renovation effectively I would need to remove all the sealer during cleaning otherwise you risk an uneven appearance.
The best sealer stripper and cleaner for the job is a product called Tile Doctor Remove and Go so I mopped a strong dilution onto the floor and then left it to soak in for around fifteen minutes. To get the best from this product it’s advised to give it a long dwell time thereby allowing it to break down old sealer and dissolve the dirt and contaminants.
The floor was then scrubbed with a rotary floor machine to work the product into the pores of the tile and release the trapped dirt. After the first pass the floor was rinsed with a little water and the soil extracted using a machine. After inspecting the floor some areas were re-treated using the same process to ensure all the sealer and dirt had been removed.
After a final inspection I left the tiles to dry off overnight.
The following day I returned and started by taking moisture readings from different parts of the floor. Its not a good idea to apply a sealer to a damp tile and damp areas should be dried out with a heat gun first.
My client was keen to have a classic shiny appearance, so I chose Tile Doctor Seal and Go to add protection to the tiles. The sealer will prevent dirt becoming ingrained in the tile and protect the floor from staining caused by spillages whilst making it very easy for our customer to maintain in the future. As you can see from the pictures, it also gives a nice sheen finish to add lustre to the floor as requested by my customer.
Before leaving we had a quick chat about maintaining the floor and a warning about the use of strong floor cleaning products which can be over strong and prematurely strip the sealer away over time. For this floor I recommend Tile Doctor Neutral cleaner which is an effective cleaner but as its name suggests is pH neutral and mild enough not to harm the sealer.
Jonathan Oldham
South Middlesex Tile Doctor
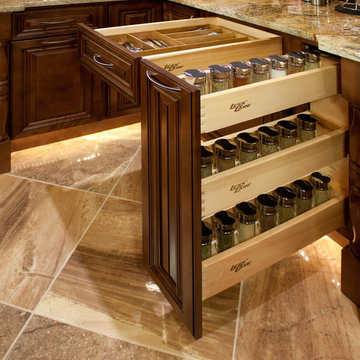 AAA Distributor, LLC
One of our favorite collections, the Geneva Cabinetry Collection, will easily catch the eye of visitors with its traditional and skillfully crafted custom appearance. Emerging with an unprecedented hand applied rich chocolate glaze and charming contour boundaries, our Geneva kitchen and bath cabinetry collection was formulated for universal application to any room - bathroom, bedroom, office, laundry, or kitchen.
As with all of our products, our natural wood interior finish is smoothly illusive throughout and can be contrasted by of some of the lighter color palettes. To further our suggestions, we recommend selecting pure chrome and elite, silver accents. Any of the indirect tones such as playful pearl or even sophisticated mosaic backdrop will joyfully consent to the newly installed Geneva kitchen and bath cabinetry collection.
Specifications:
- Full overlay
- All wood construction
- Hand applied rich dark chocolate glaze
- Natural wood interior finish
- Solid wood frame
- 1/2" plywood box
- 3/4" 5-piece drawer front raised solid wood panel
- 3/4" plywood half-depth adjustable base cabinet shelve
- Dead-lock shelve clip technology
- Quiet smooth-close door hinges on all doors
- Full extension dovetailed drawer with soft-close glides
Click the link below to build and order your kitchen with our convenient online ordering system.
 Tile Doctor Ltd
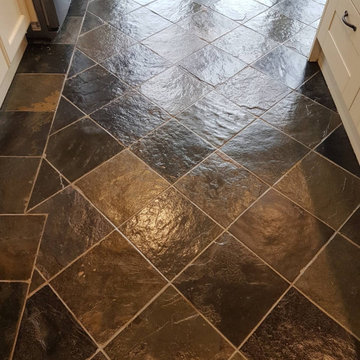
Pictured below is a Slate tiled kitchen floor that had been installed in the kitchen of a property in Harrogate around fifteen years prior. I discovered that the tiles had never been cleaned and resealed since installation and this explained why they were now looking dull and un-interesting. They had lost all character and it wasn’t until I started cleaning them that I realised the must be of the multicoloured Brazilian Slate variety.
As well as looking dull and unattractive, there was also some water damage to some tiles caused by a leak, this had resulted in some shaling and efflorescence staining. This had occurred some time ago and the floor had now dried out fully, so I was not expecting any further efflorescence issues going forward.
Brazil, I understand is the world’s 2nd biggest producer of Slate, it is also exceptionally durable and reasonably priced so its not surprising you see a lot of it over in the UK. Like any natural stone however it is porous and without a sealer to protect it and bring out those natural colours it soon ends up like the example on this pad.
I cleaned the floor with a strong dilution of Tile Doctor Pro-Clean using my usual method of spraying the cleaning solution onto the Slate and grout and then leaving it for a ten minutes to soak in and get to work breaking down the dirt and old sealers. Although I doubted there was much sealer left on the floor after all this time you need to be sure to remove all of it to get the best result. The floor was then scrubbed with a rotary floor buffer fitted with a black scrubbing pad, then after rinsing with water and extracting the soil I inspected the floor.
I detected there was still some sort of sealer present in some of less used parts of the floor, it was proving stubborn to remove so I suspect it may have been an old fashioned wax based product that was used. Not a problem though we Tile Doctors have a solution to every problem, so I spot treated the stubborn areas with Tile Doctor Wax Away to see if I was right. After scrubbing that in followed by another rinse and extraction with the wet vacuum I was pleased to see I was right and was happy all the old seal had now been removed. I gave the floor another rinse at the end of the day and dried it as much as possible with the wet vacuum, then left it to dry off fully overnight.
I came back the next day and checked the floor was dry with a damp meter. The readings were good, so I was able to crack on and seal the tiles using several coats of Tile Doctor Seal and Go. Each coat was applied leaving time to dry between each layer. This gave the floor a uniform appearance which disguised the damaged tiles. It will also help to stop more cracking and reduce the appearance of the efflorescence. The sealer really brought out the natural colours in the Brazilian Slate and the floor looked transformed.
I’m sure you will agree it was a vast improvement, certainly my client was very happy and couldn’t believe the difference I had managed to achieve. Before leaving I recommended, they should invest in some Tile Doctor Neutral Tile Cleaner which would ensure the newly applied seal was prematurely eroded away which is a problem with many of the stronger products you find in supermarkets.
Nigel Stoker
North West Yorkshire Tile Doctor
 Water Street Brass
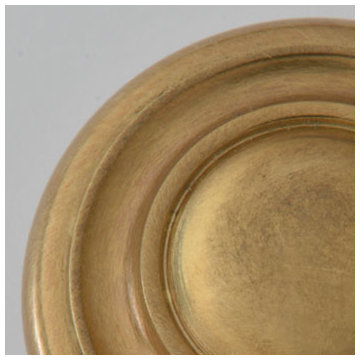
This finish gives solid brass hardware the desirable, time-worn patina of authentic antiques. The brass is gently rubbed to give it a vintage look which boots the warm glow of the finish and adds depth. The brass is then slightly antiqued and relieved by hand rubbing. The final step of applying a Decorative Hardware Wax brings out additional patina and protects the finish allowing it to age naturally over time.
Cleaning with mild soap and water then buffing the surface dry with a soft cloth is recommended. Applying a coat of Decorative Hardware Wax will protect the finish.
 Tile Doctor Ltd
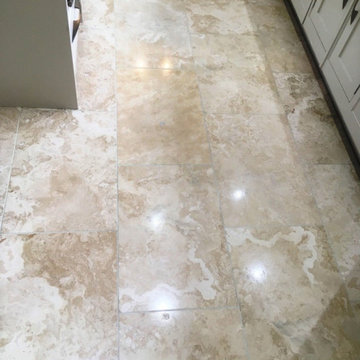
This is a Travertine tiled floor installed at a property in the popular Cheshire town of Wilmslow around 16 years prior. It had previously been maintained by a Tile Doctor colleague about three years ago and the owner was hoping the floor could be given a simple maintenance clean and seal. This is a service we provide as part of an annual maintenance plan, unfortunately after surveying the floor it was clear they had left it far too long, the floor had lost its shine and it would now need to be resurfaced with a set of diamond burnishing pads and then resealed.
Naturally burnishing the floor costs more than a simple seal and polish but if you are going to opt for the quicker maintenance plan route it does need to be done at least annually and possibly more frequently if it’s a floor in frequent use such as a kitchen. We agreed a price for the work, and I arranged a time with them to return and renovate the floor.
To restore the polished appearance of the Travertine I used a set of four burnishing pads which are applied to the floor with a rotary machine. You start with a coarse 400-grit pad using water to lubricate and running it over each tile at least three times. This first pad cleans up the stone and removes old sealers. This is then followed with the finer 800-grit, 1500-grit and finally a 3000-grit pad. Except for the 3000-grit, each pad is applied with water and the floor is rinsed and the soil extracted afterwards with the wet vacuum.
The Grout lines were also deep cleaned with a scrubbing brush and Tile Doctor Pro-Clean tile and grout cleaner. The product really gets to into deep seated dirt and grease which tends to accumulate in the grout. After a final rinse and extraction, the floor was then left to dry off overnight.
I returned on the second day and started by checking the floor was dry by taking several moisture readings with a damp meter. The readings were good, so I proceeded to seal the floor using a couple of coats of Tile Doctor Colour Grow. Colour Grow is an ideal sealer for Travertine as it seeps into the pores of the stone enhancing the natural brown colours in the process. It also offers great protection going forward.
Whilst I was there I had noticed that one of the doors had scratched the floor, fortunately the polishing process had got the scratches out of the stone but to prevent future scratching I helped them remove the door so a carpenter could shave off a few mm’s from the bottom.
My customer left the following feedback:
“Second time had Travertine floor restored, cleaned & sealed, the first time was 3 years ago. Great job done then by Simon Bywater. This time Kamila did a really professional job on the kitchen limestone floor. A bit more expensive this time, but a good job was done. Have left instructions for her to contact me in 12 months time for annual maintenance on the same floor, hopefully to prevent restoration being required! Highly recommend the service.”
The floor looked great and they should now be able to maintain it in between the maintenance visits, with day to day cleaning using Tile Doctor Neutral Tile Cleaner.
Kamila Logonzy
East Cheshire Tile Doctor
16