
Search results for "Apply recommendations" in Home Design Ideas
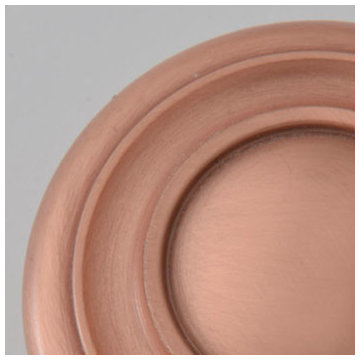
 Water Street Brass
The solid brass or bronze piece is satined then copper plated and satined again to enhance the soft lines. A protective semi-gloss lacquer is applied as the final step in the finishing process. Copper is known to contain antimicrobial properties and is becoming more popular for certain applications where more than just a beautiful finish is desired.
Cleaning with mild soap and water then buffing the surface dry with a soft cloth is recommended. Applying a coat of Decorative Hardware Wax will protect the finish.
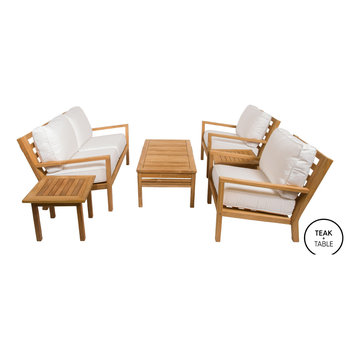
 Teak + Table Outdoor Living
The Coastal Love Seat and Club Chair is a contemporary slimline design that gives great comfort at an affordable price. The line utilizes the same accent pieces as the Royal Teak Collection Miami line.
This Set Includes: (2) Coastal Club Chairs (1) Coastal Love Seat (2) Miami End Tables (1) Miami Coffee Table (1) Bottle Water Based Teak Sealer
Recommended Space Needed: 9FT X 9FT
Dimensions Chair: Width: 28.5 Depth: 35 Height 30.5 Seat Height: 19" With Cushions
Love Seat: Width: 53 Depth: 35 Height 30.5 Seat Height: 19" With Cushions
Hardware: Stainless Steel
Cushion Fabric: Sunbrella
Quick Ship Cushions Available: Sunbrella Navy W/ White Piping, Bronze With White Piping, Off White / White Piping
Simple Maintenance: It's never been easier for Teak Customers. Apply a very light coat of water based teak sealer with a spray bottle 7 days after setting up your set. Let dry for 30 minutes then apply 1 more light coat. Your set will be protected for 3 years, feel free to spot clean / spray sealer as needed.
FREE SHIPPING NATIONWIDE
 Tile Doctor Ltd
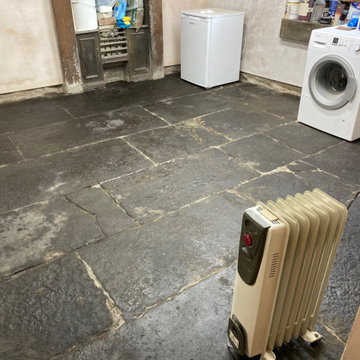
I was contacted by a client in Kendal to see if I could help with their Black Flagstone basement floor. As you can see from the photographs it was in a bit of a state and the stone looked mostly White rather than Black.
I carried out a site visit, to survey the floor and work out the best approach to restore its appearance. After testing a few different products and techniques I worked out an effective restoration plan and discussed this with the owner. Happy with my plan and costing’s we agreed a date to start the work. Being in the basement of the property had its challenges but it would mean we could work socially distanced from the owner.
To restore the floors appearance, I started with a set of coarse wire (60 and 120 grit) brushes lubricated with Tile Doctor Remove and Go which is a strong coatings remover. I had considered using milling pads on the tiles to reveal a new surface underneath but that does involve the use of an expensive set of coarse pads and given it was a basement the owners didn’t feel the extra expense would be justified.
The wire grits work well on rough stone floors when attached to a weighted buffing machine and we add some Tile Doctor Remove and Go to the mix. Once clean the floor was rinsed with water and the slurry extracted using an industrial wet vacuum. After cleaning the floor, it looked transformed, some pointing was required so we carried this out after the main clean.
The stone was left to dry out for a few days before returning to apply a sealer. For this floor I felt Tile Doctor X-Tra seal would be the best product and applied two coats. I chose X-Tra seal for this job as it ticks a lot of boxes, it’s a breathable oil-based resin sealer which being breathable will allow moisture to rise through the floor. Old floors like this don’t have a damp proof membrane so it is important to choose a sealer that can allow the floor to breath and not let damp build up under the floor where it can reach out to the walls and cause rising damp.
I also chose X-Tra Seal as it has a great ability to bring out the colour of the darker stone due to its high oil content, the oil will deter salts from forming if efflorescence is an issue. This is a unique property of this sealer as we never know if efflorescent salts are going to form or not so having this in place as a sealer is a great plus for a Tile Doctor, it is new to the market and is already proving popular on floors like this and for protecting external stone.
If the tiles are smooth Tile Doctor X-Tra Seal adds a bit of a sheen to the appearance of the stone however this stone was very rough, so we didn’t manage a shine, but the customer was happy with the matt finish and the slightly honed effect.
The floor looked great and much more appealing making the space more attractive and likely to be used. For aftercare I recommended Tile Doctor Neutral Tile Cleaner which will clean the floor without impacting the sealer which can be a problem with many of the stronger products you find in supermarkets.
Heidi Taylor
South Cumbria Tile Doctor
Find the right local pro for your project
 DZN Partners
The Photo: Marisa Smith
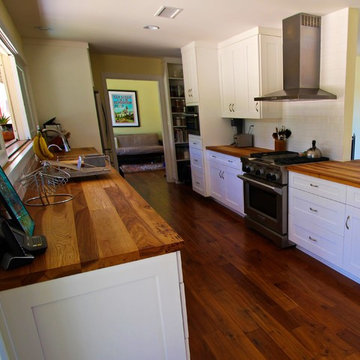
Example of a mid-sized classic galley medium tone wood floor eat-in kitchen design in San Diego with a single-bowl sink, shaker cabinets, white cabinets, wood countertops, white backsplash, subway tile backsplash, stainless steel appliances and no island
Example of a mid-sized classic galley medium tone wood floor eat-in kitchen design in San Diego with a single-bowl sink, shaker cabinets, white cabinets, wood countertops, white backsplash, subway tile backsplash, stainless steel appliances and no island
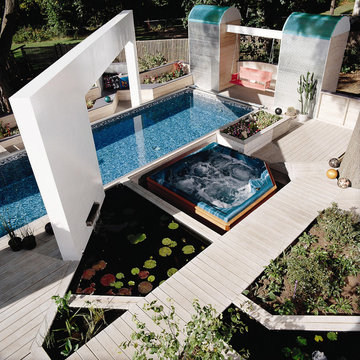
 Wood, Naturally
Pressure-treated wood is wood that’s been treated with preservatives. This protects wood from insects and decay and is ideal for projects where wood is exposed to the elements or excessive moisture. Wood preservatives are registered with the Environmental Protection Agency for their safe use.
Pressure-treated softwood lumber includes Southern Pine, Ponderosa Pine, Douglas fir and Hem-fir.
Pressure-treated wood is labeled for above ground or ground contact. When you purchase pressure-treated lumber, be sure to let the salesperson know your intended use so they can recommend the best product for your project.
Common sense safety practices apply when working with any building material. When working with treated wood, it’s important to wear a dust mask, eye protection and gloves. Dispose of treated wood scraps using normal trash collection methods; do not burn treated wood.

 Advance Design Studio, Ltd.
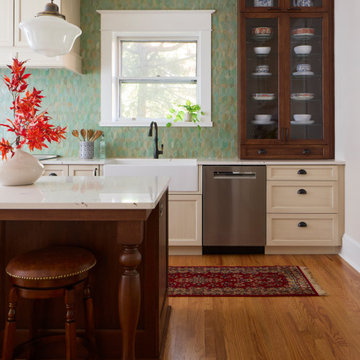
Curtis and Peggy had been thinking of a kitchen remodel for quite some time, but they knew their house would have a unique set of challenges. Their older Victorian house was built in 1891. The kitchen cabinetry was original, and they wanted to keep the authenticity of their period home while adding modern comforts that would improve their quality of life.
A friend recommended Advance Design Studio for their exceptional experience and quality of work. After meeting with designer Michelle Lecinski at Advance Design, they were confident they could partner with Advance to accomplish the unique kitchen renovation they’d been talking about for years. “We wanted to do the kitchen for a long, long time,” Curtis said. “(We asked ourselves) what are we actually going to do? How are we going to do this? And who are we going to find to do exactly what we want?”
The goal for the project was to keep the home renovation and new kitchen feeling authentic to the time in which it was built. They desperately wanted the modern comforts that come with a larger refrigerator and the dishwasher that they never had! The old home was also a bit drafty so adding a fireplace, wall insulation and new windows became a priority. They very much wanted to create a comfortable hearth room adjacent to the kitchen, complete with old world brick.
The original cabinetry had to go to make way for beautiful new kitchen cabinetry that appears as if it was a hundred years old, but with all the benefits of cutting-edge storage, self-closing drawers, and a brand-new look. “We just wanted to keep it old looking, but with some modern updates,” Peggy said.
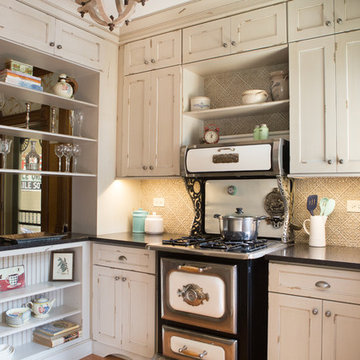
Dura Supreme Highland Cabinets with a Heritage Old World Painted Finish replaced the original 1891 cabinets. The hand-applied careful rubbed-off detailing makes these exquisite cabinets look as if they came from a far-gone era. Despite the small size of the kitchen, Peggy, Curtis and Michelle utilized every inch with custom cabinet sizes to increase storage capacity. The custom cabinets allowed for the addition of a 24” Fisher Paykel dishwasher with a concealing Dura Supreme door panel. Michelle was also able to work into the new design a larger 30” Fisher Paykel French refrigerator. “We made every ¼ inch count in this small space,” designer Michelle said. “Having the ability to custom size the cabinetry was the only way to achieve this.”
“The kitchen essentially was designed around the Heartland Vintage range and oven,” says Michelle. A classic appliance that combines nostalgic beauty and craftsmanship for modern cooking, with nickel plated trim and elegantly shaped handles and legs; the not to miss range is a striking focal point of the entire room and an engaging conversation piece.
Granite countertops in Kodiak Satin with subtle veining kept with the old-world style. The delicate porcelain La Vie Crackle Sonoma tile kitchen backsplash compliments the home’s style perfectly. A handcrafted passthrough designed to show off Peggy’s fine china was custom built by project carpenters Justin Davis and Jeff Dallain to physically and visually open the space. Additional storage was created in the custom panty room with Latte Edinburg cabinets, hand-made weathered wood shelving with authentic black iron brackets, and an intricate tin copper ceiling.
Peggy and Curtis loved the idea of adding a Vermont stove to make the hearth-room not only functional, but a truly beckoning place to be. A stunning Bordeaux red Vermont Castings Stove with crisp black ventilation was chosen and combined with the authentic reclaimed Chicago brick wall. Advance’s talented carpenters custom-built elegant weathered shelves to house family memorabilia, installed carefully chosen barn sconces, and made the hearth room an inviting place to relax with a cup of coffee and a good book.
“Peggy and Curtis’ project was so much fun to work on. Creating a space that looks and feels like it always belonged in this beautiful old Victorian home is a designer’s dream. To see the delight in their faces when they saw the design details coming together truly made it worth the time and effort that went into making the very compact kitchen space work”, said Michelle. “The result is an amazing custom kitchen, packed with functionality in every inch, nook and cranny!” exclaims Michelle.
The renovation didn’t end with the kitchen. New Pella windows were added to help lessen the drafts. The removal of the original windows and trim necessitated the re-creation of hand-made corbels and trim details no longer available today. The talented carpenter team came to the rescue, crafting new pieces and masterfully finishing them as if they were always there. New custom gutters were formed and installed with a front entry rework necessary to accommodate the changes.
The whole house functions better, but it still feels like the original 1891 home. “From start to finish it’s just a much better space than we used to have,” Peggy said. “Jeff and Justin were amazing.” Curtis added; “We were lucky to find Advance Design, because they really came through for us. I loved that they had everything in house, anything you needed to have done, they could do it”.

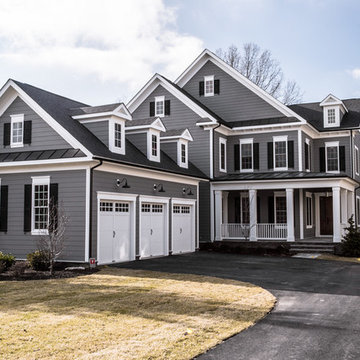
 Wakefield Homes, LC
Inspiration for a large timeless gray three-story concrete fiberboard exterior home remodel in DC Metro
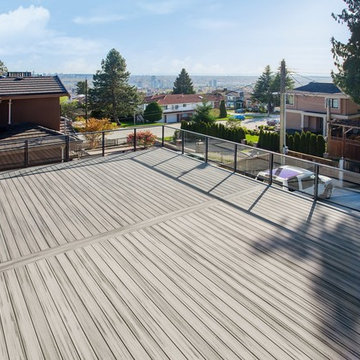
 XMT Construction Ltd.
This massive deck is over 1000 square feet. This deck was designed to talk advantage of the stunning view. Built over a garage this deck is very durable and low maintenance with a two ply torch down roof membrane. This deck is covered with Trex Transcend composite decking in "Island Mist" it features a double picture framed border and double spine. The railings are fascia mounted powder coated aluminum in gun metal grey with glass panels.
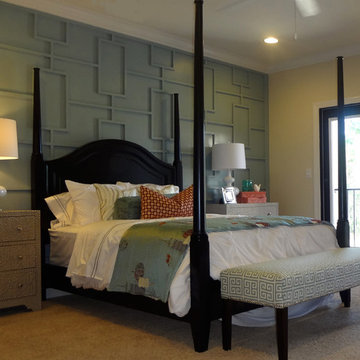
 Masterpiece Design Group
It's all about the details ---
Forget plain-old artwork or dated faux painting – consider creating a one-of-a-kind bed wall like this!
Utilizing a very well thought out, and dimensioned pattern, (not to mention, a very skilled trim carpenter), this wall was created with applied trim moulding, installed to our perfectly geometric pattern, and then painted the same color as the wall behind it.
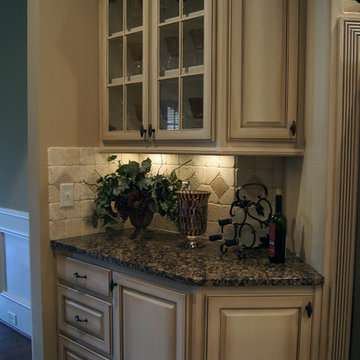
 Creative Cabinets and Fine Finishes, LLC
Originally Elder wood, Cabinets refinished to a factory smooth antique white painted finish with glaze. An old
world aged effect was achieved on the cabinets by a shadowing technique unique to CCFF. A protective topcoat professionally sprayed to ensure the highest level of durability
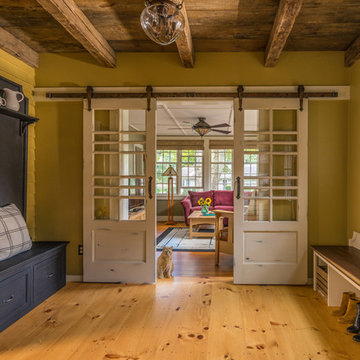
 Cummings Architecture + Interiors
Eric Roth Photography
Inspiration for a cottage entryway remodel in Boston
Inspiration for a cottage entryway remodel in Boston
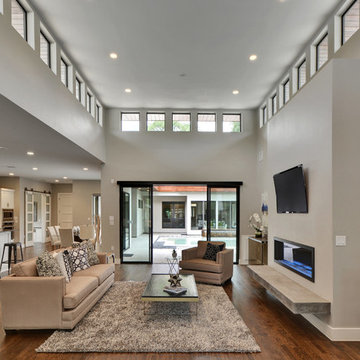
 Danze & Davis Architects, Inc.
Ana Swanson
Example of a large minimalist open concept medium tone wood floor family room design in Austin with gray walls, a ribbon fireplace, a concrete fireplace and a wall-mounted tv
Example of a large minimalist open concept medium tone wood floor family room design in Austin with gray walls, a ribbon fireplace, a concrete fireplace and a wall-mounted tv
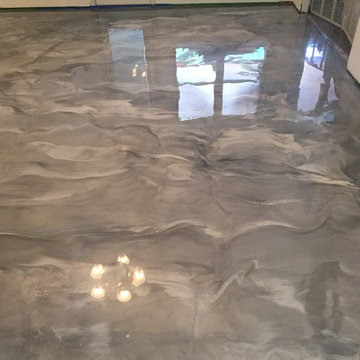
 Versatile Coatings LLC
Tore out the carpet and installed a metallic epoxy wonder.
Mid-sized trendy open concept living room photo in Dallas with white walls, a standard fireplace, a brick fireplace and a wall-mounted tv
Mid-sized trendy open concept living room photo in Dallas with white walls, a standard fireplace, a brick fireplace and a wall-mounted tv
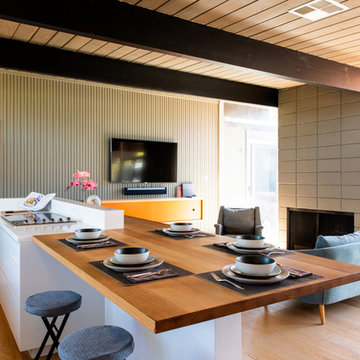

 Apartment 46 for the Home
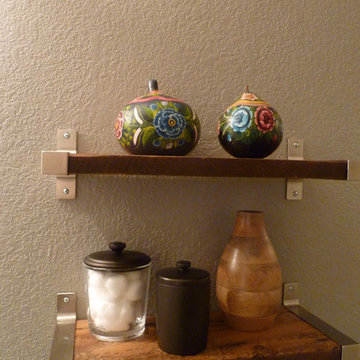
Reclaimed wood shelves provide a place for storage and display.
Inspiration for a small transitional home design remodel in San Francisco
Inspiration for a small transitional home design remodel in San Francisco
 Vision Interiors
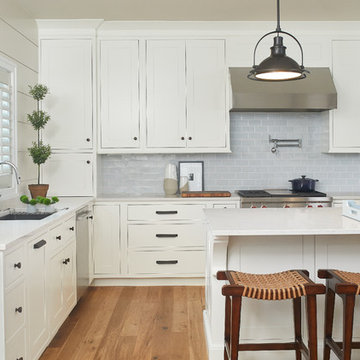
The focal point of the kitchen is the blue subway tiles on the range wall. Having only one wall of backsplash allowed for a bit more fun with tile without any worry of getting too much color or becoming too busy.
Photographer: Ashley Avila Photography
Interior Design: Vision Interiors by Visbeen
Builder: Joel Peterson Homes
 Grandin Road
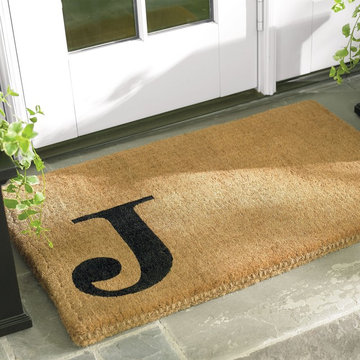
A bit of contemporary typographic art that’s elegant in its simplicity, our Offset Monogram Coco Mat creates a personalized welcome for your home that’s more updated. The composition just feels more modern, with your monogram offset to the side in bold black on the natural coco fiber mat. Hand-tufted, this sturdy mat scrubs dust and dirt from shoes, to keep your home cleaner. The color of the monogram is applied using fade-resistant dyes via a high-pressure spray. To help preserve the design even longer, place your met in a sheltered area.
 Clemens & Associates Inc.
Photo Credit: Lee Ann White
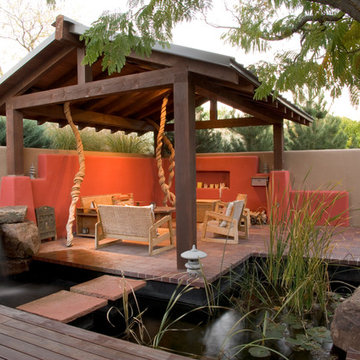
Zen courtyard brick patio fountain photo in Albuquerque with a pergola
Zen courtyard brick patio fountain photo in Albuquerque with a pergola
18