
Search results for "Apply recommendations" in Home Design Ideas
 Tile Doctor Ltd
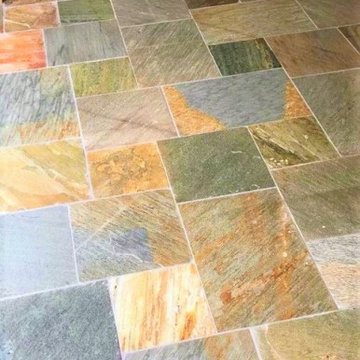
The tiles pictured are Chinese Slate which were laid in the Kitchen of a house in Chepstow around nine years ago. The town of Chepstow is located on the Welsh side of the River Seven and has the River Wye running through it.
The floor had not been professionally cleaned and sealed since installation. During this time the old sealer had mostly worn off allowing dirt to get into the pores of the stone leaving it looking dull, uninviting and dirty. The grout lines had also collected dirt and many of the lines had darkened.
I discussed with the client the process to get the floor cleaned and restored and demonstrated the effectiveness of the process on a small test area. They were impressed and were happy to go ahead with my quote, so we scheduled in the work which would take two days.
To get the floor clean and remove what was left of the old sealer I first made the floor wet and then added a strong dilution of Tile Doctor Pro-Clean mixed with Tile Doctor Remove and Go to give it extra power. This cleaning cocktail was left to soak into the tiles for ten minutes before being scrubbed in with a black scrubbing pad fitted to a rotary machine and by hand where necessary. This combination works well on really dirty floors such as this.
The scrubbing action released the years of dirt from the pores of the Slate and it wasn’t long before the cleaning solution turned black. This was then extracted off the floor using a wet vacuum. We then gave the floor a thorough inspection. There were one or two areas that were particularly stubborn, so these areas were retreated using the same process and the grout scrubbed by hand using more Tile Doctor Pro Clean.
The floor was then given another rinse with water and then dried as much as possible with the wet vacuum. This got the floor dry, but it would need to be completely dry before sealing so it was then left to dry off fully overnight.
I came back the next day to seal the floor first checking the moisture level of the stone by taking readings with a damp meter to ensure it was dry. I chose to use Tile Doctor Colour Grow for the sealer as the colour enhancing formula would be the best product to bring out the natural colours in the Chinese slate. Colour Grow is an impregnating sealer which will provides durable protection as well as allowing the surface to breath. Three coats were applied, allowing each to dry before applying the next one.
The client was so happy, so much that she said it looked better than when first laid!
I discussed aftercare with her and recommended the use of Tile Doctor Neutral Tile Cleaner, it’s pH balanced so it won’t prematurely erode the sealer which can be the problem with stronger products you find in supermarkets. It comes in concentrated form so one bottle lasts a long time.
Paul Wales
Monmouthshire Tile Doctor
 Water Street Brass
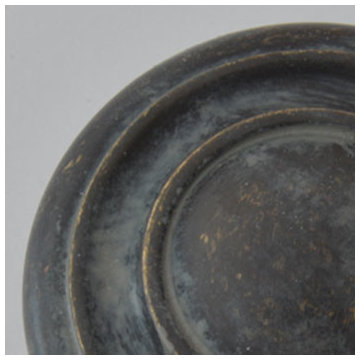
The solid brass or bronze hardware is satined then carefully antiqued by hand to a dark gray-brown tone. A small amount of paint is applied and then rubbed off so that some remains in the crevices. Highlighting reveals a blush of the brass below and the end is a rich, deep hue. Barcelona is protected with a lacquer.
Cleaning with mild soap and water and then buffing the surface dry with a soft cloth is recommended. Applying a coat of Decorative Hardware Wax will protect the finish.
 AAA Distributor, LLC
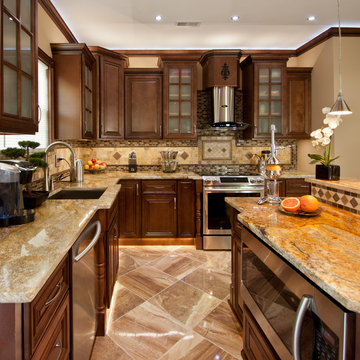
One of our favorite collections, the Geneva Cabinetry Collection, will easily catch the eye of visitors with its traditional and skillfully crafted custom appearance. Emerging with an unprecedented hand applied rich chocolate glaze and charming contour boundaries, our Geneva kitchen and bath cabinetry collection was formulated for universal application to any room - bathroom, bedroom, office, laundry, or kitchen.
As with all of our products, our natural wood interior finish is smoothly illusive throughout and can be contrasted by of some of the lighter color palettes. To further our suggestions, we recommend selecting pure chrome and elite, silver accents. Any of the indirect tones such as playful pearl or even sophisticated mosaic backdrop will joyfully consent to the newly installed Geneva kitchen and bath cabinetry collection.
Specifications:
- Full overlay
- All wood construction
- Hand applied rich dark chocolate glaze
- Natural wood interior finish
- Solid wood frame
- 1/2" plywood box
- 3/4" 5-piece drawer front raised solid wood panel
- 3/4" plywood half-depth adjustable base cabinet shelve
- Dead-lock shelve clip technology
- Quiet smooth-close door hinges on all doors
- Full extension dovetailed drawer with soft-close glides
Click the link below to build and order your kitchen with our convenient online ordering system.
Find the right local pro for your project

 Seventy Acres Landscape Architecture & Design
The Potager, a kitchen garden, just a few steps from the kitchen door, creates a world that restores and recharges the senses, enriching the everyday experience of home and place.
Photography: Charles Hugh Moretz, Jr.
 Tile Doctor Ltd
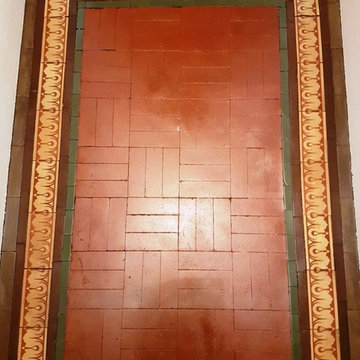
Roundhay is an affluent area of North Leeds which is well-known for the fantastic Roundhay Park. The park is large enough to contain two lakes, extensive woodland, formal gardens and even golf courses! It’s the premier attraction for anyone fortunate enough to live in the area, or anyone visiting from nearby.
I recently visited a customer who lives in Roundhay and was looking for help in restoring the small Victorian tiled entranceway at the front of her house. The tiles were in a shocking state, but it’s not hard to imagine why – the entrance to a house receives a lot of foot traffic and is not typically taken care of regularly. These tiles were also marked with paint splashes left over from decoration work, making them look even worse.
The appearance of the entranceway did not set the right standard for the rest of the house, so the property owner was keen to have it restored professionally.
The appearance of the entranceway did not set the right standard for the rest of the house, so the property owner was keen to have it restored professionally.
The appearance of the entranceway did not set the right standard for the rest of the house, so the property owner was keen to have it restored professionally.
The appearance of the entranceway did not set the right standard for the rest of the house, so the property owner was keen to have it restored professionally.
I informed the customer that I could have the tiles rejuvenated within a day’s work. To begin, I used a scrapper and wire wool brush to manually remove some of the most stubborn paint marks.
Following this, I applied a strong solution of Tile Doctor Remove and Go, before leaving the product to dwell for about an hour. Remove and Go is multi-purpose stripping agent that can remove any adhesive and paint deposits, as well as many types of old coatings and sealers.
To work the product deep into the tiles, I agitated with an abrasive cleaning pad and then rinsed the area with fresh water. This had the desired affect and all the unsightly paint marks were removed.
Next, I gave the floor another thorough clean to remove any general muck and ingrained dirt. This was done using our high-alkaline cleaner, which we typically use on Victorian tiles, known as Tile Doctor Pro-Clean. In fact, Pro-Clean is a very reliable cleaner for all types of tile and grout including natural stone, Limestone, Slate and Travertine, amongst others.
Since I told the customer I would able to finish the job within a day, I dried the floor quickly using a heat gun so it could be sealed there and then. To seal the floor, I applied four coats of Tile Doctor Seal and Go, which is a topical sealer formulated to provide maximum protection along with a high-quality, low sheen finish.
As you can see from the photos above, the entranceway was absolutely transformed. These tiles are now a true asset to the rest of the property, rather than looking out of place! I’m please to say my customer was amazed by how quickly such a big difference could be made and left the following glowing feedback.
I can’t believe the before and after pictures. The restoration of the tiles is top quality, they are so much brighter and richer in colour – especially without the garage paint hiding the detail! Nigel did an amazing job, even better than I could have hoped for, and is a lovely guy as well. Would definitely recommend.
Nigel Stoker
North West Yorkshire Tile Doctor
 Tile Doctor Ltd
During an inspection for alteration work, this customer from Cheshunt discovered what appeared to be an original encaustic tiled floor under the hallway carpet. Keen to work out what it was, and have it restored, I was asked to pop round and look.
I went over as requested to survey the hallway floor and confirm their suspicions. The carpet had been secured with gripper rods glued onto the floor and that came away easily enough. Underneath, the tiles had been covered with self-levelling cement which had to be carefully scraped away to reveal the tiles.
I ran a test to see if the cement leveller could be easily removed and using a combination of a scraper with Tile Doctor Pro-Clean, I was able to confirm the tiled floor was indeed salvageable. The house was Edwardian, and the tiles had been laid in a classic black and white geometric pattern typical of the period so I suspect the floor was indeed original.
I worked out a quote to restore the whole floor including the removal of the cement, deep cleaning and then sealing the tiles. Without removing all the cement, it would be difficult to price for replacing broken tiles, but I suspected there may be a few as its quite usual for a floor of this age. Keen to have the floor restored we were given the go-ahead and a date scheduled for the work to start.
The first step was to remove all the carpet and gripper rod so we could see the full extent of the self-levelling screed. Once done it was a case of carefully chipping and scraping away to break up the cement until the tiled floor had been fully revealed. Its slow and detailed work but quite rewarding when the tiled floor is finally revealed. The tiles had survived well under the carpet and cement but as suspected a few repairs and replacement would be needed.
With all the cement brushed away work moved onto cleaning which started with a strong dilution of Tile Doctor Pro-Clean applied to the floor and left to soak in for fifteen minutes the scrubbed in with a rotary machine fitted with a Black pad. A lot of soiling is generated from this which is rinsed off with water and extracted with a wet vacuum. The floor was then inspected and the process repeated where required.
The next step was to treat the tiles to an acid wash using Tile Doctor Grout Clean-up. This is applied as before and has several benefits including dissolving the remaining cement residue and neutralising the pH of the floor after the use of Tile Doctor Pro-Clean which is a strong alkaline.
The floor was then inspected and the broken tiles carefully removed so they could be replaced. This is delicate work as lifting a tile can sometimes upset its neighbour and before you know it the size of the work has tripled. Replacement tiles were then cut to fit the existing geometric pattern and secured into place with a rapid set adhesive and grouted in.
Once the replacement tile and grout had set, the floor was given a light clean using Tile Doctor Neutral Tile Cleaner and then left to dry out overnight.
The next day the tiles were sealed using a single coat of Tile Doctor Colour Grow and the followed up with give coats of Tile Doctor Seal & Go. Colour Grow is an impregnator that soaks into the pores of the tile protecting it from within and improving colour, where as Seal and Go adds a nice subtle sheen to the tiles. Both products are breathable which is an important feature with old floors that don’t have a damp proof membrane.
For aftercare I recommended Neutral Tile Cleaner which is a gentle but effective tile cleaning product that won’t damage the sealer.
Robert Voyce
Hertfordshire TIle Doctor
 Tile Doctor Ltd
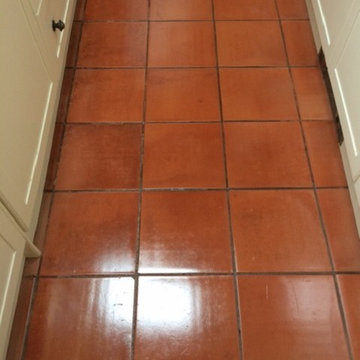
Terracotta is an interesting type of stone manufactured using a variety of techniques dependant on the country of origin which leads to a number of differences such as Spanish Terracotta being less porous than its Mexican counterpart: the former is semi-hand made and finished in a factory kiln, while the latter is completely handmade. Spanish Terracotta is therefore a lot less than porous and ultimately, of a higher quality.
But despite the Spanish Terracotta being less porous, and therefore being less prone to ingrained dirt, it still, like any other stone, needs regular maintenance to keep it looking smart. In the tiling trade, we quite often refer to this as a good old fashioned ‘Clean and Seal’ and this is exactly what was requested by this property owner in Halifax, for their Spanish Terracotta tiled floors in the kitchen and adjacent hallway.
I cleaned both sets of Terracotta tiles using the same process, which involved the application of our reliable alkaline cleaner known as Tile a Doctor Pro Clean, diluted with five parts of warm water. Once the solution had been left to dwell for a short period, it was scrubbed into the tiles to remove all dust, dirt, and general muck. This created a slurry of cleaning residue, which I promptly soaked up using a wet vac. A wet vac machine is an essential tool when it comes to cleaning porous tiles since, unlike a traditional mop and bucket, it sucks the excess trapped dirt out of the clay and thus provides a superior clean.
Following this, I applied a small amount of our heavy duty remover, known as Tile Doctor Remove & Go, to deal with some of the more stubborn stains and paint splashes, before rinsing with clean water and wet vaxing in a similar fashion to before.
Once the clean had been completed I left the tiles to dry completely. This can take 12 to 24 hours depending on numerous factors including whether a Damp proof Membrane and underfloor heating has been installed which can really help reduce drying times. Letting the tiles dry completely before sealing is paramount as moisture can cloud the sealer and affect its performance.
Upon my return to the property I ran some quick damp tests, which revealed the tiles were ready to be sealed. I then applied several coats of Tile Doctor Seal and Go, our topical sealer which provides a satin finish and accentuates colour. A new coat of this product is recommended every six months on Terracotta to ensure the continuous protection of the tiles’ soft clay particles.
My customer was extremely pleased with her refreshed Terracotta tiles. It goes to show what a big difference a bit of regular maintenance can make. I advised the customer that an everyday cleaner called Tile Doctor pH Neutral cleaner can also be used regularly to keep the tiles looking great without damaging the sealer.
Nigel Stoker
North West Yorkshire Tile Doctor
 sirboom
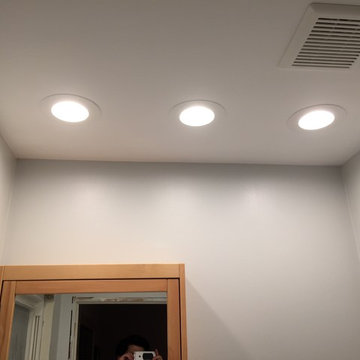
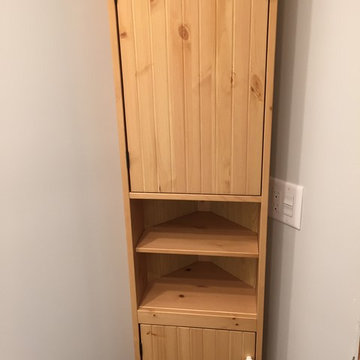
Owner designed and remodeled small half-bathroom in south Atlanta suburb. Gut remodel with updated (corrected) electrical, updated (corrected) plumbing, Kohler toilet, IKEA Silveran vanity (partial-wall mount; mounted to be 37" high to top of sink, my preference), IKEA Silveran medicine cabinet, IKEA Silveran cabinet, and retrofitted an IKEA Lillangen sink (which normally goes with a different vanity). Paint is Olympic One "Thin Ice" (paint not recommended, was disappointing for the "best" Olympic sells at Lowe's; color is great, though). Chrome fixtures with faucet by Glacier Bay (unknown model; Home Depot clearance find) and chrome door knobs (also from Home Depot). Blinds are from SelectBlinds.com and are Bamboo 1" faux wood. Wall art is from Etsy.com (look up dictionary prints if you want to find similar). Tile is from Lowe's, by Style Selections, and called Skyros Gray (highly recommended, good quality). Grout color is Silver by MAPEI (Lowe's). Silver MAPEI grout-look cauking along top and bottom of baseboard tiles (upper floor home so can't use grout). Unfortunately the sink and toilet were a different shade of white but the toilets were all fairly new and it's more noticeable in the photo than in real life. Used 3 LED new work IC recessed lights, LED under-cabinet light from Home Depot off of same switch as the lights but with a switch on-board, and a basic contractor-grade ceiling fan with some Dynamat-like material applied to the casing which reduces its noise significantly off of its own switch. GFCI outlet has a nightlight built in and, not shown, is another GFCI outlet retrofitted into the medicine cabinet. Don't worry, that silicone caulking around the toilet has been improved to a professional look with the Silver caulking over it to blend better since this photo, so don't hold that against me! In fact, don't hold anything you don't like against me... just posting this to give folks some ideas WITH the actual units used, unlike most postings on Houzz.
©Kil|Photography
 Tile Doctor Ltd
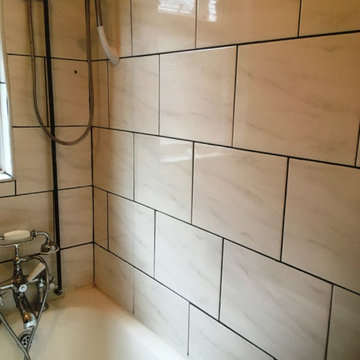
We were contacted by a client from the Levenshulme area of Greater Manchester who had just purchased a property there and hated the state of the grout which despite cleaning did not improve. The owner said she could not use the bathroom in this state as it looked disgusting and unclean and was keen to have it renovated. The rest of the house was being redecorated so whilst that was going on, I was called over to have a proper look at the grout and quote for sorting it out.
It didn’t take long to understand the issue, is seems the previous owner in an attempt to improve the appearance of the grout had touched it up by applying another thin layer of grout on top of the original. Now both the new and old was starting to flake off making a real mess.
I explained to the client we would need to scrape out the new layer, clean the original and then apply a grout colourant to improve the overall appearance. I gave her a price for the work, and she was happy for me to go ahead with the job.
My first task was to scrape off the new layer of grout, so I had a stable grout line to work from. I then started cleaning the grout up using a Tile Doctor Grout Colourant Pre-Treater cleaner, this cleans up the grout and being acidic it etches the surface to provide a better base for the grout colourant to adhere to. The dirt was rinsed off and then the area was dried using a heat gun.
Once dry I used a Tile Doctor Grout Colourant in Charcoal Grey (one bottle was sufficient). This product is equally effective for interior or exterior applications including bathrooms and kitchens and it is available in ten different colours. The client had requested to darken the grout and give it a completely new modern look. The colourant is painted onto the grout with a small brush and any excess which gets onto the tile is removed with a cloth before it dries.
The best thing about the grout colourant is it forms an easy to clean seal over the grout which ensures the grout is protected. Given Ceramic tiles are glazed and therefore don’t need sealing the new combination should ensure the tiles keep their appearance for a very long time with minimal cleaning. The silicone sealant between the bath and the wall tiles looked in good condition and had not discoloured so there was no need for this to be replaced.
The bathroom now looked clean and inviting and I’m pleased to report my client was very happy with the completed renovation and was finally happy to use the bathroom!
I recommended that for on-going cleaning that they use Tile Doctor Aqua-Pro, this is a pH neutral cleaner with a trigger action for easy application. It can be used in the bathroom every day. It helps to keep soap scum and limescale at bay and has a pleasant lemon smell so cleaning should not be too much of a chore.
Alex Logonzy
Greater Manchester Tile Doctor
 AAA Distributor, LLC
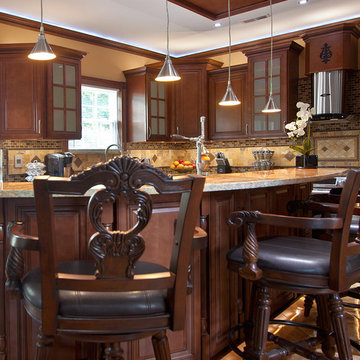
One of our favorite collections, the Geneva Cabinetry Collection, will easily catch the eye of visitors with its traditional and skillfully crafted custom appearance. Emerging with an unprecedented hand applied rich chocolate glaze and charming contour boundaries, our Geneva kitchen and bath cabinetry collection was formulated for universal application to any room - bathroom, bedroom, office, laundry, or kitchen.
As with all of our products, our natural wood interior finish is smoothly illusive throughout and can be contrasted by of some of the lighter color palettes. To further our suggestions, we recommend selecting pure chrome and elite, silver accents. Any of the indirect tones such as playful pearl or even sophisticated mosaic backdrop will joyfully consent to the newly installed Geneva kitchen and bath cabinetry collection.
Specifications:
- Full overlay
- All wood construction
- Hand applied rich dark chocolate glaze
- Natural wood interior finish
- Solid wood frame
- 1/2" plywood box
- 3/4" 5-piece drawer front raised solid wood panel
- 3/4" plywood half-depth adjustable base cabinet shelve
- Dead-lock shelve clip technology
- Quiet smooth-close door hinges on all doors
- Full extension dovetailed drawer with soft-close glides
Click the link below to build and order your kitchen with our convenient online ordering system.
 Tile Doctor Ltd
Most stone and tile benefit from the protection that a sealer provides to stop dirt becoming ingrained into its pores. However, the act of walking on the tile causes wear and this over time will lead to the sealer wearing off and dirt reaching the pores; the worse thing is you rarely notice it happening because it takes a long time to wear down a sealer.
Most of my customers have this problem and call on me to clean and reseal the floors every few years when it becomes difficult to clean effectively. The alternative which I do for a number of my clients is to have the floor lightly cleaned and a new layer of sealer added every six to twelve months.
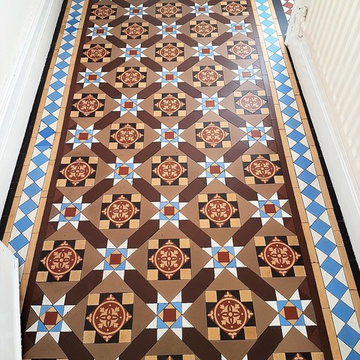
This Victorian tiled entrance at a period house in Ilkley was not in too bad a shape just a little dirty and dull and the owner was keen to have is renovated in the run up to the Christmas holidays. Ilkley is a lovely town in West Yorkshire which became very fashionable in the Victorian era due to the health benefits of the local water, this led to a lot of Victorian architecture and tiled entrance floors like this one are very typical in the area.
To get the dirt out of the tile and grout I applied a strong dilution of Tile Doctor Pro-Clean to the tiles and left it to soak in for fifteen minutes. Pro-Clean is a very reliable cleaner for all types of tile and grout including natural stone, Limestone, Slate and Travertine, amongst others; additionally, when used in a strong dilution it will strip off old sealers. The solution was then worked into the tile using a black scrubbing pad fitted to a rotary machine and the soil extracted using a wet vacuum.
I gave the floor a light rinse with water to remove any trace of cleaning products and then inspected the floor to ensure it was up to standard. At this point I could see there were flecks of paint on the tile around the edges of the floor from previous decorating work and, so I removed carefully removed these with a scrapper and a hand-held diamond block.
The floor was given a final rinse and the wet vacuum used to extract as much moisture from the floor as possible before leaving it to dry for the evening.
I returned the next day to seal the floor first discussing the finish that the customer wanted for the tiles. Typically, I recommend using a satin sealer for Victorian tiles as it adds a nice sheen to the tile however surprisingly the owner wanted a matt finish.
Tile Doctor has a full range of sealers available to cater for all requirements so for this floor I applied three coats of Tile Doctor Colour Grow which leaves a matt finish whilst enriching the colours in the tile.
The tiles are now full of life and with the paint specs removed there is now a crisp black edge between the floor and the skirting which the customer also picked up on.
Nigel Stoker
North West Yorkshire Tile Doctor
 sirboom
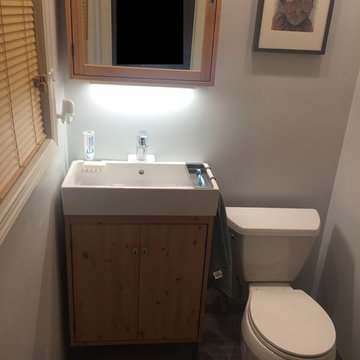
Owner designed and remodeled small half-bathroom in south Atlanta suburb. Gut remodel with updated (corrected) electrical, updated (corrected) plumbing, Kohler toilet, IKEA Silveran vanity (partial-wall mount; mounted to be 37" high to top of sink, my preference), IKEA Silveran medicine cabinet, IKEA Silveran cabinet, and retrofitted an IKEA Lillangen sink (which normally goes with a different vanity). Paint is Olympic One "Thin Ice" (paint not recommended, was disappointing for the "best" Olympic sells at Lowe's; color is great, though). Chrome fixtures with faucet by Glacier Bay (unknown model; Home Depot clearance find) and chrome door knobs (also from Home Depot). Blinds are from SelectBlinds.com and are Bamboo 1" faux wood. Wall art is from Etsy.com (look up dictionary prints if you want to find similar). Tile is from Lowe's, by Style Selections, and called Skyros Gray (highly recommended, good quality). Grout color is Silver by MAPEI (Lowe's). Silver MAPEI grout-look cauking along top and bottom of baseboard tiles (upper floor home so can't use grout). Unfortunately the sink and toilet were a different shade of white but the toilets were all fairly new and it's more noticeable in the photo than in real life. Used 3 LED new work IC recessed lights, LED under-cabinet light from Home Depot off of same switch as the lights but with a switch on-board, and a basic contractor-grade ceiling fan with some Dynamat-like material applied to the casing which reduces its noise significantly off of its own switch. GFCI outlet has a nightlight built in and, not shown, is another GFCI outlet retrofitted into the medicine cabinet. Don't worry, that silicone caulking around the toilet has been improved to a professional look with the Silver caulking over it to blend better since this photo, so don't hold that against me! In fact, don't hold anything you don't like against me... just posting this to give folks some ideas WITH the actual units used, unlike most postings on Houzz.
©Kil|Photography
 Tile Doctor Ltd
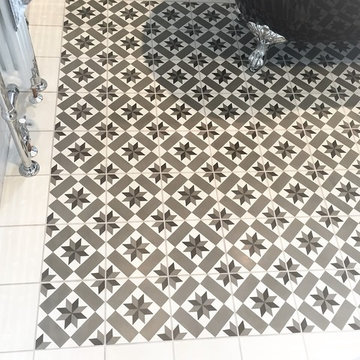
I’m often asked if you should seal a tile before grouting and the answer is a definite yes, and this Encaustic Cement tiled bathroom floor installation in Stockport is a great example as to why. The tiles had not been sealed before grouting and then, once the tiler went to grout the newly installed tiles with a grey grout, the colour ran into the tiles, staining them and leaving them looking grubby and dirty. Had the tiles been sealed it would of made the process of removing the grout from the surface of the tile much easier.
If you haven’t come across them before Encaustic cement tiles are often hand painted and are available in a range of beautifully artistic patterns, so it was a real shame that these tiles were allowed to be spoilt by an avoidable mistake. As you can imagine, the property owner was keen to have the tiles professionally restored, and she contacted me to get the job done. I took some photographs but I’m not sure that they do justice to the problem.
Rather than use a liquid cleaning product, I opted to use diamond encrusted handheld burnishing pads to remove the grout stains. Our burnishing system comprises four pads of varying grits. I started with the Coarse grit burnishing pads applying to the tiles it with a small amount of water as lubricant to grind down the grubby marks. Following this I worked my way through the system, applying Medium, Fine and Very Fine pads to gradually restore the appearance of the floor. Once the burnishing process has been completed I rinsed the tiles and then accelerated the drying process using a heat gun to prepare them to be sealed.
Removing any excess moisture before sealing is essential as even a small amount can cloud the sealer and prevent it from properly protecting the tiles from dirt and stains. Once satisfied that the floor was dry, I proceeded to seal it using Tile Doctor Colour Grow. As an impregnating sealer Colour Grow penetrates deep into the pores of the stone to fill them and thus prevent dirt from becoming ingrained. Colour Grow’s colour intensifying properties also really accentuated the patterns of the Encaustic Cement tiles.
Now that these fantastic tiles have been properly sealed it will be far easier for the customer to keep them clean in future. Needless to say, she was very happy with the result. We recommend topping up your sealer on a regular basis to ensure problems like those which occurred here do not damage the appearance of your tiles.
Steve Keary
Greater Manchester Tile Doctor
 AAA Distributor, LLC
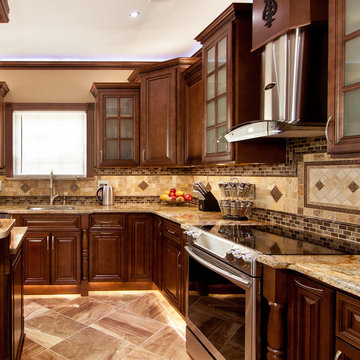
One of our favorite collections, the Geneva Cabinetry Collection, will easily catch the eye of visitors with its traditional and skillfully crafted custom appearance. Emerging with an unprecedented hand applied rich chocolate glaze and charming contour boundaries, our Geneva kitchen and bath cabinetry collection was formulated for universal application to any room - bathroom, bedroom, office, laundry, or kitchen.
As with all of our products, our natural wood interior finish is smoothly illusive throughout and can be contrasted by of some of the lighter color palettes. To further our suggestions, we recommend selecting pure chrome and elite, silver accents. Any of the indirect tones such as playful pearl or even sophisticated mosaic backdrop will joyfully consent to the newly installed Geneva kitchen and bath cabinetry collection.
Specifications:
- Full overlay
- All wood construction
- Hand applied rich dark chocolate glaze
- Natural wood interior finish
- Solid wood frame
- 1/2" plywood box
- 3/4" 5-piece drawer front raised solid wood panel
- 3/4" plywood half-depth adjustable base cabinet shelve
- Dead-lock shelve clip technology
- Quiet smooth-close door hinges on all doors
- Full extension dovetailed drawer with soft-close glides
Click the link below to build and order your kitchen with our convenient online ordering system.

 Water Street Brass
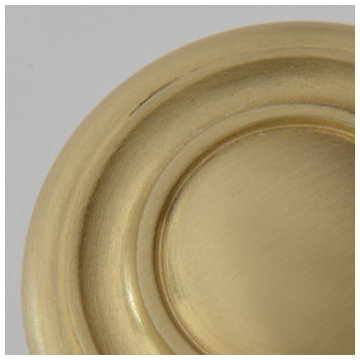
This solid brass hardware is satined to provide a brushed look and a protective clear lacquer is applied to protect its warmth over time.
Cleaning with mild soap and water then buffing the surface dry with a soft cloth is recommended. Applying a coat of Decorative Hardware Wax will protect the finish.
 Tile Doctor Ltd
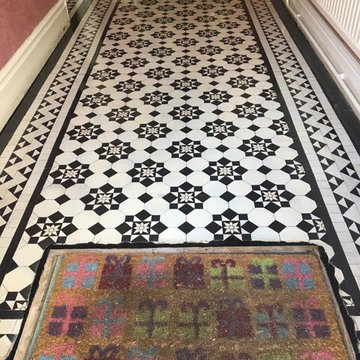
I was contacted by a professional couple who were despairing over the state of their Victorian tiled hallway floor which was dull and uninviting. The property was in Newport which is on the south east side of Wales around twelve miles east of the bustling city of Cardiff.
I went over to visit the property which was a beautiful Victorian period terrace house nestled amongst other properties of a similar age properties. The couple wanted their Victorian hallway floor to be brought back to life, so I demonstrated the cleaning process I intended to use on a small part of the floor. Immediately it had the desired effect and the floor looked much cleaner. I could see that there were no structural issues with the floor and the test clean proved it was just ingrained dirt that was the problem. The clients were happy with the result of the demonstration and subsequent quote, so we arranged a suitable date to come back and complete the work.
When I arrived, I started by protecting the skirting boards with tape and then set about giving the Victorian tiles a deep clean. I applied a combination of Tile Doctor Pro-Clean and Remove and Go leaving it to dwell for a short time to allow the products to soak into the pores of the tiles and start breaking down the ingrained dirt. After about ten minutes I scrubbed the floor with black scrubbing pad attached to a rotary floor buffer which released the years of grime and dirt. The floor was then rinsed with water and the soil removed using a wet vacuum. I repeated the process to ensure the floor was as clean as possible.
A further inspection of the Victorian tiles revealed a few stubborn marks which were dealt with using handheld diamond burnishing blocks. These are also handy for getting into the corners of the floor which were difficult to reach with the rotary machine. The floor was then left overnight to dry out.
The following day I returned, and I checked the floor was dry using a moisture meter to ensure it was dry. Once I was happy, I started to seal the floor with Tile Doctor Seal & Go which is a water-based sealer that works well on Victorian tiles. Several coats were applied building up layers to produce a stunning satin finish.
Once I had finished the floor was looking so much cleaner and brighter and the addition of the sealer will protect the floor from dirt and keep it looking good for some time to come. My clients were over the moon with the floor!
For aftercare I recommend Tile Doctor Neutral Tile Cleaner, which unlike the stronger products you find in supermarkets is ideal for cleaning sealed floors and will ensure the sealer stays in good condition.
Paul Wales
Monmouthshire Tile Doctor
 Tile Doctor Ltd
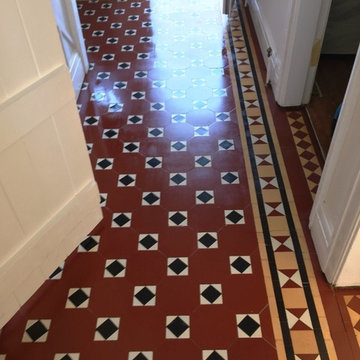
This Victorian tiled hallway was one of the most beautiful Victorian floors I have ever had the pleasure to work on. With the wide range of patterns and colours they are available in, it seems no two Victorian tiled floors are exactly the same, and this uniqueness is part of what makes them so appealing to property owners.
Unfortunately, this floor had been poorly maintained over the years, even suffering from a few loose and missing tiles. There was a thick coating of dust and dirt soiling its appearance, and the property owner was understandably keen to remedy the situation. Having realised that everyday household cleaners are not likely to achieve great results, she asked me to carry out a full professional restoration, including making some repairs where necessary. I was pleasantly surprised to find out that this property was situated in the town of Wyken, which is a few miles outside of Coventry city centre and in fact just down the road from where I live myself!
Before making a start on the cleaning process, it was first necessary to re-fix the small number of loose tiles and replace a single missing tile by the radiator. Fortunately, I’ve been working on these types of floors for some time and have built up a good collection of replacement Victorian tiles so I was able to find one that matched in nicely with the rest of the floor without too much problem.
To clean the tiles, I began by applying a layer of Tile Doctor Oxy-Gel directly into the floor with a small brush. This product is very similar to the popular Tile Doctor Pro Clean: both are strong alkaline cleaners, strippers and degreasers, with the main difference being that Oxy-Clean comes in a gel form, making it easier to control and therefore ideal for precise cleaning, or for application to vertical surfaces. Like Pro Clean and being an alkaline base it is suitable for use on all types of natural stone and tile. The Oxy-Gel was left to soak into the tiles for around ten minutes before being scrubbed in and then rinsed off carefully with water, I then used a wet vacuum to extract the now soiled cleaning solution off the floor.
The next step was to acid wash the floor using Tile Doctor Acid Gel; this served to break down alkaline mineral deposits inherent in the grout along with some excess grout that had been left on the untidily left on tile from installation. It is recommended not to use this product on acid-sensitive soon such as Marble and Limestone as it can cause irreparable etching but its fine on Victorian tiles as long as you don’t leave it on too long.
Finally, the floor was given a rinse with clean water to remove any trace of chemicals from the cleaning and to neutralise the area in preparation for sealing.
I left the floor for 48 hours to dry before returning to the property to seal the tiles. This allowed plenty of time for the floor to dry completely, which is important as any excess moisture can damage the ability of the sealer to protect against dirt and stains.
My choice of sealer for this floor was Tile Doctor High Shine; three coats in total were applied, providing – as the product name suggests – the high shine finish that the customer had requested. The sealer will provide durable surface protection going forward preventing dirt from becoming ingrained into the pores of the tile and ensuring it remains easy to clean and keeping its appearance for some time to come.
As a big fan of Victorian tiles, it was a great pleasure to restore this floor, and my customer was certainly pleased too. It’s amazing how far a little professional maintenance can go to improving the appearance of these fantastic types of floor.
Mick Gayton
Warwickshire Tile Doctor
 sirboom
Owner designed and remodeled small half-bathroom in south Atlanta suburb. Gut remodel with updated (corrected) electrical, updated (corrected) plumbing, Kohler toilet, IKEA Silveran vanity (partial-wall mount; mounted to be 37" high to top of sink, my preference), IKEA Silveran medicine cabinet, IKEA Silveran cabinet, and retrofitted an IKEA Lillangen sink (which normally goes with a different vanity). Paint is Olympic One "Thin Ice" (paint not recommended, was disappointing for the "best" Olympic sells at Lowe's; color is great, though). Chrome fixtures with faucet by Glacier Bay (unknown model; Home Depot clearance find) and chrome door knobs (also from Home Depot). Blinds are from SelectBlinds.com and are Bamboo 1" faux wood. Wall art is from Etsy.com (look up dictionary prints if you want to find similar). Tile is from Lowe's, by Style Selections, and called Skyros Gray (highly recommended, good quality). Grout color is Silver by MAPEI (Lowe's). Silver MAPEI grout-look cauking along top and bottom of baseboard tiles (upper floor home so can't use grout). Unfortunately the sink and toilet were a different shade of white but the toilets were all fairly new and it's more noticeable in the photo than in real life. Used 3 LED new work IC recessed lights, LED under-cabinet light from Home Depot off of same switch as the lights but with a switch on-board, and a basic contractor-grade ceiling fan with some Dynamat-like material applied to the casing which reduces its noise significantly off of its own switch. GFCI outlet has a nightlight built in and, not shown, is another GFCI outlet retrofitted into the medicine cabinet. Don't worry, that silicone caulking around the toilet has been improved to a professional look with the Silver caulking over it to blend better since this photo, so don't hold that against me! In fact, don't hold anything you don't like against me... just posting this to give folks some ideas WITH the actual units used, unlike most postings on Houzz.
©Kil|Photography
 5 star finishes ltd
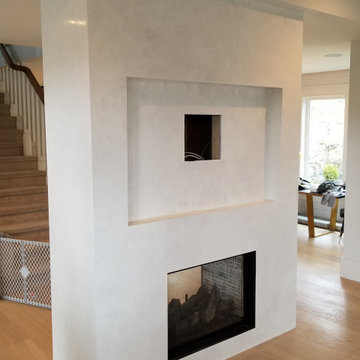
Custom fireplace with the stone removed and new hardi backer board and drywall installed. Metal l bead was installed around the opening and proset 60 used to tape in and finish the entire fireplace for crack prevention and eifs mesh installed around the opening.
Grassello Di Calce product, Venetian plaster fireplace!
Typical install for a non zero clearance fireplace is as follows:
For fireplaces that are non-zero clearance: Use Hardi backer board around the opening, usually half inch and 18 inches around the opening, and then half inch drywall matched well to the hardi backer board seams. DO NOT USE DUROCK BOARD. Do not allow seams of the board to have breaks above the fireplace, preventing cracks by using one continuous piece of hardi board across the top, and placing the joints ideally in the middle of the two sides of the fireplace opening. Then tape in and finish only with Proset 60 drywall compound and use only metal corner beads and cut half the width of a 90 degree corner bead to make a homemade L bead, and fit this in between the drywall and fireplace flange.
Sand everything with an orbital sander and then primer with quartz primer diluted 1-1, and then 30% or undiluted quartz primer, allow to dry 4 hrs, apply adhesive 9 inch mesh etc. as per above with our Italian basecoat 30 in two layers. Wax is definitely not recommended for around hot fireplaces. Stain shield is the best sealer choice for these areas.
This finish was polished to a satin sheen, and was not applied in three layers to produce a mirror finish. This finish was sealed with advanced penetrating sealer and was polished with a wool bonnet and microfiber rags.
2020
Venetian plaster install only, no rebuild or drywall work: $4200
17