
Search results for "Apply recommendations" in Home Design Ideas
 Tile Doctor Ltd
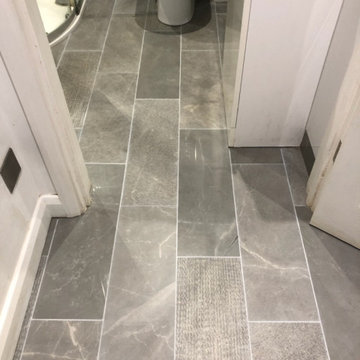
The pictures below detail the renovation of a Porcelain Tiled Floor I completed at a property in Ipswich. Installed throughout the Kitchen and into the adjacent WC the porcelain tile and grout were in a very dirty state and the client was desperate to get them clean. The situation wasn’t helped by their two dogs with grubby paws. She had tried all the usual household cleaners she could find, and nothing seemed to work. Unfortunately, household cleaners can make the problem worse due the strong chemicals they contain.
I visited the property to survey the floor and was able to reassure the client that although the grout was heavily stained it could be renovated by recolouring it with a Tile Doctor Grout Colourant. I was confident we would soon be able to get the floor looking great again and demonstrated the process I would use on a small part of the floor. The demonstration went well and happy with the result we agreed a date for my return the following week to complete the work which should be completed in a single day.
Returning on the agreed date we started by protecting the by applying a clear silicone sealant to the MDF skirting boards and kitchen base units. We left this to dry for an hour before proceeding with the cleaning.
The Porcelain tile and grout was cleaned with a strong dilution of Tile Doctor Pro-Clean using 3 parts cleaner to 5 parts water. The solution was applied to the tile and grout and then left to soak in for ten minutes before being worked in using a rotary machine fitted with a Black Scrubbing Pad. Tile Doctor Pro-Clean is a concentrated, multi-purpose high-alkaline cleaner which is designed for deep cleaning tile, stone and grout of dirt and grease and can also remove sealers.
Pads can struggle to reach into the recesses of the grout line so once I was finished with the tile, I hand scrubbed the grout with a wire brush. The floor was then rinsed with water and the resultant slurry extracted off the floor with wet vacuum.
The floor took about three hours to deep clean which was just the right timing for us to have lunch whilst the floor dried. The grout was much improved by the cleaning process but as suspected there were too many deep-seated stains to be able to guarantee a consistent finish. So as previously agreed with the client we set about colouring the grout using a light grey colourant. This took most of the afternoon as there was a lot of grout.
The Porcelain tiles were the non-porous type that won’t take a sealer and the colourant acts as a barrier over the grout protecting it and making it easy to clean so once I was done colouring there was no need to apply a sealer.
My client was relieved to have the floor looking clean and presentable again. For aftercare I recommended that moving forward it would be best to use Tile Doctor Neutral Tile Cleaner which is a pH neutral cleaner. This will ensure that with regular cleaning the floor will keep clean and the grout won’t be compromised by overly strong products.
Bruce Copping
Suffolk Tile Doctor
 Tile Doctor Ltd
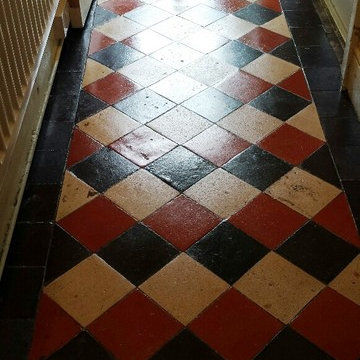
The pictures below were taken at a house in the town of Merthyr Tydfil, which is located not too far north of Cardiff. My client was keen to keep her very old Quarry tiled floor – which dated back to 1905 – intact. The floor had understandably seen a large amount of traffic in its lifetime, and was now in dire need of a professional restoration, including a thorough clean and seal.
First, I completed a survey of the area and provided my client with a quote. After completing many similar jobs in the past, I generally have a good idea of what the final result will look like. I passed on some images of a final result to my client, who was happy for me to begin my work.
On the first day, my first task was to take run some damp tests which were fine; it’s always good to know up front if there are likely to be any damp issues. Next I covered the floor with water to take the surface suction out and waited fifteen minutes before applying a cocktail of Tile Doctor NanoTech Heavy Build-Up cleaner mixed with Pro-Clean and Grout clean-up covering the whole floor. I then immediately starting to work the solution into the floor with a rotary machine fitted with a coarse black pad. The solution was then rinsed off with water which was then extracted with a wet vacuum as I worked. For stubborn areas I applied more of the previously mixed solution scrubbed into the floor with coarse wire wool by hand followed by further rinsing with water.
Each of the products used serves a particular purpose. Pro-Clean is a strong high-alkaline cleaner for natural stone, while NanoTech HBU is a particularly powerful cleaner that uses nano-sized particles to penetrate deep into the stone to get underneath and lift out ingrained dirt and stains. Grout Clean-Up, as the name implies, is a product for resolving grout related problems such as removing grout smears from tile surfaces aka grout haze.
After completing the clean I left the house for 48 hours, to leave enough time for the floor to dry completely in preparation for sealing. Upon my arrival back at the house I conducted some more damp tests to check that the floor was dry enough to seal using the previous readings as a benchmark. The results indicated that I was fine to proceed with the seal, so I applied a total of eight coats of Tile Doctor Seal & Go for durable protection. This was the product I recommended to my client as she wanted a nice, soft shine for her surface seal.
As you can see from the photos, the desired result was achieved to a high standard and needless to say my client was delighted with the transformation.
Julian Iancono
South East Wales
 Tile Doctor Ltd
These pictures of a Victorian Tiled Hallway are from a property in Canterbury that was once a nursing home and was now being renovated to become a children’s home. The building was being gutted and extended at the same time and when the carpet was pulled up in the hallway, they were surprised to find a relatively intact Victorian tiled floor underneath.
Whilst they thought it bizarre that anyone would want to cover up such an attractive floor the carpet had protected it over the years. They realized it would make a marvellous feature at the entrance to the property, but professional restoration would be needed to do it justice. After a bit of research, they came across Tile Doctor and got in touch.
Canterbury comes under my North Kent designation, so I went to visit the property and survey the floor and quote for doing the restoration. There were a few missing and loose tiles that would need replacing and refixing also there was a lot of ingrained dirt so a deep clean and application of a new sealer would be required. I gave them a price for the work which they readily accepted, and we arranged a suitable time to carry out the work. Subject to the building schedule I had calculated the floor would take three days to restore.
On the first day I set about replacing and re-fixing the missing, broken, and loose tiles. This is delicate work as you need to extract the old tile without disturbing its neighbours and then clean up the area ready for its replacement. Being a Tile Doctor I keep a selection of stock tiles for repairs, some are reclaimed, and some are replica. Also, there are several companies still making Victorian style tiles so I can usually source what I need.
After the individual missing and broken tiles had been replaced and the adhesive had set, it was then a matter of renovating the floor as a whole. The tiles were covered in a thick layer of carpet adhesive which needed a combination of specialist tools and products to remove. First, a liberal layer of Tile Doctor Remove and Go was applied and left to dwell for thirty minutes. Next, Tile Doctor Pro-Clean was added and scrubbed in with a black pad.
This process softened the adhesive sufficiently in readiness for the next stage which involves using a set of diamond burnishing pads on a weighted buffing machine. Several applications were needed, each time with a successively finer grade of diamond pad and rinsing off the slurry in between. The tiles were first milled using a very coarse 50-grit pad, followed by 100, 200 and finally burnished with a 400-grit burnishing pads. This removed all the adhesive and dirt in the tiles, which was cleaned up using the wet vacuum.
Old Victorian floors like this do not have a damp proof membrane installed under the floor, and with a lot of water being used in the cleaning process I was concerned White efflorescence salts could appear later as the floor dried. To counter this, I gave the floor an acid wash using Tile Doctor Acid Gel to counter and dissolve the salts, it also gives the tiles another clean and will remove any old grout smears further improving the appearance of the tiles. Once done the floor was left to dry overnight.
On my return I tested the floor was dry by taking several moisture readings around the floor with a damp meter. Applying sealer to a damp floor is never advised and can lead to clouding and an unwanted finish.
Happy that the tiles were dry, a single coat of Tile Doctor Colour Grow sealer was applied. This is an impregnating sealer with a colour enhancing component to ‘lift’ the stronger colours of the floor. Colour Grow however does leave a matt appearance and as the client had asked for a shiny finish it was topped up with five coats of Tile Doctor Seal and Go. This is a compatible topical sealer which added a mid to high sheen.
By the end of the third day the Victorian floor looked brand new, and I received the following feedback from the client. Its rare to receive feedback from commercial customers so they were clearly overwhelmed with the transformation.
Did not think this glued covered bad old floor could look sooooo good Fabulous Fantastic job Looks Amazing Thank you
For aftercare I recommend the use of Tile Doctor Neutral Cleaner which isn’t as harsh as many of the products you find in supermarket. Stronger products can actually strip off the sealer over time leaving it vulnerable to dirt and detracting from its appearance.
Graham Davis
North Kent Tile Doctor
Find the right local pro for your project
 Tile Doctor Ltd
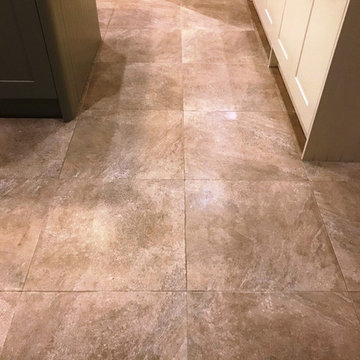
This request came from a client who lives in the Newcastle district of Jesmond who was unhappy with the appearance of their Textured Porcelain floor tiles. The problem was that the Porcelain Tiles were grouted in whilst the underfloor heating was switched on. This resulted in the grout drying out quicker than expected and the tiler struggled to get the excess grout off the tiles. To rectify the problem, the tiler tried to get the dried grout off with acid, but it didn’t work, and the floor was left looking dark and dull. Unable to rectify the problem the client was left with a disappointing pale floor and had searched around the internet for a solution.
Normally grout smears like these (aka Grout Haze) can be removed with an acidic product and Tile Doctor sell Grout Clean-up specially for this purpose. However, some grouts contain acid resistant polymers which need to broken down first. Fortunately, we have a solution for everything tile related and the system we use does not affect the main grout lines only the excess grout. I called in to do a site visit and having surveyed the problem I was confident it could resolved, I gave them a price for the work and agreed a date to return to do the job.
My first task was to spray the tiles with Tile Doctor Remove and Go, this was left to soak into the tile for around ten minutes before being scrubbed in. Remove and Go is a coatings remover that is safe to use on tile and grout; normally we use it to remove old sealers but in this case I applied it to break down the polymers. To work the product into the tile I use a buffing machine fitted with a black scrubbing pad, the mechanical advantage this gives makes the job a lot quicker. Then the slurry generated is rinsed off with water and removed with a wet vacuum. The floor was then left to dry for 30 minutes.
We were then able to remove the excess grout which was done by applying Tile Doctor Grout Clean-Up which I mentioned earlier. The process was the same, i.e. using the buffing machine and a wet vacuum to scrub the floor and extract the soil. The floor was rinsed with water to remove any trace of the products used and dried as much as possible using the wet vacuum. The underfloor heating really helped at this point to dry out the floor.
Once the floor was fully dry including the grout lines a single thin coat of Tile Doctor Colour Grow sealer was applied. The tiles were textured porcelain, so the dirt gets trapped into the textured surface if it is not sealed. We usually find one coat of Tile Doctor Colour Grow is more than enough for this, anything that hadn’t soaked in after three to five minutes was then polished off with clean dry cloths.
The client was very happy with the floor and pleased that the excess grout had been cleaned up and the floor looked as it should. Before leaving I recommended the use a pH Neutral tile cleaner for general cleaning such as Tile Doctor Neutral Tile Cleaner. There is no point sealing the tiles only to have it stripped off later with the use of a bleach based cleaner.
Raf Barrett
Tyneside Tile Doctor
 Tile Doctor Ltd
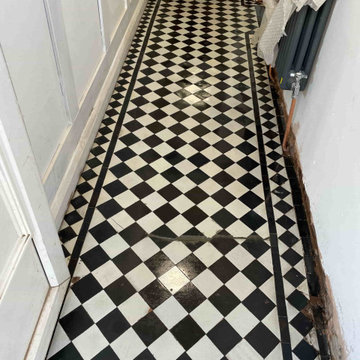
This 1920s single bay house in Earlsdon had been restored by the builder from top to bottom. The hallway floor had been covered in laminate flooring which had been removed, revealing an Edwardian tiled floor beneath. Unfortunately, the plasterer had not covered the floor when working on the walls, so the tiles were now covered in plaster!
The client was keen to keep as many original features as possible and called me in to see if the original 100-year-old floor could be renovated in keeping with the rest of the house. I visited the property to survey the tiles and explained that it certainly could be and having worked on hundreds of these renovations before I was confident of getting a good result. They were happy to go with my quotation and we arranged a time to carry out the work.
The floor tiles themselves were in good condition, but I had to hand carefully scrape the plaster off the tiles before starting on the deep clean. With the plaster removed from the floor I applied Tile Doctor Acid Gel and worked it into the tiles with a coarse 100-grit pad. The floor was then rinsed, and the waste extracted from the floor using a wet vacuum. The process was then repeated with a 200-Grit and then a 400-grit pad until I was happy.
The floor was then speed dried with fans whilst I worked on a repair around the threshold of one of the doors. The repair was relatively straight forward, and I managed to restore the tiling, so the repair was unnoticeable.
The floor was then left overnight to completely dry out. Floors of this age don’t have a damp proof membrane so moisture can build up if they have been covered as in this case. The next stage in the restoration would be to apply a sealer and the floor needs to be dry before you do this otherwise the result can be patchy.
Returning the following day, I first tested the floor with a damp meter to check the moisture levels in different parts of the floor to ensure it was dry enough to seal. The fans had done a good job and I was pleased to find that the floor was dry.
To seal this floor, I used Tile Doctor Seal and Go Extra, it’s a breathable acrylic based sealer that allows for moisture vapour to rise through the tile and evaporate at the surface. This makes it ideal for situations where no damp proof membrane has been installed and there is a low risk of mineral salt deposits being formed (efflorescence).
Once completed the transformation was huge and he Victorian tiles looked well suited to the hallway. Feedback from my client was they were over the moon with the newly restored floor!
For regular cleaning, I recommended Tile Doctor Neutral Tile Cleaner, this is a gentle pH neutral cleaner that will ensure the newly applied seal is retained and not eroded prematurely. This can be the problem with most household cleaning products which contain strong chemicals like bleach which can break down the sealer over time. Without a sealer dirt gets back into the pores of the tile which will mean the homeowner will need to get the floor cleaned and sealed again – a vicious circle!
Mick Gayton
Warwickshire Tile Doctor



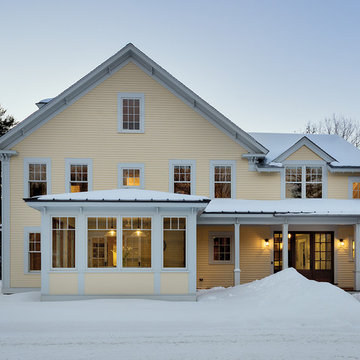
 Whitten Architects
photography by Rob Karosis
Inspiration for a large timeless three-story wood exterior home remodel in Portland Maine
Inspiration for a large timeless three-story wood exterior home remodel in Portland Maine
 Amazing Spaces
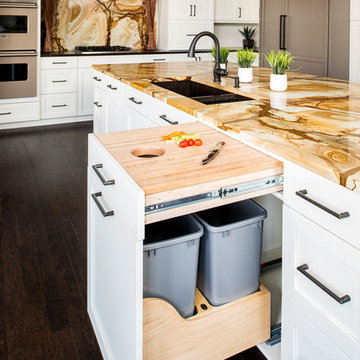
The stainless steel double oven and range hood compliment the white cabinetry and metal hardware. Warm tones in the stonewood granite backsplash and island countertop add interest and depth. Dark hardwood floors ground the space. The island features an integrated cutting board and trash bins creating a functional workspace.
Ilir Rizaj
 Lesley Glotzl
Todd Wright
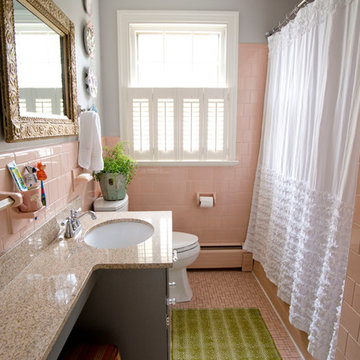
Small eclectic pink tile and ceramic tile ceramic tile bathroom photo in Other with an undermount sink, gray cabinets, granite countertops and gray walls
Small eclectic pink tile and ceramic tile ceramic tile bathroom photo in Other with an undermount sink, gray cabinets, granite countertops and gray walls
 Stone Selex
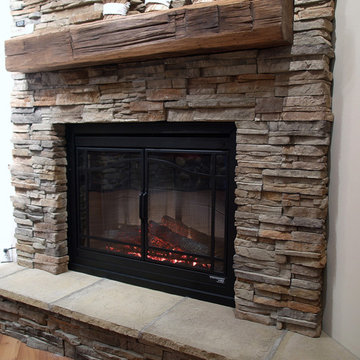
This is one of our favorite stones for fireplace surrounds.
“I love the stone fireplace, great texture.”
“wonderful use of stone on the fireplace surround”
“family room fireplace feature stone texture”
“Beautiful Fireplace Ideas for Stone Veneer Fireplace Surrounds”
“This stone fireplace surround is a popular choice for rustic interiors as well as contemporary spaces”
“The stonework covers the fireplace in Toronto creating a rustic feel on the fireplace surround”
 Rice and DeTienne Designs llc
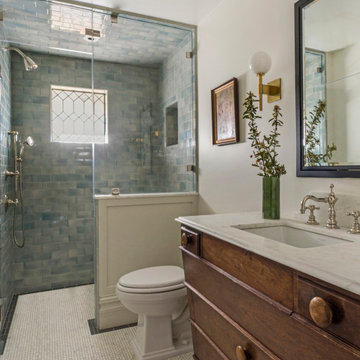
Guest bathroom with antique vanity. Leaded glass window.
Example of an ornate bathroom design in San Francisco
Example of an ornate bathroom design in San Francisco
 Studio Dearborn
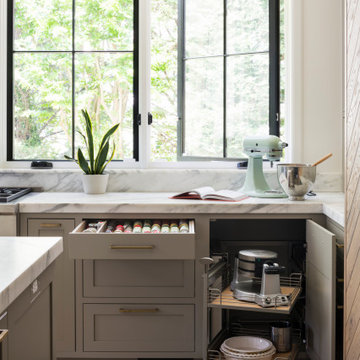
This expansive Victorian had tremendous historic charm but hadn’t seen a kitchen renovation since the 1950s. The homeowners wanted to take advantage of their views of the backyard and raised the roof and pushed the kitchen into the back of the house, where expansive windows could allow southern light into the kitchen all day. A warm historic gray/beige was chosen for the cabinetry, which was contrasted with character oak cabinetry on the appliance wall and bar in a modern chevron detail. Kitchen Design: Sarah Robertson, Studio Dearborn Architect: Ned Stoll, Interior finishes Tami Wassong Interiors
 Timeless Kitchen Cabinetry
Gridley+Graves Photographers
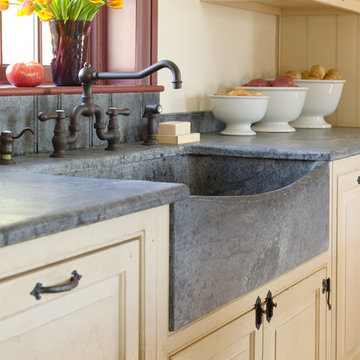
Example of a mid-sized country single-wall brick floor and red floor eat-in kitchen design in Philadelphia with a farmhouse sink, raised-panel cabinets, beige cabinets, concrete countertops, paneled appliances, an island and gray countertops
Example of a mid-sized country single-wall brick floor and red floor eat-in kitchen design in Philadelphia with a farmhouse sink, raised-panel cabinets, beige cabinets, concrete countertops, paneled appliances, an island and gray countertops

 New Eco Landscapes
Photography by Anthony Crisafulli
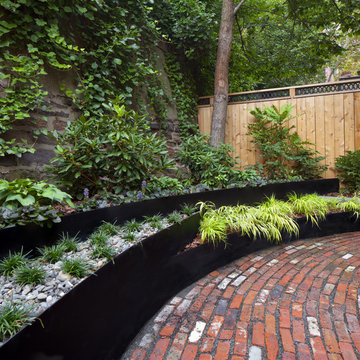
Inspiration for a small eclectic shade backyard brick retaining wall landscape in New York.
Inspiration for a small eclectic shade backyard brick retaining wall landscape in New York.
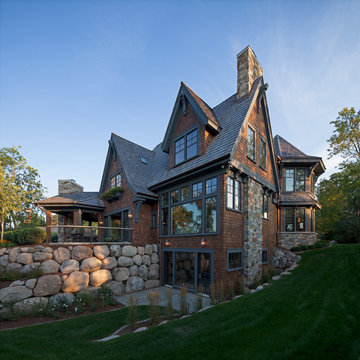
 Kyle Hunt & Partners, Incorporated
Phillip Mueller Photography, Architect: Sharratt Design Company, Landscape Design: Yardscapes
Inspiration for a large rustic brown three-story wood exterior home remodel in Minneapolis with a shingle roof
Inspiration for a large rustic brown three-story wood exterior home remodel in Minneapolis with a shingle roof
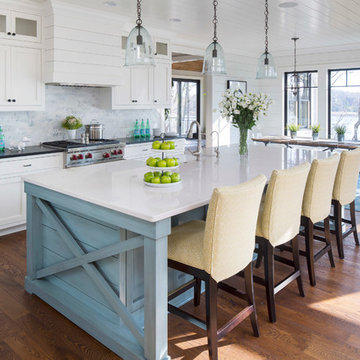
 O’Hara Interiors
Martha O'Hara Interiors, Interior Design & Photo Styling | Stellar Homes | Troy Thies, Photography
Please Note: All “related,” “similar,” and “sponsored” products tagged or listed by Houzz are not actual products pictured. They have not been approved by Martha O’Hara Interiors nor any of the professionals credited. For information about our work, please contact design@oharainteriors.com.


13