
Search results for "Applying" in Home Design Ideas
 Tile Doctor Ltd
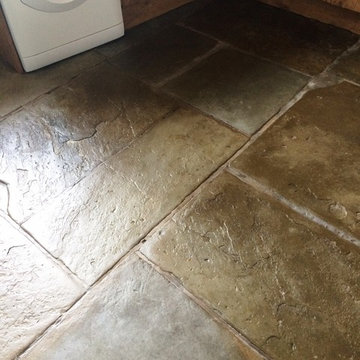
This Flagstone floor was installed in a house near the village of Ambleside and had previously been sealed with varnish and other products which had left the floor looking dull and nowhere near its best. I did a test clean which came out well and then agreed a date and price I came back a couple of weeks later to do the job.
Due to the numerous coatings that had been applied to the floor it was necessary to completely strip off the coatings back to the bare stone. To start I used Tile Doctor Remove and Go which does what it says on the bottle and removes coatings from tiles, the product was diluted with water and left to soak in before being scrubbed in using a Black Scrubbing pad fitted to a rotary machine. The now dirty cleaning solution was removed using a wet vacuum and I could see that the Remove and Go had removed most but not all of the coatings so it was time to using something stronger. To do this I applied NanoTech UltraClean which is a gel that is left to soak into the floor for thirty minutes before adding water and then agitating with the black pad. The floor was rinsed with water and the solution removed with the wet vacuum. At this point I could see that all the varnish and dirt had been removed so I gave the floor a final wash down with clean water to neutralise the floor before sealing and left for the evening so the floor could dry overnight.
I came back the next day and tested the floor with a damp meter to confirm the floor was dry and then proceeded to seal the floor with Tile Doctor Seal and Go applied with a paint pad which gave the floor a nice low sheen finish that the customer requested.


 AGAM CONSTRUCTION
• $13,999 for a bathroom remodel, up to 40 square feet, labor and materials included
• Offer includes: complete detailed 3d design; demolition and haul away existing: shower; tile floor, vanity, counter, sink, faucet, medicine vanity, light fixture, exhaust fan, toilet, and mirror if needed; installation of single shower head valve; installation of spray handle with diverter; installation of (1) standard 4 inch led waterproof recessed light on 1 switch above tub per plan; installation of fan light combination with humidity sensor on separate switch per plan (provided by home owner); installation of light bar above vanity (provided by home owner), upgrade outlets to gfi, switches and outlets to be standard white décor, pass rough inspection, repair drywall as necessary after rough work; installation of ceramic or porcelain tile on bathroom floor, apply grout, apply sealer over grout (not on tile); paint complete bathroom walls and ceiling; installation of freestanding prefabricated vanity with its own countertop (provided by homeowner); build and installation of custom stained alder or maple vanity; installation of knobs and handles (provided by home owner); installation of 4 inch tile MDF base molding; provide, cut, fabricate, and installation of 4 inch backsplash; installation of undermount sink and faucet; installation of toilet; installation of mirror, towel bar and toilet paper holder (provided by homeowner); pass final inspection
• Finish material to be provided by the homeowner (tile, plumbing fixtures, vanity and other finish materials will be provided by home owner)
• Offer excludes: relocations of plumbing and electrical; tile installation on slab foundation; structural work
• Permits are not included
• Payment for this offer will be made directly to New Act Construction.
• Limit 1 offer per household
The Real Deal: Achieve the bathroom you have dreamed of for with this offer.
The Fine Print
• Not valid for cash back
• Offer cannot be combined with other specials or offers
• Offer cannot be applied to current or past jobs
• Appointments are to be performed during normal business hours
• Image may not reflect exact product/service
• Offer expires 6 months from date of acquisition
Find the right local pro for your project
 Tile Doctor Ltd
I was contacted about a Georgian property in the Kent village of Leeds , to see if I could do anything to improve a Travertine tiled floor. The use of Travertine was extensive and had been installed throughout the ground floor including the kitchen, dining room, utility and bathroom WC. Travertine is probably my favourite stone, but it is acid sensitive and attracts dirt easily, due to its ‘holey’ composition.
Initially we discussed the floor over the phone where I got to know about the issues they were experiencing, and I detailed the renovation process I normally use to restore it including the products and timelines. Naturally they wanted to me to provide a quote for the work however its tricky to do that accurately without seeing the floor, so I arranged a date to pop over.
Upon arriving I could see the tiles and the wide grout joints had extensive, ingrained dirt indicating the previous sealer had long since worn away. This is a common issue with stone floors, and to re-assure myself and the client it could be resolved I cleaned a small area in the utility room with pleasing results!
This test clean helped me to understand which products and methods would work best on the floor and later that day I emailed over a detailed quote for the renovation. Happy with the quote I received a reply the same day asking when I could start.
My colleague and I arrived on the agreed date and work started with adding protection to all areas that required it. We use a lot of water during the cleaning process and some materials such as MDF can become damaged with water ingress, so it makes sense to do this.
To get the floor clean, a coarse Carbide Brush fitted to a rotary machine was run over the Travertine tiles to scrub in a strong solution of Tile Doctor Pro-Clean. This process generates a lot of slurry as the dirt was washed out of the stone and grout which is extracted with a wet vacuum as we progressed.
Next it was on hands and knees with more Tile Doctor Pro-Clean and handheld brushes run over stubborn areas and along the grout lines to take them from 80% up to 100%.
Happy with the results, the next step was to renovate the stone using a series of diamond encrusted burnishing pads. Using only water for lubrication this process starts with the application of a coarse 400-grit burnishing pad attached to the floor buffer. This produces a lot of slurry which again was removed with a wet vacuum.
This left the Travertine clean, but the pores of the stone had been opened giving the floor a matt finish and more absorbent than it was originally. To further refine the appearance of the stone the next two burnishing pads were applied which are 800 and 1500-grit. These pads polish the stone and close the pores, restoring the natural sheen in the process. After each pad was applied the slurry was rinsed off the floor with water and extracted with the wet vacuum. Once complete the floor was left to dry off fully overnight.
I arrived the next day and took several moisture readings from the floor to check that it had dried off sufficiently overnight. The results were good, so work moved onto sealing the Travertine with two coats of Tile Doctor Ultra Seal which is a natural look impregnating sealer. It works by soaking into the stone, occupying the pores and thereby preventing dirt from becoming ingrained there. This ensures dirt remains on the surface where it is easily cleaned away.
The final step in the floor’s renovation was to apply the last of the diamond polishing pads which is a very fine 3000-grit. This pad further improves the polished appearance of the stone resulting in a satisfying sheen.
The work made a massive difference to the floor, and I received an email the next day from one of the owners who was really pleased with the transformation:
”Floors look brilliant. Very pleased.”
For the care and maintenance of polished sealed floors I recommend the use of Tile Doctor’s Stone Soap which is a gentle but effective cleaning product that won’t impact the sealer and contains a patina enhancer. When it comes to sealed floors my mantra is:
“If you look after the sealer, the sealer will look after the floor!”
Graham Davis
North Kent Tile Doctor
 Scott's Lumber
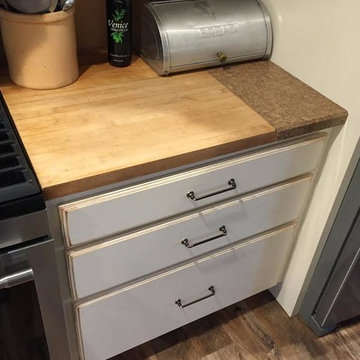
Example of a mid-sized mountain style l-shaped laminate floor and brown floor open concept kitchen design in Other with an undermount sink, raised-panel cabinets, white cabinets, laminate countertops, stainless steel appliances and an island
 Tile Doctor Ltd
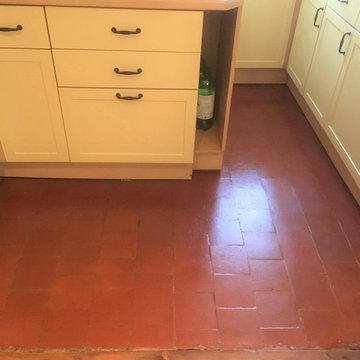
I received a call from this client in Old Marston around two miles north east of the centre of Oxford. They had lifted a lino floor in their kitchen and found an old Quarry Tiled floor underneath and decided to see if they could have it restored.
I went over to survey the floor and could see that the tiles had been covered with a thin layer of levelling screed to ensure the lino didn’t sink into the recesses. I ran some tests to demonstrate how the screed could be removed which worked well and it was apparent that the tiles underneath were intact and could be renovated. I submitted a quotation for removing all the screed, deep cleaning the Quarry tiles and then sealing the tiles to protect them. The client was really pleased that we could restore the floor and the quote was accepted, with a date booked to do the work.
To start the work, I applied undiluted Tile Doctor Grout Clean-up worked in with a small carbide brush attached to a hand-held rotary buffer. The combination of the acid in the Tile Doctor Grout Clean-up combined with the scrubbing action of the brush were effective at removing most of the screed. The small bits of remaining screed were carefully removed by hand, using a floor scraper. The floor was then rinsed with water and the soil removed with a wet vacuum.
For the second phase of the cleaning process I applied Tile Doctor Oxy-Gel which was scrubbed into the floor with a stiff brush rinsing after with water and the soil extracted again using the wet vacuum. After cleaning the floor to remove the dirt I could still see some evidence of the screed on the tiles, so I decided to give the floor an Acid Wash using Tile Doctor Acid Gel which was scrubbed into the floor and rinsed off as before. Tile Doctor Acid Gel is of course an acidic product so once it was removed, I decided to rinse the floor with Tile Doctor Neutral Cleaner to neutralise the pH levels in the floor. The wet vacuum was used again to remove as much moisture from the Quarry tiles as possible before leaving the now clean floor to dry off fully overnight.
I returned to seal this floor the next day. First, I checked the floor was fully dry with the damp meter, it was within the recommended range, so I was ready to complete the sealing process.
The client was not too sure if they wanted a matt or sheen finish, so I first put a coat of Tile Doctor Colour Grow on the floor to show them the matt finish. Colour Grow is an impregnating sealer that enhances natural colour and protects from within by occupying the pores in the tile. After reviewing the floor, they decided it was not for them, so I followed up by applying several coats of Tile Doctor Seal & Go which adds a nice sheen finish and is compatible with Colour Grow.
The combination of sealers worked very well together, and they were very satisfied with the final result and of course that we had been able to restore the Quarry tiles.
Barry Woodward
Oxfordshire Tile Doctor

 Design 2 Finish LLC
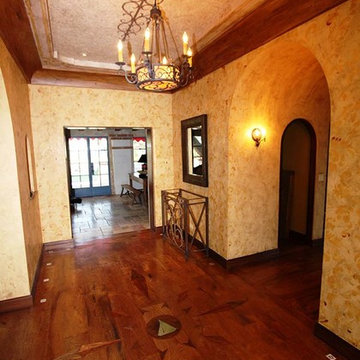
The client and designer wanted an entry that reflected the historic Josiah Joesler home in the foothills of Tuscon, Arizona; and would also incorporate the antique mesquite floorboards. Starting at the top – on the ceiling coffer a visual texture using frottage was applied. Over the frottage design a Joesler-styled faux wrought iron work was designed around the chandelier, painted in the studio and installed. The next architectural element was then painted and design elements from the wall stencil were applied in plaster with two connecting bands then all was distressed. The large crown is originally a plaster element; that was faux grained to blend with the floor. Because Joesler is known for square headed iron nails, the “boards” were then connected by trompe l’oeil nail heads. On the walls, polished Italian plaster was applied then a “broken” stencil pattern was dry-brushed on in two colors; the walls were then rubbed out in glaze to age.

 ELISABETTA MARIOTTI Italian Interiors
Inkiostro Bianco designer wallpaper is the creative wallcovering that confers personality to the home.
Huge trendy single-wall concrete floor and gray floor open concept kitchen photo in Other with white cabinets, wood countertops and brown countertops
Huge trendy single-wall concrete floor and gray floor open concept kitchen photo in Other with white cabinets, wood countertops and brown countertops




 Scott's Lumber
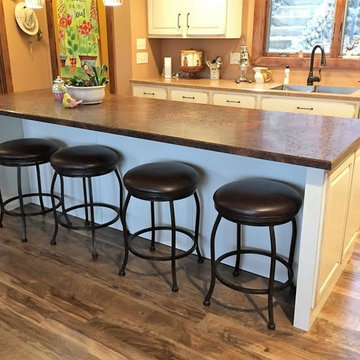
Open concept kitchen - mid-sized rustic l-shaped laminate floor and brown floor open concept kitchen idea in Other with an undermount sink, raised-panel cabinets, white cabinets, laminate countertops, stainless steel appliances and an island
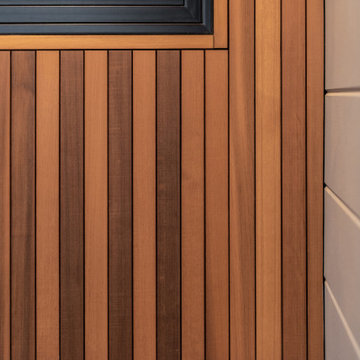
 MAK Design + Build Inc.
Large contemporary blue two-story wood exterior home idea in Sacramento with a metal roof and a gray roof

 safe ZOnea
Every year, the same thing happens. The first real snowfall arrives, demand for de-icing materials spikes overnight, and the businesses that waited too long find themselves scrambling for supply at the worst possible moment. Facility managers, property owners, contractors, and municipalities all depend on a steady supply of salt and ice melt to keep their properties safe and operational through winter. The ones who plan ahead sail through. The ones who don't pay more, wait longer, and take on real risk.
Sourcing de-icing materials well is not complicated, but it does require thinking ahead and understanding the options. The choices you make about what to buy, how to buy it, and who to buy it from have a direct effect on your costs, your reliability, and your ability to keep people safe when conditions turn dangerous. This article lays out what matters.
Why Your Choice of Supplier Matters More Than You Think
It is easy to treat de-icing material as a commodity, something you grab whenever you need it without much thought about where it comes from. That works fine until the moment it doesn't, usually in the middle of a storm when everyone needs supply at once and the casual sources have run dry. At that point, the relationships you built before the season become the difference between staying stocked and being stuck.
Reliable supply is the whole game in winter operations. A property that runs out of ice melt during a storm faces safety hazards, liability exposure, and disruption, none of which can wait for a back-ordered shipment. This is why establishing relationships with dependable rock salt suppliers before the season starts is one of the smartest moves a facility manager or contractor can make. It locks in supply, often locks in better pricing, and removes a major source of mid-winter stress.
The lesson here is to treat sourcing as a planning decision rather than a last-minute errand. The businesses that come through winter smoothly are almost always the ones that secured their supply chain early, chose suppliers who could actually deliver when it counted, and never had to gamble on finding material during a shortage. Reliability bought in advance is far cheaper than scarcity paid for in a crisis.
Bagged or Bulk: Matching the Material to the Job
One of the first practical decisions is whether to buy de-icing material in bags or in bulk, and the right answer depends entirely on the operation. Each format has clear advantages, and many operations end up using both for different purposes.
Bagged material offers convenience, control, and easy storage. It is simple to handle, easy to distribute to different locations or crews, straightforward to store without special equipment, and convenient for spot application by hand. It suits smaller properties, businesses without bulk storage, and situations where portion control and tidiness matter. Bulk material, on the other hand, tends to make sense for large operations that go through high volumes, where buying in quantity lowers the per-unit cost and the operation has the equipment and space to store and handle it. The tradeoff is between the convenience and flexibility of bags and the volume economics of bulk.
For many operations, the right approach is a mix: bulk for the high-volume core of the work and bags for flexibility, spot treatment, and locations where bulk handling is impractical. The key is to match the format to how the material will actually be stored, moved, and applied, rather than defaulting to one or the other out of habit. Thinking this through in advance avoids both the waste of over-buying bulk you can't handle and the expense of relying entirely on bags for a large operation.
Rock Salt Is Not Your Only Option
Rock salt, or sodium chloride, is the workhorse of winter de-icing for good reason. It is effective, widely available, and cost-efficient, which makes it the default choice for most operations most of the time. But it has limits, and understanding the alternatives helps you choose the right material for the conditions you actually face.
The most important limitation is temperature. Rock salt becomes less effective as temperatures drop, and in genuinely cold conditions it can struggle to do the job at all. This is where alternatives come in. Calcium chloride, for instance, works at much lower temperatures than rock salt and acts quickly, which makes it valuable when conditions are severe or when fast melting matters. Operations that face hard freezes or need dependable performance in extreme cold often keep calcium chloride for sale on hand for exactly those situations, using it alongside rock salt rather than instead of it.
The practical approach is to understand the conditions your property faces and stock accordingly. For many operations, rock salt handles the bulk of the work while a faster, colder-rated material like calcium chloride covers the extreme days when ordinary salt falls short. Matching the material to the temperature and the urgency of the situation is what separates an operation that stays ahead of winter from one that is constantly reacting to it.
Securing Your Supply Before the Season
Knowing what to buy is only half the equation. The other half is making sure you can actually get it when you need it, which means securing your supply before winter arrives rather than after it has already started. Timing is one of the most underrated factors in winter operations.
The logic is simple. Demand for de-icing materials is highly seasonal and spikes sharply during storms, when everyone needs supply simultaneously. Prices and availability both move against the buyer at exactly those moments. By contrast, planning ahead, estimating your needs and arranging supply before the season, puts you in a far stronger position. Working with established rock salt suppliers ahead of time means your material is accounted for before the rush, often at better pricing and with the confidence that it will be there when the first storm hits.
This kind of planning also lets you think clearly rather than react under pressure. You can estimate your seasonal needs based on your property and past winters, decide on the right mix of materials and formats, and arrange storage in advance. Operations that do this consistently spend less, worry less, and never find themselves making frantic calls during a storm. The effort of planning ahead is modest, and the payoff in reliability and cost savings is substantial.
Storing and Handling What You Buy
Securing supply is not much use if the material degrades before you can use it, which makes proper storage and handling an important and often overlooked part of the equation. De-icing materials are sensitive to moisture, and poor storage can turn a good supply into a clumped, hardened mess that is difficult to apply.
The fundamentals are straightforward. Keep material dry and protected from moisture, since salt and ice melt readily absorb water and can harden if exposed. Store it in a way that suits the format, whether that means a proper bulk storage area or a dry space for stacked bags. Keep it accessible, so crews can get to it quickly when a storm hits and time is short. And handle it with the right equipment for the format and volume, which protects both the material and the people working with it. None of this is complicated, but neglecting it can undermine even a well-planned supply.
Good storage practices protect the investment you made in securing supply early. There is little point in arranging your materials ahead of the season only to have them degrade before use. Treating storage and handling as part of the overall plan, rather than an afterthought, ensures that the material you secured is actually usable when the moment comes. It is the final link in a supply chain built to perform under winter conditions.
Estimating How Much You Actually Need
One question trips up operations of every size: how much de-icing material to buy. Order too little and you risk running short during a storm. Order too much and you tie up money and storage space in material you may not use. Getting the estimate reasonably right is a meaningful part of sourcing well.
Several factors shape the answer. The size and type of the areas you treat, sidewalks, lots, entrances, and drive lanes, set the baseline for how much material each application consumes. The local climate matters too, since colder regions and those with frequent snowfall go through far more material than milder ones. Application frequency depends on how often storms hit and how quickly surfaces need to be cleared, which varies with the kind of property and the expectations of the people who use it. And the type of material plays a role, since different products are applied at different rates.
Past experience is often the best guide. Operations that track what they used in previous winters, adjusted for the size of the property and the severity of the season, can estimate their needs with reasonable confidence. For newer operations without that history, it helps to plan conservatively and to work with a supplier who can replenish stock reliably, so that a low estimate does not turn into a mid-storm shortage.
The goal is not perfect precision but a sound, slightly cautious estimate paired with a dependable supply relationship. That combination lets an operation keep enough material on hand to handle the season without over-committing to volume it cannot store or use. Thinking this through before winter, rather than guessing during it, is one more way that planning ahead pays off when the snow starts to fall.
The Bottom Line
Sourcing de-icing materials well comes down to a few straightforward principles: plan ahead, choose reliable suppliers before the season, match your materials and formats to your actual needs and conditions, and store what you buy properly. The operations that follow these principles move through winter with confidence, while those that improvise pay more and take on needless risk.
Winter is predictable in one respect: it arrives every year, and demand for de-icing material spikes the moment it does. The businesses that prepare for that reality, rather than being surprised by it, are the ones that keep their properties safe, their costs controlled, and their operations running no matter what the season throws at them. A little foresight before the first snowfall pays off through every storm that follows.
 Scott's Lumber
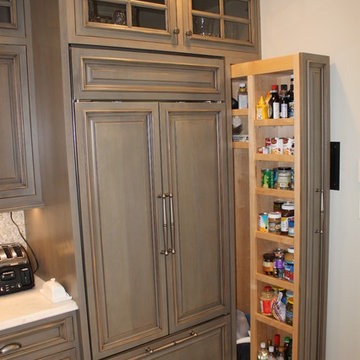
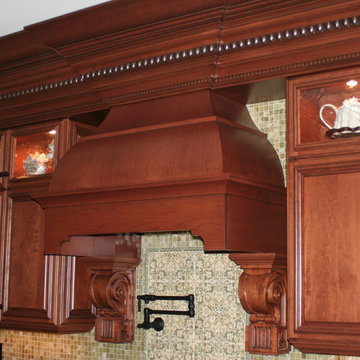
Kitchen Cabinets
Woodland Cabinetry
Door Villager Raised panel
Maple Painted Ivory with Timeworn Brushed Stroke Wheat Glaze
Karran undermount Stainless steel sinks
 Tile Doctor Ltd
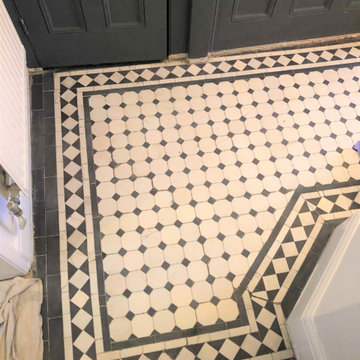
The owners of this Edwardian property in Finchley had purchased it a couple of years prior and since then had slowly been renovating it to restore its original character. The project was almost complete and now attention had turned to the tiled floor. The tiles were in quite a state and I was asked to work our Tile Doctor magic and bring it back to its original condition.
When they moved in the hallway had been covered with carpet which gave the tiles underneath some protection. Unfortunately, however the carpet has been secured with carpet grippers that had been glued to the tiles around the edges. There were also paint splashes on the surface that would need dealing with. On top of that the floor had a few missing tiles that had been back filled by cement to provide a level base for the carpet, the client wanted like them replaced if possible.
After surveying the floor, I explained what could be done and ever completed a small test clean to demonstrate how the tiles would look once deep cleaned. I was confident on being able to source very similar reclaimed tiles so replacing the missing should not be a problem. The client was very happy with the initial test result and my quotation so booked me in to restore the floor.
On my return I started by applying Tile Doctor Remove and Go to soften up the glue which allowed it to be carefully peeled off the tiles with scrappers. Once all the carpet adhesive was gone, I worked a strong dilution of Tile Doctor Remove and Go into the tiles using a black pad to work the cleaning solution deeper into the tiles. A wet vacuum was used to remove the slurry created, and I followed this by giving the tiles an extra clean using a 200-grit diamond burnishing pad lubricated with water.
The last step in the cleaning process was to give the floor an acid rinse using Tile Doctor Grout Clean-up, I did this for several reasons, first it removes old grout smears from the surface of the tile and second it neutralised any efflorescent salts lying dormant in the floor. This can be quite a problem for old floors which don’t have the benefit of a protective damp proof membrane under the floor. The floor was given a final rinse with water which was again extracted with a wet vacuum.
I then set about lifting all the loose tiles (approximately ten) and carefully removing the concrete infills. I had previously managed to source replacements for these holes from original features. Unfortunately, they didn’t sell the correct sized octagon tiles, so I had bought 150mm square tiles and then needed to cut them on site to get the right size.
After cutting and fixing the tiles I fixed them in place and regrouted the rest of the floor.
I then left the floor to dry out overnight and returned in the morning. Before applying a sealer, I took several moisture readings with the damp meter to make sure the tiles were dry enough to take the sealer.
I was able to confirm the floor was dry, so went ahead and applied three coats of Tile Doctor Colour Grow sealant. Colour Grow is an impregnating sealer that is fully breathable sealer which is important when it comes to old floors like these that don’t have a damp proof membrane installed.
My client was very happy with the renovated floor and for aftercare I left them with a bottle of Tile Doctor Neutral Tile Cleaner and gave advice on how best to clean the floor going forward.
Andrew Newstead
North London Tile Doctor

 Ressource USA
Stretched brushed lime paint should be applied in vertical movements using a brush. Slight variations with subtle striated nuances appear, reminiscent of antique walls. This vertical effect gives a matte and delicate grain to the wall.
This lime wash coating gives a sober yet highly decorative style with a traditional natural finish and subtle striated nuances.
The stretched effect is perfectly suited for medium shades.
OR
Cloudy brushed lime paint should be applied in regular movements at different angles, using a brush. This technique creates nuances reminiscent of the marks on antique walls.
Cloudy brushed lime paint gives a dense and textured decorative look with its matte grained finish.
The cloudy effect embellishes light, medium and dark shades.
Burnished lime paint should be applied using a stainless steel trowel and in rounded, supple layers. This visual effect is that of the lustrous lime wash in Ancient Rome which has been perpetuated by various cultures including Tadelakt in Morocco.
Burnished lime paint renders a spectacular mineral look with matte and shiny variations which you can accentuate by using our water-based finishing wax.
Ideal for light and medium shades.

36