
Search results for "Backing effectively" in Home Design Ideas

 Ronda Batchelor
photo by Ronda Batchelor
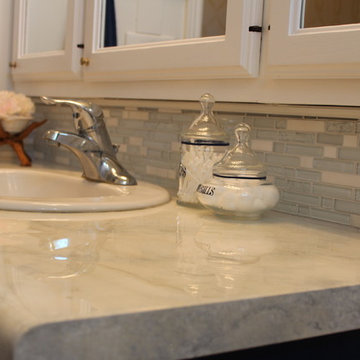
I painted the exisiting laminate counter to look like marble and poured a two part epoxy over the top. I then added a glass tile back splash to finish the faux marble illusion.
 Guettler Photo
David Guettler Photography david@guettlerphotography.com
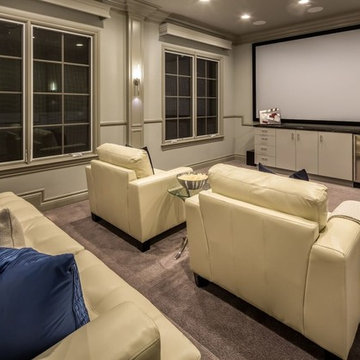
Home theater - transitional home theater idea in Los Angeles
Home theater - transitional home theater idea in Los Angeles
Find the right local pro for your project
 Cassoni Furniture & Accessories
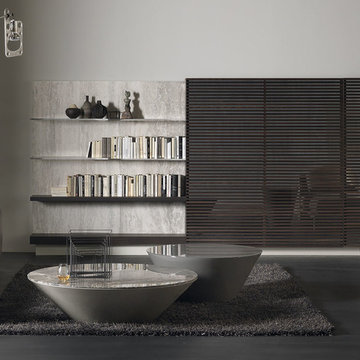
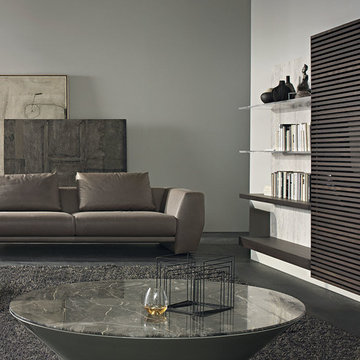
- N.C. LANDSCAPE 2016 WALL UNIT. The forms, colors and materials evolve towards a new warmth, a cozy, comfortable mood, which transforms the elegance of the linear shapes into soft, sensory emotions: N.C. Landscape shows new horizons. The large doors made with thin solid wood slats, together with glass that is reflective and transparent at the same time, create an intriguing play of light and shadow, reflection and transparency. The freely sliding doors reveals surprising contrasts of material with the inside of the compartments and the backs of the paneling, emphasizing each time the different functions: concealing and integrating audio-video equipment, displaying books and favorite objects on the shelves or containing them within the spacious closed compartments.
189"W x 20"7/8D x 63"H.
https://cassoni.com/NC_Landscape_2016_02
- HYPER SOFA. A sofa with a special bridge structure, slender and linear, that reveals and enhances the decisive forms and the pronounced volumes of the weight-bearing arms, giving an unusual shape to comfort, strictly in leather. The low back creates an unusual contrast between the height and the depth of the seat, while the cushions create a harmony with the severity of the structural lines, liberating a feeling of comfort and relaxation. Its unusual suspended effect creates a dreamy, relaxed atmosphere, soft and at the same time exquisitely squared, with shapes that give a personal character to the living space.
2 or 3-seaters.
https://cassoni.com/Hyper_Sofa
- POND COFFEE TABLE. Family of cocktail tables, side tables, occasional tables with different heights and width. While the conical base tends to disappears in the shadow, the top is raised from the ground and lives of intriguing reflections and shades of colors. The reflections of the glass top, whose perfectly glossy surface mirrors everything around, recreating the mystic reflection effect of perfectly still water, or those of the marble top, for the rich grains and mosaic of minerals it is made of. Base made from molded polyurethane BAYDUR®60, lacquered with glossy finishes. Top in back-lacquered glass or in stone. 47"1/4 version on wheels, hidden inside the base.
Ø35''3/8 x 15''H.
Ø47''1/4 x 11''7/8H.
https://cassoni.com/Pond_Coffee_Table
 Cassoni Furniture & Accessories
- HYPER SOFA. A sofa with a special bridge structure, slender and linear, that reveals and enhances the decisive forms and the pronounced volumes of the weight-bearing arms, giving an unusual shape to comfort, strictly in leather. The low back creates an unusual contrast between the height and the depth of the seat, while the cushions create a harmony with the severity of the structural lines, liberating a feeling of comfort and relaxation. Its unusual suspended effect creates a dreamy, relaxed atmosphere, soft and at the same time exquisitely squared, with shapes that give a personal character to the living space.
2 or 3-seaters.
https://cassoni.com/Hyper_Sofa
- N.C. LANDSCAPE 2016 WALL UNIT. The forms, colors and materials evolve towards a new warmth, a cozy, comfortable mood, which transforms the elegance of the linear shapes into soft, sensory emotions: N.C. Landscape shows new horizons. The large doors made with thin solid wood slats, together with glass that is reflective and transparent at the same time, create an intriguing play of light and shadow, reflection and transparency. The freely sliding doors reveals surprising contrasts of material with the inside of the compartments and the backs of the paneling, emphasizing each time the different functions: concealing and integrating audio-video equipment, displaying books and favorite objects on the shelves or containing them within the spacious closed compartments.
189"W x 20"7/8D x 63"H.
https://cassoni.com/NC_Landscape_2016_02
- POND COFFEE TABLE. Family of cocktail tables, side tables, occasional tables with different heights and width. While the conical base tends to disappears in the shadow, the top is raised from the ground and lives of intriguing reflections and shades of colors. The reflections of the glass top, whose perfectly glossy surface mirrors everything around, recreating the mystic reflection effect of perfectly still water, or those of the marble top, for the rich grains and mosaic of minerals it is made of. Base made from molded polyurethane BAYDUR®60, lacquered with glossy finishes. Top in back-lacquered glass or in stone. 47"1/4 version on wheels, hidden inside the base.
Ø35''3/8 x 15''H.
Ø47''1/4 x 11''7/8H.
https://cassoni.com/Pond_Coffee_Table

 William Hoffman Architect
4 Steps to Achieving a Rewarding Cost Effective Home Renovation
1 Home Renovation an Introduction
A home renovation due to changes in family needs and space requirements can be a challenging, but also a rewarding experience. As a homeowner, gathering and coordinating resources and possibly help from professional consultants are required. Once the construction phase has started, patience, endurance and commitment to follow through are necessary. Despite the challenges, the rewards of a well-planned and successfully completed project are meaningful, adding aesthetic and economic value, also providing the opportunity to personalize a home, encompassing the function, comfort and aesthetics to accommodate individual taste and lifestyle.
A renovation of an existing home is a viable alternative to moving or building a new home, assuming that a home is structurally sound, the expenditure to enlarge or improve can be a cost effective alternative. A home possessing charm, style, historical significance, established landscaping or an exceptional location could be a significant motivation to consider purchasing another home with the intent to renovate.
The complexity of a project could be relatively simple, changing the use of a room, consolidating two rooms into one, or opening up a room to the outdoors. It could also be a more involved task requiring planning, design and construction documents to build a second floor addition, the addition of a new wing or completely gutting the interior. Some projects could be completed in a weekend’s work or more complex projects, using a “Master Plan”, a plan which provides overall guidance; a renovation can be accomplished all at once or divided into manageable projects over a period of time. With the home evolving gradually allowing the renovation to be planned, timed and tailored to meet individual needs and circumstances.
The due diligence phase should precede the decision to renovate whether it’s an existing home or a home that is purchased with the intent to renovate. The due diligence phase will reveal the factors affecting the nature and scope of the project or if a renovation makes sense.
Every renovation project is unique relative to personal requirements, architectural style & construction type. This guide will be helpful in developing an understanding of the preliminary groundwork required to realize a successful project. If properly planned, a home renovation project can be a positive and rewarding experience resulting in a comfortable, practical and an attractive living environment.
The first step of the planning process is documenting the goals and long-range plans referred to as the “Project Program”. This will dictate the nature, scope and feasibility of the project. Providing a guide to achieving defined goals, the timing or phasing of the project and budget required to achieve the desired end result.
2 Documenting Existing Conditions
Once the “Project Program”, has been established, the next step is to determine what there is to work with. This requires documenting the home’s floor plan and site elements which includes drawing an “as built” floor & site plan consisting of the existing exterior walls, interior rooms, doors, windows, etc. and surrounding site elements, landscape and other significant exterior features. Additionally understanding and noting on the “as built” plan, the structural, mechanical and electrical systems as necessary. Gathering the “existing condition” information defines what there is to work with, creating the framework from which to facilitate and organize the decision making process and develop effective “project program” solutions.
3 Evaluating Existing Conditions
The goals and long-range plans have been established, and the existing floor plan and site elements have been documented. Before developing design solutions, the next step is to evaluate existing conditions. The evaluation includes: a detailed analysis of the structural, mechanical and electrical systems, determining the condition of the house, noting functional and aesthetic deficiencies. At the same time recognizing the home’s strengths, assets and evaluating its relationship to its site. The remaining parameters will be defined by the local jurisdiction’s zoning regulations, these regulations will define the “envelope”, within which the proposed project will be required to fit:
•required front, side & rear yard setbacks
•maximum allowable lot coverage & height
The previous three steps have provided the necessary foundation to start the design phase. The goals and long range plans have been established, existing conditions have been documented and the evaluation of what there is to work with are now in place. This will provide the framework from which to facilitate and organize design solutions. The consolidation of this information is manifested in the development of the “Master Plan” which will become the road map by which sound decision-making can be made as a home renovation evolves. Keeping the project, on a linear path, avoiding redundancies and back tracking, on time, within budget, concluding with a well crafted finished product. After all the “up front” research and documentation has been completed, the design phase of the project can now precede, with the creation of diagrammatic design drawings. Organizing interior spaces, taking into account the external elements, prevailing breezes, solar orientation, view, existing outdoor features, etc. Through the development of schematic sketches themes will emerge followed by design development drawings. Wise planning and renovation decisions can save money and time at the same time provide a well crafted finished project. The “Master Plan” provides a strategic path in the planning and decision making process leading to a successful and rewarding home renovation, which will add value and considerable enjoyment, for many years, living in a newly renovated home.
By virtue of having gone through these steps, frustrations sometimes encountered during a home renovation will be minimized, allowing the renovation to be a gratifying and rewarding experience. Being aware of the process allows one to become an “Educated Client,” which is worth quite a bit more than one might realize. The uneducated client may not realize the benefit of going through the planning, evaluation and documentation groundwork. He will only realize its benefits after having completed a prior renovation project. This rational approach keeps the design process on a direct path to achieving prescribed goals.
4 Exploring Design Solutions & Developing a Master Plan
The previous three steps have provided the necessary foundation to start the design phase. The goals and long range plans have been established, existing conditions have been documented and the evaluation of what there is to work with are now in place. This will provide the framework from which to facilitate and organize design solutions. The consolidation of this information is manifested in the development of the “Master Plan” which will become the road map by which sound decision-making can be made as a home renovation evolves. Keeping the project, on a linear path, avoiding redundancies and back tracking, on time, within budget, concluding with a well crafted finished product.
By virtue of having gone through these steps, frustrations sometimes encountered during a home renovation will be minimized, allowing the renovation to be a gratifying and rewarding experience. Being aware of the process allows one to become an “Educated Client,” which is worth quite a bit more than one might realize. The uneducated client may not realize the benefit of going through the planning, evaluation and documentation groundwork. He will only realize its benefits after having completed a prior renovation project. This rational approach keeps the design process on a direct path to achieving prescribed goals.
After all the “up front” research and documentation has been completed, the design phase of the project can now precede, with the creation of diagrammatic design drawings. Organizing interior spaces, taking into account the external elements, prevailing breezes, solar orientation, view, existing outdoor features, etc. Through the development of schematic sketches themes will emerge followed by design development drawings. Wise planning and renovation decisions can save money and time at the same time provide a well crafted finished project. The “Master Plan” provides a strategic path in the planning and decision making process leading to a successful and rewarding home renovation, which will add value and considerable enjoyment, for many years, living in a newly renovated home.
 Solid Apollo LED
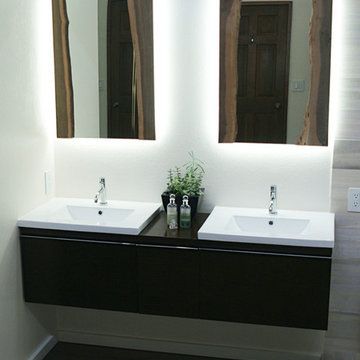
Justin Moorland. Solid Apollo LED. Here Waterproof Pure White LED Strip Lights were added behind the bathroom mirrors, as back lighting, for an incredible indirect lighting effect. The soft glow from the strip light not only adds to the modern layout of the bathroom, but also keeps with the simplistic design as no lighting fixtures disturb the well planned design. The LED Strip Lights are easy to control and easy to dim for just the right amount of light. Here the Waterproof LED Strip Light was placed along the edges of the back of the mirrors, and then the mirror was hung just over an inch away from the wall to avoid creating hot spots (where individual LED's are shown) for a completely smooth linear lighting effect all around the mirror.
Sponsored
Westerville, OH

Custom Home Works
Franklin County's Award-Winning Design, Build and Remodeling Expert
 Tile Doctor Ltd
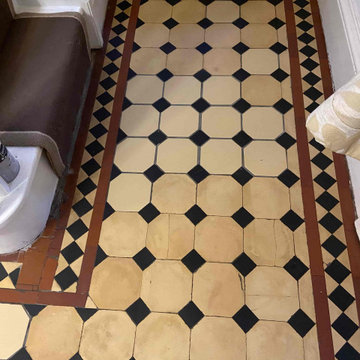
Detailed below is the restoration of a Victorian tiled hallway floor that we started back in June in Preston. Although we started in June there was so much damage to the subfloor and the tiles it took some time to complete, additionally, the client did not like the colour samples of the replacement tiles we had brought along and so decided to source their own which took some time.
Three months later with replacement tiles now sourced we were given the go ahead to start the restoration. The first day’s focus was cleaning the original floor using very coarse 100-grit and 200-grit Diamond pads fitted to a rotary buffer machine and applied to the floor using a strong dilution of Tile Doctor Remove and Go to add extra cleaning power. Tile edges were given special attention using a flex machine fitted with small diamond grit pads.
The floor was rinsed with water to remove the soil generated and this was followed up with an acid rinse using a 1:3 dilution of Tile Doctor Grout Clean Up. This last step in the cleaning process is especially recommend for old floors like this which don’t have a damp proof membrane and can suffer from efflorescence issues.
The next stage focused on repairing the floor and started by carefully knocking out all the broken and chipped tiles. We had previously estimated over 30 tiles needed replacing and so the client had bought two boxes, meaning I had plenty of spares to work with.
Before tiling however, the subfloor had suffered over the years and needed attention first. To deal with this the damaged areas were raked out, cleaned up and then back filled with rapid setting self-levelling screed from Mapie adhesives. Once the sub-base was fixed then we put the new tiles back in, they were not an exact match, about 5mm too short and lighter in tone, but the colour was pretty close.
Tiling an old Victorian floor like this can be a bit like dominoes as you move one out of place 2 decent ones come loose and then they also need refixing. Some of the tiles had hair line cracks in them and once they were loose, they just cracked in half. As such the 20 spare tiles that I thought were spare came into good use and I actually ended up using all of them. I could have done with a few more so it was decided to reset the last four broken tiles and grout them in. Luckily for me the client was very understanding about the nature of tile restoration and had accepted that there would be some imperfections and they were not expecting a new floor.
The Tiles were fixed down using Ultralite Rapid Flex (another product from Mapie) and then grouted using the same adhesive (not a grout, as they did not have grout back in the day, just cement and screed).
The floor was left this to cure overnight, and we came back the next day to finish the clean using a 200-grit diamond pad fitted to a buffing machine and lubricated with water, then one last acid rinse to get the tiles as clean as possible and remove any lingering grout haze. This last clean helps to blend the new tiles in with the original.
Before applying a protective sealer, the floor was left to dry for a couple of days, the tiles need to be thoroughly dry before sealing or you can end up with a patchy appearance.
For this floor with no damp proof membrane, it was important to use a fully breathable sealer that will allow moisture to rise through the tile and evaporate at the surface, so Tile Doctor Colour Grow was chosen. This is a good choice for old floors like this as its fully breathable, head wearing, and it contains a colour enhancer that improves the overall appearance of the tile.
Three coats of Tile Doctor Colour Grow which is a fully breathable, colour enhancing sealer hat works by soaking into the pores of the tile protecting it from within. It has a matt finish, and it works really well with all clay tiles and is ideal for these types of floors.
You can probably spot the lighter coloured tiles in the after photos on this page, however it’s a very subtle difference and I think they have blended in quite well with the original. Certainly, my client was very pleased with the newly restored floor, its completely transformed from when we first visited the client, and the floor has now gained character and history. For aftercare we recommend Tile Doctor Neutral Cleaner, its an effective pH neutral product that is compatible with the new sealer.
Russell Taylor
Lancashire Tile Doctor
 Tile Doctor Ltd
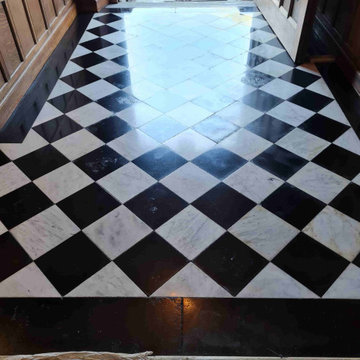
This Black and White Marble tiled hallway floor at a Grade II listed property in the village of Tattenhall has quite a history. The building was constructed in 1865 and at one time it has been the home to the high sheriff of Cheshire, and the family home of Edith Wignall the daughter of Sir Henry Tate the founder of the sugar company Tate and Lyle.
In more recent years the property had been used as a council building and even a nursing home for the elderly. After a long history of decline it has now been restored to a lavish family mansion however the marble floor had suffered over the years and still need attention. The current owner had been in touch as they wanted it restoring and basically brought back to life.
As it turns out I had already planned to go to Tattenhall the following week to work on another listed building which was formerly the village bank. After discussing the Marble floor over the phone, I agreed a date and time to pop over from the bank and inspect the floor in detail. I can provide a rough quote from photographs, which has been especially useful recently, but it’s far better for all concerned if I’m able to properly survey the floor first.
The Marble floor consisted of Black and White Mable tiles laid in a diamond pattern, it wasn’t a very large area perhaps 9 square metres in total. The tiles were well worn as described but also stained and scratched. I would see they would need a deep burnish and polish to bring them back to life and then protected with a fresh sealer. Following on from that visit I was able to provide an accurate quote which was accepted, and a date agreed for my return.
The first job was to protect the surrounding heavy wooden panelling with masking film. The floor was very heavily stained yellow with deep scratches, to remove these I would have to grind the marble back until a clean fresh tile was left. To start I used a 200-grit coarse pad fitted to a weighted buffing machine, the abrasive action of the pad was lubricated with water. After inspection I found that the staining and scratches were still there, so I needed to use stronger pads, so I worked my way through a set of very coarse milling pads starting at a 50, 100 and finishing with a 200-grit pad. Again, water was used to lubricate, and the resultant slurry was removed by a powerful wet vacuum and washed down between each pad.
The milling pads had the desired effect, and I was then able to bring back the polished appearance of the Marble surface using a set of finer burnishing pads with the same process. The 400 and 800-grit pads helped to clean and remove the fine scratches left by the milling pads and then the next 1500-grit pad started to build the shine back on the marble tile.
After finishing with 1500-grit pad I washed the Marble with Tile Doctor Stone Soap and vacuumed up the residue with the wet vacuum. I left an industrial blower in place overnight to dry out the floor ready for the next morning when it would be sealed.
The next morning, I used the last of the four burnishing pads which is a very fine 3000-grit to polish the floor further. This last pad is applied dry with just a spray of water to create a high gloss finish.
When I was happy, I sealed the floor with two coats of Tile Doctor Colour Grow which is an impregnating sealer that soaks into the fine pores of the Marble to protect it from within. This product also improves colour and after application it was left to soak into the tile for five minutes before polishing off and then leaving it to dry.
The last step was to I buff the floor with a white pad. The finish was impressive, and the family were very happy with the work we had carried out. For aftercare I recommended they use Stone Soap as its designed for the regular cleaning of sealed and polished stone, as well as cleaning it also helps build the patina.
Alastair Robb
West Cheshire TIle Doctor
 The Panel Company
Vox Motivo Piedra 4 Pack
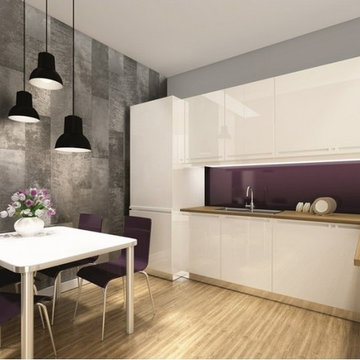
This beautiful, classy range from Vox is new to the market in the UK and brings a real touch of sophistication to any wall to which it is applied. A huge seller in Europe, this range includes tile effect, wooden panel effect and marble effect all in stunning, high quality finishes.
The panels can be used to clad an entire room or of course can be selectively displayed on a feature wall for a different effect. These 100% waterproof panels are also easy to keep clean and with no grouting required you can be assured that they are also extremely hygienic.
The simple finishing system leads to quick and easy installation – a fantastic alternative to ceramic tiles, wallpapers and paints.
Each panel measures 2700mm length x 250mm width.
 Cassoni Furniture & Accessories
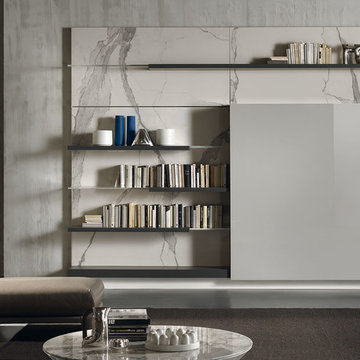
- N.C. LANDSCAPE 2016 WALL UNIT. The forms, colors and materials evolve towards a new warmth, a cozy, comfortable mood, which transforms the elegance of the linear shapes into soft, sensory emotions: N.C. Landscape shows new horizons. The large doors made with thin solid wood slats, together with glass that is reflective and transparent at the same time, create an intriguing play of light and shadow, reflection and transparency. The freely sliding doors reveals surprising contrasts of material with the inside of the compartments and the backs of the paneling, emphasizing each time the different functions: concealing and integrating audio-video equipment, displaying books and favorite objects on the shelves or containing them within the spacious closed compartments.
157"1/2W x 15"D x 94"1/2H.
https://cassoni.com/NC_Landscape_2016_01
- HYPER CHAISE LOUNGE. Special bridge structure, slender and linear, that reveals and enhances the decisive forms and the pronounced volumes of the weight-bearing arms, giving an unusual shape to comfort, strictly in leather. The low back creates an unusual contrast between the height and the depth of the seat, while the cushions create a harmony with the severity of the structural lines, liberating a feeling of comfort and relaxation. Its unusual suspended effect creates a dreamy, relaxed atmosphere, soft and at the same time exquisitely squared, with shapes that give a personal character to the living space.
31''1/2W x 59''7/8D x 24''3/8H.
39''3/8W x 59''7/8D x 24''3/8H.
https://cassoni.com/Hyper_Chaise_lounge
- POND COFFEE TABLE. Family of cocktail tables, side tables, occasional tables with different heights and width. While the conical base tends to disappears in the shadow, the top is raised from the ground and lives of intriguing reflections and shades of colors. The reflections of the glass top, whose perfectly glossy surface mirrors everything around, recreating the mystic reflection effect of perfectly still water, or those of the marble top, for the rich grains and mosaic of minerals it is made of. Base made from molded polyurethane BAYDUR®60, lacquered with glossy finishes. Top in back-lacquered glass or in stone. 47"1/4 version on wheels, hidden inside the base.
Ø35''3/8 x 15''H.
Ø47''1/4 x 11''7/8H.
https://cassoni.com/Pond_Coffee_Table

 CabinetGlass.com
Another photo, with slightly different lighting conditions, however the effect on the glass was dramatic..
This panel was created to fit into an opening that went to a bonus storage area.
The end result was so much better than just a piece of bathroom obscure glass.
It is now a work of Art Glass, and as a bonus the effect can easily be adjusted with a dimmer light. Unlimited moods by simply adjusting their dimmer.
The actual panel measured 24" x 48" and had many colors and textured glass types. Of course you can have your own, but this is what is shown in the photos below;
Sky - Spectrum Glass - 6034-83CC - "Aqua-Rose"
Sun - Spectrum Glass - 6067-83CC - " Mimosa "
Sun Reflection - Spectrum Glass - 6076-83CC - " Mimosa "
Tree Leaves - Spectrum Glass - 327-6S - Dark Green/White
Tree Bark - Spectrum Glass - 317-2S - Medium Amber/White
Water - Spectrum Glass - 6033-83CC - " Blue Yonder "
Gray Rocks - Spectrum Glass - 387-2S - Gray/White
Wispy Rocks - Spectrum Glass - 6092-86CC - " Heather "
Lighter Rocks - Spectrum Glass - "Aqua-Rose"
We also utilized our Dark Antique Patina Tiffany Style (Copper Foil) which is best suited to " Art Style " Stained Glass. Simply Stunning !!!
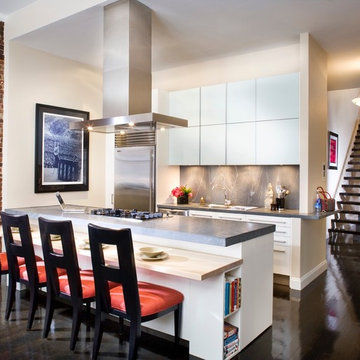
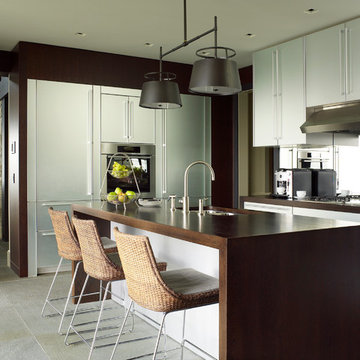
Example of a trendy dark wood floor kitchen design in Boston with flat-panel cabinets, white cabinets, gray backsplash, stainless steel appliances and an island

 Webber + Studio, Architects
Paul Bardagjy Photography
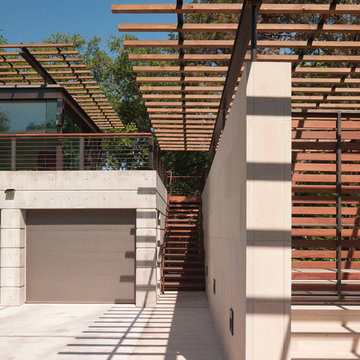
Inspiration for a mid-sized modern attached four-car garage remodel in Austin
Inspiration for a mid-sized modern attached four-car garage remodel in Austin
 Bosler Earth Design
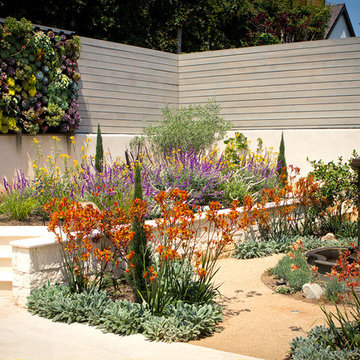
Add a retaining wall with a tall fence for privacy.
-Build a large lush succulent vertical green wall.
-Create a butterfly and hummingbird garden adding a fountain for a cooling effect.
©Daniel Bosler Photography
 TaylorPro Design and Remodeling, Inc.
"Kerry Taylor was professional and courteous from our first meeting forwards. We took a long time to decide on our final design but Kerry and his design team were patient and respectful and waited until we were ready to move forward. There was never a sense of being pushed into anything we didn’t like. They listened, carefully considered our requests and delivered an awesome plan for our new bathroom. Kerry also broke down everything so that we could consider several alternatives for features and finishes and was mindful to stay within our budget. He accommodated some on-the-fly changes, after construction was underway and suggested effective solutions for any unforeseen problems that arose.
Having construction done in close proximity to our master bedroom was a challenge but the excellent crew TaylorPro had on our job made it relatively painless: courteous and polite, arrived on time daily, worked hard, pretty much nonstop and cleaned up every day before leaving. If there were any delays, Kerry made sure to communicate with us quickly and was always available to talk when we had concerns or questions."
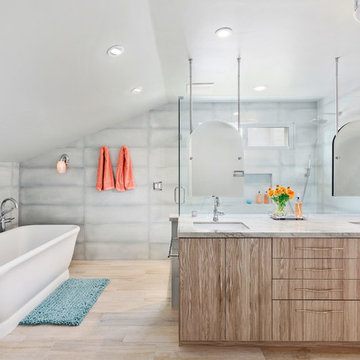
This Carlsbad couple yearned for a generous master bath that included a big soaking tub, double vanity, water closet, large walk-in shower, and walk in closet. Unfortunately, their current master bathroom was only 6'x12'.
Our design team went to work and came up with a solution to push the back wall into an unused 2nd floor vaulted space in the garage, and further expand the new master bath footprint into two existing closet areas. These inventive expansions made it possible for their luxurious master bath dreams to come true.
Just goes to show that, with TaylorPro Design & Remodeling, fitting a square peg in a round hole could be possible!
Photos by: Jon Upson

Sponsored
Columbus, OH

Hope Restoration & General Contracting
Columbus Design-Build, Kitchen & Bath Remodeling, Historic Renovations
 Milgard Windows & Doors
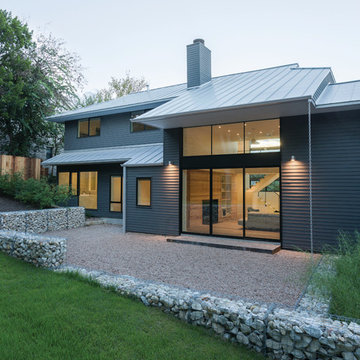
The Kiguchi family moved into their Austin, Texas home in 1994. Built in the 1980’s as part of a neighborhood development, they happily raised their family here but longed for something more contemporary. Once they became empty nesters, they decided it was time for a major remodel. After spending many years visiting Austin AIA Home Tours that highlight contemporary residential architecture, they had a lot of ideas and in 2013 were ready to interview architects and get their renovation underway.
The project turned into a major remodel due to an unstable foundation. Architects Ben Arbib and Ed Hughey, of Arbib Hughey Design were hired to solve the structural issue and look for inspiration in the bones of the house, which sat on top of a hillside and was surrounded by great views.
Unfortunately, with the old floor plan, the beautiful views were hidden by small windows that were poorly placed. In order to bring more natural light into the house the window sizes and configurations had to be addressed, all while keeping in mind the homeowners desire for a modern look and feel.
To achieve a more contemporary and sophisticated front of house, a new entry was designed that included removing a two-story bay window and porch. The entrance of the home also became more integrated with the landscape creating a template for new foliage to be planted. Older exterior materials were updated to incorporate a more muted palette of colors with a metal roof, dark grey siding in the back and white stucco in the front. Deep eaves were added over many of the new large windows for clean lines and sun protection.
“Inside it was about opening up the floor plan, expanding the views throughout the house, and updating the material palette to get a modern look that was also warm and inviting,” said Ben from Arbib Hughey Design. “Prior to the remodel, the house had the typical separation of rooms. We removed the walls between them and changed all of the windows to Milgard Thermally Improved Aluminum to connect the inside with the outside. No matter where you are you get nice views and natural light.”
The architects wanted to create some drama, which they accomplished with the window placement and opening up the interior floor plan to an open concept approach. Cabinetry was used to help delineate intimate spaces. To add warmth to an all-white living room, white-washed oak wood floors were installed and pine planks were used around the fireplace. The large windows served as artwork bringing the color of nature into the space.
An octagon shaped, elevated dining room, (named “the turret”), had a big impact on the design of the house. They architects rounded the corners and added larger window openings overlooking a new sunken garden. The great room was also softened by rounding out the corners and that circular theme continued throughout the house, being picked up in skylight wells and kitchen cabinetry. A staircase leading to a catwalk was added and the result was a two-story window wall that flooded the home with natural light.
When asked why Milgard® Thermally Improved Aluminum windows were selected, the architectural team listed many reasons:
1) Aesthetics: “We liked the slim profiles and narrow sightlines. The window frames never get in the way of the view and that was important to us. They also have a very contemporary look that went well with our design.”
2) Options: “We liked that we could get large sliding doors that matched the windows, giving us a very cohesive look and feel throughout the project.”
3) Cost Effective: “Milgard windows are affordable. You get a good product at a good price.”
4) Custom Sizes: “Milgard windows are customizable, which allowed us to get the right window for each location.”
Ready to take on your own traditional to modern home remodeling project? Arbib Hughey Design advises, “Work with a good architect. That means picking a team that is creative, communicative, listens well and is responsive. We think it’s important for an architect to listen to their clients and give them something they want, not something the architect thinks they should have. At the same time you want an architect who is willing and able to think outside the box and offer up design options that you may not have considered. Design is about a lot of back and forth, trying out ideas, getting feedback and trying again.”
The home was completely transformed into a unique, contemporary house perfectly integrated with its site. Internally the home has a natural flow for the occupants and externally it is integrated with the surroundings taking advantage of great natural light. As a side note, it was highly praised as part of the Austin AIA homes tour.
 Arrigoni Woods, Inc.
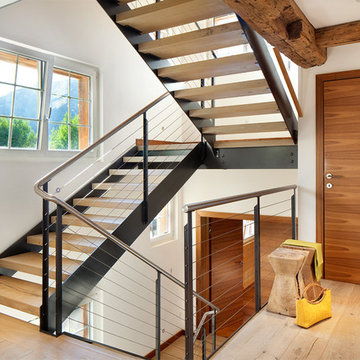
Hand-hewn Bavarian oak wide-plank floors and reclaimed wood exposed beams in the ceiling add a hint of rustic charm to this modern luxury home. // Photographed for Mountain Living Magazine by Gibeon Photography


45