
Search results for "Cleaning solution" in Home Design Ideas
 L-ONE DESIGN,LLC
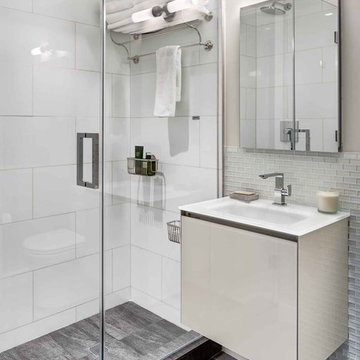
Small Bathroom renovation for the downtown Manhattan project.
Photos by Richard Cadan Photography
Example of a mid-sized trendy 3/4 glass tile porcelain tile and gray floor alcove shower design in New York with a wall-mount sink, flat-panel cabinets, beige walls and a hinged shower door
Example of a mid-sized trendy 3/4 glass tile porcelain tile and gray floor alcove shower design in New York with a wall-mount sink, flat-panel cabinets, beige walls and a hinged shower door

 Life Australia Cleaning & Facility Management
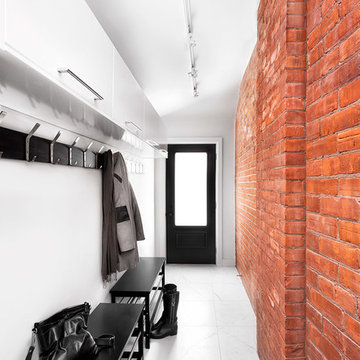
Get professional office cleaning services in Brisbane. Our team delivers high-quality cleaning solutions for offices, warehouses, and more.
Home office - modern home office idea
Home office - modern home office idea
Find the right local pro for your project
 Two Birds Design
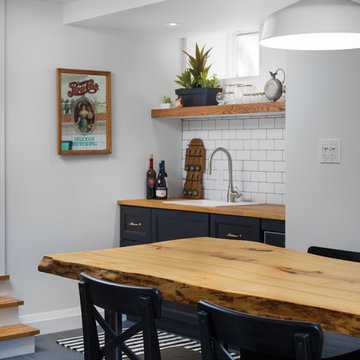
This eclectic space is infused with unique pieces and warm finishes combined to create a welcoming and comfortable space. We used Ikea kitchen cabinets and butcher block counter top for the bar area and built in media center. Custom wood floating shelves to match, maximize storage while maintaining clean lines and minimizing clutter. A custom bar table in the same wood tones is the perfect spot to hang out and play games. Splashes of brass and pewter in the hardware and antique accessories offset bright accents that pop against or white walls and ceiling. Grey floor tiles are an easy to clean solution warmed up by woven area rugs.
 Tile Doctor Ltd
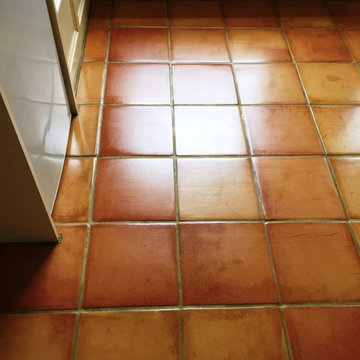
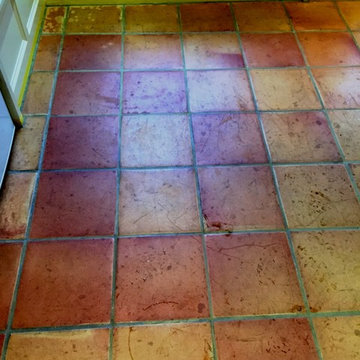
The before picture below was actually taken after another cleaning company had come in to clean these Terracotta floor tiles for a client in the city of Oxford; well what can I say except they then called Tile Doctor.
I started by doing a test on a small area and realised that I could strip the remaining sealer from the floor with a strong dilution of Tile Doctor Pro Clean which is also an effective cleaner and safe to use on stone and tiled floors. So I diluted Pro Clean with warm water and spread this on the floor leaving it to dwell for twenty minutes before scrubbing it in with a black pad fitted to my Rocky floor machine. This worked very well on the floor and the cleaning solution was soon dirty with the released soil which was removed using a wet vacuum and more water to rinse it away and dry the floor as much as possible.
Satisfied that the floor was now as clean as it could be I left for the day and returned the next day to seal the floor, first checking that the tiles were dry and ready to be sealed.
Sealing was done in two stages starting with an initial coat of Tile Doctor Colour Grow which is an impregnating sealer that adds life to the natural colours in the tiles and gives the floor a good base for the next sealer. The second stage was to apply a few coats of Tile Doctor Seal & Go which builds up a surface seal that leaves a nice sheen to the floor as requested by the customer.
 Tile Doctor Ltd
The before picture below was actually taken after another cleaning company had come in to clean these Terracotta floor tiles for a client in the city of Oxford; well what can I say except they then called Tile Doctor.
I started by doing a test on a small area and realised that I could strip the remaining sealer from the floor with a strong dilution of Tile Doctor Pro Clean which is also an effective cleaner and safe to use on stone and tiled floors. So I diluted Pro Clean with warm water and spread this on the floor leaving it to dwell for twenty minutes before scrubbing it in with a black pad fitted to my Rocky floor machine. This worked very well on the floor and the cleaning solution was soon dirty with the released soil which was removed using a wet vacuum and more water to rinse it away and dry the floor as much as possible.
Satisfied that the floor was now as clean as it could be I left for the day and returned the next day to seal the floor, first checking that the tiles were dry and ready to be sealed.
Sealing was done in two stages starting with an initial coat of Tile Doctor Colour Grow which is an impregnating sealer that adds life to the natural colours in the tiles and gives the floor a good base for the next sealer. The second stage was to apply a few coats of Tile Doctor Seal & Go which builds up a surface seal that leaves a nice sheen to the floor as requested by the customer.

 Connecticut Stone
Photo Credit: Neil Landino,
Counter Top: Connecticut Stone Calacatta Gold Honed Marble,
Kitchen Sink: 39" Wide Risinger Double Bowl Fireclay,
Paint Color: Benjamin Moore Arctic Gray 1577,
Trim Color: Benjamin Moore White Dove,
Kitchen Faucet: Perrin and Rowe Bridge Kitchen Faucet
VIDEO BLOG, EPISODE 2 – FINDING THE PERFECT STONE
Watch this happy client’s testimonial on how Connecticut Stone transformed her existing kitchen into a bright, beautiful and functional space.Featuring Calacatta Gold Marble and Carrara Marble.
Video Link: https://youtu.be/hwbWNMFrAV0


 Robert Paige Cabinetry LLC
Photography by William Quarles
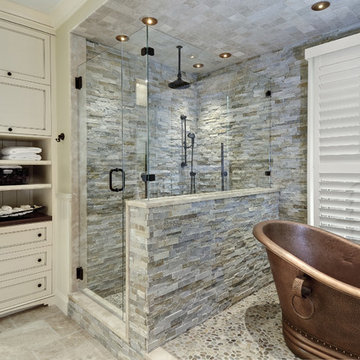
Large elegant master stone tile and gray tile pebble tile floor and gray floor bathroom photo in Charleston with beaded inset cabinets, beige cabinets, beige walls, quartz countertops and white countertops
Large elegant master stone tile and gray tile pebble tile floor and gray floor bathroom photo in Charleston with beaded inset cabinets, beige cabinets, beige walls, quartz countertops and white countertops

 Bruns Architecture
Tricia Shay Photography
Large trendy courtyard concrete patio photo in Milwaukee with no cover
Large trendy courtyard concrete patio photo in Milwaukee with no cover
 Verde Fine Gardens
Photo by Samantha Robison
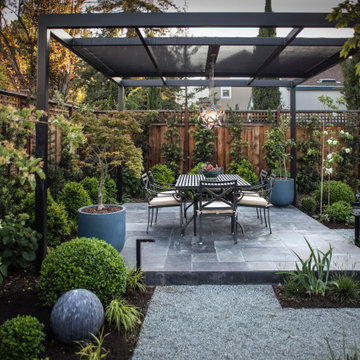
Small transitional backyard stone patio photo in Other with a pergola
Small transitional backyard stone patio photo in Other with a pergola
 Cabinet Innovations
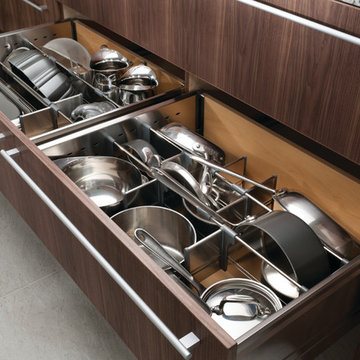
Large wide and deep drawers for storage of large pots and pans with dividers for easy organization. Cabinets are Wood-Mode 84 featuring the Vanguard Plus door style on Plain Sawn Walnut. Flooring by Porcelanosa, Rapid Gris.
All pictures are copyright Wood-Mode. For promotional use only.
 Tile Doctor Ltd
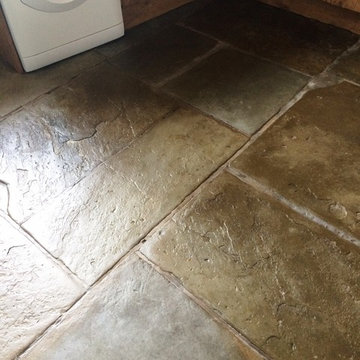
This Flagstone floor was installed in a house near the village of Ambleside and had previously been sealed with varnish and other products which had left the floor looking dull and nowhere near its best. I did a test clean which came out well and then agreed a date and price I came back a couple of weeks later to do the job.
Due to the numerous coatings that had been applied to the floor it was necessary to completely strip off the coatings back to the bare stone. To start I used Tile Doctor Remove and Go which does what it says on the bottle and removes coatings from tiles, the product was diluted with water and left to soak in before being scrubbed in using a Black Scrubbing pad fitted to a rotary machine. The now dirty cleaning solution was removed using a wet vacuum and I could see that the Remove and Go had removed most but not all of the coatings so it was time to using something stronger. To do this I applied NanoTech UltraClean which is a gel that is left to soak into the floor for thirty minutes before adding water and then agitating with the black pad. The floor was rinsed with water and the solution removed with the wet vacuum. At this point I could see that all the varnish and dirt had been removed so I gave the floor a final wash down with clean water to neutralise the floor before sealing and left for the evening so the floor could dry overnight.
I came back the next day and tested the floor with a damp meter to confirm the floor was dry and then proceeded to seal the floor with Tile Doctor Seal and Go applied with a paint pad which gave the floor a nice low sheen finish that the customer requested.
 Tile Doctor Ltd
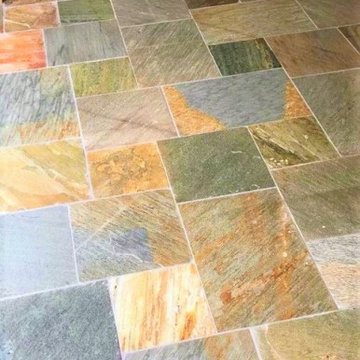
The tiles pictured are Chinese Slate which were laid in the Kitchen of a house in Chepstow around nine years ago. The town of Chepstow is located on the Welsh side of the River Seven and has the River Wye running through it.
The floor had not been professionally cleaned and sealed since installation. During this time the old sealer had mostly worn off allowing dirt to get into the pores of the stone leaving it looking dull, uninviting and dirty. The grout lines had also collected dirt and many of the lines had darkened.
I discussed with the client the process to get the floor cleaned and restored and demonstrated the effectiveness of the process on a small test area. They were impressed and were happy to go ahead with my quote, so we scheduled in the work which would take two days.
To get the floor clean and remove what was left of the old sealer I first made the floor wet and then added a strong dilution of Tile Doctor Pro-Clean mixed with Tile Doctor Remove and Go to give it extra power. This cleaning cocktail was left to soak into the tiles for ten minutes before being scrubbed in with a black scrubbing pad fitted to a rotary machine and by hand where necessary. This combination works well on really dirty floors such as this.
The scrubbing action released the years of dirt from the pores of the Slate and it wasn’t long before the cleaning solution turned black. This was then extracted off the floor using a wet vacuum. We then gave the floor a thorough inspection. There were one or two areas that were particularly stubborn, so these areas were retreated using the same process and the grout scrubbed by hand using more Tile Doctor Pro Clean.
The floor was then given another rinse with water and then dried as much as possible with the wet vacuum. This got the floor dry, but it would need to be completely dry before sealing so it was then left to dry off fully overnight.
I came back the next day to seal the floor first checking the moisture level of the stone by taking readings with a damp meter to ensure it was dry. I chose to use Tile Doctor Colour Grow for the sealer as the colour enhancing formula would be the best product to bring out the natural colours in the Chinese slate. Colour Grow is an impregnating sealer which will provides durable protection as well as allowing the surface to breath. Three coats were applied, allowing each to dry before applying the next one.
The client was so happy, so much that she said it looked better than when first laid!
I discussed aftercare with her and recommended the use of Tile Doctor Neutral Tile Cleaner, it’s pH balanced so it won’t prematurely erode the sealer which can be the problem with stronger products you find in supermarkets. It comes in concentrated form so one bottle lasts a long time.
Paul Wales
Monmouthshire Tile Doctor
Sponsored
Columbus, OH

Wannemacher Interiors
Customized Award-Winning Interior Design Solutions in Franklin Cnty OH
 Tile Doctor Ltd
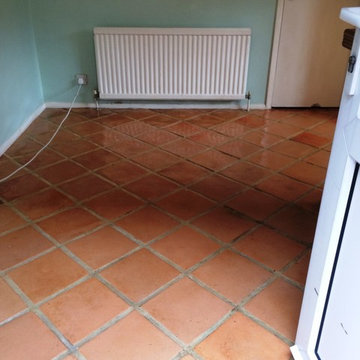
This was a rather dirty Terracotta kitchen floor located at a house in Winchmore Hill in Buckinghamshire, not to be confused with the Winchmore Hill in London. The sealer on the tiles had worn off some time ago and now the dirt was becoming trapped in the pores of the Terracotta making it impossible to clean.
Deep Cleaning Terracotta Tile
To deep clean into the pores of the Terracotta a diluted solution of Tile Doctor Pro Clean, which is a strong tile cleaner sage to use on tiled floors, was applied to kitchen floor and left to soak in for around ten minutes. Then with the aid of a commercial rotary machine the solution was scrubbed into the tiles to release the many years of accumulated ingrained soiling which was removed from the floor using a wet vacuum.
Although this deep cleaned the tile the grout lines needed further attention and were treated with Tile Doctor Grout Clean-up solution and then washed down with fresh water which was removed with a wet vacuum.
There was still evidence of sealer remaining on the floor in some areas so the next step in the process was to apply Tile Doctor Remove and Go again working it into the tile using a scrubbing pad fitted to a rotary machine. Remove and Go as its name suggests is used to remove waxes and sealants from tile and stone. It certainly did the job and once the resultant slurry was vacuumed up and the floor given a final rinse to remove any chemicals used in the process the floor was looking much cleaner and left to dry overnight ready for our return
Sealing Terracotta Tile
The next day came back to do the sealing and checked the floor first for any spots we might had missed and also to ensure it had dried sufficiently. Tile Doctor Seal and Go was then applied in coats to fully seal the floor. As well as adding protection Seal and Go adds a nice subtle satin finish to Terracotta and being water based it doesn’t give off an odour when it’s drying.
 Tile Doctor Ltd
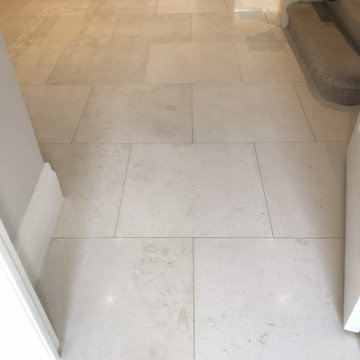
This client from Highgate in North London, N6 contacted us about their large honed Limestone tiled floor that was installed throughout the ground floor. It had been laid seven years prior and was now grubby and in need of a deep clean and seal including the grout which had turned black with dirt.
I visited the property to survey and assess what was required and provided the owner with a quotation for the renovation. The hallway pictured was in the worst condition, it was a busy house with young children and dogs and over the years the sealer had worn down leaving it vulnerable to ingrained dirt. Without a sealer to protect the stone it had become heavily soiled and lost its original polished appearance.
Happy with the quote we scheduled a date for the work to go ahead. The quote included deep cleaning and burnishing the stone to bring back the polish, grout cleaning and re-sealing the Limestone to protect it.
We arrived on the first day and prepared the area by taping up the skirting and woodwork to protect them from potential splashing. Next step was to burnish the floor using a set of Tile Doctor Diamond Burnishing Pads, specifically the 400, 800 and 1500 grit pads fitted to a rotary machine, these were used in sequence running each pad over the tiles several times with water to lubricate the process. The water turns into a fine slurry as pores in the stone are opened and the dirt is released, the slurry is rinsed off with more water and extracted using an industrial wet vacuum after each pad. The finer 800 and 1500-grit pads slowly close the pores and refine the appearance of the stone building up the polish in the process.
A strong dilution of Tile Doctor Pro-Clean was then applied to the grout lines, leaving it for a short while to soak in and then hand scrubbing with a grout brush. The dirty cleaning solution and were then removed from the floor with the wet vacuum.
This process was repeated across the different sections of the Limestone floor until I was satisfied with its appearance. Before leaving for the day, I rinsed the floor again using a buffing machine fitted with a brush fitted to give it a final clean. The floor was dried as much as possible using the wet vacuum and then allowed it to dry off fully overnight.
The following day the final 3000-grit pad in the four-pad set was applied to the floor to bring up the polish even further. The pad is applied dry with only a little water sprayed onto the tile. We call this process a “Spray Burnish” and as well as leaving the floor nice and dry ready for sealing it adds a nice subtle shine to the stone.
The floor was then sealed with two coats of Tile Doctor Colour Grow sealer. This is a colour intensifying impregnating sealer that works by occupying the pores in the stone so dirt cannot become ingrained there. It will provide durable protection and make the floor much easier to keep clean. It worked well on the pale Limestone and beautifully enhanced the colour and features in stone. Once complete the floor looked brand new again.
I left a complimentary bottle of Tile Doctor Stone Soap with the client and gave them some information about how best to maintain the floor. This product is pH neutral and cleans whilst maintaining the patina on the stone helping to keep the floor in great condition.
The client was delighted with the result and left us a great review.
“Andrew is excellent and gets on with the job and we got a fantastic result. Highly recommend. By Aaron S, Highgate, 15 March 2021”
Andrew Newstead
North London Tile Doctor

 Sophisticated Storage Solutions Custom Closets
Scott Janelli Photography, Bridgewater, NJ
Elegant dressing room photo in New York with white cabinets
Elegant dressing room photo in New York with white cabinets
 Bernardo Pozas Residential Design
Photo credit: Mike Kelley
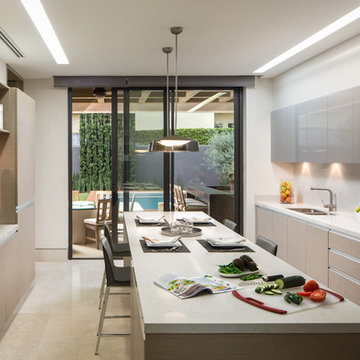
Trendy kitchen photo with a double-bowl sink, flat-panel cabinets, beige cabinets, white backsplash and an island
Trendy kitchen photo with a double-bowl sink, flat-panel cabinets, beige cabinets, white backsplash and an island

Sponsored
Columbus, OH

Hope Restoration & General Contracting
Columbus Design-Build, Kitchen & Bath Remodeling, Historic Renovations
 Granite State Cabinetry
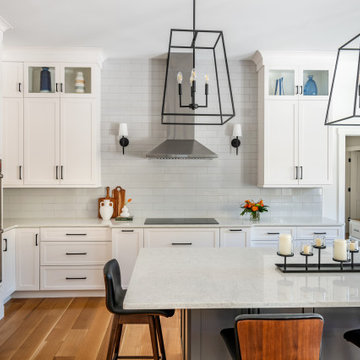
Transitional l-shaped medium tone wood floor and brown floor kitchen photo in Boston with shaker cabinets, white cabinets, white backsplash, subway tile backsplash, stainless steel appliances, an island and white countertops
 Closets Plus
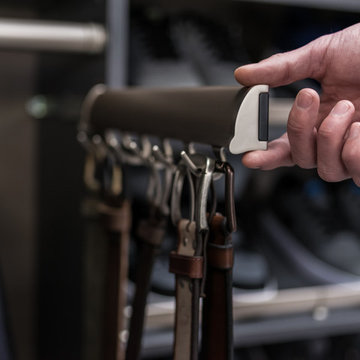
Inspiration for a small contemporary gender-neutral concrete floor and beige floor reach-in closet remodel in Detroit with open cabinets and gray cabinets

11