
Search results for "Cleaning solution" in Home Design Ideas



Find the right local pro for your project



 Tampa variety cleaning solution
Tampa variety make home look very nice and make it smell good
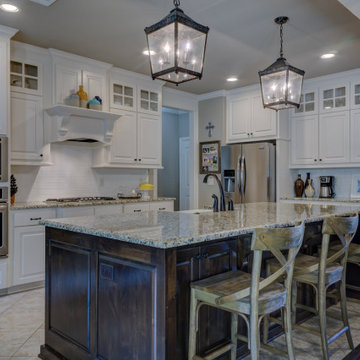
Example of a mid-sized urban kitchen design in Tampa
Example of a mid-sized urban kitchen design in Tampa




 Tile Doctor Ltd
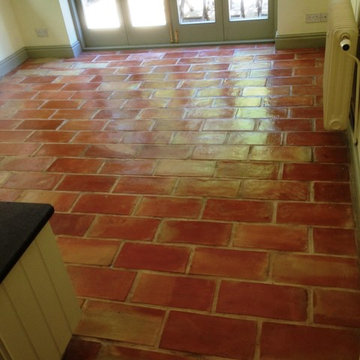
This is an interesting Terracotta brick tiled floor installed in a house in the village of Alderly Edge. The Terracotta tiles were made in a brick shape which was a popular design found in rural buildings in the 19th century. Although the floor was in good condition the sealer was starting to wear off and being clay Terracotta are porous and trap dirt if not sealed. You can see this in the before photograph below where you can see how the grout and Terracotta has darkened with ingrained dirt.
To get the Terracotta tiles clean and free of any remaining sealer I soaked tiles in a strong dilution of Tile Doctor Pro-Clean and left it to dwell for twenty minutes, Pro-Clean is an alkaline product and so safe to use on tiled floors. Then using a large 17inch black scrubbing pad fitted to a rotary machine and a stiff grout brush proceeded to work the cleaning solution into the tile and grout. The now dirty cleaning solution was removed using a wet vacuum and the floor rinsed down with hot water. Some stubborn areas were spot treated using the same process and once happy with the overall condition of the floor the tiles were thoroughly rinsed three times using hot water to remove any trace of cleaning product prior to sealing and then left to dry overnight.
I returned the next day to seal the floor testing it first with a damp meter to make sure it had dried. I then started to seal the tiles and with Terracotta being a very porous material it took eight coats of sealer to do the job. I used Tile Doctor Seal and Go which is a topical sealer that gives Terracotta a subtle gloss finish, it’s also water based so it doesn’t leave a smell as it dries.
 Eco Star Painting
Step #1 Apply BM CLEAN
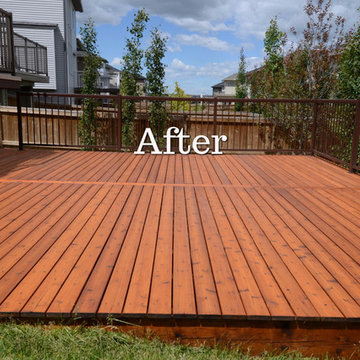
As you can see in the 'Before' picture above, this cedar deck was extremly dirty. This required an extra step in comparison to the typical deck stripping process. My paint rep at Benjamin Moore recommended a product called CLEAN. It comes in one gallon plastic containers and can be applied out of a plastic pail or with a garden sprayer. We used a Garden sprayer and chose a flat tip for application. The three gallon garden sprayer was filled with 2 gallons of water and one gallon of the CLEAN solution. This is a strong mixture and can be reduced to up to 6 parts water and one part of the Benjamin Moore CLEAN.
This approximately 22x20 deck had a board running perpindicular to the rest of the floor boards which divided it into 2 equal parts. Our method was to apply the solution to 3-4 of these 10' boards at a time. Allow it to set up for a few minutes and then scrub away with the deck brush. The agitation loosens up the dirt and grime and is then removed with a pressure washer a board a time. The flat tip on the pressure washer was almost the same width as the floor board. It is important to clean the sides of the board too because any remaining dirt or stain will be visible.
Benjamin Moore Deck Restoration products named Clean,Restore,brighten
Step #2 Apply BM RESTORE
The second step is exactly the same as the first step but with a different solution called Benjamin Moore RESTORE. The deck was dry before we started the 2nd step becuase it was baking hot outside. You use the same 2/1 mixture of water to chemical. This chemical will remove the stain still present in the deck floor. Make sure to rinse the garden sprayer clean before adding the restore solution. Unlike the BM CLEAN, the BM RESTORE has an orange-ish color in appearance. It did a fine job of removing most of the stain, but not 100% of it. There were a few areas that required a 3rd coat of restore but the process was quicker.
Step #3 Apply BM BRIGHTEN
The third step is exactly the same as the first two step but the chemical solution used was Benjamin Moore 'BRIGHTEN'. Again, the garden sprayer was cleaned and filled with 2 parts water and one part Brighten. The brightener not only lightens the wood but it also neutralizes the previous stripper solution. As stated before the Restore adds a bit of color and the Brighten will remove any traces of it. you still have to agitate the brightener with a scrub brush and either pressure wash it off or use a garden hose. We used the pressure washer for faster results. After it dries the wood look a lot brighter but we still found some spots of stain that had not come off.
Apply Sikkens Stain
As stated above the stain we used is called "Sikkens Proluxe" which is basically just a slight re-branding of the classic Sikkens Stain. The formula is exactly the same. In fact, the secondary name is still called 'Cetol' SRD RE. The color chosen was "CEDAR".
The weather was quite hot for a typical Calgary Spring day so we stained a 10' section of floor board at a time. The deck has a metal railing so the supporting feet had to be brushed in with a 2.5" natural bristle paint brush. for the rest of the job a 6" Wooster natural bristle deck brush was used. The handle was remove and a broom handle was inserted. The stain was stirred frequently and poured into a plastic Simms brand roller pan. Semi transparent Oil based stain has the consistency of water so you need to be careful not to spill any of it. When applying to a board you hit the sides first with the brush and then fillin the rest. Ten feet of floor board can be stain in a short period of time. it's important not to leave any streaks so it is adviseable to back-brush the entie length before moving on to the next board. The staining only took about 2.5 hours to complete. One coat is the manufacturers recommendation.
One last thing about Sikkens Stain. To maintain this beautiful look the deck should be re- coated once a year, preferably every spring. It's like applying sunscreen yearly to protect the wood against further damage. Two gallons was enough to cover this 450 sq foot deck.
 Tile Doctor Ltd
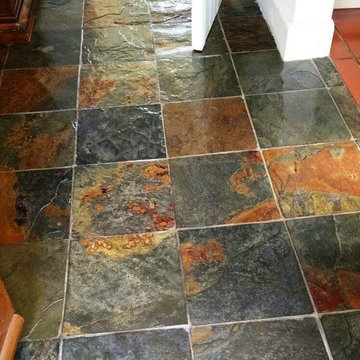
The photographs below are of rough Chinese Slate floor tiles installed at a house in Dorchester; they had not been deep cleaned in a long time and the combination of pets and grandchildren had taken its toll on the floor. Rough Slate from China is a relatively inexpensive product and although long lasting and value for money the texture of the Slate is difficult to maintain and thus difficult to keep clean even if fully sealed
To clean the tiles I used a strong dilution of Tile Doctor Pro-Clean which was left to soak into the Slate for a good ten minutes before working it in with a buffing machine fitted with a black scrubbing pad. This action removed the ground in dirt and any old sealer and a stiff brush was then run along the grout lines with more Pro-Clean to get them as clean as possible. The floor was then rinsed thoroughly and any stubborn areas retreated; a wet vacuum was used to extract the soiled water from the surface of the stone in order to get it as dry as possible.
The floor was left to dry overnight and I returned the next day to seal using three coats of Tile Doctor Seal and Go sealer which is a water based sealer (so no smell) that leaves a nice subtle shine to floor.
The slate and the grout looked really dull and dirty before we started and now the floor looks like it was recently laid.
For aftercare we don’t recommend the use of a Floor Steamer as they work on a 100 degrees and this damages the sealer; for regular cleaning use Tile Doctor Ph Neutral Cleaner using a two bucket system, whereby you apply the cleaning solution with a jug, wipe the floor and then squeeze off the excess into the second bucket, this stops you reapplying dirty water onto a clean floor.
Stuart Tibu
Dorset Tile Doctor
 Tile Doctor Ltd
I was recently contacted by a client who had just moved into a large Victorian property in the West Cheshire village of Tarvin about renovating their Victorian tiled hallway. Apparently, the floor was in good condition, and it would just be a case of removing what was left of the old sealer, deep cleaning the tiles and then applying a fresh seal. Unless the floor has been regularly maintained with the same sealer it’s important to remove all traces of old sealers before applying fresh.
Victorian Hallway Before Cleaning Tarvin Cheshire
A lot of the work we do at Tile Doctor can be a lot more involved, often requiring the sourcing of matching replacement tiles and rebuilding large sections of tiled flooring so straight forward clean and seal job is always welcome.
To remove what was left of the sealer and the ingrained dirt from the pores of the Victorian tile I dressed the floor with a strong dilution of Tile Doctor Pro-Clean. On this occasion I used a 1:3 dilution with water and applied it to the floor with a mop. I left it to soak into the tile for fifteen minutes before scrubbing so it could get to work breaking down the old sealer.
During this time, I set up a weighted floor buffer and fitted a black buffing pad, these pads are designed for scrubbing hard floors and lifting out the dirt. I applied a little water as required during this process to ensure the pad was lubricated. Shortly the cleaning solution darkened as the old sealer and dirt was released from the tile.
The soil was rinsed away with water and then removed using a wet vacuum. Once clear the floor was inspected and the process repeated until I was satisfied it was as clean as it could be and free of sealer.
I left the floor to dry off overnight and returned the next day to apply a new sealer. Before doing so however I like to use a damp meter to take moisture readings from the floor. This is needed to ensure it is dry enough to seal which is important as any moisture in the tile can affect the sealer and lead to an inconsistent finish.
To seal I started with the application of a single coat of Tile Doctor Colour Grow which is a colour intensifying breathable impregnator that soaks into the tile improving appearance and adding protection from within. Any excess sealant was removed by wiping the floor with a microfibre cloth and then it was left to dry for an hour.
This was followed with four coats of Tile Doctor Seal and Go Extra which is an acrylic breathable sealer which adds a pleasing subtle shine to the tile. This is an important feature when choosing a sealer for old floors where moisture needs to be allowed to rise through the tile, otherwise it can become trapped under the floor and reach out to the walls causing rising damp.
The customer was very happy with the revamped hallway which made the house a lot brighter and welcoming. Before closing I should mention that for aftercare cleaning I recommend Tile Doctor Neutral cleaner which is designed for the daily cleaning for sealed tiles, this is important as most domestic supermarket cleaners are simply too strong and can prematurely erode the sealer.
Alastair Robb
West Cheshire Tile Doctor


 Tile Doctor Ltd
Yorkstone is a variety of Sandstone unique to Yorkshire, and is known for its hard wearing and durable qualities. It was first manufactured during medieval times, but is still used for a range of building and construction purposes including, of course, tiled floors in houses. Yorkstone comes in a variety of natural colours, depending on the mineral makeup of the stone, and means that the tiled floors often have a unique look to them.
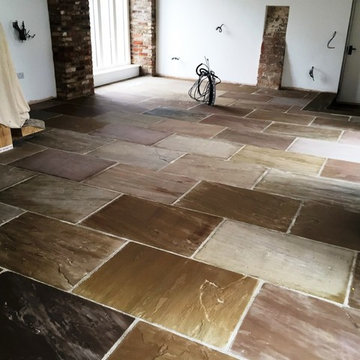
This customer, living in the small Yorkshire town of Driffield is the lucky owner of a fantastic new Yorkstone tiled living room floor. Unfortunately, the floor had been installed by an independent builder, as opposed to a professional tiling company, and had been left with no sealer to ensure it would stay looking great for a long time to come. Over time, the lack of a sealer has allowed the dirt to become ingrained in the stone, making it increasingly difficult for the customer to keep the tiles clean. I was called in to bring completion to what was an unfinished job!
As you can see from the photographs, the entire floor was quite dusty and dull looking following the recent installation. To get the tiles clean, I mixed a strong 60-40 mix of Tile Doctor Pro Clean and clean water. Pro Clean is a reliable alkaline cleaner suitable for use on most natural stone floors, including Sandstone, Quarry, and Slate.
The cleaning solution was applied to the floor and left to dwell for 20 minutes, allowing it time to penetrate the stone. Then, using my 17” rotary machine fitted with a black scrubbing pad, I proceeded to deep clean the tiles, leaving them looking immediately cleaner and more vibrant. Any resulting cleaning residue was promptly soaked up using a wet vacuum.
The process was repeated in the more stubborn areas, and I gave the floor a final rinse with water and left it to dry. Typically, we would leave a 12 to 24 hour drying period, depending on whether there is a damp proof membrane installed. However, this floor had underfloor heating and so dried really quickly, allowing me to seal it on the same day.
The customer wished to have a matt, natural finish for the Yorkstone tiled living room, so I applied two coats of Tile Doctor Colour Grow, our impregnating sealer which offers a natural, no-sheen look for textured floors, while providing durable protection against ingrained dirt and stains.
As the name of the product suggests, Colour Grow contains colour intensifying properties which really helped to accentuate the rich variety of colours in the customer’s Yorkstone tiles. The results were fantastic and you can see from the water test we performed after the sealer dried how water now bubbles up on the surface of the stone.
Ronnie Phipps
East Yorkshire Tile Doctor
 Tile Doctor Ltd
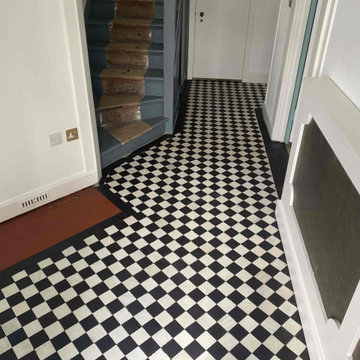
This client from North London had recently bought a property in Highgate N6 and during renovation had discovered an original Victorian tiled floor in the hallway. The floor was laid in a classic black and white diamond pattern but unfortunately a large section was missing and had been filled with concrete. Furthermore, most of the remaining floor had been covered in cement and glue.
I carried out a survey of the floor to determine the main issues and was then able to email over a quote later that day that included rebuilding the missing section of flooring. I suspect the floor had been excavated at some point in the past to install central heating and then rather than have the excavated section restored it was simply back filled and then levelled with a cement screed before finally gluing down a carpet on top.
Once the quote was accepted, I sourced replacement tiles from the Vintage Floor Tile company. Situated in Kent they are a reclamation yard that specialises in supplying original geometric and encaustic tiles including the major historical makers such as Minton and Craven Dunnill.
Armed with replacement tiles I started by removing the concrete that had been used to backfill the missing section and prepare a new surface for tiling with quick drying cement. When ready I was able to carefully build back the original pattern using the replacements. The tiles were secured with tile adhesive and once that had gone off, they were grouted.
The floor was left to set fully overnight and then the next day I was able to return and clean the whole floor using a strong dilution of Tile Doctor Remove and Go. As usual this was left to soak into the tiles for a good ten minutes before being scrubbed into the tiles using a black scrubbing pad. The Tile Doctor Remove and Go did a good job of cleaning the floor and the cleaning solution soon turned black with dirt during the scrubbing. The floor was rinsed with water and the soil extracted with a wet vacuum. After inspecting the floor any areas that needed further work were hand scrubbed and rinsed again until I was happy the floor was clean.
The last part of the cleaning process was to give the tiles an acid wash using Tile Doctor Acid Gel which further cleans the floor by removing old cement residue and grout haze. It also neutralises efflorescent salts in the tiles which are a common issue with floors of this age with no damp proof membrane. After another rinse and extraction, the floor was given a final rinse and then dried as much as possible using the wet vacuum.
I left the floor to dry out for a couple of days before returning to apply a protective sealer. Tile and Stone should be dry before sealing so I use a damp meter first to double check. All was well so to seal the tiles I proceeded to apply the first of what would be three coats of sealer. I used Tile Doctor Colour Grow for this, it works by impregnating the tile occupying the pores and thereby preventing dirt from becoming ingrained there. This product also enhances the black and white colour of the tiles and makes the floor much easier to clean.
Once done the floor was transformed and needless to say my customer was very pleased with the result. For the aftercare of Victorian Tiled floors, I recommend the use of a ph neural tile cleaner such as Tile Doctor Neutral Cleaner; most supermarket tile cleaners are simply too strong for use on sealed floors and can strip off the sealer prematurely.
Andrew Newstead
North London Tile Doctor
 Tile Doctor Ltd
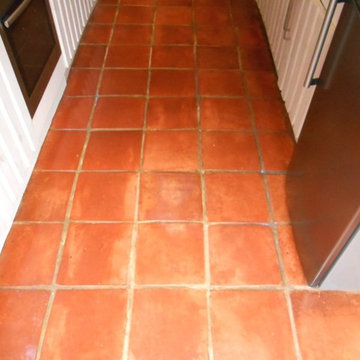
Not too long ago, I visited a house in the town of Fulwood in Preston, Lancashire. My client had a Terracotta tiled floor which had been neglected for many years and in their attempt to improve it had unfortunately been given some very poor advice by tile retailers, all of whom sold him different products, and each of which was unsuitable. Using these different products in succession had resulted in the depreciation of the floor’s texture and smoothness, in turn making the clay difficult to clean and maintain.
As per my usual process I ran a small test clean to demonstrate what could be done to improve the floor and I was commissioned to restore the floor back to its former glory.
I started by mixing a strong cleaning solution consisting of one part Tile Doctor Pro-Clean to three parts water. The solution was applied to the floor and left it to dwell for a short period. The high alkaline cleaner seeps into the pores of the tile getting underneath and lifting out the ingrained dirt and breaking down the old sealers. Then, I agitated the floor using a scrubbing pad fitted to a rotary floor machine before using a wet vacuum to suck up the resulting soiled solution.
There were a few paint marks dotted across the floor, but these were not noticeable until after I had given the Terracotta a deep clean. To remove the paint marks I used Tile Doctor Remove & Go, which is specially formulated to break down paint stains, adhesives and coatings. This product was used in combination with a steamer which, when applied directly to the tiles, helped to lift the paint out. Following this, I rinsed the entire floor a couple of times to remove any trace of cleaning product, and vacuumed up the excess moisture.
It’s always best to let the floor dry completely prior to sealing as applying sealer to a damp floor will affect the sealer. I left the house to allow this to take place overnight returning the next day. To get the best out of the Terracotta I sealed the floor using one coat of Tile Doctor Colour Grow, which is an impregnating sealer that soaks into the pores of the tile and acts as both as a bonding sealer enhancing the natural colours and darkening the clay (as requested by my client).
After the coat of Colour Grow had dried, I applied a further seven coats of Tile Doctor Seal & Go, which achieves a nice, low sheen Satin finish. Before leaving my happy client to enjoy his newly restored Terracotta floor, I made sure to provide some professional cleaning and long-term maintenance advice.
Russell Taylor
Lancashire Tile Doctor
 Tile Doctor Ltd
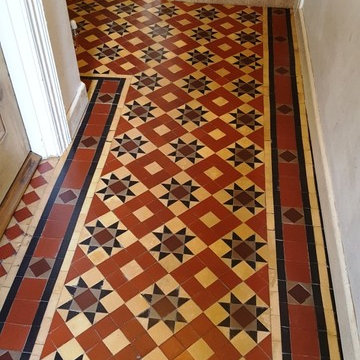
Pontcanna is a popular residential area in the western district of Cardiff, in South East Wales. Known for its rather large houses and spectacular foliage, interestingly enough roughly a quarter of the population are English folk.
I was called down to a property in the area to take a look at a Victorian tiled floor which was in quite poor condition. Along with the typical amount of dirt and muck seen on poorly maintained tiles, there were a number of missing tiles and a fair bit of cement caked on the surface of the floor.
It would require a robust clean, fresh seal, and several repairs to get this floor back into optimum condition.
To begin, I checked for excess moisture problems using a damp meter in various places of the hallway floor and, thankfully, it was showing dry results. Any dampness could have potentially caused problems later on in the restoration process, so it was s good idea to run tests before starting.
Next, I manually scraped as much of the dry paint and cement off the tiles as possible, with no lubrication necessary. I then proceeded to clean the floor with a solution I mixed early, consisting of equal parts Tile Doctor NanoTech HBU and Tile Doctor Pro Clean, rinsing as I went. Both products are designed to tackle heavy soil build-up, with the former uniquely using nano-sized particles (as the product name suggests) to penetrate deep into difficult to reach areas in the tiles in order to lift out ingrained muck.
Following the initial clean, I removed all of the loose tiles and those heavily affected by cement, before retiling as necessary with fresh Victorian tiles, and grouting the whole floor. Of course, these replacement tiles were carefully sourced to ensure consistency, as far as possible, with the original pattern of the floor.
The next day, I went over the whole floor with an application of the acid-based Tile Doctor Grout Clean Up, diluted with a little alkaline Pro Clean to form a cleaning solution. I then used a black pad to scrub the cleaner into the tiles, similarly to the previous day’s cleaning. This was followed by a through rinse with water to neutralise the floor.
It was at this point that I noticed some stubborn cement stains remained so I set about breaking them down using a 60 grade hand held diamond polishing block, and this technique proved successful.
After completing the clean, I left the floor to dry out for roughly 24 hours. Upon my return to the property to seal the tiles, I tested again for moisture. It is recommended to run damp tests before sealing, as excess moisture can cloud the sealer, affecting its performance in the long run.
Fortunately, no dampness was detected and I was proceeded to seal the floor with seven coats of Tile Doctor Seal & Go, which enhances the natural colours in the stone and provides a nice satin gloss appearance, as requested by the customer.
I was extremely pleased with the results of this restoration, as was the customer. The extent of the soil build up and damage was such before the restoration that, after completion, the floor looked like it had been newly laid!
Julian Iancono
South East Wales Tile Doctor

 Tile Doctor Ltd
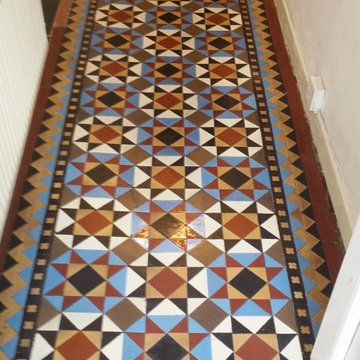
When you uncover a tiled floor after it has been covered by carpet for many years, it’s almost a given that it will be in a bad state. However, my customer, who lives in the town of Lymm, wasn’t expecting the Victorian tiled hallway they had recently uncovered to be in quite so terrible a state. As you can see from the photograph, it has been completely devastated by paint plaster and a big pool of cement floor leveller. Understandably, the formerly colourful appearance of the tiles had completely drained and it would require a through restoration to get them back into a usable condition.
To begin the restoration, I mixed a strong cleaning solution which consisted of Tile Doctor Remove & Go combined 50/50 with Tile Doctor Pro Clean. Remove & Go is a heavy duty remover that breaks down old sealers, along with adhesives, paint stains and other tough soil build up where as Pro-Clean is a versatile alkaline-based cleaner that reliably eradicates dirt on a wide variety of natural stone floors.
The solution was applied liberally across the floor, and left to dwell for a short period, allowing time for it to soften up the paint plaster. Next, I fitted a coarse scrubbing pad to my rotary cleaning machine and began to scrub the solution into the tiles, with a big difference to the appearance of the tiles being made quite quickly. The resulting cleaning slurry was promptly removed using a wet-vac machine.
I repeated the process two times to provide an extra thorough clean and then give the floor a thorough rinse. Some particularly stubborn marks remained on the floor which I was able to remove using Tile a Doctor Acid Gel, a blend of phosphoric and hydrochloric acids in gel form that’s easy to control. The floor was then left to dry fully overnight.
The next morning, I returned to the property and ran some damp tests. This is incredibly important to do before sealing any tiled floor because any excess moisture can cloud the sealer and prevent it from doing its job properly.
Once satisfied that the floor could be sealed, I applied several coats of Tile Doctor Seal and Go, our topical sealer which provides both a robust surface seal and a long-lasting low sheen finish in one and ideal for Victorian tiles.
It would be an understatement to say that this Victorian tiled floor was transformed. The customer was amazed at the results considering how bad a state the tiles had been in just a day earlier. When you have a situation like this, it’s hard to believe the tiles could ever be fully restored. Nonetheless, we could now see them in their full and original glory, and needless to say, the customer was very, very pleased with the result.
Alastair Robb
West Cheshire Tile Doctor
 Tile Doctor Ltd
When you discover an old Victorian tiled floor underneath carpet, the first question that will probably pop into your mind is: can it be restored?
The answer, in the majority of cases, is yes. In fact, Tile Doctor has completed hundreds of Victorian tiled floor restorations. Victorian tiles have a timeless quality about them and are still popular for residential use even in the twenty first century.
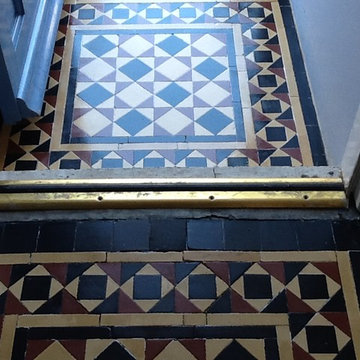
What you can usually expect upon lifting your carpet is for the tiles to be covered in carpet adhesives and grippers, as was the case with this particular example of a Victorian Tiles hallway floor at a property in Bedford. Sometimes you might also find paint splashes or other staining left over from decoration work. And, of course, the tiles will be dirty and in much need of a deep clean. These issues spoil the original appearance of the tiles, but with the right methods and products, a complete restoration can be achieved quickly and cost-effectively.
My first task upon arriving at the proper was to carry out a site survey to address the condition of the tiles, before running a quick test clean on a small area of the floor. The result was good and so I was confident that I could achieve a high-quality restoration for the client.
A quote was issued and accepted, and the work was booked in at a date that was convenient for the customer.
Returning to the property, my first course of action was to mix a strong dilution of Tile Doctor Pro Clean, which is a powerful alkaline cleaner safe to use on natural stone, with hot water. This cleaning solution was sprayed along all edges of the floor loosen the glue securing the carpet grippers. I then successfully removed the adhesive carefully using handheld tools to avoid damaging any tiles.
Once this was done, I applied Tile Doctor Remove and Go, scrubbing it into the tiles with a rotary machine. This product is designed to remove heavy soiling, paint splashes and old waxes and sealers. The soiled solution was then extracted using a wet vacuum and stubborn areas re-treated until I was satisfied the floor was clean.
The entire floor was then given a thorough rinse with water to remove any trace of cleaning products and extracted using a wet vax machine.
The floor was allowed to dry for several days before I was able to return to seal the tiles. It’s always important to leave significant time for the floor to dry because any moisture left over can impact the performance of the sealer.
The choice of sealer was Tile Doctor Seal and Go Extra, which provides robust protection against dirt and stains, with a light sheen finish. I chose this sealer not only because the customer wanted a light sheen finish, but also because this particular sealer is fully breathable. Dampness can sometimes be an issue with old Victorian and Quarry tiles which were installed before damp proof membranes became standard.
The transformation achieved within the space of a week was quite incredible and the colours in the tile have really come through.
Another satisfied customer!
David Vissian
Bedfordshire Tile Doctor
 Tile Doctor Ltd
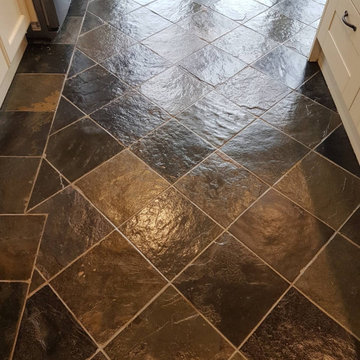
Pictured below is a Slate tiled kitchen floor that had been installed in the kitchen of a property in Harrogate around fifteen years prior. I discovered that the tiles had never been cleaned and resealed since installation and this explained why they were now looking dull and un-interesting. They had lost all character and it wasn’t until I started cleaning them that I realised the must be of the multicoloured Brazilian Slate variety.
As well as looking dull and unattractive, there was also some water damage to some tiles caused by a leak, this had resulted in some shaling and efflorescence staining. This had occurred some time ago and the floor had now dried out fully, so I was not expecting any further efflorescence issues going forward.
Brazil, I understand is the world’s 2nd biggest producer of Slate, it is also exceptionally durable and reasonably priced so its not surprising you see a lot of it over in the UK. Like any natural stone however it is porous and without a sealer to protect it and bring out those natural colours it soon ends up like the example on this pad.
I cleaned the floor with a strong dilution of Tile Doctor Pro-Clean using my usual method of spraying the cleaning solution onto the Slate and grout and then leaving it for a ten minutes to soak in and get to work breaking down the dirt and old sealers. Although I doubted there was much sealer left on the floor after all this time you need to be sure to remove all of it to get the best result. The floor was then scrubbed with a rotary floor buffer fitted with a black scrubbing pad, then after rinsing with water and extracting the soil I inspected the floor.
I detected there was still some sort of sealer present in some of less used parts of the floor, it was proving stubborn to remove so I suspect it may have been an old fashioned wax based product that was used. Not a problem though we Tile Doctors have a solution to every problem, so I spot treated the stubborn areas with Tile Doctor Wax Away to see if I was right. After scrubbing that in followed by another rinse and extraction with the wet vacuum I was pleased to see I was right and was happy all the old seal had now been removed. I gave the floor another rinse at the end of the day and dried it as much as possible with the wet vacuum, then left it to dry off fully overnight.
I came back the next day and checked the floor was dry with a damp meter. The readings were good, so I was able to crack on and seal the tiles using several coats of Tile Doctor Seal and Go. Each coat was applied leaving time to dry between each layer. This gave the floor a uniform appearance which disguised the damaged tiles. It will also help to stop more cracking and reduce the appearance of the efflorescence. The sealer really brought out the natural colours in the Brazilian Slate and the floor looked transformed.
I’m sure you will agree it was a vast improvement, certainly my client was very happy and couldn’t believe the difference I had managed to achieve. Before leaving I recommended, they should invest in some Tile Doctor Neutral Tile Cleaner which would ensure the newly applied seal was prematurely eroded away which is a problem with many of the stronger products you find in supermarkets.
Nigel Stoker
North West Yorkshire Tile Doctor
7