
Search results for "Cleaning solution" in Home Design Ideas
 Island Time Renovation & Design
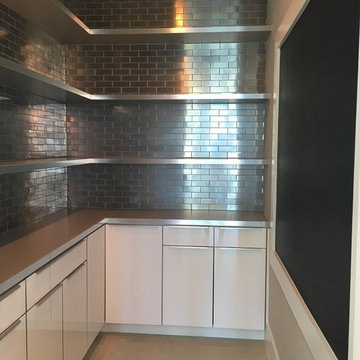
Inspiration for a small contemporary l-shaped concrete floor kitchen pantry remodel in Miami with flat-panel cabinets, white cabinets, stainless steel countertops, metallic backsplash, subway tile backsplash and an island

 Global Garage - Concrete Coating Specialists
Example of a large classic attached two-car garage workshop design in Denver


Find the right local pro for your project
 LU Design Build
Designer: Rochelle McAvin
Photographer: Karen Palmer
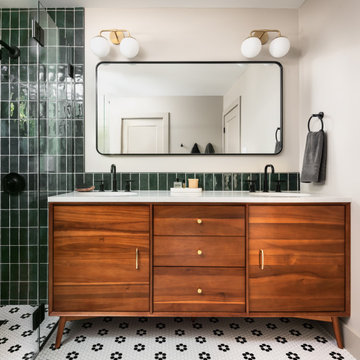
Welcome to our stunning mid-century kitchen and bath makeover, designed with function and color. This home renovation seamlessly combines the timeless charm of mid-century modern aesthetics with the practicality and functionality required by a busy family. Step into a home where classic meets contemporary and every detail has been carefully curated to enhance both style and convenience.
Kitchen Transformation:
The heart of the home has been revitalized with a fresh, open-concept design.
Sleek Cabinetry: Crisp, clean lines dominate the kitchen's custom-made cabinets, offering ample storage space while maintaining cozy vibes. Rich, warm wood tones complement the overall aesthetic.
Quartz Countertops: Durable and visually stunning, the quartz countertops bring a touch of luxury to the space. They provide ample room for food preparation and family gatherings.
Statement Lighting: 2 central pendant light fixtures, inspired by mid-century design, illuminates the kitchen with a warm, inviting glow.
Bath Oasis:
Our mid-century bath makeover offers a tranquil retreat for the primary suite. It combines retro-inspired design elements with contemporary comforts.
Patterned Tiles: Vibrant, geometric floor tiles create a playful yet sophisticated atmosphere. The black and white motif exudes mid-century charm and timeless elegance.
Floating Vanity: A sleek, vanity with clean lines maximizes floor space and provides ample storage for toiletries and linens.
Frameless Glass Shower: The bath features a modern, frameless glass shower enclosure, offering a spa-like experience for relaxation and rejuvenation.
Natural Light: Large windows in the bathroom allow natural light to flood the space, creating a bright and airy atmosphere.
Storage Solutions: Thoughtful storage solutions, including built-in niches and shelving, keep the bathroom organized and clutter-free.
This mid-century kitchen and bath makeover is the perfect blend of style and functionality, designed to accommodate the needs of a young family. It celebrates the iconic design of the mid-century era while embracing the modern conveniences that make daily life a breeze.

 Kristen Elizabeth Design
This family loves classic mid century design. We listened, and brought balance. Throughout the design, we conversed about a solution to the existing fireplace. Over time, we realized there was no solution needed. It is perfect as it is. It is quirky and fun, just like the owners. It is a conversation piece. We added rich color and texture in an adjoining room to balance the strength of the stone hearth . Purples, blues and greens find their way throughout the home adding cheer and whimsy. Beautifully sourced artwork compliments from the high end to the hand made. Every room has a special touch to reflect the family’s love of art, color and comfort.
 Designs by Craig Veenker
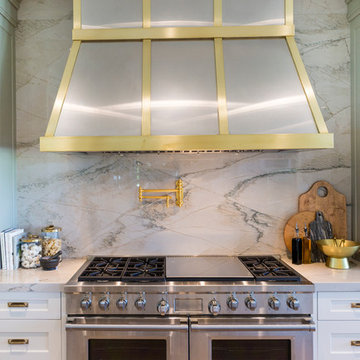
Example of a huge transitional l-shaped medium tone wood floor and brown floor kitchen design in Salt Lake City with a farmhouse sink, shaker cabinets, white cabinets, quartzite countertops, white backsplash, stone slab backsplash, paneled appliances and two islands

 Incredible Homes & Renovations
Study room - transitional built-in desk medium tone wood floor and beige floor study room idea in Houston with beige walls


 Don Vensel
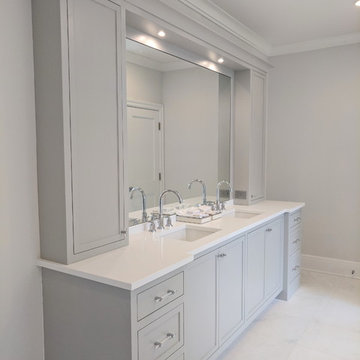
Bathroom - large transitional master marble floor and white floor bathroom idea in New York with recessed-panel cabinets, gray cabinets, gray walls, an undermount sink and quartz countertops


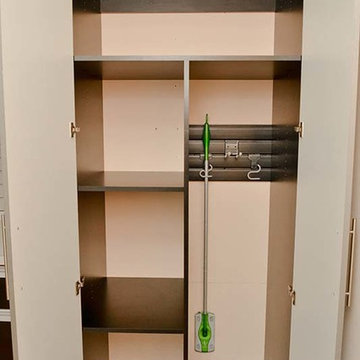
 Artisan Custom Closets
Customize your garage with storage solutions from Artisan Custom Closets. Doored cabinets, adjustable shelving, baskets, and slat wall solutions create a space for every item in your garage.
 Tile Doctor Ltd
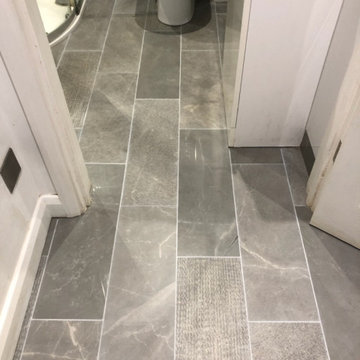
The pictures below detail the renovation of a Porcelain Tiled Floor I completed at a property in Ipswich. Installed throughout the Kitchen and into the adjacent WC the porcelain tile and grout were in a very dirty state and the client was desperate to get them clean. The situation wasn’t helped by their two dogs with grubby paws. She had tried all the usual household cleaners she could find, and nothing seemed to work. Unfortunately, household cleaners can make the problem worse due the strong chemicals they contain.
I visited the property to survey the floor and was able to reassure the client that although the grout was heavily stained it could be renovated by recolouring it with a Tile Doctor Grout Colourant. I was confident we would soon be able to get the floor looking great again and demonstrated the process I would use on a small part of the floor. The demonstration went well and happy with the result we agreed a date for my return the following week to complete the work which should be completed in a single day.
Returning on the agreed date we started by protecting the by applying a clear silicone sealant to the MDF skirting boards and kitchen base units. We left this to dry for an hour before proceeding with the cleaning.
The Porcelain tile and grout was cleaned with a strong dilution of Tile Doctor Pro-Clean using 3 parts cleaner to 5 parts water. The solution was applied to the tile and grout and then left to soak in for ten minutes before being worked in using a rotary machine fitted with a Black Scrubbing Pad. Tile Doctor Pro-Clean is a concentrated, multi-purpose high-alkaline cleaner which is designed for deep cleaning tile, stone and grout of dirt and grease and can also remove sealers.
Pads can struggle to reach into the recesses of the grout line so once I was finished with the tile, I hand scrubbed the grout with a wire brush. The floor was then rinsed with water and the resultant slurry extracted off the floor with wet vacuum.
The floor took about three hours to deep clean which was just the right timing for us to have lunch whilst the floor dried. The grout was much improved by the cleaning process but as suspected there were too many deep-seated stains to be able to guarantee a consistent finish. So as previously agreed with the client we set about colouring the grout using a light grey colourant. This took most of the afternoon as there was a lot of grout.
The Porcelain tiles were the non-porous type that won’t take a sealer and the colourant acts as a barrier over the grout protecting it and making it easy to clean so once I was done colouring there was no need to apply a sealer.
My client was relieved to have the floor looking clean and presentable again. For aftercare I recommended that moving forward it would be best to use Tile Doctor Neutral Tile Cleaner which is a pH neutral cleaner. This will ensure that with regular cleaning the floor will keep clean and the grout won’t be compromised by overly strong products.
Bruce Copping
Suffolk Tile Doctor
 Tile Doctor Ltd
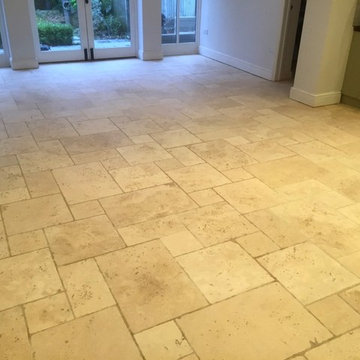
Recently I visited a client in the town of Maidenhead, Berkshire who needed assistance restoring a very dirty pitted Limestone tiled floor which had suffered over the years due to poor maintenance choices. The pressures of a busy family life had, understandably, prevented my client from undertaking regular cleaning and the products and methods used for cleaning were by and large unsuitable for this type of natural stone. In addition, the pits in the tiles had been filled with grout; however, they were not flush to the tile and therefore a large amount of soil had collected in the pockets. The result was a Limestone tiled floor in considerably poor condition that was increasingly difficult to keep clean.
My client had tried and tried to get the floor clean, using methods such as scrubbing with toothbrushes, steam cleaners, and mopping – but they weren’t getting anywhere! I explained to my client that steaming is, in fact, one of the worst cleaning systems to use on natural stone floors. Steam not only damages sealers, it also thins out greasy soils. Some of these soils are absorbed onto the domestic microfiber pads, however a lot of the soil becomes thinner allowing it to penetrate deeper into the pours of the stone and grout. This in itself starts the vicious circle to rapidly soiled and dirty tiles and grout. This happens because the grease soils magnetise dirt!
My first task in the cleaning process was to mix a strong solution of Tile Doctor Pro-Clean, which is a high alkaline cleaner. This solution was applied liberally across the entire Limestone tiled floor and grout. It was allowed to dwell for 30-40 minutes, giving it time to seep into the stone to get underneath and lift the ingrained dirt to the surface. During this time, I scrubbed the grout lines using a specialist stiff grout brush. The Limestone tiles were then scrubbed with heavy mechanical rotary agitation machine.
I then gave the floor a thorough rinse using the latest in cleaning and capture technology, which involves firing hot water at high pressure in a spinning motion across the floor, in effect blasting away the ingrained soils from the grout and pitting in the limestone. The high pressure is delivered from a system mounted inside my van which also contains waste tanks to capture the extracted soiled water.
After being allowed to dry thoroughly for 24 hours, I returned to seal the floor with Tile Doctor Colour Grow which would have brought out the deep colours in the stone, however after discussing the options with the client it became clear that they wanted to keep the floor looking as light as possible so Tile Doctor Ultra Seal was applied. Ultra Seal is a natural look impregnating sealer that soaks into the pores of the stone and protects it from within.
The floor now looks fantastic and the sealer should ensure it remains looking that way for some time to come and before leaving I made sure to provide my client with some professional maintenance advice.
Tim Colenutt
Berkshire Tile Doctor
 Tile Doctor Ltd
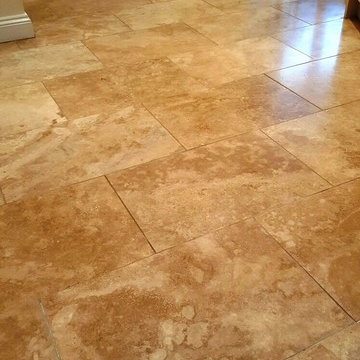
This fantastic Travertine tiled kitchen floor was in a bad way. Not only had it not been treated to a proper clean and seal in a long while, but it has also suffered from natural pitting, leaving lots of little holes that damaged the overall appearance of the floor. Travertine is very aesthetic, but suffers from the drawback of being quite soft compared to other types of stone (typically it sits between 3-4 on the Moh’s scale of mineral hardness).
The customer, who lives in the town of Sleaford a small Lincolnshire market town, was keen to have the situation remedied through a complete restoration. This would need to include small repairs, along with a deep clean and a fresh seal.
My first job was to deep clean the whole area, which I did using a solution of Tile Doctor Pro Clean and clean water. Pro Clean is a strong alkaline product which has a long history of producing reliable results of a wide range of natural stone floors, including Travertine, Granite, Limestone, and Slate. I applied the solution to both the tiles and the grout lines, and proceeded to scrub it in using a scrubbing pad fitted to a rotary floor machine.
This left the floor fresh and clean, but I would also need to restore the polish to the Travertine to really take its appearance to the next level. To do this I used the process known as burnishing, which essentially involves the consecutive application of different gritted pads to achieve a high quality polish on tiles. Our burnishing system, which consists of four pads, achieves fantastic results on high-end polished stone like Limestone, Marble and, of course, Travertine. I started by applying the Coarse grit burnishing pad, before gradually working my way through to the Medium, Fine, and finally Very Fine pads to achieve a brilliant shine and light reflection finish.
To round off the first day of the restoration, I used a flexible matching filler to fill up any pitted holes present on the surface of the tiles. Following this, I installed a turbo dryer to make sure the floor would dry fully overnight, and be ready to seal the following day.
The next day I returned to the property and proceeded to seal the Travertine tiles using several costs of Tile Doctor Colour Grow sealer to protect the tiles and also really enhance the natural colours in the stone. As an impregnating sealer, Colour Grow penetrates into the stone and fills its pores to safeguard it against ingrained dirt and stains from within.
As you can see from the photographs, the combination of a deep clean, high quality polish and fresh seal really transformed the appearance of the floor from dull and lifeless to a really asset to the kitchen. The customer was absolutely delighted with the results, leaving the following feedback: “Very good job – delighted! Thank you Phil!”
Phil Barrs
Lincolnshire Tile Doctor

 Tile Doctor Ltd
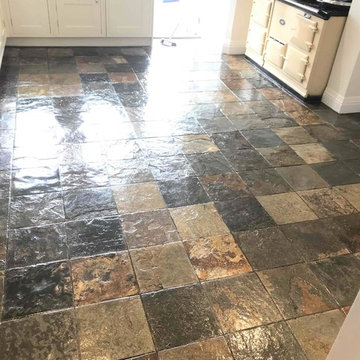
I recently completed the renovation of a Multi-Coloured Slate tiled kitchen floor in Sutton Coldfield. I was actually at the property before Christmas to survey the floor and quote for the work however the owners had planned to have a new kitchen installed in the new year, so we decided it was best for me to wait until after the installation to complete the work.
The slate was in good condition but like any stone floor you do need to maintain the sealer to prevent dirt becoming ingrained in the stone. Sealer do wear off overtime especially in the high foot traffic areas such as Kitchens and within a few years the tiles become dull and difficult to clean effectively.
The kitchen was installed on schedule and I got the call to arrange a visit to deep clean and reseal the floor which would take to two days, one to clean and one to seal.
To begin the restoration, I soaked the slate in a strong dilution of Tile Doctor Pro-Clean and left it to soak in for about ten minutes re-applying extra solution where it dried. Pro-Clean is a powerful tile cleaner that will strip old sealers when applied in concentrated form. I agitated the product using a black pad fitted to a rotary buffing machine. I paid particular attention to the grout which the customer had trouble keeping clean. The rotary pad struggles to reach into the recesses of the grout lines so I also made sure to scrub the solution into the grout with a grout brush.
Once I was satisfied that the Slate and the Grout was clean and clear of old sealers, I gave the whole floor a thorough rinse with water using a wet vacuum to extract the soil and get the floor as dry as possible. The floor was then left to dry off fully overnight.
Returning to the property the next day, I ran some quick damp tests to check for any excess moisture that might have prevented me from sealing the floor. We will always do this as excess moisture can affect the sealer curing.
The customer was very happy with the clean and the floor was dry, so we discussed sealer options to find out their preference for Matt or Satin finish. With the decision made to go with a Satin finish I began the application of the Tile Doctor Seal and Go which enhances the look of the stone with an aesthetically pleasing low-sheen finish, as well as providing on-going protection against ingrained dirt and staining.
A total of four coats of Seal and Go were needed to seal the Slate tiles and as you can see from the photos the sealer really put the life back into the floor.
Trevor Preece
Staffordshire Tile Doctor
 Tile Doctor Ltd
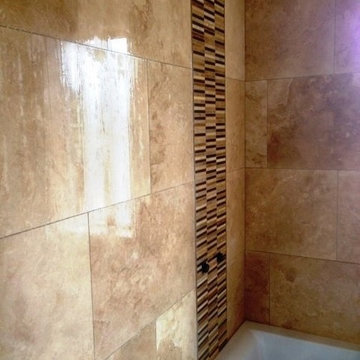
For this job, I was asked to work on my client’s newly installed bathroom in their house in Hull, the largest city in East Yorkshire. The new bathroom consisted of natural Travertine stone, and my task was to give the tiles a thorough clean, polish and seal. Travertine is a form of limestone with a distinct appearance consisting mainly of tan, white and cream-coloured shades. It’s commonly used for both residential and commercial use; although recently installed the tiles were dull and lifeless and not looking anywhere near their best.
My first task was to polish the wall tiles using the Tile Doctor burnishing system, this consists of four six-inch buffing pads with different grits. Starting with a coarse pad you grind off any dirt off the tile before moving onto the medium, fine and very fine pads which build up the polish. The result was a superior polished finish, as you can see from the below photo.
After achieving the desired polished finish, I set about cleaning the tiles using a solution of Tile Doctor Pro-Clean, a high alkaline cleaner safe to use on stone and grout, diluted with water. Once mixed, the solution was applied using spray bottles as the air makes the solution lighter and enables it to stick to the vertical surface. The solution was then scrubbed into the tile and grout to lift out any ingrained dirt and muck left over from the initial installation of the bathroom.
Following the clean I gave the bathroom tiles a good rinse with water to remove any trace of product; I used a wet-vacuum machine to remove any excess residue and left the tiles to dry.
The last step was to seal the bathroom Travertine tiles. After checking to make sure the whole area was completely dry, I applied five coats of Tile Doctor Colour Grow. Colour Grow is a colour intensifying, impregnating sealer which accentuated the natural shades in the Travertine, while at the same time providing a durable surface seal. The product is suitable for use on both internal and external Travertine tiled floors and walls, along with a range of other natural stone surfaces.
The sealer was applied using cloths, and the Tile Doctor three cloth system. The surface was also buffed after the application of each coat of sealer.
My client was very pleased with the end results; the Travertine surface finish is now looks exactly the way she had expected it to look.
Ronnie Phipps
East Yorkshire Tile Doctor
 Tile Doctor Ltd
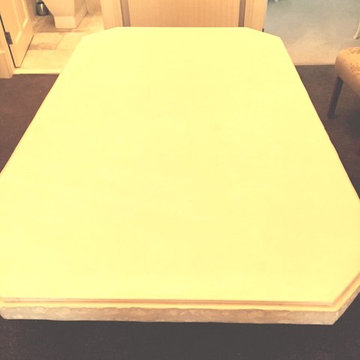
Here is a Limestone table that we stripped, cleaned and sealed in Edinburgh city centre. As you can see from the photographs below the old sealer/wax coating had started to deteriorate and wear off in places leaving the table looking dirty and the client hated the waxy/yellow shine finish it left so asked us to remove the old seal completely and make the Limestone look completely natural.
To remove the remaining wax coating the table was smothered in strong solution of Tile Doctor Pro-Clean which is an effective cleaning product that will strip off old sealers when used in a concentrated form. The solution was left to dwell for a while before being scrubbed in by hand and then rinsed off with water.
To make the job easier the table was cleaned in two sections and the process repeated a number of times in order to remove all the wax. Once complete the table was given a final clean using Tile Doctor Neutral Clean which is a PH neutral cleaning product to remove any trace of Pro-Clean and neutralise the stone before sealing.
The table was dried thoroughly before being sealed using three coats of Tile Doctor Colour Grow which is a penetrating sealer that soaks into the pores of the stone improving its natural colours and protecting it against staining from within.
The difference was remarkable and my client was delighted with the result.
Thomas Wilson
Edinburgh Tile Doctor
 Brickmoon Design
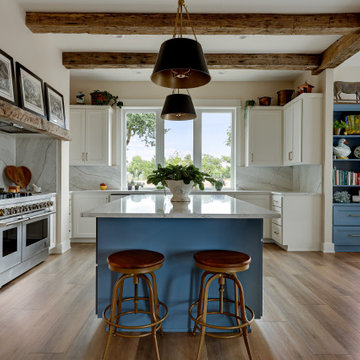
Example of a cottage l-shaped light wood floor eat-in kitchen design in Austin with white cabinets, marble countertops, marble backsplash, stainless steel appliances and an island



 Fireplace Xtrordinair
The 864™ TRV Clean Face gas fireplace is the perfect solution for anyone looking to have a big, beautiful fire that provides supplemental heat. Ideal for small to mid-sized homes or zone heating in large living spaces such as great rooms and living rooms, the 864™ clean face gas fireplace allows you to comfortable display a gorgeous, glowing fire all year-round while being able to control the heat output to a setting that is just right for you.
The large 864 square inch clean face fire view showcases the highly detailed Dancing-Fyre™ log set and glowing embers from any angle in the room. Its high quality all-glass appearance shows no visible face, grills or louvers and features the 2015 ANSI approved low visibility safety barrier to increase the overall safety of this unit for you and your family without detracting from the fire view. This deluxe gas fireplace comes with the GreenSmart® 2 system that features Comfort Control™, allowing you to turn the heat down while still maintaining the fire and glowing embers. All of the components on this fireplace can be operated simply by accessing the easy-to-use GreenSmart® 2 wall mounted remote control. With the 864™ TRV clean face gas fireplace, you are truly getting a beautiful fire view while being able to control the heat output

 Garage Design Works
Garage organization system for workshops
Example of an arts and crafts shed design in Orlando
Example of an arts and crafts shed design in Orlando

28