
Search results for "Cleaning solution" in Home Design Ideas
 The Grime Boss
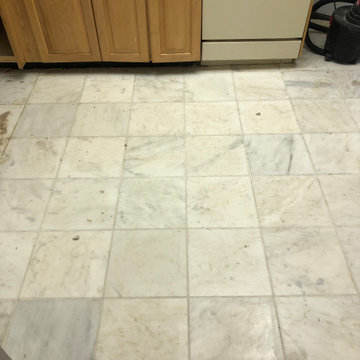
Here's is a dull marble floor The Grime Boss restored in Arlington, VA. This marble floor has lost its luster and shine over time.
There are several reasons why a marble floor may become dull. Over time, foot traffic, spills, and regular wear and tear can cause the surface to become scratched and scuffed. Harsh cleaning chemicals or improper cleaning techniques can also damage the finish of the marble and leave it looking dull and lackluster.
Fortunately, there are several ways to restore the shine to a dull marble floor. Professional polishing can remove surface scratches and restore the natural shine of the marble. Regular maintenance, such as sweeping and mopping with a pH Neutral cleaning solution, can also help to keep the marble looking its best.
 Mid in Mod
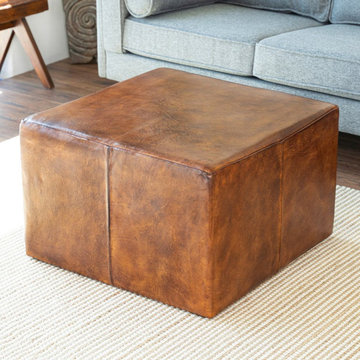
17.5"H x 28"W x 28"D
Kalila Mid-Century Square Genuine Leather Upholstered Ottoman in Tan. You found your dream sofa (finally!) Now pair it with this ottoman and make it that. much. better with the Kalila Tan Mid-Century Modern Ottoman. Found atop a Solid Wood frame, this ottoman features clean lines and High-Quality genuine leather upholstery, its high-density foam cushioned top will set new standards in comfort. Refined and versatile enough to complement any number of armchairs and sofas, it can be used as a footstool but also can serve as a coffee table or seat. Can be cleaned with non-abrasive cleaning solution followed by a quick microfiber cloth. Removable legs allow for simple delivery for tight spaces. Available in a variety of timeless colors, you're sure to find something that matches your decor.
 CraftPro Contracting LLC
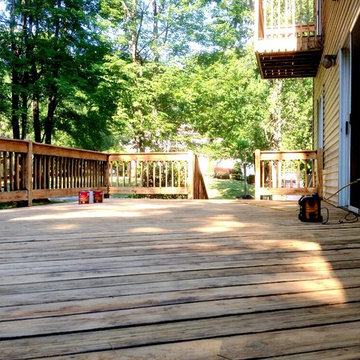
 In order to refinish and re-stain this deck in Parsippany, NJ we first had to remove the existing dark, almost black stain. We started with a thorough, high-pressure power-wash with bleach. We then used Sherwin Williams’ brand “SuperDeck: Stain & Sealer Remover” chemical stripping/cleaning solution. It was applied liberally, scrubbed, brushed and rinsed off. Since this deck was constructed with Western Red Cedar – a wood with a chemical tannin – we needed to restore the wood with SuperDeck’s “Revive”, which nuetralizes the wood’s natural tannin and restores it to a bright, clean, bare-wood deck. “Revive” is not a cure-all, however. There were still spots of old stain and tannin bleed after the stripping and cleaning, so we power-sanded the entire surface of both decks using coarse- to fine-grit sanding discs. It was finally stained with Sherwin Williams brand SuperDeck Semi-Transparent deck stain in "Classic Barn Red".
Find the right local pro for your project


 CraftPro Contracting LLC
 In order to refinish and re-stain this deck in Parsippany, NJ we first had to remove the existing dark, almost black stain. We started with a thorough, high-pressure power-wash with bleach. We then used Sherwin Williams’ brand “SuperDeck: Stain & Sealer Remover” chemical stripping/cleaning solution. It was applied liberally, scrubbed, brushed and rinsed off. Since this deck was constructed with Western Red Cedar – a wood with a chemical tannin – we needed to restore the wood with SuperDeck’s “Revive”, which nuetralizes the wood’s natural tannin and restores it to a bright, clean, bare-wood deck. “Revive” is not a cure-all, however. There were still spots of old stain and tannin bleed after the stripping and cleaning, so we power-sanded the entire surface of both decks using coarse- to fine-grit sanding discs. It was finally stained with Sherwin Williams brand SuperDeck Semi-Transparent deck stain in "Classic Barn Red".
 Tile Doctor Ltd
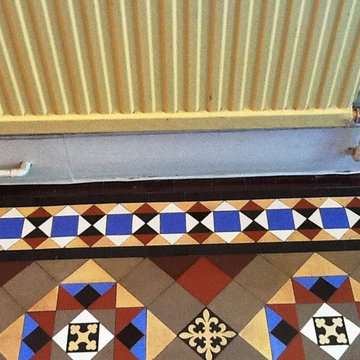
This customer from Bedford, the county town of one of England’s smallest counties Bedfordshire, called me out because they have bought a house and, upon lifting the glued down carpet, had discovered a beautiful Victorian tiled floor. They decided to call me in to see if this original feature could be restored to its former glory having already tried household products to remove the glue and clean the tiles with limited success.
We often find customers who discover old tiles under carpet or linoleum struggle with the standard cleaning products available in supermarket which are only designed for everyday cleaning. The products Tile Doctor sells are far stronger; naturally however to achieve the best results it also helps if you have the right equipment, knowledge and experience and that where we come in.
I popped round to take a look at the floor and having tackled quite a few of these restorations before was confident we could restore the floor so a quote was given and the work was booked in for the next week.
My first course of action was to vacuum the floor to remove any loose debris. This gave me a better picture of the condition of the floor overall, and so I could assess how best to proceed. I opted for our tried and trusted method of applying a diluted solution of Tile Doctor Pro-Clean, which is a very reliable high alkaline cleaner suitable for all types of natural stone and tile. The solution was applied with a pump-up sprayer and left to dwell for 20 minutes to seep into the pores of the tile.
Next, I worked the solution into the tiles using a black scrubbing pad fitted to a rotary machine and hand brushes. The resulting cleaning slurry was then rinsed off – and I found that this had removed most of the glue and surface dirt. There were a few stubborn deposits of glue remaining, but I was able to remove them by using hand brushes and scrapers in combination with Tile Doctor Remove and Go, which is as its name suggest can remove most things including old sealers, epoxy grout haze, urethane coatings, synthetic finishes, adhesives and event paint.
Even after this there were still some patches of glue, so I decided to spray the whole floor with Remove and Go and worked it into the stubborn areas with brushes. I left it to dwell for 15 minutes and then rinsed the floor with a wet pick-up extraction machine. This did the job and the floor was left fresh and clean, ready to be sealed once it had dried.
The floor was left to dry for several days, which is typically necessary for old tiled floors that don’t have a damp proof membrane installed. The customer wanted the floor to look traditional and therefore requested a matt finish. This was achieved by applying two coats of Tile Doctor Colour Grow, which is also breathable thereby allowing any damp to evaporate as gases through the sealer, without affecting the finish.
As I previously mentioned, floors of this age can sometimes have damp issues, so this sealer is ideal for these older floors. Colour Grow is an impregnating sealer, meaning it penetrates the pores of the stone to fill them and prevent trapped dirt. It also intensifies the colours in the tiles to really bring them to life.
The customer was shocked and amazed by the great results as she thought nothing could be done to restore such an old floor. Before leaving the property, I gave her some maintenance instructions to help her keep the floor looking its best in the future. Another satisfied customer!
David Vissian
Bedfordshire Tile Doctor
 Tile Doctor Ltd
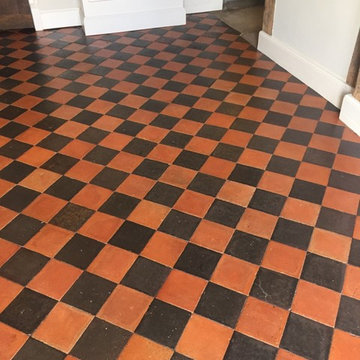
Sometimes it isn’t until you’ve deep cleaned your tiles that you realise just how dirty they were to begin with. This was the case with my customer in Thame, in the south of Oxfordshire where I worked on a classic red and black Quarry tiled floor which was far from being in its best condition.
My starting point in the cleaning process was to mix a strong solution of Tile Doctor Pro Clean, which is the reliable, multi-purpose alkaline cleaner that is safe to use on tile, stone and grout. The solution was left to soak into the tiles for ten minutes before being scrubbed into the floor with a rotary floor machine fitted with a stiff brush.
Following this, I rinsed the floor with clean water and then proceeded to wash it with Tile Doctor Grout Clean Up. This is a concentrated phosphoric acid cleaner designed to remove efflorescence and other mineral deposits such as grout smears.
Finally, I rinsed the tiles again with water and Tile Doctor Neutral Tile Cleaner, which is a pH neutral solution, to neutralise the chemicals and leave the floor fresh and clean, ready to be sealed. The floor was left to dry overnight.
The next day I returned to seal the floor after checking the tiles were dry. I opted to use two different sealers. The first was Tile Doctor Colour Grow, which is an impregnating sealer with the added effect of enhancing the natural colour in the stone. The second was Tile Doctor Seal & Go, a topical sealer that adds the high quality, durable sheen finish to the floor that the customer had requested.
I took the photograph below after sealing half the floor, it really shows the difference a sealer can make to a tiled floor.
Here’s the photo of theQuarry tiled floorafter sealing the whole floor. As you can see, they now have a new lease of life, and they’ll be much easier for the customer to keep looking great in the future.
Barry Woodward
Oxfordshire Tile Doctor


 CraftPro Contracting LLC
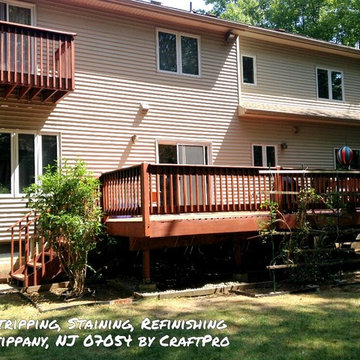
 In order to refinish and re-stain this deck in Parsippany, NJ we first had to remove the existing dark, almost black stain. We started with a thorough, high-pressure power-wash with bleach. We then used Sherwin Williams’ brand “SuperDeck: Stain & Sealer Remover” chemical stripping/cleaning solution. It was applied liberally, scrubbed, brushed and rinsed off. Since this deck was constructed with Western Red Cedar – a wood with a chemical tannin – we needed to restore the wood with SuperDeck’s “Revive”, which nuetralizes the wood’s natural tannin and restores it to a bright, clean, bare-wood deck. “Revive” is not a cure-all, however. There were still spots of old stain and tannin bleed after the stripping and cleaning, so we power-sanded the entire surface of both decks using coarse- to fine-grit sanding discs. It was finally stained with Sherwin Williams brand SuperDeck Semi-Transparent deck stain in "Classic Barn Red".
 Baron Construction and Remodeling
Baron Construction & Remodeling Co.
Complete Home Remodel
Sunnyvale, Ca
Agnieszka Jakubowicz PHOTOGRAPHY
408.234.8148
www.agajphoto.com
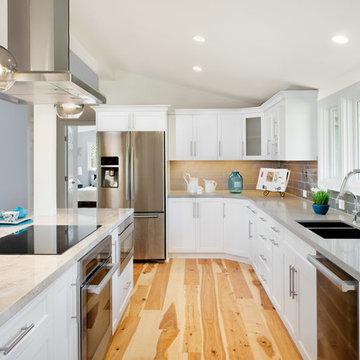
Kitchen - large transitional light wood floor kitchen idea in San Francisco with an undermount sink, shaker cabinets, white cabinets, quartzite countertops, gray backsplash, glass tile backsplash, stainless steel appliances and an island
Kitchen - large transitional light wood floor kitchen idea in San Francisco with an undermount sink, shaker cabinets, white cabinets, quartzite countertops, gray backsplash, glass tile backsplash, stainless steel appliances and an island
 Tile Doctor Ltd
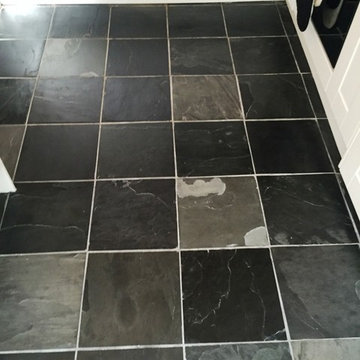
These Slate kitchen floor tiles at a property in Oxford were in good physical condition, but had become dull over time due to heavy usage, and upon close inspection the grout was stained. The customer contacted me as she was keen to get the tiles back to looking their best. This would require a thorough clean and the application of a fresh sealer.
While Slate floor tiles are reputed to be hard wearing and damage resistant – and are therefore a popular choice for high traffic areas like kitchens – this does not exclude them from needing regular maintenance.
To begin, I mixed a strong solution of Tile Doctor Pro Clean and water. Pro-Clean is a versatile cleaner that when used in a weak dilution can be used as a regular cleaner for most types of natural stone floor, including more sensitive stones such as Limestone and Marble.
The cleaning was then spread across the surface area of the floor, and left it to dwell for ten minutes to allow the solution to seep into the pores of the stone and lift the ingrained dirt to the surface. Pro-Clean in a strong dilution also functions as a stripping product, meaning it works to strip away any old and ineffectual sealer.
I then scrubbed the solution into the floor using a stiff scrubbing brush, paying particular attention to the grout in order to break down the visible staining. The tiles and grout lines came up really well during the cleaning process – this became clear once I had rinsed the floor and removed the residue using a wet vacuum.
With the customer eager to have the job completed quickly, I installed portable room dryers and utilised a heat gun to dry the floor, allowing me to seal it on the same day.
Once I had ensured the floor was completely dry, I commenced the sealing process by firstly applying a coat of Tile Doctor Stone Oil, a product which is designed to bring out all of the natural dark shades in the Slate.
When this was dry, I applied a single coat of Tile Doctor Colour Grow. This is an impregnating sealer, meaning that it soaks into pores of the stone to provide durable protection from within against ingrained dirt and stains. Colour Grow also enhances the natural colours in the stone even further.
The customer was amazed by just how big a difference could be made to the tiles in the space of just a day. Although the tiles were generally in very good nick, my main task was to be liven them up – judging by the before and after photos, I think this was achieved. And, now that they have been treated to a fresh seal, the tiles will be prevented from quickly becoming dull again.
Barry Woodward
Oxfordshire Tile Doctor
 Tile Doctor Ltd
This is a large 17.2 m2 Sandstone Floor installed throughout the living and kitchen areas of a property in the beautiful village of Disley close to Lyme Park which is run by the National Trust. The floor had been installed four years ago and my client was unhappy with the original sealer which hadn’t lasted very long. Without the protection of a sealer dirt had become ingrained in the pores of the stone which was now difficult to clean. Another issue was the rough nature of the Sandstone meant it was impossible to mop as it shreds the mop! As a result, the floor was mainly cleaned with a hoover which was not ideal, especially in a kitchen.
I went over to survey the floor and before quoting I ran a small test clean in the kitchen which took the floor back to its natural pale colour and really showed how dirty the floor had become. Test cleans are great as it helps me to formulate an effective cleaning plan and provide an accurate quote. My client was impressed with the result and so I was booked to come back and deep clean and then reseal the whole floor. Due to its size I estimated the floor would take two days to deep clean and a further day to apply a new sealer, so three days in total.
Working in large sections I started by cleaning the floor and stripping off the old sealer with a strong dilution of Tile Doctor Remove and Go which is a coatings remover that is safe to use on stone. The solution was left to soak into the pores of the Sandstone for ten minutes before being worked in with a 200-grit diamond pad fitted to a rotary floor machine. This action not only removed the old sealer and cleaned the floor but the 200-grit pad being vey coarse removed a lot of the roughness from the surface of the Sandstone so it shouldn’t shred any more mops.
After rinsing the floor with water and removing the slurry with a wet vacuum I set about cleaning the grout with Tile Doctor Pro-Clean worked into the grout line with a stiff brush and assisted with steam from a professional steam cleaner with a grout attachment. Once done the floor was rinsed and extracted again to remove the soil from the grouting. There was also an area near one of the doors where the grout had become loose and needed replacing so I made up a batch of matching grout and filled this in. The floor was then left overnight to dry with assistance from a couple of air movers.
I returned the next day to finish the floor by applying a sealer. First, I double checked the floor was dry with the damp meter. The readings confirmed the air movers had done a good job and that the floor was within the accepted parameters, so I was ready to seal. The sealer I chose was Tile Doctor Seal and Go which being water based doesn’t leave a smell as it dries, it really works well on Sandstone and adds a nice subtle sheen to the stone.
Once finished the floor looked much cleaner, lighter in colour overall more inviting, you could even see the fossils in some of the tiles.
The surface was also smoother so the customer should find cleaning with a mop much easier in future. On that subject its worth pointing out that owners of sealed floors should always use a neutral pH tile cleaner on their floors as most supermarket products are simply too strong and will prematurely strip the sealer off a tile if used repeatedly. Tile Doctor sell a product called Tile Doctor Neutral Cleaner which is ideal for cleaning sealed Sandstone floors like this one.
My client was really happy with the results and sent me a message later saying: “the floor looks amazing!”
Kamila Logonzy
East Cheshire Tile Doctor
 Visionary Home Remodeling Inc.
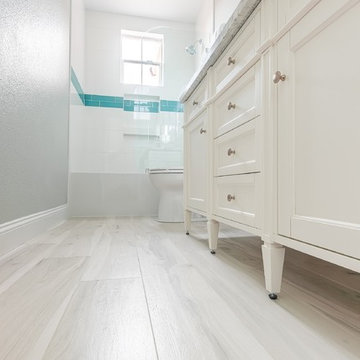
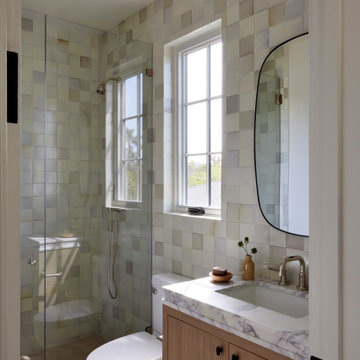
Inspiration for a mid-sized contemporary kids' multicolored tile and porcelain tile porcelain tile bathroom remodel in San Francisco with shaker cabinets, white cabinets, a two-piece toilet, an undermount sink and quartz countertops

 A. Bollman & Sons.
Custom 2 sided single bed with built in storage and trundle bed.
Recessed and surface mounted Kreon lighting fixtures throughout.
Photo by Lauren Coleman
Furniture by Holly Hunt





 Designs by Craig Veenker
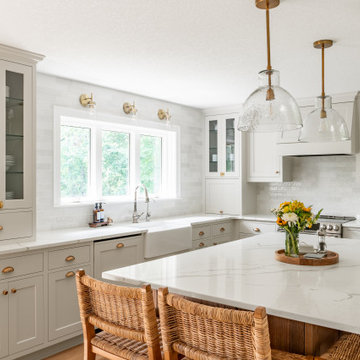
Example of a huge transitional l-shaped medium tone wood floor and brown floor kitchen design in Salt Lake City with a farmhouse sink, shaker cabinets, white cabinets, quartzite countertops, white backsplash, stone slab backsplash, paneled appliances and two islands

 Desmond Johnson, Ltd.
Motorized Lutron Solar Shades
Example of a mid-sized minimalist open concept light wood floor and beige floor living room design in San Francisco with white walls, no fireplace and no tv
Example of a mid-sized minimalist open concept light wood floor and beige floor living room design in San Francisco with white walls, no fireplace and no tv

Sponsored
Columbus, OH

Hope Restoration & General Contracting
Columbus Design-Build, Kitchen & Bath Remodeling, Historic Renovations


 ShelfGenie of Central & Coastal VA
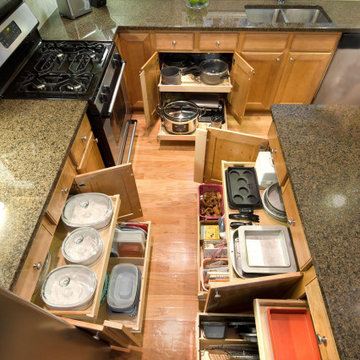
Kitchen overview with ShelfGenie solutions on display.
Enclosed kitchen - mid-sized traditional u-shaped dark wood floor and brown floor enclosed kitchen idea in Richmond with an undermount sink, granite countertops, stainless steel appliances and multicolored countertops
Enclosed kitchen - mid-sized traditional u-shaped dark wood floor and brown floor enclosed kitchen idea in Richmond with an undermount sink, granite countertops, stainless steel appliances and multicolored countertops
27