
Search results for "Cleaning solution" in Home Design Ideas

 Piedras International
Living room - contemporary open concept living room idea in Miami with no fireplace
 Tile Doctor Ltd
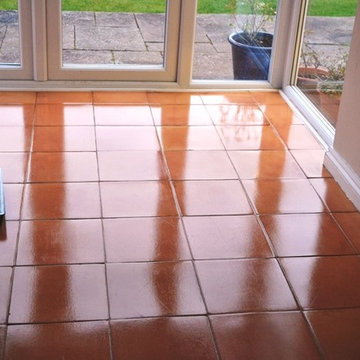
Having an effective sealer in place is essential for ensuring the long term condition of tiled floors in fact a lack of sealer can make cleaning the tiles exceptionally difficult as the sealer prevents dirt becoming ingrained in the tile.
This property owner, living in the former spa town of Matlock in Derbyshire, was experiencing problems with their Terracotta tiled kitchen floor since they had applied some kind of wax to act as a sealer, and this had worn off within a few weeks. After this happened the tiles were not sealed again, making cleaning a big problem. Terracotta is a highly porous stone and thus easily soaks in spillages and stains, and allows dirt to become very easily trapped.
In this situation, the property owner resolved to contact me about some professional maintenance. I suggested that the tiles would need a deep clean followed by the application of a fresh, high quality sealer. The work was agreed on and I made my way down to the property the following week.
When I arrived at the property and saw the tiles first hand it became clear that a professional clean had been in need for a long time: greasy looking stains were particularly prevalent and covered large areas of the kitchen floor.
To remove I mixed a strong solution of Tile Doctor Pro Clean, which is a multi-purpose, high-alkaline cleaner, stripper and degreaser, and, working in small areas, applied it to the floor. Working in small sections was important because the stone is very porous and quickly soaked in any product laid down. I scrubbed the cleaner into the stone using a rotary machine fitted with a black scrubbing pad, with the dirt and stains coming away nicely. Pro Clean is highly versatile and can be used for similar cleaning purposes on most types of natural stone floor.
After cleaning each section, I quickly removed the excess dirty water and chemicals with my wet vax machine. Once the whole floor had been cleaned I rinsed it several times with fresh water just to make sure all cleaning chemicals were gone. I then left the floor to dry completely for 36 hours.
When I returned to the property, I conducted several damp tests to check for any areas of the floor that needed further drying. As is almost always the case, there were a few areas that remained slightly damp, and I set about speeding the drying process along using my heat gun. In fact, it actually took me more than three hours to get the floor completely dry, but this was worth the effort as even the slightest excess moisture can damage the performance of the sealer.
Once the floor was finally dried I began sealing the floor with one coat of Tile a Doctor Colour Grow sealer. Colour Grow is an impregnating sealer that penetrates deep into the pores of the stone, thus acting as a shield against ingrained dirt, and also raises the colour of the tiles to provide an aesthetically appealing appearance. sealer. After sealing with Colour Grow, I left the floor to dry for couple of hours and then applied six coats of Tile Doctor Seal & Go, which is a topical sealer that builds up durable protection on the surface of the tiles.
The combination of through cleaning and the application of not one, but two high quality sealers really did wonders for the appearance of these Terracotta tiles. Looking at the final results you wouldn’t have believed they had been without a proper clean and seal for so long! Needless to say the customer was exceptionally pleased and will surely be able to keep her floor looking great for a long time to come.
Tony Olmet
Derbyshire Tile Doctor

Find the right local pro for your project

 Building Solutions and Design, Inc
Photo credit: Charles-Ryan Barber
Architect: Nadav Rokach
Interior Design: Eliana Rokach
Staging: Carolyn Greco at Meredith Baer
Contractor: Building Solutions and Design, Inc.

 Kevin O'Sullivan + Associates
Beach style light wood floor eat-in kitchen photo in New York with an island, white countertops, an undermount sink, flat-panel cabinets, white cabinets and stainless steel appliances


 J & M Remodel
Jesse Young
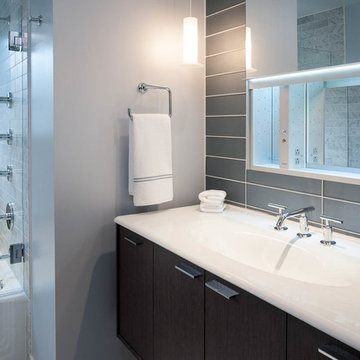
Bathroom - mid-sized modern gray tile and glass tile marble floor bathroom idea in Seattle with a drop-in sink, brown cabinets and gray walls
Bathroom - mid-sized modern gray tile and glass tile marble floor bathroom idea in Seattle with a drop-in sink, brown cabinets and gray walls

Sponsored
Columbus, OH

Hope Restoration & General Contracting
Columbus Design-Build, Kitchen & Bath Remodeling, Historic Renovations

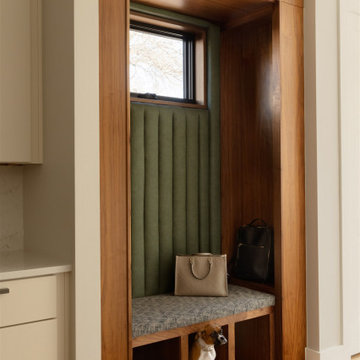
 Kimberly Timmons Interiors
This entryway bench is wrapped in walnut with built-in cubbies below an upholstered bench, serving as a place to stop and take off shoes and drop your bag. The vertical channel upholstered back in olive green leather makes a statement.
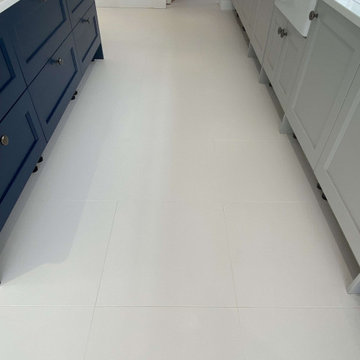 Tile Doctor Ltd
I was called out to clean a Porcelain tiled floor at a newly built property in Winwick near Huntingdon. The tiles were heavily marked with grout and dirt and were impossible to get clean. To make things worse the tiles were pale, almost white, in colour which made the staining more obvious. It was clear to me that the builder had not managed to polish off all the grout after tiling and this had now set hard on the surface.
This is a very common problem known as Grout Haze and fortunately there is a solution, in that it can be removed by giving the tiles a rinse with an acidic tile cleaner called Tile Doctor Grout Clean-up. To prove the point, I carried out a quick demonstration so the new owners could appreciate the difference.
I always like to test porcelain tiles for a reaction to acid prior to commencing work as acidic cleaners can have a negative effect on some types of polished porcelain however this one had a textured feel to it so there was no issue.
The test went well so having got the go head I began by first cleaning the tiles with a medium dilution of Tile Doctor Pro-Clean, this was left for about ten minutes before being worked into the tile with a black scrubbing pad fitted to a rotary machine. I also used a stiff brush along the grout lines to make sure the grout was as clean as the tile.
This process generates a lot of soiling which was then extracted using a truck mount machine. By Truck Mount I’m referring to a powerful cleaning machine that’s fitted into my van, it blasts the floor with hot water and then immediately extracts it using an equally powerful vacuum to grey tank in the vehicle, it’s incredibly effective and leaves very little water on the floor afterwards.
The next step was to tackle the grout haze and this is done as before by Acid Washing the floor using a dilution of Tile Doctor Grout Clean-up and scrubbing into the tile as before. Again, the resultant soils were extracted as before using the truck mount.
The floor was then speed dried using Dripods which are small horizontal fans designed to blow air downwards and ideal for drying carpets and hard floors. Once dry, a coat of Tile Doctor Ultra-Seal was applied, left to dry and any excess buffed away with a White pad.
The work was completed in one day and completely transformed the floor much to the delight of my customer who left the following message in a subsequent email:
“Thank you very much indeed, we are delighted with the floor.”
I’m pleased to say I have since returned to the neighbourhood and completed another identical grout removal job at a neighbour’s property who had the same issue with builder.
Tom Conlon
Cambridge Tile Doctor
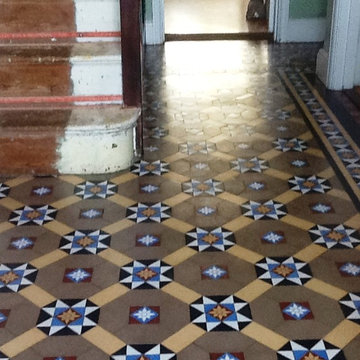 Tile Doctor Ltd
I was recently called down to a client’s house in the market town of Wellingborough, situated approximately 11 miles from Northampton. My client’s situation was an interesting one, as she had an old gas pipe sticking out of her Victorian tiled floor, very close to a doorway. Not only was this a bit of an eyesore, it was also significant trip hazard. The floor had been previously covered by carpet, so it is understandable that my client would have been initially unaware of the obstructive gas pipe.
Rather than risking an accident in the future, she asked me to see what I could do to rectify the issue. At the same time, I was commissioned to give the floor a much needed clean and re-seal.
My first priority was, of course, to deal with the exposed gas pipe. I was unsure whether the pipe was live or not, so I carefully removed the surrounding tiles, allowing a certified engineer access to it. He ensured that the pipe was capped below the tile line, allowing me to safely proceed with my repairs.
I returned a few days later, rescreened the area, and began to refit the tiles, carefully hand painting some of the black tiles to hide the damage and cracks. I also applied new grout to fix all of the replaced tiles into position, and this was left to set overnight.
Returning to the house the next day, I set about treating the floor to a normal strip, clean and re-seal of the entire floor. There was very little old sealer still remaining on the tiles, so I mixed a solution of Tile Doctor Pro Clean and water, before applying this to the floor. Pro Clean is a strong alkaline cleaner which also contains stripping properties, allowing it to both clean and break down any old sealer. The solution was worked into the tiles using a black scrubbing pad, and any excess residue was quickly absorbed using a wet-vac machine.
With older floors you never can tell if a damp proof membrane was installed and it can be troublesome applying a sealant to a damp floor so I left the whole floor to dry for seven days, giving it more than sufficient time to dry completely before the re-seal. To seal the tiles I used five coats of Tile Doctor Seal & Go Extra, which provides both a robust surface seal and the pleasing sheen finish requested by my client; Seal and Go Extra is especially suitable for exterior applications or damp floors due to its increased breathability.
My client was very glad to see the back of the gas pipe and pleased with the overall results of the clean and seal, as it had given this Victorian tiled floor – once hidden under carpet – new life and character. Additionally I’m sure that restoring such an original feature for the property has increased its value.
Phil Vissian
Northamptonshire Tile Doctor
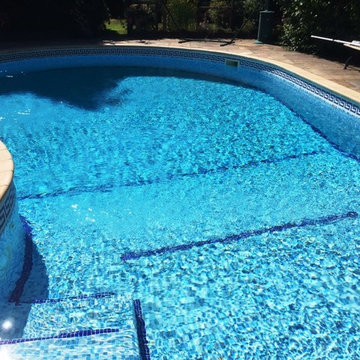 Tile Doctor Ltd
Here’s a quick account of a Mosaic tiled pool cleaning I completed in the grounds of a grand house situated in the New Forest which is a national park on the west side of Hampshire. Mosaic tiles have been in use for thousands of years and are a popular choice for swimming pools, the tiles used in this pool were glazed ceramic which are very hard wearing and don’t generally need that much maintenance.
My client had just drained the pool in order to repair some cracked tiles, and so took the opportunity to have the entire tiled surface professionally cleaned and we were called in to get the job done.
To get these tiles cleaned I mixed a strong solution of Tile Doctor Pro Clean, which is a high alkaline, versatile cleaner, suitable for use tile, stone and grout and ideal for this job. The cleaner is sprayed onto the surface and then allowed to soak in to the dirt and grime breaking it down and making it easier to remove.
The solution was applied, and working in sections, the tile and grout were scrubbed with the aid of a hand-held rotary machine fitted with a small scrubbing pad. Once the tiles had been scrubbed they were then washed down with water under high pressure.
As you can imagine given the size of the pool, the cleaning process certainly took some to complete. However, it was definitely worth it, as we were able to achieve some amazing results although I’m not sure you will appreciate that with these photographs. Ceramic tiles won’t take a sealer so there was no need for any further work.
My client was also pleased with the results, and will no doubt be happy to have a clean pool ready for when the warm weather finally comes back around – whenever that will be!
Charles Okwechime
Hampshire Tile Doctor
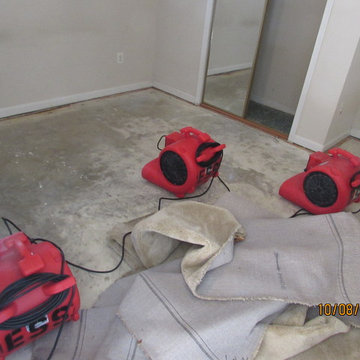
 Environmental Solutions Services(ESS)
These dryers are facing the most saturated area of the room.
Home design - traditional home design idea in DC Metro
Home design - traditional home design idea in DC Metro


 Tile Doctor Ltd
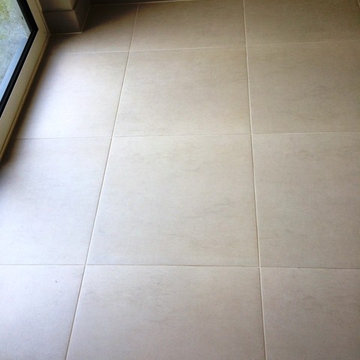
Recently, I was called to a work on a Limestone tiled floor in a house near Hove Park. Hove Park is a popular park in Hove, East Sussex, which was once opposite to the Goldstone Ground, the traditional home of Brighton and Hove Albion football club until the ground was demolished. My client informed me that the house was used a meeting place every Friday, and the high traffic of people was taking its toll on the floor.
The floor was clearly in need of a good clean, especially the grout. You do need to take care when cleaning Limestone as it can be affected by the acidic substances you get in some cleaning products which can break down the surface of the Limestone and cause further damage. The results of my test clean showed the Limestone tiles responded well to the cleaning, but I was concerned about the grout, which was not cleaning very easily. I suspected that the grout had, in fact, been discoloured by a bleach-based cleaner, turning it grey. Bleach contains strong chemicals, so there is a good chance that any bleach-based cleaners used on tiled floors will discolour the grout over time. After discussing this issue with my client, I quoted separately for a possible grout recolour.
On the first day of working on the floor, I started the cleaning process using a black buffing pad attached to a floor buffer machine, in combination with a solution of Tile Doctor Pro-Clean, which I applied to the floor. This combination really helped to remove the heavily built up grime and dirt. Although the tiles looked great after the clean, I still wasn’t convinced by the state of the grout. After drying a test area with a heat gun, I confirmed that the grout was not continuous in colour and would need a recolour to get it back to looking its best again.
I left the rest of the floor to dry for a period of two days, allowing any residual moisture to evaporate, before returning to recolour the grout with a white Grout Colourant which was applied using a good old fashioned toothbrush and baby wipes to remove any excess. I was careful to apply thin, even coats in order to prevent the possibility of the Colourant staining the tile.
After several hours of knee-breaking work, the recolouring was complete, and I was extremely pleased to be able to show my client the finished product. She was very happy to be able to show off the floor to her friends, which was now white all the way through, without the dark lines caused by the discoloured grout.
Another satisfied client.

 Dresner Design | Chicago Custom Kitchens Cabinets
A Lake Michigan Home gets a Modern Refresh from Dresner Design.
Photos by Tony Soluri.
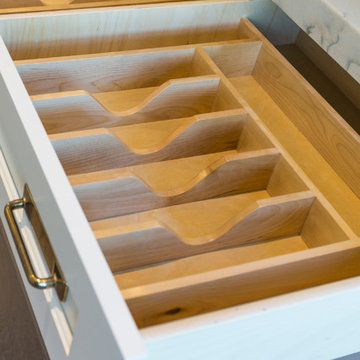
This couple moved from Chicago’s Wicker Park to a rural setting but wanted to maintain their modern aesthetic. Scott Dresner of Dresner Design created a light bright clean-lined kitchen perfect for the couple’s need to entertain. Must have’s included a drawer for over sixty spices, storage for three sets of dishes, a coffee bar, and a huge island the couple uses for entertaining. The palette is mostly white to maximize outdoor views. Constraints were plenty both timeline and budgetary. Dresner came up with some creative solutions, which allowed the homeowners to save on cabinetry and materials and splurge on appliances.

 Innovate Building Solutions
This shower can fit into a 60" alcove space. Very sleek and yet it offers nice storage underneath the base - this is cool engineering!
Alcove shower - mid-sized transitional master alcove shower idea in Cleveland
Alcove shower - mid-sized transitional master alcove shower idea in Cleveland

 California Closets of Michigan
After remodeling and living in a 1920s Colonial for years, creative consultant and editor Michelle Adams set out on a new project: the complete renovation of a new mid-century modern home. Though big on character and open space, the house needed work—especially in terms of functional storage in the master bedroom. Wanting a solution that neatly organized and hid everything from sight while staying true to the home’s aesthetic, Michelle called California Closets Michigan to create a custom design that achieved the style and functionality she desired.
Michelle started the process by sharing an inspiration photo with design consultant Janice Fisher, which highlighted her vision for long, clean lines and feature lighting. Janice translated this desire into a wall-to-wall, floor-to-ceiling custom unit that stored Michelle’s wardrobe to a T. Multiple hanging sections of varying heights corral dresses, skirts, shirts, and pants, while pull-out shoe shelves keep her collection protected and accessible. In the center, drawers provide concealed storage, and shelves above offer a chic display space. Custom lighting throughout spotlights her entire wardrobe.
A streamlined storage solution that blends seamlessly with her home’s mid-century style. Plus, push-to-open doors remove the need for handles, resulting into a clean-lined solution from inside to out.

 California Closets of Michigan
After remodeling and living in a 1920s Colonial for years, creative consultant and editor Michelle Adams set out on a new project: the complete renovation of a new mid-century modern home. Though big on character and open space, the house needed work—especially in terms of functional storage in the master bedroom. Wanting a solution that neatly organized and hid everything from sight while staying true to the home’s aesthetic, Michelle called California Closets Michigan to create a custom design that achieved the style and functionality she desired.
Michelle started the process by sharing an inspiration photo with design consultant Janice Fisher, which highlighted her vision for long, clean lines and feature lighting. Janice translated this desire into a wall-to-wall, floor-to-ceiling custom unit that stored Michelle’s wardrobe to a T. Multiple hanging sections of varying heights corral dresses, skirts, shirts, and pants, while pull-out shoe shelves keep her collection protected and accessible. In the center, drawers provide concealed storage, and shelves above offer a chic display space. Custom lighting throughout spotlights her entire wardrobe.
A streamlined storage solution that blends seamlessly with her home’s mid-century style. Plus, push-to-open doors remove the need for handles, resulting into a clean-lined solution from inside to out.
 California Closets of Michigan
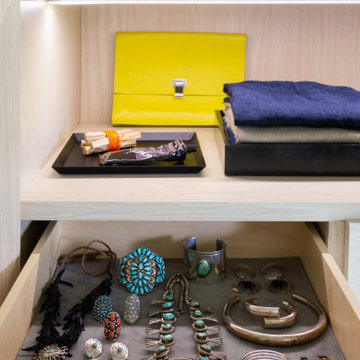
After remodeling and living in a 1920s Colonial for years, creative consultant and editor Michelle Adams set out on a new project: the complete renovation of a new mid-century modern home. Though big on character and open space, the house needed work—especially in terms of functional storage in the master bedroom. Wanting a solution that neatly organized and hid everything from sight while staying true to the home’s aesthetic, Michelle called California Closets Michigan to create a custom design that achieved the style and functionality she desired.
Michelle started the process by sharing an inspiration photo with design consultant Janice Fisher, which highlighted her vision for long, clean lines and feature lighting. Janice translated this desire into a wall-to-wall, floor-to-ceiling custom unit that stored Michelle’s wardrobe to a T. Multiple hanging sections of varying heights corral dresses, skirts, shirts, and pants, while pull-out shoe shelves keep her collection protected and accessible. In the center, drawers provide concealed storage, and shelves above offer a chic display space. Custom lighting throughout spotlights her entire wardrobe.
A streamlined storage solution that blends seamlessly with her home’s mid-century style. Plus, push-to-open doors remove the need for handles, resulting into a clean-lined solution from inside to out.
 California Closets of Michigan
After remodeling and living in a 1920s Colonial for years, creative consultant and editor Michelle Adams set out on a new project: the complete renovation of a new mid-century modern home. Though big on character and open space, the house needed work—especially in terms of functional storage in the master bedroom. Wanting a solution that neatly organized and hid everything from sight while staying true to the home’s aesthetic, Michelle called California Closets Michigan to create a custom design that achieved the style and functionality she desired.
Michelle started the process by sharing an inspiration photo with design consultant Janice Fisher, which highlighted her vision for long, clean lines and feature lighting. Janice translated this desire into a wall-to-wall, floor-to-ceiling custom unit that stored Michelle’s wardrobe to a T. Multiple hanging sections of varying heights corral dresses, skirts, shirts, and pants, while pull-out shoe shelves keep her collection protected and accessible. In the center, drawers provide concealed storage, and shelves above offer a chic display space. Custom lighting throughout spotlights her entire wardrobe.
A streamlined storage solution that blends seamlessly with her home’s mid-century style. Plus, push-to-open doors remove the need for handles, resulting into a clean-lined solution from inside to out.
30