
Search results for "Cleanup" in Home Design Ideas
 Sosna Inc
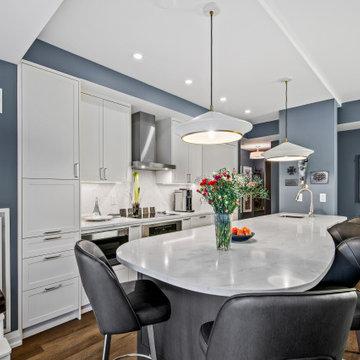
This project centered on helping a wonderful client and her equally fantastic dog transform her condo into a space that truly reflected her style and simplified her life. Eager to create a home that was both beautiful and functional, she envisioned a haven in the heart of the city.
Before: Feeling Disconnected
Before the renovation, our client felt disconnected from her condo. The builder-grade kitchen was a constant source of frustration, with an awkward peninsula that hindered the flow of the space. The condo overall felt outdated and no longer captured her vibrant personality. The foyer and laundry areas were cramped and lacked organization, while the mismatched hardwood flooring only added to the disjointed atmosphere. As for the bathrooms, they felt frozen in time, desperately needing an update.
Worries and Concerns
Like many homeowners, our client had heard her fair share of renovation horror stories—tales of projects gone awry and the frustrations of managing multiple contractors. She was understandably cautious and needed a trustworthy, experienced team she could rely on to handle the project with care and expertise.
The Solution: A Personalized Transformation
We took the time to listen carefully to our client’s needs and concerns and developed a tailored plan to address each of her pain points. For the kitchen, we preserved the existing layout but reimagined the space entirely. The awkward peninsula was redesigned to improve traffic flow and provide much-needed storage and counter space. Clever storage solutions, such as pull-outs, shelving, concealed drawers in the toe kicks, and an appliance garage, were incorporated. The kitchen now boasts a warm and inviting atmosphere, with light wood-tone lower cabinetry, off-white upper cabinets, and brushed nickel hardware that ties it all together.
The laundry room, once cramped and chaotic, was transformed into an organized, efficient space. We added custom cabinetry with pull-outs for hanging clothes, open storage above, a laundry sink, and a spacious counter for folding—no more piles of laundry!
Both the en-suite and shared bathrooms underwent complete renovations. Custom cabinetry was installed, including a floor-to-ceiling linen closet, and light grey and brown-toned tiles were selected, with contrasting hexagonal tiles for the shower floor. A heated flooring system was added for luxury and comfort year-round.
The mismatched flooring throughout the condo was replaced with cohesive vinyl and porcelain tiles, creating a seamless, modern aesthetic throughout the space.
Overcoming Challenges
As with any renovation, there were challenges to navigate. One of the key obstacles was managing the condo board’s renovation rules and policies while coordinating the delivery schedules for finishes and fixtures, especially during the busy holiday season. With careful planning, we ensured the project stayed on track. Additionally, we encountered a height variation between the tile and vinyl flooring. To resolve this, we used self-leveling material under the vinyl, ensuring a smooth and seamless transition between the two flooring types.
The Grand Reveal: A Dream Come True
The final result is simply stunning. The kitchen is now a chef’s dream, with custom-built cabinets, smooth quartz countertops, and a matching stone backsplash. Brushed nickel and stainless steel plumbing fixtures, elegant cabinet hardware, and LED lighting under the upper cabinets add the perfect finishing touches. Custom organizers in the foyer and laundry closets provide ample storage and keep everything neatly in place. The bathrooms have been transformed into spa-like retreats, with beautiful porcelain tiles and custom cabinetry. The new vinyl flooring throughout the main living areas and bedroom unifies the space, creating a cohesive and modern atmosphere.
Life Transformed
Our client’s life has been completely transformed. As a passionate cook, she now relishes spending time in her beautiful and functional kitchen. The single-bowl sink makes cleanup a breeze, and the thoughtfully designed storage solutions have brought a sense of calm and order to her home. The refreshed flooring and neutral paint palette have created a relaxing, comfortable environment she truly loves.
A Memorable Journey
This project was more than just a renovation—it was a collaboration. Our client valued our guidance throughout the design process, particularly when faced with the overwhelming number of decisions. We built a strong relationship with her, and we are immensely grateful for the trust she placed in our team.
 Tile Doctor Ltd
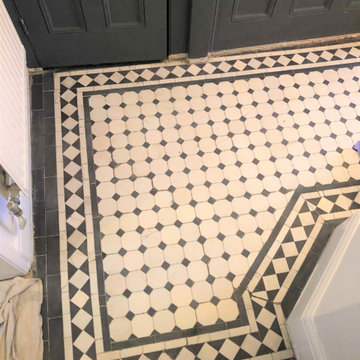
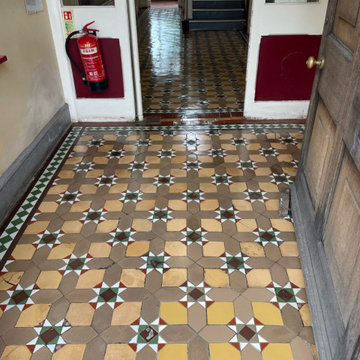
The owners of this Edwardian property in Finchley had purchased it a couple of years prior and since then had slowly been renovating it to restore its original character. The project was almost complete and now attention had turned to the tiled floor. The tiles were in quite a state and I was asked to work our Tile Doctor magic and bring it back to its original condition.
When they moved in the hallway had been covered with carpet which gave the tiles underneath some protection. Unfortunately, however the carpet has been secured with carpet grippers that had been glued to the tiles around the edges. There were also paint splashes on the surface that would need dealing with. On top of that the floor had a few missing tiles that had been back filled by cement to provide a level base for the carpet, the client wanted like them replaced if possible.
After surveying the floor, I explained what could be done and ever completed a small test clean to demonstrate how the tiles would look once deep cleaned. I was confident on being able to source very similar reclaimed tiles so replacing the missing should not be a problem. The client was very happy with the initial test result and my quotation so booked me in to restore the floor.
On my return I started by applying Tile Doctor Remove and Go to soften up the glue which allowed it to be carefully peeled off the tiles with scrappers. Once all the carpet adhesive was gone, I worked a strong dilution of Tile Doctor Remove and Go into the tiles using a black pad to work the cleaning solution deeper into the tiles. A wet vacuum was used to remove the slurry created, and I followed this by giving the tiles an extra clean using a 200-grit diamond burnishing pad lubricated with water.
The last step in the cleaning process was to give the floor an acid rinse using Tile Doctor Grout Clean-up, I did this for several reasons, first it removes old grout smears from the surface of the tile and second it neutralised any efflorescent salts lying dormant in the floor. This can be quite a problem for old floors which don’t have the benefit of a protective damp proof membrane under the floor. The floor was given a final rinse with water which was again extracted with a wet vacuum.
I then set about lifting all the loose tiles (approximately ten) and carefully removing the concrete infills. I had previously managed to source replacements for these holes from original features. Unfortunately, they didn’t sell the correct sized octagon tiles, so I had bought 150mm square tiles and then needed to cut them on site to get the right size.
After cutting and fixing the tiles I fixed them in place and regrouted the rest of the floor.
I then left the floor to dry out overnight and returned in the morning. Before applying a sealer, I took several moisture readings with the damp meter to make sure the tiles were dry enough to take the sealer.
I was able to confirm the floor was dry, so went ahead and applied three coats of Tile Doctor Colour Grow sealant. Colour Grow is an impregnating sealer that is fully breathable sealer which is important when it comes to old floors like these that don’t have a damp proof membrane installed.
My client was very happy with the renovated floor and for aftercare I left them with a bottle of Tile Doctor Neutral Tile Cleaner and gave advice on how best to clean the floor going forward.
Andrew Newstead
North London Tile Doctor
 Lezley Barclay
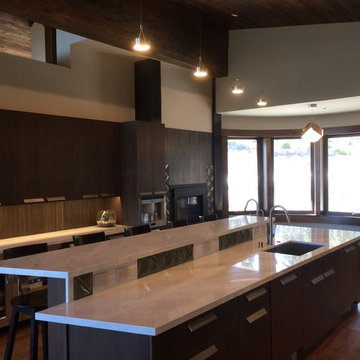
Cooking area of kitchen in the foreground, clean-up area at far end makes for a kitchen that supports more than one cook (no tripping over your sous chef) and acts as a transition area to the serving area and buffet on left with dishes in cupboards above
Round nook beyond features two-sided fireplace and built it espresso maker with easy access to the nook or the dining room.
Lezley Jerome Barclay
Find the right local pro for your project
 Talon Construction Inc.
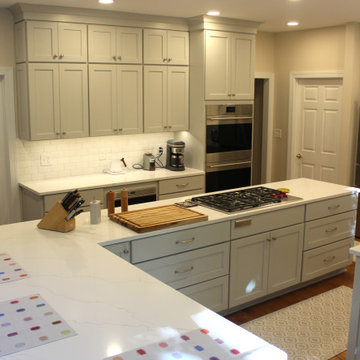
Renovating an open kitchen can be an exciting project that can improve the functionality, aesthetics, and value of your home. Here are some steps to guide you through the process:
Planning and Design:
Define your goals and budget for the renovation.
Determine the layout of your open kitchen. Consider factors like the work triangle (the relationship between the stove, sink, and refrigerator) and the flow of traffic.
Choose a design style and color scheme that suits your preferences and complements the rest of your home.
Research and Inspiration:
Collect inspiration from magazines, websites, and social media platforms to get ideas for your open kitchen design.
Create a mood board or vision board to help you visualize the final look.
Hiring Professionals:
Depending on the scale of your renovation, you may need to hire professionals, such as architects, interior designers, contractors, and electricians. Make sure to check references and get multiple quotes.
Demolition and Structural Work:
If your renovation involves structural changes, like removing walls, this is the time to do it. Ensure that the necessary permits are obtained.
Plumbing and Electrical Work:
Update or reconfigure plumbing and electrical systems as needed. This may include adding or moving outlets, switches, and lighting fixtures.
Cabinetry and Countertops:
Choose and install new kitchen cabinets and countertops. This is a significant part of your renovation and will greatly influence the kitchen's appearance and functionality.
Appliances:
Update or install new kitchen appliances, including the refrigerator, stove, oven, microwave, and dishwasher.
Flooring:
Select and install flooring that is suitable for a kitchen, such as hardwood, tile, laminate, or vinyl. Ensure it complements the overall design.
Backsplash and Wall Finishes:
Install a backsplash that matches your design and protects your walls. Consider materials like tile, glass, or stainless steel.
Lighting:
Choose and install various types of lighting, including ambient, task, and accent lighting. Pendant lights above an island or breakfast bar can add style and functionality.
Paint and Finishing Touches:
Paint the walls and ceiling in the colors you've selected. Add finishing touches like hardware, window treatments, and decorative elements.
Furniture and Accessories:
Bring in furniture, such as a dining table and chairs, barstools, and any other pieces you need to complete the space. Decorate with accessories like artwork, plants, and decorative items.
Final Inspection and Cleanup:
Ensure that all work meets safety and building code requirements. Clean the entire area thoroughly.
Enjoy Your New Kitchen:
Once the renovation is complete and everything is in its place, enjoy your beautiful, functional open kitchen.
Remember that open kitchen renovations can be complex and may require careful planning. It's essential to stay within your budget, communicate with your contractors and designers, and be flexible as unexpected issues may arise during the process. Ultimately, a well-executed open kitchen renovation can enhance the heart of your home and improve your overall living space.
 Wiedemann Architects LLC
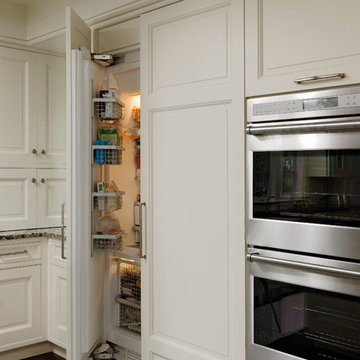
Custom cabinetry and matching include matching panels to conceal refrigerator
This home on the Eastern Shore of Maryland began as a modest 1927 home with a central hall plan. Renovations included reversing the kitchen and dining room layout , adding a large central island and hood to anchor the center of the kitchen. The island has a walnut counter encircling the working island and accommodates additional seating. The main sink looks out to the north with beautiful water views. The southwest bay window affords a seating area with built-in bookshelves adjoining the breakfast room while the one in the kitchen provides for the secondary sink and clean-up area. By capturing the additional depth in the bay window, a large TV is concealed below the countertop and can emerge with a press of a button or retract out of sight to enjoy views of the water.
A separate butler's pantry and wine bar were designed adjoining the breakfast room. The original fireplace was retained and became the center of the large Breakfast Room. Wood paneling lines the Breakfast Room which helps to integrate the new kitchen and the adjoining spaces into a coherent whole, all accessible from the informal entry.
This was a highly collaborative project with Jennifer Gilmer Kitchen and Bath LTD of Chevy Chase, MD.
Bob Narod, Photographer, LLC
 LEEHAR HOME LTD
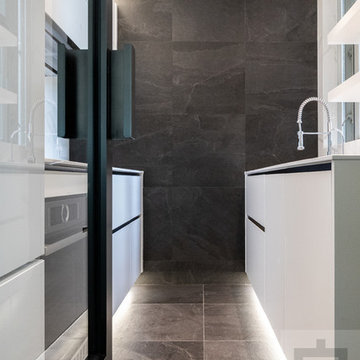
Streamlining Kitchens is our passion from Day 1....
We like to cook, without interference of cabinet doors being in the way (Blum - Lifts), locating cooking items easily (Full extension Blum-Drawers), and then quickly re-locating everything back for an efficient cleanup after mission accomplished.....
Kitchens made in-house by LH
Personalised for you.....
 Envision Web
Stuart Wade, Envision Virtual Tours
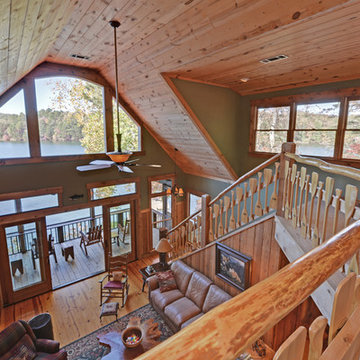
Envision Virtual Tours and High Resolution Photography is your best choice to find just what you are looking for in the Lake Burton Area . Knowing the areas and resources of Lake Burton is our specialty
Lake Burton is a 2,775 acre man-made lake with 62 miles of shoreline located in the northeastern corner of Georgia in Rabun County. It is the first lake in a five-lake series called the Tallulah River Watershed that follows the original course of the Tallulah River. The series of lakes starts with Lake Burton as the northernmost lake followed by Lake Seed, Lake Rabun, Lake Tallulah Falls and the eastern arm of Lake Tugalo (the western arm is formed by the Chattooga River. The lakes are owned and operated by the Georgia Power Company to generate hydroelectric energy for Georgia's largest city, Atlanta. At one time these lakes were the largest producers of electricity in the state of Georgia. Now, they only provide peak power supply.
The lake was built in a deep valley located along a 10 mile section of the Tallulah River. The Lake Burton Dam was closed on December 22, 1919 and the lake started to fill. The dam is a gravity concrete dam, with a height of 128 feet and a span of 1,100 feet. The spillway is equipped with eight gates 22 feet wide by 6.6 feet high. The total capacity at an elevation of 1,866.6 feet is 108,000 acre-ft, of which 106,000 acre-ft is usable storage. The generating capacity of the dam is 6,120 kilowatts (two units).Lake Burton is the highest Georgia Power lake in Georgia.
Lake Burton gets its named from the town of Burton, which was the second largest town in Rabun County with a population of approximately 200 but now lies below the lake's surface. The town (and the lake) was named after local prominent citizen Jeremiah Burton and was situated along the road from Clayton, Georgia to the Nacoochee Valley. Andrew Jackson Ritchie served as the postmaster for the area for several years. Gold was first discovered in Rabun County where Dicks Creek and the Tallulah River come together and was the reason for the town's founding in the early 1800s.
The Lake Burton Fish Hatchery and Moccasin Creek State Park are located on the western side of the lake. Lake Burton is home to several species of fish, including Spotted Bass, Largemouth Bass, White Bass, Black Crappie, Bluegill, Redear Sunfish, White Catfish, Walleye, Brown Trout, Rainbow Trout, and Yellow Perch.
The residents of Lake Burton are a mix of permanent residents and seasonal vacationers who together make-up the Lake Burton Civic Association, a local organization who goal is to maintain the lake through volunteer clean-ups and other such events. Let a Lake Burton resident and expert show you the way
The Lake Burton Civic Association is an active homeowners association for residents of the Lake Burton area and sponsors many events throughout the year such as:
burton, custom, envision, georgia, lake, mountain, nc, north, photography, web, western, Lake Burton, Lake Rabun, Seed Lake,Virtual Tours.
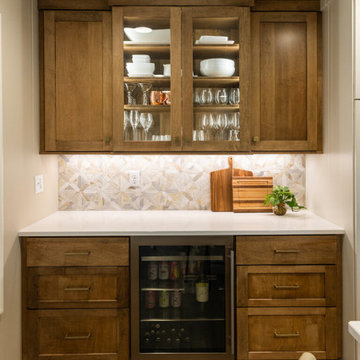

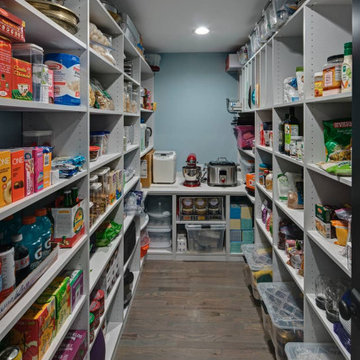
 Drury Design
Entertaining and bringing people together is what this family is all about. Birthdays involve amazing cakes like you see on those TV shows, and groups of 30 people or more. Their ideal kitchen needed to accommodate that level of baking and hosting, but also support the daily rhythms of life.
Our collaborative design was guided by Vastu Shastra, an ancient architectural tradition that predates feng shui. Based on Vedic traditions that harmonize human behavior with natural forces in the world, Vastu Shanstra basically suggests how to inhabit a place in the best way possible.
The objectives were:
-Relocate the entire kitchen so the home’s heat source (oven) is in the southeast
-Incorporate symmetry into the overall design
-Create a large space for entertaining – open and airy with lots of light
-Simultaneously separate but join cooking and gathering spaces, allowing the cook to have a cook-specific zone that is still a part of any gathering
-Individual storage for small appliances – making them easier to use
-Simplicity – the space should be easy to use and maintain
Design challenges we solved for:
-Incorporate three load bearing points of the house
-Provide structural support that was not obvious
-Reconfigure kitchen utilities to another part of the home
-Maximize storage space
Design solutions and mindful innovations became an exciting motivation that drove the project:
-Double-horseshoe design features two symmetrical islands that seat 18 people comfortably
-Downdraft ventilation behind rangetop allows unobstructed views
-Overhead beams for structural support
-Equip nearby dining room with locking bar and wine cabinet
-Roll-out appliance shelves on back of cooking island are powered for easy use
-Symmetrical fridge and freezer columns separated by oven
-Cabinets along back of the cooking area for everyday items
-Tall pantry cabinet has four drawers for paperwork
-Spacious walk-in storage pantry has a counter with power outlets
-Coffee station has a trash can directly below for easy clean up
-Two sinks and dishwashers for easy cleanup
“A lot of relationships are built over food,” the homeowner told us. “This [kitchen] keeps our family close because we all love food. My kids sit in the kitchen all evening long every day – and I’m right there cooking. That’s life –to be together.”
We also collaborated with the homeowners to remodel their primary bathroom, primary bedroom closet and an additional bathroom.
 Silliman CitySide Homes
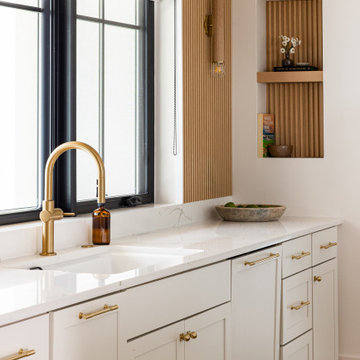
Expansive kitchen with large island for working and gathering. Commerical range, built in refrigerator and under counter beverage center. There is also a separate scullery for prepping meals and cleanup. It has a drawer dishwasher, beverage center, glass cleaner, and water purification system.
The windowsills are mitered to the backsplash in both rooms and there is a full height backsplash on the wall with the range providing an elegant look that is easy to clean.
 Atlanta Porch & Patio
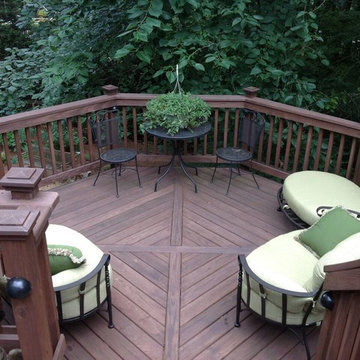
At Atlanta Porch & Patio we are dedicated to building beautiful custom porches, decks, and outdoor living spaces throughout the metro Atlanta area. Our mission is to turn our clients’ ideas, dreams, and visions into personalized, tangible outcomes. Clients of Atlanta Porch & Patio rest easy knowing each step of their project is performed to the highest standards of honesty, integrity, and dependability. Our team of builders and craftsmen are licensed, insured, and always up to date on trends, products, designs, and building codes. We are constantly educating ourselves in order to provide our clients the best services at the best prices.
We deliver the ultimate professional experience with every step of our projects. After setting up a consultation through our website or by calling the office, we will meet with you in your home to discuss all of your ideas and concerns. After our initial meeting and site consultation, we will compile a detailed design plan and quote complete with renderings and a full listing of the materials to be used. Upon your approval, we will then draw up the necessary paperwork and decide on a project start date. From demo to cleanup, we strive to deliver your ultimate relaxation destination on time and on budget.
 Moss & Jane
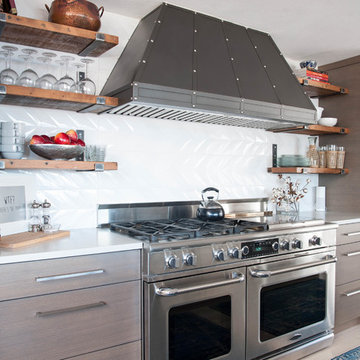
Midcentury modern home on Lake Sammamish. We used mixed materials and styles to add interest to this bright space. A Caesarstone quartz insert protects the reclaimed wood counter top and provides a work space for the chef. The crushed granite sink allows for easy clean-up and a scratch proof surface.
 mackmiller design+build
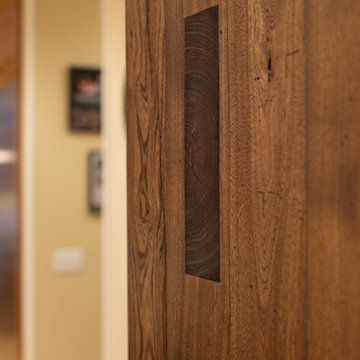
Our client loves to cook for her family and she requested a traditional kitchen that would blend with the rest of her home. She selected full overlay raised panel maple cabinets with a medium stain, bronze knobs and pulls and an oak floor. There are seedy glass inserts in the row above her upper cabinets. She chose all Thermador appliances including two 36" built-in refrigerator and freezer columns, gas cooktop and oven, a single oven and a microwave both housed in base cabinets. She selected Cambria quartz countertops and requested a recessed dog feeding station. We located it at the base of a tall kitchen cabinet and installed a quartz base for easy clean-up. A rustic sliding barn door with black iron hardware leads to her laundry room and adds character. Decorative lights with a bronze finish include a 3 three pendant fixture, a 5 light chandelier and 2 wall pendants. Recessed ceiling lights with dimmer switches provide plenty of general lighting. We clear coated her oak floors.

 Picture Perfect Kitchen Designs
Photo Credit: Brandi Image Photography
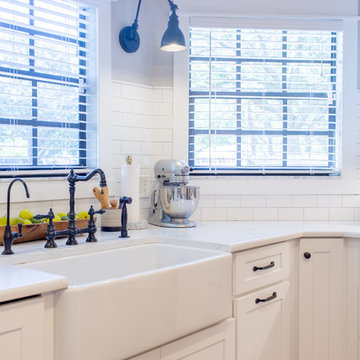
Our Modern Farmhouse Style reflects in our own personal kitchen and working showroom. The warmth of the Walnut Butcher Block sets the scene for gathering and also for long baking sessions. The Silestone Quartz countertop around the perimeter makes it for easy clean up - especially around the range area. That heavy cooking zone features a custom PPKD built wood hood with all the detailing in the crown molding. The glass hutch serves as a perfect every day dish cabinet, while glass on the range wall also helps to lighten up the heavy load. The Farmhouse sink provides a beautiful clean-up station with the bridge faucet to add beauty and tradition. The purifier is strategically set up near the coffee station for early morning risers. The refrigerator is built into an old walkway that was under-used and it provides the perfect spot to house a hard working appliance. The dishwasher is paneled and tucked away beside the sink while the double pull-out trash is also camoflauged adjacent to the sink.
We welcome you to make your Design Consult Appointment today so you can come and see the beauty, quality, and special touches we will put in your home, as we did with ours.
 Windward Pointe
Open House This Sunday 4/11/21 in Fishersville!
Your brand new, three-bedroom, 2.5-bathroom home awaits you in Windward Pointe! If you have been waiting for the perfect home for your family, this one is it! Your new kitchen features a large island with a built-in breakfast bar, stainless steel appliances, granite countertops, and hardwood floors. Warm yourself on cold days by the fireplace in the living room. There are many windows in this home, too, allowing the natural light to accent the home's beautiful construction.
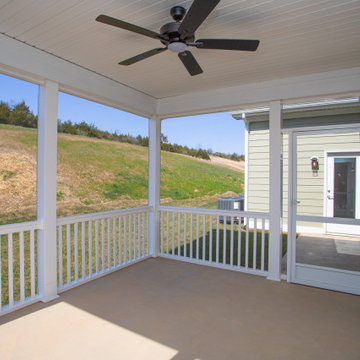
Enjoy the warmer weather on your screened-in back porch. The laundry room has plenty of cabinet space and a sink for easy clean-up. There is a bonus room just off the master suite, which would be perfect for a home office or nursery. Speaking of your new master suite, it features a walk-in closet and a master bath with a jetted tub, a stall shower, and his and her sinks!
Follow the gorgeous staircase to the second floor, where you'll find a loft/rec room area, two more bedrooms, a second full bath, and an unfinished bonus room! Plus, there's plenty of space for your vehicles in your new two-car garage!
This home is a must-see in person! Lucky for you, Ashley is hosting an open house this Sunday, April 11, 2021, at this stunning home! Visit her at 197 Windsor Drive, Fishersville, VA 22939, from 1 to 4 PM. This home is available with a builder's warranty for one year and qualifies for our easy owner financing program. Ashley has all the details! If you prefer to schedule a private tour or have any questions before the open house, contact her at 540-280-3385. We are an equal housing opportunity and warmly welcome realtors!
 H2D Architecture + Design
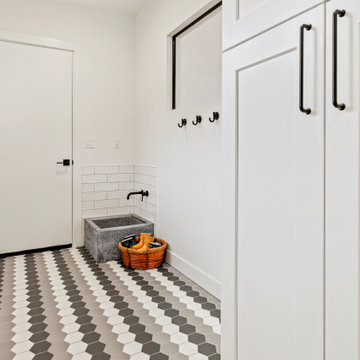
The mudroom seamlessly connects the garage to the home’s entry. Designed for low maintenance, it features a built-in storage cabinet, a dog wash, and space for a bench with hooks above (bench not shown in photo). The tiled floor ensures easy cleanup in this frequently used area.
Design: H2D Architecture + Design
www.h2darchitects.com
Build: Schenkar Construction
Photos: Christopher Nelson Photography
#h2d
#moderncustomhome
#innisarden
#innisardenarchitect
 Tradition Outdoor Living
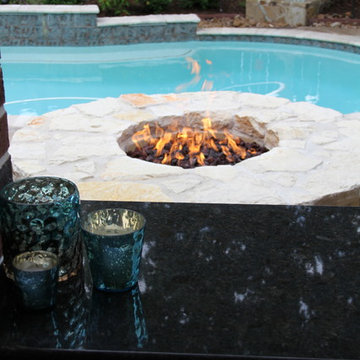
Considering the current patio space, the foundation to this outdoor addition began with the Flagstone Stamped Overlay with custom coloring on the floor, fashioning a natural feel to the patio while replacing the previous concrete slab.
The outdoor kitchen boasts a Travertine backsplash stone with a custom ceramic mosaic, the focal point of the room. Wall Sconce Lighting illuminate the kitchen with a warm glow and reveal the depth of the dark Onyx Black Granite bar and countertops. Providing stark contrast to the granite, the bar and kitchen are faced with Austin Chop Limestone, a lovely and light natural stone.
The kitchen houses a 30” grill with a motorized rotisserie featuring LED lighting, perfect for serving a crisped-to-perfection chicken! Completing the meal is no challenge with the double side burner, an ideal spot for sautéing vegetables. The two sets of double doors provide underneath counter space allowing for plenty of storage. And, of course, electrical outlets are placed for convenience and afford access for a Margarita machine or other necessary appliances!
The gas-powered fire pit filled with Lava Rock Aggregate is faced with matching stone to the kitchen/bar and requires no maintenance or ash cleanup.
 Driftwood Builders Roofing
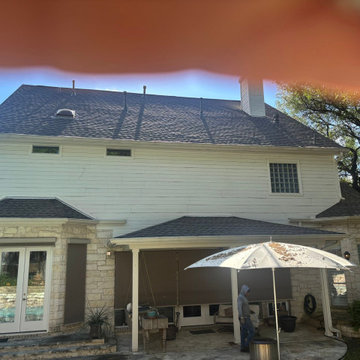
Completed another premium metal roof replacement in Westlake, Austin featuring a custom standing seam roofing system designed for both performance and curb appeal. The homeowner wanted a roofing solution that would better handle Texas heat, hail, and seasonal storms while also complementing the modern architecture of the home.
This project involved a complete tear-off of the existing roof, installation of upgraded waterproofing materials, new flashing details, improved ventilation components, and precision installation of high-end standing seam metal panels. Our crew paid close attention to critical transition areas, roof penetrations, drainage paths, and panel layout to ensure a clean finished appearance and long-term durability.
Standing seam metal roofing has become increasingly popular throughout Westlake because of its longevity, energy efficiency, low maintenance requirements, and strong resistance to wind and hail damage. Many homeowners also appreciate the sleek architectural look and potential long-term value a metal roofing system can add to a property.
From the initial inspection through final cleanup, the goal was to deliver a high-quality roofing installation with clear communication, professional workmanship, and minimal disruption to the homeowner. For homeowners researching metal roof replacement in Westlake, luxury roofing contractors in Austin, modern standing seam roofing systems, or hail-resistant roofing options, investing in a properly installed metal roof can provide decades of protection and performance.
118