
Search results for "Cloud based solutions" in Home Design Ideas
 Spire Integrated Systems Inc.
Sustainable Design Meets Smart Technology
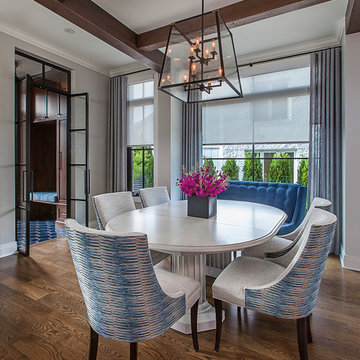
This home featured a request from the client to use as many environmentally friendly materials and fabrics as possible. Many common shade manufacturers use materials with PVC plastic, which is known for off-gassing hazardous chemicals that linger in the air in the home for years. The main floor roller shades met the client’s request for an eco-friendly fabric by utilizing motorized shades with GreenScreen fabric. In other rooms, the designer and client wanted the classic look and soft fabrics with roman shades and drapery tracks on several windows in the house. By partnering with the interior designer and fabric workroom, we were able to provide a custom solution for motorization of roman shades and drapery.
Lighting Control
The client is able control all of the lighting and window treatments in the house with a single control system. This eliminates the need for extra devices on the wall or remote controls that clutter up the space and get lost. By utilizing the custom window treatments, the house is able to conserve energy by keeping the house warmer in the winter, and cooler in the summer by providing insulation and blocking sunlight. The lighting control system further helps to conserve energy by beautifully dimming LED lights as well as using quick buttons that turn off all of the lights in the house, or un-occupied rooms, with the press of a single button.
Motorized Window Treatments
Motorized window treatments add a high level of convenience to any project, especially those with many windows in hard to reach places. The challenge with many manufacturers is a limitation of style and fabric selection, some may be a s basic as only roller shades. Often times these come with un-reliable, wireless controls.
On this Birmingham, MI project completed in March 2019, we partnered with the interior designer and drapery workroom to provide a truly unique solution. The homeowner and designer’s requests included many different styles of window treatments including rollers shades, roman shades and motorized draperies. Typically, this would result in a collection of various shade manufacturers with unsightly remotes scattered across each room or stuck to the wall for control. Utilizing standard offerings, coupled with an incredible team effort by the designer and drapery workroom, we provided all of the requested styles of window treatments, and were able to control them all on a single system. This means that each room has a single, elegant keypad built into the wall that controls not only the window treatments, but the lighting as well.
When leaving/entering the home, all of the window coverings can be raised or lowered with a single button press. Shades and draperies can also be set to operate based on the time of day for automatic day-to-day operation using sunlight as a guide. In the end, we achieved convenience, function and sophisticated style.
 Custom Surface Solutions
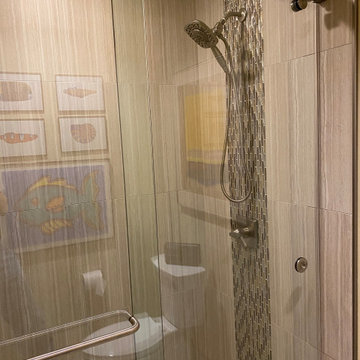
Custom Surface Solutions (www.css-tile.com) - Owner Craig Thompson (512) 966-8296. This project shows master bath shower / toile room remodel with before and after pictures. Remodel included tub-to-shower conversion with 12" x 24" tile set vertically aligned / on-grid on walls and floor. Custom wall floor base tile. Pebble tile shower floor. Vertical accent stripe on plumbing control wall and back of 22" x 14" niche using Harlequin shaped mosaic glass file. Schluter Rondec Satin Nickel finish profile edging. Delta plumbing fixtures.
 Kitchen Solvers of North Raleigh
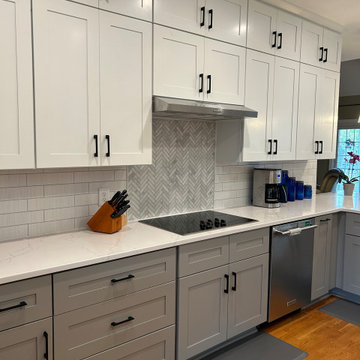
For this kitchen remodeling project, the homeowner wanted to change the look of their kitchen while also adding more storage space. We got busy tearing out the existing cabinets, countertops and backsplash to get the space ready for the new cabinets. They went with a shaker door for the entire kitchen. For the perimeter and wall cabinets they went with a polar white color, while the peninsula and base cabinets were done in a pebble gray color. For the backsplash, they decided to go with a linear white subway tile for the perimeter walls and a white herringbone for the stove/vent area. To pull the new look together, they went with the Sterling quartz countertop. To finish this kitchen transformation, we added several new storage solution items like a tray divider, a mixer, trash can, and pantry pullouts. Now these homeowners have the kitchen they have been dreaming of.
Find the right local pro for your project
 TVL Creative Ltd.
Cramped kitchen be gone! That was the project motto and top priority. The goal was to transform the current layout from multiple smaller spaces into a connected whole that would activate the main level for our clients, a young family of four.
The biggest obstacle was the wall dividing the kitchen and the dining room. Removing this wall was central to opening up and integrating the main living spaces, but the existing ductwork that ran right through the center of the wall posed a design challenge, er design opportunity. The resulting design solution features a central pantry that captures the ductwork and provides valuable storage- especially when compared to the original kitchen's 18" wide pantry cabinet. The pantry also anchors the kitchen island and serves as a visual separation of space between the kitchen and homework area.
Through our design development process, we learned the formal living room was of no service to their lifestyle and therefore space they rarely spent time in. With that in mind, we proposed to eliminate the unused living room and make it the new dining room. Relocating the dining room to this space inherently felt right given the soaring ceiling and ample room for holiday dinners and celebrations. The new dining room was spacious enough for us to incorporate a conversational seating area in the warm, south-facing window alcove.
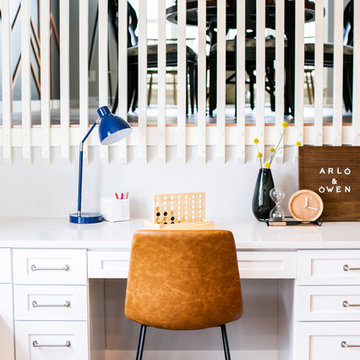
Now what to do with the old dining room?! To answer that question we took inspiration from our clients' shared profession in education and developed a craft area/homework station for both of their boys. The semi-custom cabinetry of the desk area carries over to the adjacent wall and forms window bench base with storage that we topped with butcher block for a touch of warmth. While the boys are young, the bench drawers are the perfect place for a stash of toys close to the kitchen.
The kitchen begins just beyond the window seat with their refrigerator enclosure. Opposite the refrigerator is the new pantry with twenty linear feet of shelving and space for brooms and a stick vacuum. Extending from the backside of the pantry the kitchen island design incorporates counter seating on the family room side and a cabinetry configuration on the kitchen side with drawer storage, a trashcan center, farmhouse sink, and dishwasher.
We took careful time in design and execution to align the range and sink because while it might seem like a small detail, it plays an important role in supporting the symmetrical configuration of the back wall of the kitchen. The rear wall design utilizes an appliance garage mirrors the visual impact of the refrigerator enclosure and helps keep the now open kitchen tidy. Between the appliance garage and refrigerator enclosure is the cooking zone with 30" of cabinetry and work surface on either side of the range, a chimney style vent hood, and a bold graphic tile backsplash.
The backsplash is just one of many personal touches we added to the space to reflect our client's modern eclectic style and love of color. Swooping lines of the mid-mod style barstools compliment the pendants and backsplash pattern. A pop of vibrant green on the frame of the pantry door adds a fresh wash of color to an otherwise neutral space. The big show stopper is the custom charcoal gray and copper chevron wall installation in the dining room. This was an idea our clients softly suggested, and we excitedly embraced the opportunity. It is also a kickass solution to the head-scratching design dilemma of how to fill a large and lofty wall.
We are so grateful to bring this design to life for our clients and now dear friends.
 Custom Surface Solutions
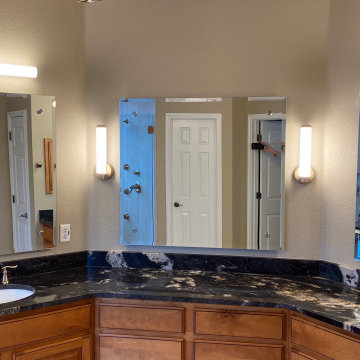
Custom Surface Solutions (www.css-tile.com) - Owner Craig Thompson (512) 966-8296. This project shows a complete master bathroom remodel with before and after pictures including large 9' 6" shower replacing tub / shower combo with dual shower heads, body spray, rail mounted hand-held shower head and 3-shelf shower niches. Titanium granite seat, curb cap with flat pebble shower floor and linear drains. 12" x 48" porcelain tile with aligned layout pattern on shower end walls and 12" x 24" textured tile on back wall. Dual glass doors with center glass curb-to-ceiling. 12" x 8" bathroom floor with matching tile wall base. Titanium granite vanity countertop and backsplash.
 Innovate Building Solutions
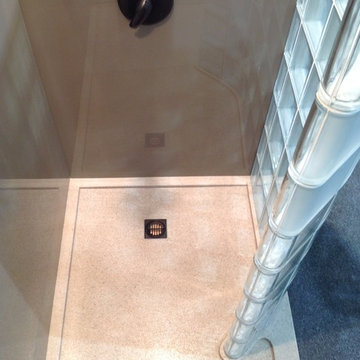
These high gloss walls really help to reflect the light with this custom glass block shower project. The solid surface shower pan is also another easy to clean feature of this shower
 Germano Creative Interior Contracting Ltd
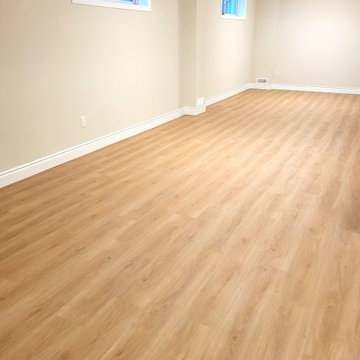
This renovation included work on both the main floor and basement. We started in the basement, where we replaced the floors with a luxury vinyl plank, replaced the baseboards and door casing, and installed wall sconces. We also added an additional 3 piece washroom in the basement, which included a vanity and top, toilet, shower base with sliding glass door system and shower faucet kit.
On the main floor, the kitchen was fully gutted, and the dividing wall between the dining room and kitchen was moved back, to expand the kitchen further; this was a load bearing wall. Due to this, we also enclosed the doorway to the dining room from the kitchen. An entirely new kitchen was installed in an MDF finish with a Michigan door style, featuring brushed nickel accents. The flooring throughout the main floor, including the kitchen was replaced with a luxury vinyl plank. A beautiful porcelain tile was installed for the kitchen backsplash with a quartz countertop. The client opted for a hooded fan with tile going up the surrounding walls, with decorative pendant lights and pot lights to brighten the space. The kitchen includes multiple storage solutions, including: 2 magic corners, a garbage/recycling system, and pull out drawer systems in the pantry. On the main floor, we also updated the powder room with a new vanity and top and toilet and installed a new laundry sink base unit in the laundry room. The railings and treads on the stairs were repainted, as well as all of the walls on the main floor. Due to the height of the new floor, the casing also had to be replaced on all of the doors on the main floor, and additional doorstop had to be added to each door.

 Custom Surface Solutions
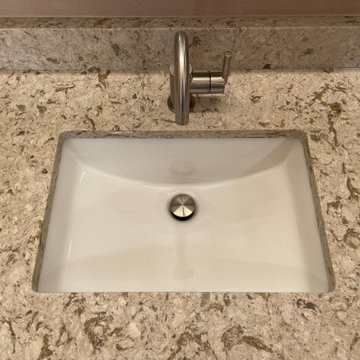
Custom Surface Solutions (www.css-tile.com) - Owner Craig Thompson (512) 966-8296. This project shows an master bath and bedroom remodel moving shower to tub area and converting shower to walki-n closet, new frameless vanities, LED mirrors, electronic toilet, and miseno plumbing fixtures and sinks.
Shower is 65 x 35 using 12 x 24 porcelain travertine wall tile installed horizontally with aligned tiled and is accented with 9' x 18" herringbone glass accent stripe on the back wall. Walls and shower box are trimmed with Schluter Systems Jolly brushed nickle profile edging. Shower floor is white flat pebble tile. Shower storage consists of a custom 3-shelf shower box with herringbone glass accent. Shelving consists of two Schluter Systems Shelf-N shelves and two Schluter Systems Shelf-E corner shelves.
Bathroom floor is 24 x 24 porcelain travvertine installed using aligned joint pattern. 3 1/2" floor tile wall base with Schluter Jolly brushed nickel profile edge also installed.
Vanity cabinets are Dura Supreme with white gloss finish and soft-close drawers. A matching 30" x 12" over toilet cabint was installed plus a Endura electronic toilet.
Plumbing consists of Misenobrushed nickel shower system with rain shower head and sliding hand-held. Vanity plumbing consists of Miseno brushed nickel single handle faucets and undermount sinks.
Vanity Mirrors are Miseno LED 52 x 36 and 32 x 32.
24" barn door was installed at the bathroom entry and bedroom flooring is 7 x 24 LVP.
 Kitchen Solvers of Grayslake
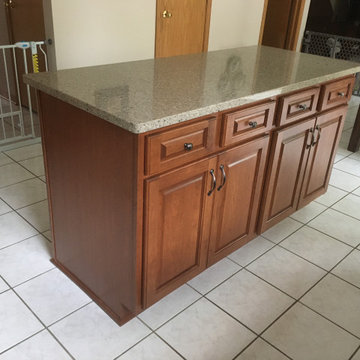
For this kitchen remodel, the homeowner wanted a refresh to their kitchen but liked the current layout. Cabinet refacing was the perfect solution for them. We removed the cabinet above the stove and continued the tile to the soffit. A new hood was also installed. We then refaced the existing cabinets with real Cherry wood veneer, installed cherry crown molding, and replace doors with raised panel Cherry doors in a Nutmeg stain. For added storage, we installed rollouts in 2 of the base cabinets. Under cabinet lighting was also installed. To finish the new look we replaced the existing laminate countertops with Quartz in Toasted Almond and removed the existing wall splash and replaced it with Zen Ease Mosaic.
 Rae Muranski
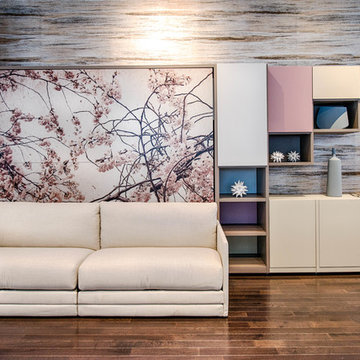
Together, and in total freedom. ON-OFF is the expression of many Made in Italy craftsmanship cooperating - on the one hand - to design a whole and systematic project, on the other hand to offer even one single product to decorate convertible living/ sleeping areas. An actual system offering permanent solutions in terms of quality and design, and allowing at the same time to change a space from living to sleeping area depending on individual needs and never as a makeshift solution. So home becomes really usable by the widest variety of family units: big families, young couples, friends hosting friends, with the possibility to optimize small spaces in stable multi-functionality situations; one same room will become a real living or a real bedroom based on needs! The modularity, the range of materials, finishing and upholsteries is really complete and in contemporary-modern style; the raw materials selected to have the best aesthetic output and function. So there is nothing left to do but imagine your own home, for both big and small spaces you’ll find here the answer, the quality design and experience of ATL Group and Tumidei: together, but in total freedom.
 Kitchen Solvers of Miami
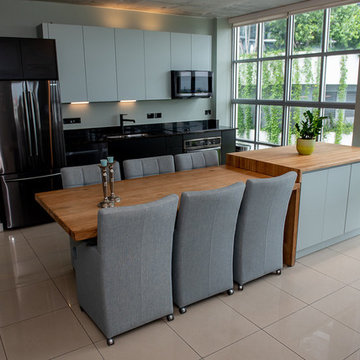
For this project we had the challenge of adding more countertop space and storage within a small kitchen-living room area. The solution was to add an island with 3 new base cabinet drawers and a butcher block that would match the existing teak dining table, placing them one next to the other. For a sleek look we custom made a small waterfall that would reach the surface of the table to have a fully integrated and modern look. The cabinets were done in Northern Contours Elegantee II doors with finger pull done in black and aloe super matte. All new black appliances for a contemporary look that would perfectly blend with the all black matte doors.
 California Closets
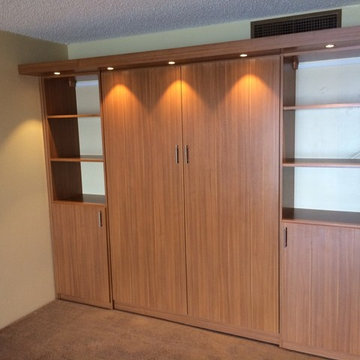
This vertical murphy bed folds up to allow for ample use of the space. Open shelving and two base cabinets on either side of the bed provides storage and display space, which is accented by recessed lighting above.
 Deck and Patio Company "Outdoor Living Experts"
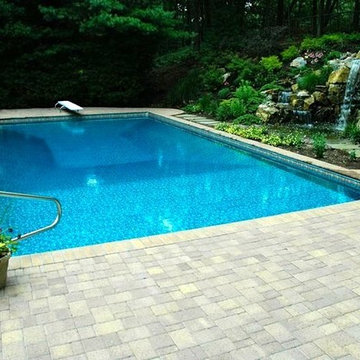
With the slope stabilized, our team addressed pool renovation. After draining the pool and removing the original liner, a poorly built concrete block wall was uncovered.
The solution was to straighten the wall and fill the block in with concrete and steel rebars for strength. New vinyl covered stairs were then added, as well as new pipes, returns, skimmers, pump, filter and new liner was installed.
After this, the pool was carefully backfilled and tamped. We compacted the soil back around the pool in three-inch lifts to allow for the immediate installation of new pavers around the pool.
This compacting process is not done by many contractors. The idea is that using compacted soil the base will not settle, so you don’t have to wait to install a patio around a new pool. Many contractors still install concrete slabs under their patio. In our experience we find this does not work well. Settling still occurs under the slab allowing the patio to crack or settle.
After the base materials were finished, we installed chestnut-hued durable pavers from Cambridge (Sahara). These particular pavers have little or no color fade and the random design pattern adds interest to the patio. The pavers’ protective coating means these clients will have a clean-lined modern look. Even after being subjected to snow plowing, de-icing salts and normal wear, they will keep their color and beautiful appearance.

 lavish
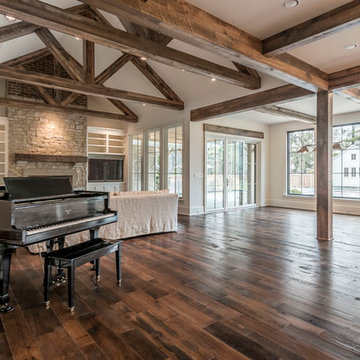
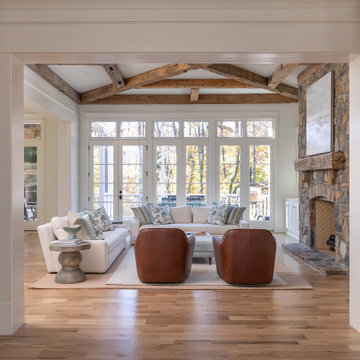
This breathtaking whole-home renovation is a masterclass in balancing raw, natural materials with refined coastal elegance. Reclaimed wood, fieldstone, linen, cane, and soft blue hues weave a cohesive story from the soaring great room all the way up to the nursery — creating a home that feels both grounded in the land and kissed by the sea.
Great Room
The emotional heart of the home is a spectacular great room anchored by a floor-to-ceiling fieldstone fireplace with a hand-hewn reclaimed wood beam mantel and a herringbone brick firebox. Flanking the fireplace are generous built-in white shelving units with linen-backed interiors, beautifully styled with blue-and-white chinoiserie, ceramic vessels, and coastal curiosities.
Overhead, a dramatic cathedral ceiling with exposed reclaimed wood trusses in a king-post configuration draws the eye upward and gives the space an almost barn-like grandeur — softened immediately by the warmth of crisp white walls and abundant natural light pouring in through a wall of French doors. Those doors open to a deck overlooking mature woodland, blurring the boundary between inside and out.
The furnishings strike a balance that feels lived-in and luxurious at once. Two generous cream linen sofas face each other across a soft blue-gray upholstered square ottoman, while a pair of cognac saddle-leather swivel chairs add warmth and contrast. A stone pedestal side table, a rattan tray, and an oversized abstract seascape canvas above the mantel complete a room that is effortlessly inviting.
Kitchen & Dining
The open-plan kitchen and dining space flows seamlessly from the great room, united by the same reclaimed beam ceiling and wide-plank light oak hardwood floors. The kitchen itself is a dream: custom white inset cabinetry with brushed nickel hardware surrounds a showstopping island with a pale blue-gray painted base and a warm natural butcher block top — a choice that brings organic texture and approachability to an otherwise polished space.
A handmade zellige-style light blue brick backsplash adds subtle artisanal character behind a professional-grade six-burner gas range framed by a tailored white custom range hood. Open glass shelves nearby display a curated collection of blue-and-white chinoiserie vases, adding personality and a collected feel. Clear glass-and-nickel pendant lanterns hang over the island, while a stunning crystal rod linear chandelier marks the dining area — a glamorous counterpoint to all the rustic texture in the room.
Cane-back counter stools and a matching set of cane dining chairs in white keep the palette light, fresh, and connected to the home's coastal character. A stone arch passageway between the kitchen and adjacent rooms adds architectural drama and reinforces the home's commitment to natural materiality.
Staircase & Entry
The staircase is a design moment in its own right. A classic woven runner in gray with a crisp navy border brings pattern and polish to the oak treads, while a built-in window seat with a navy cushion at the landing creates a charming reading nook. A nautical-inspired abstract canvas on the entry wall sets the tonal palette for the upper level.
Primary Bedroom
Upstairs, the primary bedroom is a soft, serene retreat wrapped in a soothing dusty blue — walls and ceiling painted the same tranquil tone for an enveloping, cocoon-like effect. A white linen platform bed with an upholstered headboard sits beneath a wide horizontal panoramic cloud painting in a warm wood frame, evoking an open sky. The nightstands — in a soft white with brass ring pulls — are paired with ribbed ceramic table lamps that echo the room's quiet coastal sensibility.
Blue-and-white gingham curtains on a brass rod, a soft white textured carpet, a cream leather recliner, and a slim brass reading floor lamp round out a room that feels simultaneously fresh and deeply restful. Blue embroidered bedding and a striped bolster pillow tie the whole palette together with gentle precision.
Nursery
A thoughtfully designed nursery shares the upper level's soft blue palette, with a classic white Jenny Lind spindle crib, a natural wood book rack, a wicker whale toy basket, and a gold circular mirror creating a space that is sweet without being saccharine. The same cloud painting above the bed and the soft blue walls create a dreamy, sky-like atmosphere perfectly suited for a young child.
 Drury Design
THE SETUP
Multiple ovens, multiple workspaces, multiple sinks – when you think about it, non-jewish kitchens have been adapting the criteria of kosher kitchens for years.
Gladys’ clients in West Rogers Park are Orthodox Jewish. The house they bought already had a kosher kitchen – it just wasn’t done that well. It needed some more things to be duplicated for the dairy side and the meat side. Plus, it was dark and the configuration wasn’t very conducive for a family of eight.
It was time for a remodel.
Design Objectives
Improve kosher kitchen
Add more storage in the island
Better lighting
More open, lighter feel
Change the wood floor in the kitchen to tile
THE REMODEL
Design Challenges
- We had originally planned on removing a wing wall by the breakfast area. During demolition, we learned it contained a support beam.
- The kitchen is a substantial size, but having two sinks, dishwashers, and ovens presented a challenge – how do we fit it all in and make it flow with the storage still accessible near the work areas?
Where do you stop the materials for the new space? - -- The right tile, paint, lighting, etc. would be needed to make the remodeled area cohesive with the rest of the main floor.
- An existing column limited cabinet options and thus, storage capacity. Could we conceal it without disrupting the cabinetry flow?
Design Solutions
- We had to keep the wing wall, but decided to continue the tile on the sides of the cabinets and maintain the height of the tile to line up with the rest of the backsplash. This actually presented a very nice and cohesive look, especially since the opposite side has a wing wall to the left of the refrigerator.
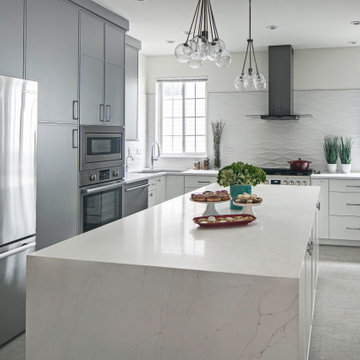
- We used “L-shaped” corner sinks instead of the rectangular ones set on an angle. This gave us more of the legs of the triangles versus the hypotenuse, which allowed for the two dishwashers, and the pullout utensil canisters and spice pullouts while still keeping the 3-drawer cabinets on either side of the range (by the sinks). The old island had the recess for stools which the family never used. By extending the width of the island 6” and utilizing this leg space, we were able to fit 18”-deep cabinets on this side – adding lots of accessible storage. The family can now work simultaneously on the dairy side (the side with the fridge) and the meat side (opposite) without getting in each other’s way. We separated the cooking by using the range oven for the meat and a built-in microwave in the base cabinet. The wall oven with built-in microwave on top is for dairy.
- Corner sinks opened up the middle area for a wider range – we went from a 30” to a 36”. Removing all the wall cabinets (on the range wall) made a big difference. That opened up the entire space while adding some visual impact. (Not pictured: We also made the cabinets directly opposite the range wall tall and removed the countertop, resulting in more room for rollouts and even more storage!) The kitchen now has more storage than it did before.
- We ended up painting the ceiling of the kitchen into the hallway that leads to the foyer. The living and dining rooms were separated by a soffit, so that became a natural boundary. We kept the tile in the kitchen by stopping it short of the hallway and lining it up with the pantry wall. This creates a border between the breakfast area and family room. The rest of the existing wood floors were refinished to refresh and make the hue darker. We also painted a dark accent wall and carried it into the breakfast area to make the rooms look deeper.
- The in-the-way column housed plumbing and couldn’t be moved. We still built cabinets in that spot – we just had to build a chase inside it to conceal the pipes. There was still plenty of room for new storage. We also took the cabinets all the way to the ceiling. The continuous tall cabinets added a functional elegance to the space.
THE RENEWED SPACE
The client’s long-awaited dream of a better kosher kitchen has finally been achieved, beautifully combining enhanced storage solutions with adherence to the family’s orthodox dietary laws. The kitchen’s standout feature, an expanded island, now offers a spacious and efficient workspace. This allows several family members to cook together comfortably, without the inconvenience of bumping into each other, ensuring a harmonious and productive cooking environment.

 KitchensNClosets of Charleston
Sometimes creating a pantry in base cabinets is the perfect solution.
Inspiration for a contemporary kitchen remodel in Charleston
Inspiration for a contemporary kitchen remodel in Charleston
 Bella Systems Philly - Custom Closets
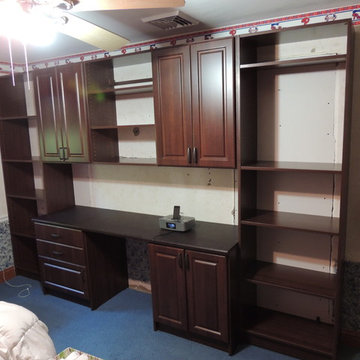
The other side of the room is his desk area. The desk area has two tall shelving units for his trophies. There are three top cabinets, two have double doors. There is under-the-cabinet lighting. The base cabinets have drawers and double doors with a brown leather countertop.

Sponsored
Columbus, OH

Hope Restoration & General Contracting
Columbus Design-Build, Kitchen & Bath Remodeling, Historic Renovations
 Kitchen Solvers of Spring Hill
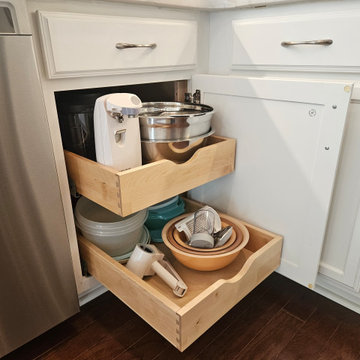
These homeowners didn’t feel the need for a whole remodel and liked the color of their cabinets but really wanted a few upgrades… and then ended up doing a little more once we showed them how we can improve efficiency and storage in their kitchen!
Their biggest issue is having a microwave over their stove since they tend to an elderly parent and that the exhaust is not vented outside. Andy figured out the perfect solution to vent out their new matching range hood and since they never liked their countertops or backsplash, they added that to the mix. With standard cabinet that have deep or half shelves it is hard to maximize storage and accessibility so Marty suggested roll-out trays in 3 cabinets, a pull-out trash so they don’t have to walk around the one at the end of their island, a blind corner pull-out so they don’t have to get down on their hands and knees to access things, and then their favorite… hinge out spice rack! Let’s be honest, it’s EVERYONE’s favorite!
Needless to say, we more than solved this kitchen for these homeowners. Where is the microwave now? Well, he is a handy guy so he decided to tackle a simple cabinet modification and is installing it himself in a base cabinet!
 Kustom Home Design
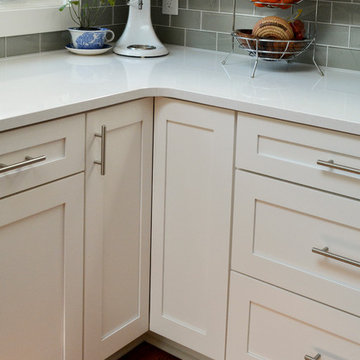
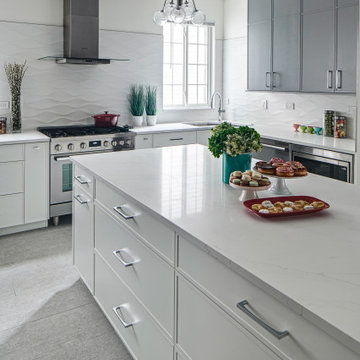
This amazing renovation focused on solving a series of problems that a previous kitchen expansion had created. By rearranging the appliance placement, updating the cabinetry, designing all new storage solutions and maximizing the amazing outdoor views; we cured the spit personality disorder plaguing the existing kitchen. The home now has a beautifully redesigned kitchen and living space perfect for entertaining, relaxing and enjoying the outside views. Vaulted ceilings with bright skylights, reflective glass wall tiles, sleek sophisticated Cambria quartz counter tops, fingerprint-free faucet, multi-functional Prolific kitchen sink by Kohler, stainless steel appliances, creative storage solutions, all new lighting and timeless shaker cabinets by Wellborn lend to the now bright, open, vivacious and flawless function of this newly renovated galley style kitchen. White base cabinets along the outside walls contrast perfectly with the dark grey island cabinets. Linear satin nickel door and drawer pulls coordinate with the stainless steel appliances and sink. An eclectic blend of vintage and modern furnishings, artwork and rugs create a comfortable balance that feels and looks timeless. Breathtaking backyard views are artfully framed by new Pella windows and doors with integral blinds between the glass. Calm, inviting neutral tones provide the perfect backdrop for this refined design.
Photos by: Kimberly Kerl
 Drury Design
THE SETUP
Multiple ovens, multiple workspaces, multiple sinks – when you think about it, non-jewish kitchens have been adapting the criteria of kosher kitchens for years.
Gladys’ clients in West Rogers Park are Orthodox Jewish. The house they bought already had a kosher kitchen – it just wasn’t done that well. It needed some more things to be duplicated for the dairy side and the meat side. Plus, it was dark and the configuration wasn’t very conducive for a family of eight.
It was time for a remodel.
Design Objectives
Improve kosher kitchen
Add more storage in the island
Better lighting
More open, lighter feel
Change the wood floor in the kitchen to tile
THE REMODEL
Design Challenges
- We had originally planned on removing a wing wall by the breakfast area. During demolition, we learned it contained a support beam.
- The kitchen is a substantial size, but having two sinks, dishwashers, and ovens presented a challenge – how do we fit it all in and make it flow with the storage still accessible near the work areas?
Where do you stop the materials for the new space? - -- The right tile, paint, lighting, etc. would be needed to make the remodeled area cohesive with the rest of the main floor.
- An existing column limited cabinet options and thus, storage capacity. Could we conceal it without disrupting the cabinetry flow?
Design Solutions
- We had to keep the wing wall, but decided to continue the tile on the sides of the cabinets and maintain the height of the tile to line up with the rest of the backsplash. This actually presented a very nice and cohesive look, especially since the opposite side has a wing wall to the left of the refrigerator.
- We used “L-shaped” corner sinks instead of the rectangular ones set on an angle. This gave us more of the legs of the triangles versus the hypotenuse, which allowed for the two dishwashers, and the pullout utensil canisters and spice pullouts while still keeping the 3-drawer cabinets on either side of the range (by the sinks). The old island had the recess for stools which the family never used. By extending the width of the island 6” and utilizing this leg space, we were able to fit 18”-deep cabinets on this side – adding lots of accessible storage. The family can now work simultaneously on the dairy side (the side with the fridge) and the meat side (opposite) without getting in each other’s way. We separated the cooking by using the range oven for the meat and a built-in microwave in the base cabinet. The wall oven with built-in microwave on top is for dairy.
- Corner sinks opened up the middle area for a wider range – we went from a 30” to a 36”. Removing all the wall cabinets (on the range wall) made a big difference. That opened up the entire space while adding some visual impact. (Not pictured: We also made the cabinets directly opposite the range wall tall and removed the countertop, resulting in more room for rollouts and even more storage!) The kitchen now has more storage than it did before.
- We ended up painting the ceiling of the kitchen into the hallway that leads to the foyer. The living and dining rooms were separated by a soffit, so that became a natural boundary. We kept the tile in the kitchen by stopping it short of the hallway and lining it up with the pantry wall. This creates a border between the breakfast area and family room. The rest of the existing wood floors were refinished to refresh and make the hue darker. We also painted a dark accent wall and carried it into the breakfast area to make the rooms look deeper.
- The in-the-way column housed plumbing and couldn’t be moved. We still built cabinets in that spot – we just had to build a chase inside it to conceal the pipes. There was still plenty of room for new storage. We also took the cabinets all the way to the ceiling. The continuous tall cabinets added a functional elegance to the space.
THE RENEWED SPACE
The client’s long-awaited dream of a better kosher kitchen has finally been achieved, beautifully combining enhanced storage solutions with adherence to the family’s orthodox dietary laws. The kitchen’s standout feature, an expanded island, now offers a spacious and efficient workspace. This allows several family members to cook together comfortably, without the inconvenience of bumping into each other, ensuring a harmonious and productive cooking environment.
67