
Search results for "Cloud based solutions" in Home Design Ideas
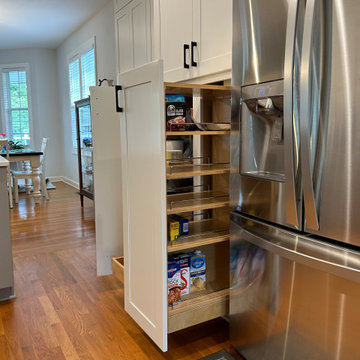
 Kitchen Solvers of North Raleigh
For this kitchen remodeling project, the homeowner wanted to change the look of their kitchen while also adding more storage space. We got busy tearing out the existing cabinets, countertops and backsplash to get the space ready for the new cabinets. They went with a shaker door for the entire kitchen. For the perimeter and wall cabinets they went with a polar white color, while the peninsula and base cabinets were done in a pebble gray color. For the backsplash, they decided to go with a linear white subway tile for the perimeter walls and a white herringbone for the stove/vent area. To pull the new look together, they went with the Sterling quartz countertop. To finish this kitchen transformation, we added several new storage solution items like a tray divider, a mixer, trash can, and pantry pullouts. Now these homeowners have the kitchen they have been dreaming of.
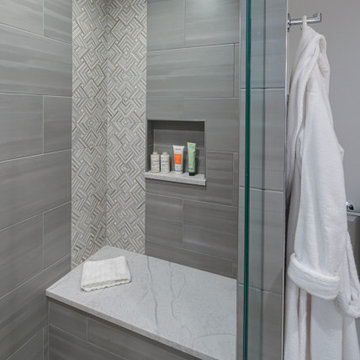
 Drury Design
The Setup
When our clients decided to remodel their primary bathroom, the goal was to transform the space into a brighter, more open retreat tailored to their needs. The previous layout, with its enclosed zones and limited functionality, no longer met their needs. By reimagining the layout and introducing thoughtful design choices, we created a modern, elegant bathroom that serves their current and future lifestyle.
Design objectives:
- Create a brighter, more open bathroom while maintaining privacy.
- Provide functional storage solutions without relying on the old linen closet.
- Incorporate a freestanding tub, large shower, and a makeup area for added versatility.
- Retain natural light from existing windows.
- Introduce elegant finishes and accents for a timeless aesthetic.
The Remodel
Design challenges to be solved:
- Reconfiguring the layout while keeping the existing plumbing for the toilet.
- Creating storage that houses everything that resided within the linen closet.
- Designing clearance and functionality for a freestanding tub, shower, and makeup area within the limited space.
- Accommodating the client’s desire for a pocket door in the commode room despite spatial constraints.
Introducing accent tile and cabinetry colors that align with the client’s vision yet maintain a cohesive look with the rest of the home.
The Renewed Space
Design solutions:
- Reimagined Layout: Moved the shower from the back of the room, creating a more open feel with additional glass while preserving privacy with a wing wall and bench. The freestanding tub was angled to optimize space and enhance circulation, with textured tile behind it adding visual interest.
- Efficient Storage: Eliminated the original linen closet and incorporated functional base cabinet storage and a designated makeup area for added utility.
- Optimized Access: Adjusted the depth of the makeup vanity to provide sufficient walkway clearance, ensuring a comfortable flow around the tub.
- Tailored Features: Installed a smaller pocket door in the commode room to resolve framing and plumbing limitations.
- Elegant Accents: Introduced a subtle marble herringbone mosaic tile in the shower and textured tile behind the tub to enhance the monochromatic palette. Painted cabinetry in a dark gray finish provided a bold yet refined contrast to the light countertops.
Final Thoughts:
The reimagined primary bathroom is a true reflection of the client’s needs and style preferences. By thoughtfully reworking the layout and incorporating functional yet elegant design elements, we created a serene and practical space that serves as a personal retreat. The result is a timeless bathroom that supports their busy lifestyle while providing moments of tranquility.
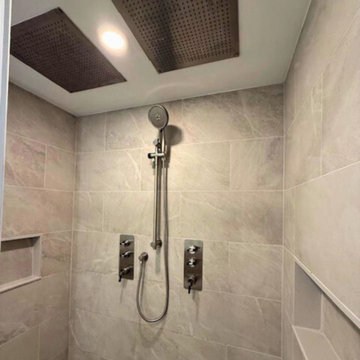
 Toronto Bath Centre
This guest bathroom renovation in the heart of Yorkville maximizes style and functionality in a compact space. The project features a Schluter Kerdi shower base with a Vario Linear drain for a sleek and efficient waterproofing solution. We installed a Tenzo Signature shower system with precision controls and a slide bar for a modern, spa-like experience.
To enhance luxury and comfort, we incorporated an Aquadesign recessed ceiling rain shower head, paired with a Fleurco glass shower door. Storage and lighting were addressed with a Fleurco Lune LED mirror and a Fleurco Luna recessed medicine cabinet, offering both elegance and utility. The bathroom is completed with a Toto toilet, known for its clean lines and reliable performance.
This project is a perfect example of a small bathroom remodel done right—balancing smart design choices with high-quality materials to elevate everyday living.
Find the right local pro for your project
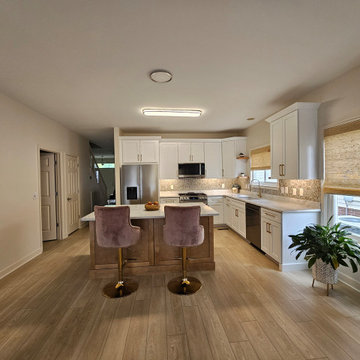
 Kitchen Solvers of Spring Hill
Sometimes the best solution isn't the one you originally planned.
This homeowner wanted to add an island and stacked cabinets to gain more storage in her small kitchen. After months of waiting for another contractor to provide a quote, she turned to a friend for a recommendation—and that's how she found Kitchen Solvers.
After evaluating the space, we recommended a different approach that would solve more of her challenges while maximizing her investment. We installed new 42" upper cabinets for additional storage, refaced the base cabinets to match, created a custom refrigerator surround, and added a beautiful wood island that brings warmth and character to the space.
To complete the transformation, we paired Matterhorn Dolomite countertops with the existing mosaic backsplash, saving the homeowner money by incorporating elements she already had. We also installed a new flat-top range, added roll-out trays for improved organization, and finished the space with floating shelves around the window for a warm, custom touch.
The result is a kitchen that feels larger, functions better, and has become a space she loves to cook, gather, and entertain in. Best of all, the entire transformation was completed in just a few weeks!
 Germano Creative Interior Contracting Ltd
This renovation included work on both the main floor and basement. We started in the basement, where we replaced the floors with a luxury vinyl plank, replaced the baseboards and door casing, and installed wall sconces. We also added an additional 3 piece washroom in the basement, which included a vanity and top, toilet, shower base with sliding glass door system and shower faucet kit.
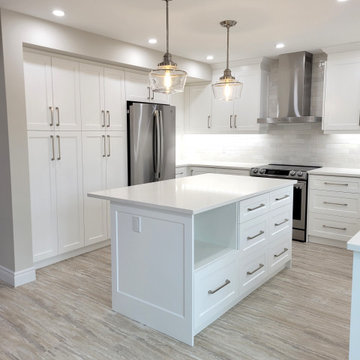
On the main floor, the kitchen was fully gutted, and the dividing wall between the dining room and kitchen was moved back, to expand the kitchen further; this was a load bearing wall. Due to this, we also enclosed the doorway to the dining room from the kitchen. An entirely new kitchen was installed in an MDF finish with a Michigan door style, featuring brushed nickel accents. The flooring throughout the main floor, including the kitchen was replaced with a luxury vinyl plank. A beautiful porcelain tile was installed for the kitchen backsplash with a quartz countertop. The client opted for a hooded fan with tile going up the surrounding walls, with decorative pendant lights and pot lights to brighten the space. The kitchen includes multiple storage solutions, including: 2 magic corners, a garbage/recycling system, and pull out drawer systems in the pantry. On the main floor, we also updated the powder room with a new vanity and top and toilet and installed a new laundry sink base unit in the laundry room. The railings and treads on the stairs were repainted, as well as all of the walls on the main floor. Due to the height of the new floor, the casing also had to be replaced on all of the doors on the main floor, and additional doorstop had to be added to each door.
 MD Flooring Solutions, LLC
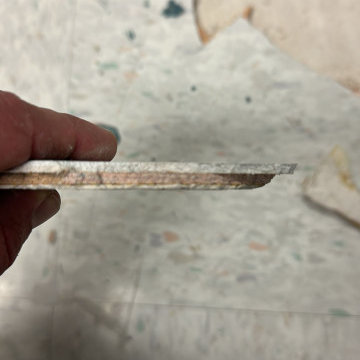
- To move furniture: 12x huge and heavy pieces of furniture out and back in from Main floor: break room, one bathroom, 6 exam rooms, lab room
To move Appliances out and back in: Fridge and mini fridge
- Take Up, Remove & Haul Away 12x12 Glued Down VCT (Vinyl Composition Tile) from floors from Main floor: break room, one bathroom, 6 exam rooms, lab room - 849.72 sqft
- Take Up, Remove & Haul Away vinyl cove base baseboards from Main floor: kitchen, one bathroom, 6 exam rooms, kitchenette - 849.72 sqft
- To Install glued down Luxury Vinyl Planks on floors on Main floor: break room, one bathroom, 6 exam rooms, lab room - 849.72 sqft
- To install Glued Down 4" Cove Base Baseboards on Main floor: break room, one bathroom, 6 exam rooms, lab room (292 LNFT)
- To install 6x black rubber T- moldings transition pieces - 3.5 LFT each
 Crown Point Cabinetry
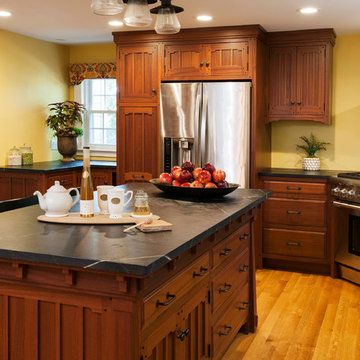
This Pasadena Arts & Crafts custom kitchen features stained cabinetry that blends seamlessly with the rest of the home. The designer paid close attention to every authentic detail while incorporating the needs of a functional kitchen. Design details include glass lead doors, cloud-lift detail on doors and end panel rails, Ebony square protruding pegs with pillow tops, drop stiles with inside corner radius on wall cabinets, an inclined routed foot detail on the base cabinet stiles, crown G & upper scribe molding that displays stepped surfaces w/ rounded edge detail, a wine rack with oil bronze tubes, and Pasadena Island brackets and posts! The kitchen features Sapele wood, Nutmeg stain, with Monterey & Pasadena door styles with Pasadena 5pc drawer fronts along with integrated Waterfall drawer fronts. Photo by Crown Point Cabinetry

 Unique Home Solutions Inc.
Katia Provencher-Photographer
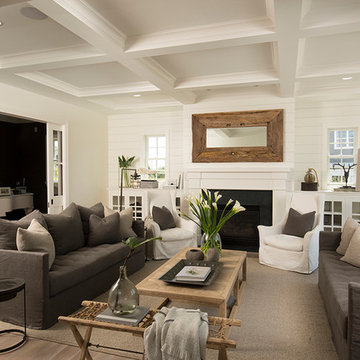
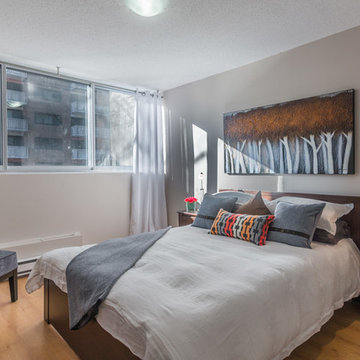
680 Sq. Ft. condo Model Suite. It is a small condo but feels like there is a lot of room. The colours were based on Rainy Day artwork and metal art Nick-Nacks by Olivia Salazar.
If you would like a home staging consultation or redesign of the interior of your house, give us a call. Unique Home Solutions Inc. has been in business since 2006.
Joanne Vroom 514-222-5553
 Drury Design
THE SETUP
Multiple ovens, multiple workspaces, multiple sinks – when you think about it, non-jewish kitchens have been adapting the criteria of kosher kitchens for years.
Gladys’ clients in West Rogers Park are Orthodox Jewish. The house they bought already had a kosher kitchen – it just wasn’t done that well. It needed some more things to be duplicated for the dairy side and the meat side. Plus, it was dark and the configuration wasn’t very conducive for a family of eight.
It was time for a remodel.
Design Objectives
Improve kosher kitchen
Add more storage in the island
Better lighting
More open, lighter feel
Change the wood floor in the kitchen to tile
THE REMODEL
Design Challenges
- We had originally planned on removing a wing wall by the breakfast area. During demolition, we learned it contained a support beam.
- The kitchen is a substantial size, but having two sinks, dishwashers, and ovens presented a challenge – how do we fit it all in and make it flow with the storage still accessible near the work areas?
Where do you stop the materials for the new space? - -- The right tile, paint, lighting, etc. would be needed to make the remodeled area cohesive with the rest of the main floor.
- An existing column limited cabinet options and thus, storage capacity. Could we conceal it without disrupting the cabinetry flow?
Design Solutions
- We had to keep the wing wall, but decided to continue the tile on the sides of the cabinets and maintain the height of the tile to line up with the rest of the backsplash. This actually presented a very nice and cohesive look, especially since the opposite side has a wing wall to the left of the refrigerator.
- We used “L-shaped” corner sinks instead of the rectangular ones set on an angle. This gave us more of the legs of the triangles versus the hypotenuse, which allowed for the two dishwashers, and the pullout utensil canisters and spice pullouts while still keeping the 3-drawer cabinets on either side of the range (by the sinks). The old island had the recess for stools which the family never used. By extending the width of the island 6” and utilizing this leg space, we were able to fit 18”-deep cabinets on this side – adding lots of accessible storage. The family can now work simultaneously on the dairy side (the side with the fridge) and the meat side (opposite) without getting in each other’s way. We separated the cooking by using the range oven for the meat and a built-in microwave in the base cabinet. The wall oven with built-in microwave on top is for dairy.
- Corner sinks opened up the middle area for a wider range – we went from a 30” to a 36”. Removing all the wall cabinets (on the range wall) made a big difference. That opened up the entire space while adding some visual impact. (Not pictured: We also made the cabinets directly opposite the range wall tall and removed the countertop, resulting in more room for rollouts and even more storage!) The kitchen now has more storage than it did before.
- We ended up painting the ceiling of the kitchen into the hallway that leads to the foyer. The living and dining rooms were separated by a soffit, so that became a natural boundary. We kept the tile in the kitchen by stopping it short of the hallway and lining it up with the pantry wall. This creates a border between the breakfast area and family room. The rest of the existing wood floors were refinished to refresh and make the hue darker. We also painted a dark accent wall and carried it into the breakfast area to make the rooms look deeper.
- The in-the-way column housed plumbing and couldn’t be moved. We still built cabinets in that spot – we just had to build a chase inside it to conceal the pipes. There was still plenty of room for new storage. We also took the cabinets all the way to the ceiling. The continuous tall cabinets added a functional elegance to the space.
THE RENEWED SPACE
The client’s long-awaited dream of a better kosher kitchen has finally been achieved, beautifully combining enhanced storage solutions with adherence to the family’s orthodox dietary laws. The kitchen’s standout feature, an expanded island, now offers a spacious and efficient workspace. This allows several family members to cook together comfortably, without the inconvenience of bumping into each other, ensuring a harmonious and productive cooking environment.
 China Marmoglass Co.,Limited
Home > Products
Crystallized Glass,Crystallized stone 6
Crystallized Glass,Crystallized stone,Crystallized glass panel
Marmoglass,Nanoglass,Marmoglass Composite Collectively referred to as Crystallized Glass
Crystallized Glass Application:
1). Interior & external wall cladding
2). Flooring Tile, Stair, Column cladding
3). Basin, Countertop, Table, Bar
4). bath, Kitchen, any tops, round pillar and furniture decoration etc .
Crystal white is a kind of artificial stone . It is made of glass ,which should be burned in the oven for two days under the more than 1000C temperature . It is much different from natural stone from all sides.
1. Natural and soft texture,
2. Varied colors such white, beige, carrara white
3. Good weather resisting property and durability
4. Zero percent of water absorption , not be polluted easily
5. Green environmental building material
6. High-intensity, light weight
7. Bending formation, economical, time saving
8. scratch resistant ,withstand high-heat .
More details about it :
1. There are more than 10 colors of crystallized glass panel products available: Pure white, yellow, silver yellow, silver grey, grey in white, grey spot white, USA grey spot white, yellow in white….
2. Panel thickness: 10-30MM
3. Normal specifications (mm):
1800*3000*18 1200*2400*18 600*600*18 1200*1200*18
1600*2400*18 1800*3000*30 800*800*18 1000*1000*18
Thin tiles:
305*305*12mm, 450*450*12mm
457*457*12mm, 400*400*12mm
600*600*12mm 1200*2400*12mm
4. Material: crystal quartz sand
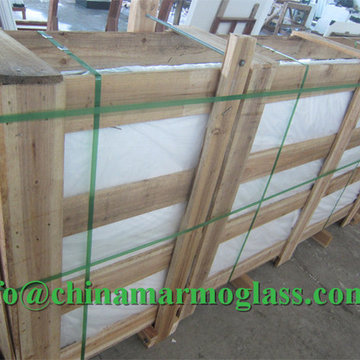
5. Packaging: Fumigated wooden crates, Bundles,foam
6. Brand name: China Marmoglass / Nanoglass
7. Place of origin: Xiamen, Fujian ,China
8. Model NO.: GS001, SN002, NANO2009, NNAO2011
9. Supply ability: 20000M2/MONTH, 30TON/DAY
10. Delivery time: generally within 10 days, after the order confirmed and the deposit received
11. Arc panel specifications (mm):
Thickness: 18-30mm
Diameter : 30cm-120cm
1.What is crystallized glass stone(Marmoglass SN002 )?
The micro crystal stone is an innovative product designed as a substitute for the rare natural white marble. It is superior to the natural white marble in terms of characteristics, where the micro crystal stone possesses extreme density making it anti-breakage, giving it zero water absorption qualities, and making it resistant to acidic and alkaline substances. at the pace that mankind is consuming the natural resources in today’s world, the micro crystal stone is the ultimate solution, the superior alternative for the external and internal applications. It is certainly a revolutionary product and the finest construction material of the 21st century.
2.Why choose crystallized glass stone(Marmoglass SN002)?
The micro-crystal stone, also known as the micro-crystal glass, Marmoglass, is a new type of high-level decoration material. It is derived from natural inorganic material through a high temperature process, and it possesses excellent characteristics including the followings:
1. High Performance
The micro-crystal stone has even texture and high density, which makes it crush resistant, anti-bending and high resistant resulting its performance being higher than natural stone. It can be used for long period with minimal damage.
2. Acid-proof alkalinity and anti-corrosion
Not only does the micro-crystal stone posses special micro-crystal characteristics, it also has special glass features such as a fine texture, shiny surface and light reflection effect.
3. Fine Texture
We have the flexibility to manufacture any colors as per customer requirements while also making up the defect of color differences, which exists in natural stone. While the product is widely used for interior and interior decoration of star-level hotels, subways, local landmark buildings, airports, and office building etc, it is more suitable for high-level home decoration.
4. Pollution-resistance and easy maintenance
The micro-crystal is a kind of inorganic crystalline material with stable chemical characteristics. Its acid proof alkalinity and anti-corrosion nature are superior to nature stone, specifically its anti-weather characteristics whereby it is unaffected by the wind or sunlight.
5.A wide application range
The water absorption rare of micro-crystal is quite low, close to zero. Several types of dirty pulps and dyed solution have difficulty in penetrating it. Any dirt on the surface is easily cleaned and it is convenient to mankind.
6. Heat-bend reformation
With the heating method, the micro-crystal can be made into various arched profiles and arched slabs. the process is simple and it allows us to save time, cost, material and resources.
7. No radioactive elements
In the process of manufacturing the micro-crystal stone, we have integrated the elimination of all the harmful radioactive elements that are found in natural stone from its components. It is therefore the safest and most environmentally friendly building material in our modern world.
Crystallized glass can be processed into slab, tile, countertop, column and vanity top, wash basin and etc. It is applicable for flooring, interior and exterior wall cladding, stairs and table. Contributed to the character of no color difference, so it is widely used for top grade hotel, business building shopping mall and such great construction.
Physical Parameter
Density
2.70 g/cm
Water Absorption
0.01%
Compressive Strength
126 Mpa
Radioactive
Class A (Suitable for indoor and outdoor)
Size
Slabs
2400/2600/2800/3000 x 1800/1600/1400/1500mm
Cut-to-size Tiles
30 / 40 / 50 / 60 / 80 / 100cm X 30 /40/50 /60/80 /100cm
12"x12", 24"X12", 24"x24" or customized size
Thickness
1.2cm,1.8cm (3/4'), 2.0cm, 2.5cm, 3.0cm,
Finishing
Polished, honed
Usage
Flooring, Walls, Stairs / Steps, Counter tops, Vanity, Paving / Curbstone, Pillar, Column, Border, Skirting, Window Sills
Quality Control
Thickness Tolerance
+- 1mm;
Polishing Grade
above 100 degree
Crack / Spot
EU / US Standard: zero
QC Standard
AQL2.5/4.0 ITS
Certificate
CE, ISO, GB/T19001-2008
Advantage
1. Own factory with stable supply;
2. Factory direct with good price and prompt delivery;
3. Good Management System for good quality;
4. Value-added service.
large glass white artificial stone of Packing
Inner Packing
Cover with foam and plastic film, corner paper board protection
Individual Carton
Individual carton packing with trademark is available upon request
Outer Packing
Plastic tapes in 6 sides, further strengthened with iron sheet in the corner
Shipping Mark
OEM
Port of Loading
Xiamen Port of China
Delivery Lead Time
Normally 10-15 days for one 20’ GP, faster delivery is available upon confirmation
Trade Term
FOB, CFR, CIF, etc.
Loading Info.
Thickness
Qty per pallet
Pallets per 20ft container
QTY per 20ft container
Square Meter per 20ft container
Weight per 20ft container
Big slab size
3000*1200mm
12mm
25pcs
7
175pcs
600-900 m2
21000kgs
3000*1400mm
15mm
20pcs
7
175pcs
500-700 m2
21000kgs
3000*1600mm
20mm
15pcs
7
105pcs
350-500 m2
21000kgs
3200*1600mm
30mm
10pcs
7
70pcs
250-358 m2
21000kgs
Installation Recommendations
Wall Cladding
1.Wall should be leveled and cleaned,
2.Fix the panel on the wall with wire and expansion screw tightly,
3.Fill the space between the panel and the wall with cement mortar of ratio 1:3,
4.Clean the extra mortar and dirt on the surface.
Floor Installation
1.Mark out the baseline of gound level,
2.Mix the mortar with ratio of 1 cement to 4 sand to have semi-day mortar,
3.Lay the mixed mortar in level with a layer of 3-4cm thickness,place the tile over the mortar and adjust the height properly to be leveled,
4.Remove the tile after level adjustment.Put a thin layer of cement powder on the mortar and add water on it to become wet,
5.Put the tile on top and gently knock with rubber hammer until it sealed with the mortar properly. Make sure the tile is leveled and has the same space between each other. Those tiles which are not leveled with others should be removed and repeat the leveling procedure in step 4.Genetally,the space between two tiles should be 2mm for water evaporation and normal expansion.
Daily maintenance of Micro Crystal Stone
1.The laying area of micro crystal stone can only be opened for use or stacking any item on top after at least 24 hours of filling the gap,
2.The ground must be covered with plywood or carpet for protection in case of doing other decoration work after the installation of micro crystal stone floor,
3.In areas like exit and entrance, the surface of micro crystal stone floor should be covered by carpet or plywood to protect it from the damage of abrasion of sand or other hard material.
4.Do not use general floor wax on micro crystal stone,General floor wax is an oil-based wax which is easily stuck to dust.
5.Please use rubber wheels for shopping cart and trolley on micro crystal stone floor, for the hard wheel may scratch and damage the surface,
6.Regular care and maintenance is the key for long lasting of micro crystal stone’s high glossy and reflection.
Important Notice
1.Make sure the ground of laying area is dry and clean before laying mortar. The ratio 1:3(volume ratio) must be strictly followed and no extra water added during the installation progress
2.In the choice of using white cement as the filling material, the strength and quality of the cement must be checked properly.
3.It is not recommended to store micro crystal stone outdoor for long time. It should be covered with rock wool in winter and moved into indoor 2 hours in advance before installation. It also needs to be covered with waterproof cloth when installing during the rainy days outdoor,
4.When using micro crystal stone as ground floor,2mm wild gap must be left between the joints for the benefit of the water vaporization and physical expansion. In the case of large-scale installation, it is recommended to leave an 8mm expansion joint,
5.It is recommended that the area of micro crystal stone to remain-not used-for at least 24 hours and kept 2-3 days before passing or storing items on top.
Marmoglass Polished Edge, Shining !
China Marmoglass SN002 Slabs Packing and Ready for ship
We not only make Slabs, we also can make:
- Project Tiles
- Countertop
- Tabletop
- Vanitytop
- Column
Tags: Marmoglass, Crystallized glass panel, nano crystallized glass panel, pore marmoglass, pore crystallized glass panel, Artificial Stone, Hole-Free Micro Crystal Stone, Pure white stone, Crystallized glass tile, Crystal glass tile, pure white artificial white marble, Marmo Glass, Glass Marble, White Marble, Marmoglass, nano marmoglass, no pore marmoglass, non-pore crystallized glass panel, glass marble, white marble, crystal white marble, white stone, white marble tile, Micro-crystal stone, Crystallized glass, Crystallized White Stone, Crystallized White Stone, Micro-crystallized composite tile, Hole-Free Micro Crystal Stone, Micro-crystallized composite tile, White Marble Tiles, pure white marble
China Marmoglass SN002 Strong Packing Crates
China Marmoglass SN002 and Nanoglass NANO3 Container Loading
Welcome to our product page of China Marmoglass, in which you can find detailed information of Marmoglass. China Marmoglass Co.,Limited offer Crystallized White Marmoglass is good in quality and competitive in price. China Marmoglass Co.,Limited is the manufacturer and supplier of Marmoglass,White Crystallized Glass Panel,Nanoglass. Crystallized Glass Stone,Crystallized Glass Panel,Crystallized Glass Stone Tile,Crystallized Glass Stone Countertop,Marmoglass also known as Nanoglass and White Crystallized Glass,Marmoglass, Crystallized Glasss is the popular materials for interior and exterior applications, including kitchen countertops, bathroom vanities, commercial foyer wall claddings, etc. China Marmoglass Co.,Limited is the Manufacturer and export Crystallized Glass and Crystallized Glass products. Crystallized Glass can be used Interior & external wall cladding, Flooring Tile, Stair, Column cladding, Basin, Countertop, Table, Bar, bath, Kitchen, any tops, round pillar and furniture decoration etc. Super White Nanoglass Slab, You Can Buy Various High Quality Super White Nanoglass Slab Products from Super White Nanoglass Slab Suppliers and Super White Nanoglass Slab Manufacturers at Chinamarmoglass.com
 Crafted Custom Homes + Renovations
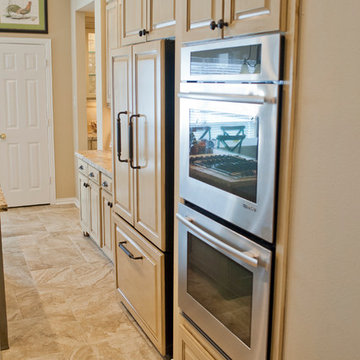
This home is a typical suburban home in a planned community in Katy, Texas (outside of Houston). We took the existing pre-fab builder-grade stained cabinets and refaced them with poplar raised panel doors and drawer fronts. We extended the island and added the spindles. We added decorative feet to the cabinet bases. We installed custom panels on the new Jenn-Air appliances. We added decorative corbels under the bar and in the butler's pantry. The cabinets were painted with a base color of Sherwin Williams Macadamia (SW 6142) and then glazed with Van Dyke Brown (SW 70471). A clear sealer coat was then applied. The island was painted Storm Cloud (SW 6249) and then faux-finished with the same technique. The backsplash tile is from Arizona Tile and is called San Mateo Split Face.
 TVL Creative Ltd.
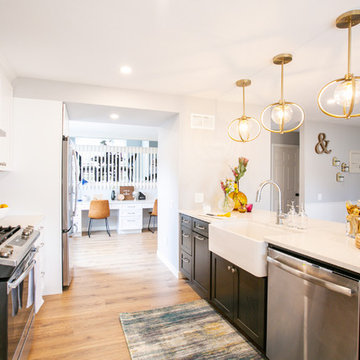
Cramped kitchen be gone! That was the project motto and top priority. The goal was to transform the current layout from multiple smaller spaces into a connected whole that would activate the main level for our clients, a young family of four.
The biggest obstacle was the wall dividing the kitchen and the dining room. Removing this wall was central to opening up and integrating the main living spaces, but the existing ductwork that ran right through the center of the wall posed a design challenge, er design opportunity. The resulting design solution features a central pantry that captures the ductwork and provides valuable storage- especially when compared to the original kitchen's 18" wide pantry cabinet. The pantry also anchors the kitchen island and serves as a visual separation of space between the kitchen and homework area.
Through our design development process, we learned the formal living room was of no service to their lifestyle and therefore space they rarely spent time in. With that in mind, we proposed to eliminate the unused living room and make it the new dining room. Relocating the dining room to this space inherently felt right given the soaring ceiling and ample room for holiday dinners and celebrations. The new dining room was spacious enough for us to incorporate a conversational seating area in the warm, south-facing window alcove.
Now what to do with the old dining room?! To answer that question we took inspiration from our clients' shared profession in education and developed a craft area/homework station for both of their boys. The semi-custom cabinetry of the desk area carries over to the adjacent wall and forms window bench base with storage that we topped with butcher block for a touch of warmth. While the boys are young, the bench drawers are the perfect place for a stash of toys close to the kitchen.
The kitchen begins just beyond the window seat with their refrigerator enclosure. Opposite the refrigerator is the new pantry with twenty linear feet of shelving and space for brooms and a stick vacuum. Extending from the backside of the pantry the kitchen island design incorporates counter seating on the family room side and a cabinetry configuration on the kitchen side with drawer storage, a trashcan center, farmhouse sink, and dishwasher.
We took careful time in design and execution to align the range and sink because while it might seem like a small detail, it plays an important role in supporting the symmetrical configuration of the back wall of the kitchen. The rear wall design utilizes an appliance garage mirrors the visual impact of the refrigerator enclosure and helps keep the now open kitchen tidy. Between the appliance garage and refrigerator enclosure is the cooking zone with 30" of cabinetry and work surface on either side of the range, a chimney style vent hood, and a bold graphic tile backsplash.
The backsplash is just one of many personal touches we added to the space to reflect our client's modern eclectic style and love of color. Swooping lines of the mid-mod style barstools compliment the pendants and backsplash pattern. A pop of vibrant green on the frame of the pantry door adds a fresh wash of color to an otherwise neutral space. The big show stopper is the custom charcoal gray and copper chevron wall installation in the dining room. This was an idea our clients softly suggested, and we excitedly embraced the opportunity. It is also a kickass solution to the head-scratching design dilemma of how to fill a large and lofty wall.
We are so grateful to bring this design to life for our clients and now dear friends.
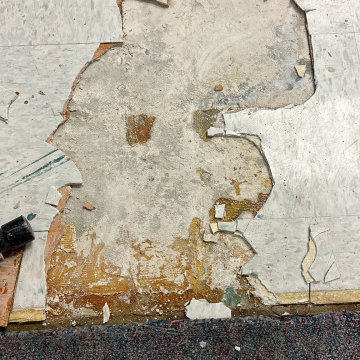 MD Flooring Solutions, LLC
- To move furniture: 12x huge and heavy pieces of furniture out and back in from Main floor: break room, one bathroom, 6 exam rooms, lab room
To move Appliances out and back in: Fridge and mini fridge
- Take Up, Remove & Haul Away 12x12 Glued Down VCT (Vinyl Composition Tile) from floors from Main floor: break room, one bathroom, 6 exam rooms, lab room - 849.72 sqft
- Take Up, Remove & Haul Away vinyl cove base baseboards from Main floor: kitchen, one bathroom, 6 exam rooms, kitchenette - 849.72 sqft
- To Install glued down Luxury Vinyl Planks on floors on Main floor: break room, one bathroom, 6 exam rooms, lab room - 849.72 sqft
- To install Glued Down 4" Cove Base Baseboards on Main floor: break room, one bathroom, 6 exam rooms, lab room (292 LNFT)
- To install 6x black rubber T- moldings transition pieces - 3.5 LFT each
 KITCHEN SOLVERS - La Crosse
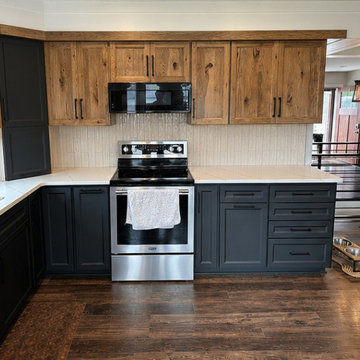
For this kitchen remodel, the homeowners wanted a fresh new look without the expense and disruption of a full kitchen tear-out. Cabinet refacing with shaker bevel doors provided the perfect solution.
The transformation features a stunning two-tone design with Black SmartMatte base cabinets paired with Light American Walnut on Rustic Hickory upper cabinets, creating a beautiful balance of warmth and contrast. To complete the look, we installed Linnstone Capri Gold quartz countertops and a 3" x 12" Artcrafted Dune backsplash.
Additional upgrades included new drawer boxes for improved storage, custom island legs, a new appliance garage, and converting standard base cabinets into convenient three-drawer banks for enhanced functionality. The result is a kitchen that feels completely refreshed, more organized, and beautifully updated.
 Greywolf Cabinets and More
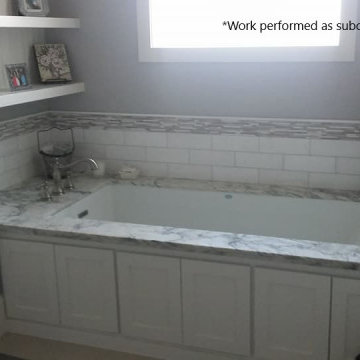
Clean, timeless design meets custom millwork in this primary bathroom installation.
We crafted a custom panel manager/tub surround in a classic white Shaker profile, topped with a rich marble-look countertop deck surrounding a deep drop-in soaking tub. The walls feature white subway tile wainscoting accented by a glass mosaic accent border. Flanking the tub alcove is a matching custom white vanity and built-in floating wall shelves for display and storage.
Key Features & Highlights:
Custom Tub Surround: White Shaker paneling built out to seamlessly frame the drop-in tub setup.
Stone Tub Decking & Countertop: Veined marble-look stone top continuing onto the adjacent vanity.
Tile Accent Detailing: White subway tile wainscoting finished with a delicate mosaic band trim.
Matching Storage Solutions: Integrated white floating open shelves in the wall niche and coordinating Shaker vanity base.
 MIG Furniture Design, Inc.
Final Sale! Price reduced below wholesale. First come, first served. While stocks last!
USUALLY IN STOCK. Usually leaves our warehouse within 3-7 business days.
Free shipping and assembly within New York City. Enter Coupon code 'NYC' on checkout.
Made in Italy by Gruppo Spar Holding
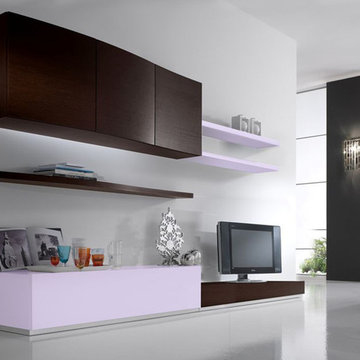
Modern Italian Wall Unit Closeout Composition Avio A by Spar. This stylish wall unit composition will be an excellent design solution for any modern living room. The entertainment center provides an abundance of storage space, both hidden and exposed, to aid with the organization of all your belongings. Its wide media area allows to place a modern large TV with all possible media remote control devises. Three shelves are great for keeping books, CDs, photos, or other decorative exhibits. The three-door hanging cabinet complements the design of this wall unit composition, featuring concave and convex shape that adds elegance and uniqueness to the interior. The wall unit is shown in Wenge finish and High Gloss Lilac lacquer.
MATERIAL/CONSTRUCTION:
Structure: Made with particle board of wood, covered with E1 melamine finishes or high gloss lacquer
Drawers: Made with panels of wood particles in E1-coated finish PVC beech. Metal runners with fine race to fall
The starting price is for the Wall Unit Composition Avio A as shown in the main picture.
Dimensions:
Wall Unit Composition: W106.3" x D22.8" x H78"
Base Cabinet (Lilac): W59" x D22.8" x H13.7"
Base Cabinet (Wenge): W47.2" x D22.8" x H7.8"
 lavish
This breathtaking whole-home renovation is a masterclass in balancing raw, natural materials with refined coastal elegance. Reclaimed wood, fieldstone, linen, cane, and soft blue hues weave a cohesive story from the soaring great room all the way up to the nursery — creating a home that feels both grounded in the land and kissed by the sea.
Great Room
The emotional heart of the home is a spectacular great room anchored by a floor-to-ceiling fieldstone fireplace with a hand-hewn reclaimed wood beam mantel and a herringbone brick firebox. Flanking the fireplace are generous built-in white shelving units with linen-backed interiors, beautifully styled with blue-and-white chinoiserie, ceramic vessels, and coastal curiosities.
Overhead, a dramatic cathedral ceiling with exposed reclaimed wood trusses in a king-post configuration draws the eye upward and gives the space an almost barn-like grandeur — softened immediately by the warmth of crisp white walls and abundant natural light pouring in through a wall of French doors. Those doors open to a deck overlooking mature woodland, blurring the boundary between inside and out.
The furnishings strike a balance that feels lived-in and luxurious at once. Two generous cream linen sofas face each other across a soft blue-gray upholstered square ottoman, while a pair of cognac saddle-leather swivel chairs add warmth and contrast. A stone pedestal side table, a rattan tray, and an oversized abstract seascape canvas above the mantel complete a room that is effortlessly inviting.
Kitchen & Dining
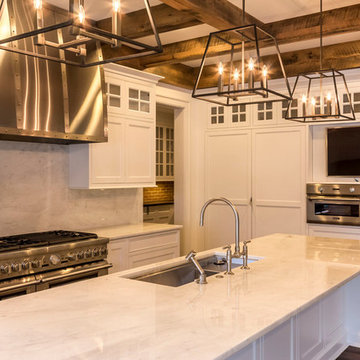
The open-plan kitchen and dining space flows seamlessly from the great room, united by the same reclaimed beam ceiling and wide-plank light oak hardwood floors. The kitchen itself is a dream: custom white inset cabinetry with brushed nickel hardware surrounds a showstopping island with a pale blue-gray painted base and a warm natural butcher block top — a choice that brings organic texture and approachability to an otherwise polished space.
A handmade zellige-style light blue brick backsplash adds subtle artisanal character behind a professional-grade six-burner gas range framed by a tailored white custom range hood. Open glass shelves nearby display a curated collection of blue-and-white chinoiserie vases, adding personality and a collected feel. Clear glass-and-nickel pendant lanterns hang over the island, while a stunning crystal rod linear chandelier marks the dining area — a glamorous counterpoint to all the rustic texture in the room.
Cane-back counter stools and a matching set of cane dining chairs in white keep the palette light, fresh, and connected to the home's coastal character. A stone arch passageway between the kitchen and adjacent rooms adds architectural drama and reinforces the home's commitment to natural materiality.
Staircase & Entry
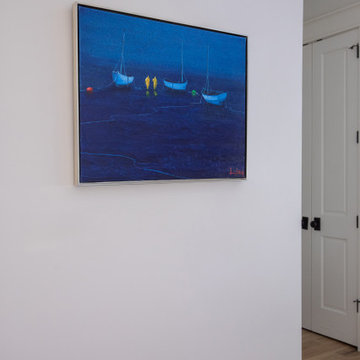
The staircase is a design moment in its own right. A classic woven runner in gray with a crisp navy border brings pattern and polish to the oak treads, while a built-in window seat with a navy cushion at the landing creates a charming reading nook. A nautical-inspired abstract canvas on the entry wall sets the tonal palette for the upper level.
Primary Bedroom
Upstairs, the primary bedroom is a soft, serene retreat wrapped in a soothing dusty blue — walls and ceiling painted the same tranquil tone for an enveloping, cocoon-like effect. A white linen platform bed with an upholstered headboard sits beneath a wide horizontal panoramic cloud painting in a warm wood frame, evoking an open sky. The nightstands — in a soft white with brass ring pulls — are paired with ribbed ceramic table lamps that echo the room's quiet coastal sensibility.
Blue-and-white gingham curtains on a brass rod, a soft white textured carpet, a cream leather recliner, and a slim brass reading floor lamp round out a room that feels simultaneously fresh and deeply restful. Blue embroidered bedding and a striped bolster pillow tie the whole palette together with gentle precision.
Nursery
A thoughtfully designed nursery shares the upper level's soft blue palette, with a classic white Jenny Lind spindle crib, a natural wood book rack, a wicker whale toy basket, and a gold circular mirror creating a space that is sweet without being saccharine. The same cloud painting above the bed and the soft blue walls create a dreamy, sky-like atmosphere perfectly suited for a young child.
 Art & Smart Inc
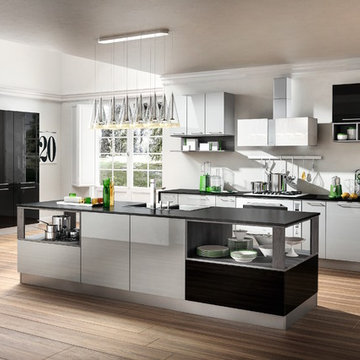
Fiat LUX...versions WHITE, CAPPUCCINO, BLACK, CREAM, BLACK CHERRY, PEARL, CHOCOLATE and TURQUOISE. Harmonious and refined design, innovative colors with glossy effect and imprint youth. LUX is a complete model with high composability features; it is based on a full development of the operative concept, together with Accessories and electric appliance of very high quality. Finally, we would like to highlight the solutions based on low worktop for snack, which give a touch of modernity to the indoor design of your home.
 Drury Design
The Setup
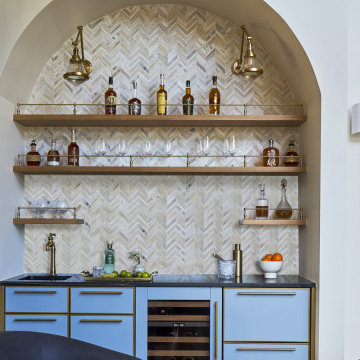
Situated between the front kitchen and the home’s primary living spaces, this bar was originally conceived as a modest bistro-style nook – a place to sit, watch TV, and enjoy a drink. As the design process evolved, both the homeowners and the design team recognized an opportunity to let the bar become something more: a visually compelling focal point that anchors circulation through the home while offering a distinct moment of hospitality.
Set within an arched recess and framed by a partial glass wall, the bar is visible from much of the public area of the home. Its location places it directly along the natural path between the kitchen, dining room, and family room, making it both highly accessible and impossible to ignore. From the outset, the goal was to ensure the bar felt intentional and complete – not an afterthought – while still complementing the adjacent kitchens rather than competing with them.
Design objectives:
Create a fully functional wet bar with refrigeration, ice, sink, waste storage, and liquor storage
Allow the bar to feel visually distinct while remaining cohesive with the surrounding spaces
Introduce color and character in a controlled, intentional way
Design the bar as a focal point within a highly visible circulation zone
Balance everyday usability with refined, layered design details
Design challenges to be solved:
Fitting a complete wet bar – including refrigeration, ice, sink, storage, and waste — into a base cabinetry run measuring under eight feet wide
Determining which appliances and storage functions were essential once upper cabinetry was eliminated
Providing adequate task lighting while also highlighting bottles and glassware on open shelving
Introducing texture and visual interest within the arched recess without overdesigning a compact space
Giving the bar a distinct identity that complements – but does not compete with – the adjacent kitchens
Design solutions:
Designing fully custom base cabinetry that prioritized core bar functions and used every inch efficiently, including split cabinetry and compact waste storage
Selecting a drawer-style refrigeration unit that combines refrigeration and freezer capabilities, allowing ice storage without sacrificing valuable width
Layering lighting with integrated LED strip lighting above and below the shelves, paired with decorative articulating fixtures to support both display and task lighting
Using a chevron-patterned natural stone tile backsplash to introduce movement, texture, and subtle color variation while keeping surrounding surfaces intentionally restrained
Specifying metal cabinetry in a soft blue tone with integrated brass framing to establish a distinctive visual identity that harmonizes with the home’s broader palette
A Space That Works on Its Own — and Within the Whole
Though compact in size, the bar carries significant visual and functional weight within the home. It stands confidently on its own as a richly detailed, fully functional destination, while also flowing naturally into the adjacent kitchens and living spaces. The result is a bar that feels purposeful rather than ornamental – a space designed to be used daily, noticed often, and appreciated over time.
 Custom Surface Solutions
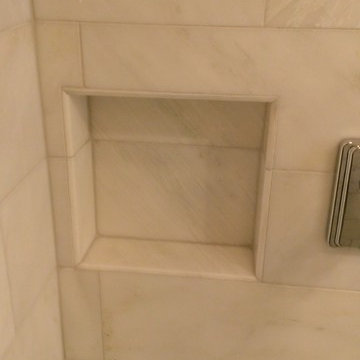
Custom Surface Solutions (www.css-tile.com) - Owner Craig Thompson (512) 430-1215. This project shows the remodel of a small 1950's vintage home master bathroom. 8"" x 18" Calcutta gold marble tile was used on the shower walls and floor wall base and ceramic gray penny tile on the floor. Shower includes curbless pan / floor, dual shower boxes, frameless glass slider, trough duel fixture sink and chrome fixtures.
84