
Search results for "Determination" in Home Design Ideas

 Hoover Architecture, PLLC
Entering the home, one is drawn into the bright open space by the view of the lake through the living room windows.
Philip Jensen Carter
Example of a large beach style light wood floor foyer design in New York with gray walls
Example of a large beach style light wood floor foyer design in New York with gray walls

 Vintage Cellars - Luxury Custom Wine Cellars OC
This stunning glass enclosed modern custom wine cellar was designed and installed by Vintage Cellars earlier this year. The Contemporary Custom Wine Room was fitted into an existing fireplace space, turning the visually unappealing sore thumb of the room into a magnificent show stopping centerpiece.
This modern luxury condo on the 31st floor in a downtown San Diego high-rise acted as a very interesting project for the custom wine cellar design team at Vintage Cellars. The modern wine room space has dual paned, insulated glass but because of the nature of glass itself, the cooling unit was recommended to be oversized.
The custom wine room space itself didn't have great options for venting the cooling unit due to the location on the 31st floor. The best option to vent was determined to treat the wine room as a wine cabinet, per se. The Cooling Unit, a CellarPro 1800 XTS, was placed in the ceiling, venting down cool air and circulating vented air back upward. The result works perfectly for a uniquely modern and contemporary space such as this.
This fully enclosed, glass front custom wine cellar boasts a 300 bottle capacity with a sleek, modern, label forward feel that ULTRA Wine Peg racking is known for. The center section is a double stacked full reveal display row, showcasing some of the homeowner's finer wines.
Though no particular space was made within the wine racking area, the design of this modern custom wine cellar was pushed back a couple of feet so that wine case storage could be an option between the glass front and the custom racking.
Additionally, the clean feel goes even further upon looking for the entrance into this wine cellar. The flat panel on the furthest left side opens slowly and almost magically when pushed in slightly. A great, modern touch!
A gorgeous, modern condo such as this is just begging to have a custom wine cellar. This space, with big help from this contemporary wine room, screams luxury upon entering. The clean, modern and sleek style within the home has found its match with an equally stunning custom wine room.
Vintage Cellars has built gorgeous custom wine cellars and wine storage rooms across the United States and World for over 25 years. We are your go-to business for anything wine cellar and wine storage related! Whether you're interested in a wine closet, wine racking, custom wine racks, a custom wine cellar door, or a cooling system for your existing space, Vintage Cellars has you covered!
We carry all kinds of wine cellar cooling and refrigeration systems, incuding: Breezaire, CellarCool, WhisperKool, Wine Guardian, CellarPro and Commercial systems.
We also carry many types of Wine Refrigerators, Wine Cabinets, and wine racking types, including La Cache, Marvel, N'Finity, Transtherm, Vinotheque, Vintage Series, Credenza, Walk in wine rooms, Climadiff, Riedel, Fontenay, and VintageView.
Vintage Cellars also does work in many styles, including Contemporary and Modern, Rustic, Farmhouse, Traditional, Craftsman, Industrial, Mediterranean, Mid-Century, Industrial and Eclectic.
Some locations we cover often include: Agora Hills, Alameda, Albany, Alhambra, Aliso Viejo, Altadena, Anaheim, Angwin, Arcadia, Aromas, Arroyo Grande, Atascadero, Atherton, Avila Beach, Balboa Terrace, Bel Air, Belmont, Belvedere, Benton, Berkeley, Bermuda Dunes, Beverly Hills, Big Sur, Bolinas, Boyle Heights, Bradbury, Bradley, Brea, Brentwood, Bridgeport, Brisbane, Buellton, Buena Park, Burbank, Burlingame, Calabasas, Calistoga, Cambria, Canoga Park, Cardiff, Carlsbad, Carmel, Carmel By The Sea, Carmel Valley, Carnelian Bay, Carpinteria, Casmalia, Castroville, Cathedral City, Cayucos, Chatsworth, Chualar, City of LA, City of SF, Coachella, Coleville, Colma, Corona Del Mar, Coronado, Coronado Island, Corte Madera, Costa Mesa, Coto De Caza, Creston, Crystal Cove, Cupertino, Cypress, Danville, Deer Park, Del Mar, Diablo, Duarte, Eagle Rock, East Palo Alto, East Pasadena, Echo Park, El Granada, El Monte, Emeryville, Encinitas, Encino, Fairfax, Foster City, Fountain Valley, Fremont, Fullerton, Garden Grove, Glendale, Golden Gate Park, Goleta, Gonzales, Granada Hills, Granite Bay, Greenbrae, Greenfield, Grover Beach, Guadalupe, Half Moon Bay, Hancock Park, Harmony, Hidden Hills, Hillsborough, Hollywood, Hollywood Hills, Huntington Beach, Indian Wells, Indio, Industry, Inner Richmond, Inverness, Irvine, Jolon, June Lake, Kentfield, King City, La Canada Flintridge, La Habra, La Honda, La Jolla, La Palma, La Quinta, Ladera Heights, Laguna Beach, Laguna Hills, Laguna Niguel, Laguna Woods, Lake Balboa, Lake Forest, Lake Tahoe, Lake View Terrace, Larkspur, Laurel Canyon, Lee Vining, Lockwood, Lompoc, Long Beach, Los Alamitos, Los Alamos, Los Altos, Los Altos Hills, Los Angeles, Los Gatos, Los Olivos, Los Osos, Malibu, Mammoth Lakes, Manhattan Beach, Marin, Marina, Marshall, Mayflower Village, Menlo Park, Mill Valley, Millbrae, Mission Hills, Mission Viejo, Mono, Monrovia, Montara, Montebello, Monterey, Monterey Park, Morro Bay, Moss Beach, Moss Landing, Mountain View, Napa, New Cuyama, Newark, Newport Beach, Newport Coast, Nicasio, Nipomo, North Hills, Northridge, Novato, Oakland, Oakville, Ocean Beach, Oceano, Orange, Orange County, Pacific Grove, Pacific Palisades, Pacoima, Palm Desert, Palm Springs, Palo Alto, Palos Verdes, Panorama City, Pasadena, Paso Robles, Pebble Beach, Pescadero, Piedmont, Pismo Beach, Placentia, Point Reyes Station, Pope Valley, Portola Valley, Presidio, Presidio Heights, Rancho Mirage, Rancho Santa Fe, Rancho Santa Margarita, Redondo Beach, Redwood City, Reseda, Rosemead, Russian Cliff, Rutherford, Saint Helena, Salinas, San Anselmo, San Ardo, San Bruno, San Carlos, San Clemente, San Diego, San Fernando, San Francisco, San Gabriel, San Gregorio, San Jose, San Juan Capistrano, San Leandro, San Lorenzo, San Lucas, San Luis Obispo, San Marino, San Mateo, San Miguel, San Rafael, San Simeon, Santa Ana, Santa Barbara, Santa Clara, Santa Clarita, Santa Margarita, Santa Maria, Santa Monica, Santa Ynez, Saratoga, Sausalito, Sea Cliff, Seal Beach, Seaside, Shadow Hills, Shandon, Sherman Oaks, Sierra Madre, Silver Lake, Solana Beach, Soledad, Solvang, Sonoma, South El Monte, South Pasadena, South San Gabriel, Spreckels, Squaw Valley, St Helena, Stanford, Stanton, Stinson Beach, Stough Park, Studio City, Summerland, Sun Valley, Sunland, Sunnyvale, Sylmar, Tahoe City, Tahoe Vista, Tarzana, Temple City, Templeton, Thousand Oaks, Thousand Palms, Tiburon, Toluca Lake, Topanga, Topaz, Torrey Pines, Tujanga, Tustin, Union City, Valencia, Verdugo Mountains, Vernon, Villa Park, Walnut, Walnut Creek, West Puente Valley, Westminster, Westwood, Whittier, Woodside, Yorba Linda, Yountville
Contact Vintage Cellars today with any of your Wine Cellar needs!
(800) 876-8789
Vintage Cellars
904 Rancheros Drive
San Marcos, California 92069
(800) 876-8789
 TKS Design Group
Download our free ebook, Creating the Ideal Kitchen. DOWNLOAD NOW
The homeowner and his wife had lived in this beautiful townhome in Oak Brook overlooking a small lake for over 13 years. The home is open and airy with vaulted ceilings and full of mementos from world adventures through the years, including to Cambodia, home of their much-adored sponsored daughter. The home, full of love and memories was host to a growing extended family of children and grandchildren. This was THE place. When the homeowner’s wife passed away suddenly and unexpectedly, he became determined to create a space that would continue to welcome and host his family and the many wonderful family memories that lay ahead but with an eye towards functionality.
We started out by evaluating how the space would be used. Cooking and watching sports were key factors. So, we shuffled the current dining table into a rarely used living room whereby enlarging the kitchen. The kitchen now houses two large islands – one for prep and the other for seating and buffet space. We removed the wall between kitchen and family room to encourage interaction during family gatherings and of course a clear view to the game on TV. We also removed a dropped ceiling in the kitchen, and wow, what a difference.
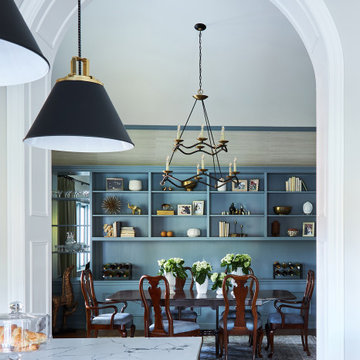
Next, we added some drama with a large arch between kitchen and dining room creating a stunning architectural feature between those two spaces. This arch echoes the shape of the large arch at the front door of the townhome, providing drama and significance to the space. The kitchen itself is large but does not have much wall space, which is a common challenge when removing walls. We added a bit more by resizing the double French doors to a balcony at the side of the house which is now just a single door. This gave more breathing room to the range wall and large stone hood but still provides access and light.
We chose a neutral pallet of black, white, and white oak, with punches of blue at the counter stools in the kitchen. The cabinetry features a white shaker door at the perimeter for a crisp outline. Countertops and custom hood are black Caesarstone, and the islands are a soft white oak adding contrast and warmth. Two large built ins between the kitchen and dining room function as pantry space as well as area to display flowers or seasonal decorations.
We repeated the blue in the dining room where we added a fresh coat of paint to the existing built ins, along with painted wainscot paneling. Above the wainscot is a neutral grass cloth wallpaper which provides a lovely backdrop for a wall of important mementos and artifacts. The dining room table and chairs were refinished and re-upholstered, and a new rug and window treatments complete the space. The room now feels ready to host more formal gatherings or can function as a quiet spot to enjoy a cup of morning coffee.
Find the right local pro for your project

 Home System Solutions
This home theater in the Broken Top neighborhood in Bend, Oregon is equipped with state-of-the-art technology, audio, video, lighting, shades and furniture.

 Housetrends Magazine
Since moving into her Dublin home two and a half years ago, Nancy Sanford has been peeling off the decades—quite literally. Built in the 1980s, the home was “very well-maintained, but very little had been done to it” in terms of updating the finishes or style, Sanford says. Plush white carpet ran from wall-to-wall-to-wall, almond-colored laminate coated the kitchen cabinets and wallpaper ran rampant—even covering some ceilings.
Despite her efforts, Sanford knew it was going to take more than cosmetic editing to shake the ‘80s and make the home her own. Although she lives in the traditional-leaning Muirfield community, Sanford adores a minimalist, contemporary style—and admits to devouring design magazines “ad nauseam.”
To implement her thoroughly modern vision, Sanford turned to Brigid Norton, an interior designer and family friend, and Kristi Youles, a kitchen designer with The JAE Company. Working together, the trio created a carefully considered contemporary design that’s easy on the eyes, and the body.
In addition to improving the flow of the kitchen—by removing a V-shaped peninsula that angled out into the room—and adding appliances like a stainless steel refrigerator, Sanford’s short list of must-haves included clean, uncluttered lines and no wall cabinets over the countertops. “I’ve found as I’ve aged, I’ve gotten shorter and just don’t use the upper cabinets,” Sanford explains.
Easy-access, smooth-slide drawers with clean slab fronts were the answer—resulting in strong visual lines, an open, airy feel and enhanced ergonomics. Starting with a “needs assessment,” Youles and Norton designed the space quite literally around Nancy. By looking at factors such as her height and which items she uses most frequently, they were able to determine the optimum placement for everything from canned goods in the pantry to cutlery, pans and plates in the customized drawers, all of which helped to achieve the ultimate kitchen organization.
But there’s more to the kitchen cabinets smooth façade than clean-lined storage. Walnut drawer fronts—found on the oven and the base of the island—are book-matched, allowing the grain to continue from drawer to drawer. And even in spaces where drawers weren’t feasible, beneath the sink and in a desk area, the designers continued the look with cabinet doors crafted to resemble drawers.
The visual continuity of these lines might not be as impactful if it weren’t for the careful selection of contrasting finishes. The designers filled the space with pure, glossy white—using a specific type of quartz, White Cliff by Cambria, to accent the bold rectangular design of the island. Then, to break up the expanse of accompanying white painted drawers, walnut was selected to bring the contrasting warmth and grain of wood without red undertones. It is commonly found in modern furniture design, as well as current productions of mid-century designs like the iconic Eames Lounge Chair from Herman Miller, Youles says.

 Amiano & Son Construction, LLC
Steve Schilling Media
Freestanding bathtub - mid-sized modern master white tile and porcelain tile porcelain tile freestanding bathtub idea in Philadelphia with an undermount sink, raised-panel cabinets, dark wood cabinets, quartz countertops, a one-piece toilet and beige walls
Freestanding bathtub - mid-sized modern master white tile and porcelain tile porcelain tile freestanding bathtub idea in Philadelphia with an undermount sink, raised-panel cabinets, dark wood cabinets, quartz countertops, a one-piece toilet and beige walls

 Ready 2 Remodel
Large L-shape size Kitchen with Open Floor Plan. Salinas White Granite with Denim Glass Mosaic Tile Backsplash. Island includes Double Sink and Raised Tier Riser for dining or socializing. Plenty of Storage with Large Soft Close Drawers, Rollout Spice Racks and Roll Out Trash. Raised Panel Cabinets with Custom Crown Molding. A Gas Range with Range Hood and Custom Fridge Surrounding cabinets.
 highland
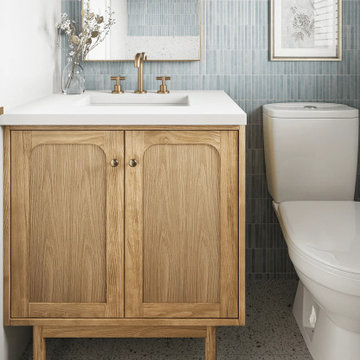
Renovating a bathroom is one of the most rewarding home improvement projects you can undertake. It adds immediate value to your property and elevates your daily routine. However, designing the perfect space requires balancing aesthetics with practical utility. At the heart of this balance is the vanity — it is the functional hub where you get ready each morning, a vital storage unit, and the visual centerpiece of the room.
To ensure you make the right investment, here is an in-depth look at choosing a bathroom vanity that blends style, longevity, and everyday functionality.
1. Assessing the Layout and Space Constraints
Before you fall in love with a specific design or finish, you must determine what your bathroom can physically handle. Scale is everything. A vanity that is too large disrupts traffic flow, while one that is too small gets lost visually and lacks adequate storage.
The next major step is determining the scale of your plumbing fixtures. Understanding how to choose a bathroom sink and vanity setup comes down to a simple choice: single or double sinks. Your choice will depend on who uses the bathroom and the overall footprint of the space.
Single Sink Vanities
Typically ranging from 20 to 48 inches (50–120 cm) in width, single vanities are the ideal choice for powder rooms, guest bathrooms, or small master suites. For very compact spaces, you can find narrower options starting around 16 inches (40 cm). The major advantage of a single-sink layout is that it provides more usable countertop space for cosmetics, toiletries, and decorative items. If you want to skip the guesswork and invest in a premium, beautifully handcrafted fixture, explore the luxury collections at Willow Bath and Vanity. From elegant single vanities to spacious double setups, their masterfully built furniture combines solid wood construction with elite styling to transform any bathroom into a spa-like retreat.
Double Sink Vanities
Usually starting at 48 inches (120 cm) and extending up to 72 inches (180 cm) or more, double vanities are a lifesaver for shared master bathrooms. They allow two people to get ready simultaneously without fighting for sink space. Keep in mind that a double vanity naturally reduces both cabinet storage space and countertop real estate since a second sink basin and plumbing lines take up substantial interior room.
Sink Types to Consider
The countertop is the workhorse of the bathroom. It regularly comes into contact with running water, toothpaste, soapy residue, and high-heat styling tools. Knowing how to choose a bathroom vanity top requires evaluating how much maintenance you are willing to perform against the look you want to achieve. Material Pros Cons Maintenance Level Quartz Highly durable, non-porous, stain and scratch-resistant. Offers the look of stone without the hassle. Premium pricing; can show seams on very large custom layouts. Low (No sealing required) Marble Timeless, elegant, and luxurious. Every slab features a completely unique veining pattern. Porous; prone to scratching, etching from acids, and water stains. Requires careful daily use. High (Requires regular sealing) Granite Naturally strong, heat-resistant, and chemically stable. Unique earthy patterns. Porous; can chip if subjected to heavy impacts. Medium (Requires occasional sealing) When coordinating your countertop, ensure it complements your bathroom’s floor tiles, shower surround, and plumbing hardware to maintain visual harmony.
4. Selecting the Core Vanity Style and Finish
Once the functional components are locked in, you can focus on the architectural style of the vanity base. The base dictates the design theme of the entire room.
Conclusion
Choosing the perfect vanity is a step-by-step process that combines precise measurements with your personal design taste. By taking careful measurements, choosing between a single- or double-sink setup, and picking a durable counter material like quartz or granite, you can transform your bathroom into a beautiful, organized retreat. Prioritize high-quality materials and smart craftsmanship, and your new vanity will look spectacular and serve your household reliably for years to come.
1. Assessing the Layout and Space Constraints
Before you fall in love with a specific design or finish, you must determine what your bathroom can physically handle. Scale is everything. A vanity that is too large disrupts traffic flow, while one that is too small gets lost visually and lacks adequate storage.
- Take Precise Measurements: measure the available width, depth, and height. Remember to account for surrounding fixtures.
- Check Clearance Zones: ensure there is enough clearance for the bathroom door to swing open, for shower glass doors to clear the vanity, and for drawers and cabinet doors to extend fully without hitting the toilet or walls.
-
Locate Existing Plumbing: moving pipes can significantly increase renovation costs. If you want a seamless installation, look for a vanity configuration that aligns easily with your current plumbing setup.
The next major step is determining the scale of your plumbing fixtures. Understanding how to choose a bathroom sink and vanity setup comes down to a simple choice: single or double sinks. Your choice will depend on who uses the bathroom and the overall footprint of the space.
Single Sink Vanities
Typically ranging from 20 to 48 inches (50–120 cm) in width, single vanities are the ideal choice for powder rooms, guest bathrooms, or small master suites. For very compact spaces, you can find narrower options starting around 16 inches (40 cm). The major advantage of a single-sink layout is that it provides more usable countertop space for cosmetics, toiletries, and decorative items. If you want to skip the guesswork and invest in a premium, beautifully handcrafted fixture, explore the luxury collections at Willow Bath and Vanity. From elegant single vanities to spacious double setups, their masterfully built furniture combines solid wood construction with elite styling to transform any bathroom into a spa-like retreat.
Double Sink Vanities
Usually starting at 48 inches (120 cm) and extending up to 72 inches (180 cm) or more, double vanities are a lifesaver for shared master bathrooms. They allow two people to get ready simultaneously without fighting for sink space. Keep in mind that a double vanity naturally reduces both cabinet storage space and countertop real estate since a second sink basin and plumbing lines take up substantial interior room.
Sink Types to Consider
- Undermount: installed beneath the counter for a smooth, seamless surface that is incredibly easy to wipe down.
- Vessel: sits atop the counter like a decorative bowl. It makes a bold style statement but raises the overall height of the counter surface.
- Drop-In: features a lip that rests on the counter cutout. It is easier to install, but its edges can catch dirt.
-
The countertop is the workhorse of the bathroom. It regularly comes into contact with running water, toothpaste, soapy residue, and high-heat styling tools. Knowing how to choose a bathroom vanity top requires evaluating how much maintenance you are willing to perform against the look you want to achieve. Material Pros Cons Maintenance Level Quartz Highly durable, non-porous, stain and scratch-resistant. Offers the look of stone without the hassle. Premium pricing; can show seams on very large custom layouts. Low (No sealing required) Marble Timeless, elegant, and luxurious. Every slab features a completely unique veining pattern. Porous; prone to scratching, etching from acids, and water stains. Requires careful daily use. High (Requires regular sealing) Granite Naturally strong, heat-resistant, and chemically stable. Unique earthy patterns. Porous; can chip if subjected to heavy impacts. Medium (Requires occasional sealing) When coordinating your countertop, ensure it complements your bathroom’s floor tiles, shower surround, and plumbing hardware to maintain visual harmony.
4. Selecting the Core Vanity Style and Finish
Once the functional components are locked in, you can focus on the architectural style of the vanity base. The base dictates the design theme of the entire room.
- Freestanding vanities: sit directly on the floor, supported by legs or a solid kickboard base. This is a traditional, stable configuration that offers the maximum hidden cabinet and drawer storage space.
- Wall-Mounted (Floating) vanities: anchored directly onto the wall studs, leaving the floor underneath completely clear. Floating vanities are staples of modern, minimalist design. They create an illusion of space, making small rooms look larger, and make cleaning the bathroom floor incredibly easy.
- Console vanities: feature an open shelving design supported by a metal or wood frame. It offers a light, airy look reminiscent of a boutique hotel, though it sacrifices hidden storage.
Conclusion
Choosing the perfect vanity is a step-by-step process that combines precise measurements with your personal design taste. By taking careful measurements, choosing between a single- or double-sink setup, and picking a durable counter material like quartz or granite, you can transform your bathroom into a beautiful, organized retreat. Prioritize high-quality materials and smart craftsmanship, and your new vanity will look spectacular and serve your household reliably for years to come.

 L Rose Interior Design
Photographer- Katrina Wittkamp/
Architect- Visbeen Architects/
Builder- Homes By True North/
Interior Designer- L Rose Interior Design
Inspiration for a large cottage u-shaped limestone floor and beige floor open concept kitchen remodel in Grand Rapids with an undermount sink, raised-panel cabinets, white cabinets, quartz countertops, white backsplash, stone tile backsplash, stainless steel appliances, an island and white countertops
Inspiration for a large cottage u-shaped limestone floor and beige floor open concept kitchen remodel in Grand Rapids with an undermount sink, raised-panel cabinets, white cabinets, quartz countertops, white backsplash, stone tile backsplash, stainless steel appliances, an island and white countertops


 Phoenix Home Remodeling
Their Kitchen Remodel
Siene & Kentay’s tired kitchen needed some attention. The large and heavy stone covered hood vent paired with the dark stained cabinets sucked the life and light out of the room.
One thing that struggled was lighting. Even with the walls of windows the dark features just absorbed the light.
We started by using a soft white shaker cabinet called Dove White as the main cabinet color in the kitchen. We removed the stone from the hood and the dark slate from the backsplash.
We also removed the dated shape of the peninsula by squaring it off. By doing this, the new walking area improved and allows for transitioning between rooms.
The oddly shaped island in the center struggled to give them the storage they needed. They were large cabinets, but items usually got stuck or lost.
After determining that Siene wanted to prepare food here, we opted to do deep drawer cabinets to store a lot of her prep items at arm’s reach.
The Island and bar cabinets are in a natural stain called Fawn. This color complimented the existing slate flooring. We also lined the hood in trim that matches the island.
The island is also waterfalled on both sides with quartz from Arizona Tile called Ivory White Honed.
Kitchen getting remodeled before & after photo
Kitchen being remodeled before and after photo
Just off the kitchen there was a bar, however it was hidden from all rooms. We decided that we would move the bar to a more prominent place in the home, and the existing would be turned into an appliance pantry.
A place for the coffee maker, microwave, and other smaller appliance storage.
We finished the kitchen with a simple backsplash in a lantern white mosaic with a natural tan grout. The door hardware, faucet from Delta and the new pendant lighting are all in the stainless family allowing for depth and consistency.
The new bar features a Sub-Zero wine column with refrigerated storage below. The upper lit glass cabinets offer a chance to showcase stemware and spirits.
This custom cabinet install allows the wood to shine and offers storage.
Lastly, the additional lighting installed in all areas now is controllable. Siene and Kentay have full control and can direct the light and how much is used.
When they want a night in, they can turn down the lights and relax. In their new updated family room in front of a newly integrated modern fireplace.
Kitchen getting renovated before and after photo
Laundry Room Remodeling
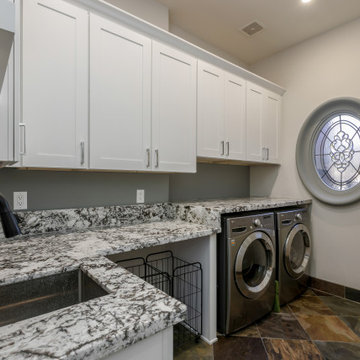
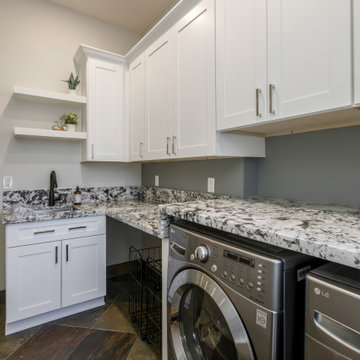
Jokingly, Siene called her Laundry Room the Christmas Box. We traded the red and green wallpaper for paint called Drift of Mist from Sherwin Williams.
The new white cabinetry offers a lot of storage they are , and a dedicated folding station was integrated for easy transitioning between loads of laundry.
 SUPERIOR CHIMNEY SERVICES CORPORATION
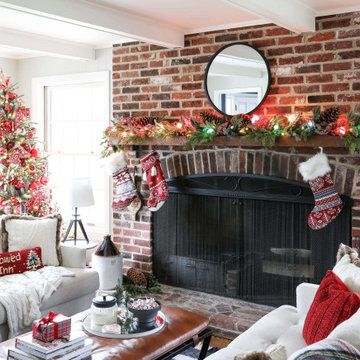
A certified chimney inspection in Illinois is one of the key ‘to-do’s’ for the holidays. The last thing you need are a bunch of complaints because it’s too cold.
There’s a cold draft coming from the fireplace. Or the fire is nice and warm, but the kids playing are starting to cough because there’s a backup of smoke coming into the home. Now you have to open the windows and everyone is cold again. There are enough stresses the host must deal with, do we need to add another one?
What is a Certified Chimney Inspection?
According to the CSIA, a certified chimney inspection is an evaluation of the chimney or venting system to assess its condition and determine if it’s fit for use. Superior Chimney is certified by the CSIA to perform chimney inspections and chimney sweeps as well. What this means for you is that our technicians are trained to adhere to the NFPA 211 standard which states that the chimney and venting systems are to be inspected each year regardless if it’s a woodburning gas or unused fireplace and chimney.
Chimney Inspection Levels
A Level 1 inspection is the minimum required. How do you know this one is for you? A certified chimney inspection is when you have your chimney swept and inspected each year. Nothing has changed, you use it (or don’t use it) any differently than in the past.
A Level 2 inspection is when a change has been made to your system. This can include a change in the type of fuel being used such as changing over from gas to woodburning or from not using the fireplace to using it even if it is only once per year. Another change can also be the change to the shape of the flue or you had a new flue lining installed which is different that what you had prior.
A Level 2 is also necessary if you sold your home or if there’s been a tornado, bad storms or those (once in a few years) earthquakes.
Level 3 inspection is for more serious hazards and issues. The normal technician tools won’t do and they need special tools in order to inspect closed out portions that can’t be viewed easily.
Reason for a Yearly Inspection…
One of the main reason your chimney and fireplace needs an inspection…regardless if you use the fireplace or not…is the winter freeze thaw cycles. This is when the air temperature drops to 32 degrees or below to freeze the rain and/or snow and then goes right back up in temperature for the rain and/or snow to thaw.
As we have all experienced, winter and early spring are the perfect times of year to experience the freeze thaw cycle.
Finally…
Now that you know the stress your chimney and fireplace goes through each year, be sure to get it swept and inspected by a certified chimney technician from Superior Chimney. This will keep the holiday complaints down to a minimum. Contact us today at 877-CHIM-FIX (877-244-6349)
 Phoenix Home Remodeling
Their Kitchen Remodel
Siene & Kentay’s tired kitchen needed some attention. The large and heavy stone covered hood vent paired with the dark stained cabinets sucked the life and light out of the room.
One thing that struggled was lighting. Even with the walls of windows the dark features just absorbed the light.
We started by using a soft white shaker cabinet called Dove White as the main cabinet color in the kitchen. We removed the stone from the hood and the dark slate from the backsplash.
We also removed the dated shape of the peninsula by squaring it off. By doing this, the new walking area improved and allows for transitioning between rooms.
The oddly shaped island in the center struggled to give them the storage they needed. They were large cabinets, but items usually got stuck or lost.
After determining that Siene wanted to prepare food here, we opted to do deep drawer cabinets to store a lot of her prep items at arm’s reach.
The Island and bar cabinets are in a natural stain called Fawn. This color complimented the existing slate flooring. We also lined the hood in trim that matches the island.
The island is also waterfalled on both sides with quartz from Arizona Tile called Ivory White Honed.
Kitchen getting remodeled before & after photo
Kitchen being remodeled before and after photo
Just off the kitchen there was a bar, however it was hidden from all rooms. We decided that we would move the bar to a more prominent place in the home, and the existing would be turned into an appliance pantry.
A place for the coffee maker, microwave, and other smaller appliance storage.
We finished the kitchen with a simple backsplash in a lantern white mosaic with a natural tan grout. The door hardware, faucet from Delta and the new pendant lighting are all in the stainless family allowing for depth and consistency.
The new bar features a Sub-Zero wine column with refrigerated storage below. The upper lit glass cabinets offer a chance to showcase stemware and spirits.
This custom cabinet install allows the wood to shine and offers storage.
Lastly, the additional lighting installed in all areas now is controllable. Siene and Kentay have full control and can direct the light and how much is used.
When they want a night in, they can turn down the lights and relax. In their new updated family room in front of a newly integrated modern fireplace.
Kitchen getting renovated before and after photo
Laundry Room Remodeling
Jokingly, Siene called her Laundry Room the Christmas Box. We traded the red and green wallpaper for paint called Drift of Mist from Sherwin Williams.
The new white cabinetry offers a lot of storage they are , and a dedicated folding station was integrated for easy transitioning between loads of laundry.
 TKS Design Group
Download our free ebook, Creating the Ideal Kitchen. DOWNLOAD NOW
The homeowner and his wife had lived in this beautiful townhome in Oak Brook overlooking a small lake for over 13 years. The home is open and airy with vaulted ceilings and full of mementos from world adventures through the years, including to Cambodia, home of their much-adored sponsored daughter. The home, full of love and memories was host to a growing extended family of children and grandchildren. This was THE place. When the homeowner’s wife passed away suddenly and unexpectedly, he became determined to create a space that would continue to welcome and host his family and the many wonderful family memories that lay ahead but with an eye towards functionality.
We started out by evaluating how the space would be used. Cooking and watching sports were key factors. So, we shuffled the current dining table into a rarely used living room whereby enlarging the kitchen. The kitchen now houses two large islands – one for prep and the other for seating and buffet space. We removed the wall between kitchen and family room to encourage interaction during family gatherings and of course a clear view to the game on TV. We also removed a dropped ceiling in the kitchen, and wow, what a difference.
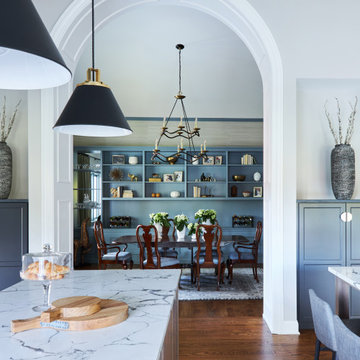
Next, we added some drama with a large arch between kitchen and dining room creating a stunning architectural feature between those two spaces. This arch echoes the shape of the large arch at the front door of the townhome, providing drama and significance to the space. The kitchen itself is large but does not have much wall space, which is a common challenge when removing walls. We added a bit more by resizing the double French doors to a balcony at the side of the house which is now just a single door. This gave more breathing room to the range wall and large stone hood but still provides access and light.
We chose a neutral pallet of black, white, and white oak, with punches of blue at the counter stools in the kitchen. The cabinetry features a white shaker door at the perimeter for a crisp outline. Countertops and custom hood are black Caesarstone, and the islands are a soft white oak adding contrast and warmth. Two large built ins between the kitchen and dining room function as pantry space as well as area to display flowers or seasonal decorations.
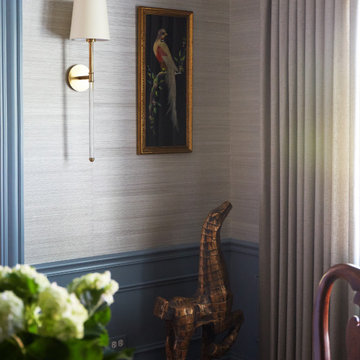
We repeated the blue in the dining room where we added a fresh coat of paint to the existing built ins, along with painted wainscot paneling. Above the wainscot is a neutral grass cloth wallpaper which provides a lovely backdrop for a wall of important mementos and artifacts. The dining room table and chairs were refinished and re-upholstered, and a new rug and window treatments complete the space. The room now feels ready to host more formal gatherings or can function as a quiet spot to enjoy a cup of morning coffee.
 TKS Design Group
Download our free ebook, Creating the Ideal Kitchen. DOWNLOAD NOW
The homeowner and his wife had lived in this beautiful townhome in Oak Brook overlooking a small lake for over 13 years. The home is open and airy with vaulted ceilings and full of mementos from world adventures through the years, including to Cambodia, home of their much-adored sponsored daughter. The home, full of love and memories was host to a growing extended family of children and grandchildren. This was THE place. When the homeowner’s wife passed away suddenly and unexpectedly, he became determined to create a space that would continue to welcome and host his family and the many wonderful family memories that lay ahead but with an eye towards functionality.
We started out by evaluating how the space would be used. Cooking and watching sports were key factors. So, we shuffled the current dining table into a rarely used living room whereby enlarging the kitchen. The kitchen now houses two large islands – one for prep and the other for seating and buffet space. We removed the wall between kitchen and family room to encourage interaction during family gatherings and of course a clear view to the game on TV. We also removed a dropped ceiling in the kitchen, and wow, what a difference.
Next, we added some drama with a large arch between kitchen and dining room creating a stunning architectural feature between those two spaces. This arch echoes the shape of the large arch at the front door of the townhome, providing drama and significance to the space. The kitchen itself is large but does not have much wall space, which is a common challenge when removing walls. We added a bit more by resizing the double French doors to a balcony at the side of the house which is now just a single door. This gave more breathing room to the range wall and large stone hood but still provides access and light.
We chose a neutral pallet of black, white, and white oak, with punches of blue at the counter stools in the kitchen. The cabinetry features a white shaker door at the perimeter for a crisp outline. Countertops and custom hood are black Caesarstone, and the islands are a soft white oak adding contrast and warmth. Two large built ins between the kitchen and dining room function as pantry space as well as area to display flowers or seasonal decorations.
We repeated the blue in the dining room where we added a fresh coat of paint to the existing built ins, along with painted wainscot paneling. Above the wainscot is a neutral grass cloth wallpaper which provides a lovely backdrop for a wall of important mementos and artifacts. The dining room table and chairs were refinished and re-upholstered, and a new rug and window treatments complete the space. The room now feels ready to host more formal gatherings or can function as a quiet spot to enjoy a cup of morning coffee.
 TKS Design Group
Download our free ebook, Creating the Ideal Kitchen. DOWNLOAD NOW
The homeowner and his wife had lived in this beautiful townhome in Oak Brook overlooking a small lake for over 13 years. The home is open and airy with vaulted ceilings and full of mementos from world adventures through the years, including to Cambodia, home of their much-adored sponsored daughter. The home, full of love and memories was host to a growing extended family of children and grandchildren. This was THE place. When the homeowner’s wife passed away suddenly and unexpectedly, he became determined to create a space that would continue to welcome and host his family and the many wonderful family memories that lay ahead but with an eye towards functionality.
We started out by evaluating how the space would be used. Cooking and watching sports were key factors. So, we shuffled the current dining table into a rarely used living room whereby enlarging the kitchen. The kitchen now houses two large islands – one for prep and the other for seating and buffet space. We removed the wall between kitchen and family room to encourage interaction during family gatherings and of course a clear view to the game on TV. We also removed a dropped ceiling in the kitchen, and wow, what a difference.
Next, we added some drama with a large arch between kitchen and dining room creating a stunning architectural feature between those two spaces. This arch echoes the shape of the large arch at the front door of the townhome, providing drama and significance to the space. The kitchen itself is large but does not have much wall space, which is a common challenge when removing walls. We added a bit more by resizing the double French doors to a balcony at the side of the house which is now just a single door. This gave more breathing room to the range wall and large stone hood but still provides access and light.
We chose a neutral pallet of black, white, and white oak, with punches of blue at the counter stools in the kitchen. The cabinetry features a white shaker door at the perimeter for a crisp outline. Countertops and custom hood are black Caesarstone, and the islands are a soft white oak adding contrast and warmth. Two large built ins between the kitchen and dining room function as pantry space as well as area to display flowers or seasonal decorations.
We repeated the blue in the dining room where we added a fresh coat of paint to the existing built ins, along with painted wainscot paneling. Above the wainscot is a neutral grass cloth wallpaper which provides a lovely backdrop for a wall of important mementos and artifacts. The dining room table and chairs were refinished and re-upholstered, and a new rug and window treatments complete the space. The room now feels ready to host more formal gatherings or can function as a quiet spot to enjoy a cup of morning coffee.
 United Porte Inc
Imagine walking into any room of your house and being greeted by a stunning piece of artwork that also serves as a practical home feature. What if I told you, it's possible! Our sleek and modern order and buy pocket doors and double pocket doors are not just any ordinary doors, they are a functional piece of artistry. With their streamlined appearance and ingenious design, they add a layer of sophistication to any interior, whether it be an ultra-modern condo or a charming country cottage.
Chic and versatile design
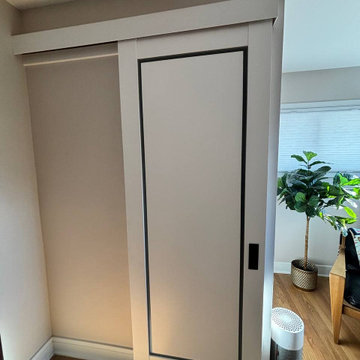
Double pocket doors are the epitome of innovation when it comes to interior design. They slide swiftly and neatly into a compartment in the adjacent wall when open. When closed, they present a refined facade adorning your rooms. This feature is not only stylish but also a space-saver, perfect for areas such as small bathrooms or compact kitchens where every bit of valuable room counts.
This ingenious door system type: slide, allows you to have a full-size door without the need for any swing space. It's like having the best of both worlds - the practicality of a sliding door coupled with the beauty of a full door.
Aesthetically Pleasing Pocket Doors
Our pocket doors come in a color palette: white that can easily blend in with any room decor. Encased in a solid wood core, they carry a touch of rustic charm, while the modern sliding mechanism adds an element of contemporary design.
Picture this: sun rays gently gliding through the frosted glass insets of the double pocket doors, adding an ethereal glow to your room. Sounds calming, doesn't it?
Size that fits your Space
When it comes to the size of our pocket doors, you won't have to worry. They fit into a recommended opening of 37" x 84 1/2" inches, ensuring that awkwardly sized or atypical door frames won't be a hindrance in your home decor journey. The panel configuration: double doors are designed specifically to give you that extra access point if needed.
Why not buy interior doors in Miami, Long Island, New York, or Texas from the comfort of your home? Our online shop allows you to order doors to suit your convenience and style.
Personalized Shopping experience
Our goal is to provide you with top-quality doors that match your style and functionality needs. Need help determining which door is best for you? Visit the leading door shop in Long Island, Miami, New York, or Texas at UnitedPorte.
To sum it up, our pocket and double pocket doors offer a superb blend of beauty, practicality, and smart design. They are a worthwhile investment, bound to deliver an impressive statement and functionality, promising to remain in style for years to come!
Now, isn't that the kind of door you want to walk through every day? Order pocket doors from UnitedPorte today and unlock the beauty of your interior spaces.

 Shuler Architecture
This 3 BR, 3 1/2 bath home allows the owners to live on one level most of the time. The Master Suite is on the main level along with the Living Room, Kitchen, Dining, pantries, Sun Room and service areas. The upper level houses two ample bedrooms while the lower level supports a rec center, media room, wine cellar, shop and full wet bar. Conceived as a Great Room house, the main level is designed as one seamless space that flows onto an ample deck overlooking the rear yard.
We also incorporated a variety of green building techniques - photo-voltaic shingles on the roof of the garage to generate a portion of the home's energy, a super insulated building envelope, rain water harvesting, high performance windows and doors, a high efficiency heat pump, low flow bath & kitchen fixtures, Energy Star appliances and LED lighting - that greatly reduced this structure's carbon footprint. All of the strategies amounted to a 30% reduction in the energy consumption in this home relative to comparable structures.
 TKS Design Group
Download our free ebook, Creating the Ideal Kitchen. DOWNLOAD NOW
The homeowner and his wife had lived in this beautiful townhome in Oak Brook overlooking a small lake for over 13 years. The home is open and airy with vaulted ceilings and full of mementos from world adventures through the years, including to Cambodia, home of their much-adored sponsored daughter. The home, full of love and memories was host to a growing extended family of children and grandchildren. This was THE place. When the homeowner’s wife passed away suddenly and unexpectedly, he became determined to create a space that would continue to welcome and host his family and the many wonderful family memories that lay ahead but with an eye towards functionality.
We started out by evaluating how the space would be used. Cooking and watching sports were key factors. So, we shuffled the current dining table into a rarely used living room whereby enlarging the kitchen. The kitchen now houses two large islands – one for prep and the other for seating and buffet space. We removed the wall between kitchen and family room to encourage interaction during family gatherings and of course a clear view to the game on TV. We also removed a dropped ceiling in the kitchen, and wow, what a difference.
Next, we added some drama with a large arch between kitchen and dining room creating a stunning architectural feature between those two spaces. This arch echoes the shape of the large arch at the front door of the townhome, providing drama and significance to the space. The kitchen itself is large but does not have much wall space, which is a common challenge when removing walls. We added a bit more by resizing the double French doors to a balcony at the side of the house which is now just a single door. This gave more breathing room to the range wall and large stone hood but still provides access and light.
We chose a neutral pallet of black, white, and white oak, with punches of blue at the counter stools in the kitchen. The cabinetry features a white shaker door at the perimeter for a crisp outline. Countertops and custom hood are black Caesarstone, and the islands are a soft white oak adding contrast and warmth. Two large built ins between the kitchen and dining room function as pantry space as well as area to display flowers or seasonal decorations.
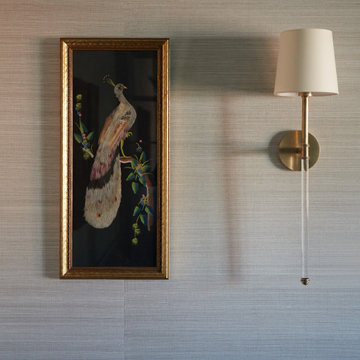
We repeated the blue in the dining room where we added a fresh coat of paint to the existing built ins, along with painted wainscot paneling. Above the wainscot is a neutral grass cloth wallpaper which provides a lovely backdrop for a wall of important mementos and artifacts. The dining room table and chairs were refinished and re-upholstered, and a new rug and window treatments complete the space. The room now feels ready to host more formal gatherings or can function as a quiet spot to enjoy a cup of morning coffee.
 Tile Doctor Ltd
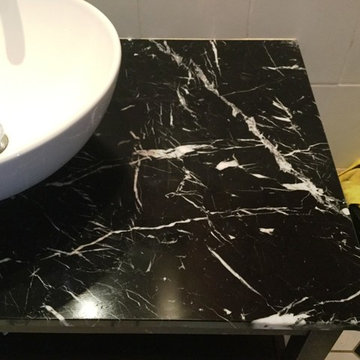
Marble is known for its premium quality, toughness and aesthetic, making it a very popular choice for bathroom countertops, such as this one at a house in Northampton. However just because it’s tough doesn’t mean that Marble can be cleaned with the usual household cleaners. Like all natural stone, Marble is acid sensitive and unsuitable products can have a very damaging effect on its appearance.
In this situation, the property owner had used a limescale remover to remove some unsightly marks from the countertop. Unfortunately, the product was acid-based and instead of making an improvement it just made it worse and caused severe etching.
The first photo above shows the limescale marks from where toiletries have been placed on the side whilst wet. Since Northampton is a hard water area, the limescale deposits over time caused these marks to appear.
The only way to effectively remove the Limestone deposits – while at the same time rectifying the damaged caused by the botched cleaning attempt – was to use a system of hand-held diamond encrusted pads and hand help blocks of various grits to cut back the stone and re-polish it, a process we call burnishing.
Before officially beginning the burnishing process, I ran a few tests to determine the type of pad I would need to use to achieve the best results. I found that, in most areas, I would need to use the Tile Doctor 400 Grit (Coarse) pad to resurface the tile and remove the damaged layer of stone, but in some areas where the etching was worse, I would need to use the 200 Grit (Very Coarse) pad.
After burnishing the affected areas with the Coarse and Very Coarse grit pads, I started to incrementally polish the stone to achieve a high-quality shine, working my up through the Medium, Fine and Very grit pads.
No chemicals were used during this process – only water for lubrication, combined with the six-inch diamond encrusted burnishing pads fitted to a hand-held buffing machine.
The final part of the restoration was to seal the stone to maintain a long-lasting, deep polished appearance. To do this, I used Tile Doctor Shine Powder, which is a crystallising sealer in powder form. The powder is applied directly and combined with water, before being worked into the stone to seal it.
The customer was very happy with the results and the level of shine achieved. I gave the customer a complimentary bottle of Tile Doctor Stone Soap, which is our aftercare cleaner for polished natural stone, along with instructions on periodic maintenance to help maintain the finish we had achieved for as long as possible.
Phil Vissian
Northamptonshire Tile Doctor
178