
Search results for "Developing step by step" in Home Design Ideas
 Dreamworks Remodeling
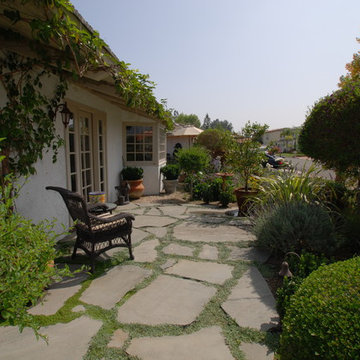
This beautiful garden walk with slate stepping stones, garden trellis, and french drain area was added to this beautiful bedroom with a single French door with 2 crank out sidelights. The handscraped flooring in the bedroom inside, wall sconses and crown molding were all done by our crew. Grading the patio area, installing the French drain, slate stepping stones, trellis, and all general construction was completed by our in house staff. Photos by Lester O'Malley
 New Outlooks Construction
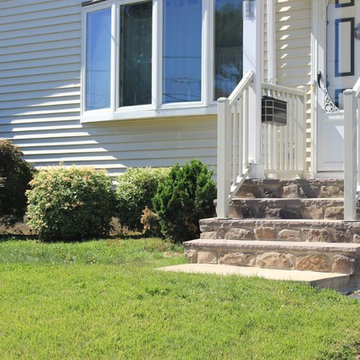
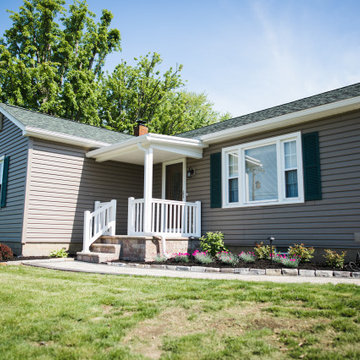
Improve your curb appeal with a simple replacement of your front steps. As shown here, no project is too small for New Outlooks Construction! This front step replacement project was handled by our Handyman division and increased the curb appeal of this client's home immediately. The use of masonry has increased across the country for its beauty and durability!
 Seoane Landscape Design
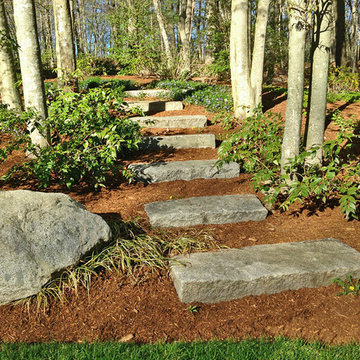
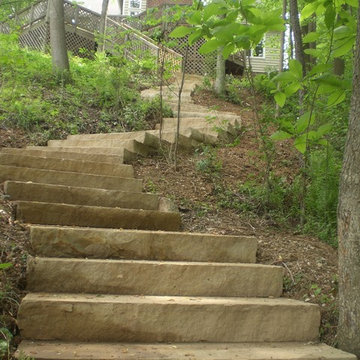
Aged Granite Steps through wooded area
This is an example of a traditional backyard landscaping in Boston.
This is an example of a traditional backyard landscaping in Boston.
Find the right local pro for your project
 Morrison Custom Concrete
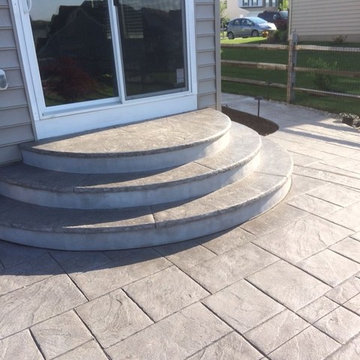
Large ashlar slate patio with texture stamped bullnose steps located in Coatesville, PA 19320
Example of a mid-sized classic backyard stamped concrete patio design in Philadelphia
Example of a mid-sized classic backyard stamped concrete patio design in Philadelphia

 Industrial Projects
Creating a comfortable outdoor living space is a priority for many homeowners and DIY enthusiasts. With rising summer temperatures, installing a shade tarp in your backyard offers an affordable and effective solution for sun protection. We’ve developed this detailed, step-by-step guide to help you confidently install a shade tarp that not only shields you from the sun but also adds aesthetic appeal to your outdoor area.
Benefits of Installing a Backyard Shade Tarp
Before diving into the installation process, let’s explore the key benefits of having a backyard shade tarp:
Provides UV Protection: Keeps your family and guests safe from harmful sun exposure.
Reduces Outdoor Temperatures: Creates a cooler, more enjoyable outdoor space.
Protects Outdoor Furniture: Extends the life of patio furniture by reducing sun damage.
Enhances Outdoor Aesthetics: Adds a modern, stylish look to your yard.
Budget-Friendly: More affordable compared to permanent structures like pergolas.
Materials and Tools You’ll Need
To begin your DIY backyard shade project, gather the following materials and tools:
Materials:
Shade tarp (UV-resistant and breathable)
Sturdy posts or existing structures (trees, fences, walls)
Mounting hardware (eye bolts, D-rings, turnbuckles, snap hooks)
Nylon or polyester rope, or stainless-steel wire
Concrete (if installing new posts)
Tools:
Power drill
Measuring tape
Level
Ladder
Wrench or adjustable spanner
Post hole digger (if installing new posts)
Step 1: Plan Your Shade Tarp Layout
The first step in installing your backyard shade tarp is careful planning. Take time to assess your outdoor area and answer these key questions:
Where is the sun’s path throughout the day?
What size and shape of tarp best suits your space?
Will you anchor the tarp to existing structures or install new posts?
What height do you want the tarp to sit at for maximum shade and airflow?
Pro Tip: Use string or garden hoses to visualize the tarp layout on the ground before making permanent decisions.
Step 2: Measure and Mark Anchor Points
Once you’ve determined the tarp’s location and orientation:
Measure the tarp dimensions.
Mark the exact points where each corner of the tarp will be anchored.
Ensure that the anchor points are at least 5–10% longer than the tarp size to allow for tensioning and slight adjustments.
Consider slope angles for water runoff. Aim for at least a 20-degree angle to prevent water pooling on the tarp.
Step 3: Install Support Posts (If Necessary)
If your backyard lacks existing anchor points like trees or fences, you’ll need to install sturdy support posts:
Dig post holes at least 24 inches deep and 8-12 inches wide for stability.
Set posts in concrete, making sure they remain plumb and level.
Allow the concrete to cure for at least 24–48 hours before applying tension from the tarp.
We recommend using pressure-treated wood, galvanized steel poles, or aluminum posts for longevity and strength.
Step 4: Install Mounting Hardware
With your anchor points ready, it’s time to install the necessary hardware:
Attach eye bolts or pad eyes securely into walls, posts, or other fixed structures.
For added flexibility and adjustability, install turnbuckles or tensioners to fine-tune the tarp’s tightness.
Connect snap hooks, D-rings, or carabiners to make assembly and disassembly easier.
Make sure all hardware is rated for outdoor use to prevent rust and corrosion.
Step 5: Attach and Tension the Shade Tarp
Now it’s time for the most satisfying part—mounting the shade tarp:
Begin by attaching one corner of the tarp to an anchor point.
Gradually attach the remaining corners, moving diagonally for even tension.
Adjust each connection point using your turnbuckles, ropes, or cables.
Pull the tarp tight enough to avoid sagging, but not so tight that it risks tearing.
Check that the tarp maintains the desired slope for rainwater runoff and adjust tension as needed.
Step 6: Final Adjustments and Safety Check
Before enjoying your new shaded area:
Inspect all anchor points and hardware for stability.
Test the tarp’s tension and make adjustments for even distribution.
Ensure that no sharp edges or loose connections remain that could damage the tarp or pose a safety hazard.
Confirm that the tarp is secure in windy conditions by giving it a gentle tug.
If you live in an area with frequent high winds, consider removing the tarp during storms to prevent damage.
Step 7: Enjoy Your Shaded Backyard Oasis
Once installed, your backyard shade tarp provides a comfortable and protective space for outdoor gatherings, relaxation, or family activities. You can decorate underneath with outdoor furniture, string lights, or potted plants to create a personalized outdoor retreat.
Maintenance Tips for Long-Lasting Shade Tarp Performance
To extend the life of your shade tarp, follow these maintenance guidelines:
Regularly check for wear and tear, especially around anchor points and seams.
Clean the tarp periodically with mild soap and water to prevent mildew buildup.
Store the tarp indoors during harsh weather seasons if it's not designed for year-round use.
Tighten hardware as needed to maintain proper tension and avoid sagging.
By following these simple care steps, your shade tarp will continue to deliver years of sun protection and outdoor comfort.
Conclusion: Upgrade Your Outdoor Space with a DIY Shade Tarp
Installing a shade tarp in your backyard is a cost-effective and rewarding DIY project. With careful planning, quality materials, and proper installation techniques, you’ll enjoy cool, shaded outdoor living all season long. This step-by-step guide ensures your project goes smoothly from start to finish.
 Vetter Architects
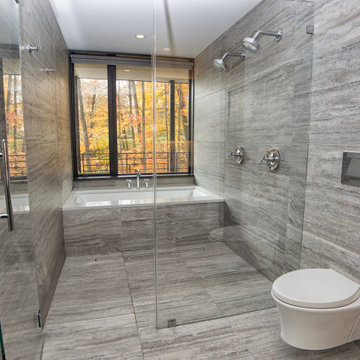
The client’s request was quite common - a typical 2800 sf builder home with 3 bedrooms, 2 baths, living space, and den. However, their desire was for this to be “anything but common.” The result is an innovative update on the production home for the modern era, and serves as a direct counterpoint to the neighborhood and its more conventional suburban housing stock, which focus views to the backyard and seeks to nullify the unique qualities and challenges of topography and the natural environment.
The Terraced House cautiously steps down the site’s steep topography, resulting in a more nuanced approach to site development than cutting and filling that is so common in the builder homes of the area. The compact house opens up in very focused views that capture the natural wooded setting, while masking the sounds and views of the directly adjacent roadway. The main living spaces face this major roadway, effectively flipping the typical orientation of a suburban home, and the main entrance pulls visitors up to the second floor and halfway through the site, providing a sense of procession and privacy absent in the typical suburban home.
Clad in a custom rain screen that reflects the wood of the surrounding landscape - while providing a glimpse into the interior tones that are used. The stepping “wood boxes” rest on a series of concrete walls that organize the site, retain the earth, and - in conjunction with the wood veneer panels - provide a subtle organic texture to the composition.
The interior spaces wrap around an interior knuckle that houses public zones and vertical circulation - allowing more private spaces to exist at the edges of the building. The windows get larger and more frequent as they ascend the building, culminating in the upstairs bedrooms that occupy the site like a tree house - giving views in all directions.
The Terraced House imports urban qualities to the suburban neighborhood and seeks to elevate the typical approach to production home construction, while being more in tune with modern family living patterns.
Overview:
Elm Grove
Size:
2,800 sf,
3 bedrooms, 2 bathrooms
Completion Date:
September 2014
Services:
Architecture, Landscape Architecture
Interior Consultants: Amy Carman Design
 TOUGH OAKS LANDSCAPING
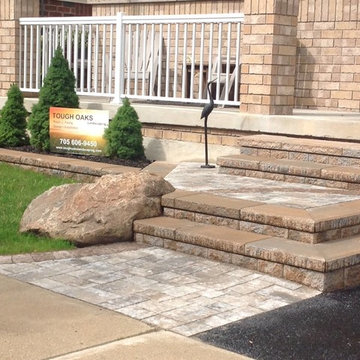
Stone steps, interlocking stone front landing, front entry, interlocking walkway, stone garden bed, Tough Oaks Landscaping Company Barrie. Ralph J. Young Natural Stone. Colour banding, front entrance, front porch steps & landing redo, remodel, steps renovation.

 Vetter Architects
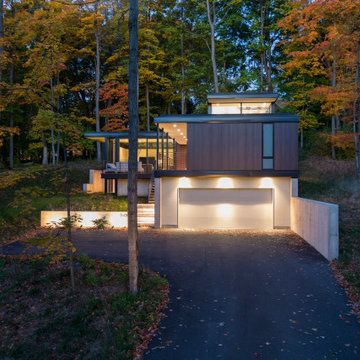
The client’s request was quite common - a typical 2800 sf builder home with 3 bedrooms, 2 baths, living space, and den. However, their desire was for this to be “anything but common.” The result is an innovative update on the production home for the modern era, and serves as a direct counterpoint to the neighborhood and its more conventional suburban housing stock, which focus views to the backyard and seeks to nullify the unique qualities and challenges of topography and the natural environment.
The Terraced House cautiously steps down the site’s steep topography, resulting in a more nuanced approach to site development than cutting and filling that is so common in the builder homes of the area. The compact house opens up in very focused views that capture the natural wooded setting, while masking the sounds and views of the directly adjacent roadway. The main living spaces face this major roadway, effectively flipping the typical orientation of a suburban home, and the main entrance pulls visitors up to the second floor and halfway through the site, providing a sense of procession and privacy absent in the typical suburban home.
Clad in a custom rain screen that reflects the wood of the surrounding landscape - while providing a glimpse into the interior tones that are used. The stepping “wood boxes” rest on a series of concrete walls that organize the site, retain the earth, and - in conjunction with the wood veneer panels - provide a subtle organic texture to the composition.
The interior spaces wrap around an interior knuckle that houses public zones and vertical circulation - allowing more private spaces to exist at the edges of the building. The windows get larger and more frequent as they ascend the building, culminating in the upstairs bedrooms that occupy the site like a tree house - giving views in all directions.
The Terraced House imports urban qualities to the suburban neighborhood and seeks to elevate the typical approach to production home construction, while being more in tune with modern family living patterns.
Overview:
Elm Grove
Size:
2,800 sf,
3 bedrooms, 2 bathrooms
Completion Date:
September 2014
Services:
Architecture, Landscape Architecture
Interior Consultants: Amy Carman Design
 ConcreteAid
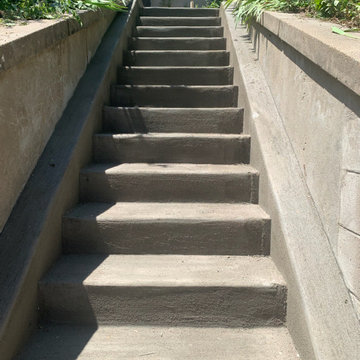
This concrete step project in Omaha was designed to improve both safety and curb appeal. The original front steps had visible cracks, uneven surfaces, and were becoming a trip hazard, especially during Nebraska winters.
We removed the damaged concrete and installed a clean, reinforced set of custom concrete steps, poured with a finish designed to handle freeze-thaw conditions. The new steps were widened slightly to give the entry a more inviting look, and we added a broom finish for extra traction.
Our team at ConcreteAid specializes in concrete step installation in Omaha and nearby areas, including Bellevue, Ralston, and La Vista. Whether it's a front porch, back entry, or multi-level walkway, we can build long-lasting steps that fit your home's look and your safety needs.
Learn more about our services here:
https://concreteaid.com/concrete-steps-omaha/
 C.E. Pontz Sons
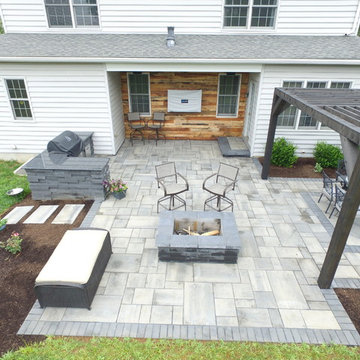
This Outdoor Living Patio project included installation of new patio area, pergola, front and side walkways, and lighting as per our design. Installed was approximately 530 square feet of patio area with a landing step area at the rear door. We used Techo-Bloc ‘Blu 60 Smooth’ pavers for the patio area as well as the front walkway. The existing Front and side walks were removed prior to the hardscape installation. Outdoor kitchen, fire pit, and step were all constructed with Techo-Bloc ‘Graphix’ wall stone. Fire pit and step capped with Techo-Bloc ‘Graphix’ Cap. The Outdoor kitchen is topped with a custom marble counter top. 38″ grill and 38″ double access door were installed in kitchen area. The Pergola is constructed using Western Red Cedar and stained to compliment the hardscaping. Low voltage LED lighting that was installed includes, under cap lighting on step and kitchen; up lights on trees (2 lights each); and a 150 watt transformer. Landscape beds and new plants were installed around the new patio area. The Landscaping included, mulching of new landscape beds, Repair, grade, and seeding damaged lawn areas as well as Trimming existing Hydrangea and Boxwoods. This Outdoor living patio area was installed in Lancaster, PA.
 Garden Gate Landscaping
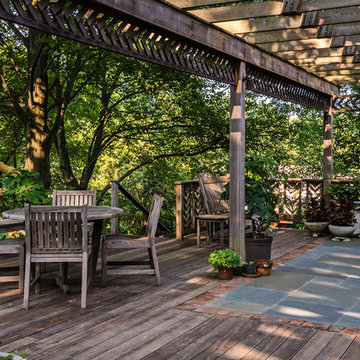
A complete and eclectic rear garden renovation with a creative blend of formal and natural elements. Formal lawn panel and rose garden, craftsman style wood deck and trellis, homages to Goldsworthy and Stonehenge with large boulders and a large stone cairn, several water features, a Japanese Torii gate, rock walls and steps, vegetables and herbs in containers and a new parking area paved with permeable pavers that feed an underground storage area that in turns irrigates the garden. All this blends into a diverse but cohesive garden.
Designed by Charles W Bowers, Built by Garden Gate Landscaping, Inc. © Garden Gate Landscaping, Inc./Charles W. Bowers
 Gordon Tobey Developments
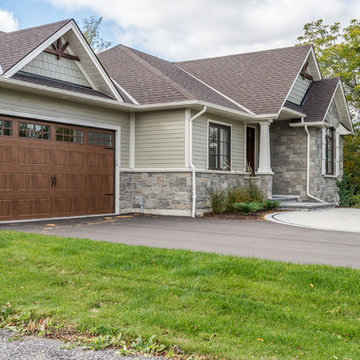
Front view of the home
Inspiration for a mid-sized craftsman gray one-story stone exterior home remodel in Toronto
Inspiration for a mid-sized craftsman gray one-story stone exterior home remodel in Toronto
 Realty Restoration, LLC
Christopher Davison, AIA
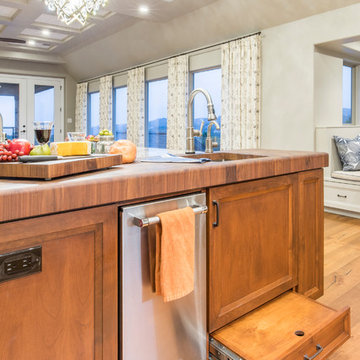
Eat-in kitchen - large l-shaped medium tone wood floor and brown floor eat-in kitchen idea in Austin with an undermount sink, shaker cabinets, medium tone wood cabinets, wood countertops, stainless steel appliances and an island
Eat-in kitchen - large l-shaped medium tone wood floor and brown floor eat-in kitchen idea in Austin with an undermount sink, shaker cabinets, medium tone wood cabinets, wood countertops, stainless steel appliances and an island
Sponsored
Westerville, OH

Custom Home Works
Franklin County's Award-Winning Design, Build and Remodeling Expert
 THE KING'S MASONS
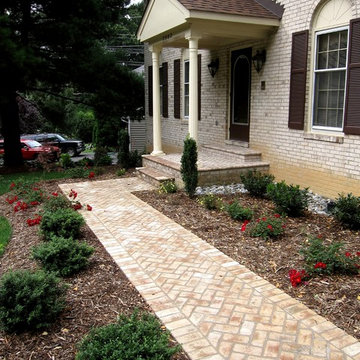
This client in Falls Church had a deteriorated front walkway. We designed and installed a mortared brick walk in herringbone pattern and overlaid the front porch - the brick and mortar match was perfect!
 Krugel Cobbles, Inc.
Landscape Architect: The Garden Consultants, Inc.;
Photography: Linda Oyama Bryan
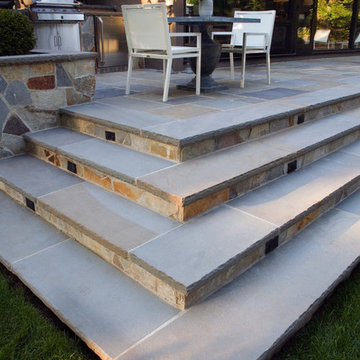
This is an example of a mid-sized contemporary backyard stone landscaping in Chicago.
This is an example of a mid-sized contemporary backyard stone landscaping in Chicago.
 Rudloff Custom Builders
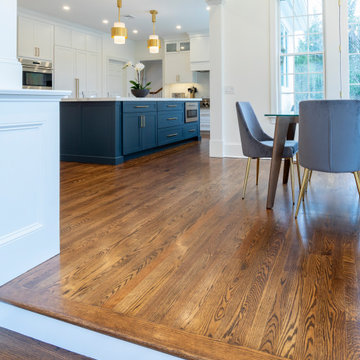
This light and airy kitchen is the definition of elegance. It has white shaker cabinets with satin gold pulls topped with white quartz counters. The matching white quartz backsplash provides a clean look. The center piece of the room is the large island! With seating for four, the deep blue island is loaded with storage and has a drawer microwave. For a special touch on the white quartz counter, we used an extra thick quartz slab. The striking gold pendants are from Ferguson Lighting.
The eating area connected to the kitchen is filled with light courtesy of the numerous windows and a set of French doors. The vaulted ceililng contributes to the airy feeling of the space.
Sleek and contemporary, this beautiful home is located in Villanova, PA. Blue, white and gold are the palette of this transitional design. With custom touches and an emphasis on flow and an open floor plan, the renovation included the kitchen, family room, butler’s pantry, mudroom, two powder rooms and floors.
Rudloff Custom Builders has won Best of Houzz for Customer Service in 2014, 2015 2016, 2017 and 2019. We also were voted Best of Design in 2016, 2017, 2018, 2019 which only 2% of professionals receive. Rudloff Custom Builders has been featured on Houzz in their Kitchen of the Week, What to Know About Using Reclaimed Wood in the Kitchen as well as included in their Bathroom WorkBook article. We are a full service, certified remodeling company that covers all of the Philadelphia suburban area. This business, like most others, developed from a friendship of young entrepreneurs who wanted to make a difference in their clients’ lives, one household at a time. This relationship between partners is much more than a friendship. Edward and Stephen Rudloff are brothers who have renovated and built custom homes together paying close attention to detail. They are carpenters by trade and understand concept and execution. Rudloff Custom Builders will provide services for you with the highest level of professionalism, quality, detail, punctuality and craftsmanship, every step of the way along our journey together.
Specializing in residential construction allows us to connect with our clients early in the design phase to ensure that every detail is captured as you imagined. One stop shopping is essentially what you will receive with Rudloff Custom Builders from design of your project to the construction of your dreams, executed by on-site project managers and skilled craftsmen. Our concept: envision our client’s ideas and make them a reality. Our mission: CREATING LIFETIME RELATIONSHIPS BUILT ON TRUST AND INTEGRITY.
Photo Credit: Linda McManus Images
 Hsu McCullough
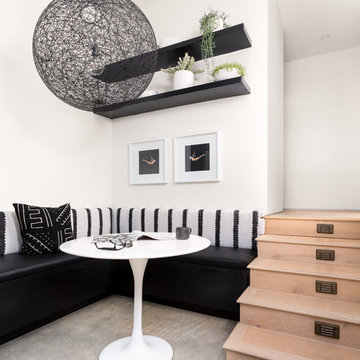
Breakfast Nook
Photo by Clark Dugger
Inspiration for a mid-sized contemporary concrete floor and beige floor great room remodel in Los Angeles with white walls
Inspiration for a mid-sized contemporary concrete floor and beige floor great room remodel in Los Angeles with white walls
 LDW 2.0
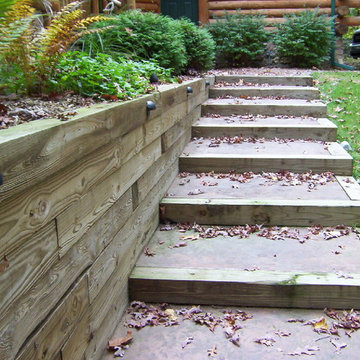
In order to match the rustic style of the house, the homeowner decided they preferred using timbers over some of the other materials available on the market. These stairs were constructed using a timber frame and pouring concrete slabs for the treads.

 Boyd's Custom Masonry LLC
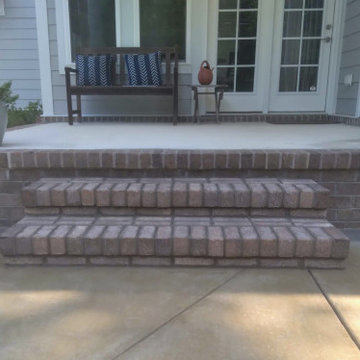
?Take a look at the fresh new set of steps off the back porch?
Brick: Triangle Brick Libby Mill O/S
Mortar: Roanoke Gray Type "N"
Materials from Riverside Brick & Supply Co., Inc.
☎Call Mike at 757-412-5630 for your FREE estimate TODAY!
#boydscustommasonry #brick #outdoorliving #homegoals #patio #bricksteps #steps #backyard #masonry #bricklife #trianglebrick #trianglebricklibbymill #roanokemortar #riversidebrick #style #exterior
21