
Search results for "Disruption" in Home Design Ideas
 Mission Home Remodeling
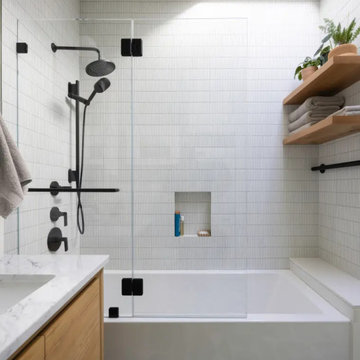
A serene bathroom retreat where matte black fixtures create striking contrast against soft white micro-tile walls, drawing the eye from the rainfall showerhead down to the deep soaking tub framed by a frameless glass enclosure. Warm white oak vanity cabinetry and floating shelves bring natural texture to the space, softened further by neatly folded linen towels and a touch of greenery. Veined marble countertops add a quiet note of refinement, while the built-in tiled niche keeps everyday essentials tucked away without disrupting the room's clean lines. The result is a spa-like sanctuary that balances airy brightness with grounded, tactile warmth — thoughtfully designed for both daily ritual and quiet unwinding.

 JayMarc Homes
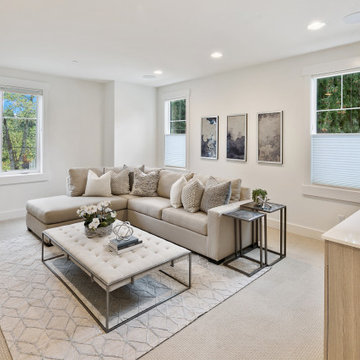
The Victoria's Living Room is a cozy and inviting space designed for relaxation and comfort. The room features a beige couch that serves as a comfortable seating option, providing a place to unwind and enjoy leisurely activities. The beige carpet adds softness and warmth to the space, creating a cozy atmosphere. White plush coffee tables offer a stylish and practical surface for placing drinks, snacks, or decorative items. A gray wooden cabinet provides storage space while adding a touch of contrast to the room. The white windows allow natural light to flood the space, creating an open and airy feel. White vents blend seamlessly with the walls, providing proper ventilation without disrupting the room's aesthetic. The combination of beige, white, and gray tones in the Victoria's Living Room creates a serene and welcoming environment for relaxation and leisure.
Find the right local pro for your project
 Boerne Kitchens and Baths
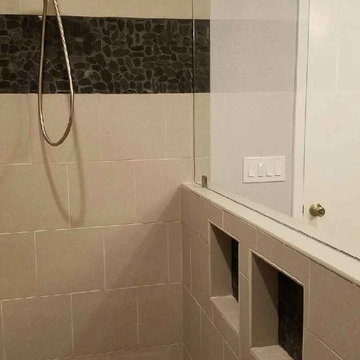
The Owner of this residence had damage from a plumbing leak and took advantage of the disruption to remodel the Master Bath. An unused whirlpool tub was removed and the master shower expanded to make a elegant walk in shower with a granite topped bench. The wall were tiled in a 13X13 light gray tile offset in a broken joint pattern. The floor was a cut river rock sloping to the front of the shower and a linear drain. The wall also has a accent stripe in a black cut river rock. A half wall was topped with a frameless piece of glass to give the room a clean transitional appearance.
 CO Interiors
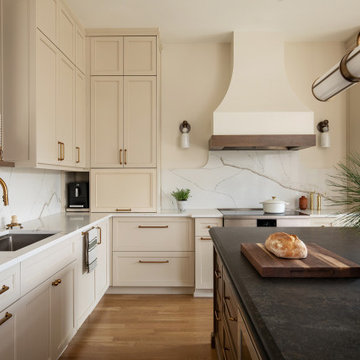
A sculptural range hood creates a graceful focal point within this warm transitional kitchen. Its curved profile softens the surrounding cabinetry, while a dark wood accent visually connects it to the contrasting island.
The full-height veined slab backsplash adds movement without disrupting the calm neutral palette. Cream Shaker cabinetry maximizes storage around the perimeter, while brass hardware and plumbing fixtures bring warmth and refinement. A dark island countertop provides a durable visual anchor, balancing the lighter finishes and clearly defining the central work zone.
 Boerne Kitchens and Baths
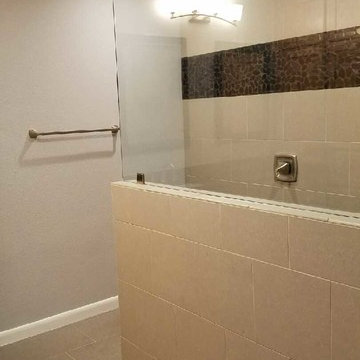
The Owner of this residence had damage from a plumbing leak and took advantage of the disruption to remodel the Master Bath. An unused whirlpool tub was removed and the master shower expanded to make a elegant walk in shower with a granite topped bench. The wall were tiled in a 13X13 light gray tile offset in a broken joint pattern. The floor was a cut river rock sloping to the front of the shower and a linear drain. The wall also has a accent stripe in a black cut river rock. A half wall was topped with a frameless piece of glass to give the room a clean transitional appearance.
 Schloegel Design Remodel
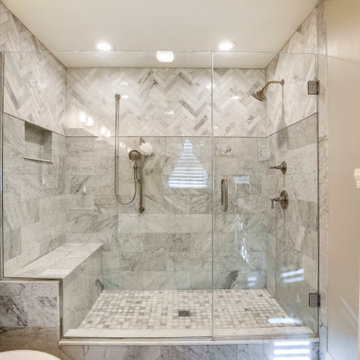
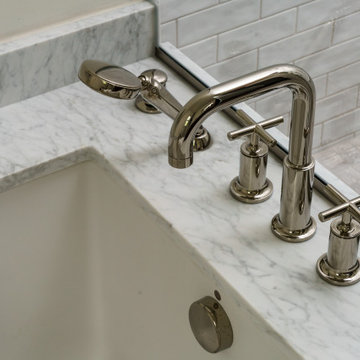
This creamy, spa-like shower creates a calming retreat within the home. Soft, neutral tones and seamless finishes set a serene foundation, while a spacious built-in bench invites relaxation and everyday comfort. Thoughtfully integrated niches provide convenient storage for shower essentials without disrupting the clean, streamlined design. The result is a tranquil, elevated space that feels both luxurious and effortlessly functional.
 The Decorating Therapist
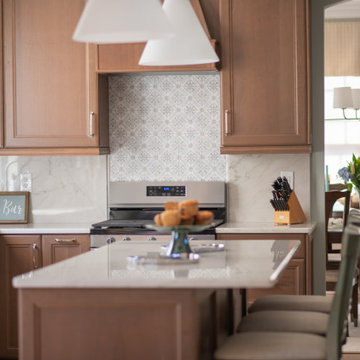
The tranquil beauty of the quartzite countertops continues seamlessly onto the full-height backsplash, creating a clean, cohesive backdrop that enhances the kitchen's calm, sophisticated atmosphere. Extending the same natural stone across the backsplash emphasizes the organic movement and subtle veining of the quartzite, reinforcing the timeless elegance of this luxury kitchen design.
To create a distinctive focal point, the area above the range was highlighted with exquisite hand-painted marble tiles. Rich in artisanal craftsmanship and understated detail, the decorative tile introduces texture, character, and visual interest without disrupting the kitchen's serene palette. This thoughtful layering of natural stone and handcrafted materials adds depth and individuality, transforming the cooking area into an elegant architectural feature that perfectly balances refinement with everyday functionality.
 New Era Builders Inc
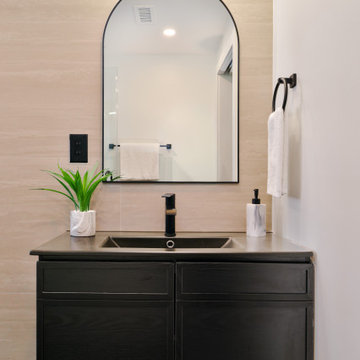
A bathroom designed with simplicity and intention. Floor-to-ceiling tile creates a seamless, modern look while making the space feel taller and more refined. A carefully crafted mitered niche adds both style and function, keeping essentials organized without disrupting the clean lines of the design. Every element was selected with purpose — where functionality is thoughtfully considered and modern finishes come together to create a bathroom that feels sleek, timeless, and effortlessly elegant.
 Dynamic Garage Door
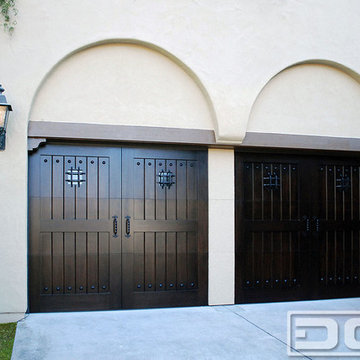
Getting your homeowner's association board to approve your new custom garage doors can seem daunting. Dynamic Garage Door as a custom design and manufacturing firm has come across this situation quite frequently with a phenomenal success approval rate!
In order to get approval for your custom garage door approval there are a few basic points you must understand. First off, your HOA is committed to preserving the neighborhood's curb appeal integrity by focusing on the impact your new custom garage doors might have on your house and the houses of your neighbors. It is important to understand that your curb appeal decisions will impact your home and neighborhood alike. Too many companies offer semi-custom wood doors without the true understanding of the client's need and the essence of their home's architectural style. The garage door design you choose needs to comply with neighborhood regulations while complement your home's architecture. At Dynamic Garage Door, our designers are well-rounded in the garage door industry and so we can suggest or develop designs that will reinforce the natural appearance of your home's style. If you can prove to your HOA that you've done your homework and that the garage door design you chose will complement not only your home but the neighborhood you'll be surprised when your proposal is marked with the approval stamp!
This garage door is actually a single double-car door not two as it appears. The reason is that this garage used to have two separate doors with a post in the middle. The post in the middle made it difficult to use the garage on a daily basis so the post was removed to facilitate the use of the garage. The HOA wasn't too happy about the removal of the post as it was an essential part of the arches located right above the garage doors. You can clearly see how that would have been disruptive if the homeowner went with a regular wood door and not one custom designed and manufactured by Dynamic Garage Door.
This garage door was specifically designed to address the HOA's concern about the center post removal and the effect it would have on the curb appeal of the home with the incomplete double arch look. So we addressed this by crafting the door with a false center post in the middle that was textured and painted the same color of the house to give off that illusion that the post is still there. Overall, it gives the home a complete finished appearance with two independent-looking doors and original post. The homeowner got the entire width of the opening to use at the push of a button so having a larger car won't be a problem anymore. The neighbors are all happy and no one seems to notice the center post is actually fake!
Got an interesting garage door project you want our designers to review and price out for you? Give us a call at (855) 343-DOOR
 Boerne Kitchens and Baths
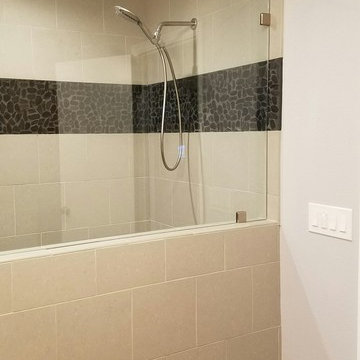
The Owner of this residence had damage from a plumbing leak and took advantage of the disruption to remodel the Master Bath. An unused whirlpool tub was removed and the master shower expanded to make a elegant walk in shower with a granite topped bench. The wall were tiled in a 13X13 light gray tile offset in a broken joint pattern. The floor was a cut river rock sloping to the front of the shower and a linear drain. The wall also has a accent stripe in a black cut river rock. A half wall was topped with a frameless piece of glass to give the room a clean transitional appearance.
 Mission Home Remodeling
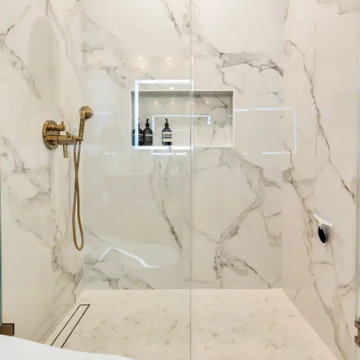
A spa-quality primary bath built around a glass-enclosed shower clad in book-matched marble, its soft veining running floor to ceiling for an unbroken, serene wall of stone. Brushed brass fixtures — a wide rain showerhead and articulated handheld wand — add warmth against the cool marble, while a recessed niche with clean LED edge lighting keeps everyday essentials tucked away without disrupting the room's quiet symmetry. A freestanding soaking tub sits just beyond the glass, reinforcing the sense of a private retreat rather than a purely functional space. Underfoot, a linear drain and continuous marble flooring carry the same material from shower to floor, giving the room a seamless, sculptural calm.
 Mastercraft Design Inc.
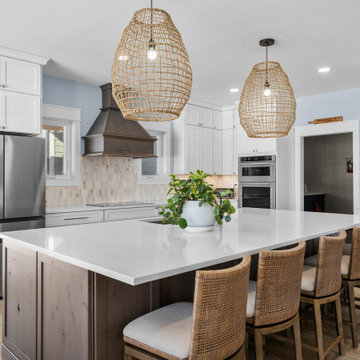
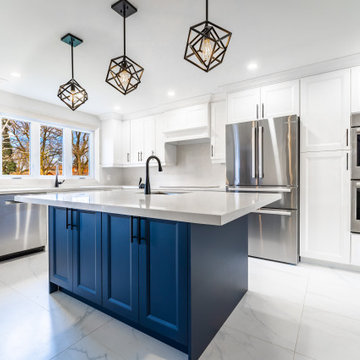
Kitchen Deep Dive: Designed for Flow
In this Nokesville kitchen, every cabinetry decision began with space planning.
We carefully evaluated workflow, sightlines, and proportion to create a layout that feels open — yet grounded. The perimeter cabinetry features Medallion Cabinetry in Maple with Potter’s Mill Reverse Raised Panel doors, finished in Sea Salt with a Graphite Dry Brush. The softer perimeter tone keeps the room feeling light and expansive while allowing architectural details to stand out subtly.
To anchor the space, we designed the island and hood in Knotty Alder, using the same door style but finished in Dockside stain. The warmth and texture of the wood create contrast and depth — drawing the eye inward and establishing the island as a natural gathering point.
Maintaining consistent door styling throughout ensures visual cohesion, while the material and finish contrast introduces dimension without disrupting flow.
Thoughtful proportion. Intentional finish selection.
Design that supports how the space is truly used.


 Houseplay Renovations LLC
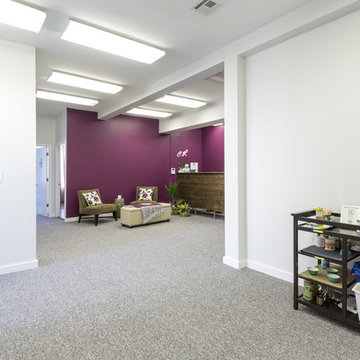
This Jersey City, NJ space was the first permanent ‘home’ for the yoga studio, so it was essential for us to listen well and design a space to serve their needs for years to come. Through our design process, we helped to guide the owners through the fit-out of their new studio location that required minimal demolition and disruption to the existing space.
Together, we converted a space originally used as a preschool into a welcoming, spacious yoga studio for local yogis. We created one main yoga studio by combining four small classrooms into a single larger space with new walls, while all the other program spaces (including designated areas for holistic treatments, massage, and bodywork) were accommodated into pre-existing rooms.
Our team completed all demo, sheetrock, electrical, and painting aspects of the project. (The studio owners did some of the work themselves, and a different company installed the flooring and carpets.) The results speak for themselves: a peaceful, restorative space to facilitate health and healing for the studio’s community.
Looking to renovate your place of business? Contact the Houseplay team; we’ll help make it happen!
Photo Credit: Anne Ruthmann Photography
 HomeSource Builders
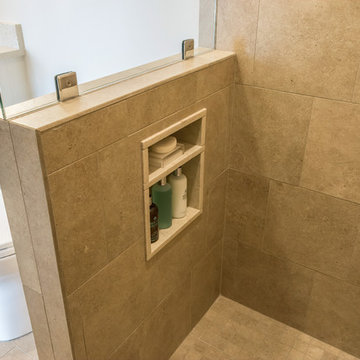
The shower nook was positioned on the curb wall so it wouldn't disrupt the back wall design. Coming from a downtown Chicago high-rise condo, these folks were ready to expand their space. The jack-and-jill bathroom for the lower level bedrooms had been oddly laid out with a narrow line-up of sink, tub, and toilet. By moving one short wall about two feet, jackhammering out 3 old drains of 9-inch-thick concrete, and adding 6 new ones, the space was expanded so each spare bedroom now has its own en suite, private bathroom with shower, along with new HVAC ducts to serve each room. Also on the lower level, the family activity room was a little “tired.” So, we fashioned decorative beams and installed new LED can lights. Planning for a future move, we gutted and refitted the large mother-in-law bathroom with elegant tall and overhead cabinets with built-in lighting. Throughout this level, carpet was replaced with concrete-compatible hardwood flooring.

 Maureen McGough Interior Design
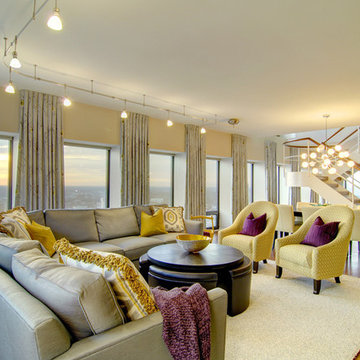
We wanted to frame the windows to take advantage of the view from the 37th floor of the high rise condo building. We wanted a crisp & clean look, with a contemporary color palette of soft greys, creams and metallics.

 Total System Service
As a manager of a building or property, you quickly learn the art of mediation. One minute you may be working with a vendor to keep the building’s operating system running efficient and smooth; the next moment you may be calming a tenant down after finding the change in the system disrupted his office’s workflow. Give and take; it’s the only way to make sure every day runs perfectly.
Overall, you have two goals to strive for in everything you do.
1. Keep the building running properly, upgrading systems as appropriate, and striving to do all you can on a pre-established budget.
2. Keep the building occupants happy, with as little disruption as possible.
While some changes are minor, barely registering on a building occupant’s mind, with HVAC challenges, that’s rarely the case. If a HVAC contractor is replacing an air handler, for instance, and disconnects one and moves to the next unit, it may cause major disruptions to sensitive areas of a building. And if the occupant wasn’t prepared for the disruption, you can have a mighty unhappy customer on your hand.
Anytime you are working on HVAC projects throughout your building, there are strategies you can put into place to keep things running smooth.
Communicate with occupants
Communication is key to any good relationship, and as a property manager, this rule is a great place to start. If you will be working with the HVAC equipment, block out the timeframe for work to be done, and understand the potential consequences of the process. Then communicate this process with every point of contact you have throughout the building. The more detail you can provide, the less surprises you’ll have throughout the process. You can also work with your building’s occupants before the process begins, finding out if there are better timeframes than others.
Establish a realistic schedule
As a property manager, its easy to provide your expectations for the HVAC project at hand, and request that the proposal be written in such a way that work is completed on your timeframe. Unfortunately, many contractors want your business and will agree to anything upfront in order to win the bid, knowing full well the work will take longer than specified. Instead of projecting your timeframes into the proposal process, ask for HVAC project bids to establish realistic schedules of how long the process will take, and what areas of your property will be most effected throughout the schedule. This will help you avoid crises between you and the contractor, and you and your tenants.
Plan for the whole system
If one small piece of your HVAC system is weak, its easy to fix that one small piece. But how will that impact your overall system? Will it cause weak spots in different parts of the building – maybe a corner office will have reduced air flow, and therefore be colder in the winter and warmer in the summer? When retrofitting new pieces with older existing systems, its easy to reduce the efficiency of your entire system. Before agreeing to certain repairs, make sure you understand how it will impact your entire system overall. An easy way of handling this problem is by working with the same HVAC contractor again and again, He will understand your system’s potential, and know when to make repairs, and when to replace.
Have points of contact available for immediate assistance
In many cases, problems arise because connections can’t be made. Can the HVAC contractor get a hold or you or another person that can make decisions at a moments notice if a problem arises? Do you have access to decision makers throughout the building that may be impacted by this change? Many projects have been put on hold simply because a person in authority can’t be found to give the go-ahead to move forward. If you have access to these people during the time of the project, you’ll be able to complete the project in record time.
Test
Finally, if you can test things in stages, or test when the potential for problems is the smallest, you reduce the chances of bigger emergency issues falling into your lap. If you’ll be installing a new terminal unit, can you make the switch on a Saturday morning when the building is largely unoccupied? If you’re replacing a large system, can you replace and test in phases so the entire project isn’t released at once?
Most issues can be avoided with just a little strategy from the beginning. If you’ve never had a HVAC maintenance team to help you stay on track with your building’s heating and cooling, now may be the time to find out how easy a team approach makes the process.
44