
Search results for "Evaporation" in Home Design Ideas
 Greenwood Design Associates, LLC
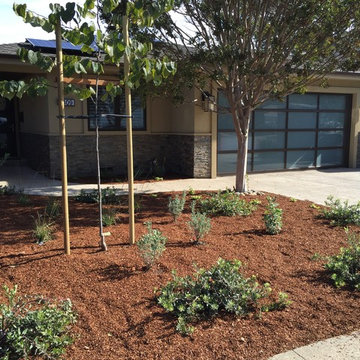
Immediately after planting, in November of 2014. Almost every plant shown in this photo is a California native (not the trees). This garden will be open to the public as "Tranquil California" on Saturday, April 9th for the California Native Plant Society spring garden tour. Register here for tour info: http://gngt.org/GNGT/HomeRO.php
This home went from "blah" to beautiful with the addition of a deck and lush, California native plantings. All that boring, time-consuming lawn is gone, making room for bids, bees, and butterflies. Now this garden is a fit habitat for a much wider range of party animals!
 Just in Thyme Landscape Design
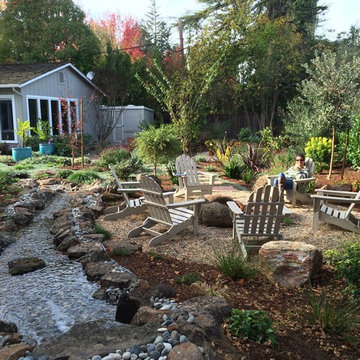
This 44' long water feature blends into the woodland setting of this large back yard by starting in the Redwood grove outside the client's bedroom deck, meandering by a fire pit sitting area, and ending in front of their dining patio. It has become the main feature of the yard as it can be heard and seen throughout. It is subtle, yet central. There are three falls and a place to cross from the deck to the fire pit. The water recirculates and is stored in a reservoir underground, eliminating evaporation, algae, and bug issues. The grade of the yard needed to be raised near the Redwood grove to increase the slope of the stream.
 Tile Doctor Ltd
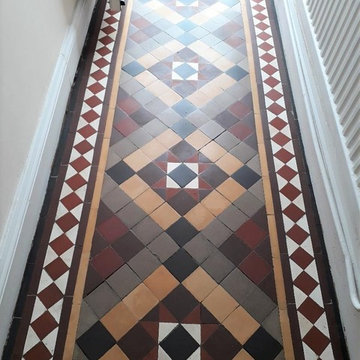
As is often the case in years past and for whatever reason many homeowners covered their decorative Victorian hallway tiles in a variety of products from carpet to laminate flooring. These days the trend has reversed and quite rightly many homeowners now realise the value a tiled floor can bring to a property and look to us to have it restored.
Our client had purchased a property in Norfolk seaport of Kings Lynn and, on lifting the dirty old carpet and decaying underlay in the hallway, discovered a beautiful tiled entrance hall. It was obvious that a previous owner had decided to lay carpet over the tiles as an easy way of hiding the result of careless renovation and decorating which had resulted in a thick coating of plaster, paint, carpet tape glue and various other contaminants which had become firmly stuck to the surface. There were also two small rectangular black and brown tiles missing behind the front door which had been damaged during the removal of some old lead pipes.
This was clearly a job which would need somewhat more than a scrubbing brush and a bottle of Flash!
Our first job was to remove as much of the solid contaminants as possible by hand with floor scrapers and a steamer which softened the more stubborn lumps. We then applied Tile Doctor Remove & Go which is a powerful alkaline stripper to the whole area, left it to dwell on the surface for twenty minutes and then scrubbed it in using a rotary machine fitted with a black scrubbing pad. The resulting slurry was then power rinsed and extracted away using our Ninja machine which is a high-power industrial vacuum. Any remaining patches where the carpet tape had been stuck down were spot treated using Tile Doctor Nanotech HBU which made short work of the hardened glue.
The result was a clean floor, but the surface still felt slightly rough and pitted, a problem which we resolved using the rotary machine fitted with a 200-grit diamond burnishing pad followed by a 400-grit pad with a little 400 grit honing powder which left the surface smooth, silky and ready for the application of a sealer.
Finally, we acid washed the whole area using Tile Doctor Acid Gel, a slow release product which would neutralise any remaining chemicals, improve new sealer adhesion and inhibit the future production of any efflorescence salts. We had used a fair amount of water during the cleaning process, so we left the floor to dry off thoroughly overnight with assistance from our commercial dehumidifier.
On our return the following day, we discussed the sealer options with the client and recommended using microporous Tile Doctor Colour Grow which is an impregnating sealer that seeps into the pores of the stone protecting it from within. It will provide an excellent fluid resistant seal whilst enhancing the natural colours in the stone, additionally it’s fully breathable thereby enabling any moisture trapped under the floor to rise through the floor and evaporate. This is important on old floors like this where no damp-proof membrane was installed. The sealer was applied with a paint pad in tow coats and allowed to dry for an hour before buffing the floor with a hog’s hair pad to give a rich natural-look sheen finish.
The Victorian tiles responded well to the treatments which were completed in two consecutive days. My client was extremely pleased with the results and left the following comment:
“My floor was in poor condition after being buried under carpet as well as many, many years of paint and muck. I enjoyed the time they spent at my home and wouldn’t hesitate to use (or recommend) the Tile Doctor service in the future.”
Nick White
Norfolk Tile Doctor
Find the right local pro for your project
 LandCurrent Landscape Architects -Eugene OR
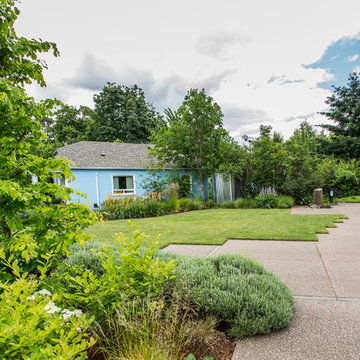
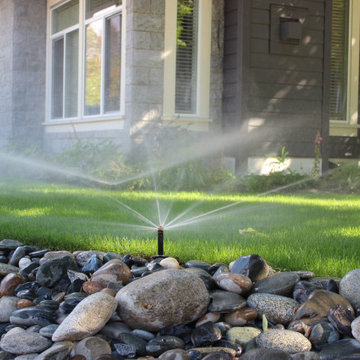
Drought tolerant plants surround open space with lawn. Lawn was seeded with Water Star qualified grass seed to reduce water demand of lawn and further water reductions were achieved by using an underground drip irrigation to minimize evaporation and target water delivery to roots.
 C.E. Pontz Sons
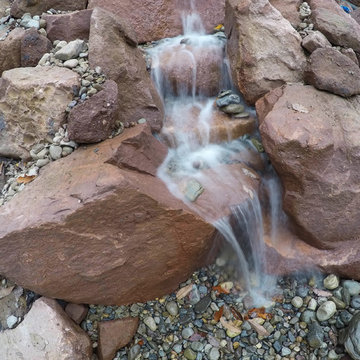
This Backyard Waterfall project included installation of a pondless waterfall approximately 15' in length on a sloped bank at the area next to the existing pool. The backyard waterfall cascades down the existing embankment. There is still retaining wall work in progress as of this video and pictures being shot. Future landscaping will be installed once surrounding hardscaping has been complete. Rocks and Boulders for this project were chosen and supplied by home owner. This pondless waterfall project was installed in Mohnton (Berks County), PA.
Pondless Waterfalls are simply a re-circulating waterfall and/or stream without the presence of a pond. You can enjoy the sight and sound of running water without the maintenance of a pond.
The waterfall is undoubtedly the most beautiful and favored feature in a water garden. If space is lacking in your yard or you have safety concerns with a pond, go Pondless! The name basically explains it all. It’s a waterfall and stream, without the pond. So why would you want a waterfall without a pond? The truth is that a Pondless Waterfall isn’t for everyone, but it can be a great alternative for someone who isn’t quite sure if a pond is right for their family.
Because there is no pool of water, a Pondless Waterfall is a great option if you are concerned about safety issues associated with a traditional pond.
Cost can be a big factor when considering the type of pond you want to build. In most cases, the price of a Pondless waterfall will be less than a pond, because there is less labor involved, as well as less rock and materials. Operating costs are also less. Because you’re not dealing with an established ecosystem, it’s not necessary to run the pump 24/7.
The small size of the Pondless Waterfall means you can build and enjoy a beautiful waterfall anywhere in you yard. Taking care of your Pondless Waterfall is easy. Filling the reservoir every few weeks to compensate for water loss because of evaporation is all that’s required.
Perhaps the best part of the Pondless Waterfall is the possibility for the future. If you change your mind later, wishing you’d build a pond, that’s ok! If you leave enough room around the base of the waterfall, it’s easy to add a pond onto a Pondless Waterfall.
A Pondless Waterfall works much like a regular pond. The hole, deeper than a normal pond, is dug then lined with rock and gravel, and filled with water. The water is then circulated from beneath the rocks and gravel by a pump that sits on the bottom, inside a Snorkel™ Vault and Centipede™ Module. A pipe runs from there up to a BioFalls Filter and into an overflowing waterfall, where it falls back into the reservoir. Since the water level never pools above the level of the rock and gravel fill, it give the appearance of a waterfall without a pond, when in fact, the “pond” is there but not visible.
The Pondless Waterfall has made many water-lovers who were previously unable to indulge in the sweet sounds of falling water, very happy. It’s a great alternative for those who are trying to get their feet wet, or looking to fit a little bit of paradise into their own backyard. In other words, when all else fails … go Pondless!
 C.E. Pontz Sons
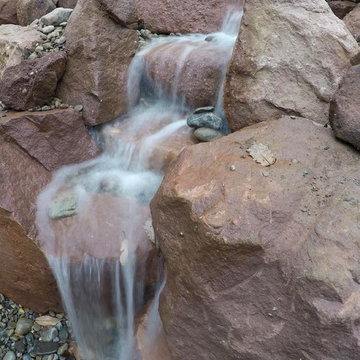
This Backyard Waterfall project included installation of a pondless waterfall approximately 15' in length on a sloped bank at the area next to the existing pool. The backyard waterfall cascades down the existing embankment. There is still retaining wall work in progress as of this video and pictures being shot. Future landscaping will be installed once surrounding hardscaping has been complete. Rocks and Boulders for this project were chosen and supplied by home owner. This pondless waterfall project was installed in Mohnton (Berks County), PA.
Pondless Waterfalls are simply a re-circulating waterfall and/or stream without the presence of a pond. You can enjoy the sight and sound of running water without the maintenance of a pond.
The waterfall is undoubtedly the most beautiful and favored feature in a water garden. If space is lacking in your yard or you have safety concerns with a pond, go Pondless! The name basically explains it all. It’s a waterfall and stream, without the pond. So why would you want a waterfall without a pond? The truth is that a Pondless Waterfall isn’t for everyone, but it can be a great alternative for someone who isn’t quite sure if a pond is right for their family.
Because there is no pool of water, a Pondless Waterfall is a great option if you are concerned about safety issues associated with a traditional pond.
Cost can be a big factor when considering the type of pond you want to build. In most cases, the price of a Pondless waterfall will be less than a pond, because there is less labor involved, as well as less rock and materials. Operating costs are also less. Because you’re not dealing with an established ecosystem, it’s not necessary to run the pump 24/7.
The small size of the Pondless Waterfall means you can build and enjoy a beautiful waterfall anywhere in you yard. Taking care of your Pondless Waterfall is easy. Filling the reservoir every few weeks to compensate for water loss because of evaporation is all that’s required.
Perhaps the best part of the Pondless Waterfall is the possibility for the future. If you change your mind later, wishing you’d build a pond, that’s ok! If you leave enough room around the base of the waterfall, it’s easy to add a pond onto a Pondless Waterfall.
A Pondless Waterfall works much like a regular pond. The hole, deeper than a normal pond, is dug then lined with rock and gravel, and filled with water. The water is then circulated from beneath the rocks and gravel by a pump that sits on the bottom, inside a Snorkel™ Vault and Centipede™ Module. A pipe runs from there up to a BioFalls Filter and into an overflowing waterfall, where it falls back into the reservoir. Since the water level never pools above the level of the rock and gravel fill, it give the appearance of a waterfall without a pond, when in fact, the “pond” is there but not visible.
The Pondless Waterfall has made many water-lovers who were previously unable to indulge in the sweet sounds of falling water, very happy. It’s a great alternative for those who are trying to get their feet wet, or looking to fit a little bit of paradise into their own backyard. In other words, when all else fails … go Pondless!
 US Cellar Systems
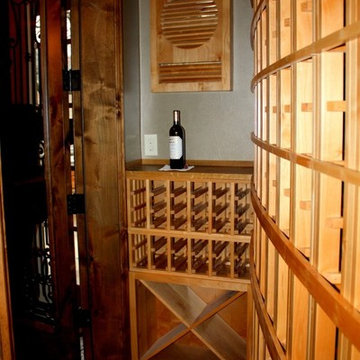
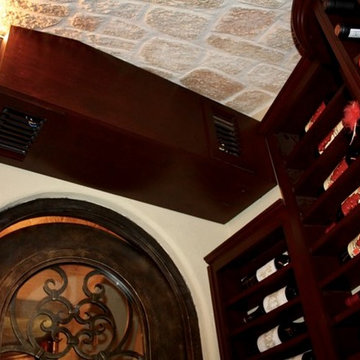
When you enter the wine room door, the left wall consists of a half height tabletop with single storage and a solid X bin at the bottom. The tabletop was made of reclaimed wine barrel.
The evaporator of the wine cooling system was installed above the tabletop. It was hidden in a wooden grill and box constructed from Knotty Alder.
Learn more about the project: http://www.winecellarrefrigerationsystems.com/texas-home-wine-cellar-cooling-solution/
US Cellar Systems
2470 Brayton Ave.
Signal Hill, California 90755
(562) 513-3017
dan@uscellarsystems.com
See what people say about us: https://www.google.com/search?q=us%20cellar%20systems&lrd=0x80dd338b17b6e057%3A0x9995f30dbfee9fc1%2C1%2C&rct=j
http://www.winecellarrefrigerationsystems.com/
 Classic Sofa
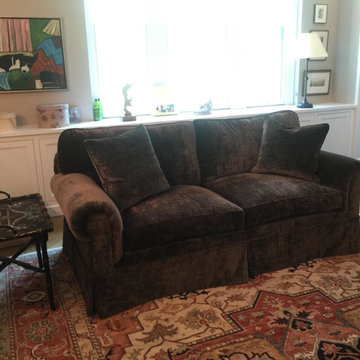
The Classic Sofa that despite an evaporating sense of what is real, a few old things mysteriously hold up under pressure of changing design perspectives – The Classic Bentley Sofa will always remain a staple in traditional styles.
 Wine Cellar Specialists
The ductless split cooling system evaporator for this Texas wine cellar was installed just above the door. It was concealed in a wooden grill cover.
Wine Cellar Specialists used the RM3600 refrigeration unit from US Cellar Systems.
Request a wine cellar design for FREE: http://www.winecellarspec.com/free-3d-drawing/
Wine Cellar Specialists
+1 (972) 454-0480
Take a video tour of this project: https://youtu.be/dqk_gAkBKsQ

 M A Jaworski Landscape Design
CONTAINER PLANTS do very well on balconies, if fertilized and watered appropriately. They may need additional water due to evaporation from wind, and if there is a hot microclimate on a S or SW-facing balcony. The style and assortment of containers can be bohemian mix-and-match, or it can be carefully coordinated. The important feature is that each container must have drainage holes, and that there be no standing water in any saucers - it's best to have flow-through casters so the water flows onto the balcony floor and down through the drainpipes. Mosquitoes will breed in any standing water, even if the volume is only that of an upturned soft drink or beer cap.

 Mamma Mia Covers
100% Soft Polyester. Patented eco-friendly and soft fabric with skin-friendly pH and 100% hypoallergenic.
Office / Gaming Chair Slipcover is perfectly suitable for any chair. It perfectly fits 20"-35" seats, whether gaming or office furniture.
Soft fabric retains minimal heat, allows air to stream quickly, speeding up sweat evaporation and keeping you cool.
Both zip and a super stretch design make it super-easy to install and remove the cover. Slipcover is machine washable. Instructions included.
 Platinum Poolcare
Request Free Quote
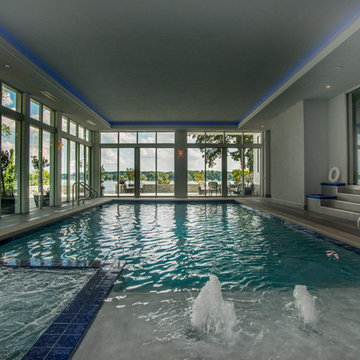
This modern indoor swimming pool in Lake Geneva, Wi measures 19'8" x 37'5" and features a 7'0" x 7'0" hot tub inside it. Adjacent to the hot tub is a 5'0" x 11'8" sunshelf equipped with 3 LED lit bubbler jet features. The pool also possesses a 5'0" bench all around the perimeter and a 3' x 37'5" Jogging Lane. Limestone Coping surrounds the pool and an automatic safety cover cuts evaporative moisture in the space. The pool finish is CeramaQuartz. Photos by Larry Huene
 Yuba River Swimming Holes and Pools
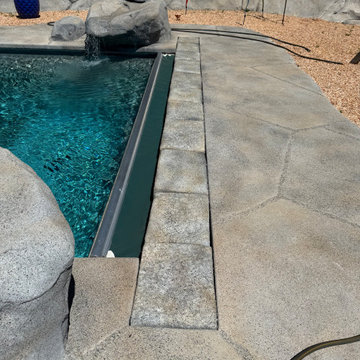
An automatic pool cover adds safety, energy efficiency, and convenience to this custom rock lap pool. Designed to help retain heat, reduce water evaporation, and keep debris out, automatic covers make pool ownership easier while maintaining a clean, modern appearance. Yuba River Swimming Holes & Pools specializes in custom lap pools, automatic pool covers, natural rock pools, and luxury backyard design throughout Auburn, Granite Bay, Loomis, Grass Valley, Nevada City, and Northern California.
 Tile Doctor Ltd
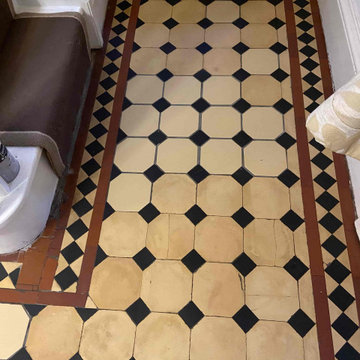
Detailed below is the restoration of a Victorian tiled hallway floor that we started back in June in Preston. Although we started in June there was so much damage to the subfloor and the tiles it took some time to complete, additionally, the client did not like the colour samples of the replacement tiles we had brought along and so decided to source their own which took some time.
Three months later with replacement tiles now sourced we were given the go ahead to start the restoration. The first day’s focus was cleaning the original floor using very coarse 100-grit and 200-grit Diamond pads fitted to a rotary buffer machine and applied to the floor using a strong dilution of Tile Doctor Remove and Go to add extra cleaning power. Tile edges were given special attention using a flex machine fitted with small diamond grit pads.
The floor was rinsed with water to remove the soil generated and this was followed up with an acid rinse using a 1:3 dilution of Tile Doctor Grout Clean Up. This last step in the cleaning process is especially recommend for old floors like this which don’t have a damp proof membrane and can suffer from efflorescence issues.
The next stage focused on repairing the floor and started by carefully knocking out all the broken and chipped tiles. We had previously estimated over 30 tiles needed replacing and so the client had bought two boxes, meaning I had plenty of spares to work with.
Before tiling however, the subfloor had suffered over the years and needed attention first. To deal with this the damaged areas were raked out, cleaned up and then back filled with rapid setting self-levelling screed from Mapie adhesives. Once the sub-base was fixed then we put the new tiles back in, they were not an exact match, about 5mm too short and lighter in tone, but the colour was pretty close.
Tiling an old Victorian floor like this can be a bit like dominoes as you move one out of place 2 decent ones come loose and then they also need refixing. Some of the tiles had hair line cracks in them and once they were loose, they just cracked in half. As such the 20 spare tiles that I thought were spare came into good use and I actually ended up using all of them. I could have done with a few more so it was decided to reset the last four broken tiles and grout them in. Luckily for me the client was very understanding about the nature of tile restoration and had accepted that there would be some imperfections and they were not expecting a new floor.
The Tiles were fixed down using Ultralite Rapid Flex (another product from Mapie) and then grouted using the same adhesive (not a grout, as they did not have grout back in the day, just cement and screed).
The floor was left this to cure overnight, and we came back the next day to finish the clean using a 200-grit diamond pad fitted to a buffing machine and lubricated with water, then one last acid rinse to get the tiles as clean as possible and remove any lingering grout haze. This last clean helps to blend the new tiles in with the original.
Before applying a protective sealer, the floor was left to dry for a couple of days, the tiles need to be thoroughly dry before sealing or you can end up with a patchy appearance.
For this floor with no damp proof membrane, it was important to use a fully breathable sealer that will allow moisture to rise through the tile and evaporate at the surface, so Tile Doctor Colour Grow was chosen. This is a good choice for old floors like this as its fully breathable, head wearing, and it contains a colour enhancer that improves the overall appearance of the tile.
Three coats of Tile Doctor Colour Grow which is a fully breathable, colour enhancing sealer hat works by soaking into the pores of the tile protecting it from within. It has a matt finish, and it works really well with all clay tiles and is ideal for these types of floors.
You can probably spot the lighter coloured tiles in the after photos on this page, however it’s a very subtle difference and I think they have blended in quite well with the original. Certainly, my client was very pleased with the newly restored floor, its completely transformed from when we first visited the client, and the floor has now gained character and history. For aftercare we recommend Tile Doctor Neutral Cleaner, its an effective pH neutral product that is compatible with the new sealer.
Russell Taylor
Lancashire Tile Doctor
 Paragon Pools
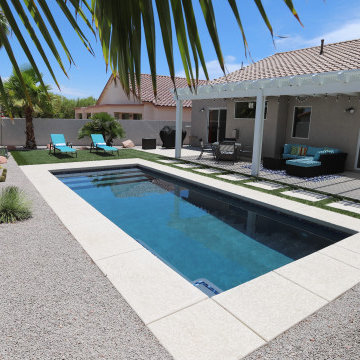
20 Fabulous Pool Designs Under 600 sq feet of Water Surface Area
Custom pools are a much-desired amenity in Southern Nevada, however in accordance with the 2022 water use ordinance, new residential pools may NOT exceed 600 sq ft of water surface area. The square footage includes a total of the pool, spa, and any infinity-edge troughs where applicable. And, there is also a ban on independent water features.
Paragon Pools’ VP & Chief Design Executive Joseph A Vassallo, CBP provides 20 pool designs under 600sq ft as an inspiration for homeowners.
Excerpt from the SNWA website: Residential pool size limits
Ongoing drought and climate change conditions continue to affect water levels in Lake Mead – Southern Nevada's primary water supply. As a result, the federal government declared a shortage on the Colorado River, reducing Southern Nevada's available water supply by 8.1 billion gallons, and additional reductions are expected in the coming years.
To help manage these water supply constraints, the Southern Nevada Water Authority approved a resolution in July 2022 that supports a 600-square-foot surface area limit on new residential pools. The Las Vegas Valley Water District and other local jurisdictions approved this change shortly thereafter with rule and code changes. This measure will help reduce consumptive water use associated with evaporative water loss, targeting savings from the top 25 percent of new pools constructed.


 Pennsylvania Landscape & Nursery Association
Terren Landscapes http://www.terrenlandscapes.com
2014 PLNA Awards for Landscape Excellence Winner
Category: Residential $30,000-$60,000
Award Level: Silver
Project Description:
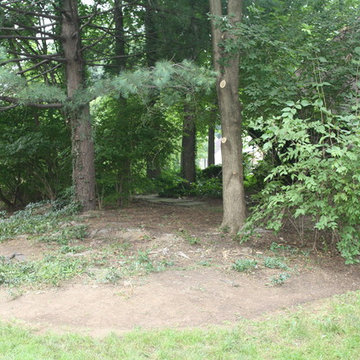
Our company was contracted to do a master plan for the family who was in desperate need of a rear yard renovation. The existing lawn area remained saturated throughout most of the year and the runoff from the neighboring property ran across their back yard, down the side of their property and all the way to the sidewalk in front of their house. The water was so intense that it had begun to cut through the back yard and erode the soil across the sidewalk and into the nearby storm drain.
By identifying these drainage problems and discussing solutions with the homeowner, we were able to design and create the aesthetically pleasing and sustainable solution of a rain garden. The goal was to slow down storm water runoff, and catch pollution and sediment by creating a rain garden that acts as a filter prior to entering the storm drain, while enhancing the aesthetics of the property.
The rain garden created was a shallow depression, 12 - 16" deep that collects rainfall runoff from all downspouts of the home and water collected into perforated pipes underneath the lawn area. The perforated pipe begins at the highest elevation in the yard and ends in the rain garden, the new lowest elevation that has been excavated down to an 8" depth. The perforated pipe captures the runoff water and allows the water to seep slowly back into the
ground as it runs across the property and into the garden. The garden was lined with a geotextile filter fabric to aide in removing contaminants from the water, prevent migration of the stone in to the soil, and minimalize maintenance.
A large variety of plant material was chosen, focusing mainly on native wetland species for their tolerance of our local soil types, moisture conditions and
the habitat they provide for wildlife. The garden was abundant with native wildlife and was a sustainable ecosystem for birds and butterflies upon completion of the project.
After planting, we arranged decorative stone throughout the garden to slow the flow of water and help prevent erosion. The combination of vegetative and stone surfaces provides temporary storage for runoff before the water either evaporates or infiltrates the soil.
The surrounding beds throughout the property were also all amended with compost and replanted with plants that work in harmony with the rain garden. The front, side, and rear yards are a beautiful display of colors that bloom throughout the seasons and the plants throughout the entire property provide food and shelter for native wildlife.
The rear yard that was once a muddy play space for the kids is now a dry lawn space that can be utilized by the family and their neighbors. This multi functional garden has become the focal point of the residence.
Photo Credit:
Terren Landscapes
 Garage Makeover Company, LLC
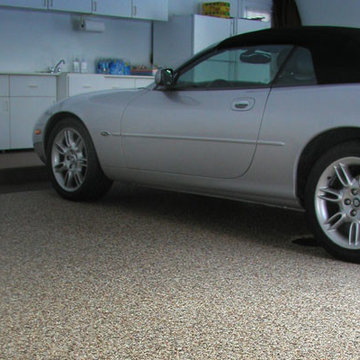
Reduces tracked-in dirt. Safe and slip-resistant. Eliminates puddling or standing water. Hydrostatic ports allow moisture/water to evaporate, allowing concrete floors to breathe naturally. Won’t peel or bubble.
 Tom Mannion Landscape Design, Inc.
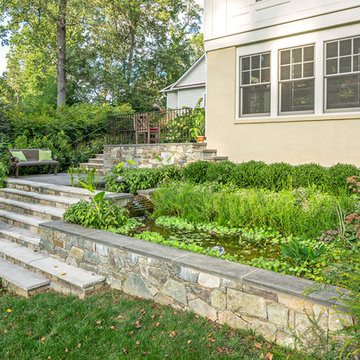
The water-harvesting fish pond captures rain water from the two downspouts on either corner of the new addition.
Roger Foley Photography, All Rights Reserved
www.foleyfoto.com
19