
Search results for "Final cut" in Home Design Ideas

 Cut and Curve Creations
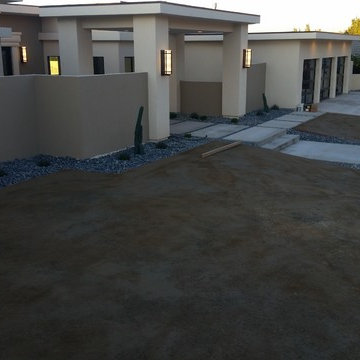
Final grade just before turf being put down
This is an example of a large modern drought-tolerant landscaping in Los Angeles.
This is an example of a large modern drought-tolerant landscaping in Los Angeles.
Find the right local pro for your project
 CuttingEdge Built LLC
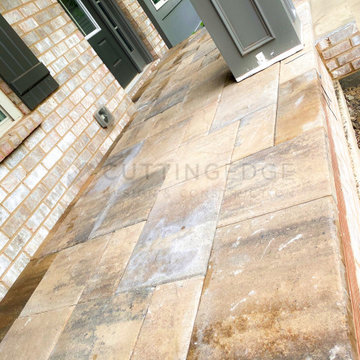
This beautiful new construction craftsman-style home had the typical builder's grade front porch with wood deck board flooring and painted wood steps. Also, there was a large unpainted wood board across the bottom front, and an opening remained that was large enough to be used as a crawl space underneath the porch which quickly became home to unwanted critters.
In order to beautify this space, we removed the wood deck boards and installed the proper floor joists. Atop the joists, we also added a permeable paver system. This is very important as this system not only serves as necessary support for the natural stone pavers but would also firmly hold the sand being used as grout between the pavers.
In addition, we installed matching brick across the bottom front of the porch to fill in the crawl space and painted the wood board to match hand rails and columns.
Next, we replaced the original wood steps by building new concrete steps faced with matching brick and topped with natural stone pavers.
Finally, we added new hand rails and cemented the posts on top of the steps for added stability.
WOW...not only was the outcome a gorgeous transformation but the front porch overall is now much more sturdy and safe!
 CuttingEdge Built LLC
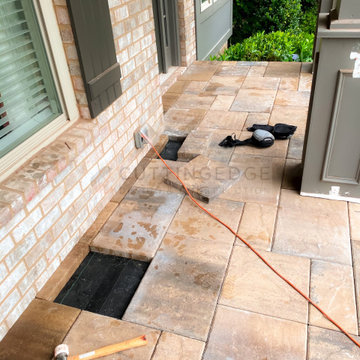
This beautiful new construction craftsman-style home had the typical builder's grade front porch with wood deck board flooring and painted wood steps. Also, there was a large unpainted wood board across the bottom front, and an opening remained that was large enough to be used as a crawl space underneath the porch which quickly became home to unwanted critters.
In order to beautify this space, we removed the wood deck boards and installed the proper floor joists. Atop the joists, we also added a permeable paver system. This is very important as this system not only serves as necessary support for the natural stone pavers but would also firmly hold the sand being used as grout between the pavers.
In addition, we installed matching brick across the bottom front of the porch to fill in the crawl space and painted the wood board to match hand rails and columns.
Next, we replaced the original wood steps by building new concrete steps faced with matching brick and topped with natural stone pavers.
Finally, we added new hand rails and cemented the posts on top of the steps for added stability.
WOW...not only was the outcome a gorgeous transformation but the front porch overall is now much more sturdy and safe!
Sponsored
Columbus, OH

Hope Restoration & General Contracting
Columbus Design-Build, Kitchen & Bath Remodeling, Historic Renovations

 Five Star Tree Care
Once the endless winter has finally subsided, it is time to start thinking about your spring tree care! Once the last of the snow and ice has finally melted away, your trees and garden will be released once again. It is finally time to prepare for your spring tree care. If you want to maximize your tree’s new growth, you are going to want to follow Five Star Tree Services spring checklist! You can also start planning for new trees as well. We are going to give you all the information you need to know in order to properly take care of your trees this spring.
Inspect Your Trees
When all the ice and snow has left your trees, this is a good time to inspect for any damage done from the harsh winter. There aren’t any leaves that will get in your way, making it easier to see anything amiss, like damage or diseases. If you hire an arborist to do this initial spring inspection, you can guarantee that they will analyze every tree on your property very carefully to make sure they can provide you with the most accurate report. This report will make you aware of any and all tree problems on your property. The arborist will also go over all possible ways that you can fix these problems and explain them to you.
Preemptive Pruning
In order to properly prepare your trees for their spring growth, you will need to prune them. A trained arborist will be able to identify dead branches and cut them off. They will also deal with damaged branches, weak branches, and any unsafe branches and make sure they remove them before they become a problem or hazard. We recommend that you prune or hire an arborist to prune your trees in the early spring. If you wait and prune your trees after their spring growth, they are more likely to be attacked by pests and diseases. When done properly, your spring pruning is going to have a major positive impact on the overall health of your trees.
Cleanup the Gardens
Part of your spring cleaning is not limited to your home. You also need to clean your gardens too! This is an important part of your checklist routine. When all the snow and ice melt away and exposes your gardens and lawn once again, it is important to clean up your yard from any and all fallen leaves, branches, and anything else that isn’t supposed to be there. Once you do this, the sunlight will be able to get to the ground and will aid in penetrating and warming up the ground faster below the surface. Developing tree roots will have a positive effect from the sunlight. Which results in better tree growth in the spring.
Fertilization of Your Trees
After the winter has subsided, it usually takes most of the nutrients out of the soil. Which is why you should be taking advantage of fertilizing your trees in the spring. It is important to feed your trees in order to provide them with the adequate nutrients they need in order for them to be healthy and grow during the spring. When trees are properly fertilized, this helps them fight off diseases and pests.
Add Some Mulch
There are many marvelous benefits to mulching in the spring. This improves the soil quality that’s around your tree. It also helps to keep the soil fertilized and moist. Mulch is also a fantastic way to prohibit weeds from developing and growing in your gardens. This is very important for newly planted and young trees. We recommend that you add 2-4 inches of mulch around each tree in the early spring.
Plant Some New Trees!
There are many reasons why people plant trees. One major reason is to combat deforestation and provide more oxygen. If you are looking for other reasons to plant some trees, consider planting shade trees. These trees allow you to take shelter under them in the summer from the glaring sun. But did you know that they can also benefit you by maximizing your energy savings during the winter? Making it so that you can actually increase the overall value of your home when you plant new trees.
How Five Star Tree Services Can Help
When you are looking to add more magnificent trees to your yard, you need to make sure they are planted properly. One of the first important steps is to pick the right placement for your new tree. You also need to consider what trees are right for your property. Without any experience planting trees, we highly recommend that you contact your local Toronto Tree Planting Services for assistance! Our team is highly knowledgeable and will be able to help you with anything you require for your trees, both new and pre-existing. Make sure to contact Five Star Tree Service for all your tree needs. Contact us at (416) 990-3355 or go to our website to learn more!
 S & S Homes, Inc.
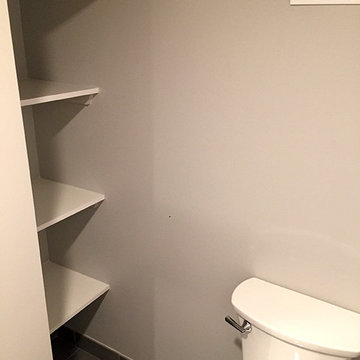
This bathroom was constructed from start to finish in an area of the the client’s basement that was not prepped for a 3-piece bathroom, so a lot of concrete floor cutting was involved. The client merely said, “I like grays and blacks,” and that was it! He trusted our judgement and asked for us to surprise him. After a meeting with our interior designer at Beaver Tile, a really unique and beautiful tile arrangement came together utilizing ceramic and porcelain tiles. With the beautiful tile “mural” on the main shower wall, the dual Delta shower heads, a corner seat, and clear glass slider doors with brushed nickel framing, our client was thrilled with the final shower design. Continuing to weave blacks and grays through the rest of the bathroom, 12”x24” ceramic and porcelain tiles were laid into the floor in a brick pattern, and a counter top of “steel gray” granite was installed on top of the white shaker vanity. The Delta brushed nickel fixtures added the final touch of coordinated color to the bathroom.
And next year? The client would like us to do his Master Bathroom and Kitchen! Photos of the final product will be added here as soon as we have them.
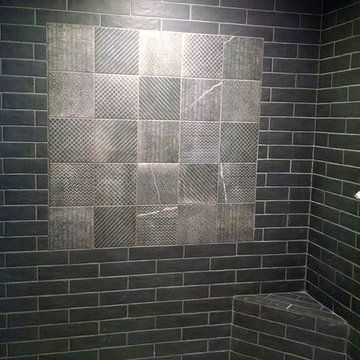 S & S Homes, Inc.
This bathroom was constructed from start to finish in an area of the the client’s basement that was not prepped for a 3-piece bathroom, so a lot of concrete floor cutting was involved. The client merely said, “I like grays and blacks,” and that was it! He trusted our judgement and asked for us to surprise him. After a meeting with our interior designer at Beaver Tile, a really unique and beautiful tile arrangement came together utilizing ceramic and porcelain tiles. With the beautiful tile “mural” on the main shower wall, the dual Delta shower heads, a corner seat, and clear glass slider doors with brushed nickel framing, our client was thrilled with the final shower design. Continuing to weave blacks and grays through the rest of the bathroom, 12”x24” ceramic and porcelain tiles were laid into the floor in a brick pattern, and a counter top of “steel gray” granite was installed on top of the white shaker vanity. The Delta brushed nickel fixtures added the final touch of coordinated color to the bathroom.
And next year? The client would like us to do his Master Bathroom and Kitchen! Photos of the final product will be added here as soon as we have them.
 UNEKUAL Construction
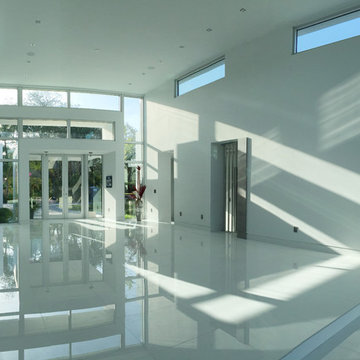
Entryway - large modern porcelain tile entryway idea in Miami with white walls and a glass front door
Sponsored
Columbus, OH
Hope Restoration & General Contracting
Columbus Design-Build, Kitchen & Bath Remodeling, Historic Renovations
 S & S Homes, Inc.
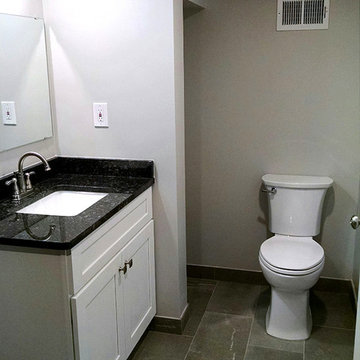
This bathroom was constructed from start to finish in an area of the the client’s basement that was not prepped for a 3-piece bathroom, so a lot of concrete floor cutting was involved. The client merely said, “I like grays and blacks,” and that was it! He trusted our judgement and asked for us to surprise him. After a meeting with our interior designer at Beaver Tile, a really unique and beautiful tile arrangement came together utilizing ceramic and porcelain tiles. With the beautiful tile “mural” on the main shower wall, the dual Delta shower heads, a corner seat, and clear glass slider doors with brushed nickel framing, our client was thrilled with the final shower design. Continuing to weave blacks and grays through the rest of the bathroom, 12”x24” ceramic and porcelain tiles were laid into the floor in a brick pattern, and a counter top of “steel gray” granite was installed on top of the white shaker vanity. The Delta brushed nickel fixtures added the final touch of coordinated color to the bathroom.
And next year? The client would like us to do his Master Bathroom and Kitchen! Photos of the final product will be added here as soon as we have them.
 House Sprucing
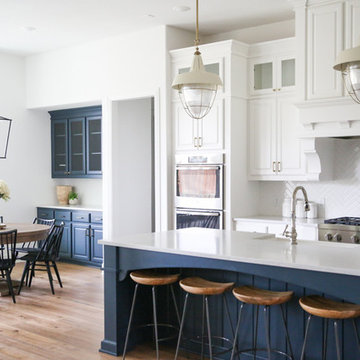
Example of a large transitional u-shaped medium tone wood floor and brown floor eat-in kitchen design in Dallas with a farmhouse sink, raised-panel cabinets, white cabinets, quartz countertops, white backsplash, ceramic backsplash, stainless steel appliances, an island and white countertops
 S & S Homes, Inc.
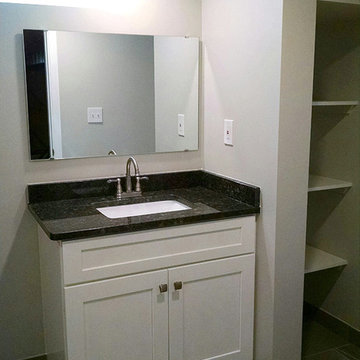
This bathroom was constructed from start to finish in an area of the the client’s basement that was not prepped for a 3-piece bathroom, so a lot of concrete floor cutting was involved. The client merely said, “I like grays and blacks,” and that was it! He trusted our judgement and asked for us to surprise him. After a meeting with our interior designer at Beaver Tile, a really unique and beautiful tile arrangement came together utilizing ceramic and porcelain tiles. With the beautiful tile “mural” on the main shower wall, the dual Delta shower heads, a corner seat, and clear glass slider doors with brushed nickel framing, our client was thrilled with the final shower design. Continuing to weave blacks and grays through the rest of the bathroom, 12”x24” ceramic and porcelain tiles were laid into the floor in a brick pattern, and a counter top of “steel gray” granite was installed on top of the white shaker vanity. The Delta brushed nickel fixtures added the final touch of coordinated color to the bathroom.
And next year? The client would like us to do his Master Bathroom and Kitchen! Photos of the final product will be added here as soon as we have them.
 Windy City Painters
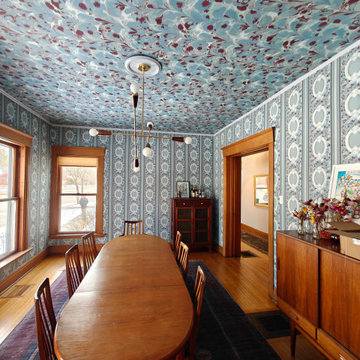
Professional wallpaper installation Chicago dining room showcases expert craftsmanship in this stunning transformation that perfectly complements the home's architectural character.
## Project Overview
This comprehensive wallpaper installation project involved both walls and ceiling application in a formal dining room within a vintage Chicago greystone. The intricate pattern required precise alignment and professional techniques to achieve seamless results that honor the home's historic charm while adding contemporary elegance.
## Materials and Products
We utilized premium wallpaper adhesive specifically formulated for Chicago's climate variations, along with professional-grade smoothing tools and precision cutting equipment. High-quality primer ensured optimal surface preparation for lasting adhesion across both vertical and horizontal applications.
## Installation Process
First, comprehensive surface preparation included removing existing materials and repairing any imperfections. Second, application of specialized primer designed for wallpaper adhesion. Third, precise measurement and cutting with careful attention to pattern alignment. Finally, professional installation with meticulous corner work and ceiling transitions.
## Chicago-Specific Challenges
Chicago homes present unique wallpaper installation challenges including settling foundations that affect wall surfaces, humidity fluctuations impacting adhesive performance, and older plaster surfaces requiring specialized preparation techniques. Additionally, vintage buildings often have irregular walls demanding expert adjustment skills.
## Results and Quality
The completed wallpaper installation creates a sophisticated dining environment that seamlessly integrates with the home's architectural character. Perfect pattern matching across walls and ceiling demonstrates the precision possible with professional installation techniques.
## Professional Tips
Before starting wallpaper installation, always test adhesion in inconspicuous areas first. Maintain consistent room temperature throughout the process. Choose quality materials designed for Chicago's climate. Plan pattern layout carefully to minimize waste and ensure optimal visual flow.
See more work and request free estimate at windypainters.com - Windy City Painters delivers exceptional results.
Q: How long does wallpaper installation take?
A: Professional wallpaper installation typically requires 1-2 days depending on room size, pattern complexity, and surface preparation needs.
Q: Can you install wallpaper on textured walls?
A: Yes, textured wall wallpaper installation requires proper surface preparation and specialized techniques for optimal adhesion results.
Q: Do you remove old wallpaper first?
A: Complete old wallpaper removal is essential before new wallpaper installation to ensure proper adhesion and smooth finish.
Q: What about ceiling wallpaper installation?
A: Ceiling wallpaper installation requires specialized equipment and techniques - Windy City Painters handles this expertly and safely.
Q: How do you ensure pattern matching?
A: Professional wallpaper installation includes precise measuring, cutting, and alignment techniques for seamless pattern matching throughout the space.
Q: Can wallpaper installation work in humid areas?
A: Proper wallpaper installation with quality adhesives designed for humidity variations ensures lasting results in Chicago's climate.
Q: What surfaces accept wallpaper installation?
A: Most properly prepared surfaces including drywall, plaster, and previously painted walls can accept professional wallpaper installation successfully.
Q: Do you handle corner installations?
A: Corner wallpaper installation requires specialized techniques for inside and outside corners - we ensure perfect alignment.
Q: What's included in the service?
A: Complete wallpaper installation service includes surface preparation, removal if needed, professional application, cleanup, and quality guarantee.
Q: How do you prepare surfaces?
A: Surface preparation for wallpaper installation includes cleaning, repairing imperfections, priming, and ensuring optimal conditions for adhesion.
 S & S Homes, Inc.
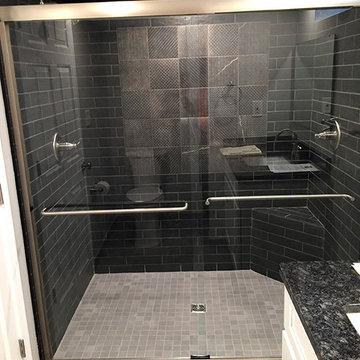
This bathroom was constructed from start to finish in an area of the the client’s basement that was not prepped for a 3-piece bathroom, so a lot of concrete floor cutting was involved. The client merely said, “I like grays and blacks,” and that was it! He trusted our judgement and asked for us to surprise him. After a meeting with our interior designer at Beaver Tile, a really unique and beautiful tile arrangement came together utilizing ceramic and porcelain tiles. With the beautiful tile “mural” on the main shower wall, the dual Delta shower heads, a corner seat, and clear glass slider doors with brushed nickel framing, our client was thrilled with the final shower design. Continuing to weave blacks and grays through the rest of the bathroom, 12”x24” ceramic and porcelain tiles were laid into the floor in a brick pattern, and a counter top of “steel gray” granite was installed on top of the white shaker vanity. The Delta brushed nickel fixtures added the final touch of coordinated color to the bathroom.
And next year? The client would like us to do his Master Bathroom and Kitchen! Photos of the final product will be added here as soon as we have them.
 S & S Homes, Inc.
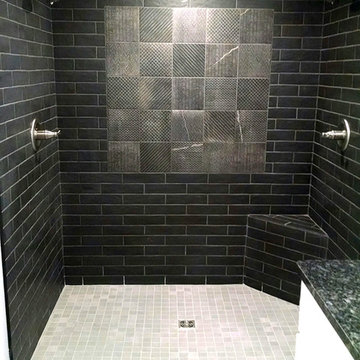
This bathroom was constructed from start to finish in an area of the the client’s basement that was not prepped for a 3-piece bathroom, so a lot of concrete floor cutting was involved. The client merely said, “I like grays and blacks,” and that was it! He trusted our judgement and asked for us to surprise him. After a meeting with our interior designer at Beaver Tile, a really unique and beautiful tile arrangement came together utilizing ceramic and porcelain tiles. With the beautiful tile “mural” on the main shower wall, the dual Delta shower heads, a corner seat, and clear glass slider doors with brushed nickel framing, our client was thrilled with the final shower design. Continuing to weave blacks and grays through the rest of the bathroom, 12”x24” ceramic and porcelain tiles were laid into the floor in a brick pattern, and a counter top of “steel gray” granite was installed on top of the white shaker vanity. The Delta brushed nickel fixtures added the final touch of coordinated color to the bathroom.
And next year? The client would like us to do his Master Bathroom and Kitchen! Photos of the final product will be added here as soon as we have them.
 Homework Remodels
 With education being key to our remodel process, our designer discussed lighting elements, space planning, cabinet options and finish materials with our homeowners. To begin, she talked about under cabinet and above cabinet lighting options. They also discussed the popularity and functionality of LED lights for task, decorative and ambient lighting scenes. Eavesdropping on our conversation, one of the brothers chimed in on how often they had to change the recessed ceiling fixtures. That comment from the brother led our designer to increase our scope of work to add dimmable LED can lights in the color frequency close to daylight. Now it was time to complete the finish selections.
Product selection had to go quickly, as the homeowner was only able to dedicate one long weekend to shop. With this goal in mind, our designer made choosing plumbing products and decorative lighting an online event. Then they went to an appliance showroom and granite/tile showroom to make the final choices. Our designer made sure they found a gorgeous set of slabs for the granite above the cooktop, since it was a key factor for the client and her mother.
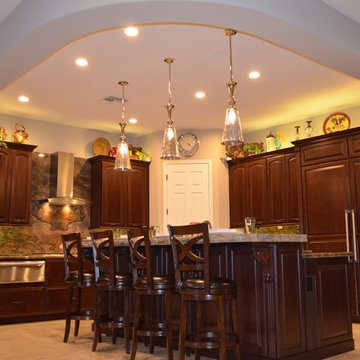
With all the selections made, final space plan drawings and the electrical layout complete, the client met with our designer to sign off on all the paperwork and move forward with their new kitchen. The key improvements incorporated into the final design were:
LED can lights, under cabinet and above cabinet lights all on dimmers.
Accessible items for wheelchair use with a touch-free faucet and microwave drawer .
Extra deep counter space and seating at the island.
Additional storage cabinets under the seating area of the island.
Decreased traffic flow issues by adjusting refrigerator/freezer location and double oven cabinet.
Plug strips under the wall cabinets to eliminate backsplash outlets.
An expansive granite slab backsplash centered on the cooktop area.
Our project manager started the job with rough electrical and rough plumbing, as the homeowner had enlisted the assistance of a family friend to remove the kitchen cabinets and re-install them in her garage. The plumbing was straight forward with the gas line already in place and the sink location staying in the island. The electrician wired for the new under-cabinet and above cabinet LED strip lights. The sconce locations were adjusted for the new bar top location, as were a row of can lights to accommodate for an even pour of ambient light throughout the space. The new LED can lights are a hit, as none have needed to be changed out.
Our project manager specializes in trim carpentry so he did the cabinet install to keep our schedule on time. The cabinets went in smoothly except for the custom refrigerator panel. One of the panels needed to be remade three times, as each time it was produced the manufacturer’s quality control caught a defect. Our project manager worked closely with manufacturer and homeowner to keep everyone in the loop waiting patiently on its arrival.
When it came time for the quartzite installation, we worked closely with our fabricator at cut layout to create the focal point at the hood. His team did an excellent job with the installation. The sink area was a surprise. They went above and beyond in framing the sink with the similar vein to the hood backsplash. Upon installation, the tile backsplash just did not do justice to the amazing quartzite. Discussion with the family and pictures sent to the homeowner lead to a decision to call the fabricator to see how much quartzite might be left. He had just enough to complete the island and beverage center. In the end, the backsplash worked out beautifully in all stone.
We met our schedule for the end date of the project and the wheelchair-bound sister was able to move in. For this large Italian family, big meals with lots of family and friends in the new wonderful hub/kitchen is now a part of their happy life. Mission accomplished.
24