
Search results for "Final cut" in Home Design Ideas

 Corvus Construction
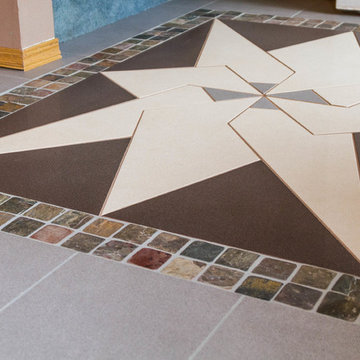
Sometimes great things come from small things and this entryway project was exactly like that. This very small yet interesting project started almost by accident.
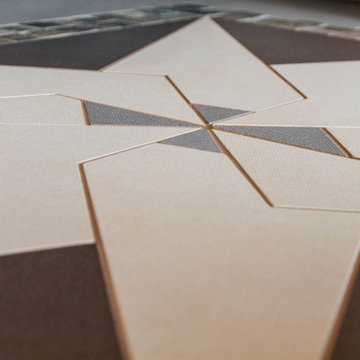
Entryway TileI had completed a tile job a few months before and had some high quality porcelain tile left over. It was nice tile so I was hesitant to toss it out but after moving the pile around my shop for several months I finally decided to throw it away. While loading my pickup with miscellaneous construction garbage – and this great tile – one of my neighbors stopped by for a chat about some of my recent projects.
I showed him the great left over tile that I was throwing away and asked him if he had any interest in taking it off my hands – for free. He said he was actually thinking about replacing his existing tile landing at his house because although it had been redone just a few years ago, it had cracked. We went over and took a look at his landing and decided the scrap tile might be a perfect solution.
tile floorI told my neighbor “you come up with any design you want, and I’ll bring that to life.” He came up with an idea and sketched out the idea within a couple of days. As soon as I looked at the sketches, I knew it was going to be a very challenging project, but I also knew it would be a rewarding project I would be proud to put the Corvus name on.
We took the final sketch and imported it into a graphics design program to make the focal point of the design work within the existing space and fine tune the look of the project to fit the available space of the entryway. This was going to be a highly customized undertaking that was going to be all about the details.
Because every tile had to be custom cut, I printed out the final design from the program to create a stencil to trace the outline on each tile. After all of the painstaking tile cutting, I laid it out in a mock-up on the entry floor. Then we were ready to overcome our next challenge – the flexing and moving sub floor.
The existing tile landing that we were replacing had been installed just a few years earlier but had already cracked down the center. This fracture made me realize that we needed to find a way to somehow decouple the substrate from the finished tile surface to prevent the same problem from cropping up again.
tile floor entrywayI decided to go with a Schluter-DITRA™ tile underlay for this job. Working with DITRA™ was surprisingly simple. The only thing you need to remember is to use unmodified thinset mortar when setting tile over this substrate, because modified thinset would take a very long time to cure. We also decided to use QuartzLock™ urethane grout for the floor because it expands and contracts when the floor flexes under foot traffic and could help prevent future cracking.
In the end the project came out great! My neighbor is thrilled and can’t wait to show it off to anyone that stops by. This is a great example of how custom work can really amp up the appeal of your home and how a small change can make a big difference in the look of your home.
 Interlocking Concrete Pavement Institute
HNA Hardscape Project Award Winner
Virginia Street Residence
Omaha, NE
Paver Designs, LLC
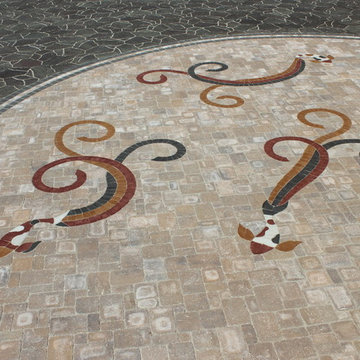
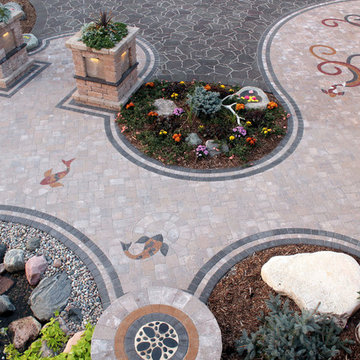
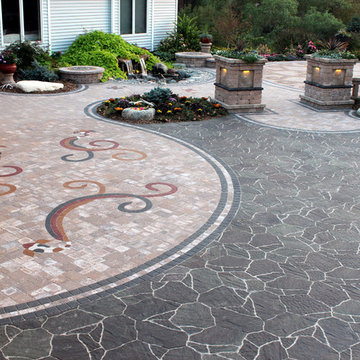
This project was built in two stages. The front patio area was finished for a family wedding, and the driveway was added after the wedding. The driveway was excavated to a depth of 16-18 in. and the patio is 12 in. deep. Crushed recycled concrete was used for the base with one inch of paver sand placed on top. After the concrete pavers were laid, another inch of base was added for the concrete paver areas. Three round seats were built next to the water feature and pebble designs were created in the center of each. Columns for the freestanding wall were designed with recessed areas for lights and for use as planters. Three by six inch concrete pavers were cut in half for the triple border in the narrower areas of the patio. The front paver entrance is gently ramped with no step for handicapped accessibility if the need should arise. Probably the most difficult stage of this project was drawing over 20 diverse designs over the winter months and then making a final selection. Using our basement floor as a drawing board, the "Y" shaped designs were drawn on Masonite at appropriate angles and distances so that the mirrored pairs nearly touched, and a template was made from this. After laying the field of concrete pavers, we marked the mosaic areas with the template. These pavers were cut out one at a time. All of the colored pavers were cut into thirds, and then angles were cut to follow curves. The template was moved and traced twelve times; each triple-row design took eight hours to complete, an approximate total time of 96 house (just) for the mosaic patterns. Many additional hours were spent cutting and installing the fish, triple borders, etc. The pavers in the mosaic, as well as the koi and borders, were coated with corresponding colors of sealer. These colors are amazingly rich and bright, well worth the extra time and effort! The two sets of koi are different as our designs are constantly evolving. A color booster in matte finish was applied to the pavers on the driveway.
Find the right local pro for your project
 Interlocking Concrete Pavement Institute
HNA Hardscape Project Award Winner
Virginia Street Residence
Omaha, NE
Paver Designs, LLC
This project was built in two stages. The front patio area was finished for a family wedding, and the driveway was added after the wedding. The driveway was excavated to a depth of 16-18 in. and the patio is 12 in. deep. Crushed recycled concrete was used for the base with one inch of paver sand placed on top. After the concrete pavers were laid, another inch of base was added for the concrete paver areas. Three round seats were built next to the water feature and pebble designs were created in the center of each. Columns for the freestanding wall were designed with recessed areas for lights and for use as planters. Three by six inch concrete pavers were cut in half for the triple border in the narrower areas of the patio. The front paver entrance is gently ramped with no step for handicapped accessibility if the need should arise. Probably the most difficult stage of this project was drawing over 20 diverse designs over the winter months and then making a final selection. Using our basement floor as a drawing board, the "Y" shaped designs were drawn on Masonite at appropriate angles and distances so that the mirrored pairs nearly touched, and a template was made from this. After laying the field of concrete pavers, we marked the mosaic areas with the template. These pavers were cut out one at a time. All of the colored pavers were cut into thirds, and then angles were cut to follow curves. The template was moved and traced twelve times; each triple-row design took eight hours to complete, an approximate total time of 96 house (just) for the mosaic patterns. Many additional hours were spent cutting and installing the fish, triple borders, etc. The pavers in the mosaic, as well as the koi and borders, were coated with corresponding colors of sealer. These colors are amazingly rich and bright, well worth the extra time and effort! The two sets of koi are different as our designs are constantly evolving. A color booster in matte finish was applied to the pavers on the driveway.
 Corvus Construction
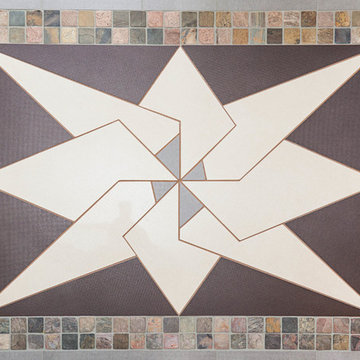
Sometimes great things come from small things and this entryway project was exactly like that. This very small yet interesting project started almost by accident.
Entryway TileI had completed a tile job a few months before and had some high quality porcelain tile left over. It was nice tile so I was hesitant to toss it out but after moving the pile around my shop for several months I finally decided to throw it away. While loading my pickup with miscellaneous construction garbage – and this great tile – one of my neighbors stopped by for a chat about some of my recent projects.
I showed him the great left over tile that I was throwing away and asked him if he had any interest in taking it off my hands – for free. He said he was actually thinking about replacing his existing tile landing at his house because although it had been redone just a few years ago, it had cracked. We went over and took a look at his landing and decided the scrap tile might be a perfect solution.
tile floorI told my neighbor “you come up with any design you want, and I’ll bring that to life.” He came up with an idea and sketched out the idea within a couple of days. As soon as I looked at the sketches, I knew it was going to be a very challenging project, but I also knew it would be a rewarding project I would be proud to put the Corvus name on.
We took the final sketch and imported it into a graphics design program to make the focal point of the design work within the existing space and fine tune the look of the project to fit the available space of the entryway. This was going to be a highly customized undertaking that was going to be all about the details.
Because every tile had to be custom cut, I printed out the final design from the program to create a stencil to trace the outline on each tile. After all of the painstaking tile cutting, I laid it out in a mock-up on the entry floor. Then we were ready to overcome our next challenge – the flexing and moving sub floor.
The existing tile landing that we were replacing had been installed just a few years earlier but had already cracked down the center. This fracture made me realize that we needed to find a way to somehow decouple the substrate from the finished tile surface to prevent the same problem from cropping up again.
tile floor entrywayI decided to go with a Schluter-DITRA™ tile underlay for this job. Working with DITRA™ was surprisingly simple. The only thing you need to remember is to use unmodified thinset mortar when setting tile over this substrate, because modified thinset would take a very long time to cure. We also decided to use QuartzLock™ urethane grout for the floor because it expands and contracts when the floor flexes under foot traffic and could help prevent future cracking.
In the end the project came out great! My neighbor is thrilled and can’t wait to show it off to anyone that stops by. This is a great example of how custom work can really amp up the appeal of your home and how a small change can make a big difference in the look of your home.
 Corvus Construction
Sometimes great things come from small things and this entryway project was exactly like that. This very small yet interesting project started almost by accident.
Entryway TileI had completed a tile job a few months before and had some high quality porcelain tile left over. It was nice tile so I was hesitant to toss it out but after moving the pile around my shop for several months I finally decided to throw it away. While loading my pickup with miscellaneous construction garbage – and this great tile – one of my neighbors stopped by for a chat about some of my recent projects.
I showed him the great left over tile that I was throwing away and asked him if he had any interest in taking it off my hands – for free. He said he was actually thinking about replacing his existing tile landing at his house because although it had been redone just a few years ago, it had cracked. We went over and took a look at his landing and decided the scrap tile might be a perfect solution.
tile floorI told my neighbor “you come up with any design you want, and I’ll bring that to life.” He came up with an idea and sketched out the idea within a couple of days. As soon as I looked at the sketches, I knew it was going to be a very challenging project, but I also knew it would be a rewarding project I would be proud to put the Corvus name on.
We took the final sketch and imported it into a graphics design program to make the focal point of the design work within the existing space and fine tune the look of the project to fit the available space of the entryway. This was going to be a highly customized undertaking that was going to be all about the details.
Because every tile had to be custom cut, I printed out the final design from the program to create a stencil to trace the outline on each tile. After all of the painstaking tile cutting, I laid it out in a mock-up on the entry floor. Then we were ready to overcome our next challenge – the flexing and moving sub floor.
The existing tile landing that we were replacing had been installed just a few years earlier but had already cracked down the center. This fracture made me realize that we needed to find a way to somehow decouple the substrate from the finished tile surface to prevent the same problem from cropping up again.
tile floor entrywayI decided to go with a Schluter-DITRA™ tile underlay for this job. Working with DITRA™ was surprisingly simple. The only thing you need to remember is to use unmodified thinset mortar when setting tile over this substrate, because modified thinset would take a very long time to cure. We also decided to use QuartzLock™ urethane grout for the floor because it expands and contracts when the floor flexes under foot traffic and could help prevent future cracking.
In the end the project came out great! My neighbor is thrilled and can’t wait to show it off to anyone that stops by. This is a great example of how custom work can really amp up the appeal of your home and how a small change can make a big difference in the look of your home.
 Interlocking Concrete Pavement Institute
HNA Hardscape Project Award Winner
Virginia Street Residence
Omaha, NE
Paver Designs, LLC
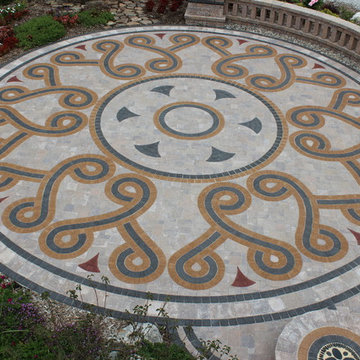
This project was built in two stages. The front patio area was finished for a family wedding, and the driveway was added after the wedding. The driveway was excavated to a depth of 16-18 in. and the patio is 12 in. deep. Crushed recycled concrete was used for the base with one inch of paver sand placed on top. After the concrete pavers were laid, another inch of base was added for the concrete paver areas. Three round seats were built next to the water feature and pebble designs were created in the center of each. Columns for the freestanding wall were designed with recessed areas for lights and for use as planters. Three by six inch concrete pavers were cut in half for the triple border in the narrower areas of the patio. The front paver entrance is gently ramped with no step for handicapped accessibility if the need should arise. Probably the most difficult stage of this project was drawing over 20 diverse designs over the winter months and then making a final selection. Using our basement floor as a drawing board, the "Y" shaped designs were drawn on Masonite at appropriate angles and distances so that the mirrored pairs nearly touched, and a template was made from this. After laying the field of concrete pavers, we marked the mosaic areas with the template. These pavers were cut out one at a time. All of the colored pavers were cut into thirds, and then angles were cut to follow curves. The template was moved and traced twelve times; each triple-row design took eight hours to complete, an approximate total time of 96 house (just) for the mosaic patterns. Many additional hours were spent cutting and installing the fish, triple borders, etc. The pavers in the mosaic, as well as the koi and borders, were coated with corresponding colors of sealer. These colors are amazingly rich and bright, well worth the extra time and effort! The two sets of koi are different as our designs are constantly evolving. A color booster in matte finish was applied to the pavers on the driveway.
Sponsored
Columbus, OH

Hope Restoration & General Contracting
Columbus Design-Build, Kitchen & Bath Remodeling, Historic Renovations
 Interlocking Concrete Pavement Institute
HNA Hardscape Project Award Winner
Virginia Street Residence
Omaha, NE
Paver Designs, LLC
This project was built in two stages. The front patio area was finished for a family wedding, and the driveway was added after the wedding. The driveway was excavated to a depth of 16-18 in. and the patio is 12 in. deep. Crushed recycled concrete was used for the base with one inch of paver sand placed on top. After the concrete pavers were laid, another inch of base was added for the concrete paver areas. Three round seats were built next to the water feature and pebble designs were created in the center of each. Columns for the freestanding wall were designed with recessed areas for lights and for use as planters. Three by six inch concrete pavers were cut in half for the triple border in the narrower areas of the patio. The front paver entrance is gently ramped with no step for handicapped accessibility if the need should arise. Probably the most difficult stage of this project was drawing over 20 diverse designs over the winter months and then making a final selection. Using our basement floor as a drawing board, the "Y" shaped designs were drawn on Masonite at appropriate angles and distances so that the mirrored pairs nearly touched, and a template was made from this. After laying the field of concrete pavers, we marked the mosaic areas with the template. These pavers were cut out one at a time. All of the colored pavers were cut into thirds, and then angles were cut to follow curves. The template was moved and traced twelve times; each triple-row design took eight hours to complete, an approximate total time of 96 house (just) for the mosaic patterns. Many additional hours were spent cutting and installing the fish, triple borders, etc. The pavers in the mosaic, as well as the koi and borders, were coated with corresponding colors of sealer. These colors are amazingly rich and bright, well worth the extra time and effort! The two sets of koi are different as our designs are constantly evolving. A color booster in matte finish was applied to the pavers on the driveway.
 Interlocking Concrete Pavement Institute
HNA Hardscape Project Award Winner
Virginia Street Residence
Omaha, NE
Paver Designs, LLC
This project was built in two stages. The front patio area was finished for a family wedding, and the driveway was added after the wedding. The driveway was excavated to a depth of 16-18 in. and the patio is 12 in. deep. Crushed recycled concrete was used for the base with one inch of paver sand placed on top. After the concrete pavers were laid, another inch of base was added for the concrete paver areas. Three round seats were built next to the water feature and pebble designs were created in the center of each. Columns for the freestanding wall were designed with recessed areas for lights and for use as planters. Three by six inch concrete pavers were cut in half for the triple border in the narrower areas of the patio. The front paver entrance is gently ramped with no step for handicapped accessibility if the need should arise. Probably the most difficult stage of this project was drawing over 20 diverse designs over the winter months and then making a final selection. Using our basement floor as a drawing board, the "Y" shaped designs were drawn on Masonite at appropriate angles and distances so that the mirrored pairs nearly touched, and a template was made from this. After laying the field of concrete pavers, we marked the mosaic areas with the template. These pavers were cut out one at a time. All of the colored pavers were cut into thirds, and then angles were cut to follow curves. The template was moved and traced twelve times; each triple-row design took eight hours to complete, an approximate total time of 96 house (just) for the mosaic patterns. Many additional hours were spent cutting and installing the fish, triple borders, etc. The pavers in the mosaic, as well as the koi and borders, were coated with corresponding colors of sealer. These colors are amazingly rich and bright, well worth the extra time and effort! The two sets of koi are different as our designs are constantly evolving. A color booster in matte finish was applied to the pavers on the driveway.

 Joni Spear Interior Design
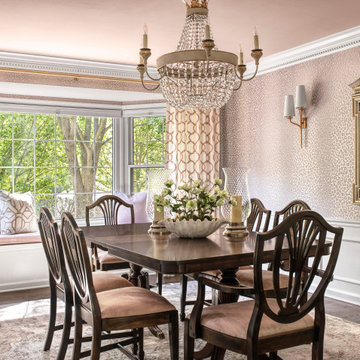
As a practical trend, formal dining spaces have largely become obsolete in favor of great, dynamic kitchens; however, bucking the movement, my young, but highly traditional client wanted to enjoy evening meals as a routine close to the family’s scattered and hectic days.
Ceilings are christened a whisper of a blush to inspire relaxed conversation under the halo of a warm glow.
The traditional table and chairs are the yield of a highly juried online treasure hunt. Each piece is meticulously refinished in an updated stain more reflective of the young homeowners. Performance fabric is used on the chairs to ensure ease of cleanability to combat daily use by children and young adults.
Walls are clad in a cut velvet and metallic animal print wallpaper to add subtle nostalgia from eras gone by.
Millwork is freshly painted in a semi-gloss alabaster to offer relief from the wallpaper and ceiling.
The opulent, antique-inspired chandelier is the dazzling focal point with draped crystal beading.
Linen drapery panels seamlessly silhouette the cozy window seat.
Cleanable yet regal velvet fabric upholstered cushions, ornamented with a braided trim add a final pop of elegance.
 Final Draft Cabinetry
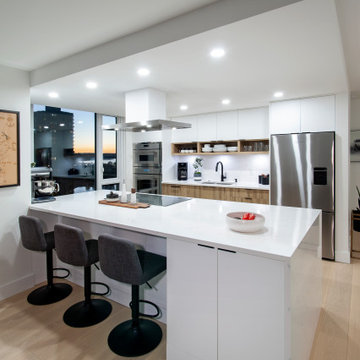
Looking to upgrade your home with premium, Canadian-made cabinetry? At Final Draft Cabinetry, we’re proud to be an Exclusive Dealer of Merit Kitchens & Lectus Cabinets, crafted with precision right here in Surrey, BC.
Since 1971, Merit Kitchens has been designing high-quality, semi-custom cabinetry, growing from a local workshop into a world-class brand known for its superior craftsmanship, durability, and style. With two cutting-edge manufacturing lines and a team of over 100 expert craftspeople, every cabinet is built to the highest standards.
Why Choose Merit Kitchens?
Over 100 colours, finishes, and door styles to fit any aesthetic
Premium materials & expert craftsmanship for long-lasting beauty
Sustainably made in Canada, supporting local trades and businesses
Custom solutions for every room—kitchen, bathroom, mudroom & more
Whether you're renovating your kitchen or designing a custom space from the ground up, Final Draft Cabinetry can bring your vision to life with cabinetry that’s as functional as it is stunning.
Let’s create something extraordinary together! Contact us today for a free consultation → https://finaldraftcabinetry.com/estimate/
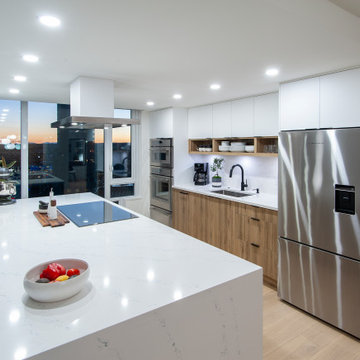 Final Draft Cabinetry
Looking to upgrade your home with premium, Canadian-made cabinetry? At Final Draft Cabinetry, we’re proud to be an Exclusive Dealer of Merit Kitchens & Lectus Cabinets, crafted with precision right here in Surrey, BC.
Since 1971, Merit Kitchens has been designing high-quality, semi-custom cabinetry, growing from a local workshop into a world-class brand known for its superior craftsmanship, durability, and style. With two cutting-edge manufacturing lines and a team of over 100 expert craftspeople, every cabinet is built to the highest standards.
Why Choose Merit Kitchens?
Over 100 colours, finishes, and door styles to fit any aesthetic
Premium materials & expert craftsmanship for long-lasting beauty
Sustainably made in Canada, supporting local trades and businesses
Custom solutions for every room—kitchen, bathroom, mudroom & more
Whether you're renovating your kitchen or designing a custom space from the ground up, Final Draft Cabinetry can bring your vision to life with cabinetry that’s as functional as it is stunning.
Let’s create something extraordinary together! Contact us today for a free consultation → https://finaldraftcabinetry.com/estimate/
Sponsored
Columbus, OH
Hope Restoration & General Contracting
Columbus Design-Build, Kitchen & Bath Remodeling, Historic Renovations
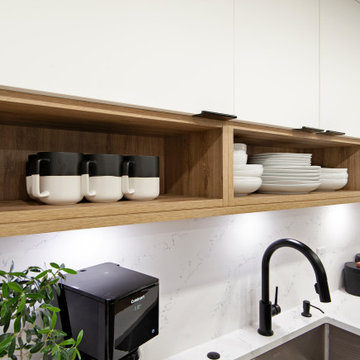 Final Draft Cabinetry
Looking to upgrade your home with premium, Canadian-made cabinetry? At Final Draft Cabinetry, we’re proud to be an Exclusive Dealer of Merit Kitchens & Lectus Cabinets, crafted with precision right here in Surrey, BC.
Since 1971, Merit Kitchens has been designing high-quality, semi-custom cabinetry, growing from a local workshop into a world-class brand known for its superior craftsmanship, durability, and style. With two cutting-edge manufacturing lines and a team of over 100 expert craftspeople, every cabinet is built to the highest standards.
Why Choose Merit Kitchens?
Over 100 colours, finishes, and door styles to fit any aesthetic
Premium materials & expert craftsmanship for long-lasting beauty
Sustainably made in Canada, supporting local trades and businesses
Custom solutions for every room—kitchen, bathroom, mudroom & more
Whether you're renovating your kitchen or designing a custom space from the ground up, Final Draft Cabinetry can bring your vision to life with cabinetry that’s as functional as it is stunning.
Let’s create something extraordinary together! Contact us today for a free consultation → https://finaldraftcabinetry.com/estimate/
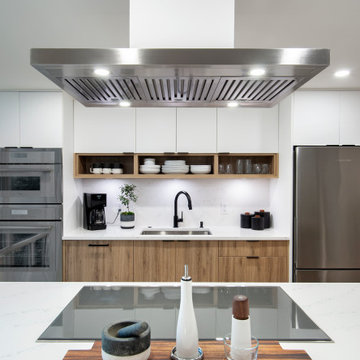 Final Draft Cabinetry
Looking to upgrade your home with premium, Canadian-made cabinetry? At Final Draft Cabinetry, we’re proud to be an Exclusive Dealer of Merit Kitchens & Lectus Cabinets, crafted with precision right here in Surrey, BC.
Since 1971, Merit Kitchens has been designing high-quality, semi-custom cabinetry, growing from a local workshop into a world-class brand known for its superior craftsmanship, durability, and style. With two cutting-edge manufacturing lines and a team of over 100 expert craftspeople, every cabinet is built to the highest standards.
Why Choose Merit Kitchens?
Over 100 colours, finishes, and door styles to fit any aesthetic
Premium materials & expert craftsmanship for long-lasting beauty
Sustainably made in Canada, supporting local trades and businesses
Custom solutions for every room—kitchen, bathroom, mudroom & more
Whether you're renovating your kitchen or designing a custom space from the ground up, Final Draft Cabinetry can bring your vision to life with cabinetry that’s as functional as it is stunning.
Let’s create something extraordinary together! Contact us today for a free consultation → https://finaldraftcabinetry.com/estimate/
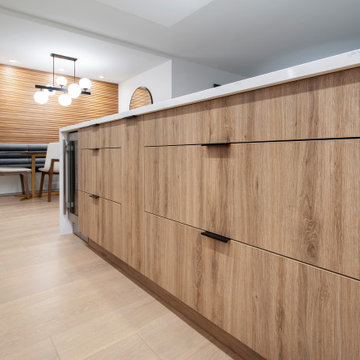 Final Draft Cabinetry
Looking to upgrade your home with premium, Canadian-made cabinetry? At Final Draft Cabinetry, we’re proud to be an Exclusive Dealer of Merit Kitchens & Lectus Cabinets, crafted with precision right here in Surrey, BC.
Since 1971, Merit Kitchens has been designing high-quality, semi-custom cabinetry, growing from a local workshop into a world-class brand known for its superior craftsmanship, durability, and style. With two cutting-edge manufacturing lines and a team of over 100 expert craftspeople, every cabinet is built to the highest standards.
Why Choose Merit Kitchens?
Over 100 colours, finishes, and door styles to fit any aesthetic
Premium materials & expert craftsmanship for long-lasting beauty
Sustainably made in Canada, supporting local trades and businesses
Custom solutions for every room—kitchen, bathroom, mudroom & more
Whether you're renovating your kitchen or designing a custom space from the ground up, Final Draft Cabinetry can bring your vision to life with cabinetry that’s as functional as it is stunning.
Let’s create something extraordinary together! Contact us today for a free consultation → https://finaldraftcabinetry.com/estimate/
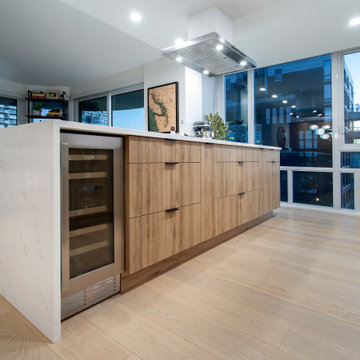 Final Draft Cabinetry
Looking to upgrade your home with premium, Canadian-made cabinetry? At Final Draft Cabinetry, we’re proud to be an Exclusive Dealer of Merit Kitchens & Lectus Cabinets, crafted with precision right here in Surrey, BC.
Since 1971, Merit Kitchens has been designing high-quality, semi-custom cabinetry, growing from a local workshop into a world-class brand known for its superior craftsmanship, durability, and style. With two cutting-edge manufacturing lines and a team of over 100 expert craftspeople, every cabinet is built to the highest standards.
Why Choose Merit Kitchens?
Over 100 colours, finishes, and door styles to fit any aesthetic
Premium materials & expert craftsmanship for long-lasting beauty
Sustainably made in Canada, supporting local trades and businesses
Custom solutions for every room—kitchen, bathroom, mudroom & more
Whether you're renovating your kitchen or designing a custom space from the ground up, Final Draft Cabinetry can bring your vision to life with cabinetry that’s as functional as it is stunning.
Let’s create something extraordinary together! Contact us today for a free consultation → https://finaldraftcabinetry.com/estimate/
 The Closet Doctor
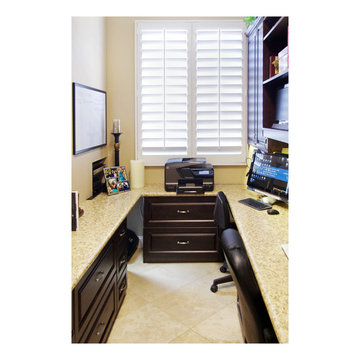
One homeowner of a particular model home in the Sun City Roseville development that came with a rather large space for a laundry room, was faced with this dilemma recently. After relocating her washer and dryer into the garage and setting up a make shift office of her own in the laundry room, the homeowner realized that, although she succeeded in turning the space into a somewhat functional work area, it just wasn’t up to par for all of her wants and needs. Hoping to come up some new small home office ideas that would squeeze all of her needs into the tiny space, she decided to seek help from a home organization specialist and sat down with The Closet Doctor. There were several requirements and obstacles that made the development of an office design which satisfied the homeowner particularly difficult. One was the need for two workstations which would have enough desk space for each person to sit comfortably and not be on top of each other. Another obstacle was the new design had to work around a cut-out in the corner of the wall, which contained built-in shelves for the components of a nearby entertainment center. Finally, the designer also had to be sure to incorporate “lots of legal sized filing drawers” into its new design.
The Closet Doctor went to work and was able to design a solution that, not only met all of the homeowner’s needs, but was attractive, and within her budget. The new built-in design included two work areas that were spacious and each with its own overhead cabinet, storage drawer, and single letter size file drawer for active projects. In between the two overhead cabinets, additional open shelving allowed for display items as well as space for a small TV in the center. Extra storage and organization space was also put behind doors for a clean and neat look. In addition, in order to maintain as much space as possible, the cabinets on the end and left side wall were made just deep enough to fit legal size lateral file drawers. Finally, the built in component shelves were left open in the corner for easy access, with the desk top passing in front of the space at the same height as one of the shelves, which gave the corner a neat and organized appearance as well. To top it off, low energy under cabinet LED lights with a dimmer switch were installed in order to illuminate the work area.
The Client loved the result of her home improvement project, in both the look and functionality of the new design compared to the “temporary setup” she had in place before. With the additional storage space and organization that the new built in office unit provided, the satisfied homeowner was able to achieve the clean and organized look as well as optimum functionality that she preferred.
 KellyBaron
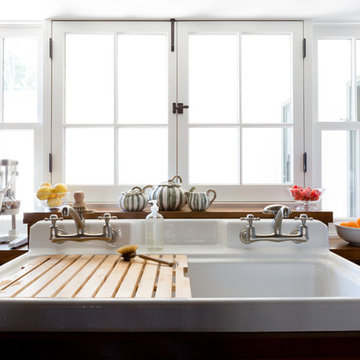
48" kohler farmhouse sink with wood wash board and dual faucets
Transitional dark wood floor kitchen photo in Los Angeles with a farmhouse sink, medium tone wood cabinets, wood countertops and no island
Transitional dark wood floor kitchen photo in Los Angeles with a farmhouse sink, medium tone wood cabinets, wood countertops and no island
20