
Search results for "Fine tuning" in Home Design Ideas
 Solid Apollo LED
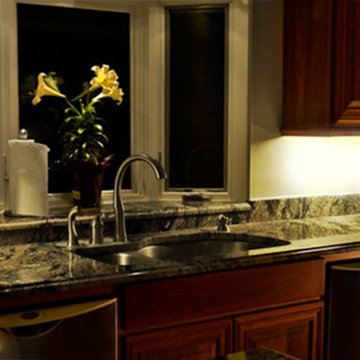
Solid Apollo LED. The owner of this kitchen found that after the remodel, the lighting on the countertops was much darker than anticipated from the dark colored granite counter tops. The owner choose to use Premium LED Light Bars in Daylight White for a finished appearance which easily plugged together. The Premium LED Light Bars are a low profile modular design with built in hinges for quick installation. For controlling the lights, the owner choose to use the light bar motion detector, to turn on the lights by the wave of a hand, and the owner also used an inline dimmer switch to fine tune the brightness from the light bars.
 Maplewood Homes
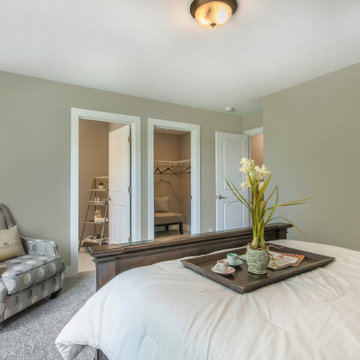
Welcome to our parade home located in Sessions Pointe, a gorgeous wooded community featuring large executive home sites in the coveted Grandville School District. This is single-story living at its finest. You’ll have all of the amenities you need all on one floor, with over 1800 square feet of living and entertaining space. But wait, there is a full basement that is your blank canvas to finish down the road. One step inside and you’ll notice the finishes have been carefully selected for a timeless palette of soft grays, whites and browns. This home has it all, with an over sized three-car garage, a gas fireplace and vaulted ceilings in the great room, and a stunning four-season Michigan room leading out to the large deck. Maplewood Homes offers the best in energy efficient building materials, including 2’x6’ walls, spray foam insulation, and a superior foundation that can’t be beat. For over 23 years, we have fine-tuned our portfolio of plans to include the best in style, function and flow to meet your lifestyle and life stage. This home is just one of many plans we can customize to make your own.
 NILES
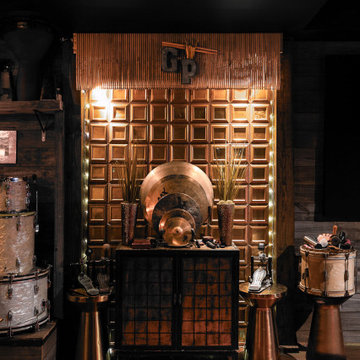
NILESThis 1,400 sq. ft. studio, built in 2018 for Grammy Award–winning drummer, multi-instrumentalist, and producer Adam Box, was one of the earliest full-scale NILES design–build projects. After years of session and touring work, Adam had a clear vision for his own creative home—a space that combined comfort, vibe, and technical precision. Our team partnered closely with him through every phase of the design and build process to bring that vision to life.
The studio features a full Control Room, a spacious Live Room, two amp isolation booths, and a large dedicated ISO booth engineered specifically for dry drum capture. Each room is fully wired for a complete live-tracking environment, enabling an entire band to plug in and record seamlessly. The Live Room is sonically open and collaborative, while the Control Room is fine-tuned for long stretches of creative focus and accurate monitoring.
Aesthetic direction played a major role in this project. Natural stonework, warm wood details, and a comfortable, lived-in feel create a distinctive character throughout the space. Adam added many of his own finishing touches, giving the studio an unmistakable personal identity that reflects his style and musical approach.
The result is a studio that delivers both atmosphere and performance—an inspiring hub for writing, tracking, mixing, and producing at the highest level.
Find the right local pro for your project
 Maplewood Homes
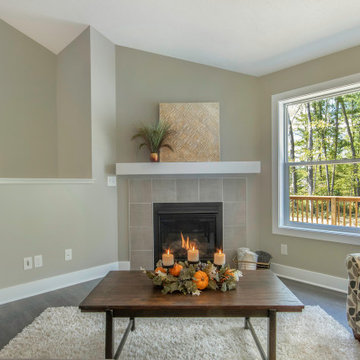
Welcome to our parade home located in Sessions Pointe, a gorgeous wooded community featuring large executive home sites in the coveted Grandville School District. This is single-story living at its finest. You’ll have all of the amenities you need all on one floor, with over 1800 square feet of living and entertaining space. But wait, there is a full basement that is your blank canvas to finish down the road. One step inside and you’ll notice the finishes have been carefully selected for a timeless palette of soft grays, whites and browns. This home has it all, with an over sized three-car garage, a gas fireplace and vaulted ceilings in the great room, and a stunning four-season Michigan room leading out to the large deck. Maplewood Homes offers the best in energy efficient building materials, including 2’x6’ walls, spray foam insulation, and a superior foundation that can’t be beat. For over 23 years, we have fine-tuned our portfolio of plans to include the best in style, function and flow to meet your lifestyle and life stage. This home is just one of many plans we can customize to make your own.
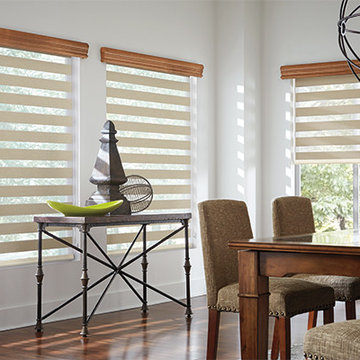
 BLIND APPEAL INC
An inspired hybrid of fabric shades and horizontal blinds, Mezzanine Layered Shades offer the ultimate flexibility in light control. In two closely linked layers of fabric stripes of sheer fabric combine with tightly woven bands of color. As you adjust the height of the shade, you can also fine-tune the light; let the sheet fabric protect your furniture, flooring, and artwork from damaging UV rays, overlap solid-color vanes to filter or block the light, or find the perfect position in between.
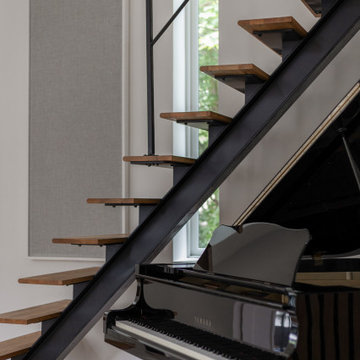 NILES
NILESGraybox is a 950 sq. ft. studio environment designed and built by NILES to redefine what a home-based creative space can be. The client wanted a light-filled, timeless studio that balanced aesthetic warmth with the precision and durability of a commercial facility. Our team handled the full scope—from architectural acoustics and mechanical planning to framing, treatments, electrical distribution, and final integration.
The Control Room is a compact, golden-ratio mix suite engineered for accuracy, featuring a finely tuned treatment plan and a Barefoot monitor system. The Live Room gains surprising scale from its 16’ ceiling, delivering sonic depth and natural ambience ideal for full-band tracking, ensemble sessions, or detailed acoustic work. Expansive glass and natural light shape the visual character of the studio while maintaining controlled isolation and proper acoustic performance.
This space was built to function as a dual-purpose creative hub for music recording and video production. The open layout supports multi-camera film shoots, quick-turn content capture, and flexible session flow. Engineers, producers, and artists can walk in, sit down, and work immediately thanks to intuitive wiring paths, plug-and-play audio infrastructure, and a layout designed for seamless movement between rooms.
Graybox has become a go-to destination for both recording and visual content, hosting sessions and video work for Capitol Records, Meinl Cymbals, The Dove Awards, Gibson, and many others. The result is a studio that feels as inspiring as it sounds—purpose-built, timeless, and engineered for long-term creative use.
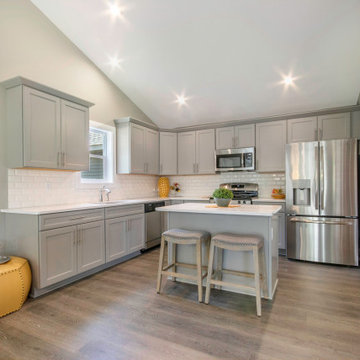 Maplewood Homes
Welcome to our parade home located in Sessions Pointe, a gorgeous wooded community featuring large executive home sites in the coveted Grandville School District. This is single-story living at its finest. You’ll have all of the amenities you need all on one floor, with over 1800 square feet of living and entertaining space. But wait, there is a full basement that is your blank canvas to finish down the road. One step inside and you’ll notice the finishes have been carefully selected for a timeless palette of soft grays, whites and browns. This home has it all, with an over sized three-car garage, a gas fireplace and vaulted ceilings in the great room, and a stunning four-season Michigan room leading out to the large deck. Maplewood Homes offers the best in energy efficient building materials, including 2’x6’ walls, spray foam insulation, and a superior foundation that can’t be beat. For over 23 years, we have fine-tuned our portfolio of plans to include the best in style, function and flow to meet your lifestyle and life stage. This home is just one of many plans we can customize to make your own.
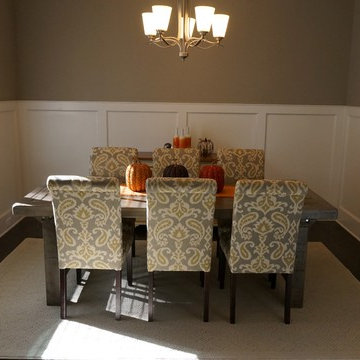
 Rustic Trades Furniture
Here is our Clayton Rustic Farm Table in our new color Rustic Slate Grey. Our customer was happy to share their new dining room! Such a creative space!
After many months of fine tuning our finishes, we have created an amazing new color: Rustic Slate Gray. The color has a mixture of brown and gray tones while still capturing the natural features of the wood. We can build any of our tables in any of our colors.
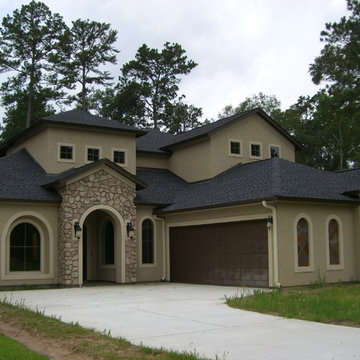
 Frontier Custom Builders, Inc
What is the definition of a Custom Home? Often times clients take their hard earned money to builders with the dream of creating a Custom, Quality and Unique living space and what they get is far less than an original piece of art. At Frontier Custom Builders, Inc our team strives to produce original Home Masterpieces for EACH of our valued clients based solely on your vision. On any given day in our 20,000 square foot master planned Home Office you will find Architectural Designers honing their craft, and fine tuning their plans to the liking of EACH Frontier Client ensuring that your new Home is TRULY your own.
 The Garden Natives
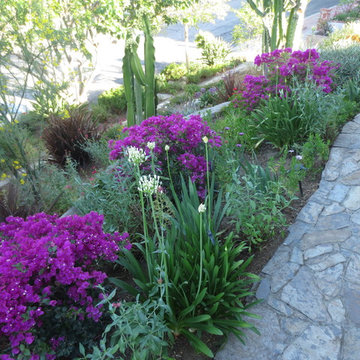
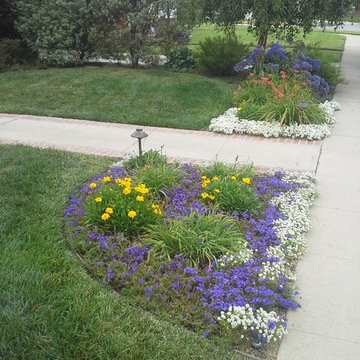
Specialized Maintenance on this colorful front yard
Photo of a traditional landscaping in Los Angeles.
Photo of a traditional landscaping in Los Angeles.

 Industrial Projects
Creating a comfortable outdoor living space is a priority for many homeowners and DIY enthusiasts. With rising summer temperatures, installing a shade tarp in your backyard offers an affordable and effective solution for sun protection. We’ve developed this detailed, step-by-step guide to help you confidently install a shade tarp that not only shields you from the sun but also adds aesthetic appeal to your outdoor area.
Benefits of Installing a Backyard Shade Tarp
Before diving into the installation process, let’s explore the key benefits of having a backyard shade tarp:
Provides UV Protection: Keeps your family and guests safe from harmful sun exposure.
Reduces Outdoor Temperatures: Creates a cooler, more enjoyable outdoor space.
Protects Outdoor Furniture: Extends the life of patio furniture by reducing sun damage.
Enhances Outdoor Aesthetics: Adds a modern, stylish look to your yard.
Budget-Friendly: More affordable compared to permanent structures like pergolas.
Materials and Tools You’ll Need
To begin your DIY backyard shade project, gather the following materials and tools:
Materials:
Shade tarp (UV-resistant and breathable)
Sturdy posts or existing structures (trees, fences, walls)
Mounting hardware (eye bolts, D-rings, turnbuckles, snap hooks)
Nylon or polyester rope, or stainless-steel wire
Concrete (if installing new posts)
Tools:
Power drill
Measuring tape
Level
Ladder
Wrench or adjustable spanner
Post hole digger (if installing new posts)
Step 1: Plan Your Shade Tarp Layout
The first step in installing your backyard shade tarp is careful planning. Take time to assess your outdoor area and answer these key questions:
Where is the sun’s path throughout the day?
What size and shape of tarp best suits your space?
Will you anchor the tarp to existing structures or install new posts?
What height do you want the tarp to sit at for maximum shade and airflow?
Pro Tip: Use string or garden hoses to visualize the tarp layout on the ground before making permanent decisions.
Step 2: Measure and Mark Anchor Points
Once you’ve determined the tarp’s location and orientation:
Measure the tarp dimensions.
Mark the exact points where each corner of the tarp will be anchored.
Ensure that the anchor points are at least 5–10% longer than the tarp size to allow for tensioning and slight adjustments.
Consider slope angles for water runoff. Aim for at least a 20-degree angle to prevent water pooling on the tarp.
Step 3: Install Support Posts (If Necessary)
If your backyard lacks existing anchor points like trees or fences, you’ll need to install sturdy support posts:
Dig post holes at least 24 inches deep and 8-12 inches wide for stability.
Set posts in concrete, making sure they remain plumb and level.
Allow the concrete to cure for at least 24–48 hours before applying tension from the tarp.
We recommend using pressure-treated wood, galvanized steel poles, or aluminum posts for longevity and strength.
Step 4: Install Mounting Hardware
With your anchor points ready, it’s time to install the necessary hardware:
Attach eye bolts or pad eyes securely into walls, posts, or other fixed structures.
For added flexibility and adjustability, install turnbuckles or tensioners to fine-tune the tarp’s tightness.
Connect snap hooks, D-rings, or carabiners to make assembly and disassembly easier.
Make sure all hardware is rated for outdoor use to prevent rust and corrosion.
Step 5: Attach and Tension the Shade Tarp
Now it’s time for the most satisfying part—mounting the shade tarp:
Begin by attaching one corner of the tarp to an anchor point.
Gradually attach the remaining corners, moving diagonally for even tension.
Adjust each connection point using your turnbuckles, ropes, or cables.
Pull the tarp tight enough to avoid sagging, but not so tight that it risks tearing.
Check that the tarp maintains the desired slope for rainwater runoff and adjust tension as needed.
Step 6: Final Adjustments and Safety Check
Before enjoying your new shaded area:
Inspect all anchor points and hardware for stability.
Test the tarp’s tension and make adjustments for even distribution.
Ensure that no sharp edges or loose connections remain that could damage the tarp or pose a safety hazard.
Confirm that the tarp is secure in windy conditions by giving it a gentle tug.
If you live in an area with frequent high winds, consider removing the tarp during storms to prevent damage.
Step 7: Enjoy Your Shaded Backyard Oasis
Once installed, your backyard shade tarp provides a comfortable and protective space for outdoor gatherings, relaxation, or family activities. You can decorate underneath with outdoor furniture, string lights, or potted plants to create a personalized outdoor retreat.
Maintenance Tips for Long-Lasting Shade Tarp Performance
To extend the life of your shade tarp, follow these maintenance guidelines:
Regularly check for wear and tear, especially around anchor points and seams.
Clean the tarp periodically with mild soap and water to prevent mildew buildup.
Store the tarp indoors during harsh weather seasons if it's not designed for year-round use.
Tighten hardware as needed to maintain proper tension and avoid sagging.
By following these simple care steps, your shade tarp will continue to deliver years of sun protection and outdoor comfort.
Conclusion: Upgrade Your Outdoor Space with a DIY Shade Tarp
Installing a shade tarp in your backyard is a cost-effective and rewarding DIY project. With careful planning, quality materials, and proper installation techniques, you’ll enjoy cool, shaded outdoor living all season long. This step-by-step guide ensures your project goes smoothly from start to finish.
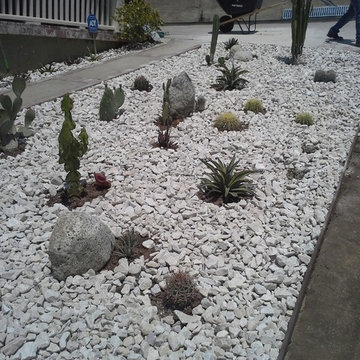 The Garden Natives
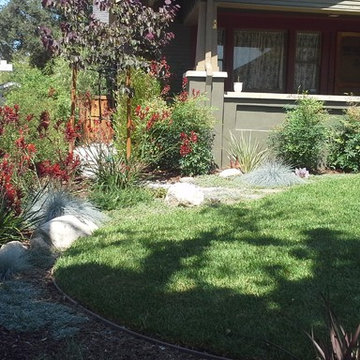
Fine-tuning this Funky Cactus Garden!
Design ideas for a small modern landscaping in Los Angeles.
Design ideas for a small modern landscaping in Los Angeles.
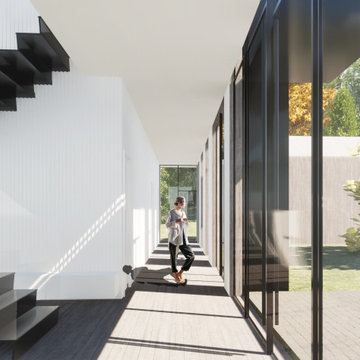
 Mechanism Architecture
The new South Cliff Residence features luxury amenities including a 40 foot lap pool, pool house, large terrace, home gym, completely private study, and a large creative studio space suited to the owners’ needs. Numerous glass panels stretch from the floor to the soaring twelve foot tall ceilings throughout the main level, and vaulted ceilings at the second level have been fine tuned to the owners’ preferences.
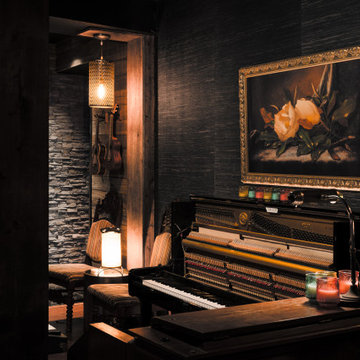 NILES
NILESThis 1,400 sq. ft. studio, built in 2018 for Grammy Award–winning drummer, multi-instrumentalist, and producer Adam Box, was one of the earliest full-scale NILES design–build projects. After years of session and touring work, Adam had a clear vision for his own creative home—a space that combined comfort, vibe, and technical precision. Our team partnered closely with him through every phase of the design and build process to bring that vision to life.
The studio features a full Control Room, a spacious Live Room, two amp isolation booths, and a large dedicated ISO booth engineered specifically for dry drum capture. Each room is fully wired for a complete live-tracking environment, enabling an entire band to plug in and record seamlessly. The Live Room is sonically open and collaborative, while the Control Room is fine-tuned for long stretches of creative focus and accurate monitoring.
Aesthetic direction played a major role in this project. Natural stonework, warm wood details, and a comfortable, lived-in feel create a distinctive character throughout the space. Adam added many of his own finishing touches, giving the studio an unmistakable personal identity that reflects his style and musical approach.
The result is a studio that delivers both atmosphere and performance—an inspiring hub for writing, tracking, mixing, and producing at the highest level.
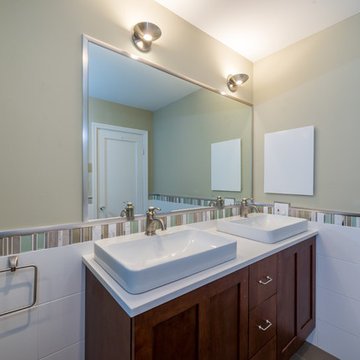
 HOMEREDI
Our New Home Buyer commissioned HOMEREDI to convert their old Master Bathroom into a spacious newly designed Contemporary retreat. We asked our designer Samantha Murray from SM Designs to work with our client to select all required tiles from our tile distributor. We then extended full contractor pricing toward the purchase of all fixtures used in this Spa bathroom. One of the unique features of this bathroom is a large 40"x40"x32" Japanese style soaking tub. Once this magnificent project was completed we asked our professional photographer Chuck Dana's Photography to capture the beauty of implementation. Lots of credit also goes to our clients who worked with us and our designer to fine tune their requirements. We are privileged to make their imagination come to life in this magnificent space.
 The Garden Natives
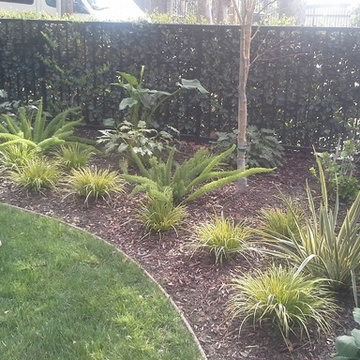
Quarterly Maintenance visits keeps this garden looking at its best throughout the year
Inspiration for a traditional landscaping in Los Angeles.
Inspiration for a traditional landscaping in Los Angeles.
 Reiter Architecture & Design
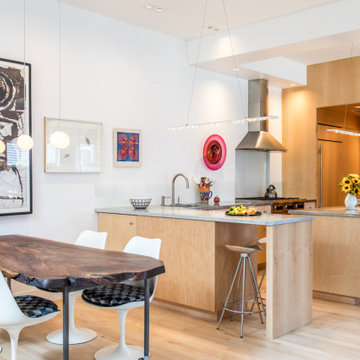
The open kitchen flows into the main living area and is free of wall cabinets in order to hang art. Lighting throughout is finely tuned to task lighting at work areas, aimed lighting at art, and soft ambient light at general spaces. The open plan also takes enhances the effect of natural light sources from different sides of the building.
 Pro Green Irrigation
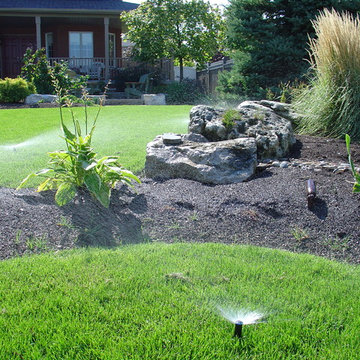
Design ideas for a mid-sized traditional full sun front yard concrete paver landscaping in Toronto.
12