
Search results for "Formulated" in Home Design Ideas
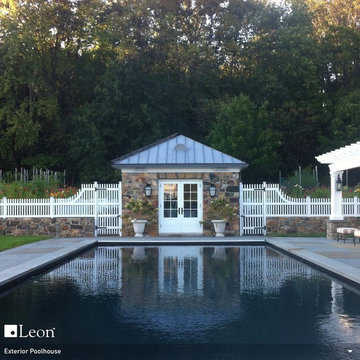
 Leon Speakers, Inc.
Our Boundary Series outdoor speakers feature two 4” outdoor aluminum cone woofers for extreme durability and performance, and 1” aluminum/magnesium dome tweeters specially formulated to weather the elements while providing audiophile accuracy and imaging with ultimate precision. Each speaker is custom built out of hand-selected Mahogany and finished with the same rich varnish as the hull of the Chris-Craft boat. Everything from the marine-grade drivers to the perfectly polished chrome edge rails is Made in America with pride.
The speakers in this photo were built to match the crown moulding around the perimeter of the pool house.
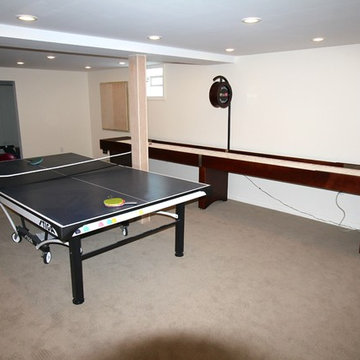
 McClure Tables
The perfect furniture for your game room or man cave, McClure's Competitor shuffleboard table features a 18'' by 2'' hard maple playing field with a specially formulated finish. Each table comes with its own complete lifetime warranty, and comes available in Cinnamon, Chestnut, Mahogany, or Mocha finish on Maple. We also custom finish any shuffleboard to complement any game room or bar decor.
Each Competitor II shuffleboard table is made in Michigan and crafted from 100% solid North American maple. Available in 9, 12, 14, and 16 foot sizes, your order comes complete with 8 pucks and 1 can of shuffleboard wax powder. Additional options include a traditional or electronic scoring unit in a matching finish. McClure Tables shuffleboards are built with the highest quality local materials and first-class craftsmanship.
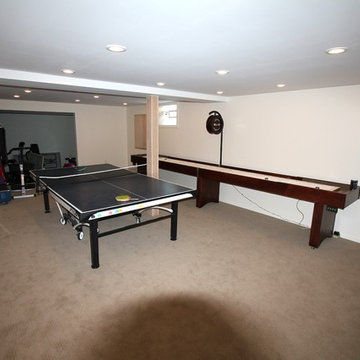 McClure Tables
The perfect furniture for your game room or man cave, McClure's Competitor shuffleboard table features a 18'' by 2'' hard maple playing field with a specially formulated finish. Each table comes with its own complete lifetime warranty, and comes available in Cinnamon, Chestnut, Mahogany, or Mocha finish on Maple. We also custom finish any shuffleboard to complement any game room or bar decor.
Each Competitor II shuffleboard table is made in Michigan and crafted from 100% solid North American maple. Available in 9, 12, 14, and 16 foot sizes, your order comes complete with 8 pucks and 1 can of shuffleboard wax powder. Additional options include a traditional or electronic scoring unit in a matching finish. McClure Tables shuffleboards are built with the highest quality local materials and first-class craftsmanship.
Find the right local pro for your project
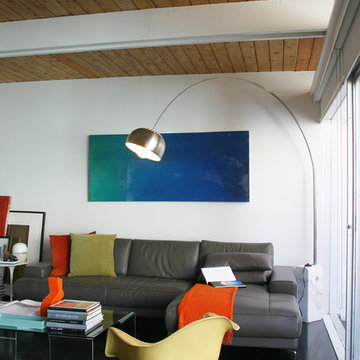
 Laidlaw Schultz architects
The project’s starting point was to understand the building’s original post and beam structure and to use that internal logic to formulate a sympathetic remodel. With an emphasis on the upper back unit, the owner’s private residence within this recently purchased Edward Killingsworth triplex, the first order of business was to strip the excess out and to return the complex to something that resembled the original. With a limited budget, the tact was to restore where possible, and to insert where needed, but always with a sympathetic eye. The kitchen quickly became the primary focus and it was soon realized that by removing the division between the existing galley and family room that the essence of the structural system could be revealed. Once opened the datum of the layered beams was adhered to with the kitchen reinforcing this overhead water line. The primary internal wall was then highlighted with a new wood veneer with the refrigerator recessed (borrowing a bit of space from the master closet) and the existing heater chromed.
 Acme Brick Company
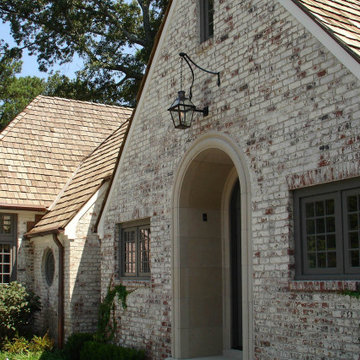
The perfect paints for masonry are now available through Acme Brick.
Romabio offers both limewash and masonry paint for those that want to change the look of their brickwork.
Classico Limewash creates that charming old world feel with a freshly painted look, but because some of the brick remains exposed, the warmth and quality endues. All it takes is a single coat for absorbant, unpainted brick, stone or other masonry, with no primer needed. Specially formulated to be easily manipulated in the first 5 days of application, you can test the product and see the results with no risk. Once it calcifies to the surface, it is breathable and will not seal the brick or stone, ensuring that it it doesnt peel, chip, or flake off.
BioDomus I & II are mineral based, breathable paints that will not seal the masonry surface. Unlike acrylic or latex, they will not peel, chip, or flake off. Both BioDomus I and BioDomus II are high performing paints that are inherently the same except for the finish they create.
BioDomus I produces a flat finish.
BioDomus II has a slight aggregate in it to create a textured look on smooth brick, or a smoother finish on a rough surface.
Color possibilites are almost unlimited as you can match other color palettes or choose from over 200 colors in the Romabio color deck. With a high UV resistance, a breatheable wall, and a 20 year warranty, the performance of these products is made to last.
 CIOT | Stone & Tile
Design: Stephanie Fredricks
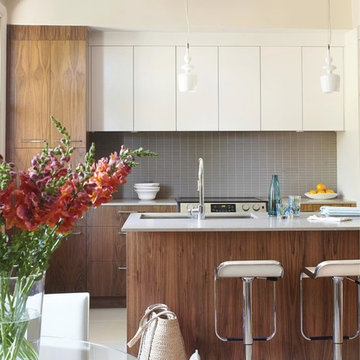
Inspiration for a contemporary kitchen remodel in Montreal
Inspiration for a contemporary kitchen remodel in Montreal
 Laidlaw Schultz architects
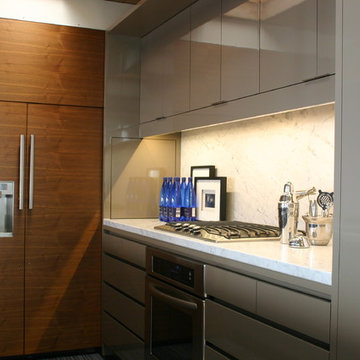
The project’s starting point was to understand the building’s original post and beam structure and to use that internal logic to formulate a sympathetic remodel. With an emphasis on the upper back unit, the owner’s private residence within this recently purchased Edward Killingsworth triplex, the first order of business was to strip the excess out and to return the complex to something that resembled the original. With a limited budget, the tact was to restore where possible, and to insert where needed, but always with a sympathetic eye. The kitchen quickly became the primary focus and it was soon realized that by removing the division between the existing galley and family room that the essence of the structural system could be revealed. Once opened the datum of the layered beams was adhered to with the kitchen reinforcing this overhead water line. The primary internal wall was then highlighted with a new wood veneer with the refrigerator recessed (borrowing a bit of space from the master closet) and the existing heater chromed.
 Laidlaw Schultz architects
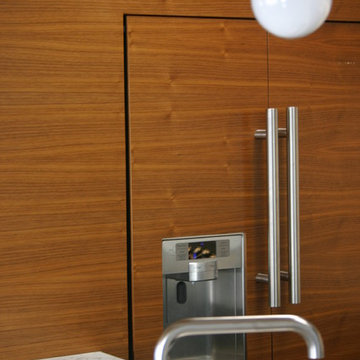
The project’s starting point was to understand the building’s original post and beam structure and to use that internal logic to formulate a sympathetic remodel. With an emphasis on the upper back unit, the owner’s private residence within this recently purchased Edward Killingsworth triplex, the first order of business was to strip the excess out and to return the complex to something that resembled the original. With a limited budget, the tact was to restore where possible, and to insert where needed, but always with a sympathetic eye. The kitchen quickly became the primary focus and it was soon realized that by removing the division between the existing galley and family room that the essence of the structural system could be revealed. Once opened the datum of the layered beams was adhered to with the kitchen reinforcing this overhead water line. The primary internal wall was then highlighted with a new wood veneer with the refrigerator recessed (borrowing a bit of space from the master closet) and the existing heater chromed.
 Spray-Net Vancouver
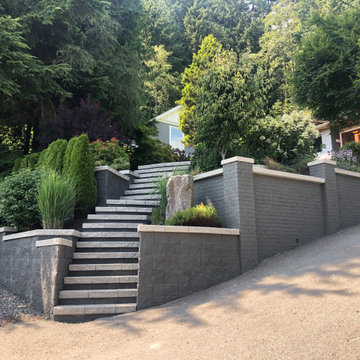
AFTER photo. Brick & stone staining project.
Our stain delivers the breathability & permanent colour transformation you need to cost-effectively revamp your home.
Since the porosity of each brick can differ, we’ve formulated a stain that combines the adhesiveness of a paint with the permanent finish of a stain.
When latex paint is applied to brick, the film simply lays on top of the surface. This stops moisture inside of the brick from evaporating, leading to blistering & peeling. Our stain travels deep into the pores of your brick and through the chemical process of crystallization, it becomes part of the brick itself, allowing your brick to continuously breathe. For brick with decreased porosity, our stain also has the unique ability to grip to the top of the surface for optimal adhesion.
Give us a call to book your free in-home consultation!
(604) 260-4525
 Laidlaw Schultz architects
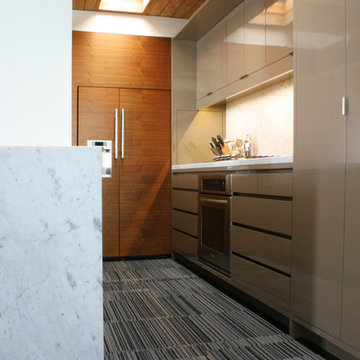
The project’s starting point was to understand the building’s original post and beam structure and to use that internal logic to formulate a sympathetic remodel. With an emphasis on the upper back unit, the owner’s private residence within this recently purchased Edward Killingsworth triplex, the first order of business was to strip the excess out and to return the complex to something that resembled the original. With a limited budget, the tact was to restore where possible, and to insert where needed, but always with a sympathetic eye. The kitchen quickly became the primary focus and it was soon realized that by removing the division between the existing galley and family room that the essence of the structural system could be revealed. Once opened the datum of the layered beams was adhered to with the kitchen reinforcing this overhead water line. The primary internal wall was then highlighted with a new wood veneer with the refrigerator recessed (borrowing a bit of space from the master closet) and the existing heater chromed.
 McClure Tables
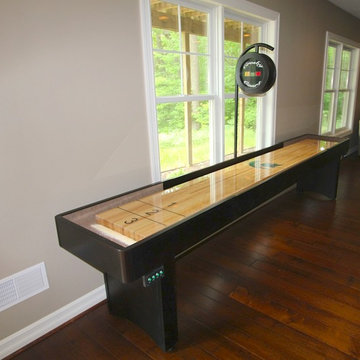
The perfect furniture for your game room or man cave, McClure's Competitor shuffleboard table features a 18'' by 2'' hard maple playing field with a specially formulated finish. Each table comes with its own complete lifetime warranty, and comes available in Cinnamon, Chestnut, Mahogany, or Mocha finish on Maple. We also custom finish any shuffleboard to complement any game room or bar decor.
Each Competitor II shuffleboard table is made in Michigan and crafted from 100% solid North American maple. Available in 9, 12, 14, and 16 foot sizes, your order comes complete with 8 pucks and 1 can of shuffleboard wax powder. Additional options include a traditional or electronic scoring unit in a mtaching finish. McClure Tables shuffleboards are built with the highest quality local material and first-class craftsmanship.
 Laidlaw Schultz architects
The project’s starting point was to understand the building’s original post and beam structure and to use that internal logic to formulate a sympathetic remodel. With an emphasis on the upper back unit, the owner’s private residence within this recently purchased Edward Killingsworth triplex, the first order of business was to strip the excess out and to return the complex to something that resembled the original. With a limited budget, the tact was to restore where possible, and to insert where needed, but always with a sympathetic eye. The kitchen quickly became the primary focus and it was soon realized that by removing the division between the existing galley and family room that the essence of the structural system could be revealed. Once opened the datum of the layered beams was adhered to with the kitchen reinforcing this overhead water line. The primary internal wall was then highlighted with a new wood veneer with the refrigerator recessed (borrowing a bit of space from the master closet) and the existing heater chromed.
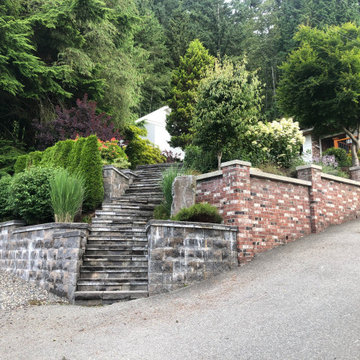 Spray-Net Vancouver
BEFORE photo. Brick & stone staining project.
Our stain delivers the breathability & permanent colour transformation you need to cost-effectively revamp your home.
Since the porosity of each brick can differ, we’ve formulated a stain that combines the adhesiveness of a paint with the permanent finish of a stain.
When latex paint is applied to brick, the film simply lays on top of the surface. This stops moisture inside of the brick from evaporating, leading to blistering & peeling. Our stain travels deep into the pores of your brick and through the chemical process of crystallization, it becomes part of the brick itself, allowing your brick to continuously breathe. For brick with decreased porosity, our stain also has the unique ability to grip to the top of the surface for optimal adhesion.
Give us a call to book your free in-home consultation!
(604) 260-4525
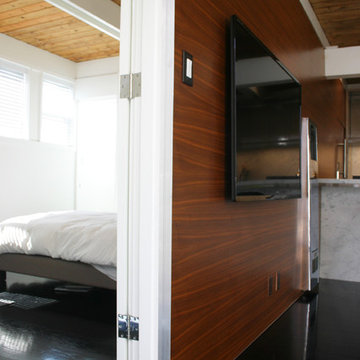 Laidlaw Schultz architects
The project’s starting point was to understand the building’s original post and beam structure and to use that internal logic to formulate a sympathetic remodel. With an emphasis on the upper back unit, the owner’s private residence within this recently purchased Edward Killingsworth triplex, the first order of business was to strip the excess out and to return the complex to something that resembled the original. With a limited budget, the tact was to restore where possible, and to insert where needed, but always with a sympathetic eye. The kitchen quickly became the primary focus and it was soon realized that by removing the division between the existing galley and family room that the essence of the structural system could be revealed. Once opened the datum of the layered beams was adhered to with the kitchen reinforcing this overhead water line. The primary internal wall was then highlighted with a new wood veneer with the refrigerator recessed (borrowing a bit of space from the master closet) and the existing heater chromed.
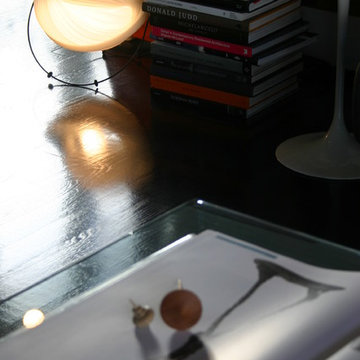 Laidlaw Schultz architects
The project’s starting point was to understand the building’s original post and beam structure and to use that internal logic to formulate a sympathetic remodel. With an emphasis on the upper back unit, the owner’s private residence within this recently purchased Edward Killingsworth triplex, the first order of business was to strip the excess out and to return the complex to something that resembled the original. With a limited budget, the tact was to restore where possible, and to insert where needed, but always with a sympathetic eye. The kitchen quickly became the primary focus and it was soon realized that by removing the division between the existing galley and family room that the essence of the structural system could be revealed. Once opened the datum of the layered beams was adhered to with the kitchen reinforcing this overhead water line. The primary internal wall was then highlighted with a new wood veneer with the refrigerator recessed (borrowing a bit of space from the master closet) and the existing heater chromed.
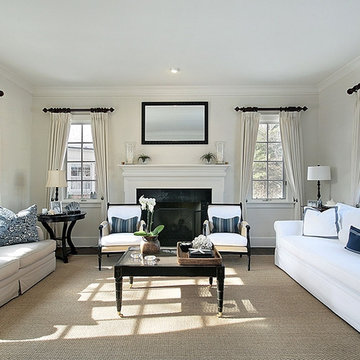
 Stain Protection Services Inc.
Why Choose Stain Protection Services?
StainProtect is much stronger, and lasts longer than our competitors. While most companies insist clients re-protect their furnishings every 12 months, StainProtect will provide full protection for as long as 30 to 36 months even in the most heavily used, and trafficked areas of your home. Our formulated protection penetrates each fiber for maximum protection. This nanotechnology penetrates the entire fiber and is not just a topical protector, providing great peace of mind for our clients. Visit our website at stainprotect.ca or call 647-779-7755 to set up an appointment or receive a "no obligation" quote!
 Laidlaw Schultz architects
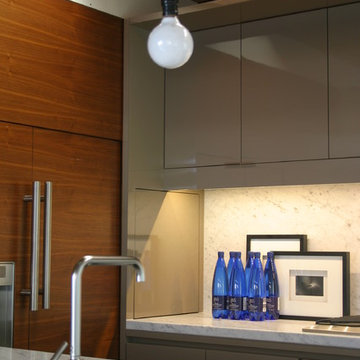
The project’s starting point was to understand the building’s original post and beam structure and to use that internal logic to formulate a sympathetic remodel. With an emphasis on the upper back unit, the owner’s private residence within this recently purchased Edward Killingsworth triplex, the first order of business was to strip the excess out and to return the complex to something that resembled the original. With a limited budget, the tact was to restore where possible, and to insert where needed, but always with a sympathetic eye. The kitchen quickly became the primary focus and it was soon realized that by removing the division between the existing galley and family room that the essence of the structural system could be revealed. Once opened the datum of the layered beams was adhered to with the kitchen reinforcing this overhead water line. The primary internal wall was then highlighted with a new wood veneer with the refrigerator recessed (borrowing a bit of space from the master closet) and the existing heater chromed.
 Laidlaw Schultz architects
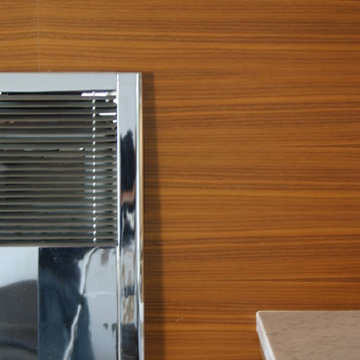
The project’s starting point was to understand the building’s original post and beam structure and to use that internal logic to formulate a sympathetic remodel. With an emphasis on the upper back unit, the owner’s private residence within this recently purchased Edward Killingsworth triplex, the first order of business was to strip the excess out and to return the complex to something that resembled the original. With a limited budget, the tact was to restore where possible, and to insert where needed, but always with a sympathetic eye. The kitchen quickly became the primary focus and it was soon realized that by removing the division between the existing galley and family room that the essence of the structural system could be revealed. Once opened the datum of the layered beams was adhered to with the kitchen reinforcing this overhead water line. The primary internal wall was then highlighted with a new wood veneer with the refrigerator recessed (borrowing a bit of space from the master closet) and the existing heater chromed.
 Laidlaw Schultz architects
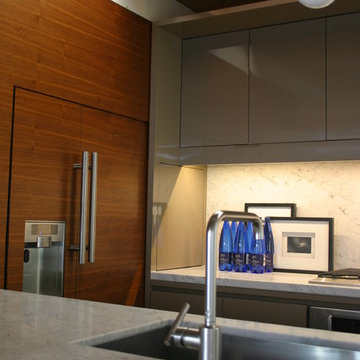
The project’s starting point was to understand the building’s original post and beam structure and to use that internal logic to formulate a sympathetic remodel. With an emphasis on the upper back unit, the owner’s private residence within this recently purchased Edward Killingsworth triplex, the first order of business was to strip the excess out and to return the complex to something that resembled the original. With a limited budget, the tact was to restore where possible, and to insert where needed, but always with a sympathetic eye. The kitchen quickly became the primary focus and it was soon realized that by removing the division between the existing galley and family room that the essence of the structural system could be revealed. Once opened the datum of the layered beams was adhered to with the kitchen reinforcing this overhead water line. The primary internal wall was then highlighted with a new wood veneer with the refrigerator recessed (borrowing a bit of space from the master closet) and the existing heater chromed.
 Spray-Net Vancouver
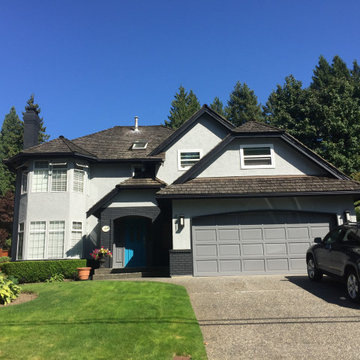
AFTER photo. Small brick accents stained dark gray.
Our stain delivers the breathability & permanent colour transformation you need to cost-effectively revamp your home.
Since the porosity of each brick can differ, we’ve formulated a stain that combines the adhesiveness of a paint with the permanent finish of a stain.
When latex paint is applied to brick, the film simply lays on top of the surface. This stops moisture inside of the brick from evaporating, leading to blistering & peeling. Our stain travels deep into the pores of your brick and through the chemical process of crystallization, it becomes part of the brick itself, allowing your brick to continuously breathe. For brick with decreased porosity, our stain also has the unique ability to grip to the top of the surface for optimal adhesion.
Give us a call to book your free in-home consultation!
(604) 260-4525
14