
Search results for "Hardest" in Home Design Ideas

 Arizona Tile
Della Terra is a natural quartz surface, it is a blend of nature and technology, combining beauty and functionality in a high performance surface. Della Terra is comprised of more than 93% natural quartz crystals, one of the hardest minerals in nature. Color controlled quartz is blended together with technologically advanced polymers. Because of its high quartz content, Arizona Tile's Della Terra Quartz surfaces are ultra-durable and resistant to scratches and chipping. Its dense composition also makes Della Terra Quartz highly resistant to staining.
Photo: Aperture Architectural Images
 highland
Skylight blackout blinds have to be held against the frame rather than hung below it, and that one difference is why a loft stays bright when the same fabric works downstairs. A blind on a sloped window sags away from the glass and daylight spills round all four edges. The fabric is rarely the problem.
Key Takeaways
On a vertical window, weight pulls the blind flat to the glass and the only leaks are two narrow strips an overlap will cover. Tilt the same window to forty degrees and the physics invert. That weight now drags the fabric away from the frame, opening a wedge of daylight along the bottom rail and a thinner one at the head. Flat roof skylight blinds have it worst, with no angle at all for the fabric to rest against.
If you have already bought a roller and taped the edges, you know this. Choosing blackout blinds for a skylight is a decision about the fixing.
Why Skylight Blackout Blinds Have to Be Captured at the Edges
The fix is a channel down each side of the reveal with the fabric running inside it. The lip overlaps the fabric edge, so no straight sightline runs from glass to room.
Tension matters as much as the track. A limp fabric bellies between two channels on a shallow pitch, which is why cell structures hold their shape better than a flat roller. The 1ClickBlinds honeycomb panel works that way. The head needs its own answer: a channel stops where the frame stops, so without a cassette a strip of glass glows above the roller. Skylight blackout blinds are only as good as their weakest edge.
Measuring, and the Velux Question
Most roof windows carry a code on a plate at the top of the sash, visible when you swing it open. Skylight blackout blinds sold as Velux blackout blinds are sized to those codes, so read the plate before ordering. Velux blackout blinds will not always sit in another brand's frame, and blinds for Velux windows cut to a generic width rarely capture in the channels.
Heat is worth a thought too. Roof glass takes the sun almost square on at midday, so skylight blackout blinds block heat and light in one action. On flat roof skylight blinds a reflective fabric beats a black one, and the full range is here if you want to compare.
Frequently asked questions
How do you fit a blackout blind to a Velux roof window?
Find the frame code on the plate at the top of the sash and order against it, then fix the two channels before the blind goes in. They must be parallel within a couple of millimetres or the fabric binds. Blinds for Velux windows clip to the frame, so nothing goes into the ceiling.
How do you measure for skylight blinds?
Use the frame code where the window has one, since it gives the exact size without a tape. Without a code, measure the inner frame width and drop at three points each and take the smallest. Note which way the window opens, as that sets where the controls go.
What are skylight blinds?
Blinds made for roof windows rather than wall windows, held along both edges so they stay against the glass at an angle. Blinds for skylight windows come in blackout, reflective and electric forms. The defining feature is the fixing, not the fabric.
Key Takeaways
- Gravity works against you. On a sloping window a hanging blind pulls away from the frame.
- Four edges leak, not two. A roof blind leaks at the sides, head and foot.
- Channels do the real work. A track down both edges keeps the fabric flat to the glass.
- Order by frame code. Blinds for skylight windows are sized from the plate on the sash, not a tape.
-
Darkness and heat are one job. The pane that wakes you at half four in June is the hottest surface by noon.
On a vertical window, weight pulls the blind flat to the glass and the only leaks are two narrow strips an overlap will cover. Tilt the same window to forty degrees and the physics invert. That weight now drags the fabric away from the frame, opening a wedge of daylight along the bottom rail and a thinner one at the head. Flat roof skylight blinds have it worst, with no angle at all for the fabric to rest against.
If you have already bought a roller and taped the edges, you know this. Choosing blackout blinds for a skylight is a decision about the fixing.
Why Skylight Blackout Blinds Have to Be Captured at the Edges
The fix is a channel down each side of the reveal with the fabric running inside it. The lip overlaps the fabric edge, so no straight sightline runs from glass to room.
Tension matters as much as the track. A limp fabric bellies between two channels on a shallow pitch, which is why cell structures hold their shape better than a flat roller. The 1ClickBlinds honeycomb panel works that way. The head needs its own answer: a channel stops where the frame stops, so without a cassette a strip of glass glows above the roller. Skylight blackout blinds are only as good as their weakest edge.
Measuring, and the Velux Question
Most roof windows carry a code on a plate at the top of the sash, visible when you swing it open. Skylight blackout blinds sold as Velux blackout blinds are sized to those codes, so read the plate before ordering. Velux blackout blinds will not always sit in another brand's frame, and blinds for Velux windows cut to a generic width rarely capture in the channels.
Heat is worth a thought too. Roof glass takes the sun almost square on at midday, so skylight blackout blinds block heat and light in one action. On flat roof skylight blinds a reflective fabric beats a black one, and the full range is here if you want to compare.
Frequently asked questions
How do you fit a blackout blind to a Velux roof window?
Find the frame code on the plate at the top of the sash and order against it, then fix the two channels before the blind goes in. They must be parallel within a couple of millimetres or the fabric binds. Blinds for Velux windows clip to the frame, so nothing goes into the ceiling.
How do you measure for skylight blinds?
Use the frame code where the window has one, since it gives the exact size without a tape. Without a code, measure the inner frame width and drop at three points each and take the smallest. Note which way the window opens, as that sets where the controls go.
What are skylight blinds?
Blinds made for roof windows rather than wall windows, held along both edges so they stay against the glass at an angle. Blinds for skylight windows come in blackout, reflective and electric forms. The defining feature is the fixing, not the fabric.

 Advance Design Studio, Ltd.
Jennifer and Dan have lived in their Deer Park Illinois home for 15 years, slowly making minor fixes like painting and decorating; but they had a new plan for their kitchen the entire time. An awkwardly placed garage door, and an island cooktop with a terrible downdraft made a full-scale kitchen remodel an absolute must. Jennifer had many ideas in mind and wanted to work with a company that could provide high-end work, while partnering with a designer that would tailor the kitchen to her ideas.
She was intrigued by the phrase “Common Sense Remodeling” in Advance Design’s feature she discovered while perusing an issue of the community’s Quintessential Barrington Magazine. Doing further research on the company’s website, as she looked through project profiles and read about Advance Design’s “Common Sense Remodeling” philosophy, she promptly scheduled an appointment to see if the people and ideas she read about were truly who they said they were. The more she read, the more she knew that the “Common Sense” approach to remodeling they described was exactly the type of company she was looking for.
The partnership was sealed after an initial consultation with Owner Todd Jurs and Project Designer Michelle Lecinski. They displayed a combination of friendliness, professionalism and respect that was unmatched by any of the other companies Jennifer talked to. She knew that with Advance Design, she would be able to retain the vision that she had in mind with high-quality craftsmanship.
“I reached out to Advance Design because of the ‘Common Sense Remodeling’ tagline,” Jennifer said. “That’s what lingered for me”. “Advance Design was the most respectful- of the house and of my design ideas, and the most professional of the handful of companies that looked at my project”.
Soon after the meeting Jennifer began working with Michelle on the project design. They quickly developed chemistry. Jennifer loved how Michelle researched and located every detail that Jennifer wanted for the kitchen. Between the two of them, every concept and idea was worked through and perfected. “Jennifer had definite ideas about what she wanted the new kitchen to look like, she just didn’t know how to bring it all together. We worked together really well to make her ideas into the practical reality necessary for a well-functioning kitchen, with the look and feel that she had envisioned”, says Michelle.
“Michelle was wonderful in using the CAD system she would show me new drawings every time we changed the layout while working through the design,” Jennifer said. “She was a really wonderful partner in execution, she made sure everything happened quickly and easily.”
The finished design drew out elements of Jennifer’s style and personality. The pair call the look “sophisticated farmhouse” to describe the kitchen renovation to family and friends. The result was a beautifully crafted, authentic-feeling space that satisfied Jennifer’s dreams 15 years in the making. The whole project consisted of a kitchen remodel, mudroom upgrade with powder room, and garage entry relocation. “The projects I personally like the best, are the ones that put the client’s dreams on display,” Project Designer Michelle said. “And this is one of those projects.”
The main focal point of the kitchen is custom zinc and brass ventilation hood with a vintage sheen, which was hand made to order by a small company in Indiana named Vogler Metalworking. “It’s like sculpture, a true work of art”, says Jennifer. Your eye is immediately drawn towards this elegant yet practical hood that eliminated the home’s downdraft problem and added a striking conversation piece at the same time. The carpenters had to use special gloves when transporting and installing it, so they didn’t smudge it with fingerprints. The beautiful hood centers proudly over the stunning black enamel and brass LaCornue Range. “I had a friend who had a LaCornue range and after learning how easy it was to cook perfect meals, I was convinced I wanted to have one”, says Jennifer. This unique, breathtaking combination anchors the entire kitchen and is apparent immediately as you walk into the great room the surrounds the space.
DuraSupreme Crestwood cabinets with a Kendall Panel add function and sophistication. A custom gray paint color paired with a storm blue was developed so that the new kitchen looked like it belonged to the existing space. Unlacquered brass faucets and hardware were important to Jennifer because she wanted the living finishes to age over time. Remarkable brass diamond mesh cabinet door inserts imported from the UK continue to add this one-of-a-kind kitchen renovation; giving it a “you won’t see this everywhere” quality. The use of old railcar flooring for the coffee bar countertop and reclaimed oak for the open shelving gives an authenticity to the space uncommon in kitchens today.
Jennifer and Michelle fell in love with the Limestone Grey Stone while they were investigating unique island countertop ideas. They liked the fact that the limestone as a living finish will age and change over time. Calcutta Miel Quartz countertops made for an excellent pairing around the perimeter, as it’s durable and perfect for cooking preparations. A textured white subway tile backsplash that runs to the ceiling keeps your eye moving towards the open shelving, and to the main focal point of the stunning range hood combination.
“The kitchen functions beautifully, and it’s gorgeous,” beams Jennifer as she gestures with both hands while smiling ear to ear. “The most important thing was I wanted a kitchen that had a wonderful flow, cooked beautiful meals and was a great gathering place for family and friends, and this space does that perfectly! Beauty wise, it turned out exactly how I had envisioned. I felt the function part was the hardest part, and that was nailed”!
Relocating the garage entry to the new mudroom was a huge priority and has finally separated the family’s arriving home functions from their kitchen. Now coats and shoes and bags have their own area for dropping once members arrive home. Matching gray DuraSupreme cabinetry helped create gorgeous, purposeful lockers for the family. A reclaimed vintage sink and custom wall paper were added to the tiny powder room to beautify the once previously only functional space. Advance Design was even able to create a custom space for their dog to sleep while the family is away.
“It was unbelievable that a project of this size was completed in such a short time, and I think that’s because of the large amount of planning and preparation that went into it,” Jennifer marveled, “When we started, we were ready, and everything was prepared”.
When it came to execution, Project Manager Justin Davis and his crew were quick, accessible, and organized. Projects like this kitchen are typically completed in as little as 8-10 weeks. Jennifer’s kitchen however despite the relocation of some challenging HVAC in a soffit and moving of an exterior door was completed remarkably fast in part because the team was working with an existing tile floor that ran throughout the first floor that the client really loved.
“You get to know these people really well because they’re living in your house while you’re living in your house. They were so fast and really good, it didn’t take as long as even planned” reported Jennifer. “I would text Justin and he always responded almost immediately. I got to know all the guys who were working in our house and they were all wonderful people”.
Details in a customized kitchen like this one require skill and care from the people who install it. “All the guys on the job were skilled at what the did. I wanted small details like little feet to look like furniture, that is where their carpentry skill came in to make these all perfect”, said Jennifer. “The tile guys were wonderful. They even let me determine how I wanted the texture with the grout to appear for a salt and pepper look; now that is a very skilled trade person making it custom”.
In Jennifer’s interview, she continued to reference Advance Design’s “Common Sense Remodeling”, so I took a minute to ask her exactly what that phrase meant to her and how it played out in her experience with her project and the Advance Design team. Here is what she said: “I was intrigued about Common Sense Remodeling and in my head that there would be clear costs and prices, great communication between the design team, the execution team and me”, said Jennifer. They did deliver on that, it was so clear about the cost breakdown, what I could expect from everyone who came to my house, and everything that we had ordered. That to me is the Common Sense”!
It’s great to see a client take literally our assertion that a well-planned remodeling project is simply “Common Sense”! She anticipated each step of the way would be clear, concise, and predictable, all the while protecting the outcome due to the careful upfront planning. “Advance Design delivered on their ‘Common Sense Remodeling’ promise,” Jennifer said. “From the design team, to the execution team - everything was straight forward like I imagined. The project turned out exactly how I envisioned, I enjoyed this process and absolutely would recommend Advance Design Studio to anyone.”
Find the right local pro for your project

 Kohler
Paneled walls in Iceberg 2122-50 reflect in the mirrored flecks of the Silestone® White Platinum backsplash while the high-arching Polished Chrome faucet accentuates the kitchen's effortless beauty. A classic, creamy vintage-style sink and refreshed antiques add an eclectic allure to the otherwise simple aesthetic.

Inspiration for a mid-sized transitional l-shaped gray floor kitchen remodel in New York with shaker cabinets, blue cabinets, multicolored backsplash, stainless steel appliances, an island, quartz countertops, porcelain backsplash and black countertops

 Margie Grace - Grace Design Associates
Sunny Yellow Retro Kitchen remodel. We Designed and laid the floors ourselves!
Inspiration for a mid-sized mid-century modern u-shaped linoleum floor and multicolored floor kitchen remodel in Santa Barbara with white cabinets, laminate countertops, white appliances, shaker cabinets, a double-bowl sink, an island and white countertops
Inspiration for a mid-sized mid-century modern u-shaped linoleum floor and multicolored floor kitchen remodel in Santa Barbara with white cabinets, laminate countertops, white appliances, shaker cabinets, a double-bowl sink, an island and white countertops

 LD&A
Example of a large transitional single-wall medium tone wood floor open concept kitchen design in Calgary with an undermount sink, shaker cabinets, metallic backsplash, metal backsplash, stainless steel appliances, an island, white cabinets and solid surface countertops


 Arizona Tile
Bella Statuario Quartz is part of Arizona Tile's Della Terra Quartz collection. Della Terra is a natural quartz surface, it is a blend of nature and technology, combining beauty and functionality in a high performance surface. Della Terra is comprised of more than 93% natural quartz crystals, one of the hardest minerals in nature. Color controlled quartz is blended together with technologically advanced polymers. Because of its high quartz content, Arizona Tile's Della Terra Quartz surfaces are ultra-durable and resistant to scratches and chipping. Its dense composition also makes Della Terra Quartz highly resistant to staining.
Photo: Aperture Architectural Images

 Jim Picardi
Inspiration for a mid-sized transitional l-shaped slate floor eat-in kitchen remodel in Boston with a farmhouse sink, raised-panel cabinets, white cabinets, granite countertops, metallic backsplash, metal backsplash, stainless steel appliances and an island

 Prime 1 Builders
This project won in the 2013 Builders Association of Metropolitan Pittsburgh Housing Excellence Award for Best Urban Renewal Renovation Project. The glass bowl was made in the glass studio owned by the owner which is adjacent to the residence. The mirror is a repurposed window. The door is repurposed from a boarding house.
George Mendel




 Knock On Wood Studio
We have a beautifull showroom where we show the quality more then the deisgn . Come and visit us at Cedros in solana Beach
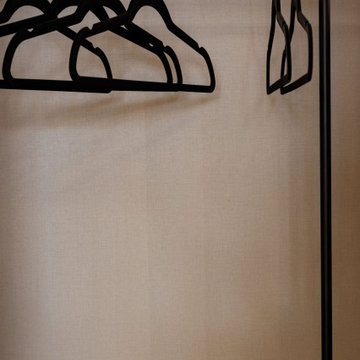
Closet - contemporary closet idea in San Diego
Closet - contemporary closet idea in San Diego


 Camino Verde Designs
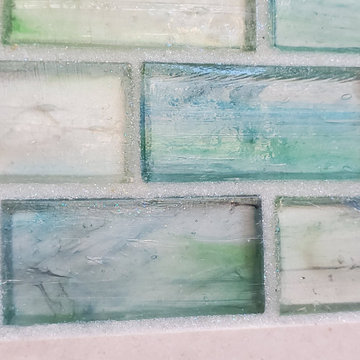
Glass Tile with sparkling grout
Example of a classic home design design in Boston
Example of a classic home design design in Boston
 GoldenHandsMan
We gave this patio a solid refresh by repairing the damaged drywall ceiling, replacing rotten fascia boards with brand-new ones, and painting the entire area for a clean, polished look. The result is a patio that’s not only visually appealing but also structurally sound and well-protected from the elements—perfect for enjoying the outdoors in comfort and style.
1