
Search results for "Hazards" in Home Design Ideas
 DSLD Land Management Company, Inc.
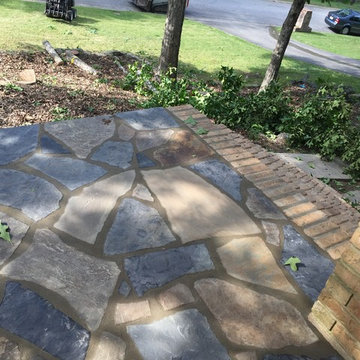
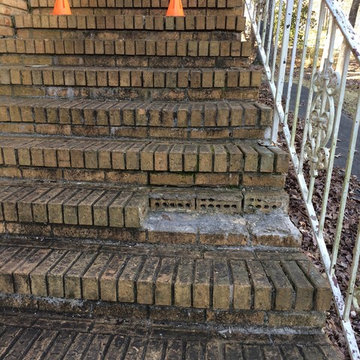
This home was built in the 70's and as you can imagine has acquired a few "ailments" over the past 40 years, one of the more serious being the deterioration of the front entrance. The brick started to loosen over the years and eventually started to break apart completely, it got to the point that the family could not use the front entrance at all due to the safety hazard it represented. After interviewing with several contractors the home owners contacted David Sharp with DSLD Land Management and he was able to ease the tension and offer a solution that not only resulted in a beautifully restored front entrance but that also fit comfortably into their budget. The project took less than a week to complete and as you can imagine the home owners are thrilled with the final product!

 Blinds.com
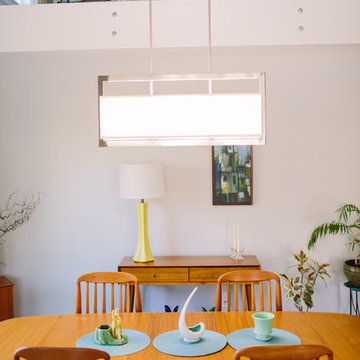
Ruthy, who writes at Discovery Street, has been lovingly restoring the “straight-out-of-mad-men” mid century home with shiplap walls, angular accents and an amazing wall of windows.
Ruthy covered her windows with Motorized Blinds.com Signature Solar Shades in Pale Grey. The sleek shades blend perfectly with the home’s modern style, plus they block heat while allowing Ruthy to keep the light she loves.
With a toddler and newborn at home, Ruthy knew she need something that was safer for kids. She added a motorized lift which eliminates all hazardous cords, and makes the shades a snap to raise and lower.
 Wilsonville Carpet & Tile
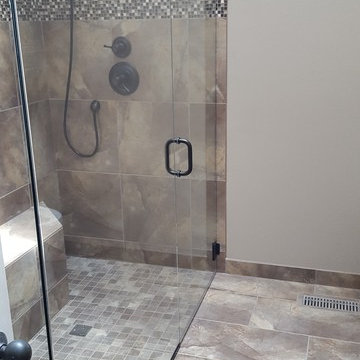
Curb-less tile showers provide a beautiful, modern look with no tripping hazard. Many of our clients also opt for grab bars. We can create any custom shower to meet your needs!
Find the right local pro for your project
 TVL Creative Ltd.
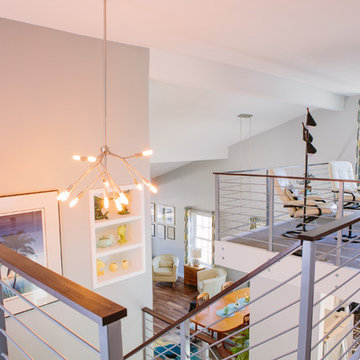
We were excited to take on this full home remodel with our Arvada clients! They have been living in their home for years, and were ready to delve into some major construction to make their home a perfect fit. This home had a lot of its original 1970s features, and we were able to work together to make updates throughout their home to make it fit their more modern tastes. We started by lowering their raised living room to make it level with the rest of their first floor; this not only removed a major tripping hazard, but also gave them a lot more flexibility when it came to placing furniture. To make their newly leveled first floor feel more cohesive we also replaced their mixed flooring with a gorgeous engineered wood flooring throughout the whole first floor. But the second floor wasn’t left out, we also updated their carpet with a subtle patterned grey beauty that tied in with the colors we utilized on the first floor. New taller baseboards throughout their entire home also helped to unify the spaces and brought the update full circle. One of the most dramatic changes we made was to take down all of the original wood railings and replace them custom steel railings. Our goal was to design a staircase that felt lighter and created less of a visual barrier between spaces. We painted the existing stringer a crisp white, and to balance out the cool steel finish, we opted for a wooden handrail. We also replaced the original carpet wrapped steps with dark wooden steps that coordinate with the finish of the handrail. Lighting has a major impact on how we feel about the space we’re in, and we took on this home’s lighting problems head on. By adding recessed lighting to the family room, and replacing all of the light fixtures on the first floor we were able to create more even lighting throughout their home as well as add in a few fun accents in the dining room and stairwell. To update the fireplace in the family room we replaced the original mantel with a dark solid wood beam to clean up the lines of the fireplace. We also replaced the original mirrored gold doors with a more contemporary dark steel finished to help them blend in better. The clients also wanted to tackle their powder room, and already had a beautiful new vanity selected, so we were able to design the rest of the space around it. Our favorite touch was the new accent tile installed from floor to ceiling behind the vanity adding a touch of texture and a clear focal point to the space. Little changes like replacing all of their door hardware, removing the popcorn ceiling, painting the walls, and updating the wet bar by painting the cabinets and installing a new quartz counter went a long way towards making this home a perfect fit for our clients
 Drury Design
The Setup
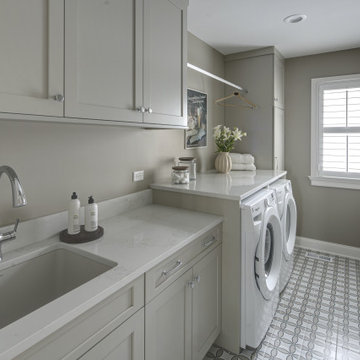
When Samantha’s clients purchased their new home, they quickly realized the primary bath and adjacent laundry room weren’t just dated — they were dysfunctional. The bathroom featured a hulking decked-in tub, a cramped pass-through layout, and plumbing fixtures that barely worked. Meanwhile, the nearby laundry room felt more like a closet, lacking both natural light and usable storage. As long-time returning Drury Design clients, these veteran remodeling clients came to us with a clear ask: reimagine these two key spaces with long-term comfort, function, and beauty in mind.
Design objectives:
Create a more functional, spacious layout in the primary bath
Modernize the aesthetic while respecting the home’s transitional character
Eliminate awkward bump-outs and toe-stubbing pinch points
Design a large walk-in shower with thoughtful aging-in-place elements
Incorporate a sculptural standalone tub that feels intentional, not crowded
Improve laundry room utility and bring in natural light
Introduce discreet yet effective storage in both rooms
Make both spaces feel cohesive, light-filled, and livable for years to come
The Remodel
Design challenges to be solved:
A bulky built-in tub jutted into the circulation path, creating toe-stubbing hazards
The bathroom layout was awkwardly L-shaped, limiting flow and flexibility
The shower and toilet were squeezed together in an enclosed room with poor use of space
The linen cabinet in the bathroom was large and clunky, crowding the room
The laundry room was undersized, lacked light, and had limited functionality
The home featured transitional details that didn’t align with the clients’ more contemporary style
The clients wanted both spaces to support future aging-in-place needs
The Renewed Space
Design solutions:
Swapped the oversized tub for a freestanding sculptural version placed on an angle, clearing walkways and preserving window symmetry and light
Reworked the footprint to create a rectangular layout that maximized space in both the primary bath and laundry room
Removed the enclosed toilet/shower room and replaced it with a wide, glass-enclosed shower and a tucked-away toilet — all within a visually open and efficient layout
Tucked a slim, full-height linen cabinet just behind the entry door — easily accessible without cluttering the visual field
Retooled layout allowed laundry room to extend over the old shower/toilet space, also winning a window – this brightens the laundry space and the hallway beyond. Also added smart storage, a wide sink, folding counter, and broom cabinet with power.
Balanced contemporary materials with transitional details — including a rich color palette, chrome finishes, mosaic accents, and herringbone tile in a larger scale for traditional flair
Integrated aging-in-place features including a wide walk-in shower, large built-in bench with nearby handheld, and plenty of room for easy movement and accessibility
Final Thoughts:
By designing these two rooms in tandem, Samantha was able to create a smooth and thoughtful flow between everyday tasks and everyday comfort. The bathroom now offers generous circulation space, elegant materials, and features designed for longevity — including a large shower with bench seating and open sightlines that support accessibility. Just steps away, the laundry room is no longer a tucked-away closet but a light-filled, functional hub with room to fold, hang, rinse, and more (ex. recharge vacuum in a closet with power outlets). For these longtime Drury Design clients, it’s a two-room transformation built not just for today – but for the years ahead.



 TVL Creative Ltd.
We were excited to take on this full home remodel with our Arvada clients! They have been living in their home for years, and were ready to delve into some major construction to make their home a perfect fit. This home had a lot of its original 1970s features, and we were able to work together to make updates throughout their home to make it fit their more modern tastes. We started by lowering their raised living room to make it level with the rest of their first floor; this not only removed a major tripping hazard, but also gave them a lot more flexibility when it came to placing furniture. To make their newly leveled first floor feel more cohesive we also replaced their mixed flooring with a gorgeous engineered wood flooring throughout the whole first floor. But the second floor wasn’t left out, we also updated their carpet with a subtle patterned grey beauty that tied in with the colors we utilized on the first floor. New taller baseboards throughout their entire home also helped to unify the spaces and brought the update full circle. One of the most dramatic changes we made was to take down all of the original wood railings and replace them custom steel railings. Our goal was to design a staircase that felt lighter and created less of a visual barrier between spaces. We painted the existing stringer a crisp white, and to balance out the cool steel finish, we opted for a wooden handrail. We also replaced the original carpet wrapped steps with dark wooden steps that coordinate with the finish of the handrail. Lighting has a major impact on how we feel about the space we’re in, and we took on this home’s lighting problems head on. By adding recessed lighting to the family room, and replacing all of the light fixtures on the first floor we were able to create more even lighting throughout their home as well as add in a few fun accents in the dining room and stairwell. To update the fireplace in the family room we replaced the original mantel with a dark solid wood beam to clean up the lines of the fireplace. We also replaced the original mirrored gold doors with a more contemporary dark steel finished to help them blend in better. The clients also wanted to tackle their powder room, and already had a beautiful new vanity selected, so we were able to design the rest of the space around it. Our favorite touch was the new accent tile installed from floor to ceiling behind the vanity adding a touch of texture and a clear focal point to the space. Little changes like replacing all of their door hardware, removing the popcorn ceiling, painting the walls, and updating the wet bar by painting the cabinets and installing a new quartz counter went a long way towards making this home a perfect fit for our clients.
 Microworks Handyman
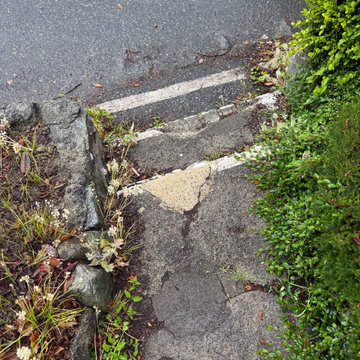
**Concrete Step Restoration & Your Entire To-Do List Done! ???️**
Start by fixing those crumbling, cracked, or settling concrete steps that have become an eyesore and a dangerous tripping hazard, and let us take care of the rest in one seamless visit. With our Ultimate Handyman Block, your professional will kick off the day with a quick property walkthrough to prioritize your exact needs. We will dive straight into carefully chipping away the loose debris, properly prepping the surface, and flawlessly applying high-strength concrete patch or resurfacer so your entryway or walkway is safe, rock-solid, and looks freshly poured. Once your concrete steps are perfectly restored, we will use the rest of your reserved session to tackle whatever else is weighing on your mind—from mounting heavy TVs and patching drywall to upgrading door hardware and repairing fences. Professional-grade consumables are fully included in the service, and if your project requires specialty masonry bonding agents, specific non-slip concrete sealers, or custom decorative caps, we source them for you and pass the items on with zero markup. It is the ultimate, stress-free way to finally catch up on those nagging repairs and get your property back to 100% in a single day.
.
.
.
.
.
Consumables Included:
High-strength concrete patch & resurfacer | Masonry bonding adhesive | Standard structural fasteners
#MicroworksHandyman #BurnabyHandyman #VancouverHandyman #NorthVancouverHandyman #WestVancouverHandyman #CoquitlamHandyman #ConcreteRepair #StepRestoration #HomeMaintenance #VancouverContractor #HandymanServices #PropertyMaintenance #HoneyDoList #HomeRepairs #MasonryRepair
 DSLD Land Management Company, Inc.
This home was built in the 70's and as you can imagine has acquired a few "ailments" over the past 40 years, one of the more serious being the deterioration of the front entrance. The brick started to loosen over the years and eventually started to break apart completely, it got to the point that the family could not use the front entrance at all due to the safety hazard it represented. After interviewing with several contractors the home owners contacted David Sharp with DSLD Land Management and he was able to ease the tension and offer a solution that not only resulted in a beautifully restored front entrance but that also fit comfortably into their budget. The project took less than a week to complete and as you can imagine the home owners are thrilled with the final product!
 JRP Design & Remodel
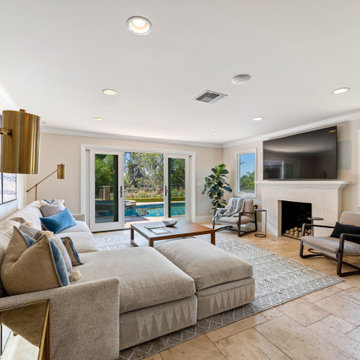
This home had a kitchen that wasn’t meeting the family’s needs, nor did it fit with the coastal Mediterranean theme throughout the rest of the house. The goals for this remodel were to create more storage space and add natural light. The biggest item on the wish list was a larger kitchen island that could fit a family of four. They also wished for the backyard to transform from an unsightly mess that the clients rarely used to a beautiful oasis with function and style.
One design challenge was incorporating the client’s desire for a white kitchen with the warm tones of the travertine flooring. The rich walnut tone in the island cabinetry helped to tie in the tile flooring. This added contrast, warmth, and cohesiveness to the overall design and complemented the transitional coastal theme in the adjacent spaces. Rooms alight with sunshine, sheathed in soft, watery hues are indicative of coastal decorating. A few essential style elements will conjure the coastal look with its casual beach attitude and renewing seaside energy, even if the shoreline is only in your mind's eye.
By adding two new windows, all-white cabinets, and light quartzite countertops, the kitchen is now open and bright. Brass accents on the hood, cabinet hardware and pendant lighting added warmth to the design. Blue accent rugs and chairs complete the vision, complementing the subtle grey ceramic backsplash and coastal blues in the living and dining rooms. Finally, the added sliding doors lead to the best part of the home: the dreamy outdoor oasis!
Every day is a vacation in this Mediterranean-style backyard paradise. The outdoor living space emphasizes the natural beauty of the surrounding area while offering all of the advantages and comfort of indoor amenities.
The swimming pool received a significant makeover that turned this backyard space into one that the whole family will enjoy. JRP changed out the stones and tiles, bringing a new life to it. The overall look of the backyard went from hazardous to harmonious. After finishing the pool, a custom gazebo was built for the perfect spot to relax day or night.
It’s an entertainer’s dream to have a gorgeous pool and an outdoor kitchen. This kitchen includes stainless-steel appliances, a custom beverage fridge, and a wood-burning fireplace. Whether you want to entertain or relax with a good book, this coastal Mediterranean-style outdoor living remodel has you covered.
Photographer: Andrew - OpenHouse VC
 AJM Construction & Repairs
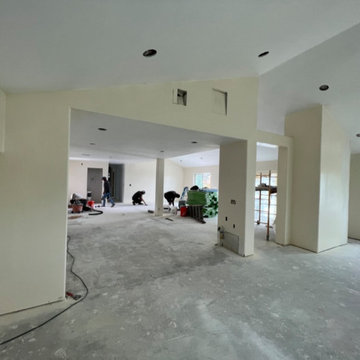
We started as a kitchen remodel but discovered there was mold in the majority of the exterior walls as well as the attic. The mold was caused by a number of problems but namely because the waterproof paper wrap on the house had deteriorated and was moisture to pass through the stucco and into the wood framing. In addition there was a leaking air conditioner condenser in the attic that was draining saturating the wood above the master bedroom. The mold was causing health problems it became clear we needed to replace a large majority of the framing and prevent future problems.
So we went from a kitchen addition/remodel to rebuilding the majority of the home and adding 800sqft; including a new bedroom, expanding the master bedroom and bath as well as a walk-in closet.
In anticipating for aging in place, we installed a walk-in shower with a bench and grab bars to allow for future wheelchair access and reduce trip hazards.
 TVL Creative Ltd.
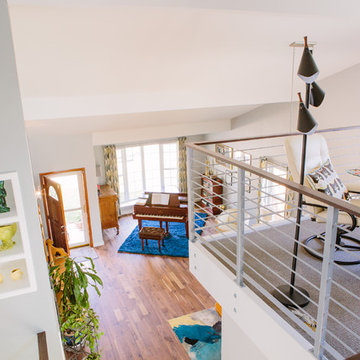
We were excited to take on this full home remodel with our Arvada clients! They have been living in their home for years, and were ready to delve into some major construction to make their home a perfect fit. This home had a lot of its original 1970s features, and we were able to work together to make updates throughout their home to make it fit their more modern tastes. We started by lowering their raised living room to make it level with the rest of their first floor; this not only removed a major tripping hazard, but also gave them a lot more flexibility when it came to placing furniture. To make their newly leveled first floor feel more cohesive we also replaced their mixed flooring with a gorgeous engineered wood flooring throughout the whole first floor. But the second floor wasn’t left out, we also updated their carpet with a subtle patterned grey beauty that tied in with the colors we utilized on the first floor. New taller baseboards throughout their entire home also helped to unify the spaces and brought the update full circle. One of the most dramatic changes we made was to take down all of the original wood railings and replace them custom steel railings. Our goal was to design a staircase that felt lighter and created less of a visual barrier between spaces. We painted the existing stringer a crisp white, and to balance out the cool steel finish, we opted for a wooden handrail. We also replaced the original carpet wrapped steps with dark wooden steps that coordinate with the finish of the handrail. Lighting has a major impact on how we feel about the space we’re in, and we took on this home’s lighting problems head on. By adding recessed lighting to the family room, and replacing all of the light fixtures on the first floor we were able to create more even lighting throughout their home as well as add in a few fun accents in the dining room and stairwell. To update the fireplace in the family room we replaced the original mantel with a dark solid wood beam to clean up the lines of the fireplace. We also replaced the original mirrored gold doors with a more contemporary dark steel finished to help them blend in better. The clients also wanted to tackle their powder room, and already had a beautiful new vanity selected, so we were able to design the rest of the space around it. Our favorite touch was the new accent tile installed from floor to ceiling behind the vanity adding a touch of texture and a clear focal point to the space. Little changes like replacing all of their door hardware, removing the popcorn ceiling, painting the walls, and updating the wet bar by painting the cabinets and installing a new quartz counter went a long way towards making this home a perfect fit for our clients
 Jennifer Ryan Design
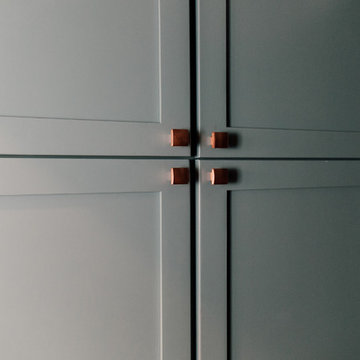
Opening up 2 walls gave this 1920's home an open floor plan plus more cabinetry and working space. Blue base cabinets come completer with a low dog bowl drawer to alleviate the trip hazard and mess of bowls on the floor. Adding double sets of french doors brings light and air to the kitchen.
 HOMEREDI
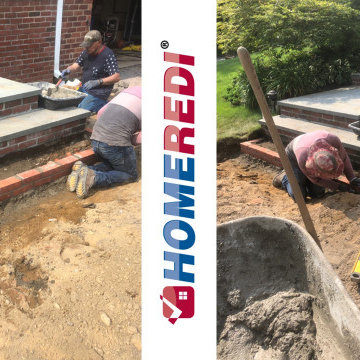
Our Masons installing a new Step with matching Thermal Blue Stone to eliminate trip hazard. New Apron installation with soldier framing to finish.
Large elegant house exterior photo in New York
Large elegant house exterior photo in New York
 The Rockaway Company
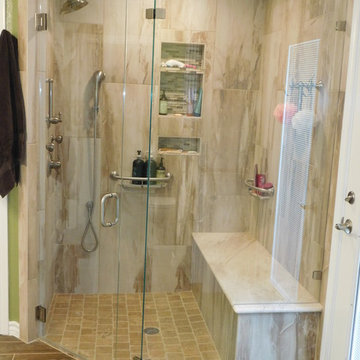
New doors, new flooring, new cabinets and we removed the tub. You will also notice that we removed the toilet room doors and widened the opening. We added several hand bars for stability. The shower has no curb to make it easy to get into without the tripping hazard. Hand bars strategically place for an aid to balance. Notice the body sprayers, and hand held wand. The hand bars on the lower level do double duty as a shampoo holder.
 Irene Designs
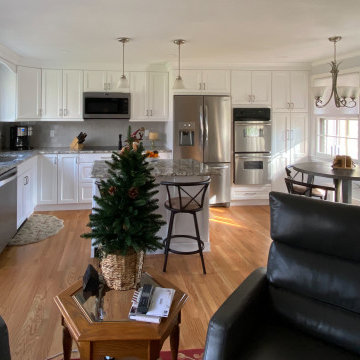
The new space looks nothing like it was before. Original kitchen was too small, and adjacent areas had a few other problems.
The front door opened straight into the wall of a long narrow hallway. It created a 90 degree turn to get into the family room.
The door between the kitchen and dining room made the traffic flow awkward for both areas.
Coat closet in the front hallway located right across the stairwell, created potential fall hazard when opening the door.
Solution:
With the rear porch door left in place, the two side windows were swapped and the kitchen was relocated to the opposite wall.
Hallway walls were taken down and the coat closet was relocated away from the stairs.
Door opening between the dining room and former kitchen was restored.
After remodeling, all rooms became bigger and more functional. New beautiful kitchen has a central island and a built-in breakfast nook.
Family room also feels more open. Dining Room has a better traffic flow and holds the potential for a bigger table to seat more guests.
 JRW Construction LLC
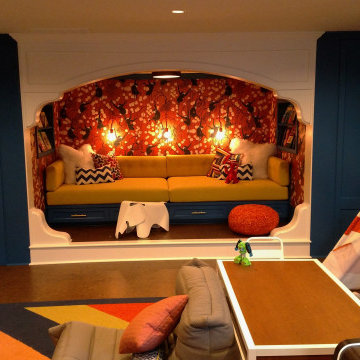
A children's playroom should be a fun and inviting space that encourages play, creativity, and imagination. Bright colors, soft textures, and plenty of toys and games can help create an exciting and comfortable environment. Storage space is also important to keep the room organized and clutter-free. Consider adding a reading nook, art station, or dress-up area to inspire a range of activities. Safety should always be a top priority, so be sure to choose age-appropriate toys and furniture and keep the room free of hazards. Overall, a well-designed playroom can provide hours of entertainment and fun for children of all ages.

 ClearChoice Windows and Doors Inc.
We installed Milgard Ultra Series dual pane fiberglass windows on this custom 1920s vintage home in Chino Hills, CA. They are tempered for a fire hazard severity zone. For the interior, we did a custom match to the existing decor.
54