
Search results for "Imperative" in Home Design Ideas

 Cascade West Development
The Willow - Transitional Family Home on Acreage in Brush Prairie, Washington by Cascade West Development Inc.
The family that owns this home is prone to travel. Whether to a National Monument or the forests of Alaska the wayward souls that dwell within these walls know how to appreciate the great outdoors. Throughout the week they might need to rest and recoup between adventures, preferably in a low-maintenance environment. The need for space was imperative; balancing storage, relaxation and entertaining was top of mind when designing. As frequent entertainers, they got the room to regale and the room to relax. Large family rooms flank the front entryway; a large open great room with vaulted ceiling and central fireplace creates an informal and loose setting for family and friends to gather. Either flooded with natural light, from the full-size Milgard windows, or warmly lit by fire and the ornate wrought iron chandelier, a cozy environment is not hard to conjure up. If some privacy is sought, the second family room across the foyer is the perfect place. This smaller family room features a knotty alder french door inlaid with seedy baroque glass. In this intimate setting a small group can get together for any number of conversations or, if necessary, enjoy a quiet setting for a movie or show.
Cascade West Facebook: https://goo.gl/MCD2U1
Cascade West Website: https://goo.gl/XHm7Un
These photos, like many of ours, were taken by the good people of ExposioHDR - Portland, Or
Exposio Facebook: https://goo.gl/SpSvyo
Exposio Website: https://goo.gl/Cbm8Ya
 Cascade West Development
The Willow - Transitional Family Home on Acreage in Brush Prairie, Washington by Cascade West Development Inc.
The family that owns this home is prone to travel. Whether to a National Monument or the forests of Alaska the wayward souls that dwell within these walls know how to appreciate the great outdoors. Throughout the week they might need to rest and recoup between adventures, preferably in a low-maintenance environment. The need for space was imperative; balancing storage, relaxation and entertaining was top of mind when designing. As frequent entertainers, they got the room to regale and the room to relax. Large family rooms flank the front entryway; a large open great room with vaulted ceiling and central fireplace creates an informal and loose setting for family and friends to gather. Either flooded with natural light, from the full-size Milgard windows, or warmly lit by fire and the ornate wrought iron chandelier, a cozy environment is not hard to conjure up. If some privacy is sought, the second family room across the foyer is the perfect place. This smaller family room features a knotty alder french door inlaid with seedy baroque glass. In this intimate setting a small group can get together for any number of conversations or, if necessary, enjoy a quiet setting for a movie or show.
Cascade West Facebook: https://goo.gl/MCD2U1
Cascade West Website: https://goo.gl/XHm7Un
These photos, like many of ours, were taken by the good people of ExposioHDR - Portland, Or
Exposio Facebook: https://goo.gl/SpSvyo
Exposio Website: https://goo.gl/Cbm8Ya

 Nar Design Group
This previously small and under-utilized hall bathroom presented several design challenges. Maximizing storage and creating a big feeling with limited square footage was priority. It was also imperative that the end result be bright yet warm, durable and easy to maintain while achieving a sleek contemporary look.
The solution was multifold. The fixture layout was rearranged to maximize function. European frameless cabinetry with large drawers was used to maximize storage. A larger medicine cabinet was custom designed and placed on an angle to give maximum storage above the vanity. Warmth was brought into the space with the charcoal wood grain patterned floor tile and Rift White Oak horizontal grain cabinetry. A soft blue grey hue was chosen for the walls and a new 5 lite door, bringing serenity and peace to the space. Updated LED recessed lights bounce off the Porcelonosa wall tile and highlight the subtle stripe detail. The old light bar was replaced with sleek wall sconces providing more flattering light both outward for the user and down to the counter to illuminate items gracing the surface.
Special details such as the stone wrapped vanity were achieved through acute intention by the designer and skillful execution by fine local craftsman. Dekton was used as the wrap and is a striking and unexpected detail creating abundant simplicity and modern elegance while providing a durable and easy to maintain surface. The mirror was inset flush with the surrounding Porcelanosa wall tile and its edges align perfectly with the lines of the tile. Wall to wall Euro glass sliding shower doors maximize the spacious feeling and slide seamlessly on a brushed nickel mechanical rail system.
Find the right local pro for your project


 AJ's Landscaping & Outdoor Construction
Tranquil patio & seating area with exceptional lighting throughout.
Example of a large trendy backyard stamped concrete patio kitchen design in San Francisco with a pergola
Example of a large trendy backyard stamped concrete patio kitchen design in San Francisco with a pergola

 Zelaya Properties LLC
We used: Custom cherry cabinetry in Arts & Crafts Shaker style by Kabinart in Boulder and Espresso stains. Liberty Hardware Venetian bronze 1-1/2" cabinet knobs. KitchenAid Architect II Series 22 CF counter-depth French door refrigerator. KitchenAid Architect Series II 27" convection single wall oven. KitchenAid 36" 6-burner dual fuel freestanding commercial-style range. KitchenAid Architect II Series 24" dishwasher. Sharp Insight Pro Series 24" built-in microwave drawer (Model #KB6524PS). Crystorama Solaris 12" wide pendant lights in English bronze. Granite countertops in Brown Fantasy. 3"x6" polished marble backsplash.
Paint colors:
Walls: Glidden Silver Cloud 30YY 63/024
Ceilings/Trims/Doors: Glidden Swan White GLC23
Robert B. Narod Photography

 Moss Yaw Design studio
Engineered cedar siding creates beautiful gray-blue tones at the exterior of the home, while adding a textural element to activate the simple exterior design.
 Philips Hue
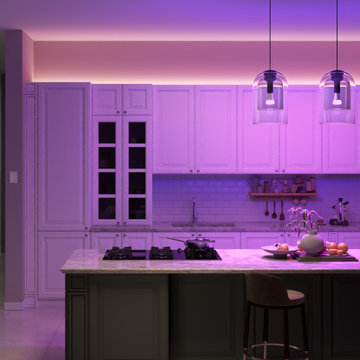
Philips Hue is more than lighting, it's part of your home decor.
Example of a transitional kitchen design in New York
Example of a transitional kitchen design in New York

 Roomscapes Cabinetry and Design Center
The blue glass mosaic mural inside of the shower is 4' x 4' and was created with 12" x 12" sheets of glass mosaic by Porcelanosa Mosaico Nomad in water. Finished with a bull nose molding and Sterling Silver permacolor grout.

 Miller-Roodell Architects Ltd
Set in Montana's tranquil Shields River Valley, the Shilo Ranch Compound is a collection of structures that were specifically built on a relatively smaller scale, to maximize efficiency. The main house has two bedrooms, a living area, dining and kitchen, bath and adjacent greenhouse, while two guest homes within the compound can sleep a total of 12 friends and family. There's also a common gathering hall, for dinners, games, and time together. The overall feel here is of sophisticated simplicity, with plaster walls, concrete and wood floors, and weathered boards for exteriors. The placement of each building was considered closely when envisioning how people would move through the property, based on anticipated needs and interests. Sustainability and consumption was also taken into consideration, as evidenced by the photovoltaic panels on roof of the garage, and the capability to shut down any of the compound's buildings when not in use.
 Tile Doctor Ltd
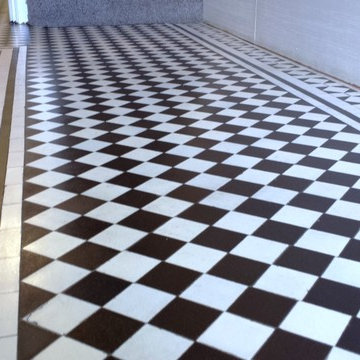
Sometimes you survey a job and you know that if you get the chance to restore it the results will be totally fantastic! This was the case with this Victorian black & white chequer tiled floor in the hallway of a large terraced Victorian house in Cardiff which dated back to around 1900 and was now looking well past its best, I know this because my family used to live in the house opposite. It was a well laid floor with no readings of dampness; I believe it’s imperative you check a floor for dampness before starting so you know what the baseline damp level is and which sealers will work with the floor.
My first action was to hoover the floor and then scrape as much debris off the surface as possible, and then as always I mixed 50/50 Tile Doctor HBU (Heavy Build-Up) remover with Pro-Clean and on this occasion because I wanted the white tiles to become really white I added the same amount of Tile Doctor Grout Clean-Up. This special recipe created a very formidable and strong cleaning solution which is what the job called for. I swept it over the whole floor letting it soak in for about ten minutes and then worked it into the floor using a scrubbing machine fitted with a coarse black pad adding more of the solution to the floor where it was drying out as I went.
The next step was to rinse the floor twice with water and extract the now filthy cleaning solution using a wet vacuum. At this point I inspected the tiles and I could see there were still a few stubborn areas with spots of paint and glue which I addressed with a decorators steam plate together with a scraper and hand held scrubbing pad.
I was now happy that the floor was clean and ready to be sealed, before sealing though it’s important to remove any trace of cleaning solution as it may contaminate the sealer so I gave the floor a thorough rinse and extracted as much of the water as possible to reduce drying times.
I left the floor to dry for 48hrs before coming back to seal the tiles taking a reader on my damp meter first to establish they had indeed dried out. To seal the floor I used eight coats of Tile Doctor Seal & Go which really works well on Victorian tiles and in this case made the whites really stand out.
The customer wanted this floor to look good because they were selling the property and were due to have an open day. The clean tiles really gave the house the wow factor and period features are so desirable these days so I don’t think it will take long to sell.


 CourseworkService
The natural right of each youngster to a quality instruction was initially recognized in 1948 in the Universal Declaration of Human Rights (UDHR). Embraced by the UN General Assembly on 10 December 1948, the Universal Declaration of Human Rights (UDHR) states that: everybody has the privilege to training and that it ought to be free in any event at the essential level. Not just does everybody have the privilege to a free and mandatory essential instruction, that training ought to concentrate on full human advancement, fortify admiration for human rights, and advance comprehension, resistance and companionship (UDHR Article 26).
The 1960, UNESCO Convention Against Discrimination in Education fortifies the privilege to a free and obligatory quality essential trainings laid out in the 1948 UDHR, and further orders that segregation in instruction is an infringement of human rights. It sets out that segregation in instruction incorporates any qualification, rejection, restriction or inclination that depends on race, shading, sex, dialect, religion, political or other feeling, national or social birthplace, monetary condition or conception.
The Convention on the Rights of the Child of 1989 further characterized youngsters' entitlement to training. The Millennium Development Goals and other worldwide traditions have subsequent to fortified instruction as a widespread right to be ensured to ALL youngsters.
Rights-based methodology
Getting to and accepting a quality training is an all inclusive human right. Instruct A Child's work is established in the privilege of ALL CHILDREN around the globe to get to a quality training that regards and elevates their entitlement to pride and full improvement.
There are three imperative parts of instruction as a human right:
Investment in quality instruction in itself;
The act of human rights in training; and
Training as a privilege that encourages the satisfaction of different rights.
Our work depends on various global instruments that recognize instruction as a human right. A few of these global instruments show the fancied nature, or nature of this training. When we take a gander at these instruments together and translate them we go a long ways past single articles to a web of responsibilities that identifies with the profundity and expansiveness of how to start to comprehend instructive quality.
Elucidation of the different instruments as to quality training must be inserted inside of the general current nearby and world settings and desires of instruction. That is, training must be set and comprehended as far as the bigger setting. A quality training must reflect learning in connection to the learner as an individual, a family and group part, and a portion of a world society.
A quality instruction comprehends the past, is significant to the present, and has a perspective to what's to come. Quality training identifies with learning building and the handy utilization of all types of information by special people who capacity both freely and in connection to others. A quality instruction mirrors the dynamic way of society and dialects, the estimation of the person in connection to the bigger setting, and the significance of living in a way that advances equity in the present and encourages an economical future.
About the Author: She is a superb essayist. Her major is «Phycology». She examines the issues of kids' advanceme at courseworkservice.com

 Allen Irvin - Designer
the butcher's table is an antique purchased before the house was designed.
Example of a cottage living room design in Houston
Example of a cottage living room design in Houston

 Smart-Solutiions
The Science of Light and Learning
To understand the relationship between lighting and learning, it’s critical to grasp the concept of correlated colour temperature (CCT). CCT refers to the warmth or coolness of light, measured in Kelvin (K). Lower CCTs (around 3000K) provide a warm, cosy atmosphere, while higher CCTs (5000K or above) emit a cool, daylight-like glow. Studies have shown that cool white light, which mimics natural daylight, can increase alertness and mood, contributing to improved cognitive performance. LED lighting, with its ability to produce this desired CCT, makes an ideal choice for educational settings.
LED Lighting: Brightening the Future of Education
Energy Efficiency and Cost Effectiveness
One of the main advantages of LED lighting is its energy efficiency. Traditional lighting solutions like fluorescent and incandescent bulbs consume much more energy to produce the same amount of light as LEDs, which is not only environmentally harmful but also financially costly. Switching to LED lights can result in substantial cost savings for schools, enabling them to redirect funds to other critical areas of education.
Durability and Longevity
LED lights are renowned for their durability and longevity. They have a significantly longer lifespan compared to conventional lights, which means less frequent replacement and reduced maintenance costs. This durability also minimises disruptions caused by light failure, providing a consistent, well-lit learning environment.
Improved Visibility and Reduced Eye Strain
With their superior colour rendering index (CRI), LED lights render colours more accurately, leading to improved visibility. This is particularly beneficial in educational settings, where activities often require distinguishing fine details and colours. LED lights also emit less glare than traditional lighting solutions, reducing eye strain and fatigue. This can lead to better concentration and increased comfort for both students and teachers.
Incorporating LED Lighting in Classrooms: Practical Considerations
When transitioning to LED lighting in classrooms, a few key factors need to be taken into account. Firstly, the lighting design should ensure an even distribution of light, preventing shadowy or overly bright spots that could distract or discomfort students. Secondly, the integration of dimming capabilities can provide flexibility, allowing educators to adjust the lighting level based on the task at hand. Finally, lighting controls can be used to take advantage of natural light, automatically dimming or turning off the LEDs when sufficient daylight is present.
Conclusion: The Bright Promise of LED Lighting in Education
As education systems continue to evolve, it’s imperative to keep sight of the physical factors that significantly impact learning, one of which is lighting. LED technology, with its myriad benefits, offers an innovative and effective way to enhance the quality of lighting in classrooms. By prioritising investments in such improvements, we can take a significant step towards creating an optimised learning environment that nurtures the educational success of future generations.

 Troico
This tired apartment was purchased by a traditional Japanese family with the intent of turning it into the ultimate minimalist retreat. Inspired by their home land, they envisioned a home with clean lines, a natural colour palette and a calming aura.
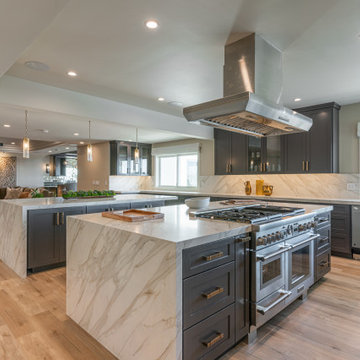
Opening up the wall between the galley kitchen and the living room to create a larger space was imperative. Structural considerations were budgeted for to remove the wall in this low rise wood frame building. Allocating part of the budget to complete this look proved well worth the investment as the finished space gives the kitchen an open and airy feeling that was desired. The kitchen was expanded along the prior living room wall. Simplistic colours of whites, creams and wood tones were used to achieve the desired look.
Flair was added with sculptural light fixtures and geometric accents. The island was lit with a side mounted fixture, and the waterfall island that was purposely cut on an angle to add an interesting depth to the otherwise clean lines. Vinyl flooring in a wood tone was used to achieve a classic wood floor look while maintaining durability.
European appliances were chosen to keep the modern, clean lines in place. A microwave was placed in the lower island in order to ensure that it was relatively hidden. The kitchen backsplash was mixed to provide further depth and dimension. A 4 inch splash matching the countertops was run on the sink wall to keep with the minimalist feel, while a bolder patterned large format tile in all white was used to create texture on the stove wall and provide adequate coverage while cooking on the range. Thin profile edge pull handles were strategically placed to be functional but unimposing.
 Tile Doctor Ltd
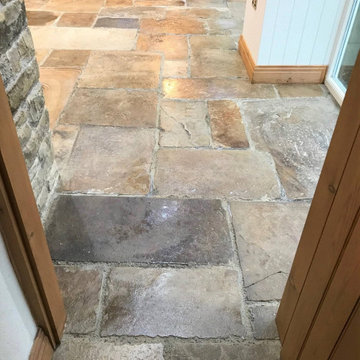
We had been to maintain this Sandstone floor about two years previously at a property in the pretty area of Windermere in the English Lake District. The client had run out of our Tile Doctor Neutral Tile Cleaner that we left after completing the job and had started using a standard cleaner instead (a well-known ecological cleaner). Unfortunately, this product has a 5% non-ionic surfactant in its chemical structure, which will strip a coat of stone sealer off the surface within 6 months, once that topcoat has been removed the sealed surface is only 50% as strong as it should be.
Readers of this article should be aware that even washing up liquid which is a degreaser will strip sealers although it will take many months of regular use before you will start to notice an issue. Stronger bleach-based cleaning products such as Flash and Domestos will cause instant damage to stone sealer which will often go an off-white colour as a result. So, the importance of using the right cleaner is imperative. Having used our services on this floor previously he client knew what to expect and was happy to go ahead with our quote.
My first task would be to clean the floor and completely remove what was left of the old sealer to ensure the floor would have a consistent appearance. On this occasion I used a strong 1:3 dilution of Tile Doctor Pro-Clean worked into the floor with a Black buffing pad fitted to a rotary buffing machine. The Sandstone floor was then rinsed with water, scrubbed again and then the waste extracted using a wet vacuum.
This was followed with acid rinse using a 1:5 dilution of Tile Doctor Grout Clean-Up, this is a Phosphoric Acid (not a Brick Acid). After being scrubbed into the tile it was rinsed off the floor as before using water and the wet vacuum. This process further cleans the stone and neutralises the floor after the use of the strong alkaline Pro-Clean used earlier.
Before leaving for the day I gave the floor one final rinse with water and then dried the floor as much as possible with the wet vacuum. The floor was now clean and free of sealer and left to fully dry off overnight.
I came back the following morning and started by testing the floor with the moisture meter. I always do this as I know from experience how important it is to ensure the floor is dry before applying a sealer.
Happy the Sandstone was dry I then proceed to apply the first of what would be four coats of sealer. For this I used Tile Doctor Seal and Go which leaves a nice low sheen finish. This product is specially formulated blend of acrylic polymers that provides will protect the floor from ingrained dirt and staining; it will make the floor easy to clean and has the added advantage of being water based so it doesn’t leave a solvent smell as it dries.
The client was left another complimentary bottle of Tile Doctor Neutral cleaner and hopefully the seal will last a long longer the 2nd time around. The client was pleased the floor had been restored and vowed to use nothing but Tile Doctor products on it in the future.
Heidi Taylor
South Cumbria Tile Doctor

 McCullough's Flooring
Gorgeous master bath finished with Dal-Tile's Fabrique porcelain tile in the color Noir Linen polished. Tile size is 12"x24" installed in a brick joint pattern. The floor boasts underfloor heating on a timed thermostat.

 Renovisions
 It’s no surprise these Hanover clients reached out to Cathy and Ed of Renovisions for design and build services as they wanted a local professional bath specialist to turn their plain builder-grade bath into a luxurious handicapped accessible master bath.
Renovisions had safety and universal design in mind while creating this customized two-person super shower and well-appointed master bath so their clients could escape to a special place to relax and energize their senses while also helping to conserve time and water as it is used simultaneously by them.
This completely water proofed spacious 4’x8’ walk-in curb-less shower with lineal drain system and larger format porcelain tiles was a must have for our senior client –with larger tiles there are less grout lines, easier to clean and easier to maneuver using a walker to enter and exit the master bath.
Renovisions collaborated with their clients to design a spa-like bath with several amenities and added conveniences with safety considerations. The bench seat that spans the width of the wall was a great addition to the shower. It’s a comfortable place to sit down and stretch out and also to keep warm as electric mesh warming materials were used along with a programmable thermostat to keep these homeowners toasty and cozy!
Careful attention to all of the details in this master suite created a peaceful and elegant environment that, simply put, feels divine. Adding details such as the warming towel rack, mosaic tiled shower niche, shiny polished chrome decorative safety grab bars that also serve as towel racks and a towel rack inside the shower area added a measure of style. A stately framed mirror over the pedestal sink matches the warm white painted finish of the linen storage cabinetry that provides functionality and good looks to this space. Pull-down safety grab bars on either side of the comfort height high-efficiency toilet was essential to keep safety as a top priority.
Water, water everywhere for this well deserving couple – multiple shower heads enhances the bathing experience for our client with mobility issues as 54 soft sprays from each wall jet provide a soothing and cleansing effect – a great choice because they do not require gripping and manipulating handles yet provide a sleek look with easy cleaning. The thermostatic valve maintains desired water temperature and volume controls allows the bather to utilize the adjustable hand-held shower on a slide-bar- an ideal fixture to shower and spray down shower area when done.
A beautiful, frameless clear glass enclosure maintains a clean, open look without taking away from the stunning and richly grained marble-look tiles and decorative elements inside the shower. In addition to its therapeutic value, this shower is truly a design focal point of the master bath with striking tile work, beautiful chrome fixtures including several safety grab bars adding aesthetic value as well as safety benefits.

 GS Construction
Example of a small classic 3/4 white tile and stone tile mosaic tile floor alcove shower design in Chicago with an undermount sink, recessed-panel cabinets, black cabinets, quartzite countertops, a two-piece toilet and gray walls
20