
Search results for "Implementing streamlined" in Home Design Ideas
 TKS Design Group
Download our free ebook, Creating the Ideal Kitchen. DOWNLOAD NOW
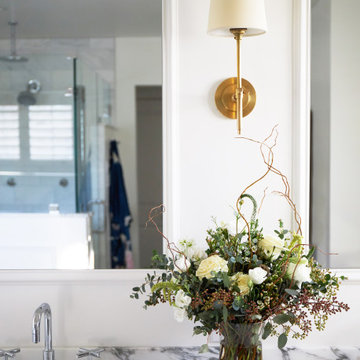
A tired primary bathroom, with varying ceiling heights and a beige-on-beige color scheme, was screaming for love. Squaring the room and adding natural materials erased the memory of the lack luster space and converted it to a bright and welcoming spa oasis. The home was a new build in 2005 and it looked like all the builder’s material choices remained. The client was clear on their design direction but were challenged by the differing ceiling heights and were looking to hire a design-build firm that could resolve that issue.
This local Glen Ellyn couple found us on Instagram (@kitchenstudioge, follow us ?). They loved our designs and felt like we fit their style. They requested a full primary bath renovation to include a large shower, soaking tub, double vanity with storage options, and heated floors. The wife also really wanted a separate make-up vanity. The biggest challenge presented to us was to architecturally marry the various ceiling heights and deliver a streamlined design.
The existing layout worked well for the couple, so we kept everything in place, except we enlarged the shower and replaced the built-in tub with a lovely free-standing model. We also added a sitting make-up vanity. We were able to eliminate the awkward ceiling lines by extending all the walls to the highest level. Then, to accommodate the sprinklers and HVAC, lowered the ceiling height over the entrance and shower area which then opens to the 2-story vanity and tub area. Very dramatic!
This high-end home deserved high-end fixtures. The homeowners also quickly realized they loved the look of natural marble and wanted to use as much of it as possible in their new bath. They chose a marble slab from the stone yard for the countertops and back splash, and we found complimentary marble tile for the shower. The homeowners also liked the idea of mixing metals in their new posh bathroom and loved the look of black, gold, and chrome.
Although our clients were very clear on their style, they were having a difficult time pulling it all together and envisioning the final product. As interior designers it is our job to translate and elevate our clients’ ideas into a deliverable design. We presented the homeowners with mood boards and 3D renderings of our modern, clean, white marble design. Since the color scheme was relatively neutral, at the homeowner’s request, we decided to add of interest with the patterns and shapes in the room.
We were first inspired by the shower floor tile with its circular/linear motif. We designed the cabinetry, floor and wall tiles, mirrors, cabinet pulls, and wainscoting to have a square or rectangular shape, and then to create interest we added perfectly placed circles to contrast with the rectangular shapes. The globe shaped chandelier against the square wall trim is a delightful yet subtle juxtaposition.
The clients were overjoyed with our interpretation of their vision and impressed with the level of detail we brought to the project. It’s one thing to know how you want a space to look, but it takes a special set of skills to create the design and see it thorough to implementation. Could hiring The Kitchen Studio be the first step to making your home dreams come to life?
 TKS Design Group
Download our free ebook, Creating the Ideal Kitchen. DOWNLOAD NOW
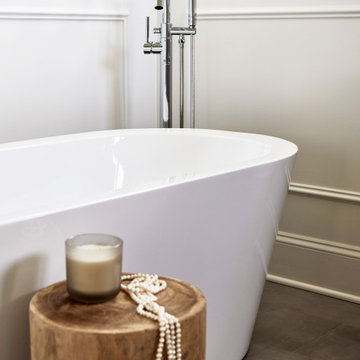
A tired primary bathroom, with varying ceiling heights and a beige-on-beige color scheme, was screaming for love. Squaring the room and adding natural materials erased the memory of the lack luster space and converted it to a bright and welcoming spa oasis. The home was a new build in 2005 and it looked like all the builder’s material choices remained. The client was clear on their design direction but were challenged by the differing ceiling heights and were looking to hire a design-build firm that could resolve that issue.
This local Glen Ellyn couple found us on Instagram (@kitchenstudioge, follow us ?). They loved our designs and felt like we fit their style. They requested a full primary bath renovation to include a large shower, soaking tub, double vanity with storage options, and heated floors. The wife also really wanted a separate make-up vanity. The biggest challenge presented to us was to architecturally marry the various ceiling heights and deliver a streamlined design.
The existing layout worked well for the couple, so we kept everything in place, except we enlarged the shower and replaced the built-in tub with a lovely free-standing model. We also added a sitting make-up vanity. We were able to eliminate the awkward ceiling lines by extending all the walls to the highest level. Then, to accommodate the sprinklers and HVAC, lowered the ceiling height over the entrance and shower area which then opens to the 2-story vanity and tub area. Very dramatic!
This high-end home deserved high-end fixtures. The homeowners also quickly realized they loved the look of natural marble and wanted to use as much of it as possible in their new bath. They chose a marble slab from the stone yard for the countertops and back splash, and we found complimentary marble tile for the shower. The homeowners also liked the idea of mixing metals in their new posh bathroom and loved the look of black, gold, and chrome.
Although our clients were very clear on their style, they were having a difficult time pulling it all together and envisioning the final product. As interior designers it is our job to translate and elevate our clients’ ideas into a deliverable design. We presented the homeowners with mood boards and 3D renderings of our modern, clean, white marble design. Since the color scheme was relatively neutral, at the homeowner’s request, we decided to add of interest with the patterns and shapes in the room.
We were first inspired by the shower floor tile with its circular/linear motif. We designed the cabinetry, floor and wall tiles, mirrors, cabinet pulls, and wainscoting to have a square or rectangular shape, and then to create interest we added perfectly placed circles to contrast with the rectangular shapes. The globe shaped chandelier against the square wall trim is a delightful yet subtle juxtaposition.
The clients were overjoyed with our interpretation of their vision and impressed with the level of detail we brought to the project. It’s one thing to know how you want a space to look, but it takes a special set of skills to create the design and see it thorough to implementation. Could hiring The Kitchen Studio be the first step to making your home dreams come to life?

 Mark S. Garff, Landscape Architect
Already partially enclosed by an ipe fence and concrete wall, our client had a vision of an outdoor courtyard for entertaining on warm summer evenings since the space would be shaded by the house in the afternoon. He imagined the space with a water feature, lighting and paving surrounded by plants.
With our marching orders in place, we drew up a schematic plan quickly and met to review two options for the space. These options quickly coalesced and combined into a single vision for the space. A thick, 60” tall concrete wall would enclose the opening to the street – creating privacy and security, and making a bold statement. We knew the gate had to be interesting enough to stand up to the large concrete walls on either side, so we designed and had custom fabricated by Dennis Schleder (www.dennisschleder.com) a beautiful, visually dynamic metal gate.
Other touches include drought tolerant planting, bluestone paving with pebble accents, crushed granite paving, LED accent lighting, and outdoor furniture. Both existing trees were retained and are thriving with their new soil.
Photography by: http://www.coreenschmidt.com/
Find the right local pro for your project

 Travis Mark Photography
Travis Mark
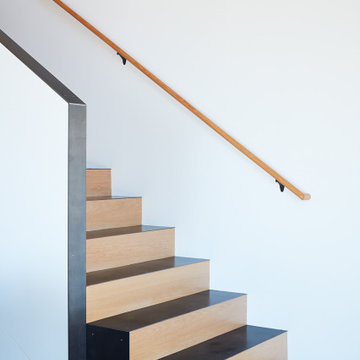
Inspiration for a contemporary straight staircase remodel in New York
Inspiration for a contemporary straight staircase remodel in New York
 Allreno
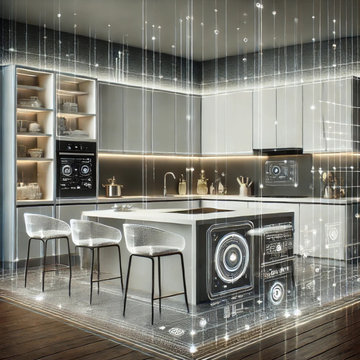
In What Order Should You Renovate a Kitchen? Revolutionizing Kitchen and Bath Renovation with Allreno's Design AI
Renovating a kitchen can be one of the most exciting and rewarding home improvement projects. However, with so many decisions to make, it can also be overwhelming. From selecting kitchen cabinets to choosing countertops and appliances, the process often involves careful planning and organization. So, how do you ensure the renovation goes smoothly? One important factor is knowing the right order in which to tackle the project.
The Right Order for Kitchen Renovation
Renovating a kitchen involves multiple steps, and knowing the proper order of operations is crucial for both time efficiency and cost savings. Here’s a general guideline for how to approach your kitchen renovation:
1. Planning and Design: The first step in any renovation is planning. This includes deciding on the layout, design, and features you want in your kitchen. At this stage, you’ll also need to think about your budget and timeline. It’s essential to finalize these details before moving forward with the actual work.
2. Demolition: Once the design is set, it’s time to remove old fixtures, cabinets, appliances, and flooring. Demolition can be a messy process, but it’s necessary for starting fresh. Having a professional handle this phase is often a smart move to ensure everything is safely removed.
3. Structural Work: If you plan on altering the layout of the kitchen by knocking down walls or adding new plumbing or electrical work, now is the time to do it. Structural changes can be complicated and costly, so it’s important to ensure these are completed before installing any new elements.
4. Plumbing and Electrical Work: With the structure in place, you can begin installing plumbing and electrical systems. This might include adding new water lines, sinks, or electrical outlets for appliances. It’s best to bring in licensed professionals for this stage, as electrical and plumbing work requires expert knowledge.
5. Cabinet Installation: Once the plumbing and electrical work are in place, you can install the kitchen cabinets. Cabinets are one of the most important elements of the kitchen, and the Allreno design AI can make this process easier. Allreno's AI-driven platform allows you to visualize how different kitchen cabinets will fit into your space, ensuring you make the best choice based on your preferences and layout.
6. Countertops: After the cabinets are installed, it’s time to add countertops. Whether you choose granite, quartz, or a more budget-friendly option, countertops are a focal point of the kitchen, and they should complement the cabinets and other design elements.
7. Flooring: Now that the major structural elements are in place, it’s time to install your flooring. Whether you opt for tile, hardwood, or vinyl, flooring should be installed after the cabinets and countertops to prevent any damage during the installation process.
8. Appliances and Fixtures: With the foundation in place, you can now add your appliances (oven, refrigerator, dishwasher, etc.) and fixtures (sink, faucets, lighting). Allreno’s AI can also help here by offering kitchen design recommendations based on available appliances and space dimensions.
9. Final Touches: The last step is adding the finishing touches to your kitchen. This includes painting the walls, adding backsplash tiles, and installing accessories like handles and knobs on your cabinets. This is also the stage where you can implement any stylistic choices to make the space uniquely yours.
How Allreno's AI Transforms the Renovation Process
One of the biggest challenges of a kitchen renovation is visualizing how everything will come together. Allreno’s design AI changes that by offering an intuitive platform that brings your ideas to life. Here’s how:
• Personalized Design Recommendations: Allreno’s AI suggests design elements based on your preferences, style, and space dimensions. Whether it’s selecting the perfect kitchen cabinets or countertop finishes, the AI ensures everything works together cohesively.
• 3D Visualization: With Allreno’s AI-driven design tools, you can visualize your kitchen layout in 3D before any work begins. This allows you to see how different elements will fit into your space and make adjustments as needed.
• Efficient Project Management: Allreno helps you streamline the entire renovation process by generating accurate material lists, estimates, and timelines. This means you can avoid costly errors and keep your renovation on track.
Conclusion
Renovating a kitchen is an exciting project, but it requires careful planning and organization to ensure it’s done right. By following a strategic order of operations and leveraging cutting-edge technology like Allreno’s design AI, homeowners can streamline the process, save time and money, and bring their dream kitchen to life with ease. Allreno not only simplifies the design process but also provides innovative solutions that make kitchen and bath renovations faster and more efficient than ever before.
Ready to get started with your kitchen renovation? Allreno's AI-powered design platform is here to help you every step of the way.

 Santa Barbara Home Design
Design Consultant Jeff Doubét is the author of Creating Spanish Style Homes: Before & After – Techniques – Designs – Insights. The 240 page “Design Consultation in a Book” is now available. Please visit SantaBarbaraHomeDesigner.com for more info.
Jeff Doubét specializes in Santa Barbara style home and landscape designs. To learn more info about the variety of custom design services I offer, please visit SantaBarbaraHomeDesigner.com
Jeff Doubét is the Founder of Santa Barbara Home Design - a design studio based in Santa Barbara, California USA.


 Lisa Tharp Design
Governor's House Entry by Lisa Tharp. 2019 Bulfinch Award - Interior Design. Photo by Michael J. Lee
Transitional painted wood floor foyer photo with white walls and a black front door
Transitional painted wood floor foyer photo with white walls and a black front door

 KINGDOM WOODWORKS
Collaboration with Canonbury Homes and Frank Neely Design Associates.
Inspiration for a timeless open concept kitchen remodel in Atlanta with beaded inset cabinets and two islands
Inspiration for a timeless open concept kitchen remodel in Atlanta with beaded inset cabinets and two islands


 McCullough's Flooring
Gorgeous master bath finished with Dal-Tile's Fabrique porcelain tile in the color Noir Linen polished. Tile size is 12"x24" installed in a brick joint pattern. The floor boasts underfloor heating on a timed thermostat.

 CairnsCraft Design & Remodel
Great spacious bathroom with lot of amenities.
Photographer: Jon Upson
Large elegant master beige tile and porcelain tile drop-in bathtub photo in San Diego with an undermount sink, raised-panel cabinets, medium tone wood cabinets, granite countertops, beige walls and a two-piece toilet
Large elegant master beige tile and porcelain tile drop-in bathtub photo in San Diego with an undermount sink, raised-panel cabinets, medium tone wood cabinets, granite countertops, beige walls and a two-piece toilet



 Spire North
Tucked away in the backwoods of Torch Lake, this home marries “rustic” with the sleek elegance of modern. The combination of wood, stone and metal textures embrace the charm of a classic farmhouse. Although this is not your average farmhouse. The home is outfitted with a high performing system that seamlessly works with the design and architecture.
The tall ceilings and windows allow ample natural light into the main room. Spire Integrated Systems installed Lutron QS Wireless motorized shades paired with Hartmann & Forbes windowcovers to offer privacy and block harsh light. The custom 18′ windowcover’s woven natural fabric complements the organic esthetics of the room. The shades are artfully concealed in the millwork when not in use.
Spire installed B&W in-ceiling speakers and Sonance invisible in-wall speakers to deliver ambient music that emanates throughout the space with no visual footprint. Spire also installed a Sonance Landscape Audio System so the homeowner can enjoy music outside.
Each system is easily controlled using Savant. Spire personalized the settings to the homeowner’s preference making controlling the home efficient and convenient.

 Amy Martin Landscape Design
www.jfaynovakphotography.com
This is an example of a large modern partial sun side yard concrete paver formal garden in Boston for fall.
This is an example of a large modern partial sun side yard concrete paver formal garden in Boston for fall.

 Taylor Knights
Peter Clarke
Staircase - small contemporary metal straight metal railing staircase idea in Melbourne with metal risers
Staircase - small contemporary metal straight metal railing staircase idea in Melbourne with metal risers

 Estero Builders, Inc.
Sandprints Photography
Inspiration for a mid-sized contemporary backyard deck remodel in San Luis Obispo with a fire pit and no cover
Inspiration for a mid-sized contemporary backyard deck remodel in San Luis Obispo with a fire pit and no cover


 Prestige Custom Building & Construction, Inc.
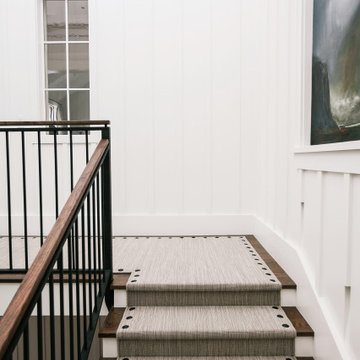
Staircase - mid-sized traditional wooden straight wood railing staircase idea in New York with painted risers
3