
Search results for "Improves safety" in Home Design Ideas

 MasterDecks, LLC
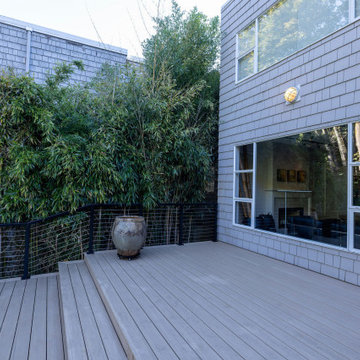
This Kirkland, WA deck resurfacing and repair project involved extensive structural upgrades and a complete transformation of the deck's appearance while preserving the existing framework where possible.
The scope included removing an aging hot tub, demolishing an existing half wall, and replacing it with a modern aluminum cable railing system to improve views and safety. Areas of siding affected by the half wall were repaired and restored to create a clean, finished appearance.
Due to moisture-related wear, 12 deck joists and their hangers were replaced as part of the structural rehabilitation. The deck, which features approximately 300 square feet of elevated surface reaching nearly 16 feet above grade, required careful material handling and installation due to steep terrain and limited side-yard access.
The existing decking was replaced with premium TimberTech Terrain composite decking in Vintage Weathered Teak, creating a low-maintenance outdoor living space with the warmth and character of natural wood. New picture-framed borders and finishing details enhanced the overall appearance, while strategic fascia installation was completed on visible interior step-down areas.
The result is a safer, stronger, and more visually appealing deck that maximizes the property's views while providing years of low-maintenance performance.
 Gilbert Design Build
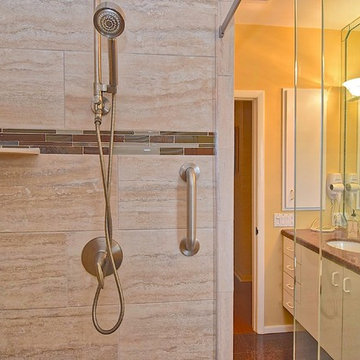
This Bradenton bathroom remodel transformed a traditional bathtub into a spacious walk-in shower designed for comfort, accessibility, and modern style. The new shower features neutral porcelain tile, built-in shelving for convenient storage, and a sleek glass enclosure that keeps the space open and bright. Safety grab bars and a handheld shower fixture add functionality while maintaining a clean, contemporary look. The updated design creates a practical and elegant shower space that improves both accessibility and everyday usability.
Find the right local pro for your project
 Wood and Hearts
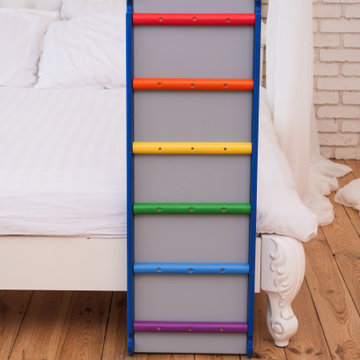
● The Climbing furniture is made from high-class polished birch plywood. Birchwood is very strong and flexible. The products are tested at a load of 100 kg, but the maximum load for use is 60 kg. We make sure that everything is brought to perfect condition.
● It is absolutely safe for children: for painting, we use only high-quality, sustainable water-based paints, environmentally friendly varnish. And that’s why our products do not cause any allergic reactions, do not emit harmful substances.
● Climbing set like one of the foundations of Montessori teachings helps developing independence. Children independently work on the improvement of their motor skills (explore their body limits in a safe manner) and encourage children's imagination.
● Our furniture is CE and CPC certified due to the major international toy safety standards, including EN71, ASTM F963, 16CFR, and 15USC 1278a
DIMENSIONS
•━━━━━━━━━━━━━━━━━•
● Climbing ramp
Small size (with sidewalls and a ladder):
Height: 98.5 cm / 38.78 inches
Width: 31 cm/ 12.2 inches
ATTENTION
•━━━━━━━━━━━━━━━━━•
⚠️ This set DOES NOT CONTAIN ANY DANGEROUS CHEMICAL ELEMENTS AND IS SAFE FOR YOUR BABY!!!
⚠️ Watch your children during games on children's furniture!!! Always be vigilant during children's games!!!
⚠️ The color of the product may be slightly different (lighter / darker) because it is made of natural wood.

 Calgary Bath Renos
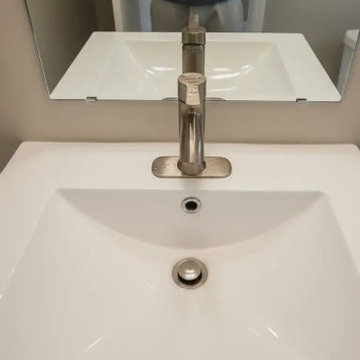
This project involved a small bathroom in a 1970s detached home in Dalhousie, NW Calgary. The layout measured approximately 5×8 feet and remained unchanged to control plumbing costs.
The primary goal was improving usability and correcting moisture-related concerns without expanding the footprint.

 McKay Landscape Lighting
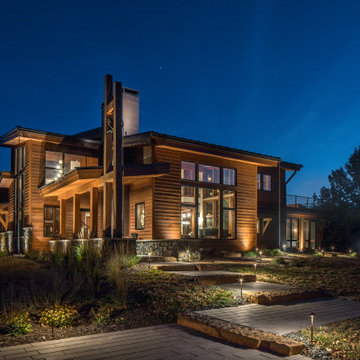
"The owner wanted to softly highlight the architectural features - nothing over the top - and improve visibility. The home sits on top of a hill near a wooded area. The secluded property was very dark at night," explains Coleman, outdoor lighting designer at McKay Landscape Lighting. The house pairs rustic and modern elements, "We wanted the lighting to naturally blend and enhance the different textures and elements they picked."
Coleman strategically uplit the house, creating unique shadowing effects while enhancing the beautiful stonework, wood cedar siding, and clean pitched roofline. A spotlight accents the stone chimney. The brick paved walkway to the front entrance is paired with stone steps to give it a rustic feel, "we staggered path lights to mark the elevation change and safely guide people to the front door."
read more: www.mckaylighting.com/blog/architectural-lighting-enhance-elkorn-home
 TrueMark Repair
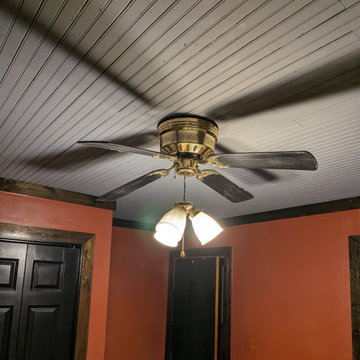
TrueMark provides specialized home solutions that enhance everyday living. In this project, we replaced an outdated or non-functional fixture with a high-efficiency ceiling fan.
Beyond the physical mounting, we ensured the unit was properly balanced for silent operation and securely anchored to the ceiling box for safety. This installation not only improves the room's air circulation but also adds a refreshed aesthetic to the space. Whether it's a precision door retrofit or an essential fixture upgrade, Jake ensures every detail is handled with professional care.
 Mediterrasian Landscapes
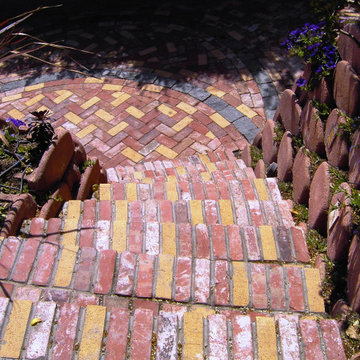
This house had a driveway that was too steep and too narrow to be used at all. We regraded the driveway and paved it with bricks laid out in a custom design. We shored up the yard with planted retaining walls and improved access to the house from the driveway with a new, colorful brick stairway. Our sculptor designed and created striking ceramic planters to beautify the original front stairs and also double as a safety rail. We also built a new patio with artistic stone paving that turned an unuseable front yard into an intriguing terrace with a viiew.
 DRIVEWAYS BY DESIGN
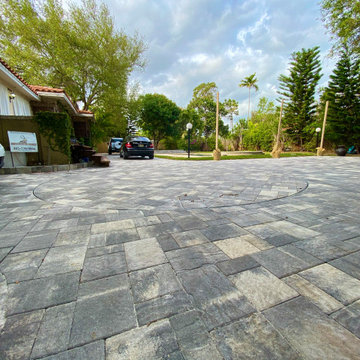
At Driveways by Design, safety and functionality are paramount to us. Peace of mind that your vehicle will enter and exit in a forward position, eliminating unwanted turns, blind spots, or backing out onto busy streets, all are priceless. When designing a driveway, it’s not just about the proper materials, the latest trends, style, colors, but it is also about the impact on the household, environment, and infrastructure. Nowadays many factors affect the daily life of south floridians, i.e. the heat island effect, some cities no longer allow circular driveways (zoning codes have become very restrictive about the amount that can be paved in order to mitigate the heat island effect,) construction happening all over our city, poor transportation systems, a turntable can truly enhance our daily experience, making it easier to exit our homes, no more agglomerations of traffic, or concrete trucks backing out, and no more worries about children or pets running unexpectedly behind the car. Designed by Shosh vant Verlaat and installed/maintained by Driveways by Design, the Car Turntable is ideal for residential and commercial applications, and will maximize the use of space, improve driver's visibility, as well as add value to your property.
 Arani Construction
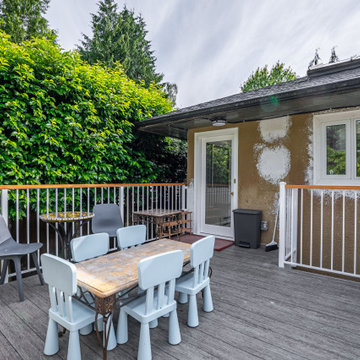
This expanded backyard deck was constructed as part of a full house renovation in the Kerrisdale neighbourhood of Vancouver. The deck extension created a larger outdoor living area connected directly to the home’s interior spaces, providing a practical setting for family gatherings and outdoor dining.
A durable vinyl deck surface was installed to improve weather resistance and long-term maintenance performance. New aluminum guardrails with a wood top rail were added to enhance safety while maintaining a clean, contemporary appearance that complements the surrounding garden landscape.
During construction, infrastructure was also prepared for a future outdoor kitchen installation. Water supply, drainage, and gas lines were strategically roughed-in beneath the deck to allow easy integration of cooking and entertainment features in the future.
 Raynor Garage Doors
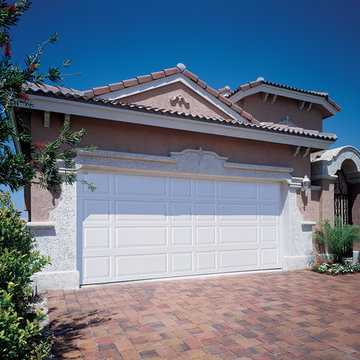
Innovations Series steel garage doors provide the ultimate in safety, quality, and energy efficiency in a steel, three-layer construction door design. The Innovations Series features Raynor's patented Finger Protection System, not found in standard steel garage door lines and mix and match panel designs.
 Get My Rugs LLC
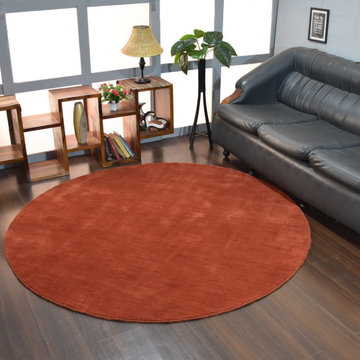
Improve your living room or bedroom begins with the perfect area rug—an essential element that enhances both style and functionality. A well-chosen rug not only anchors the room but also adds warmth, texture, and a touch of personality to your space. Whether you’re decorating a cozy bedroom or a spacious living room, selecting the right rug is crucial to achieving a harmonious and inviting atmosphere.
Design and Style: The design of your area rug can dramatically influence the overall look of your space. For a luxurious touch, consider hand-tufted or hand-knotted rugs, which offer intricate patterns and rich textures. These rugs are often crafted with attention to detail, making them ideal for adding an elegant statement to any room. If you prefer a more modern approach, machine-woven rugs are a great choice. They come in a variety of vibrant patterns and colors and are built to withstand heavy foot traffic thanks to their heat-set fibers. For a versatile option, flat-woven rugs, such as kilims, provide a reversible design that fits seamlessly into both contemporary and traditional decor.
Materials and Comfort: When selecting a rug, the material plays a significant role in both its appearance and comfort. Shag and flokati rugs are perfect for creating a plush, cozy environment. Their long, soft fibers add a layer of comfort underfoot, making your living room or bedroom feel more inviting. Hand-loomed rugs offer unique textures and artisanal quality, while braided and hand-hooked rugs add a charming, handcrafted touch. For practical maintenance, machine washable rugs are a smart choice. They allow for easy cleaning and help maintain a fresh look with minimal effort.
Functionality and Practical Features: Beyond aesthetics, consider the functionality of your rug. Stain-resistant and water-resistant rugs are ideal for managing spills and stains, ensuring that your rug remains in good condition over time. Non-slip and adhesive backings are essential for safety, particularly on hardwood floors. These features prevent the rug from shifting and reduce the risk of slips and falls. Additionally, cushioned rugs enhance comfort, making your space not only stylish but also more enjoyable to relax in.
Customization and Personalization: Add a unique touch to your space with custom or personalized rug options. An 8x10 area rug is a popular choice for covering large areas and can be tailored to fit specific dimensions or design preferences. Personalized features, such as fringe details or organic textures, allow you to create a rug that reflects your individual style and complements your existing decor.
Versatility and Maintenance: The top 15 area rugs available today offer a diverse range of styles and features to suit various needs. From distressed designs that add character to contemporary patterns that offer a modern edge, there is a rug to match every aesthetic. Large rugs for living rooms and bedrooms can help define the space and create a cohesive look, while huge carpets can make a bold statement. Consider the practicality of each rug, ensuring that it not only enhances your decor but also withstands everyday use.
In Summary: Selecting the ideal area rug involves finding a balance between style and practicality. Whether you opt for a luxurious hand-tufted design, a durable machine-woven option, or a versatile flat-woven style, the right rug will elevate your living room, bedroom, or any other space. By exploring various options and considering both design and functionality, you can find the perfect rug that transforms your space into a stylish, comfortable haven.


 Talon Construction Inc.
Designing and building a kitchen addition is a complex process that involves multiple steps and considerations. Here is a general outline to help you get started on your kitchen addition project:
Define Your Goals and Budget:
• Determine the purpose of the kitchen addition. Is it for more cooking space, a dining area, or a combination of both?
• Establish a realistic budget for your project. Consider all costs, including construction, permits, materials, and furnishings.
Hire a Design Professional:
• Seek the services of a design build company who specializes in kitchen additions.
• Discuss your vision, needs, and budget with the design professional to create a design concept.
Site Evaluation:
• Assess the existing space and structural condition of your home to ensure it can support the addition.
• Consider factors like zoning regulations, setbacks, and building codes.
Design Development:
• Collaborate with your design professional to refine the concept, including the layout, size, and architectural style.
• Choose materials, finishes, and fixtures that fit your design and budget.
Obtain Permits:
• Consult with your local design build contractor to determine the necessary permits and approvals.
• Prepare and submit all required documents, including architectural drawings and engineering plans.
Create Construction Documents:
• Work with your design build professional to develop detailed construction drawings and specifications.
• These documents will serve as a guide for contractors during construction.
Hire a design build contractor:
• Check references, credentials, and licenses before selecting a contractor.
• Sign a detailed contract that outlines the scope of work, timeline, and payment schedule.
Construction Phase:
• Demolition: If needed, remove any existing structures or walls.
• Foundation: Construct the foundation for the addition.
• Framing: Build the structural framework of the addition.
• Plumbing, Electrical, and HVAC: Install or update utilities as required.
• Insulation: Ensure proper insulation for energy efficiency.
• Drywall and Finish Work: Complete the walls and ceilings.
• Flooring and Cabinetry: Install flooring and kitchen cabinets.
• Appliances and Fixtures: Add appliances, plumbing fixtures, and lighting.
• Paint and Finish: Apply paint and finishes to achieve the desired look.
• Final Inspection: Schedule inspections to ensure compliance with building codes.
Final Inspections and Approvals:
• Arrange for final inspections to ensure the addition meets all safety and code requirements.
• Obtain any necessary certificates of occupancy or compliance.
Move In and Enjoy:
• Once all inspections and approvals are received, you can move into your new kitchen addition and start enjoying it.
Remember that every kitchen addition project is unique, so adapt this outline to your specific needs and circumstances. Consulting with professionals and obtaining the required permits and inspections is crucial to a successful and safe project.
 Talon Construction Inc.
Designing and building a kitchen addition is a complex process that involves multiple steps and considerations. Here is a general outline to help you get started on your kitchen addition project:
Define Your Goals and Budget:
• Determine the purpose of the kitchen addition. Is it for more cooking space, a dining area, or a combination of both?
• Establish a realistic budget for your project. Consider all costs, including construction, permits, materials, and furnishings.
Hire a Design Professional:
• Seek the services of a design build company who specializes in kitchen additions.
• Discuss your vision, needs, and budget with the design professional to create a design concept.
Site Evaluation:
• Assess the existing space and structural condition of your home to ensure it can support the addition.
• Consider factors like zoning regulations, setbacks, and building codes.
Design Development:
• Collaborate with your design professional to refine the concept, including the layout, size, and architectural style.
• Choose materials, finishes, and fixtures that fit your design and budget.
Obtain Permits:
• Consult with your local design build contractor to determine the necessary permits and approvals.
• Prepare and submit all required documents, including architectural drawings and engineering plans.
Create Construction Documents:
• Work with your design build professional to develop detailed construction drawings and specifications.
• These documents will serve as a guide for contractors during construction.
Hire a design build contractor:
• Check references, credentials, and licenses before selecting a contractor.
• Sign a detailed contract that outlines the scope of work, timeline, and payment schedule.
Construction Phase:
• Demolition: If needed, remove any existing structures or walls.
• Foundation: Construct the foundation for the addition.
• Framing: Build the structural framework of the addition.
• Plumbing, Electrical, and HVAC: Install or update utilities as required.
• Insulation: Ensure proper insulation for energy efficiency.
• Drywall and Finish Work: Complete the walls and ceilings.
• Flooring and Cabinetry: Install flooring and kitchen cabinets.
• Appliances and Fixtures: Add appliances, plumbing fixtures, and lighting.
• Paint and Finish: Apply paint and finishes to achieve the desired look.
• Final Inspection: Schedule inspections to ensure compliance with building codes.
Final Inspections and Approvals:
• Arrange for final inspections to ensure the addition meets all safety and code requirements.
• Obtain any necessary certificates of occupancy or compliance.
Move In and Enjoy:
• Once all inspections and approvals are received, you can move into your new kitchen addition and start enjoying it.
Remember that every kitchen addition project is unique, so adapt this outline to your specific needs and circumstances. Consulting with professionals and obtaining the required permits and inspections is crucial to a successful and safe project.
 Eagleson Landscape Co.
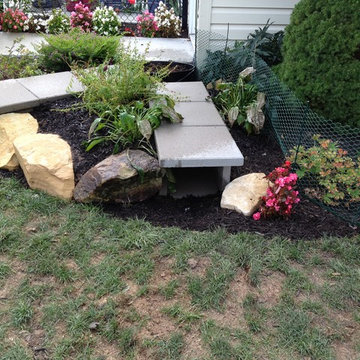
Soon after installation the Bourne family brought two new little additions into the picture. These puppies loved to run around and play, especially in the garden areas. To remedy their tides of terror we built doggy tunnels for there safety and enjoyment!
 Raynor Garage Doors
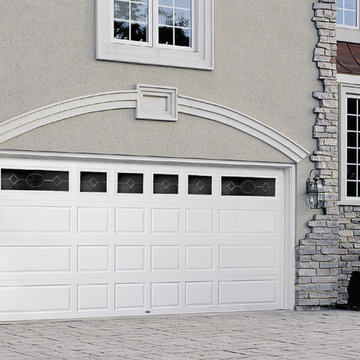
Innovations Series steel garage doors provide the ultimate in safety, quality, and energy efficiency in a steel, three-layer construction door design. The Innovations Series features Raynor's patented Finger Protection System, not found in standard steel garage door lines and mix and match panel designs.
41