
Search results for "Improves" in Home Design Ideas
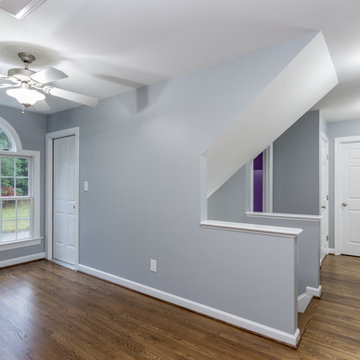
 Paradise Found Construction
Keith and Amy loved their home in quiet Wake Forest neighborhood on a large corner lot on a cul-de-sac. Over time, Amy had developed allergic reactions to unknown allergens in their home. As her condition worsened, it became impossible for her to spend much time in the home, and they were forced to move out and find temporary housing accommodations.
After months of talking with other home improvement providers and indoor air “experts” and trying other solutions to no avail including having their HVAC ducting cleaned, they turned to Paradise Found Construction and our expertise and experience in transforming indoor environments in homes into healthy and clean living spaces. Because many of the improvements we undertook to create a cleaner environment also provided energy savings, we had our work certified under the 2012 National Green Building Standards (NGBS) and were award a Bronze level certification for the home.
We conducted a thorough investigation and testing regimen that included bringing in our team industry leading air quality and HVAC experts, we developed a comprehensive plan of action that would solve their “sick home syndrome”.
We removed all of the carpeting and pad from the home and thoroughly cleaned all surfaces and filtered the air with advanced HEPA filtration units. There were a few areas of mold in the crawl space which we mitigated as well. We thoroughly air sealed the home, paying particular attention to the ground level and attic floor system. Since the HVAC systems and ducting had become re-contaminated, we cleaned both units and all associated duct work.
To eliminate unhealthy air being drawn into the home from the crawl space, we completely sealed and conditioned the crawl. In order to provide a controlled entry point for clean fresh air into the home we installed an energy efficient stand-alone Energy Recovery Ventilator (ERV).
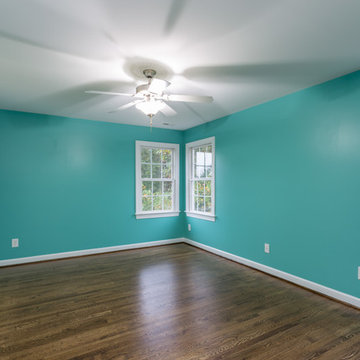
We installed wood flooring in all of the living areas that did not have wood flooring, and finished all of the flooring using a NO-VOC water-based floor finish. All of the painted surfaces of the home were sealed and painted with NO-VOC latex paint.
To further improve the energy performance of the home in addition to thoroughly air-sealing and sealing and conditioning the crawl space, we installed 100% LED lighting in the home. We improved the water efficiency of the home by installing low-flow EPA WaterSense rated toilets and shower heads, converted all of the bathroom and kitchen faucets to be more water efficient.
Upon completion, Amy and her family was able to move back into their cozy and clean “new home”, and are once again able to enjoy and be comfortable in their home.
 Grennan Construction
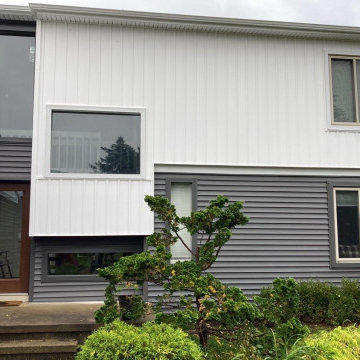
For this home exterior renovation, we removed the existing gutters and downspouts, inspected and replaced any damaged siding, and improved attic ventilation by cutting openings in the eave soffits. To enhance energy efficiency and create a smooth surface, we installed ¾” insulation board, followed by house wrap for added protection. The home was transformed with CertainTeed Monogram .046 vinyl siding in Smokey Gray (clapboard style) on the lower portion and white board and batten siding on the upper portion, separated by a stylish belly band. New vented vinyl soffits, custom bent aluminum trim, and detailed trim work around windows, doors, and fixtures add to the crisp, modern aesthetic. This stunning update improves both curb appeal and long-term durability.
Keywords: Home exterior renovation, vinyl siding installation, CertainTeed Monogram siding, Smokey Gray siding, board and batten siding, attic ventilation, custom aluminum trim, soffit and fascia installation, siding replacement, energy-efficient siding, house wrap, curb appeal upgrade, home improvement, Michigan exterior remodel.
 Paradise Found Construction
Keith and Amy loved their home in quiet Wake Forest neighborhood on a large corner lot on a cul-de-sac. Over time, Amy had developed allergic reactions to unknown allergens in their home. As her condition worsened, it became impossible for her to spend much time in the home, and they were forced to move out and find temporary housing accommodations.
After months of talking with other home improvement providers and indoor air “experts” and trying other solutions to no avail including having their HVAC ducting cleaned, they turned to Paradise Found Construction and our expertise and experience in transforming indoor environments in homes into healthy and clean living spaces. Because many of the improvements we undertook to create a cleaner environment also provided energy savings, we had our work certified under the 2012 National Green Building Standards (NGBS) and were award a Bronze level certification for the home.
We conducted a thorough investigation and testing regimen that included bringing in our team industry leading air quality and HVAC experts, we developed a comprehensive plan of action that would solve their “sick home syndrome”.
We removed all of the carpeting and pad from the home and thoroughly cleaned all surfaces and filtered the air with advanced HEPA filtration units. There were a few areas of mold in the crawl space which we mitigated as well. We thoroughly air sealed the home, paying particular attention to the ground level and attic floor system. Since the HVAC systems and ducting had become re-contaminated, we cleaned both units and all associated duct work.
To eliminate unhealthy air being drawn into the home from the crawl space, we completely sealed and conditioned the crawl. In order to provide a controlled entry point for clean fresh air into the home we installed an energy efficient stand-alone Energy Recovery Ventilator (ERV).
We installed wood flooring in all of the living areas that did not have wood flooring, and finished all of the flooring using a NO-VOC water-based floor finish. All of the painted surfaces of the home were sealed and painted with NO-VOC latex paint.
To further improve the energy performance of the home in addition to thoroughly air-sealing and sealing and conditioning the crawl space, we installed 100% LED lighting in the home. We improved the water efficiency of the home by installing low-flow EPA WaterSense rated toilets and shower heads, converted all of the bathroom and kitchen faucets to be more water efficient.
Upon completion, Amy and her family was able to move back into their cozy and clean “new home”, and are once again able to enjoy and be comfortable in their home.
Find the right local pro for your project
 Hansen's Renovations
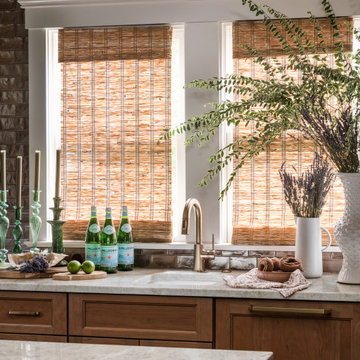
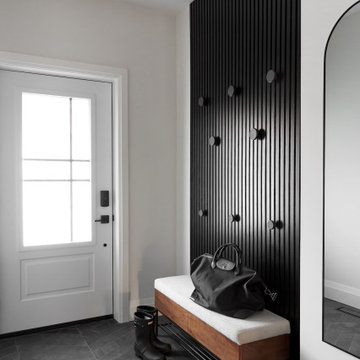
Completed in partnership with LAM Studios Inc., this Fall 2024 renovation transformed multiple areas of a Dilworth home into a cohesive, functional, and beautifully updated living environment. The project included a complete kitchen remodel, living room renovation, bathroom remodel, laundry room update, dining room renovation, fireplace enhancement, and hallway improvements.
The kitchen serves as the centerpiece of the renovation, featuring improved functionality, modern finishes, and a layout designed to support everyday living and entertaining. Adjacent living and dining spaces were thoughtfully redesigned to create a seamless flow throughout the home, while the updated fireplace provides a warm and inviting focal point.
Additional improvements to the bathroom, laundry room, and hallway enhanced both comfort and efficiency, ensuring every space contributes to the home's overall functionality and style. Through careful planning, quality craftsmanship, and timeless design choices, this renovation successfully blends modern living with lasting elegance.
The result is a beautifully refreshed home that feels brighter, more connected, and perfectly tailored to the homeowners' lifestyle.
 Ashton Renovations
This renovation focused on improving flow, function, and safety for a growing family with a newborn, while also enhancing the home’s exterior presence.
Inside, interior walls were removed to open up the main living areas, creating better sightlines, improved natural light, and a more connected layout for everyday family life. The reconfigured space feels brighter, more spacious, and better suited to modern living.
Two bathrooms were renovated as part of the project:
A powder room was updated with clean, modern finishes and luxury vinyl flooring, chosen for its durability, comfort underfoot, and easy maintenance.
The main bathroom was refreshed to balance practicality with a refined, timeless look.
Special attention was given to the stairway, where upgrades were made with safety and comfort in mind—an important consideration for a household with a newborn. Improved finishes and details help make this high-traffic area both functional and visually cohesive with the rest of the home.
The project also included exterior improvements, enhancing curb appeal and tying the updated interior to a refreshed, cohesive exterior look.
Overall, this renovation blends thoughtful planning, durable materials, and family-friendly design to create a home that works beautifully now and well into the future.
 Corinthian Fine Homes
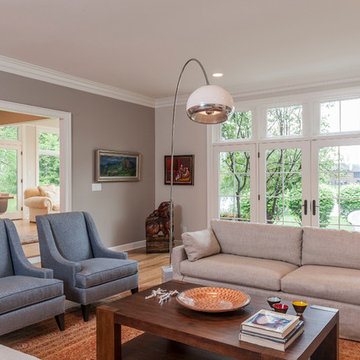
Our homeowner was desirous of an improved floorplan for her Kitchen/Living Room area, updating the kitchen and converting a 3-season room into a sunroom off the kitchen. With some modifications to existing cabinetry in the kitchen and new countertops, backsplash and plumbing fixtures she has an elegant renewal of the space.
Additionally, we created a circular floor plan by opening the wall that separated the living room from the kitchen allowing for much improved function of the space. We raised the floor in the 3-season room to bring the floor level with the kitchen and dining area creating a sitting area as an extension of the kitchen. New windows and French doors with transoms in the sitting area and living room, not only improved the aesthetic but also improved function and the ability to access the exterior patio of the home. With refinished hardwoods and paint throughout, and an updated staircase with stained treads and painted risers, this home is now beautiful and an entertainer’s dream.
 Ashton Renovations
This renovation focused on improving flow, function, and safety for a growing family with a newborn, while also enhancing the home’s exterior presence.
Inside, interior walls were removed to open up the main living areas, creating better sightlines, improved natural light, and a more connected layout for everyday family life. The reconfigured space feels brighter, more spacious, and better suited to modern living.
Two bathrooms were renovated as part of the project:
A powder room was updated with clean, modern finishes and luxury vinyl flooring, chosen for its durability, comfort underfoot, and easy maintenance.
The main bathroom was refreshed to balance practicality with a refined, timeless look.
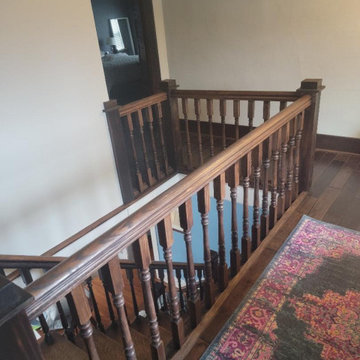
Special attention was given to the stairway, where upgrades were made with safety and comfort in mind—an important consideration for a household with a newborn. Improved finishes and details help make this high-traffic area both functional and visually cohesive with the rest of the home.
The project also included exterior improvements, enhancing curb appeal and tying the updated interior to a refreshed, cohesive exterior look.
Overall, this renovation blends thoughtful planning, durable materials, and family-friendly design to create a home that works beautifully now and well into the future.

 Mottram Architecture
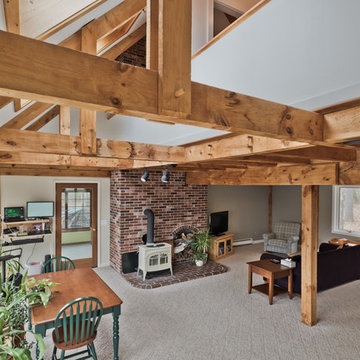
Timber frame homes offer unique challenges during a remodel. What often makes them beautiful and attractive to most homeowners, also makes them challenging for space requirements.
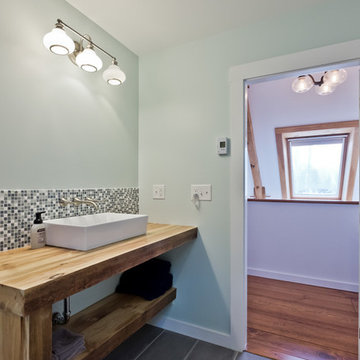
Context: The lovely couple that owned this home were struggling with some interesting floor plan challenges that just didn't work for their family. The loved the beautiful timbers and woodwork of their home, but the dramatically sloping ceilings on the second floor, particularly in the bathroom, just didn't work for this 1 1/2 bath home. Needing to use the skylight to approach the toilet was a less then ideal scenario. Although the bathroom footprint was more then adequate, the sloped ceiling only made half of the space useable. Check out the Before/After post on our blog to see the photos of the house pre-renovation. As much as they loved all the wood features in their home, another challenge they had was light. The wood ceiling made everything inside the house darker, even with a fantastic array of south facing windows, there were spaces in the home that felt dark and small. When they contacted us they wanted to know how could they make their brighter and more inviting, were there solutions to the 2nd floor sloped ceiling issues, and if they were going to do all of this work, how could they make their home more comfortable and efficient. A nagging water leak in the upstairs bathroom spurred them into action and here is how we solved their dilemma.
Conclusion: First, we added a little dormer to the rear of the house so we could get full headroom in nearly all of the upstairs bathroom! Then we decided to extend that dormer one more timber bay over to create a walk in closet with natural light and plenty of space. Since we were contemplating energy efficiency, we resolved a nagging issue that is present in a lot of timber frame construction, air tightness. Commonly found in timber frame construction, fiberglass insulation is installed in the rafter bays and board ceilings are installed over top. Unfortunately, board ceilings are anything but air tight, and fiberglass insulation needs to be in an airtight cavity for maximum effectiveness. So we were able to solve two issues at the same time for this homeowner. We removed the board ceiling and fiberglass insulation, we dense packed the rafter bays with cellulose insulation, and installed sheetrock in place of the boards. The boards were salvaged for re-use by the homeowner, and the space and light quality was dramatically improved. Some may think that losing the board ceiling took something away from the space, but what you'll see in the pictures is that it highly accentuates the heavy timbers and really makes them stand out in a beautiful way. Now with this added airtightness, better insulation, and brighter space, the homeowner hardly runs their wood stove, and it's so quiet in the space, an added bonus from changing the insulation. It became necessary to also add a sheetrock ceiling to the living room to hide the plumbing from the new bathroom layout above. Changing this ceiling gave the homeowner some real quality lighting that was lacking in the living room before. The brighter ceiling and new lighting layout completely transforms the living room into a space you want to hang out, even though the layout didn't change at all. When the homeowner saw the finished spaces she said "I can't believe this is my house, I want to live in this house"
Energy Efficiency: I touched a little on the efficiency above, but like all projects done with Mottram Architecture, we always want to leave you with a little extra. Timber frame construction with board ceilings and fiberglass insulation are notoriously leaky! If you want to know what we think about fiberglass insulation, check our our blog post on Why Fiberglass Insulation Sucks. By installing cellulose insulation and covering it with sheetrock we were able to greatly reduce the heat flowing out of this home. It not only improves cashflow it improves the comfort level in the space. Who wants to sit in their living room and feel a draft? Let us remind you, we are not saying cellulose insulation is an air barrier, we use the sheetrock to help with that, but it does significantly reduce the air flow over fiberglass insulation. And when we reduce the airflow, we reduce the heat flow. And when we reduce the heat flow, we reduce the need to re-heat that drafty air from outside. When it comes to energy efficiency the first and best place to start is air infiltration. We greatly reduced the air infiltration with the new insulation, but we also added a hat and warm boots. What I mean by that is, we improved the insulation in the roof, and we installed insulation in the basement. Maybe it's a silly analogy, but when you think about keeping warm, we always start with the hat and boots! With sustainability in mind, the next project will be to add a deck to the front of this house with rain catchment barrels from the metal roof. They are planning to plant a garden in the spring and the rain catchment system will help to irrigate the new garden.
Builder: East Shore Builders
Photographer: Michael Eric Berube
 Ashton Renovations
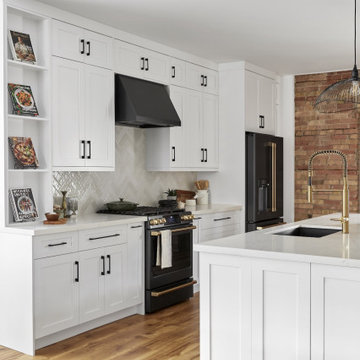
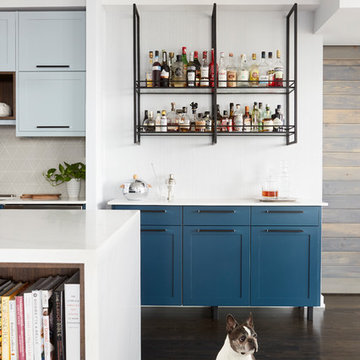
The original kitchen in this condominium was renovated arising from the need to replace Kitec plumbing. The work triangle remained generally the same, but numerous changes were made to improve the kitchen’s functionality, aesthetics, and lighting. Automation was also introduced. The goal was to design and build a modern contemporary functional kitchen with inspiring colours accented with textured wood features.
The functionality was improved with the addition of an under counter microwave, which freed up countertop space. Additional and improved storage was also created by incorporating under cabinet drawers throughout the kitchen, a bar area with open glass shelving above, and open shelving to the right of the seating area. Upper cabinet storage was as well increased with storage above the fridge.
Numerous lighting improvements were made including the addition of potlights. This was done by dropping the ceiling in the kitchen, which also created a visual division with the dining area. Automation was introduced as well into the space with HUE under cabinet lighting, and a touch faucet. The under cabinet lights are controlled by the Phillips Hue App that programs routines, scenes, and other settings.
The kitchen features painted Shaker cabinets accented by textured wood shelving. The countertop surfaces are quartz with waterfalls on both sides of the island, which is a focal point. Shapes are also strongly identified in the design with the use of triangular tiles in the backsplash along with rectangular upper cabinets, and appliance doors and drawers. The kitchen is made most unique though with the uplifting use of colour in the cabinets that make this a bright and cheerful space.
Aristea Photography
 JPG Landwork
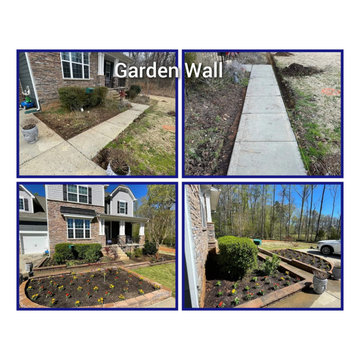
Our landscaping services include a range of professional activities and tasks related to the design, installation, maintenance and improvement of outdoor spaces. The main objective of our gardening services is to create and maintain aesthetically pleasing and functional outdoor environments. Some of our common landscaping services include:
1. Landscape design: This involves planning and creating a design for outdoor spaces, taking into account elements such as plants, trees, landscape elements (e.g. patios, paths) and other design elements to achieve a visually attractive and functional landscape .
2. Lawn Care: Lawn care services focus on maintaining healthy, attractive lawns. This includes activities, fertilizing, weed control, aerating and overseeding.
3. Garden Planting and Installation: Our landscaping professionals plant and install various types of plants, shrubs, trees and flowers to enhance the beauty and diversity of the landscape.
4. Landscaping: Our landscaping services involve the construction and installation of non-living elements in the landscape, such as retaining walls, pavers, decks, pergolas, and outdoor living spaces.
5. Irrigation systems: Installation and maintenance of irrigation systems to ensure adequate and efficient irrigation of plants and grass.
6. Tree Care: Tree care services include pruning, removal, and general maintenance of tree health.
7. Mulch: Applying mulch to garden beds helps retain moisture, control weeds, and improve soil health.
8. Seasonal Cleaning: Clear leaves, debris and other obstacles from the landscape during different seasons.
9. Landscape Lighting: Installation of exterior lighting to improve the appearance and safety of the landscape during the evening and night.
Our landscaping services can be tailored to the specific needs and preferences of homeowners, whether for residential, commercial or public spaces. Our services not only improve the overall aesthetics of the property but also contribute to the environmental sustainability and value of the property.
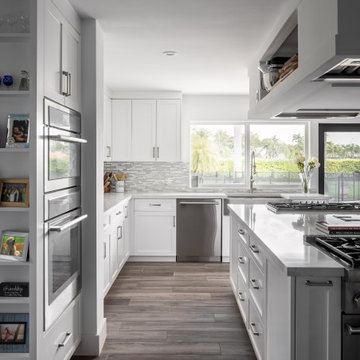

 Ashton Renovations
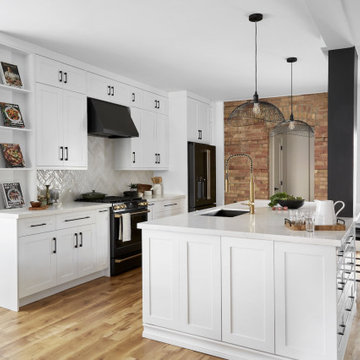
This renovation focused on improving flow, function, and safety for a growing family with a newborn, while also enhancing the home’s exterior presence.
Inside, interior walls were removed to open up the main living areas, creating better sightlines, improved natural light, and a more connected layout for everyday family life. The reconfigured space feels brighter, more spacious, and better suited to modern living.
Two bathrooms were renovated as part of the project:
A powder room was updated with clean, modern finishes and luxury vinyl flooring, chosen for its durability, comfort underfoot, and easy maintenance.
The main bathroom was refreshed to balance practicality with a refined, timeless look.
Special attention was given to the stairway, where upgrades were made with safety and comfort in mind—an important consideration for a household with a newborn. Improved finishes and details help make this high-traffic area both functional and visually cohesive with the rest of the home.
The project also included exterior improvements, enhancing curb appeal and tying the updated interior to a refreshed, cohesive exterior look.
Overall, this renovation blends thoughtful planning, durable materials, and family-friendly design to create a home that works beautifully now and well into the future.
 Ashton Renovations
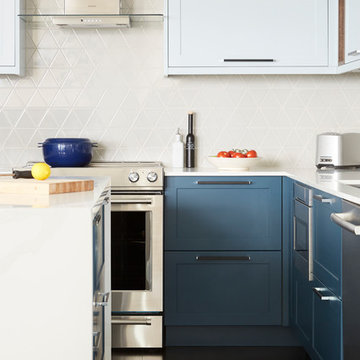
The original kitchen in this condominium was renovated arising from the need to replace Kitec plumbing. The work triangle remained generally the same, but numerous changes were made to improve the kitchen’s functionality, aesthetics, and lighting. Automation was also introduced. The goal was to design and build a modern contemporary functional kitchen with inspiring colours accented with textured wood features.
The functionality was improved with the addition of an under counter microwave, which freed up countertop space. Additional and improved storage was also created by incorporating under cabinet drawers throughout the kitchen, a bar area with open glass shelving above, and open shelving to the right of the seating area. Upper cabinet storage was as well increased with storage above the fridge.
Numerous lighting improvements were made including the addition of potlights. This was done by dropping the ceiling in the kitchen, which also created a visual division with the dining area. Automation was introduced as well into the space with HUE under cabinet lighting, and a touch faucet. The under cabinet lights are controlled by the Phillips Hue App that programs routines, scenes, and other settings.
The kitchen features painted Shaker cabinets accented by textured wood shelving. The countertop surfaces are quartz with waterfalls on both sides of the island, which is a focal point. Shapes are also strongly identified in the design with the use of triangular tiles in the backsplash along with rectangular upper cabinets, and appliance doors and drawers. The kitchen is made most unique though with the uplifting use of colour in the cabinets that make this a bright and cheerful space.
Aristea Photography

Sponsored
Delaware County, OH

Whisler Home Improvement
Franklin County's Committed Home Improvement Professionals
 Mottram Architecture
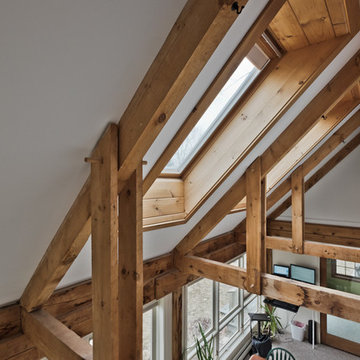
Timber frame homes offer unique challenges during a remodel. What often makes them beautiful and attractive to most homeowners, also makes them challenging for space requirements.
Context: The lovely couple that owned this home were struggling with some interesting floor plan challenges that just didn't work for their family. The loved the beautiful timbers and woodwork of their home, but the dramatically sloping ceilings on the second floor, particularly in the bathroom, just didn't work for this 1 1/2 bath home. Needing to use the skylight to approach the toilet was a less then ideal scenario. Although the bathroom footprint was more then adequate, the sloped ceiling only made half of the space useable. Check out the Before/After post on our blog to see the photos of the house pre-renovation. As much as they loved all the wood features in their home, another challenge they had was light. The wood ceiling made everything inside the house darker, even with a fantastic array of south facing windows, there were spaces in the home that felt dark and small. When they contacted us they wanted to know how could they make their brighter and more inviting, were there solutions to the 2nd floor sloped ceiling issues, and if they were going to do all of this work, how could they make their home more comfortable and efficient. A nagging water leak in the upstairs bathroom spurred them into action and here is how we solved their dilemma.
Conclusion: First, we added a little dormer to the rear of the house so we could get full headroom in nearly all of the upstairs bathroom! Then we decided to extend that dormer one more timber bay over to create a walk in closet with natural light and plenty of space. Since we were contemplating energy efficiency, we resolved a nagging issue that is present in a lot of timber frame construction, air tightness. Commonly found in timber frame construction, fiberglass insulation is installed in the rafter bays and board ceilings are installed over top. Unfortunately, board ceilings are anything but air tight, and fiberglass insulation needs to be in an airtight cavity for maximum effectiveness. So we were able to solve two issues at the same time for this homeowner. We removed the board ceiling and fiberglass insulation, we dense packed the rafter bays with cellulose insulation, and installed sheetrock in place of the boards. The boards were salvaged for re-use by the homeowner, and the space and light quality was dramatically improved. Some may think that losing the board ceiling took something away from the space, but what you'll see in the pictures is that it highly accentuates the heavy timbers and really makes them stand out in a beautiful way. Now with this added airtightness, better insulation, and brighter space, the homeowner hardly runs their wood stove, and it's so quiet in the space, an added bonus from changing the insulation. It became necessary to also add a sheetrock ceiling to the living room to hide the plumbing from the new bathroom layout above. Changing this ceiling gave the homeowner some real quality lighting that was lacking in the living room before. The brighter ceiling and new lighting layout completely transforms the living room into a space you want to hang out, even though the layout didn't change at all. When the homeowner saw the finished spaces she said "I can't believe this is my house, I want to live in this house"
Energy Efficiency: I touched a little on the efficiency above, but like all projects done with Mottram Architecture, we always want to leave you with a little extra. Timber frame construction with board ceilings and fiberglass insulation are notoriously leaky! If you want to know what we think about fiberglass insulation, check our our blog post on Why Fiberglass Insulation Sucks. By installing cellulose insulation and covering it with sheetrock we were able to greatly reduce the heat flowing out of this home. It not only improves cashflow it improves the comfort level in the space. Who wants to sit in their living room and feel a draft? Let us remind you, we are not saying cellulose insulation is an air barrier, we use the sheetrock to help with that, but it does significantly reduce the air flow over fiberglass insulation. And when we reduce the airflow, we reduce the heat flow. And when we reduce the heat flow, we reduce the need to re-heat that drafty air from outside. When it comes to energy efficiency the first and best place to start is air infiltration. We greatly reduced the air infiltration with the new insulation, but we also added a hat and warm boots. What I mean by that is, we improved the insulation in the roof, and we installed insulation in the basement. Maybe it's a silly analogy, but when you think about keeping warm, we always start with the hat and boots! With sustainability in mind, the next project will be to add a deck to the front of this house with rain catchment barrels from the metal roof. They are planning to plant a garden in the spring and the rain catchment system will help to irrigate the new garden.
Builder: East Shore Builders
Photographer: Michael Eric Berube
 Studio 1200
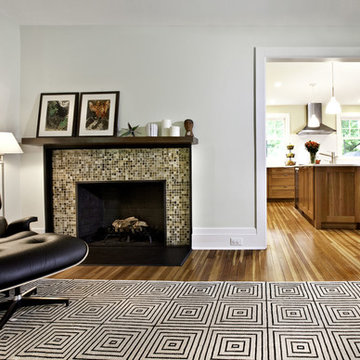
Design work for this eclectic 1900’s home in Maplewood started with making infrastructure improvements throughout the house. The new owners wanted systems that would be energy efficient and ecologically friendly. We installed a very high efficiency HVAC system, replaced the piping and plumbing throughout, and specified new super high efficiency windows. Other exterior improvements included new leaders and gutters, insulation, and new siding in some locations. These upgrades were balanced with maintaining as many as the original details of the house as possible.
When you walk into the house, you still sense the original character and charm of the house, but are surrounded by modern amenities and environmentally sensitive finishes. Specific renovations include updated and reconfigured bathrooms throughout, a new kitchen, finishing of the basement, and repurposing of several rooms so the house would have better flow.
In 2011 the family moved back to New York City, and new owners purchased this Maplewood home. We had the pleaser of working with them to design further improvements to the house necessitated by their growing family. We added a porte cochere, a family-room, and increased the ceiling height in their master bedroom. These improvements augmented our design work previously completed in 2008, and the house continues to be a blend of traditional old-house details with modern, contemporary furnishings that perfectly suite a family with young children.
 Mottram Architecture
Timber frame homes offer unique challenges during a remodel. What often makes them beautiful and attractive to most homeowners, also makes them challenging for space requirements.
Context: The lovely couple that owned this home were struggling with some interesting floor plan challenges that just didn't work for their family. The loved the beautiful timbers and woodwork of their home, but the dramatically sloping ceilings on the second floor, particularly in the bathroom, just didn't work for this 1 1/2 bath home. Needing to use the skylight to approach the toilet was a less then ideal scenario. Although the bathroom footprint was more then adequate, the sloped ceiling only made half of the space useable. Check out the Before/After post on our blog to see the photos of the house pre-renovation. As much as they loved all the wood features in their home, another challenge they had was light. The wood ceiling made everything inside the house darker, even with a fantastic array of south facing windows, there were spaces in the home that felt dark and small. When they contacted us they wanted to know how could they make their brighter and more inviting, were there solutions to the 2nd floor sloped ceiling issues, and if they were going to do all of this work, how could they make their home more comfortable and efficient. A nagging water leak in the upstairs bathroom spurred them into action and here is how we solved their dilemma.
Conclusion: First, we added a little dormer to the rear of the house so we could get full headroom in nearly all of the upstairs bathroom! Then we decided to extend that dormer one more timber bay over to create a walk in closet with natural light and plenty of space. Since we were contemplating energy efficiency, we resolved a nagging issue that is present in a lot of timber frame construction, air tightness. Commonly found in timber frame construction, fiberglass insulation is installed in the rafter bays and board ceilings are installed over top. Unfortunately, board ceilings are anything but air tight, and fiberglass insulation needs to be in an airtight cavity for maximum effectiveness. So we were able to solve two issues at the same time for this homeowner. We removed the board ceiling and fiberglass insulation, we dense packed the rafter bays with cellulose insulation, and installed sheetrock in place of the boards. The boards were salvaged for re-use by the homeowner, and the space and light quality was dramatically improved. Some may think that losing the board ceiling took something away from the space, but what you'll see in the pictures is that it highly accentuates the heavy timbers and really makes them stand out in a beautiful way. Now with this added airtightness, better insulation, and brighter space, the homeowner hardly runs their wood stove, and it's so quiet in the space, an added bonus from changing the insulation. It became necessary to also add a sheetrock ceiling to the living room to hide the plumbing from the new bathroom layout above. Changing this ceiling gave the homeowner some real quality lighting that was lacking in the living room before. The brighter ceiling and new lighting layout completely transforms the living room into a space you want to hang out, even though the layout didn't change at all. When the homeowner saw the finished spaces she said "I can't believe this is my house, I want to live in this house"
Energy Efficiency: I touched a little on the efficiency above, but like all projects done with Mottram Architecture, we always want to leave you with a little extra. Timber frame construction with board ceilings and fiberglass insulation are notoriously leaky! If you want to know what we think about fiberglass insulation, check our our blog post on Why Fiberglass Insulation Sucks. By installing cellulose insulation and covering it with sheetrock we were able to greatly reduce the heat flowing out of this home. It not only improves cashflow it improves the comfort level in the space. Who wants to sit in their living room and feel a draft? Let us remind you, we are not saying cellulose insulation is an air barrier, we use the sheetrock to help with that, but it does significantly reduce the air flow over fiberglass insulation. And when we reduce the airflow, we reduce the heat flow. And when we reduce the heat flow, we reduce the need to re-heat that drafty air from outside. When it comes to energy efficiency the first and best place to start is air infiltration. We greatly reduced the air infiltration with the new insulation, but we also added a hat and warm boots. What I mean by that is, we improved the insulation in the roof, and we installed insulation in the basement. Maybe it's a silly analogy, but when you think about keeping warm, we always start with the hat and boots! With sustainability in mind, the next project will be to add a deck to the front of this house with rain catchment barrels from the metal roof. They are planning to plant a garden in the spring and the rain catchment system will help to irrigate the new garden.
Builder: East Shore Builders
Photographer: Michael Eric Berube
 JPG Landwork
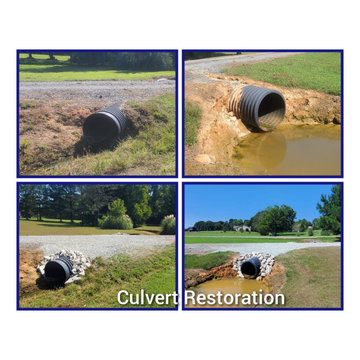
Our landscaping services include a range of professional activities and tasks related to the design, installation, maintenance and improvement of outdoor spaces. The main objective of our gardening services is to create and maintain aesthetically pleasing and functional outdoor environments. Some of our common landscaping services include:
1. Landscape design: This involves planning and creating a design for outdoor spaces, taking into account elements such as plants, trees, landscape elements (e.g. patios, paths) and other design elements to achieve a visually attractive and functional landscape .
2. Lawn Care: Lawn care services focus on maintaining healthy, attractive lawns. This includes activities, fertilizing, weed control, aerating and overseeding.
3. Garden Planting and Installation: Our landscaping professionals plant and install various types of plants, shrubs, trees and flowers to enhance the beauty and diversity of the landscape.
4. Landscaping: Our landscaping services involve the construction and installation of non-living elements in the landscape, such as retaining walls, pavers, decks, pergolas, and outdoor living spaces.
5. Irrigation systems: Installation and maintenance of irrigation systems to ensure adequate and efficient irrigation of plants and grass.
6. Tree Care: Tree care services include pruning, removal, and general maintenance of tree health.
7. Mulch: Applying mulch to garden beds helps retain moisture, control weeds, and improve soil health.
8. Seasonal Cleaning: Clear leaves, debris and other obstacles from the landscape during different seasons.
9. Landscape Lighting: Installation of exterior lighting to improve the appearance and safety of the landscape during the evening and night.
Our landscaping services can be tailored to the specific needs and preferences of homeowners, whether for residential, commercial or public spaces. Our services not only improve the overall aesthetics of the property but also contribute to the environmental sustainability and value of the property.
 From David Designs
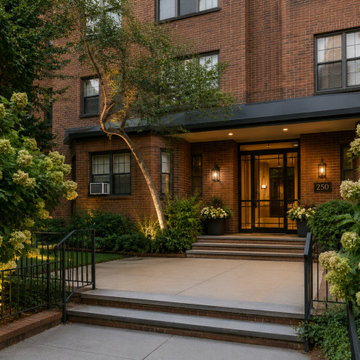
This exterior renovation focuses on elevating the arrival experience through thoughtful architectural and landscape improvements. The redesigned entry sequence balances the historic character of the brick façade with contemporary detailing, creating a welcoming and timeless first impression for residents and guests alike.
New architectural lighting highlights the building's mature landscaping and emphasizes the texture of the historic masonry after sunset. Carefully selected plantings soften the approach while framing views toward the entrance, creating a sense of warmth and discovery. Updated railings, entry doors, and exterior finishes reinforce the building's identity while improving functionality and curb appeal.
The result is a refined and inviting entry experience that enhances both the architecture and the landscape, demonstrating how targeted exterior improvements can transform the perception of an entire property.
 BMR BelMax Remodeling
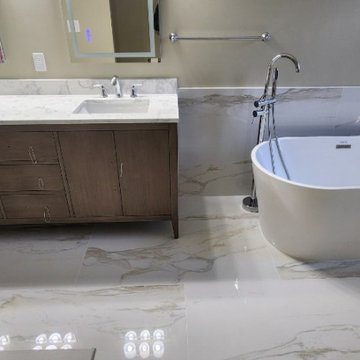
Master Bathroom Remodeling in Maple Glen, PA: A Stunning Transformation by BMR Belmax Remodeling
At BMR Belmax Remodeling, we pride ourselves on delivering exceptional remodeling services that combine elegance, functionality, and personalized design. One of our recent projects involved a master bathroom remodeling in Maple Glen, PA, where we transformed a dated bathroom into a luxurious retreat. This comprehensive bathroom renovation in Maple Glen, PA showcases our commitment to craftsmanship and attention to detail, leaving our client thrilled with the results.
A Vision for the Perfect Master Bathroom
Our client envisioned a serene and modern master bathroom that would elevate the aesthetics and functionality of their space. They sought a design that offered a balance of contemporary style and practicality, incorporating sleek fixtures, premium materials, and improved lighting. We collaborated closely with the client to bring their vision to life, ensuring that every detail met their expectations. The result was a master bathroom that perfectly aligned with their lifestyle and design preferences.
Key Features of the Master Bathroom Remodel
Our team tackled every aspect of this master bathroom remodeling project with precision and care. Here’s a breakdown of the upgrades and improvements we completed:
1. Plumbing Reconfiguration
To accommodate the updated design, we reconfigured the bathroom’s plumbing to support a sleek, smaller vanity and a stylish freestanding bathtub. This change not only optimized the layout but also created a more open and inviting feel.
2. Upgraded Bathroom Fixtures
The client opted for high-quality bathroom fixtures to enhance the space’s overall look and functionality. We installed a modern bathtub faucet, a new toilet, and other premium fixtures that seamlessly complemented the updated design.
3. Enhanced Lighting and Electrical Work
Lighting was a crucial element of this remodel. We installed new electrical wiring to accommodate lighted mirrors, which added a touch of sophistication and practicality. Additional lighting was installed above the mirrors to ensure optimal brightness for daily grooming routines, and a new exhaust fan was added to improve ventilation and maintain air quality.
4. Large-Format Tile Installation
To achieve a luxurious and contemporary look, we used 24″x48″ large-format tiles for the walls in the bathtub area and on the flooring. These tiles created a clean, seamless aesthetic, with fewer grout lines to maintain and a striking visual impact. The client was particularly impressed with the elegance and durability of this choice.
5. Freestanding Bathtub Installation
A standout feature of this remodel was the addition of a stunning freestanding bathtub. Positioned as a focal point of the bathroom, it offered both aesthetic appeal and a relaxing space for unwinding after a long day.
A Seamless Process and Impressive Results
The project was completed in just eight working days, thanks to our efficient project management and skilled team of professionals. From the initial consultation to the final walkthrough, we ensured clear communication with the client to address their questions and keep them updated on progress.
Our streamlined process involved careful planning, precise execution, and meticulous attention to detail. This approach not only delivered a beautiful transformation but also minimized disruptions for the client, ensuring a stress-free remodeling experience.
Why Choose BMR Belmax Remodeling?
This master bathroom remodeling in Maple Glen, PA exemplifies the quality and care that define our work. Here are some reasons why homeowners trust us for their bathroom renovation needs:
Expert Craftsmanship: Our team is skilled in delivering high-quality finishes and innovative solutions tailored to your preferences.
Personalized Designs: We work closely with you to create a space that aligns with your style, needs, and budget.
Premium Materials: We use top-tier materials to ensure durability, functionality, and aesthetic appeal.
Efficient Project Management: Our well-coordinated approach ensures that projects are completed on time without compromising quality.
Customer Satisfaction: We prioritize your satisfaction, striving to exceed your expectations in every aspect of the project.
Client Satisfaction and Lasting Value
The client was overjoyed with their newly remodeled master bathroom, expressing appreciation for the seamless process and stunning results. They particularly loved the enhanced lighting, the luxurious feel of the large-format tiles, and the functionality of the upgraded features. The renovation not only improved the bathroom’s aesthetics but also added significant value to their home.
Transform Your Bathroom with BMR Belmax Remodeling
If you’re considering a bathroom renovation in Maple Glen, PA, BMR Belmax Remodeling is here to help. Whether you’re looking for a complete master bathroom transformation or specific upgrades, we bring expertise, creativity, and a commitment to excellence to every project.
Contact us today to schedule a consultation and let us bring your dream bathroom to life. With BMR Belmax Remodeling, your ideal space is closer than you think!
 Maverick City Builders
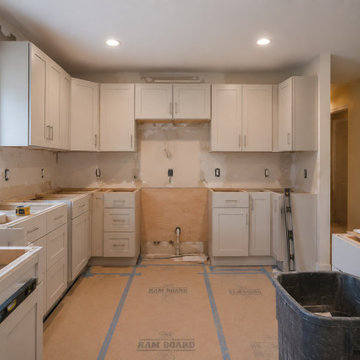
This kitchen cabinet installation project in Lancaster, MA features a clean and slightly more refined kitchen upgrade designed to improve both appearance and everyday functionality. The home already had good potential, but the kitchen needed a more updated cabinet layout, improved storage, and a brighter, more polished finish.
The project began with careful preparation and demolition of the existing kitchen cabinets. Our team protected the surrounding floors and work areas before removing the older cabinetry and preparing the space for the new installation. The goal was to keep the kitchen practical and comfortable while giving it a more upscale and finished appearance.
As the renovation progressed, new cabinets were installed with attention to alignment, spacing, and detail. The design focused on a balanced look with clean cabinet lines, improved storage, and a more modern feel without making the space overly extravagant. This approach helped create a kitchen that feels updated, functional, and appropriate for the home.
Once the cabinets were fully installed, the final details were completed and the kitchen was cleaned and staged. The finished space feels brighter, more organized, and more inviting while still maintaining a comfortable New England home style.
Projects like this show how a well-planned kitchen cabinet installation can completely refresh the heart of the home. With the right layout, clean finishes, and quality craftsmanship, a kitchen can feel more valuable, functional, and enjoyable for everyday living.
121