
Search results for "Improving insulation" in Home Design Ideas

 Mottram Architecture
Timber frame homes offer unique challenges during a remodel. What often makes them beautiful and attractive to most homeowners, also makes them challenging for space requirements.
Context: The lovely couple that owned this home were struggling with some interesting floor plan challenges that just didn't work for their family. The loved the beautiful timbers and woodwork of their home, but the dramatically sloping ceilings on the second floor, particularly in the bathroom, just didn't work for this 1 1/2 bath home. Needing to use the skylight to approach the toilet was a less then ideal scenario. Although the bathroom footprint was more then adequate, the sloped ceiling only made half of the space useable. Check out the Before/After post on our blog to see the photos of the house pre-renovation. As much as they loved all the wood features in their home, another challenge they had was light. The wood ceiling made everything inside the house darker, even with a fantastic array of south facing windows, there were spaces in the home that felt dark and small. When they contacted us they wanted to know how could they make their brighter and more inviting, were there solutions to the 2nd floor sloped ceiling issues, and if they were going to do all of this work, how could they make their home more comfortable and efficient. A nagging water leak in the upstairs bathroom spurred them into action and here is how we solved their dilemma.
Conclusion: First, we added a little dormer to the rear of the house so we could get full headroom in nearly all of the upstairs bathroom! Then we decided to extend that dormer one more timber bay over to create a walk in closet with natural light and plenty of space. Since we were contemplating energy efficiency, we resolved a nagging issue that is present in a lot of timber frame construction, air tightness. Commonly found in timber frame construction, fiberglass insulation is installed in the rafter bays and board ceilings are installed over top. Unfortunately, board ceilings are anything but air tight, and fiberglass insulation needs to be in an airtight cavity for maximum effectiveness. So we were able to solve two issues at the same time for this homeowner. We removed the board ceiling and fiberglass insulation, we dense packed the rafter bays with cellulose insulation, and installed sheetrock in place of the boards. The boards were salvaged for re-use by the homeowner, and the space and light quality was dramatically improved. Some may think that losing the board ceiling took something away from the space, but what you'll see in the pictures is that it highly accentuates the heavy timbers and really makes them stand out in a beautiful way. Now with this added airtightness, better insulation, and brighter space, the homeowner hardly runs their wood stove, and it's so quiet in the space, an added bonus from changing the insulation. It became necessary to also add a sheetrock ceiling to the living room to hide the plumbing from the new bathroom layout above. Changing this ceiling gave the homeowner some real quality lighting that was lacking in the living room before. The brighter ceiling and new lighting layout completely transforms the living room into a space you want to hang out, even though the layout didn't change at all. When the homeowner saw the finished spaces she said "I can't believe this is my house, I want to live in this house"
Energy Efficiency: I touched a little on the efficiency above, but like all projects done with Mottram Architecture, we always want to leave you with a little extra. Timber frame construction with board ceilings and fiberglass insulation are notoriously leaky! If you want to know what we think about fiberglass insulation, check our our blog post on Why Fiberglass Insulation Sucks. By installing cellulose insulation and covering it with sheetrock we were able to greatly reduce the heat flowing out of this home. It not only improves cashflow it improves the comfort level in the space. Who wants to sit in their living room and feel a draft? Let us remind you, we are not saying cellulose insulation is an air barrier, we use the sheetrock to help with that, but it does significantly reduce the air flow over fiberglass insulation. And when we reduce the airflow, we reduce the heat flow. And when we reduce the heat flow, we reduce the need to re-heat that drafty air from outside. When it comes to energy efficiency the first and best place to start is air infiltration. We greatly reduced the air infiltration with the new insulation, but we also added a hat and warm boots. What I mean by that is, we improved the insulation in the roof, and we installed insulation in the basement. Maybe it's a silly analogy, but when you think about keeping warm, we always start with the hat and boots! With sustainability in mind, the next project will be to add a deck to the front of this house with rain catchment barrels from the metal roof. They are planning to plant a garden in the spring and the rain catchment system will help to irrigate the new garden.
Builder: East Shore Builders
Photographer: Michael Eric Berube

 ZeroEnergy Design
This renovated brick rowhome in Boston’s South End offers a modern aesthetic within a historic structure, creative use of space, exceptional thermal comfort, a reduced carbon footprint, and a passive stream of income.
DESIGN PRIORITIES. The goals for the project were clear - design the primary unit to accommodate the family’s modern lifestyle, rework the layout to create a desirable rental unit, improve thermal comfort and introduce a modern aesthetic. We designed the street-level entry as a shared entrance for both the primary and rental unit. The family uses it as their everyday entrance - we planned for bike storage and an open mudroom with bench and shoe storage to facilitate the change from shoes to slippers or bare feet as they enter their home. On the main level, we expanded the kitchen into the dining room to create an eat-in space with generous counter space and storage, as well as a comfortable connection to the living space. The second floor serves as master suite for the couple - a bedroom with a walk-in-closet and ensuite bathroom, and an adjacent study, with refinished original pumpkin pine floors. The upper floor, aside from a guest bedroom, is the child's domain with interconnected spaces for sleeping, work and play. In the play space, which can be separated from the work space with new translucent sliding doors, we incorporated recreational features inspired by adventurous and competitive television shows, at their son’s request.
MODERN MEETS TRADITIONAL. We left the historic front facade of the building largely unchanged - the security bars were removed from the windows and the single pane windows were replaced with higher performing historic replicas. We designed the interior and rear facade with a vision of warm modernism, weaving in the notable period features. Each element was either restored or reinterpreted to blend with the modern aesthetic. The detailed ceiling in the living space, for example, has a new matte monochromatic finish, and the wood stairs are covered in a dark grey floor paint, whereas the mahogany doors were simply refinished. New wide plank wood flooring with a neutral finish, floor-to-ceiling casework, and bold splashes of color in wall paint and tile, and oversized high-performance windows (on the rear facade) round out the modern aesthetic.
RENTAL INCOME. The existing rowhome was zoned for a 2-family dwelling but included an undesirable, single-floor studio apartment at the garden level with low ceiling heights and questionable emergency egress. In order to increase the quality and quantity of space in the rental unit, we reimagined it as a two-floor, 1 or 2 bedroom, 2 bathroom apartment with a modern aesthetic, increased ceiling height on the lowest level and provided an in-unit washer/dryer. The apartment was listed with Jackie O'Connor Real Estate and rented immediately, providing the owners with a source of passive income.
ENCLOSURE WITH BENEFITS. The homeowners sought a minimal carbon footprint, enabled by their urban location and lifestyle decisions, paired with the benefits of a high-performance home. The extent of the renovation allowed us to implement a deep energy retrofit (DER) to address air tightness, insulation, and high-performance windows. The historic front facade is insulated from the interior, while the rear facade is insulated on the exterior. Together with these building enclosure improvements, we designed an HVAC system comprised of continuous fresh air ventilation, and an efficient, all-electric heating and cooling system to decouple the house from natural gas. This strategy provides optimal thermal comfort and indoor air quality, improved acoustic isolation from street noise and neighbors, as well as a further reduced carbon footprint. We also took measures to prepare the roof for future solar panels, for when the South End neighborhood’s aging electrical infrastructure is upgraded to allow them.
URBAN LIVING. The desirable neighborhood location allows the both the homeowners and tenant to walk, bike, and use public transportation to access the city, while each charging their respective plug-in electric cars behind the building to travel greater distances.
OVERALL. The understated rowhouse is now ready for another century of urban living, offering the owners comfort and convenience as they live life as an expression of their values.
Photography: Eric Roth Photo

 Canterbury Design Kitchen Interiors
Beaux arts architecture of Blairsden was inspiration for kitchen. Homeowner wanted clean airy look while repurposing cold commercial cooking space to an aesthetically pleasing functional kitchen for family and friends or for a catering staff during larger gatherings.
Aside from the hand made LaCornue range, no appliances were to be be in the kitchen so as not to interfere with the aesthetic. Instead, the appliances were moved to an adjacent space and celebrated as their own aesthetic with complimentary stainless steel cabinetry and tiled walls.
The color pallet of the kitchen was intentionally subtle with tones of beige white and grey. Light was reintroduced into the space by rebuilding the east and north windows.
Traffic pattern was improved by moving range from south wall to north wall. Custom stainless structural window, with stainless steel screen and natural brass harlequin grill encapsulated in insulated frosted glass, was engineered to support hood and creates a stunning backdrop for the already gorgeous range.
All hardware in kitchen is unlacquered natural brass intentionally selected so as to develop its own patina as it oxides over time to give a true historic quality.
Other interesting point about kitchen:
All cabinetry doors 5/4"
All cabinetry interiors natural walnut
All cabinetry interiors on sensors and light up with LED lights that are routed into frames of cabinetry
Magnetic cutlery dividers in drawers enable user to reposition easily
Venician plaster walls
Lava stone countertops on perimeter
Marble countertop island
2 level cutting boards and strainers in sink by galley workstation
Find the right local pro for your project
 Mottram Architecture
Timber frame homes offer unique challenges during a remodel. What often makes them beautiful and attractive to most homeowners, also makes them challenging for space requirements.
Context: The lovely couple that owned this home were struggling with some interesting floor plan challenges that just didn't work for their family. The loved the beautiful timbers and woodwork of their home, but the dramatically sloping ceilings on the second floor, particularly in the bathroom, just didn't work for this 1 1/2 bath home. Needing to use the skylight to approach the toilet was a less then ideal scenario. Although the bathroom footprint was more then adequate, the sloped ceiling only made half of the space useable. Check out the Before/After post on our blog to see the photos of the house pre-renovation. As much as they loved all the wood features in their home, another challenge they had was light. The wood ceiling made everything inside the house darker, even with a fantastic array of south facing windows, there were spaces in the home that felt dark and small. When they contacted us they wanted to know how could they make their brighter and more inviting, were there solutions to the 2nd floor sloped ceiling issues, and if they were going to do all of this work, how could they make their home more comfortable and efficient. A nagging water leak in the upstairs bathroom spurred them into action and here is how we solved their dilemma.
Conclusion: First, we added a little dormer to the rear of the house so we could get full headroom in nearly all of the upstairs bathroom! Then we decided to extend that dormer one more timber bay over to create a walk in closet with natural light and plenty of space. Since we were contemplating energy efficiency, we resolved a nagging issue that is present in a lot of timber frame construction, air tightness. Commonly found in timber frame construction, fiberglass insulation is installed in the rafter bays and board ceilings are installed over top. Unfortunately, board ceilings are anything but air tight, and fiberglass insulation needs to be in an airtight cavity for maximum effectiveness. So we were able to solve two issues at the same time for this homeowner. We removed the board ceiling and fiberglass insulation, we dense packed the rafter bays with cellulose insulation, and installed sheetrock in place of the boards. The boards were salvaged for re-use by the homeowner, and the space and light quality was dramatically improved. Some may think that losing the board ceiling took something away from the space, but what you'll see in the pictures is that it highly accentuates the heavy timbers and really makes them stand out in a beautiful way. Now with this added airtightness, better insulation, and brighter space, the homeowner hardly runs their wood stove, and it's so quiet in the space, an added bonus from changing the insulation. It became necessary to also add a sheetrock ceiling to the living room to hide the plumbing from the new bathroom layout above. Changing this ceiling gave the homeowner some real quality lighting that was lacking in the living room before. The brighter ceiling and new lighting layout completely transforms the living room into a space you want to hang out, even though the layout didn't change at all. When the homeowner saw the finished spaces she said "I can't believe this is my house, I want to live in this house"
Energy Efficiency: I touched a little on the efficiency above, but like all projects done with Mottram Architecture, we always want to leave you with a little extra. Timber frame construction with board ceilings and fiberglass insulation are notoriously leaky! If you want to know what we think about fiberglass insulation, check our our blog post on Why Fiberglass Insulation Sucks. By installing cellulose insulation and covering it with sheetrock we were able to greatly reduce the heat flowing out of this home. It not only improves cashflow it improves the comfort level in the space. Who wants to sit in their living room and feel a draft? Let us remind you, we are not saying cellulose insulation is an air barrier, we use the sheetrock to help with that, but it does significantly reduce the air flow over fiberglass insulation. And when we reduce the airflow, we reduce the heat flow. And when we reduce the heat flow, we reduce the need to re-heat that drafty air from outside. When it comes to energy efficiency the first and best place to start is air infiltration. We greatly reduced the air infiltration with the new insulation, but we also added a hat and warm boots. What I mean by that is, we improved the insulation in the roof, and we installed insulation in the basement. Maybe it's a silly analogy, but when you think about keeping warm, we always start with the hat and boots! With sustainability in mind, the next project will be to add a deck to the front of this house with rain catchment barrels from the metal roof. They are planning to plant a garden in the spring and the rain catchment system will help to irrigate the new garden.
Builder: East Shore Builders
Photographer: Michael Eric Berube
 WirelessShades.com
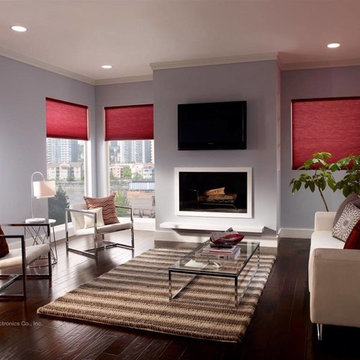
"Honeycomb"/Cellular shades are known for their clean look and great energy saving quality. They help reduce energy usage during very warm or cold months by limiting the transfer of heat. These shades have special insulating air pockets between the front and back side. If they are installed very closely to the window with both sides of the shade held close to the wall, it creates a sealed airspace that effectively limits the amount of hot or cold air from passing through either way. Blackout cellular blinds designed for room darkening are usually lined with foil, which further improve their insulation and can additionally help reduce noise. Cellular shades also help protect the interior of your home from damaging UV rays which can take their toll on hardwood floors and furniture.
 Mottram Architecture
Timber frame homes offer unique challenges during a remodel. What often makes them beautiful and attractive to most homeowners, also makes them challenging for space requirements.
Context: The lovely couple that owned this home were struggling with some interesting floor plan challenges that just didn't work for their family. The loved the beautiful timbers and woodwork of their home, but the dramatically sloping ceilings on the second floor, particularly in the bathroom, just didn't work for this 1 1/2 bath home. Needing to use the skylight to approach the toilet was a less then ideal scenario. Although the bathroom footprint was more then adequate, the sloped ceiling only made half of the space useable. Check out the Before/After post on our blog to see the photos of the house pre-renovation. As much as they loved all the wood features in their home, another challenge they had was light. The wood ceiling made everything inside the house darker, even with a fantastic array of south facing windows, there were spaces in the home that felt dark and small. When they contacted us they wanted to know how could they make their brighter and more inviting, were there solutions to the 2nd floor sloped ceiling issues, and if they were going to do all of this work, how could they make their home more comfortable and efficient. A nagging water leak in the upstairs bathroom spurred them into action and here is how we solved their dilemma.
Conclusion: First, we added a little dormer to the rear of the house so we could get full headroom in nearly all of the upstairs bathroom! Then we decided to extend that dormer one more timber bay over to create a walk in closet with natural light and plenty of space. Since we were contemplating energy efficiency, we resolved a nagging issue that is present in a lot of timber frame construction, air tightness. Commonly found in timber frame construction, fiberglass insulation is installed in the rafter bays and board ceilings are installed over top. Unfortunately, board ceilings are anything but air tight, and fiberglass insulation needs to be in an airtight cavity for maximum effectiveness. So we were able to solve two issues at the same time for this homeowner. We removed the board ceiling and fiberglass insulation, we dense packed the rafter bays with cellulose insulation, and installed sheetrock in place of the boards. The boards were salvaged for re-use by the homeowner, and the space and light quality was dramatically improved. Some may think that losing the board ceiling took something away from the space, but what you'll see in the pictures is that it highly accentuates the heavy timbers and really makes them stand out in a beautiful way. Now with this added airtightness, better insulation, and brighter space, the homeowner hardly runs their wood stove, and it's so quiet in the space, an added bonus from changing the insulation. It became necessary to also add a sheetrock ceiling to the living room to hide the plumbing from the new bathroom layout above. Changing this ceiling gave the homeowner some real quality lighting that was lacking in the living room before. The brighter ceiling and new lighting layout completely transforms the living room into a space you want to hang out, even though the layout didn't change at all. When the homeowner saw the finished spaces she said "I can't believe this is my house, I want to live in this house"
Energy Efficiency: I touched a little on the efficiency above, but like all projects done with Mottram Architecture, we always want to leave you with a little extra. Timber frame construction with board ceilings and fiberglass insulation are notoriously leaky! If you want to know what we think about fiberglass insulation, check our our blog post on Why Fiberglass Insulation Sucks. By installing cellulose insulation and covering it with sheetrock we were able to greatly reduce the heat flowing out of this home. It not only improves cashflow it improves the comfort level in the space. Who wants to sit in their living room and feel a draft? Let us remind you, we are not saying cellulose insulation is an air barrier, we use the sheetrock to help with that, but it does significantly reduce the air flow over fiberglass insulation. And when we reduce the airflow, we reduce the heat flow. And when we reduce the heat flow, we reduce the need to re-heat that drafty air from outside. When it comes to energy efficiency the first and best place to start is air infiltration. We greatly reduced the air infiltration with the new insulation, but we also added a hat and warm boots. What I mean by that is, we improved the insulation in the roof, and we installed insulation in the basement. Maybe it's a silly analogy, but when you think about keeping warm, we always start with the hat and boots! With sustainability in mind, the next project will be to add a deck to the front of this house with rain catchment barrels from the metal roof. They are planning to plant a garden in the spring and the rain catchment system will help to irrigate the new garden.
Builder: East Shore Builders
Photographer: Michael Eric Berube
 YW CONSTRUCTION SERVICES
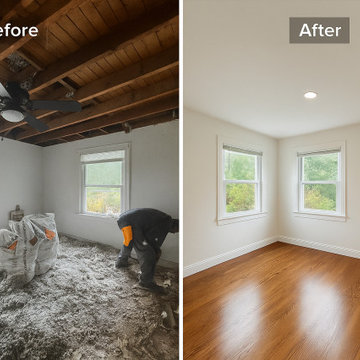
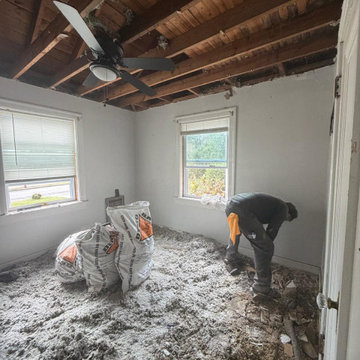
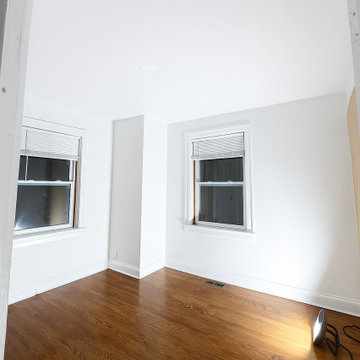
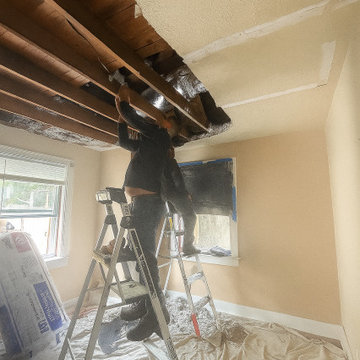
This complete bedroom renovation transformed a dated and damaged space into a bright, modern retreat. The project began with the removal of deteriorated materials and exposed ceiling beams, addressing insulation, wiring, and drywall to restore structural integrity and improve energy efficiency.
Once the framework was rebuilt, new drywall, recessed lighting, and energy-efficient windows were installed to enhance brightness and comfort. The walls were finished in a neutral warm white for a clean, timeless look, while the new hardwood flooring added warmth and character to the room.
This renovation perfectly showcases how thoughtful design and expert craftsmanship can completely revitalize an interior — turning an unfinished space into a functional and inviting bedroom ready for daily living.
? Key Features & Materials
Complete demolition and rebuild of walls and ceiling
New insulation and electrical rewiring
Smooth drywall finish and premium paint
Recessed LED lighting
Energy-efficient vinyl windows
Custom baseboards and trim work
Engineered hardwood flooring in natural oak finish
Sponsored
Delaware County, OH

Whisler Home Improvement
Franklin County's Committed Home Improvement Professionals
 YW CONSTRUCTION SERVICES
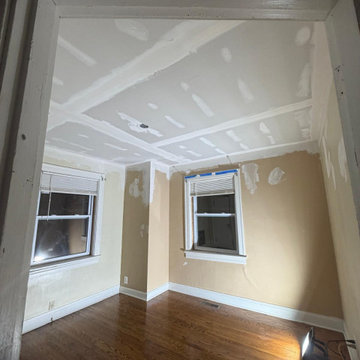
This complete bedroom renovation transformed a dated and damaged space into a bright, modern retreat. The project began with the removal of deteriorated materials and exposed ceiling beams, addressing insulation, wiring, and drywall to restore structural integrity and improve energy efficiency.
Once the framework was rebuilt, new drywall, recessed lighting, and energy-efficient windows were installed to enhance brightness and comfort. The walls were finished in a neutral warm white for a clean, timeless look, while the new hardwood flooring added warmth and character to the room.
This renovation perfectly showcases how thoughtful design and expert craftsmanship can completely revitalize an interior — turning an unfinished space into a functional and inviting bedroom ready for daily living.
? Key Features & Materials
Complete demolition and rebuild of walls and ceiling
New insulation and electrical rewiring
Smooth drywall finish and premium paint
Recessed LED lighting
Energy-efficient vinyl windows
Custom baseboards and trim work
Engineered hardwood flooring in natural oak finish
 YW CONSTRUCTION SERVICES
This complete bedroom renovation transformed a dated and damaged space into a bright, modern retreat. The project began with the removal of deteriorated materials and exposed ceiling beams, addressing insulation, wiring, and drywall to restore structural integrity and improve energy efficiency.
Once the framework was rebuilt, new drywall, recessed lighting, and energy-efficient windows were installed to enhance brightness and comfort. The walls were finished in a neutral warm white for a clean, timeless look, while the new hardwood flooring added warmth and character to the room.
This renovation perfectly showcases how thoughtful design and expert craftsmanship can completely revitalize an interior — turning an unfinished space into a functional and inviting bedroom ready for daily living.
? Key Features & Materials
Complete demolition and rebuild of walls and ceiling
New insulation and electrical rewiring
Smooth drywall finish and premium paint
Recessed LED lighting
Energy-efficient vinyl windows
Custom baseboards and trim work
Engineered hardwood flooring in natural oak finish
 Reilly's Contracting
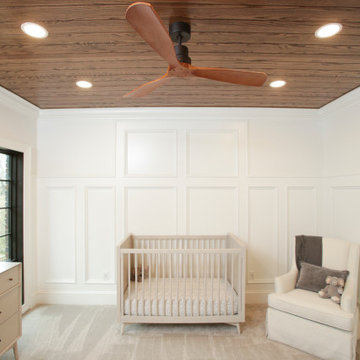
Inspiration for a transitional gender-neutral carpeted and shiplap ceiling nursery remodel in Kansas City with white walls

 E_ Designs
Tired of doing laundry in an unfinished rugged basement? These homeowner's were as well! They contacted Castle to help them with their basement planning and build for a finished laundry space and new bathroom with shower.
After the designer and client walked through ideas to improve flow of space, we decided to eliminate the existing 1/2 bath in the family room, and move the new bathroom into the existing laundry room. The full laundry room was finished to include new walls, ceilings, new plumbing, new Adura luxury vinyl tile flooring, beautiful shaker style cabinetry with beadboard panel, Glossy white Cultured marble countertops, a new Blanco composite sink, and Kohler Bellera faucet.
In the new bathroom space, we continued the Adura luxury vinyl flooring. Finishes in the bathroom include Kohler Memoirs pedestal sink, Kohler Archer faucet, custom hex tile shower floor, subway tile walls, and custom frameless glass shower enclosure.
Additional improvements were made to improve the health of the home including asbestos tile abatement, new drain tile and sump pump, new spray foam insulation, new glass block window, and a new Panasonic bathroom fan. We also decided to save and restore some original pieces in the home like their existing 5-panel doors and repurposing one salvaged door into a pocket door for the new bathroom.
The homeowner completed the basement finish with new carpeting in the family room. The whole basement feels fresh, new, and has a great flow. They will enjoy their happy and healthy home for years to come.
 YW CONSTRUCTION SERVICES
This complete bedroom renovation transformed a dated and damaged space into a bright, modern retreat. The project began with the removal of deteriorated materials and exposed ceiling beams, addressing insulation, wiring, and drywall to restore structural integrity and improve energy efficiency.
Once the framework was rebuilt, new drywall, recessed lighting, and energy-efficient windows were installed to enhance brightness and comfort. The walls were finished in a neutral warm white for a clean, timeless look, while the new hardwood flooring added warmth and character to the room.
This renovation perfectly showcases how thoughtful design and expert craftsmanship can completely revitalize an interior — turning an unfinished space into a functional and inviting bedroom ready for daily living.
? Key Features & Materials
Complete demolition and rebuild of walls and ceiling
New insulation and electrical rewiring
Smooth drywall finish and premium paint
Recessed LED lighting
Energy-efficient vinyl windows
Custom baseboards and trim work
Engineered hardwood flooring in natural oak finish
 YW CONSTRUCTION SERVICES
This complete bedroom renovation transformed a dated and damaged space into a bright, modern retreat. The project began with the removal of deteriorated materials and exposed ceiling beams, addressing insulation, wiring, and drywall to restore structural integrity and improve energy efficiency.
Once the framework was rebuilt, new drywall, recessed lighting, and energy-efficient windows were installed to enhance brightness and comfort. The walls were finished in a neutral warm white for a clean, timeless look, while the new hardwood flooring added warmth and character to the room.
This renovation perfectly showcases how thoughtful design and expert craftsmanship can completely revitalize an interior — turning an unfinished space into a functional and inviting bedroom ready for daily living.
? Key Features & Materials
Complete demolition and rebuild of walls and ceiling
New insulation and electrical rewiring
Smooth drywall finish and premium paint
Recessed LED lighting
Energy-efficient vinyl windows
Custom baseboards and trim work
Engineered hardwood flooring in natural oak finish
Sponsored
Delaware County, OH
Whisler Home Improvement
Franklin County's Committed Home Improvement Professionals
 YW CONSTRUCTION SERVICES
This complete bedroom renovation transformed a dated and damaged space into a bright, modern retreat. The project began with the removal of deteriorated materials and exposed ceiling beams, addressing insulation, wiring, and drywall to restore structural integrity and improve energy efficiency.
Once the framework was rebuilt, new drywall, recessed lighting, and energy-efficient windows were installed to enhance brightness and comfort. The walls were finished in a neutral warm white for a clean, timeless look, while the new hardwood flooring added warmth and character to the room.
This renovation perfectly showcases how thoughtful design and expert craftsmanship can completely revitalize an interior — turning an unfinished space into a functional and inviting bedroom ready for daily living.
? Key Features & Materials
Complete demolition and rebuild of walls and ceiling
New insulation and electrical rewiring
Smooth drywall finish and premium paint
Recessed LED lighting
Energy-efficient vinyl windows
Custom baseboards and trim work
Engineered hardwood flooring in natural oak finish
 Mottram Architecture
Timber frame homes offer unique challenges during a remodel. What often makes them beautiful and attractive to most homeowners, also makes them challenging for space requirements.
Context: The lovely couple that owned this home were struggling with some interesting floor plan challenges that just didn't work for their family. The loved the beautiful timbers and woodwork of their home, but the dramatically sloping ceilings on the second floor, particularly in the bathroom, just didn't work for this 1 1/2 bath home. Needing to use the skylight to approach the toilet was a less then ideal scenario. Although the bathroom footprint was more then adequate, the sloped ceiling only made half of the space useable. Check out the Before/After post on our blog to see the photos of the house pre-renovation. As much as they loved all the wood features in their home, another challenge they had was light. The wood ceiling made everything inside the house darker, even with a fantastic array of south facing windows, there were spaces in the home that felt dark and small. When they contacted us they wanted to know how could they make their brighter and more inviting, were there solutions to the 2nd floor sloped ceiling issues, and if they were going to do all of this work, how could they make their home more comfortable and efficient. A nagging water leak in the upstairs bathroom spurred them into action and here is how we solved their dilemma.
Conclusion: First, we added a little dormer to the rear of the house so we could get full headroom in nearly all of the upstairs bathroom! Then we decided to extend that dormer one more timber bay over to create a walk in closet with natural light and plenty of space. Since we were contemplating energy efficiency, we resolved a nagging issue that is present in a lot of timber frame construction, air tightness. Commonly found in timber frame construction, fiberglass insulation is installed in the rafter bays and board ceilings are installed over top. Unfortunately, board ceilings are anything but air tight, and fiberglass insulation needs to be in an airtight cavity for maximum effectiveness. So we were able to solve two issues at the same time for this homeowner. We removed the board ceiling and fiberglass insulation, we dense packed the rafter bays with cellulose insulation, and installed sheetrock in place of the boards. The boards were salvaged for re-use by the homeowner, and the space and light quality was dramatically improved. Some may think that losing the board ceiling took something away from the space, but what you'll see in the pictures is that it highly accentuates the heavy timbers and really makes them stand out in a beautiful way. Now with this added airtightness, better insulation, and brighter space, the homeowner hardly runs their wood stove, and it's so quiet in the space, an added bonus from changing the insulation. It became necessary to also add a sheetrock ceiling to the living room to hide the plumbing from the new bathroom layout above. Changing this ceiling gave the homeowner some real quality lighting that was lacking in the living room before. The brighter ceiling and new lighting layout completely transforms the living room into a space you want to hang out, even though the layout didn't change at all. When the homeowner saw the finished spaces she said "I can't believe this is my house, I want to live in this house"
Energy Efficiency: I touched a little on the efficiency above, but like all projects done with Mottram Architecture, we always want to leave you with a little extra. Timber frame construction with board ceilings and fiberglass insulation are notoriously leaky! If you want to know what we think about fiberglass insulation, check our our blog post on Why Fiberglass Insulation Sucks. By installing cellulose insulation and covering it with sheetrock we were able to greatly reduce the heat flowing out of this home. It not only improves cashflow it improves the comfort level in the space. Who wants to sit in their living room and feel a draft? Let us remind you, we are not saying cellulose insulation is an air barrier, we use the sheetrock to help with that, but it does significantly reduce the air flow over fiberglass insulation. And when we reduce the airflow, we reduce the heat flow. And when we reduce the heat flow, we reduce the need to re-heat that drafty air from outside. When it comes to energy efficiency the first and best place to start is air infiltration. We greatly reduced the air infiltration with the new insulation, but we also added a hat and warm boots. What I mean by that is, we improved the insulation in the roof, and we installed insulation in the basement. Maybe it's a silly analogy, but when you think about keeping warm, we always start with the hat and boots! With sustainability in mind, the next project will be to add a deck to the front of this house with rain catchment barrels from the metal roof. They are planning to plant a garden in the spring and the rain catchment system will help to irrigate the new garden.
Builder: East Shore Builders
Photographer: Michael Eric Berube

 Fein Construction LLC
The countertops are honed American Black granite.
Example of a large country single-wall medium tone wood floor open concept kitchen design in New York with a farmhouse sink, shaker cabinets, distressed cabinets, granite countertops, stainless steel appliances and an island
Example of a large country single-wall medium tone wood floor open concept kitchen design in New York with a farmhouse sink, shaker cabinets, distressed cabinets, granite countertops, stainless steel appliances and an island

 Altura Architects
This renovation in north Asheville has updated finishes and modernization throughout while still maintaining the style and layout of the original house. New insulation and heating and cooling systems dramatically improves the comfort and energy efficiency.

 Mottram Architecture
Michael Eric Berube, Maine Virtual Home ToursTimber frame homes offer unique challenges during a remodel. What often makes them beautiful and attractive to most homeowners, also makes them challenging for space requirements.
Context: The lovely couple that owned this home were struggling with some interesting floor plan challenges that just didn't work for their family. The loved the beautiful timbers and woodwork of their home, but the dramatically sloping ceilings on the second floor, particularly in the bathroom, just didn't work for this 1 1/2 bath home. Needing to use the skylight to approach the toilet was a less then ideal scenario. Although the bathroom footprint was more then adequate, the sloped ceiling only made half of the space useable. Check out the Before/After post on our blog to see the photos of the house pre-renovation. As much as they loved all the wood features in their home, another challenge they had was light. The wood ceiling made everything inside the house darker, even with a fantastic array of south facing windows, there were spaces in the home that felt dark and small. When they contacted us they wanted to know how could they make their brighter and more inviting, were there solutions to the 2nd floor sloped ceiling issues, and if they were going to do all of this work, how could they make their home more comfortable and efficient. A nagging water leak in the upstairs bathroom spurred them into action and here is how we solved their dilemma.
Conclusion: First, we added a little dormer to the rear of the house so we could get full headroom in nearly all of the upstairs bathroom! Then we decided to extend that dormer one more timber bay over to create a walk in closet with natural light and plenty of space. Since we were contemplating energy efficiency, we resolved a nagging issue that is present in a lot of timber frame construction, air tightness. Commonly found in timber frame construction, fiberglass insulation is installed in the rafter bays and board ceilings are installed over top. Unfortunately, board ceilings are anything but air tight, and fiberglass insulation needs to be in an airtight cavity for maximum effectiveness. So we were able to solve two issues at the same time for this homeowner. We removed the board ceiling and fiberglass insulation, we dense packed the rafter bays with cellulose insulation, and installed sheetrock in place of the boards. The boards were salvaged for re-use by the homeowner, and the space and light quality was dramatically improved. Some may think that losing the board ceiling took something away from the space, but what you'll see in the pictures is that it highly accentuates the heavy timbers and really makes them stand out in a beautiful way. Now with this added airtightness, better insulation, and brighter space, the homeowner hardly runs their wood stove, and it's so quiet in the space, an added bonus from changing the insulation. It became necessary to also add a sheetrock ceiling to the living room to hide the plumbing from the new bathroom layout above. Changing this ceiling gave the homeowner some real quality lighting that was lacking in the living room before. The brighter ceiling and new lighting layout completely transforms the living room into a space you want to hang out, even though the layout didn't change at all. When the homeowner saw the finished spaces she said "I can't believe this is my house, I want to live in this house"
Energy Efficiency: I touched a little on the efficiency above, but like all projects done with Mottram Architecture, we always want to leave you with a little extra. Timber frame construction with board ceilings and fiberglass insulation are notoriously leaky! If you want to know what we think about fiberglass insulation, check our our blog post on Why Fiberglass Insulation Sucks. By installing cellulose insulation and covering it with sheetrock we were able to greatly reduce the heat flowing out of this home. It not only improves cashflow it improves the comfort level in the space. Who wants to sit in their living room and feel a draft? Let us remind you, we are not saying cellulose insulation is an air barrier, we use the sheetrock to help with that, but it does significantly reduce the air flow over fiberglass insulation. And when we reduce the airflow, we reduce the heat flow. And when we reduce the heat flow, we reduce the need to re-heat that drafty air from outside. When it comes to energy efficiency the first and best place to start is air infiltration. We greatly reduced the air infiltration with the new insulation, but we also added a hat and warm boots. What I mean by that is, we improved the insulation in the roof, and we installed insulation in the basement. Maybe it's a silly analogy, but when you think about keeping warm, we always start with the hat and boots! With sustainability in mind, the next project will be to add a deck to the front of this house with rain catchment barrels from the metal roof. They are planning to plant a garden in the spring and the rain catchment system will help to irrigate the new garden.
Builder: East Shore Builders
Photographer: Michael Eric Berube
 Fein Construction LLC
Vintage Kitchen Remodel features Jenn Air appliances throughout.
Open concept kitchen - large cottage single-wall medium tone wood floor open concept kitchen idea in New York with a farmhouse sink, shaker cabinets, distressed cabinets, granite countertops, stainless steel appliances and an island
Open concept kitchen - large cottage single-wall medium tone wood floor open concept kitchen idea in New York with a farmhouse sink, shaker cabinets, distressed cabinets, granite countertops, stainless steel appliances and an island

 Sustainable Design, LLC
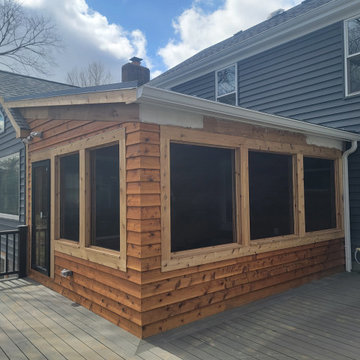
This neglected farmhouse has found a new family. Together we will undo the exterior muddling of the past, restore the interior spaces and create an amazing home for future generations to enjoy. As part of the process, we are improving the function, durability, energy efficiency and appearance of this home. We are converting a screen porch into a much-needed mudroom, air sealing the walls, increasing the insulation throughout, using resilient materials, and restoring the trim with classic details. Thanks to the amazing clients and excellent building crew, this restoration has been a truly rewarding process; transforming a village eyesore into a beautiful home.
21