
Search results for "Increased traffic" in Home Design Ideas
 Lagois Design Build Renovate
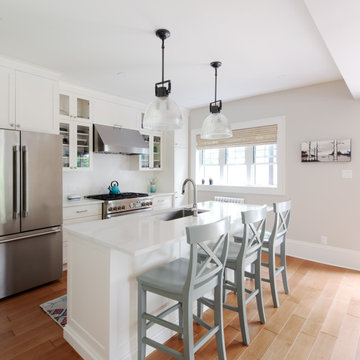
New windows, floors, powder room and basement:
We gave the home new windows, new hardwood floors, and paint throughout. We created a new main floor powder room and a new finished basement containing a living area, three-piece bathroom and new bedroom with egress (tilt and turn) windows.
Flipped around and redesigned kitchen:
We created a new kitchen. The footprint of the kitchen stayed the same, but we flipped it around and redesigned it. Now it has a walk-in pantry area and more floorspace going in and out, which optimized the flow of traffic. We replaced the old non-functioning mudroom with a new one.
Disappearing balcony and drafty door:
To create a new space using a balcony in a bedroom, we extended the second storey out to line up with the first floor, and this increased the square footage. In that room we turned a drafty door into a window.
We reinstated the rear deck, using as many of the original pieces as we could:
There was a leaking roof problem because the original roof pitches were causing ice damming. We designed a new roof to prevent that in the future.
New windows, stucco, and the challenge of asbestos:
Another challenge was installing new windows in the original stucco finish, which contained asbestos. We waterproofed those properly, future proofing them from leaks.
We solved the situation by installing a 5-inch trim around the perimeter of the window. Specialists cut the asbestos back (we had to set up a containment perimeter around each window), and then we placed windows that are five inches wider than the window frames. We used special flashing tapes and sealed them all up behind the stucco.
 Amy Pearson Design
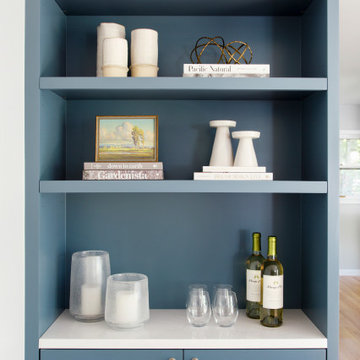
Relocating to Portland, Oregon from California, this young family immediately hired Amy to redesign their newly purchased home to better fit their needs. The project included updating the kitchen, hall bath, and adding an en suite to their master bedroom. Removing a wall between the kitchen and dining allowed for additional counter space and storage along with improved traffic flow and increased natural light to the heart of the home. This galley style kitchen is focused on efficiency and functionality through custom cabinets with a pantry boasting drawer storage topped with quartz slab for durability, pull-out storage accessories throughout, deep drawers, and a quartz topped coffee bar/ buffet facing the dining area. The master bath and hall bath were born out of a single bath and a closet. While modest in size, the bathrooms are filled with functionality and colorful design elements. Durable hex shaped porcelain tiles compliment the blue vanities topped with white quartz countertops. The shower and tub are both tiled in handmade ceramic tiles, bringing much needed texture and movement of light to the space. The hall bath is outfitted with a toe-kick pull-out step for the family’s youngest member!
 The Jack + Mare | Portland Design & Build
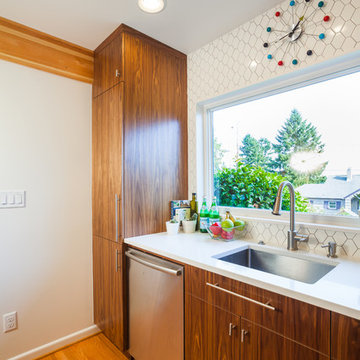
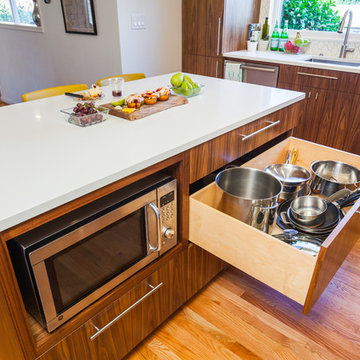
The Jack + Mare worked with the homeowners of this cool mid-century inspired kitchen from schematic design all the way through construction.
The existing kitchen was demolished all the way to studs, subfloor and ceiling joists and completely rebuilt with custom cabinets, solid oak flooring, task and ambient lighting, new electrical/plumbing, counter-to-ceiling wall tile, new beam (took down wall between living/kitchen), new window and colorful barn door.
The final design maximized storage, increased counter space, improved traffic flow, connected kitchen to adjacent living room (by removing existing wall), and improved the social aspect of the kitchen.
The kitchen is now efficient, beautiful, full of light and a happy place to call home!
Features: custom walnut cabinets (designed by The J+M), tile backsplash, new lighting plan (LED can lights, under-cabinet LED lights, Cedar+Moss pendants with LED bulbs), quartz countertops, new Marvin window with new trim, pantry with pull out shelves, glass upper cabinet (with puck LED) to feature antique glass-ware, island with microwave under counter, island seating.
photo credit: Jason Quigley
Find the right local pro for your project
 Jacobson Construction
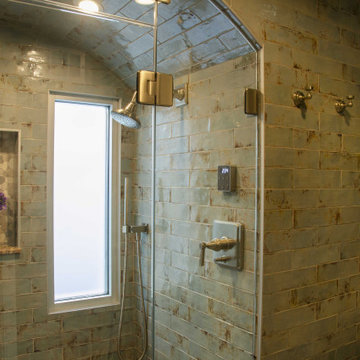
The owners of this classic “old-growth Oak trim-work and arches” 1½ story 2 BR Tudor were looking to increase the size and functionality of their first-floor bath. Their wish list included a walk-in steam shower, tiled floors and walls. They wanted to incorporate those arches where possible – a style echoed throughout the home. They also were looking for a way for someone using a wheelchair to easily access the room.
The project began by taking the former bath down to the studs and removing part of the east wall. Space was created by relocating a portion of a closet in the adjacent bedroom and part of a linen closet located in the hallway. Moving the commode and a new cabinet into the newly created space creates an illusion of a much larger bath and showcases the shower. The linen closet was converted into a shallow medicine cabinet accessed using the existing linen closet door.
The door to the bath itself was enlarged, and a pocket door installed to enhance traffic flow.
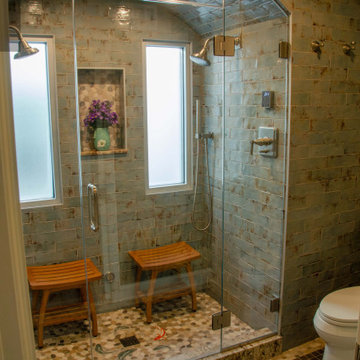
The walk-in steam shower uses a large glass door that opens in or out. The steam generator is in the basement below, saving space. The tiled shower floor is crafted with sliced earth pebbles mosaic tiling. Coy fish are incorporated in the design surrounding the drain.
Shower walls and vanity area ceilings are constructed with 3” X 6” Kyle Subway tile in dark green. The light from the two bright windows plays off the surface of the Subway tile is an added feature.
The remaining bath floor is made 2” X 2” ceramic tile, surrounded with more of the pebble tiling found in the shower and trying the two rooms together. The right choice of grout is the final design touch for this beautiful floor.
The new vanity is located where the original tub had been, repeating the arch as a key design feature. The Vanity features a granite countertop and large under-mounted sink with brushed nickel fixtures. The white vanity cabinet features two sets of large drawers.
The untiled walls feature a custom wallpaper of Henri Rousseau’s “The Equatorial Jungle, 1909,” featured in the national gallery of art. https://www.nga.gov/collection/art-object-page.46688.html
The owners are delighted in the results. This is their forever home.
 J.S. Brown & Co.
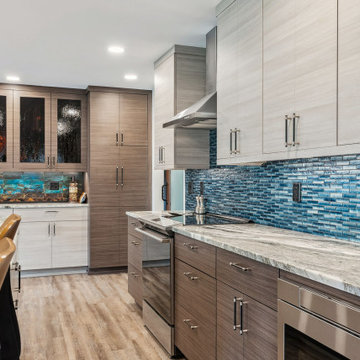
Walls were removed to increase the size of the kitchen and open up sight lines and traffic patterns to the adjacent family room. A completely new kitchen design created space for meal prep and entertaining. Softly textured cabinet finishes and dramatic backsplash colors are welcoming and fresh.
 Interior Re-Styling LLC.
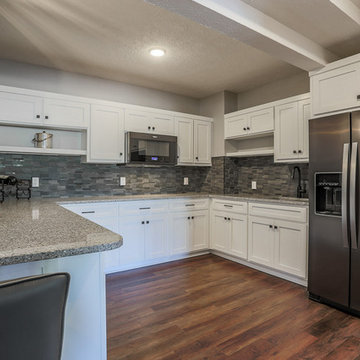
Before this remodel the support pole seemed like it was right in the middle of traffic pattern. I moved the refrigerator from the opposite kitchenette corner and ran the counter tops in a 'U' shape and created a peninsula that added seating, increased the counter space, improved flow in and out of the kitchen and removed the nuisance of the support pole.
 highland
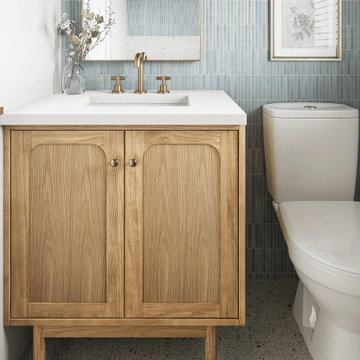
Renovating a bathroom is one of the most rewarding home improvement projects you can undertake. It adds immediate value to your property and elevates your daily routine. However, designing the perfect space requires balancing aesthetics with practical utility. At the heart of this balance is the vanity — it is the functional hub where you get ready each morning, a vital storage unit, and the visual centerpiece of the room.
To ensure you make the right investment, here is an in-depth look at choosing a bathroom vanity that blends style, longevity, and everyday functionality.
1. Assessing the Layout and Space Constraints
Before you fall in love with a specific design or finish, you must determine what your bathroom can physically handle. Scale is everything. A vanity that is too large disrupts traffic flow, while one that is too small gets lost visually and lacks adequate storage.
The next major step is determining the scale of your plumbing fixtures. Understanding how to choose a bathroom sink and vanity setup comes down to a simple choice: single or double sinks. Your choice will depend on who uses the bathroom and the overall footprint of the space.
Single Sink Vanities
Typically ranging from 20 to 48 inches (50–120 cm) in width, single vanities are the ideal choice for powder rooms, guest bathrooms, or small master suites. For very compact spaces, you can find narrower options starting around 16 inches (40 cm). The major advantage of a single-sink layout is that it provides more usable countertop space for cosmetics, toiletries, and decorative items. If you want to skip the guesswork and invest in a premium, beautifully handcrafted fixture, explore the luxury collections at Willow Bath and Vanity. From elegant single vanities to spacious double setups, their masterfully built furniture combines solid wood construction with elite styling to transform any bathroom into a spa-like retreat.
Double Sink Vanities
Usually starting at 48 inches (120 cm) and extending up to 72 inches (180 cm) or more, double vanities are a lifesaver for shared master bathrooms. They allow two people to get ready simultaneously without fighting for sink space. Keep in mind that a double vanity naturally reduces both cabinet storage space and countertop real estate since a second sink basin and plumbing lines take up substantial interior room.
Sink Types to Consider
The countertop is the workhorse of the bathroom. It regularly comes into contact with running water, toothpaste, soapy residue, and high-heat styling tools. Knowing how to choose a bathroom vanity top requires evaluating how much maintenance you are willing to perform against the look you want to achieve. Material Pros Cons Maintenance Level Quartz Highly durable, non-porous, stain and scratch-resistant. Offers the look of stone without the hassle. Premium pricing; can show seams on very large custom layouts. Low (No sealing required) Marble Timeless, elegant, and luxurious. Every slab features a completely unique veining pattern. Porous; prone to scratching, etching from acids, and water stains. Requires careful daily use. High (Requires regular sealing) Granite Naturally strong, heat-resistant, and chemically stable. Unique earthy patterns. Porous; can chip if subjected to heavy impacts. Medium (Requires occasional sealing) When coordinating your countertop, ensure it complements your bathroom’s floor tiles, shower surround, and plumbing hardware to maintain visual harmony.
4. Selecting the Core Vanity Style and Finish
Once the functional components are locked in, you can focus on the architectural style of the vanity base. The base dictates the design theme of the entire room.
Conclusion
Choosing the perfect vanity is a step-by-step process that combines precise measurements with your personal design taste. By taking careful measurements, choosing between a single- or double-sink setup, and picking a durable counter material like quartz or granite, you can transform your bathroom into a beautiful, organized retreat. Prioritize high-quality materials and smart craftsmanship, and your new vanity will look spectacular and serve your household reliably for years to come.
1. Assessing the Layout and Space Constraints
Before you fall in love with a specific design or finish, you must determine what your bathroom can physically handle. Scale is everything. A vanity that is too large disrupts traffic flow, while one that is too small gets lost visually and lacks adequate storage.
- Take Precise Measurements: measure the available width, depth, and height. Remember to account for surrounding fixtures.
- Check Clearance Zones: ensure there is enough clearance for the bathroom door to swing open, for shower glass doors to clear the vanity, and for drawers and cabinet doors to extend fully without hitting the toilet or walls.
-
Locate Existing Plumbing: moving pipes can significantly increase renovation costs. If you want a seamless installation, look for a vanity configuration that aligns easily with your current plumbing setup.
The next major step is determining the scale of your plumbing fixtures. Understanding how to choose a bathroom sink and vanity setup comes down to a simple choice: single or double sinks. Your choice will depend on who uses the bathroom and the overall footprint of the space.
Single Sink Vanities
Typically ranging from 20 to 48 inches (50–120 cm) in width, single vanities are the ideal choice for powder rooms, guest bathrooms, or small master suites. For very compact spaces, you can find narrower options starting around 16 inches (40 cm). The major advantage of a single-sink layout is that it provides more usable countertop space for cosmetics, toiletries, and decorative items. If you want to skip the guesswork and invest in a premium, beautifully handcrafted fixture, explore the luxury collections at Willow Bath and Vanity. From elegant single vanities to spacious double setups, their masterfully built furniture combines solid wood construction with elite styling to transform any bathroom into a spa-like retreat.
Double Sink Vanities
Usually starting at 48 inches (120 cm) and extending up to 72 inches (180 cm) or more, double vanities are a lifesaver for shared master bathrooms. They allow two people to get ready simultaneously without fighting for sink space. Keep in mind that a double vanity naturally reduces both cabinet storage space and countertop real estate since a second sink basin and plumbing lines take up substantial interior room.
Sink Types to Consider
- Undermount: installed beneath the counter for a smooth, seamless surface that is incredibly easy to wipe down.
- Vessel: sits atop the counter like a decorative bowl. It makes a bold style statement but raises the overall height of the counter surface.
- Drop-In: features a lip that rests on the counter cutout. It is easier to install, but its edges can catch dirt.
-
The countertop is the workhorse of the bathroom. It regularly comes into contact with running water, toothpaste, soapy residue, and high-heat styling tools. Knowing how to choose a bathroom vanity top requires evaluating how much maintenance you are willing to perform against the look you want to achieve. Material Pros Cons Maintenance Level Quartz Highly durable, non-porous, stain and scratch-resistant. Offers the look of stone without the hassle. Premium pricing; can show seams on very large custom layouts. Low (No sealing required) Marble Timeless, elegant, and luxurious. Every slab features a completely unique veining pattern. Porous; prone to scratching, etching from acids, and water stains. Requires careful daily use. High (Requires regular sealing) Granite Naturally strong, heat-resistant, and chemically stable. Unique earthy patterns. Porous; can chip if subjected to heavy impacts. Medium (Requires occasional sealing) When coordinating your countertop, ensure it complements your bathroom’s floor tiles, shower surround, and plumbing hardware to maintain visual harmony.
4. Selecting the Core Vanity Style and Finish
Once the functional components are locked in, you can focus on the architectural style of the vanity base. The base dictates the design theme of the entire room.
- Freestanding vanities: sit directly on the floor, supported by legs or a solid kickboard base. This is a traditional, stable configuration that offers the maximum hidden cabinet and drawer storage space.
- Wall-Mounted (Floating) vanities: anchored directly onto the wall studs, leaving the floor underneath completely clear. Floating vanities are staples of modern, minimalist design. They create an illusion of space, making small rooms look larger, and make cleaning the bathroom floor incredibly easy.
- Console vanities: feature an open shelving design supported by a metal or wood frame. It offers a light, airy look reminiscent of a boutique hotel, though it sacrifices hidden storage.
Conclusion
Choosing the perfect vanity is a step-by-step process that combines precise measurements with your personal design taste. By taking careful measurements, choosing between a single- or double-sink setup, and picking a durable counter material like quartz or granite, you can transform your bathroom into a beautiful, organized retreat. Prioritize high-quality materials and smart craftsmanship, and your new vanity will look spectacular and serve your household reliably for years to come.
 Julie Carpia
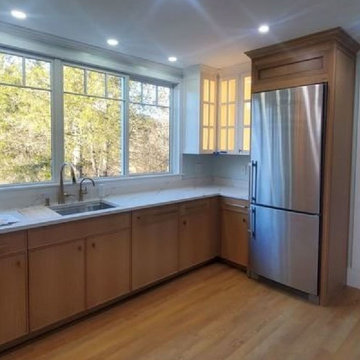
This beautiful kitchen captures the client's desire to blend modern lines with the traditional architecture and classic interior woodwork. This renovation achieved a larger footprint, better traffic flow, increased natural light, and an open feel. The blend of modern frameless base cabinets, which features a clean modern Fineline door profile and rift-cut cherry with a light graywash stain, adds dynamic warmth when paired with the traditional inset constructed wall cabinets. The white painted glass wall cabinets help to extend the visual of the window bank, helping to elevate the modern, clean, horizontal lines.
 The Jack + Mare | Portland Design & Build
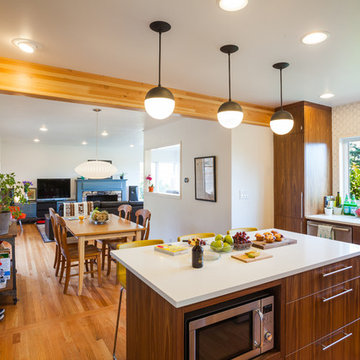
The Jack + Mare worked with the homeowners of this cool mid-century inspired kitchen from schematic design all the way through construction.
The existing kitchen was demolished all the way to studs, subfloor and ceiling joists and completely rebuilt with custom cabinets, solid oak flooring, task and ambient lighting, new electrical/plumbing, counter-to-ceiling wall tile, new beam (took down wall between living/kitchen), new window and colorful barn door.
The final design maximized storage, increased counter space, improved traffic flow, connected kitchen to adjacent living room (by removing existing wall), and improved the social aspect of the kitchen.
The kitchen is now efficient, beautiful, full of light and a happy place to call home!
Features: custom walnut cabinets (designed by The J+M), tile backsplash, new lighting plan (LED can lights, under-cabinet LED lights, Cedar+Moss pendants with LED bulbs), quartz countertops, new Marvin window with new trim, pantry with pull out shelves, glass upper cabinet (with puck LED) to feature antique glass-ware, island with microwave under counter, island seating.
photo credit: Jason Quigley
 Lagois Design Build Renovate
New windows, floors, powder room and basement:
We gave the home new windows, new hardwood floors, and paint throughout. We created a new main floor powder room and a new finished basement containing a living area, three-piece bathroom and new bedroom with egress (tilt and turn) windows.
Flipped around and redesigned kitchen:
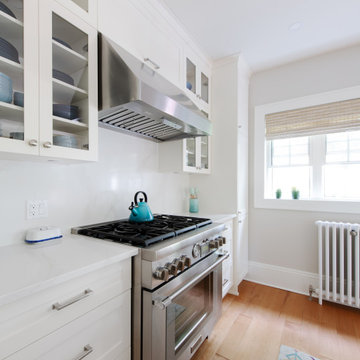
We created a new kitchen. The footprint of the kitchen stayed the same, but we flipped it around and redesigned it. Now it has a walk-in pantry area and more floorspace going in and out, which optimized the flow of traffic. We replaced the old non-functioning mudroom with a new one.
Disappearing balcony and drafty door:
To create a new space using a balcony in a bedroom, we extended the second storey out to line up with the first floor, and this increased the square footage. In that room we turned a drafty door into a window.
We reinstated the rear deck, using as many of the original pieces as we could:
There was a leaking roof problem because the original roof pitches were causing ice damming. We designed a new roof to prevent that in the future.
New windows, stucco, and the challenge of asbestos:
Another challenge was installing new windows in the original stucco finish, which contained asbestos. We waterproofed those properly, future proofing them from leaks.
We solved the situation by installing a 5-inch trim around the perimeter of the window. Specialists cut the asbestos back (we had to set up a containment perimeter around each window), and then we placed windows that are five inches wider than the window frames. We used special flashing tapes and sealed them all up behind the stucco.
 Renovisions
Our client was ready for a re-do and approached Renovisions for help to design and build a beautiful and durable space that will last as well as add value to her home.
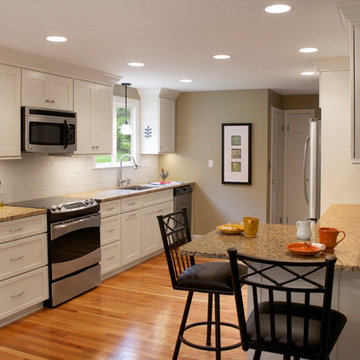
The challenge was to design the new kitchen to allow for better traffic, flow and functionalize this space for much needed storage. Moving the refrigerator to the other side of the kitchen and opening up a section of the wall between the dining room and kitchen was a great design solution. We increased the flow to the dining room and created a spacious feel with better access from the dining area.
Warm hues from the granite countertops provided a rich contrast to the Ivory colored cabinetry that brightened up the room. Under-cabinet lighting was added over all countertop areas and is controlled by a dimmer switch for both task and ambient lighting.
The brushed nickel hardware compliments the stainless steel appliances and Jado pull-down single lever faucet.
The walls are a warm and inviting earthy green tone and ties in well with the soft linen hue of the beautiful subway tile backsplash.
Simple, clean lines and earthy materials like granite and stainless steel worked together to soften the whole look.
Renovisions turned this outdated kitchen into a magnificent space where this homeowner plans on spending a lot of time.
 TOC design & construction inc.
Interior Design by: TOC design.
Project Manager: TOC design & Construction inc.
Contractor: Ivco inc.
Millworker: Soll Solutions.
Photographer: Guillaume Gorini.
Use smart strategies to make your small living room feel larger.
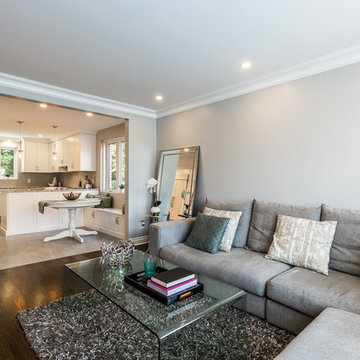
When carefully planned, a small living room can be both attractive and user-friendly. When you take the time to consider your storage needs and daily lifestyle, you can create a small but smart living room that increases the enjoyment of your home.
Make sure the furniture you choose for your small living room is appropriate for the space, For example, avoid sofas with skirts. You want to go for furniture raised off the floor.
Keep the area free from clutter and allow traffic flow in and out of the room.
A good living room lighting scheme uses different kinds of light, set at different levels, that work together to make the space warm and attractive.
Try to resist the urge to use only small pieces in your small living room. Instead, consider an oversized chair that gives unexpected scale to the space, and balance out the space with a large textured area rug. Or an oversized floor mirror to give depth.
 Homework Remodels
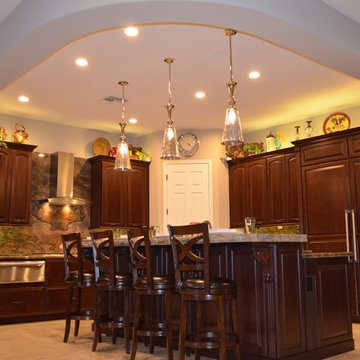
 With education being key to our remodel process, our designer discussed lighting elements, space planning, cabinet options and finish materials with our homeowners. To begin, she talked about under cabinet and above cabinet lighting options. They also discussed the popularity and functionality of LED lights for task, decorative and ambient lighting scenes. Eavesdropping on our conversation, one of the brothers chimed in on how often they had to change the recessed ceiling fixtures. That comment from the brother led our designer to increase our scope of work to add dimmable LED can lights in the color frequency close to daylight. Now it was time to complete the finish selections.
Product selection had to go quickly, as the homeowner was only able to dedicate one long weekend to shop. With this goal in mind, our designer made choosing plumbing products and decorative lighting an online event. Then they went to an appliance showroom and granite/tile showroom to make the final choices. Our designer made sure they found a gorgeous set of slabs for the granite above the cooktop, since it was a key factor for the client and her mother.
With all the selections made, final space plan drawings and the electrical layout complete, the client met with our designer to sign off on all the paperwork and move forward with their new kitchen. The key improvements incorporated into the final design were:
LED can lights, under cabinet and above cabinet lights all on dimmers.
Accessible items for wheelchair use with a touch-free faucet and microwave drawer .
Extra deep counter space and seating at the island.
Additional storage cabinets under the seating area of the island.
Decreased traffic flow issues by adjusting refrigerator/freezer location and double oven cabinet.
Plug strips under the wall cabinets to eliminate backsplash outlets.
An expansive granite slab backsplash centered on the cooktop area.
Our project manager started the job with rough electrical and rough plumbing, as the homeowner had enlisted the assistance of a family friend to remove the kitchen cabinets and re-install them in her garage. The plumbing was straight forward with the gas line already in place and the sink location staying in the island. The electrician wired for the new under-cabinet and above cabinet LED strip lights. The sconce locations were adjusted for the new bar top location, as were a row of can lights to accommodate for an even pour of ambient light throughout the space. The new LED can lights are a hit, as none have needed to be changed out.
Our project manager specializes in trim carpentry so he did the cabinet install to keep our schedule on time. The cabinets went in smoothly except for the custom refrigerator panel. One of the panels needed to be remade three times, as each time it was produced the manufacturer’s quality control caught a defect. Our project manager worked closely with manufacturer and homeowner to keep everyone in the loop waiting patiently on its arrival.
When it came time for the quartzite installation, we worked closely with our fabricator at cut layout to create the focal point at the hood. His team did an excellent job with the installation. The sink area was a surprise. They went above and beyond in framing the sink with the similar vein to the hood backsplash. Upon installation, the tile backsplash just did not do justice to the amazing quartzite. Discussion with the family and pictures sent to the homeowner lead to a decision to call the fabricator to see how much quartzite might be left. He had just enough to complete the island and beverage center. In the end, the backsplash worked out beautifully in all stone.
We met our schedule for the end date of the project and the wheelchair-bound sister was able to move in. For this large Italian family, big meals with lots of family and friends in the new wonderful hub/kitchen is now a part of their happy life. Mission accomplished.
 Amy Pearson Design
Relocating to Portland, Oregon from California, this young family immediately hired Amy to redesign their newly purchased home to better fit their needs. The project included updating the kitchen, hall bath, and adding an en suite to their master bedroom. Removing a wall between the kitchen and dining allowed for additional counter space and storage along with improved traffic flow and increased natural light to the heart of the home. This galley style kitchen is focused on efficiency and functionality through custom cabinets with a pantry boasting drawer storage topped with quartz slab for durability, pull-out storage accessories throughout, deep drawers, and a quartz topped coffee bar/ buffet facing the dining area. The master bath and hall bath were born out of a single bath and a closet. While modest in size, the bathrooms are filled with functionality and colorful design elements. Durable hex shaped porcelain tiles compliment the blue vanities topped with white quartz countertops. The shower and tub are both tiled in handmade ceramic tiles, bringing much needed texture and movement of light to the space. The hall bath is outfitted with a toe-kick pull-out step for the family’s youngest member!
 J.S. Brown & Co.
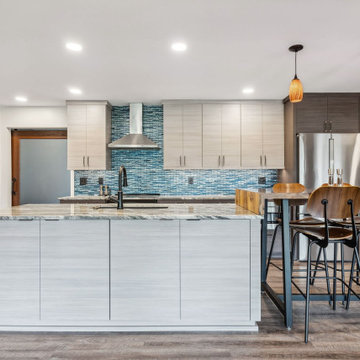
Walls were removed to increase the size of the kitchen and open up sight lines and traffic patterns to the adjacent family room. A completely new kitchen design created space for meal prep and entertaining. Softly textured cabinet finishes and dramatic backsplash colors are welcoming and fresh.
 Drury Design
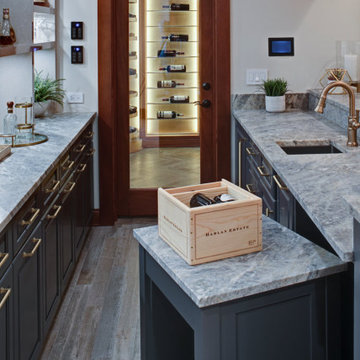
Some long-time repeat Drury customers were ready to update their wine cellar and bar area. The right design would make the space more functional and relaxing while increasing viewable wine storage capacity.
The homeowners appreciate craftsmanship and dedication – it’s the difference between good and truly great whiskies and wines. A relaxing space to appreciate such mastery would need to reflect the same kind of care and attention to detail.
Design Objectives:
-Remove heavy posts and archway to open the bar to the basement entertainment area
-Add an undercounter ice maker
-Create a clean, open display for liquor and glassware
-Create a cabinet-matching rolling cart for transporting cases of wine from the area’s entryway to the wine cellar
-Add drama and improve lighting
-Expand the wine cellar and add ceiling-mounted cooling
-Add a concealed area in the wine cellar for wine case storage
-Update task and decorative lighting
Design Challenges:
-Complement the existing stained-cherry trim in the basement area
-Determine how to include a separate area for case storage accessible from the main wine cellar
-Create an updated look that integrates seamlessly with the upscale traditional Tudor home
-The curved staircase called for creativity in the floor tile layout
Design Solutions:
-For cabinetry, a rich smoky blue-grey paint was chosen to complement the cherry stain
-Gorgeous leather-finished Tiempo Cielo quartzite countertops pair beautifully with the flooring
-Elegant textured-glass tile creates an interesting backdrop to open shelving
-High Gloss veneer shelving elevates the space and feels more modern than the previous cabinetry
-Realistic wood-look porcelain tile in a light greige tone creates a durable surface for this high traffic area
-A custom rolling cart was included to move cases into the wine cellar with ease
-Fresh decorative lighting in the bar and wine cellar adds drama while updating the overlook look and feel
Removing the heavy posts and archway between the bar and the rest of the entertainment area made the entire space feel more welcoming and inviting. The steel blue finish on the cabinetry blends beautifully with the existing woodwork, giving the basement a fresh look. The homeowners are more than pleased with how their renewed bar and wine cellar elevates the experience of celebrating fine spirits and enjoying them with friends.
 The Jack + Mare | Portland Design & Build
The Jack + Mare worked with the homeowners of this cool mid-century inspired kitchen from schematic design all the way through construction.
The existing kitchen was demolished all the way to studs, subfloor and ceiling joists and completely rebuilt with custom cabinets, solid oak flooring, task and ambient lighting, new electrical/plumbing, counter-to-ceiling wall tile, new beam (took down wall between living/kitchen), new window and colorful barn door.
The final design maximized storage, increased counter space, improved traffic flow, connected kitchen to adjacent living room (by removing existing wall), and improved the social aspect of the kitchen.
The kitchen is now efficient, beautiful, full of light and a happy place to call home!
Features: custom walnut cabinets (designed by The J+M), tile backsplash, new lighting plan (LED can lights, under-cabinet LED lights, Cedar+Moss pendants with LED bulbs), quartz countertops, new Marvin window with new trim, pantry with pull out shelves, glass upper cabinet (with puck LED) to feature antique glass-ware, island with microwave under counter, island seating.
photo credit: Jason Quigley
 Jacobson Construction
The owners of this classic “old-growth Oak trim-work and arches” 1½ story 2 BR Tudor were looking to increase the size and functionality of their first-floor bath. Their wish list included a walk-in steam shower, tiled floors and walls. They wanted to incorporate those arches where possible – a style echoed throughout the home. They also were looking for a way for someone using a wheelchair to easily access the room.
The project began by taking the former bath down to the studs and removing part of the east wall. Space was created by relocating a portion of a closet in the adjacent bedroom and part of a linen closet located in the hallway. Moving the commode and a new cabinet into the newly created space creates an illusion of a much larger bath and showcases the shower. The linen closet was converted into a shallow medicine cabinet accessed using the existing linen closet door.
The door to the bath itself was enlarged, and a pocket door installed to enhance traffic flow.
The walk-in steam shower uses a large glass door that opens in or out. The steam generator is in the basement below, saving space. The tiled shower floor is crafted with sliced earth pebbles mosaic tiling. Coy fish are incorporated in the design surrounding the drain.
Shower walls and vanity area ceilings are constructed with 3” X 6” Kyle Subway tile in dark green. The light from the two bright windows plays off the surface of the Subway tile is an added feature.
The remaining bath floor is made 2” X 2” ceramic tile, surrounded with more of the pebble tiling found in the shower and trying the two rooms together. The right choice of grout is the final design touch for this beautiful floor.
The new vanity is located where the original tub had been, repeating the arch as a key design feature. The Vanity features a granite countertop and large under-mounted sink with brushed nickel fixtures. The white vanity cabinet features two sets of large drawers.
The untiled walls feature a custom wallpaper of Henri Rousseau’s “The Equatorial Jungle, 1909,” featured in the national gallery of art. https://www.nga.gov/collection/art-object-page.46688.html
The owners are delighted in the results. This is their forever home.
 Lagois Design Build Renovate
New windows, floors, powder room and basement:
We gave the home new windows, new hardwood floors, and paint throughout. We created a new main floor powder room and a new finished basement containing a living area, three-piece bathroom and new bedroom with egress (tilt and turn) windows.
Flipped around and redesigned kitchen:
We created a new kitchen. The footprint of the kitchen stayed the same, but we flipped it around and redesigned it. Now it has a walk-in pantry area and more floorspace going in and out, which optimized the flow of traffic. We replaced the old non-functioning mudroom with a new one.
Disappearing balcony and drafty door:
To create a new space using a balcony in a bedroom, we extended the second storey out to line up with the first floor, and this increased the square footage. In that room we turned a drafty door into a window.
We reinstated the rear deck, using as many of the original pieces as we could:
There was a leaking roof problem because the original roof pitches were causing ice damming. We designed a new roof to prevent that in the future.
New windows, stucco, and the challenge of asbestos:
Another challenge was installing new windows in the original stucco finish, which contained asbestos. We waterproofed those properly, future proofing them from leaks.
We solved the situation by installing a 5-inch trim around the perimeter of the window. Specialists cut the asbestos back (we had to set up a containment perimeter around each window), and then we placed windows that are five inches wider than the window frames. We used special flashing tapes and sealed them all up behind the stucco.
 3rd Street Inn
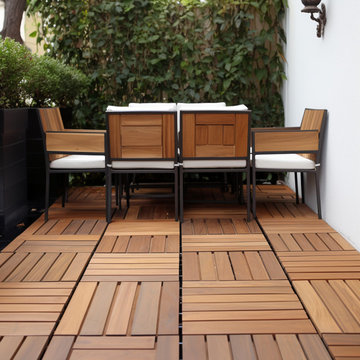
★ 3RD STREET INN® DECK TILES - 3rd Street Inn® Deck Tiles are made from 100% solid acacia hardwood. Acacia is known for its excellent resistance to rot and decay from outdoor elements including rain, sun, mold, mildew, and insects. Each 3rd Street Inn® Interlocking Patio Tile provides 12"x12" (1 Square Foot) of coverage and is available as a 6-pack (6 Square Feet), 10-pack (10 Square Feet), and 20-pack (20 Square Feet).
★ EASY INSTALLATION & NO HARDWARE NEEDED - 3RD STREET INN® interlocking deck flooring features snap-lock connectors for easy DIY installation without the use of tools or hardware. Install our interlocking deck cover tiles in your area by lining them up and then stepping on the seams until you hear an audible "click" to lock them in. All 3rd Street Inn® deck flooring options are made completely hardware free so that there aren't any components to rust and break down in the outdoor elements like other inferior tile patio decking
★ INDOOR AND OUTDOOR DECK FLOORING - 3rd Street Inn® Patio Tiles create a beautiful space both inside and outside. All that is needed is a solid surface and the deck flooring can be laid directly on top of it. Our composite deck tiles can be installed on top of concrete, wood, carpet, pavers, or any other solid surface. Great for decks, patios, balconies, around pools, saunas, showers, sun rooms, mud rooms, bedrooms, and more.
★ DURABLE BEAUTY - 3rd Street Inn® interlocking composite deck tiles are sanded and oiled for a beautiful, scratch resistant finish. All 3rd Street Inn® outdoor patio flooring is non-slip and great for high or low traffic areas inside or outside of the home. To increase the lifespan of your tile decking when used for outdoor applications, standard decking care is recommended. For best results, coat your decking with a UV-rated weatherproofing sealer twice a year and re-stain as needed. The tile decking can also be painted different colors in order to create the look that you want!
★ VERSATILE INSTALLATION OPTIONS- 3rd Street Inn® Interlocking Flooring Tiles not only look great in permanent installations on decks, patios, and around pools, they also offer a great temporary solution for installations in apartments and condos that can easily be removed when needed. For a custom fit, the interlocking patio tiles can be easily cut with a skill saw or jigsaw to accommodate areas of all shapes and sizes. Add 3rd Street Inn® Wooden Deck Flooring to your home and bring your space to life!
We recommend using a UV rated weatherproof sealant twice yearly. This sealant is a crucial step in the life of the decking tiles and can extend the life of the decking tiles, in some cases, pending the climate, by 1 to 2 years.
The life of a decking tile is heavily dependent on the climate of where they are located. Hot, humid climates, rainy climates, and cold, snowy climates can cause the decking tiles to deteriorate faster than using them in a climate controlled environment, like inside of a house or indoor venue.
16