
Search results for "Involving multiple" in Home Design Ideas
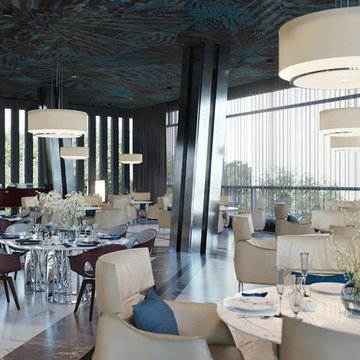
 Vanguard Development
The best interior designers & architects in NYC!
Residential interior design, Common area design, Hospitality design, Exterior design, Commercial design - any interior or architectural design basically from a unique design team :)
Our goal is to provide clients in Manhattan, New York, New Jersey & beyond with outstanding architectural & interior design services and installation management through a unique approach and unparalleled work quality.
Our mission is to create Dream Homes that change people's lives!
Working with us is a simple two step process - Design & Installation. The core is that all our design ideas (interior design of an apartment, restaurant, hotel design or architectural design of a building) are presented through exceptionally realistic images, delivering the exact look of your future interior/exterior, before you commit to investing. The Installation then abides to the paradigm of 'What I See Is What I Get', replicating the approved design. All together it gives you full control and eliminates the risk of having an unsatisfactory end product - no other interior designer or architect can offer.
Our team's passion, talent & professionalism brings you the best possible result, while our client-oriented philosophy & determination to make the process easy & convenient, saves you great deal of time and concern.
In short, this is Design as it Should be...
Other services: Lobby design, Store & storefront design, Hotel design, Restaurant design, House design
www.vanguard-development.com
 Windy City Painters
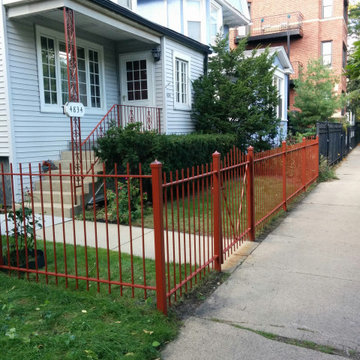
ver look at your iron fence and wonder how rust crept up so fast? For homeowners across Chicago's North Side and Near West Side, that moment of recognition often comes too late. Windy City Painters built this project guide to help you understand exactly what a professional iron fence restoration involves, what products matter, and what Chicago's climate demands from every coat of paint applied to exposed metal.
PROJECT OVERVIEW
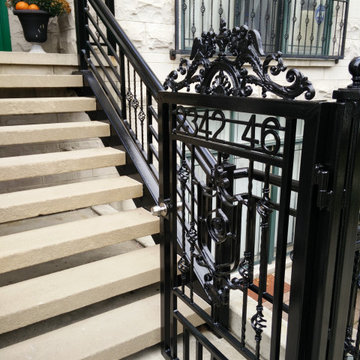
This iron fence restoration involved a multi-unit property featuring an ornamental iron perimeter fence typical of Chicago's greystone and courtyard building streetscape. The fence presented moderate-to-severe surface rust, multiple areas of paint delamination, and two sections with deep pitting requiring needle gun descaling before any coating could be applied. The goal was full rust remediation and a durable topcoat finish built for Chicago's demanding climate. Windy City Painters completed the project in two days with zero damage to surrounding hardscape.
MATERIALS AND PRODUCTS
Ospho Rust Converter - A phosphoric acid-based treatment that chemically transforms iron oxide into iron phosphate, halting active corrosion before primer is applied. Essential on Chicago iron exposed to decades of salt air and freeze-thaw cycling.
Corroseal Rust-Inhibitive Primer - A water-based latex primer with built-in rust inhibitors, applied over converted surfaces to seal and prepare metal for topcoating.
Sherwin-Williams DTM Acrylic Coating - Direct-to-Metal formulation delivering exceptional adhesion, flexibility, and corrosion resistance. Available in satin and semi-gloss, ideal for ornamental iron fence painting across Chicago properties.
THE PROCESS
Step 1 - Mechanical Surface Preparation: Wire wheel grinding with angle grinder attachments removed all loose rust scale, failing paint, and surface contamination. Heavily pitted sections received needle gun descaling to expose clean stable metal beneath. This step determines everything. No primer or topcoat performs correctly over compromised metal, regardless of product quality. Windy City Painters treats prep as the primary investment on every iron fence project.
Step 2 - Rust Conversion: Ospho was applied liberally to all areas showing active rust. The phosphoric acid reaction was allowed to complete fully before any priming began. On severely oxidized sections, a second Ospho application ensured complete conversion. This step is non-negotiable in Chicago where freeze-thaw cycles push moisture into every surface irregularity.
Step 3 - Priming with Corroseal: Full coverage Corroseal primer coat sealed the converted surface and established adhesion for the finish coats. Corroseal's rust-inhibitive chemistry adds a secondary barrier against moisture penetration, extending the effective life of the topcoat by years in Chicago's humid lakefront environment.
Step 4 - DTM Topcoat Application: Two coats of Sherwin-Williams DTM acrylic in satin black were applied by brush to ensure full penetration into ornamental detail. DTM's flexibility accommodates the metal expansion and contraction Chicago temperatures demand, from minus-15 winters to 95-degree July afternoons. Final coverage was uniform and true to color.
CHICAGO-SPECIFIC CHALLENGES
Chicago iron faces challenges most other markets do not. Lake Michigan humidity accelerates surface oxidation year-round. Road salt from winter de-icing migrates to fence bases and lower rails. Freeze-thaw cycling cracks poorly adhered coatings within a single winter. Greystones, two-flats, and Victorian brownstones often feature original ornamental ironwork with decades of layered paint that must be assessed before any new coating is added. Windy City Painters factors all of these conditions into every iron fence estimate and material selection.
WHAT TO EXPECT LONG-TERM
A properly prepared and coated iron fence using the Ospho, Corroseal, and Sherwin-Williams DTM system should deliver 5-8 years of performance in Chicago conditions. Annual visual inspection for chips or scratches, followed by prompt spot priming, extends that timeline significantly. Full refinishing cycles become less frequent when the initial prep work is done correctly.
PRO TIPS
Tip 1 - Never skip the rust converter. Painting over active rust with even the best topcoat guarantees early failure. Ospho or a comparable phosphoric acid treatment must precede any primer on iron showing orange or brown oxidation.
Tip 2 - Assess for weld repairs before scheduling painting. If rust has eaten through the metal creating structural voids or broken sections, a welder must address those areas before painting begins. Windy City Painters identifies weld repair needs during the free estimate.
Tip 3 - Choose satin or semi-gloss finish on iron. Flat finishes on metal hold moisture and show wear faster. Satin DTM provides enough sheen to shed water while maintaining the traditional look Chicago ornamental iron demands.
Ready to restore your iron fence the right way? Visit windypainters.com to schedule your free estimate with Windy City Painters.
FAQ
Q: What does iron fence painting cost in Chicago?
A: Most residential iron fence projects range from $500 to $1,800 depending on linear footage, rust severity, and prep requirements. Windy City Painters provides free detailed on-site estimates for accurate iron fence painting cost in Chicago.
Q: How do I know if my fence needs rust conversion or just repainting?
A: Any visible orange or brown rust requires chemical conversion before priming. Windy City Painters evaluates every fence during the estimate to determine whether Ospho, mechanical prep, or weld repair is needed before coating begins.
Q: Can you paint iron in cold Chicago weather?
A: DTM coatings have lower application temperature thresholds than standard exterior paint, but we avoid application below 35 degrees Fahrenheit. Windy City Painters schedules iron fence projects for appropriate weather windows throughout the season.
Q: How long does iron fence paint last in Chicago?
A: With complete rust conversion, Corroseal priming, and Sherwin-Williams DTM topcoat, iron fence painting in Chicago lasts 5-8 years. Annual inspections and prompt touch-ups of chips extend that timeline further.
Q: Do I need a welder before an iron fence can be painted?
A: Only if rust has created structural voids or breaks in the metal. Windy City Painters assesses this during the free estimate and can coordinate with welders when needed before our painting crew begins.
Q: What is the difference between Ospho and Corroseal?
A: Ospho is a rust converter applied directly to active rust to chemically neutralize it. Corroseal is a rust-inhibitive primer applied over converted or clean metal. Windy City Painters often uses both in sequence for maximum protection on Chicago iron.
Q: How often should Chicago iron fences be inspected?
A: Annual inspection is recommended, ideally in early spring after winter salt and freeze-thaw exposure. Catching small chips and bare spots early allows simple touch-up rather than full iron fence repainting, saving significant cost.

 contact7524
This stained glass window was created as part of our signature Aspen Stained Glass line. These windows look beautiful in cottage style or contemporary homes and are a great way for outdoor enthusiasts to celebrate their love of nature. The textured appearance of the glass provides the homeowners with a high level of privacy and comfort.
Find the right local pro for your project
 PropertyLark
The Pros and Cons of Fix and Flip Real Estate Investment
Last week, we covered The Pros and Cons of Buy and Hold Real Estate Investment for rental property investors. This week, we want to talk about the other most common type of real estate investment: “fix and flip.”
The Appeal of House Flipping
We all love the house flipping shows on HGTV and other reality channels. They’re great and they make the prospect of buying, renovating and flipping homes for big profits seem super sexy and fun. However, any experienced real estate investor will tell you it’s not quite as easy as they make it look. There’s a lot of work that goes into a successful fix and flip investment.
The basic premise of a fix and flip investment is pretty simple. You buy a property, usually one that needs some work and is available at a great price. You renovate the property, making the necessary repairs and upgrades to maximize its resale value. Then, you sell the property on the open market for the highest possible price. You get in and out as quickly as possible. Full-time flippers will move from property to property or will have multiple properties being worked on at the same time. Rather than the “buy and hold” strategy where you keep the house while earning rental income and equity over time, you are looking for the quick sale to earn your profits.
If you are going to explore house flipping—whether as a full-time career or just a side hustle—you will want to know exactly what you are getting into. That is why we are going to cover the pros and cons of fix and flip real estate investment in this article.
The Pros of Fix and Flip
Here are some of the pros of fix and flip investing:
Faster Return on Investment—The biggest appeal of fix and flip investing is that it gives you a quicker return on investment. Buy and hold will take you longer to see your ROI. House flipping allows you to see your full profit (hopefully) as soon as the house sells. The average house flip for an experienced investor is around six months. It may take longer for a first-timer who is just learning how to do certain things.
Fairly Safe Investment—As long as you do all your projections and calculations carefully and avoid any major problems along the way, house flipping is a relatively safe investment strategy compared to something as turbulent as the stock market. Real estate markets are generally predictable and the short time frame of a flip helps you avoid losses if the property happens to depreciate over a longer period of time.
Exciting—There is a reason why there are so many reality shows based around flipping and none based on buy and hold investing. It’s an exciting process to buy a home, gut it and completely renovate it. Then, you get the ultimate reward of selling it and collecting the profits—as long as you do things right.
The Cons of Fix and Flip
Here are some of the cons of fix and flip investing:
Upfront Expenses—A house flip will require a lot of upfront expenses. We’re not only talking about financing the house itself, but all the renovation costs and other expenses involved in the flip. You are laying out all that money at the beginning and only seeing your returns when the property sells. This can create cash flow issues and stress if you fall being schedule or go above your initial budget.
Taxes—House flips will usually create dramatic swings in income year over year, and that can increase your tax bill. You have to pace things correctly to take advantage of specific capital gains tax rules. Capital gains taxes are higher on any property owned less than a year, so you have to find that balance of how long you own any specific investment properties and how long it takes to complete the renovation and sale. Before you get too deep into fix and flip investing, you will want to talk with your tax advisor to make sure you have the right plan in place.
Surprises—All real estate investment is susceptible to surprises. You don’t always know what lies behind the walls until you start the renovation process. You cannot plan for everything as a real estate investor, but you have to be prepared for anything. It is a good idea to add some wiggle room in your budget and overestimate your renovation expenses/timeline to cover any surprises that may come up.
These are some of the biggest pros and cons of fix and flip real estate investment. Of course, there are other things you need to know as an investor, so be sure and do your homework in order to get the most out of your investment portfolio. Both fix and flip and buy and hold strategies can be highly lucrative if you do things right. There are no wrong answers, but there are wrong ways of doing things if you truly want to be successful in this field.
If you are looking for great investment properties to fix and flip, join the exclusive PropertyLark home buyers’ network. If you qualify, you’ll have access to our exclusive off-market deals and analytics tools that will help you identify the best investments and get the highest possible ROI. Fill out the contact form and questionnaire on the PropertyLark buyer’s site to apply!
 Lemon Remodeling & Services
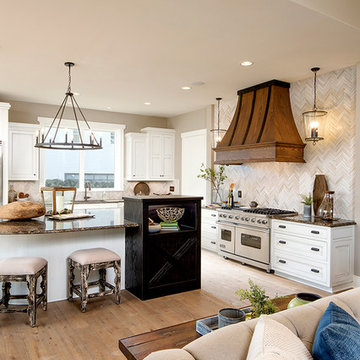
Planning a Modern Kitchen Remodel
Every successful kitchen remodeling project begins with careful planning. Before construction starts, it is important to evaluate the existing layout, cabinet storage, lighting conditions, appliance placement, and how the kitchen connects to surrounding living spaces.
For this project, the primary design goals included:
Creating a brighter open concept kitchen
Improving functionality and circulation
Increasing pantry and cabinet storage
Maximizing natural light with skylight integration
Creating a clean and timeless design aesthetic
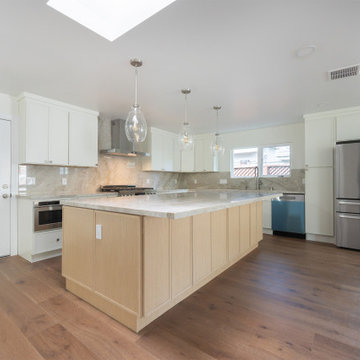
The final layout centered around a large kitchen island that functions as both a workspace and gathering area. Open concept kitchens remain highly desirable because they improve communication between living areas while helping the home feel larger and more connected.
Importance of Natural Light
Natural lighting plays a major role in modern kitchen remodeling. In this renovation, the skylight significantly improved brightness throughout the space and helped create a softer, more inviting atmosphere during the day.
Combined with recessed lighting and pendant fixtures above the island, the layered lighting design provides both functional task lighting and balanced ambient illumination.
Construction and Material Selection
Kitchen remodeling projects require coordination between multiple construction trades including demolition, framing, electrical, plumbing, drywall, flooring, cabinetry, countertops, and finish carpentry.
Bi-Color Kitchen Remodel Design
One of the standout features of this project is the bi-color kitchen remodel design. The warm natural wood island creates contrast against the surrounding white cabinetry while maintaining a clean and balanced appearance.
This approach helps:
Add visual depth to the kitchen
Create separation between functional zones
Prevent the space from feeling overly monochromatic
Introduce warmth into modern kitchen designs
The oversized island also provides additional storage, countertop workspace, and seating opportunities for everyday use and entertaining.
Countertops, Cabinetry, and Finishes
The kitchen includes:
Quartz countertops with waterfall-style edges
Custom shaker-style cabinetry
Stainless steel appliances
Modern pendant lighting
Wide plank engineered hardwood flooring
Full-height backsplash surfaces
The neutral color palette was selected to create a timeless appearance while allowing flexibility for future décor and furniture changes.
Pantry Kitchen Renovation
Storage planning is one of the most important aspects of kitchen remodeling. The pantry kitchen renovation focused on improving organization and accessibility while maximizing usable storage space.
Modern pantry systems help homeowners:
Reduce countertop clutter
Improve kitchen organization
Store small appliances more efficiently
Increase long-term functionality
Thoughtful storage design can significantly improve the daily usability of a kitchen without increasing square footage.
Real Estate Value and Long-Term Benefits
Kitchen remodeling remains one of the highest-value residential renovation projects in the Bay Area real estate market. A professionally designed open concept kitchen can improve buyer perception, increase property appeal, and modernize outdated layouts.
Features such as large islands, skylights, pantry storage, and bi-color cabinetry continue to remain highly desirable among homeowners and future buyers alike.
Common Kitchen Remodeling Mistakes
Some common mistakes homeowners should avoid include:
Insufficient lighting design
Poor circulation planning
Limited storage solutions
Choosing low-durability materials
Overcrowded layouts
Inadequate electrical preparation
Working with experienced remodeling professionals can help avoid costly design and construction issues later in the process.
Common Questions
How long does a kitchen remodel usually take?
Most kitchen remodeling projects take approximately 6–12 weeks depending on the project scope, inspections, material lead times, and structural modifications.
Do kitchen remodels require permits?
Permits are often required when plumbing, electrical, structural, or layout changes are involved. Requirements vary depending on the city and scope of work.
What is a bi-color kitchen remodel?
A bi-color kitchen remodel uses two cabinet finishes or tones to create visual contrast and a more customized design appearance.
Does an open concept kitchen increase home value?
Open concept kitchens are highly desirable because they improve functionality, natural lighting, and overall flow throughout the home.
Conclusion
A well-planned kitchen remodeling project combines thoughtful design, quality craftsmanship, and durable materials to create a space that is both functional and visually appealing. Features such as skylight integration, open concept layouts, pantry kitchen renovations, and bi-color cabinetry continue to remain popular among Bay Area homeowners seeking timeless and practical kitchen designs.
Careful planning, professional coordination, and attention to detail are essential for creating a kitchen that performs well aesthetically and functionally for many years.
------->
If you’re planning a kitchen remodeling project, consulting with an experienced contractor can help simplify the design and construction process while avoiding costly mistakes.
Book a consultation:
calendly.com/lemonremodeling




 Windy City Painters
Ever notice how your iron fence looks more rust than paint after another brutal Chicago winter? That is usually the moment homeowners start searching for a painting contractor who actually understands metal - not just someone who will brush a coat of black paint over active corrosion and call it done. At Windy City Painters, iron fence restoration is one of our most requested services on the North Side and Near West Side, and for good reason. These fences are old, they are beautiful, and they deserve a proper finish system.
PROJECT OVERVIEW
This project involved a full ornamental iron fence on a North Side greystone property. The fence was original to the building - likely installed in the 1910s or 1920s - and had gone through multiple paint cycles without any rust conversion work. By the time Windy City Painters arrived, the horizontal rails showed active pitting, the vertical spindles had surface rust under lifting paint, and two corner posts had minor joint separation. The homeowner wanted the fence restored to a sharp satin black finish that would hold through multiple Chicago winters.
MATERIALS AND PRODUCTS
Ospho Rust Converter - phosphoric acid formula that chemically neutralizes iron oxide and converts it to iron phosphate, a stable paintable surface. Used on all pitted and actively corroded areas before primer application.
Rust-Oleum DTM Rust-Inhibitive Primer - direct-to-metal primer that bonds to both converted rust zones and bare metal, blocking moisture intrusion at the substrate level.
Sherwin-Williams DTM Acrylic Topcoat - flexible, moisture-resistant finish formulated to expand and contract with metal through temperature cycling. Applied in two finish coats in satin black.
For cases with deeper rust penetration, Corroseal Water-Based Rust Converter and Metal Primer is an alternative that combines conversion and priming in a single product, useful on complex ornamental profiles where two-product systems are harder to apply.
THE PROCESS
Step 1 - Mechanical Preparation. Windy City Painters wire-wheels all loose rust, flaking paint, and scale using angle grinders fitted with wire wheel attachments. On heavily pitted sections, needle gun descaling is used to reach rust in tight ornamental grooves. This step is non-negotiable. No coating bonds reliably to iron oxide, and skipping this step is the single most common reason iron fence paint fails within a year.
Step 2 - Rust Conversion. Ospho is brushed into all pitted and bare metal areas and allowed to fully react. The surface shifts from orange to a grayish-black iron phosphate layer. This stable base accepts primer without the risk of rust migrating upward through the paint film over time.
Step 3 - Primer Coat. Rust-Oleum DTM rust-inhibitive primer is applied full coverage over the entire fence surface, including areas that appeared clean but showed minor surface oxidation. DTM primer acts as a moisture barrier and mechanical adhesion layer for the finish coats.
Step 4 - Finish Coats. Two coats of Sherwin-Williams DTM acrylic topcoat are applied in satin black, with adequate dry time between coats. The DTM formula remains flexible after cure, allowing the iron to expand and contract through Chicago temperature swings without the topcoat cracking or peeling at joints.
CHICAGO-SPECIFIC CHALLENGES
Ornamental iron on Chicago greystones, two-flats, and Victorian brownstones was almost never hot-dip galvanized. It was painted from installation and has relied on continuous paint maintenance ever since. Chicago winters add specific stress: freeze-thaw cycles force water into any paint film crack, expanding it; road salt spray elevates corrosive chloride exposure; and humidity during spring thaw keeps metal surfaces wet for extended periods. This combination accelerates rust spread beneath paint films that appear intact on the surface.
WHAT TO EXPECT LONG-TERM
A properly prepped and primed iron fence finished with a DTM topcoat system should hold 5-8 years in Chicago conditions before any touch-up is warranted. Annual inspection of joints, welds, and areas near grade level will catch early moisture entry before it becomes a larger rust issue. Windy City Painters recommends scheduling touch-up earlier rather than waiting for full paint failure to protect the prep investment.
PRO TIPS
Tip 1 - Address joint separation before painting. If fence rails have separated at welds or mechanical joints, water will enter and rust will restart from inside the connection point regardless of the exterior coating. Flag any separated joints for welding before any paint system is applied.
Tip 2 - Never use latex house paint on iron fences. Standard exterior latex lacks the adhesion and flexibility for bare metal. Always use a product labeled DTM or specify a rust-inhibitive primer underneath any finish coat applied to iron.
Tip 3 - Paint in late spring or early fall. Iron fences exposed to full sun in peak summer heat can reach surface temperatures that cause solvent-based coatings to blister during application. Ideal application conditions are 50-85 degrees Fahrenheit with low humidity and no direct intense sun on the metal surface.
Learn more about iron fence painting cost in Chicago and schedule your free estimate at windypainters.com
FAQ
Q: What does iron fence painting cost in Chicago?
A: Windy City Painters typically prices residential iron fence painting at $8-$18 per linear foot. Variables include rust severity, spindle density, ornamental profile complexity, and whether rust conversion products like Ospho or Corroseal are required before priming.
Q: Can you paint over rust without grinding it off first?
A: No. Windy City Painters always performs mechanical prep before any coating. Wire wheel grinding removes loose scale and flaking paint. Rust converters handle residual oxidation chemically. Skipping this step means the new paint film will delaminate within one season.
Q: How do I know if my iron fence needs a welder before painting?
A: Windy City Painters inspects all joints and rail connections during the estimate. Rail separation, cracked welds, or sections that flex when pressed indicate structural issues that should be welded before any paint system is applied to avoid reopening at stress points.
Q: What is the difference between Ospho and Corroseal?
A: Both are rust converters. Ospho is a phosphoric acid solution applied as a separate step before priming, giving maximum control over conversion and primer selection. Corroseal combines conversion and primer in one product, which works well on complex ornamental profiles where a two-step system is harder to apply evenly.
Q: How long does the paint last on an iron fence in Chicago?
A: With full mechanical prep, rust conversion, DTM primer, and two DTM topcoats, Windy City Painters clients typically see 5-8 years of performance before touch-up is needed, even through Chicago freeze-thaw cycling and road salt exposure.
Q: Do you paint iron fences that are still structurally sound but heavily rusted on the surface?
A: Yes. Surface rust, even heavy pitting, does not necessarily indicate structural failure. Windy City Painters evaluates each fence individually. As long as the metal is sound under the rust, proper mechanical prep and a rust converter restore the surface to a paintable condition.

 Stonebridge Mosaics
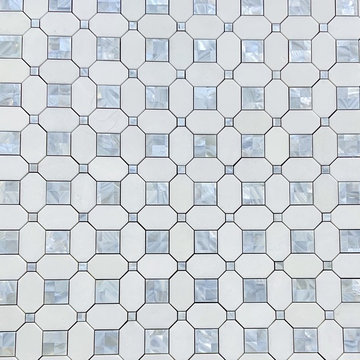
A beautiful design of Thassos and Mother of Pearl in a very unique shade of blue!
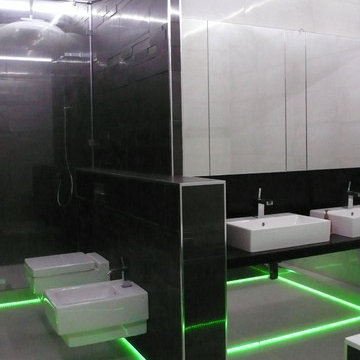
Minimalist bathroom photo in New York
Minimalist bathroom photo in New York

 RWH Architect PLLC
Set within a serene natural landscape and abutting the scenic Campbell's Scottish Highlands Golf Course, this striking custom modern home by RWH Architect blends contemporary architecture, functional living, and site-sensitive design into a residence that feels both dramatic and welcoming. Inspired by Scandinavian architectural principles and modern New England design, the home was carefully crafted to balance bold geometric forms with warm natural materials, creating a timeless luxury residence deeply connected to its surroundings. Expansive views overlooking the rolling fairways and natural landscape of the golf course further reinforce the home’s strong relationship to the site.
One of the primary design challenges of the project was fitting the home between two existing houses while maintaining a high level of privacy for both interior and exterior living spaces, while also maximizing expansive views of the course. Rather than allowing the surrounding structures to limit the design, RWH Architect carefully positioned and shaped the residence to create a sense of separation, openness, and visual connection where appropriate. Through thoughtful massing and strategic orientation, the home is able to open toward the golf course while shielding key living areas from neighboring properties, resulting in a balance of privacy, light, and uninterrupted views.
The architectural composition is defined by two soaring gabled structures connected through a recessed central entry, establishing a bold visual identity while maintaining clean, minimalist lines. A significant challenge in the design process was balancing the large-scale modern forms with a sense of warmth and livability. Through the use of natural wood accents, expansive glazing, and carefully proportioned massing, the home achieves a refined balance between contemporary minimalism and inviting residential comfort. Dark exterior cladding contrasts beautifully against warm materials and the surrounding landscape, allowing the structure to feel sophisticated without appearing cold or overpowering.
Another critical design challenge involved maximizing natural light while preserving energy efficiency and maintaining privacy throughout the home. RWH Architect carefully oriented the structure and strategically positioned the expansive floor-to-ceiling windows to capture sweeping golf course and landscape views while maintaining the comfort and privacy of the interior spaces. The result is a home filled with natural light that maintains a strong connection to the outdoors while still providing private, comfortable living environments.
Inside, the thoughtfully designed floor plan prioritizes openness, comfort, and flexibility for modern living. The residence was intentionally organized into two distinct architectural zones: a private wing dedicated to the bedrooms and personal retreats, and a public living wing centered around the kitchen, dining, and gathering spaces. This separation creates a natural balance between entertaining and privacy, allowing the home to function seamlessly for both intimate daily living and larger social gatherings.
The main living level centers around an expansive open-concept kitchen, dining area, and great room designed to function as the social heart of the home. One challenge within the interior layout was creating a highly open floor plan while still maintaining distinct functional zones and practical circulation. Through careful spatial planning, ceiling volume transitions, and strategic room positioning, the design creates separation without sacrificing openness. Large windows and direct access to the rear outdoor living spaces further reinforce the seamless indoor-outdoor connection, allowing the living spaces to fully embrace the surrounding views of the course and the natural landscape beyond.
Rather than existing on a single flat plane, the residence was thoughtfully designed across multiple levels that respond directly to the site’s natural topography. As occupants move through the home, subtle level changes and transitional stair sequences create a dynamic spatial experience that guides movement between the public and private zones of the residence. This layered circulation approach enhances the architectural character of the interior while creating moments of progression, discovery, and connection between spaces. The result is a home that feels immersive and expansive, where movement throughout the residence becomes part of the overall architectural experience itself.
The first floor also incorporates flexible private accommodations, including a guest suite with ensuite bathroom and additional secondary bedrooms positioned to create privacy away from the primary gathering spaces. This approach allows the residence to comfortably support multigenerational living, guests, and evolving family needs over time.
On the upper level, the luxurious primary suite serves as a private sanctuary complete with dual walk-in closets, a spacious spa-inspired bathroom, and access to a private balcony overlooking the property and adjacent golf course. Dedicated office spaces were intentionally integrated into the design to address the growing demand for functional remote work environments without compromising the home’s residential character. A centrally located laundry room further improves day-to-day convenience and efficiency. Vaulted ceilings, oversized glazing, and carefully framed sightlines enhance the sense of openness and light throughout the upper level.
Throughout the home, minimalist detailing and carefully selected materials reinforce the project’s modern architectural identity while preserving warmth and livability. The interplay of sharp rooflines, expansive glass, natural textures, and integrated landscaping creates a residence that feels sculptural from every angle while remaining exceptionally functional for everyday life.
This custom luxury residence exemplifies RWH Architect’s expertise in contemporary residential architecture, innovative problem solving, and personalized home design. By transforming complex site conditions and modern living demands into opportunities for architectural creativity, the project delivers a sophisticated home that is visually striking, highly functional, and thoughtfully connected to its environment for generations to come.


 John
JohnCoco coir is a versatile and sustainable growing medium that is gaining popularity among gardeners. Made from the fibrous husk of coconuts, it’s an eco-friendly alternative to peat moss and can greatly enhance the quality of your soil. In gardening, it is often utilized in systems like Coco Coir Hydroponic, where it helps create an efficient water and nutrient delivery system.
What is Coco Coir?
Coco coir is a natural fiber extracted from coconut husks. It has a neutral pH, excellent water retention, and is reusable, making it a favorite among gardeners who prefer organic and sustainable practices. It is available in different forms such as blocks, bricks, or loose coir, each requiring some preparation before use in gardening.
Benefits of Using Coco Coir in Gardening
Coco coir offers several advantages for gardening. Here are the benefits of using coco coir in gardening:
Holds up to 10 times its weight in water, ensuring plants have consistent moisture.
Promotes oxygen flow to plant roots, leading to healthier root systems.
Coco coir is a renewable and eco-friendly alternative to peat moss.
It can be washed, rehydrated, and reused, reducing waste.
Naturally pH neutral, making it suitable for various plants without major adjustments.
Enhances the texture and moisture retention of garden soil.
How to Prepare Coco Coir for Planting
Preparing coco coir for planting involves a few essential steps. First, you need to hydrate the coir block, as it typically comes in a compressed form. Place the block in a large container and add warm water, allowing the block to expand and absorb the water. Once fully expanded, the coir should be fluffed up by breaking it apart with your hands or a tool to ensure it becomes loose and airy. After the coir has been fluffed, it is important to drain any excess water, as overly wet coir can lead to root suffocation. Finally, since coco coir is inert and does not contain nutrients, it’s a good idea to add organic compost or liquid fertilizer to enrich the coir before planting.
Do You Need to Soak Coco Coir Before Planting?
Yes, soaking coco coir before planting is necessary. Since it comes in a compressed form, it needs to be broken down and hydrated for proper use. The soaking process allows the coir to expand and release the fibers, making it usable as a growing medium. After soaking, the coir should be fluffed to ensure the water is evenly distributed. Draining any excess water is crucial because overly wet coir may impede plant root health.
How to Prepare Coco Peat for Planting
Coco peat, a fine, powdery form of coco coir, is highly beneficial for seed starting and improving water retention in soil. To prepare coco peat, it first needs to be hydrated, similar to how you prepare coir blocks. Slowly add water to the peat in a container and allow it to absorb and fluff up. Once hydrated, coco peat can be used on its own or mixed with other growing media such as perlite or vermiculite for added aeration and drainage. It is advisable to check the pH level of your final mix, as coco peat generally has a neutral pH, but adjustments may be necessary depending on the plants being grown.
Can You Use Just Coco Coir for Plants?
Yes, coco coir can be used by itself to grow plants, especially in hydroponic systems or as a seed-starting medium. However, because coco coir does not naturally contain nutrients, you will need to provide regular fertilizer to support plant growth. This makes it particularly suitable for plants grown in controlled environments, such as hydroponics, where nutrient solutions can be carefully managed. In traditional soil-based gardening, mixing coco coir with other organic materials like compost is recommended to provide essential nutrients and improve the overall soil structure.
How to Use Coco Coir in Hydroponics
Coco coir is widely used in hydroponic systems due to its water retention and aeration properties. To use coco coir in hydroponics, it first needs to be soaked and hydrated, as discussed earlier. Once the coir is fully prepared, it can be placed in the hydroponic system. Since coco coir does not contain natural nutrients, you will need to supply a balanced nutrient solution tailored for hydroponic plants. Regular monitoring of water and nutrient levels is essential to prevent nutrient imbalances or root rot. One of the benefits of coco coir in hydroponics is its reusability. After completing a growing cycle, the coir can be washed, rehydrated, and used again in future plantings.
Using Coco Coir as a Soil Amendment
Coco coir is also an excellent soil amendment, as it improves the texture and moisture retention of garden soil. To use coco coir in this way, mix loose coir with your existing garden soil at a ratio of one part coco coir to two parts soil. This will help retain moisture without compacting the soil, improving both water drainage and root growth. For optimal results, you can also add organic compost to the mix, ensuring that the nutrient levels are sufficient for plant growth. Coco coir works particularly well in raised beds, where it helps maintain proper soil structure over time.
Advantages of Using Coco Coir Over Peat Moss
While peat moss has been traditionally used as a growing medium, coco coir offers several advantages over it. Coco coir is a renewable resource, as it is a byproduct of coconut processing, while peat moss is harvested from peat bogs that take centuries to regenerate. Coco coir is also more durable, as it can be reused multiple times without breaking down, while peat moss disintegrates after a single use. Another key benefit is its neutral pH, whereas peat moss is more acidic and may require balancing to meet the needs of specific plants.
Conclusion
Coco coir is a highly versatile and sustainable growing medium that benefits both novice and experienced gardeners alike. Whether you are using it for hydroponics, as a soil amendment, or as a standalone medium for growing plants, knowing how to properly prepare and use it is key to maximizing its benefits. By following the steps detailed above, you can improve water retention, aeration, and overall plant health in your garden, all while contributing to eco-friendly gardening practices.








 Betty Wasserman Art & Interiors
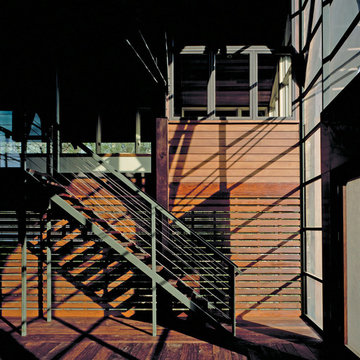
Modern luxury meets warm farmhouse in this Southampton home! Scandinavian inspired furnishings and light fixtures create a clean and tailored look, while the natural materials found in accent walls, casegoods, the staircase, and home decor hone in on a homey feel. An open-concept interior that proves less can be more is how we’d explain this interior. By accentuating the “negative space,” we’ve allowed the carefully chosen furnishings and artwork to steal the show, while the crisp whites and abundance of natural light create a rejuvenated and refreshed interior.
This sprawling 5,000 square foot home includes a salon, ballet room, two media rooms, a conference room, multifunctional study, and, lastly, a guest house (which is a mini version of the main house).
 Ehrlich Yanai Rhee Chaney Architects
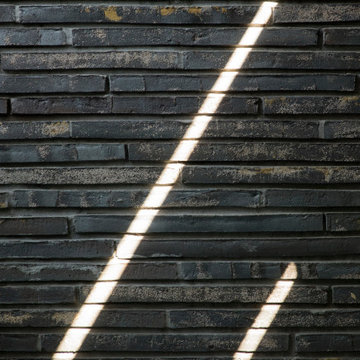
The ground floor volumes wrapped in an elongated hand-fired brick, emphasizing the horizontality of the architecture that lays solidly on the land.
(Photography by: Matthew Millman)
 Jordan Iverson Signature Homes
KuDa Photography
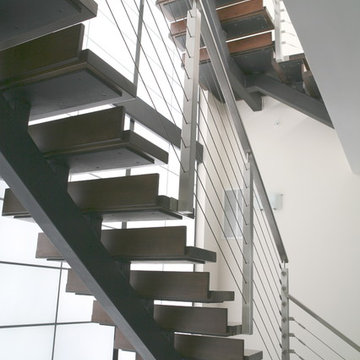
Large minimalist wooden u-shaped staircase photo with metal risers
Large minimalist wooden u-shaped staircase photo with metal risers
29