Search results for "Issuing" in Home Design Ideas

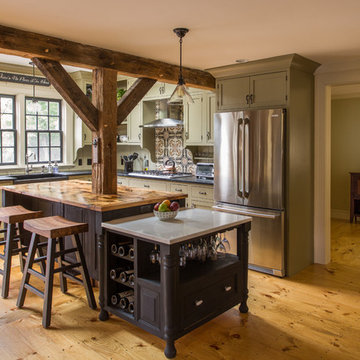
Timber frame homes offer unique challenges during a remodel. What often makes them beautiful and attractive to most homeowners, also makes them challenging for space requirements.
Context: The lovely couple that owned this home were struggling with some interesting floor plan challenges that just didn't work for their family. The loved the beautiful timbers and woodwork of their home, but the dramatically sloping ceilings on the second floor, particularly in the bathroom, just didn't work for this 1 1/2 bath home. Needing to use the skylight to approach the toilet was a less then ideal scenario. Although the bathroom footprint was more then adequate, the sloped ceiling only made half of the space useable. Check out the Before/After post on our blog to see the photos of the house pre-renovation. As much as they loved all the wood features in their home, another challenge they had was light. The wood ceiling made everything inside the house darker, even with a fantastic array of south facing windows, there were spaces in the home that felt dark and small. When they contacted us they wanted to know how could they make their brighter and more inviting, were there solutions to the 2nd floor sloped ceiling issues, and if they were going to do all of this work, how could they make their home more comfortable and efficient. A nagging water leak in the upstairs bathroom spurred them into action and here is how we solved their dilemma.
Conclusion: First, we added a little dormer to the rear of the house so we could get full headroom in nearly all of the upstairs bathroom! Then we decided to extend that dormer one more timber bay over to create a walk in closet with natural light and plenty of space. Since we were contemplating energy efficiency, we resolved a nagging issue that is present in a lot of timber frame construction, air tightness. Commonly found in timber frame construction, fiberglass insulation is installed in the rafter bays and board ceilings are installed over top. Unfortunately, board ceilings are anything but air tight, and fiberglass insulation needs to be in an airtight cavity for maximum effectiveness. So we were able to solve two issues at the same time for this homeowner. We removed the board ceiling and fiberglass insulation, we dense packed the rafter bays with cellulose insulation, and installed sheetrock in place of the boards. The boards were salvaged for re-use by the homeowner, and the space and light quality was dramatically improved. Some may think that losing the board ceiling took something away from the space, but what you'll see in the pictures is that it highly accentuates the heavy timbers and really makes them stand out in a beautiful way. Now with this added airtightness, better insulation, and brighter space, the homeowner hardly runs their wood stove, and it's so quiet in the space, an added bonus from changing the insulation. It became necessary to also add a sheetrock ceiling to the living room to hide the plumbing from the new bathroom layout above. Changing this ceiling gave the homeowner some real quality lighting that was lacking in the living room before. The brighter ceiling and new lighting layout completely transforms the living room into a space you want to hang out, even though the layout didn't change at all. When the homeowner saw the finished spaces she said "I can't believe this is my house, I want to live in this house"
Energy Efficiency: I touched a little on the efficiency above, but like all projects done with Mottram Architecture, we always want to leave you with a little extra. Timber frame construction with board ceilings and fiberglass insulation are notoriously leaky! If you want to know what we think about fiberglass insulation, check our our blog post on Why Fiberglass Insulation Sucks. By installing cellulose insulation and covering it with sheetrock we were able to greatly reduce the heat flowing out of this home. It not only improves cashflow it improves the comfort level in the space. Who wants to sit in their living room and feel a draft? Let us remind you, we are not saying cellulose insulation is an air barrier, we use the sheetrock to help with that, but it does significantly reduce the air flow over fiberglass insulation. And when we reduce the airflow, we reduce the heat flow. And when we reduce the heat flow, we reduce the need to re-heat that drafty air from outside. When it comes to energy efficiency the first and best place to start is air infiltration. We greatly reduced the air infiltration with the new insulation, but we also added a hat and warm boots. What I mean by that is, we improved the insulation in the roof, and we installed insulation in the basement. Maybe it's a silly analogy, but when you think about keeping warm, we always start with the hat and boots! With sustainability in mind, the next project will be to add a deck to the front of this house with rain catchment barrels from the metal roof. They are planning to plant a garden in the spring and the rain catchment system will help to irrigate the new garden.
Builder: East Shore Builders
Photographer: Michael Eric Berube
Find the right local pro for your project
Timber frame homes offer unique challenges during a remodel. What often makes them beautiful and attractive to most homeowners, also makes them challenging for space requirements.
Context: The lovely couple that owned this home were struggling with some interesting floor plan challenges that just didn't work for their family. The loved the beautiful timbers and woodwork of their home, but the dramatically sloping ceilings on the second floor, particularly in the bathroom, just didn't work for this 1 1/2 bath home. Needing to use the skylight to approach the toilet was a less then ideal scenario. Although the bathroom footprint was more then adequate, the sloped ceiling only made half of the space useable. Check out the Before/After post on our blog to see the photos of the house pre-renovation. As much as they loved all the wood features in their home, another challenge they had was light. The wood ceiling made everything inside the house darker, even with a fantastic array of south facing windows, there were spaces in the home that felt dark and small. When they contacted us they wanted to know how could they make their brighter and more inviting, were there solutions to the 2nd floor sloped ceiling issues, and if they were going to do all of this work, how could they make their home more comfortable and efficient. A nagging water leak in the upstairs bathroom spurred them into action and here is how we solved their dilemma.
Conclusion: First, we added a little dormer to the rear of the house so we could get full headroom in nearly all of the upstairs bathroom! Then we decided to extend that dormer one more timber bay over to create a walk in closet with natural light and plenty of space. Since we were contemplating energy efficiency, we resolved a nagging issue that is present in a lot of timber frame construction, air tightness. Commonly found in timber frame construction, fiberglass insulation is installed in the rafter bays and board ceilings are installed over top. Unfortunately, board ceilings are anything but air tight, and fiberglass insulation needs to be in an airtight cavity for maximum effectiveness. So we were able to solve two issues at the same time for this homeowner. We removed the board ceiling and fiberglass insulation, we dense packed the rafter bays with cellulose insulation, and installed sheetrock in place of the boards. The boards were salvaged for re-use by the homeowner, and the space and light quality was dramatically improved. Some may think that losing the board ceiling took something away from the space, but what you'll see in the pictures is that it highly accentuates the heavy timbers and really makes them stand out in a beautiful way. Now with this added airtightness, better insulation, and brighter space, the homeowner hardly runs their wood stove, and it's so quiet in the space, an added bonus from changing the insulation. It became necessary to also add a sheetrock ceiling to the living room to hide the plumbing from the new bathroom layout above. Changing this ceiling gave the homeowner some real quality lighting that was lacking in the living room before. The brighter ceiling and new lighting layout completely transforms the living room into a space you want to hang out, even though the layout didn't change at all. When the homeowner saw the finished spaces she said "I can't believe this is my house, I want to live in this house"
Energy Efficiency: I touched a little on the efficiency above, but like all projects done with Mottram Architecture, we always want to leave you with a little extra. Timber frame construction with board ceilings and fiberglass insulation are notoriously leaky! If you want to know what we think about fiberglass insulation, check our our blog post on Why Fiberglass Insulation Sucks. By installing cellulose insulation and covering it with sheetrock we were able to greatly reduce the heat flowing out of this home. It not only improves cashflow it improves the comfort level in the space. Who wants to sit in their living room and feel a draft? Let us remind you, we are not saying cellulose insulation is an air barrier, we use the sheetrock to help with that, but it does significantly reduce the air flow over fiberglass insulation. And when we reduce the airflow, we reduce the heat flow. And when we reduce the heat flow, we reduce the need to re-heat that drafty air from outside. When it comes to energy efficiency the first and best place to start is air infiltration. We greatly reduced the air infiltration with the new insulation, but we also added a hat and warm boots. What I mean by that is, we improved the insulation in the roof, and we installed insulation in the basement. Maybe it's a silly analogy, but when you think about keeping warm, we always start with the hat and boots! With sustainability in mind, the next project will be to add a deck to the front of this house with rain catchment barrels from the metal roof. They are planning to plant a garden in the spring and the rain catchment system will help to irrigate the new garden.
Builder: East Shore Builders
Photographer: Michael Eric Berube

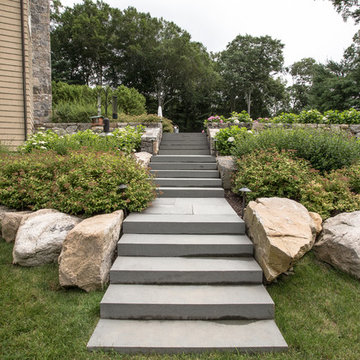
Re-build of existing flagstone patio to correct drainage issues, leveling issues, and uneven rock. Project was completed by removing existing flagstone, cutting out a portion of the over-laid driveway to obtain proper fall for drainage, laying new flagstone in a mortar bed, and leveling flagstone in place. Project achieved goal of obtaining the look the client desired, and shedding water, that was sitting in low spots in the existing flagstone and going into the house, down the driveway preventing water issues.

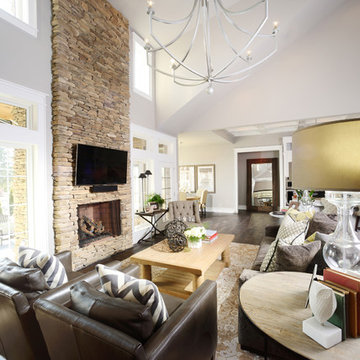
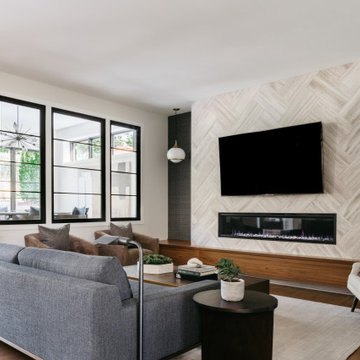
Living room - mid-sized modern open concept medium tone wood floor living room idea in Toronto with white walls and a wall-mounted tv

Re-build of existing flagstone patio to correct drainage issues, leveling issues, and uneven rock. Project was completed by removing existing flagstone, cutting out a portion of the over-laid driveway to obtain proper fall for drainage, laying new flagstone in a mortar bed, and leveling flagstone in place. Project achieved goal of obtaining the look the client desired, and shedding water, that was sitting in low spots in the existing flagstone and going into the house, down the driveway preventing water issues.

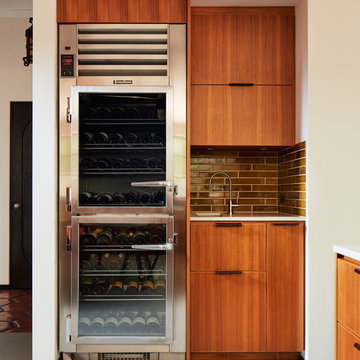
Our Architectural Digest featured acrylic wine cellar. This cellar was comprised of three alcoves that were backlit and filled with our Luma Series acrylic wine racks.
We created a stacked wine rack layout that allowed for a metal counter top between the racks. Acrylic drawers with invisible stops were added for bulk wine storage.
Contact our sales department to learn more about the stunning designs we can create for you.

Inspiration for a mid-sized modern open concept medium tone wood floor living room remodel in Toronto with white walls and a wall-mounted tv

Plantique, INC http://www.plantique.com
Entry Name: Classic Fireside Getaway
2014 PLNA Awards for Landscape Excellence Winner
Category: Hardscaping-Residential $30,000-$60,000
Award Level: Bronze
Photo Description:
The initial call from these homeowners was about a drainage issue. After having installed new roofing, siding, and a new porch enclosure, it was discovered that the original piping for the downspouts had failed. A few recent rainstorms had left a large pool of water behind the house. The new gutters and downspouts were now properly channeling water into a sub-surface piping system that no longer functioned. Obviously this had to be fixed, but after some further discussions, it was suggested that if a cost-effective solution could be found, perhaps a patio could be created along with the drainage solution. This would make the space between the porch and the pool more useful. The surfaces would have to be as kid-friendly as possible, as the homeowners foresaw frequent visits by their grandchildren. The flow of the spaces would have to be such that small bikes would be able to easily maneuver around chairs and tables.
After a site study was conducted, several issues were discovered. Pertaining to the drainage issue, it was determined that the grade sloped directly toward the porch from the pool. This not only channeled water toward the house and porch, but created a dam in an already shallow drainage swale that trapped water off to the side of the porch. Since the soil in this area is predominantly clay, water could sit in that area for days until it drained away. On the aesthetic side, a good part of the house’s façade was brick, the porch floor was brick, the small patio and walkways were brick, and the seating wall next to the pool was brick; there was a lot of brick. The challenge would be to find a cost-effective material that would contrast will with the brick, while creating a functional patio space that also facilitated water drainage.
The solution involved a significant re-grading of the area between the pool and the house, along with the installation of a completely new drain system to channel roof water away from the area. Working with the fixed points of the porch and foundation levels of the home, the slope that pitched toward the house was cut into to create a positive pitch away from the house. This created 20 in. high cut at the furthest point from the porch. To retain this, a segmental retaining wall block was used to form a curved seating wall around a mortared brick fire ring, perfect for evening campfires and marshmallow roasting with the grandchildren. Prior to the patio construction, new subsurface PVC piping was installed to channel water away from the house, under the patio, and to daylight about 100 ft. further into the side yard where it could properly drain. To construct the patio, the existing dry laid brick walks and patio were recycled as a border around a gray colored concrete paver that mimics the look of more expensive PA Bluestone, an often used companion to brick. The smooth surface texture and tight joint provide a barefoot friendly walking surface that stays cooler in the hot summer sun. The patio itself is also pitched so as to drain runoff to the lower end of the yard in case of a failure in the drain piping.
Along with providing several clear pathways between the porch, pool, and driveway the new patio includes an open air dining area, a fire pit area, and a seating/lounging area (not yet furnished at the time of the photo) for larger family gatherings or more intimate dinners and fire-side relaxation.
Photo Credit: Plantique, Mike Wimmer

The hot tub installation design closed in the spa only on 3 sides, leaving one side open for repair work. It’s also where the hot tub cover fits onto the spa.
“We recently did a service call for them,” says Bill Renter. “The unenclosed area made it easy to open the control panel and check on the problem they were having. It turned out, in this case, not to be an issue with the hot tub at all. But I was able to diagnose the problem. They had an electricity issue and I recommended a particular switch the electrician could put in. I’m glad I was able to solve the issue for their electrician.”
Upshot?
The homeowner adds he’s happy with the “really cool features" of Bullfrog Spas. “That’s what helped us make our decision. The JetPaks have turned out to be great. In fact, we were in it just last night.”
Caption: Hot Tub Installation in Hastings-On-Hudson, NY: The stone-faced vault design the couple chose not only is in keeping with the stone walls so common to their area of Westchester, NY, but the width of the vault’s edging allows plenty of room for resting snacks and drinks carried to the spa from the outdoor kitchen — yes, including glasses of lemonade.

D-Trac Construction was contracted to address install issues from a previous contractor related to the workmanship and install of the exterior hardie board package. Because of the issues, the local county would not pass building permit inspection due to non-compliance with the Alberta Building Code and the Safety Codes Act.
Issues and corrective actions included:
1. Aluminum J and corner trim does not allow for the plank to be sealed (caulked at termination).
Corrective Action: Install 5/4" Smart Trim and color match caulk at all terminations.
2. Flashing detail on primary head flashings are cut and bent, creating point of entry on each end dam at the back side of drip.
Corrective Action: Install new primary head flashings using the fold method to create end dam.
3: Incorrect stagger on plank install, Not enough distance between butt joints on stagger, no slip plates at butt joints.
Corrective Action: Install new plank using a either a 24" or 32" stagger pattern, with aluminum slip plates behind all butt joints.
4: Many terminations through plank siding have no trim block, not sealed correctly.
Corrective Action: Install 5/4" trim blocks to allow plank to be sealed(caulked to termination.
At the end of the project, a final inspection was completed and the local county passed the building permit inspection.
26