
Search results for "Masking" in Home Design Ideas
 Lifewood
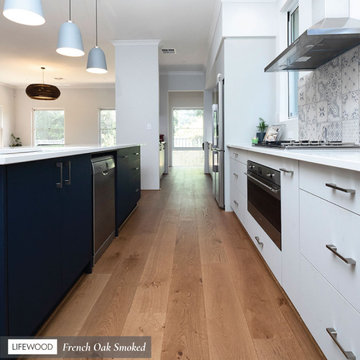
This premium oak flooring, celebrated for its effortless maintenance and family-friendly attributes. Thanks to its gum veins, this flooring not only conceals any traces of dirt but also imparts a modern touch, harmoniously enhancing the space's existing furniture selections and interior design style. #australiantimber #frenchoakfloors #timberflooring #floor #flooringideas #floooringexperts #flooring #flooringlove #floorsofinstagram #flooringinspiration #flooringmakeover

 tesa SE - International
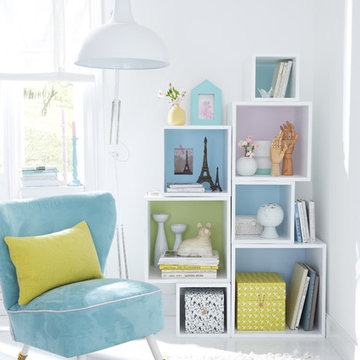
Colourful squares: Who needs a rear wall if the area behind the open shelf cubes is painted in gorgeous colours?
HERE’S WHAT WE NEED:
Shelf cube without rear wall, pencil, wall paint in pastel colours, paint roller, tesa® Masking Tape PREMIUM CLASSIC 30 mm
AND THIS IS HOW IT’S DONE:
› Stand or hang the shelf cube where you want it. Trace the inside space of the cube shelf on the wall with the pencil. Remove the shelf.
› Mask the pencilled area on the wall with tesa® Masking Tape PREMIUM CLASSIC 30 mm.
› Use the paint roller to paint the area on the wall.
› Peel off the masking tape and place or hang the cube shelf in front of the painted area.
CUBOS DIFERENTES TAMAÑOS — natiram6
Find the right local pro for your project
 tesa SE - International
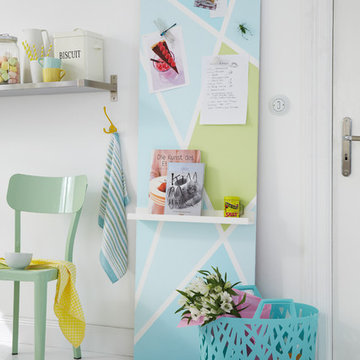
A magnetic personality? This wall has it all! The wall is pre-treated with magnetic paint and then masked into various sections and gloss painted. Special feature: a small shelf
for odds and ends.
HERE’S WHAT WE NEED:
Medium density fibreboard, 180 x 55 x 1.2 cm; magnetic paint, white wall paint, colour concentrate in blue and green, small paint roller, clear acrylic varnish, gloss roller; white picture ledge, 55 cm; tesa® Masking Tape PRECISION SENSITIVE 25 mm
AND THIS IS HOW IT’S DONE:
› Base paint the fibreboard with several layers of magnetic paint, leave to dry then paint it white.
› Position the masking tape criss-cross on the fibreboard and press down the edges carefully.
› Use the colour concentrates to mix various pastel shades with the white wall paint and fill the open sections with the paint roller.
› Peel off the masking tape and leave to dry completely.
› Finish by adding a layer of clear varnish and attach the picture ledge.
Idee Tafel magnetisch — Mandy Zunder
 tesa SE - International
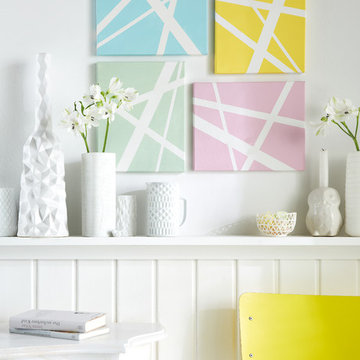
Stripe art: You can’t draw? Not to worry – just stick some strips of tesa® masking tape in various widths criss-crossing onto a canvas and paint the remaining space. Easy, right?
HERE’S WHAT WE NEED:
4 rectangular canvases, deco paint in pastel colours, paint brush, burnishing bone, tesa® Masking Tape PREMIUM CLASSIC 19 mm and 30 mm
AND THIS IS HOW IT’S DONE:
› Stick the masking tape in various widths (we have halved the 19 mm tape lengthwise as well) criss-crossing onto the canvases.
› Use the burnishing bone to press down the edges tightly.
› Paint the remaining spaces with the pastel paints.
› Peel off the masking tape.
 tesa SE - International
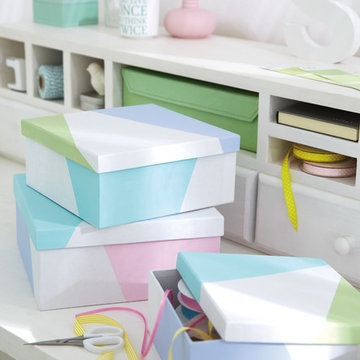
Everything in its place: One box for bows and ribbons, another for papers and a third for all those odds and ends – these boxes look great and keep order where you need it most.
HERE’S WHAT WE NEED:
Sturdy white cardboard boxes, paint brush, deco paints in a variety of pastel colours, tesa® Masking Tape for Wallpaper – Masking Tape PRECISION SENSITIVE 25 mm
AND THIS IS HOW IT’S DONE:
› Use the masking tape to create separate areas and press down the tape firmly.
› Paint each field with one of the pastel hues, while brushing away from the tape edge to prevent paint seeping underneath.
› Leave until touch-dry and peel off the masking tape.
› Leave the boxes to dry out completely.
 tesa SE - International
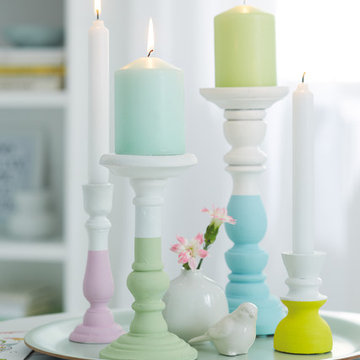
Coloured base: In white or pastels? Just the way you like it! You like both – not a problem with our tesa® Masking Tape PRECISION SENSITIVE.
HERE’S WHAT WE NEED:
Various candlesticks in wood, white spray paint, deco paint in pastel colours, paint brush, tesa® Masking Tape PRECISON SENSITIVE 25 mm
AND THIS IS HOW IT’S DONE:
› Base coat the candlesticks with white spray paint and mask with tesa® Masking Tape PRECISON SENSITIVE 25 mm when dry.
› Paint the candlesticks below the masking tape in a pastel colour of your choice and peel off the tape once the paint has dries.
schöne kerzen in pastelltönen als deko — Aline
 tesa SE - International
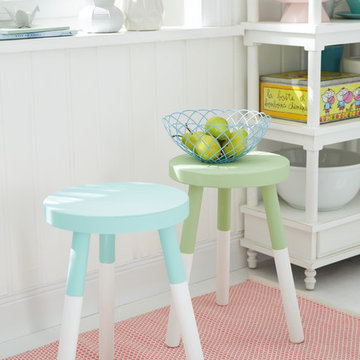
Take a seat! A splash of blue and green transforms these stools into pretty little seats or side tables.
HERE’S WHAT WE NEED:
Wooden stools, gloss paint in white and pastel colours, paint brush, tesa® Masking Tape PRECISION INDOOR 38 mm
AND THIS IS HOW IT’S DONE:
› Base coat the stool in white.
› Once dry, mask off the legs at the desired height with tesa® Masking Tape PRECISION INDOOR.
› Paint the stool above the masking tape in a pastel hue of your choice and leave to dry.
› Peel off the masking tape.
 tesa SE - International
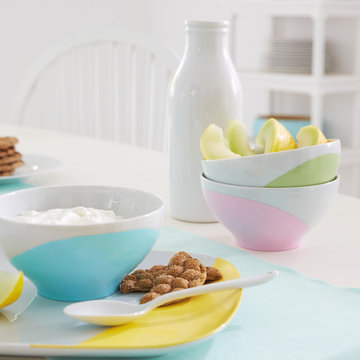
Colour where and how you want it: Completely unique and your own! The stretchy tesa® Masking Tape for Curves will have you spiralling out of control with design ideas!
HERE’S WHAT WE NEED: White crockery, porcelain paint in green, red, blue, yellow and white, paint brush, burnishing bone. tesa® Masking Tape for Curves
AND THIS IS HOW IT’S DONE:
› Carefully clean the crockery.
› Mask the areas to be painted with tesa® Masking Tape for Curves. Use the burnishing bone to press down the tape edges completely to prevent any paint leaking underneath.
› Mix the colour of your choice and apply with the paint brush. Make sure to brush away from the tape edge to make absolutely sure no paint gets in underneath the masking tape.
› Leave paint until touch-dry, then peel off the painters tape. Please read the instructions of the paint manufacturer on how to continue the treatment of the crockery.
 tesa SE - International
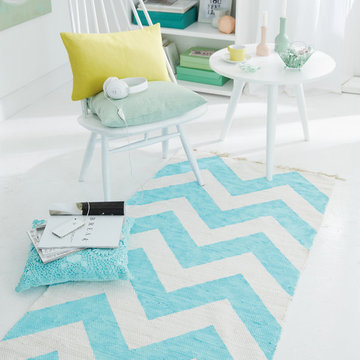
Cool look: Who wants a boring white rug when a trendy zigzag is just a bit of effort away?
HERE’S WHAT WE NEED:
Whie cotton weave rug, 80 cm wide, schematic drawing for the template (uploaded to our project), white sturdy paper for the template, geometric triangle, ruler, pencil, scissors, textile paints, paint brush, tesa® Masking Tape ECO PREMIUM 38 mm
AND THIS IS HOW IT’S DONE:
› Create your template by cutting out the schematic drawing shape from the paper.
› Use the template to transfer the chevron pattern onto the rug with a pencil.
› Mask off the pattern with tesa® Masking Tape ECO PREMIUM: Cut the ends of the masking tape diagonally and start the pattern from the inner corners of the pattern outward. Press down the edges of the tape securely.
› Paint the areas with textile paint while brushing away from the tape edge to prevent paint seeping underneath.
› Peel off the masking tape.
› Please read the instructions of the paint manufacturer on how to continue the treatment of the rug.

 Roselind Wilson Design
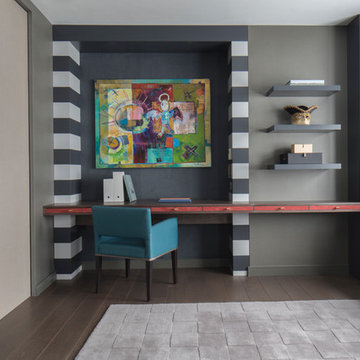
The guest bedroom / work space flows directly from the open-plan living room and is separated by internal black glazed metal frame doors. These pocket internal doors allow the living room to extend into this space and effectively enlarge it. Alternatively, they can be closed off to provide a private room. A deep navy curtain can be drawn across the internal doors for complete privacy.
The guest bedroom also contains shelving and drawer storage and a feature desk area with a bold charcoal stripe, deep blue suede wall and red suede drawer fronts. The sofa bed has been positioned beneath the window so as not to encroach on the space and is upholstered in a plush aubergine and charcoal velvet with Hermes fabric cushions and faux fur throw.
Photography by Richard Waite
 Enviable Designs Inc.
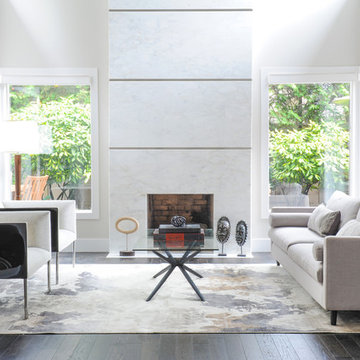
High ceilings were the perfect back drop for the modern LED pendant. With a custom marble fireplace facade featuring stainless steel inlay, we captured a feeling of modernity and simplicity. Tracey Ayton Photography
 Vancouver General Contractors
Andrew Fyfe
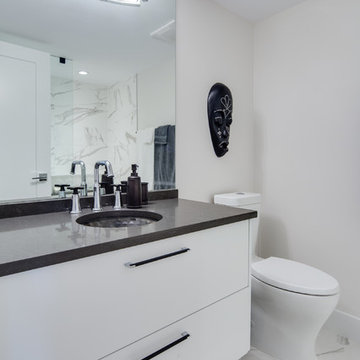
Inspiration for a contemporary 3/4 gray floor bathroom remodel in Vancouver with flat-panel cabinets, white cabinets, a two-piece toilet, white walls, an undermount sink and black countertops
Inspiration for a contemporary 3/4 gray floor bathroom remodel in Vancouver with flat-panel cabinets, white cabinets, a two-piece toilet, white walls, an undermount sink and black countertops
 User
UserJanis Nicolay
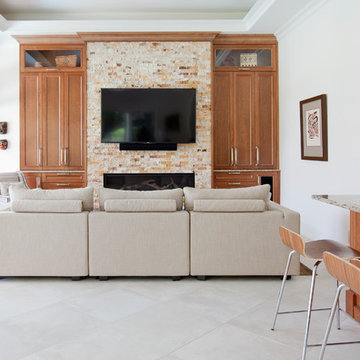
Example of a transitional concrete floor family room design in Vancouver with white walls, a standard fireplace, a brick fireplace and a wall-mounted tv
Example of a transitional concrete floor family room design in Vancouver with white walls, a standard fireplace, a brick fireplace and a wall-mounted tv
 Zebra Group
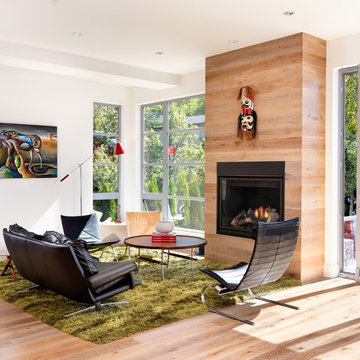
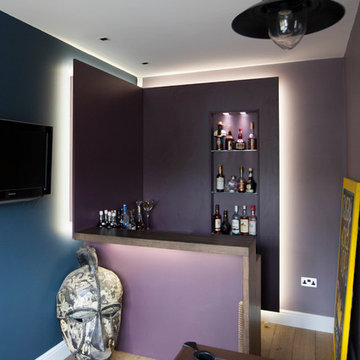
Example of a trendy open concept light wood floor and beige floor living room design in Vancouver with white walls, a standard fireplace, a wood fireplace surround and no tv
 Okanagan Home Center
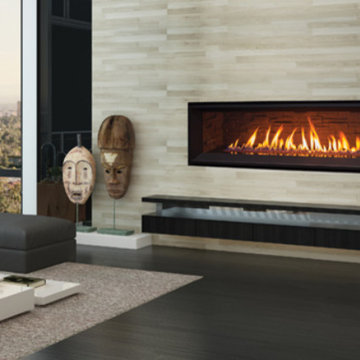
Large minimalist formal and enclosed dark wood floor and black floor living room photo in Vancouver with a ribbon fireplace, a tile fireplace and no tv
 tesa SE - International
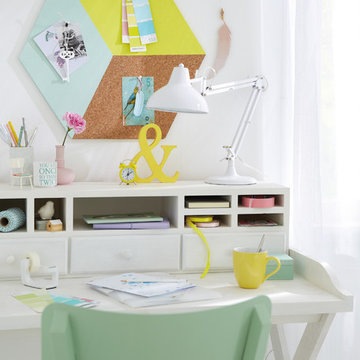
Tricks on the eye The 3D cube cork board is a very unusual wall decoration – and also a super practical pin wall!
HERE’S WHAT WE NEED:
Cork board, 50x100 cm, 10 mm thick; schematics (uploaded to our project), cutter, ruler, geometric triangle, pencil, cutting surface, paint brush, deco paint in yellow and light blue, tesa® Masking Tape PRECISION INDOOR 25 mm
AND THIS IS HOW IT’S DONE:
> Transfer the schematic in correct scale to the reverse of the cork board and carefully cut out the shape. Pencil in the internal lines from the schematic on the front of the cork board.
> Mask one of the areas with tesa® Masking Tape PRECISION INDOOR and paint the area yellow. Peel off the masking tape and leave to dry. Mask the second colour area and paint it light blue.
> Peel off the masking tape and leave to dry.
 Bill Fry Construction - Wm. H. Fry Const. Co.
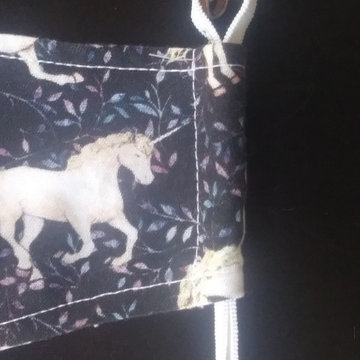
Covid During Construction and Making Face Masks
Dear Houzz Folks,
We've started getting back to work and are educating everyone at our projects on how to be safe during COVID, posting signage, and we've been making masks for our employees, colleagues, friends, family etc... Here's some information on what I've learned so far in sewing the best fitting face mask for COVID.
1. Put in a wire at the nose bridge (about 3.5 inches) - it helps with fit and if you wear glasses, it keeps them from fogging up. I found that doorbell wire, available at the hardware store, seems to work well. It isn't too thin or too fat, bends easily and holds its shape. I attach it by using a zigzag stitch on the interior seam of the outside of the mask (so there's a bit more cushion on the inside).
2. For the shaped masks, I make a pocket in case my friends, family, colleagues, want to insert a filter - it also allows for three layers of fabric in the breathing area and less bulk where the ties go. For patterns that don't offer pockets, I just make my own pattern pocket. I also first baste the two inside pieces first and then sew the front on. This way, there's no worries about slipping. No pins are needed and no pins minimizes the number of extra air holes in the fabric.
3. So that the ties/loops can be replaced or modified, I make a channel for rather than sewing it in permanently. Many videos show using a safety pin to pull the elastic through. If you sew much, you might have a bodkin in your sewing box, but it might be a bit too wide. Instead, I use a long hairpin (you could probably make a long loop with a paper clip). I run the hairpin through the channel, loop the elastic through the end of the pin and pull through. That takes much less time than piercing it with a safety-pin.
4. For the inside of the masks, it is nice to have softer fabric inside, so high-thread-count sheets purchased on sale work great. Then you can easily tell what is inside as well.
5. For surgical-style masks, there's a pattern with a pocket on the inside and a wire. I like the ideas in this video but use 2 fabrics and make them bigger. About a 9x9 inch for the outside and 9x8 inch for the inside. 5/8 seam on the nose and 1/4 seam on the bottom.
6. For the fitted masks, there are two patterns that I like. For this one, https://moinliz.de/mundschutz-naehen-mit-schnittmuster it expects you to print on European-sized paper, so if you want to get the size right, print at 100%
I also really like this pattern and I added a pocket and lengthened the ends to make channels https://intermountainhealthcare.org/covid19-coronavirus/homemade-cloth-face-coverings/ (scroll down to a link to download the pdf) Lots of folks sew craftpassion, but I like the fit of these patterns better. There are still some other patterns I have left to try!
6. After breaking lots of needles, I realized that I really didn't need to topstich the fitted masks over the bridge, so I just started skipping the bridge.
7. If you're going to wear a face-covering for a really long time, you might want to skip the ear hangers and go for ties behind the head. Instead of two ties, I'll use one long one so that the bottom one is a loop and the top one ties. Bungee cord works nice.
Happy Sewing!
: ) Rhoda Fry, Bill Fry Construction
9