
Search results for "Master achieve" in Home Design Ideas
 MP DESIGN
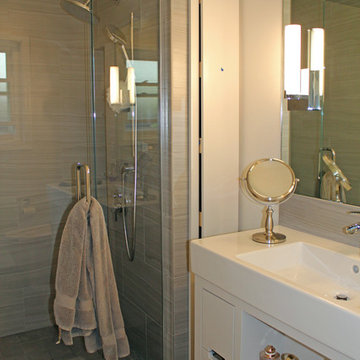
Newly remodeled Master Bath. We had to come up with a design to include as much storage as possible while keeping the space uncluttered. To achieve that, we added a full height pull-out cabinet on the right of the shower (pull/towel hook not installed yet).
 Crystal Kitchen + Bath
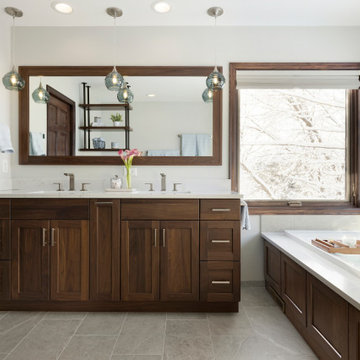
This Master Bathroom was outdated in appearance and although the size of the room was sufficient, the space felt crowded. The toilet location was undesirable, the shower was cramped and the bathroom floor was cold to stand on. The client wanted a new configuration that would eliminate the corner tub, but still have a bathtub in the room, plus a larger shower and more privacy to the toilet area. The 1980’s look needed to be replaced with a clean, contemporary look.
A new room layout created a more functional space. A separated space was achieved for the toilet by relocating it and adding a cabinet and custom hanging pipe shelf above for privacy.
By adding a double sink vanity, we gained valuable floor space to still have a soaking tub and larger shower. In-floor heat keeps the room cozy and warm all year long. The entry door was replaced with a pocket door to keep the area in front of the vanity unobstructed. The cabinet next to the toilet has sliding doors and adds storage for towels and toiletries and the vanity has a pull-out hair station. Rich, walnut cabinetry is accented nicely with the soft, blue/green color palette of the tiles and wall color. New window shades that can be lifted from the bottom or top are ideal if they want full light or an unobstructed view, while maintaining privacy. Handcrafted swirl pendants illuminate the vanity and are made from 100% recycled glass.

 Green Renovation Group Inc.
Our client Neel decided to renovate his master bathroom since it felt very outdated. He was looking to achieve that luxurious look by choosing dark color scheme for his bathroom with a touch of brass. The look we got is amazing. We chose a black vanity, toilet and window frame and painted the walls black.
Find the right local pro for your project


 TOC design & construction inc.
DESIGNED BY TOC design
CONSTRUCTION BY TOC design & Construction inc.
PHOTOS BY : Tania Scardellato
I was fortunate to have a young family approach me in desperate need to renovate there only 3 piece bathroom. This space was In dire need of a remodel, with old brown wall to wall tiles and a dated bulky yellow brown single sink vanity.
Storage was a must, lighting a necessity, and proper accessibility to the shower bath area.
We had a tight budget to respect, but a full gut of this bathroom was required. And a good thing too, once we started doing the demolition we noticed that mildew and rotting floors and walls had accumulated throughout the years. Doing it right the first time is no joke when dealing with water and electrical issues.
We discarded all reminisce of old and built from scratch, new walls, new plumbing, new electrical ,new insulation and a new window, a new fan that actually exhausted outside ( I say this laughing as you would be amazed at how many fans are installed but don’t exhaust outside, and you the client would never know unless you go inside the attic space.
Once all the hard stuff was done, the rest is just a matter of smart design. If you have a small bathroom here are some tips to guide you.
10 tips for making a small bathroom feel larger
Is your tiny bathroom cramping your functionality and style, leaving you longing for the enormous bathrooms gracing the pages of design magazines? Even if your bathroom is a fraction of the size, all it takes is some design savvy to make the most of the space you have. Consider these 10 smart tips that will help your bathroom look, feel and function like those larger contenders.
1-Get creative with corners
Space is at a premium in small bathrooms, so it's important to maximize every inch. Corners, for example, provide extra space for shelving, storage units and even hooks. Get creative and install unique design solutions that are not only functional, but also eye-catching. If you love the airiness of floating cabinets, add baskets or decorative boxes under for extra storage. If you are installing floating cabinets insure that they are installed securely to studs or plywood at wall.
2- Let solid colors shine
Busy patterns have a shrinking effect and make small bathrooms seem even smaller. Conversely, light natural hues make a space feel more open. If you're itching to get creative with design, experiment with textures but keep overpowering patterns to a minimum. Tone on tone is the best to achieve this.
3 - Maximize your bathtub
A bathtub takes up a significant portion of the room, but modern, compact options with curved basins, can make the tub feel larger when in use, all while conserving space.
4 - Select a smaller faucet
A faucet is jewelry for the bathroom. And just as accessories can overpower an outfit, a big bulky faucet isn't flattering in a small bath. Single-handle designs conserve counter space, while a wall-mount installation frees it up all together and can create quite the wow-factor, if the budget can accommodate the required changes to plumbing behind the wall.
5 - Make vanity storage simple
If you're in a storage war with your small bathroom, you're not alone in the battle. Toiletries and personal supplies without a place to call home only add clutter and chaos. Store smart with a space-saving vanity, the dual sink vanity shown here, looks quite simple, but in reality it has 4 sets of full extension drawers, and the vanity tower adds extra storage without overpowering the use of space.
6 - Show off the shower
Shower curtains may be pretty, but they interrupt the visual flow of a bathing space and make it feel significantly smaller. In bathrooms with small footprints, opt for a clear glass sliding shower door that doesn't require the clearance of one with a hinged design. Or as shown in this design and for fraction less expensive a half hinged panel installed on a fixed tempered glass panel. If you're embarking on a big remodel, create the illusion of more space by using same tile in the shower that's used throughout; instead of seeing them as two separate zones, the eye will read them as one.
7 - Discover the treasure of hidden storage
Work with a contractor, and you just might find some serious storage potential hidden behind your walls. Whether it's utilizing space between the studs for shallow shelving or a creating a small linen closet by annexing space from an adjacent room, even small additions can make a big difference.
8 - Focal Point
Tile is a beautiful, durable addition to any bathroom. For dainty spaces, consider installing tile at a diagonal to accentuate the focal point or as in this bathroom I used an oversized textured pattern to bring depth to the space at the window wall.
9 - Choose the right lights
Strategically install light to reflect and brighten a small bathroom to make it appear larger. Recessed lighting is an affordable solution for tiny rooms, offering ample light while taking up little space. Wall sconces alongside a mirror also reflect off the walls and make a room feel bright and airy. I always recommend going with LED lighting at 2800 to 3000K.
10 – Accessorize
This is your time to shine in your decorating skills, have fun with your towels, you can change the color scheme daily just by adding pops of color in your accessories, make sure to get items that serve a dual purpose, like baskets, boxes they can always be used as hampers, storing of towels and even a nice display for your guest.

 Schock Construction Inc
Alcove bathtub - mid-sized transitional kids' white tile and porcelain tile ceramic tile and gray floor alcove bathtub idea in Seattle with shaker cabinets, white cabinets, a one-piece toilet, beige walls, an undermount sink, quartz countertops and white countertops
 Designs Daly
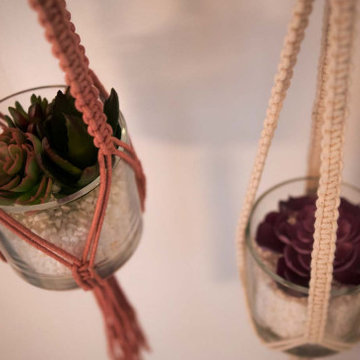
The objective of this project was to enhance the homely ambiance which was lacking before. To achieve the desired outcome, we utilized a color palette inspired by existing art pieces collected from different parts of the world by the owner. Our focus was on the communal areas and the master bedroom to create a complete transformation.
Sponsored
Delaware, OH

Buckeye Basements, Inc.
Central Ohio's Basement Finishing ExpertsBest Of Houzz '13-'21
 Armor Poxy
Epoxy flooring has emerged as a popular choice for both residential and commercial spaces, offering durability, versatility, and aesthetic appeal. However, achieving the desired results with epoxy flooring requires careful planning, precise execution, and diligent maintenance. In this comprehensive guide, we’ll delve into the dos and don’ts of epoxy flooring to ensure a successful installation and long-term maintenance plan.
Mastering the dos and don’ts of epoxy flooring installation and maintenance is essential for achieving beautiful, long-lasting results. By following these guidelines and best practices, you can ensure a successful epoxy flooring project that enhances the aesthetics, durability, and value of your space for years to come.

 Visbeen Architects
Lakefront living is not often luxurious and conscious of size. The “Emmett” design achieves both of these goals in style. Despite being ideal for a narrow waterfront lot, this home leaves nothing wanting, offering homeowners three full floors of modern living. Dining, kitchen, and living areas flank the outdoor patio space, while three bedrooms plus a master suite are located on the upper level. The lower level provides additional gathering space and a bunk room, as well as a “beach bath” with walkout access to the lake.

 DK Homes
We had the opportunity to come alongside this homeowner and demo an old cottage and rebuild this new year-round home for them. We worked hard to keep an authentic feel to the lake and fit the home nicely to the space.
We focused on a small footprint and, through specific design choices, achieved a layout the homeowner loved. A major goal was to have the kitchen, dining, and living all walk out at the lake level. We also managed to sneak a master suite into this level (check out that ceiling!).

 Studio 2G Architects
The size of the master bathroom was a challenge. The simplicity and uniformity of the materials give way to the illusion of a larger space.
In order to achieve this, we carried the floor tile up and over the tub deck. The Arto Tile on the walls runs continuously along all walls creating uniformity.
Photography by Studio 101 West.

 Emily Anne Interior Design
This original 1970's master bathroom was in need of an update. The vanity was low and dated, there was a large soffit above the sinks which made the space feel dark and small, and the shower space did not function for the current owners. We stripped the space of any existing materials and started new. Calacatta mosaic tiles add drama and texture to the vanity and shower space. By keeping the materials neutral but adding multiple textures, we achieved a calm, luxurious space.

 Jarrett Design
Old farmhouses offer charm and character but usually need some careful changes to efficiently serve the needs of today’s families. This blended family of four desperately desired a master bath and walk-in closet in keeping with the exceptional features of the home. At the top of the list were a large shower, double vanity, and a private toilet area. They also requested additional storage for bathroom items. Windows, doorways could not be relocated, but certain nonloadbearing walls could be removed. Gorgeous antique flooring had to be patched where walls were removed without being noticeable. Original interior doors and woodwork were restored. Deep window sills give hints to the thick stone exterior walls. A local reproduction furniture maker with national accolades was the perfect choice for the cabinetry which was hand planed and hand finished the way furniture was built long ago. Even the wood tops on the beautiful dresser and bench were rich with dimension from these techniques. The legs on the double vanity were hand turned by Amish woodworkers to add to the farmhouse flair. Marble tops and tile as well as antique style fixtures were chosen to complement the classic look of everything else in the room. It was important to choose contractors and installers experienced in historic remodeling as the old systems had to be carefully updated. Every item on the wish list was achieved in this project from functional storage and a private water closet to every aesthetic detail desired. If only the farmers who originally inhabited this home could see it now! Matt Villano Photography
Sponsored
Delaware, OH
Buckeye Basements, Inc.
Central Ohio's Basement Finishing ExpertsBest Of Houzz '13-'21
 DK Homes
We had the opportunity to come alongside this homeowner and demo an old cottage and rebuild this new year-round home for them. We worked hard to keep an authentic feel to the lake and fit the home nicely to the space.
We focused on a small footprint and, through specific design choices, achieved a layout the homeowner loved. A major goal was to have the kitchen, dining, and living all walk out at the lake level. We also managed to sneak a master suite into this level (check out that ceiling!).

 Corinthian Fine Homes
when you need more space for a Master bedroom, Master Bath and Master Closet….you add a second story space above your existing three car garage to achieve that objective. They asked us to create a new Master Suite with an elegant Master Bedroom including a fireplace. They requested the Master Bathroom have an oasis spa-like feel with the closet roomy enough to house all of their clothing needs. As you can see there was just enough room for a spacious and well laid out plan and design.
 Corinthian Fine Homes
when you need more space for a Master bedroom, Master Bath and Master Closet….you add a second story space above your existing three car garage to achieve that objective. They asked us to create a new Master Suite with an elegant Master Bedroom including a fireplace. They requested the Master Bathroom have an oasis spa-like feel with the closet roomy enough to house all of their clothing needs. As you can see there was just enough room for a spacious and well laid out plan and design.

 Home Expressions Interiors by Laura Bloom Inc.
The Homeowner’s of this St. Marlo home were ready to do away with the large unused Jacuzzi tub and builder grade finishes in their Master Bath and Bedroom. The request was for a design that felt modern and crisp but held the elegance of their Country French preferences. Custom vanities with drop in sinks that mimic the roll top tub and crystal knobs flank a furniture style armoire painted in a lightly distressed gray achieving a sense of casual elegance. Wallpaper and crystal sconces compliment the simplicity of the chandelier and free standing tub surrounded by traditional Rue Pierre white marble tile. As contradiction the floor is 12 x 24 polished porcelain adding a clean and modernized touch. Multiple shower heads, bench and mosaic tiled niches with glass shelves complete the luxurious showering experience.
Sponsored
Columbus, OH

Hope Restoration & General Contracting
Columbus Design-Build, Kitchen & Bath Remodeling, Historic Renovations

 Culin & Colella, Inc.
We designed and made the Kitchen, Living Room, Master Bedroom and Bathroom Cabinetry Millwork for this apartment in New York City. We also did the glazed finish which varied from room to room. We work with the client and their team to achieve the intended goals.
Phillip Ennis

 Garman Builders Inc.
Warm and masculine, this industrial chic style bedroom has become a trend even in suburban and more rural areas. Combine utilitarian items with worn textures and the warmth of raw, aged woods to achieve the look! The carpet is the High Hand style by Mohawk Flooring in the Crossroads color. The accent wall was first painted with Sherwin Williams Black Magic paint (SW6991) and then created using wooden pallets. It uses 3, 4, and 5 inch wide by 1/2” thick boards.
Photo Credit: Justin Tearney

 Excelsior Design Group & Danberry Building Corp
This summer cottage was winterized in the 1960’s as a year round home. The new owners decided to remodel the master suite to achieve more efficient energy saving and storage needs. After a design by another builder failed to inspire them, Excelsior Design Group was commissioned to review the project.
Client Objectives
The homeowners were looking to convert an old master bathroom into a walk in closet, remodel a guest bedroom into a master bathroom and remodel a hall bathroom into a laundry room.
Project Details
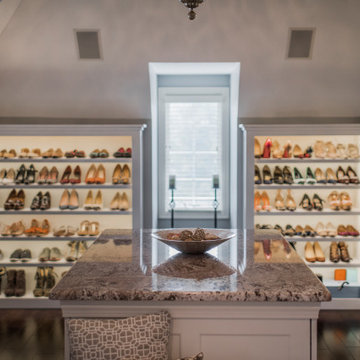
It was immediately determined that the master bath and closet layout previously designed needed to be flipped. The old master bathroom became the walk in closet for Susan. The new walk-in closet, designed to accommodate hundreds of shoes, was designed by Janis Gaut of Closet Factory and incorporates the same marble tops as the vanities and the fireplace.
54