
Search results for "May require" in Home Design Ideas
 Talon Construction Inc.
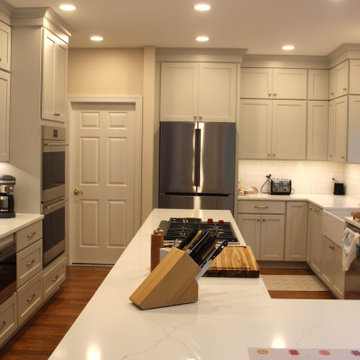
Renovating an open kitchen can be an exciting project that can improve the functionality, aesthetics, and value of your home. Here are some steps to guide you through the process:
Planning and Design:
Define your goals and budget for the renovation.
Determine the layout of your open kitchen. Consider factors like the work triangle (the relationship between the stove, sink, and refrigerator) and the flow of traffic.
Choose a design style and color scheme that suits your preferences and complements the rest of your home.
Research and Inspiration:
Collect inspiration from magazines, websites, and social media platforms to get ideas for your open kitchen design.
Create a mood board or vision board to help you visualize the final look.
Hiring Professionals:
Depending on the scale of your renovation, you may need to hire professionals, such as architects, interior designers, contractors, and electricians. Make sure to check references and get multiple quotes.
Demolition and Structural Work:
If your renovation involves structural changes, like removing walls, this is the time to do it. Ensure that the necessary permits are obtained.
Plumbing and Electrical Work:
Update or reconfigure plumbing and electrical systems as needed. This may include adding or moving outlets, switches, and lighting fixtures.
Cabinetry and Countertops:
Choose and install new kitchen cabinets and countertops. This is a significant part of your renovation and will greatly influence the kitchen's appearance and functionality.
Appliances:
Update or install new kitchen appliances, including the refrigerator, stove, oven, microwave, and dishwasher.
Flooring:
Select and install flooring that is suitable for a kitchen, such as hardwood, tile, laminate, or vinyl. Ensure it complements the overall design.
Backsplash and Wall Finishes:
Install a backsplash that matches your design and protects your walls. Consider materials like tile, glass, or stainless steel.
Lighting:
Choose and install various types of lighting, including ambient, task, and accent lighting. Pendant lights above an island or breakfast bar can add style and functionality.
Paint and Finishing Touches:
Paint the walls and ceiling in the colors you've selected. Add finishing touches like hardware, window treatments, and decorative elements.
Furniture and Accessories:
Bring in furniture, such as a dining table and chairs, barstools, and any other pieces you need to complete the space. Decorate with accessories like artwork, plants, and decorative items.
Final Inspection and Cleanup:
Ensure that all work meets safety and building code requirements. Clean the entire area thoroughly.
Enjoy Your New Kitchen:
Once the renovation is complete and everything is in its place, enjoy your beautiful, functional open kitchen.
Remember that open kitchen renovations can be complex and may require careful planning. It's essential to stay within your budget, communicate with your contractors and designers, and be flexible as unexpected issues may arise during the process. Ultimately, a well-executed open kitchen renovation can enhance the heart of your home and improve your overall living space.
 Talon Construction Inc.
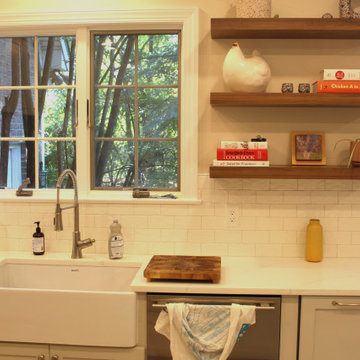
Renovating an open kitchen can be an exciting project that can improve the functionality, aesthetics, and value of your home. Here are some steps to guide you through the process:
Planning and Design:
Define your goals and budget for the renovation.
Determine the layout of your open kitchen. Consider factors like the work triangle (the relationship between the stove, sink, and refrigerator) and the flow of traffic.
Choose a design style and color scheme that suits your preferences and complements the rest of your home.
Research and Inspiration:
Collect inspiration from magazines, websites, and social media platforms to get ideas for your open kitchen design.
Create a mood board or vision board to help you visualize the final look.
Hiring Professionals:
Depending on the scale of your renovation, you may need to hire professionals, such as architects, interior designers, contractors, and electricians. Make sure to check references and get multiple quotes.
Demolition and Structural Work:
If your renovation involves structural changes, like removing walls, this is the time to do it. Ensure that the necessary permits are obtained.
Plumbing and Electrical Work:
Update or reconfigure plumbing and electrical systems as needed. This may include adding or moving outlets, switches, and lighting fixtures.
Cabinetry and Countertops:
Choose and install new kitchen cabinets and countertops. This is a significant part of your renovation and will greatly influence the kitchen's appearance and functionality.
Appliances:
Update or install new kitchen appliances, including the refrigerator, stove, oven, microwave, and dishwasher.
Flooring:
Select and install flooring that is suitable for a kitchen, such as hardwood, tile, laminate, or vinyl. Ensure it complements the overall design.
Backsplash and Wall Finishes:
Install a backsplash that matches your design and protects your walls. Consider materials like tile, glass, or stainless steel.
Lighting:
Choose and install various types of lighting, including ambient, task, and accent lighting. Pendant lights above an island or breakfast bar can add style and functionality.
Paint and Finishing Touches:
Paint the walls and ceiling in the colors you've selected. Add finishing touches like hardware, window treatments, and decorative elements.
Furniture and Accessories:
Bring in furniture, such as a dining table and chairs, barstools, and any other pieces you need to complete the space. Decorate with accessories like artwork, plants, and decorative items.
Final Inspection and Cleanup:
Ensure that all work meets safety and building code requirements. Clean the entire area thoroughly.
Enjoy Your New Kitchen:
Once the renovation is complete and everything is in its place, enjoy your beautiful, functional open kitchen.
Remember that open kitchen renovations can be complex and may require careful planning. It's essential to stay within your budget, communicate with your contractors and designers, and be flexible as unexpected issues may arise during the process. Ultimately, a well-executed open kitchen renovation can enhance the heart of your home and improve your overall living space.
 TKS Design Group
Download our free ebook, Creating the Ideal Kitchen. DOWNLOAD NOW
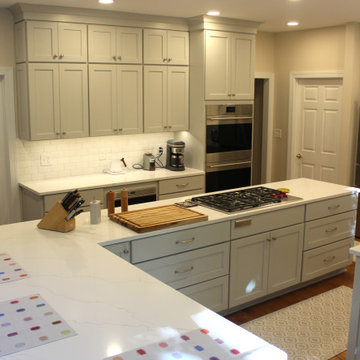
Like many families with older children, this local Glen Ellyn couple wanted to expand the size of their kitchen while also creating a more open, airy feel for their main level. The home had plenty of space that included a formal living room, formal dining room, family room with eat-in area and kitchen with butler’s pantry. What it didn’t have, was an effortless flow between the areas used daily for cooking, eating and gathering.
Additionally, the kitchen had become outdated, feeling dark and dismal, despite the abundance of natural light. Our clients wanted a bright, cheerful interior that would inspire the family to congregate in this part of the house. No easy feat with teenagers.
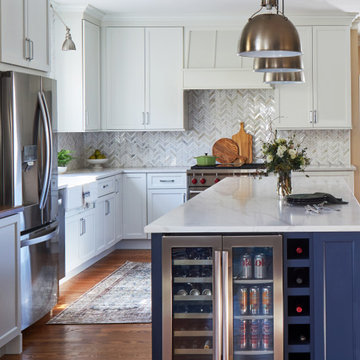
An open floor plan design solved the issues with functionality and circulation, removing the walls that restricted flow and opening up the entry to the dining room. We also eliminated the rarely used butler’s pantry allowing us to expand the kitchen and add a large island for food prep and gathering. To create a sense of symmetry and consistency in the space, a clerestory window was added below the header and framed to match the existing adjacent entry from the living room.
Inspired by the owner’s Scottish ancestry, the island cabinetry boasts a beautiful blue hue, paired with stools upholstered in a sprightly plaid. The built-in buffet area provides additional storage, topped with a beautiful wooden top stained to coordinate with the stunning tones of the flooring.
The owner’s opted for stainless steel appliances, inspiring the selection of brushed silver light fixtures and polished chrome hardware. Marble-look quartz offered a durable, lightly colored surface to reflect sunlight and enhance the cheer factor. According to this happy family, this uplifting space is now everyone’s favorite place to gather.
Designed by: Susan Klimala, CKBD
Photography by: Michael Kaskel
For more design inspiration go to: www.kitchenstudio-ge.com
Find the right local pro for your project


 Talon Construction Inc.
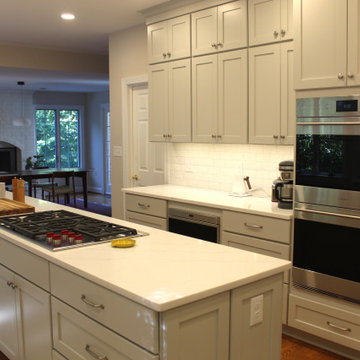
Renovating an open kitchen can be an exciting project that can improve the functionality, aesthetics, and value of your home. Here are some steps to guide you through the process:
Planning and Design:
Define your goals and budget for the renovation.
Determine the layout of your open kitchen. Consider factors like the work triangle (the relationship between the stove, sink, and refrigerator) and the flow of traffic.
Choose a design style and color scheme that suits your preferences and complements the rest of your home.
Research and Inspiration:
Collect inspiration from magazines, websites, and social media platforms to get ideas for your open kitchen design.
Create a mood board or vision board to help you visualize the final look.
Hiring Professionals:
Depending on the scale of your renovation, you may need to hire professionals, such as architects, interior designers, contractors, and electricians. Make sure to check references and get multiple quotes.
Demolition and Structural Work:
If your renovation involves structural changes, like removing walls, this is the time to do it. Ensure that the necessary permits are obtained.
Plumbing and Electrical Work:
Update or reconfigure plumbing and electrical systems as needed. This may include adding or moving outlets, switches, and lighting fixtures.
Cabinetry and Countertops:
Choose and install new kitchen cabinets and countertops. This is a significant part of your renovation and will greatly influence the kitchen's appearance and functionality.
Appliances:
Update or install new kitchen appliances, including the refrigerator, stove, oven, microwave, and dishwasher.
Flooring:
Select and install flooring that is suitable for a kitchen, such as hardwood, tile, laminate, or vinyl. Ensure it complements the overall design.
Backsplash and Wall Finishes:
Install a backsplash that matches your design and protects your walls. Consider materials like tile, glass, or stainless steel.
Lighting:
Choose and install various types of lighting, including ambient, task, and accent lighting. Pendant lights above an island or breakfast bar can add style and functionality.
Paint and Finishing Touches:
Paint the walls and ceiling in the colors you've selected. Add finishing touches like hardware, window treatments, and decorative elements.
Furniture and Accessories:
Bring in furniture, such as a dining table and chairs, barstools, and any other pieces you need to complete the space. Decorate with accessories like artwork, plants, and decorative items.
Final Inspection and Cleanup:
Ensure that all work meets safety and building code requirements. Clean the entire area thoroughly.
Enjoy Your New Kitchen:
Once the renovation is complete and everything is in its place, enjoy your beautiful, functional open kitchen.
Remember that open kitchen renovations can be complex and may require careful planning. It's essential to stay within your budget, communicate with your contractors and designers, and be flexible as unexpected issues may arise during the process. Ultimately, a well-executed open kitchen renovation can enhance the heart of your home and improve your overall living space.
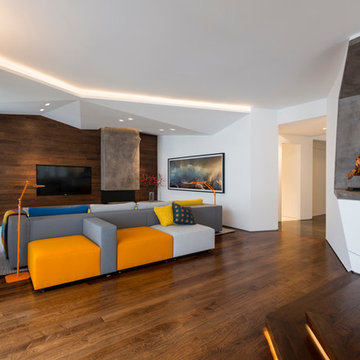
 Lightology
Soft Strip Premium 2.3W (SS2P) 12V is ideal for inside cabinets, wine cellars, steps, behind mirrors, handrails, inside drawers, niches, and toe kick applications. SS2P uses 2.3 watts of LED per foot, with 3097K color temperature, and 80 CRI. It is a flexible copper strip that is less than 1/2 inch wide with an optically clear protective coating. It is sold in 1 foot increments up to 25 feet with easy plug-in connectors on each end to join sections together. Also available in a smaller 1 inch segments. Custom lengths can be made either by joining small segments together or easily trimming the soft strip with scissors (once trimmed, no additional segments may be added). Plug-in flexible connectors are available for making turns and custom configurations. Easy to install, the SS2P features 3M sticky back tape on back of the strip, or may be installed with screw-in mounting clips, sold separately. A power supply is required, sold separately. Rated for indoor applications. SS2P includes a flexible aluminum heat sink. Maximum length before re-feeding is 25 feet. ETL listed.
 Talon Construction Inc.
Renovating an open kitchen can be an exciting project that can improve the functionality, aesthetics, and value of your home. Here are some steps to guide you through the process:
Planning and Design:
Define your goals and budget for the renovation.
Determine the layout of your open kitchen. Consider factors like the work triangle (the relationship between the stove, sink, and refrigerator) and the flow of traffic.
Choose a design style and color scheme that suits your preferences and complements the rest of your home.
Research and Inspiration:
Collect inspiration from magazines, websites, and social media platforms to get ideas for your open kitchen design.
Create a mood board or vision board to help you visualize the final look.
Hiring Professionals:
Depending on the scale of your renovation, you may need to hire professionals, such as architects, interior designers, contractors, and electricians. Make sure to check references and get multiple quotes.
Demolition and Structural Work:
If your renovation involves structural changes, like removing walls, this is the time to do it. Ensure that the necessary permits are obtained.
Plumbing and Electrical Work:
Update or reconfigure plumbing and electrical systems as needed. This may include adding or moving outlets, switches, and lighting fixtures.
Cabinetry and Countertops:
Choose and install new kitchen cabinets and countertops. This is a significant part of your renovation and will greatly influence the kitchen's appearance and functionality.
Appliances:
Update or install new kitchen appliances, including the refrigerator, stove, oven, microwave, and dishwasher.
Flooring:
Select and install flooring that is suitable for a kitchen, such as hardwood, tile, laminate, or vinyl. Ensure it complements the overall design.
Backsplash and Wall Finishes:
Install a backsplash that matches your design and protects your walls. Consider materials like tile, glass, or stainless steel.
Lighting:
Choose and install various types of lighting, including ambient, task, and accent lighting. Pendant lights above an island or breakfast bar can add style and functionality.
Paint and Finishing Touches:
Paint the walls and ceiling in the colors you've selected. Add finishing touches like hardware, window treatments, and decorative elements.
Furniture and Accessories:
Bring in furniture, such as a dining table and chairs, barstools, and any other pieces you need to complete the space. Decorate with accessories like artwork, plants, and decorative items.
Final Inspection and Cleanup:
Ensure that all work meets safety and building code requirements. Clean the entire area thoroughly.
Enjoy Your New Kitchen:
Once the renovation is complete and everything is in its place, enjoy your beautiful, functional open kitchen.
Remember that open kitchen renovations can be complex and may require careful planning. It's essential to stay within your budget, communicate with your contractors and designers, and be flexible as unexpected issues may arise during the process. Ultimately, a well-executed open kitchen renovation can enhance the heart of your home and improve your overall living space.
Sponsored
Columbus, OH
Free consultation for landscape design!

Peabody Landscape Group
Franklin County's Reliable Landscape Design & Contracting
 Designs By Mark, Inc.
Design Statement:
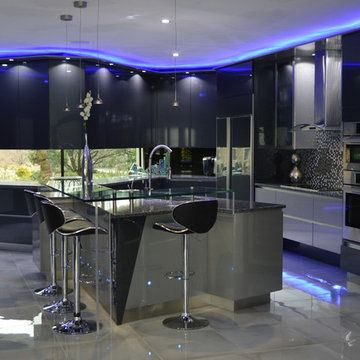
My design challenge was to create and build a new ultra modern kitchen with a futuristic flare. This state of the art kitchen was to be equipped with an ample amount of usable storage and a better view of the outside while balancing design and function.
Some of the project goals were to include the following; a multi-level island with seating for four people, dramatic use of lighting, state of the art appliances, a generous view of the outside and last but not least, to create a kitchen space that looks like no other...”The WOW Factor”.
This challenging project was a completely new design and full renovation. The existing kitchen was outdated and in desperate need help. My new design required me to remove existing walls, cabinetry, flooring, plumbing, electric…a complete demolition. My job functions were to be the interior designer, GC, electrician and a laborer.
Construction and Design
The existing kitchen had one small window in it like many kitchens. The main difficulty was…how to create more windows while gaining more cabinet storage. As a designer, our clients require us to think out of the box and give them something that they may have never dreamed of. I did just that. I created two 8’ glass backsplashes (with no visible supports) on the corner of the house. This was not easy task, engineering of massive blind headers and lam beams were used to support the load of the new floating walls. A generous amount of 48” high wall cabinets flank the new walls and appear floating in air seamlessly above the glass backsplash.
Technology and Design
The dramatic use of the latest in LED lighting was used. From color changing accent lights, high powered multi-directional spot lights, decorative soffit lights, under cabinet and above cabinet LED tape lights…all to be controlled from wall panels or mobile devises. A built-in ipad also controls not only the lighting, but a climate controlled thermostat, house wide music streaming with individually controlled zones, alarm system, video surveillance system and door bell.
Materials and design
Large amounts of glass and gloss; glass backsplash, iridescent glass tiles, raised glass island counter top, Quartz counter top with iridescent glass chips infused in it. 24” x 24” high polished porcelain tile flooring to give the appearance of water or glass. The custom cabinets are high gloss lacquer with a metallic fleck. All doors and drawers are Blum soft-close. The result is an ultra sleek and highly sophisticated design.
Appliances and design
All appliances were chosen for the ultimate in sleekness. These appliances include: a 48” built-in custom paneled subzero refrigerator/freezer, a built-in Miele dishwasher that is so quiet that it shoots a red led light on the floor to let you know that its on., a 36” Miele induction cook top and a built-in 200 bottle wine cooler. Some other cool features are the led kitchen faucet that changes color based on the water temperature. A stainless and glass wall hood with led lights. All duct work was built into the stainless steel toe kicks and grooves were cut into it to release airflow.
Photography by Mark Oser

 Greenhaven Landscapes Inc.
Inspiration for a large farmhouse partial sun backyard landscaping in Chicago for fall.

 Urban Ironcraft
The Chelsea wall mounted vanity with legs features a half round design made from laser cut steel and is paired with hand forged legs with an embossed collar. The quatrefoil pattern is a very popular look and tends to blend in well with many different styles. If installed properly, this base is very strong and can hold any type of countertop. With so many different countertop options on the market, this base is not offered with a top.
Custom height is available upon request (no charge)
A template for this top is available upon request for a fee (note: a template isn’t mandatory, countertop fabricators may choose to make their own)
20 gauge sheet metal backing is optional for a fee
7 finishes to choose from (this base is also offered as unfinished so that the customer can choose their own finish)
1” x 1/4” wall strap (at the top against the wall and down the sides)
1/ 8” thick x 3/8” wide quatrefoil pattern
Legs are a 1” thick solid hammered square bar with decorative collar
Upper wall mount strap comes with 3 - ¼” wide mounting holes
Mounting holes are located on the top back-strap and mid-section
Mounting hardware not included (depending on the install application, requires either wood screws or toggle bolts)
Fully open back for easy plumbing installation
No assembly required (fully welded construction)
Custom made in the USA
Usually ships within 10-14 business days
 Younger Brothers Builders
LucidPic Photography
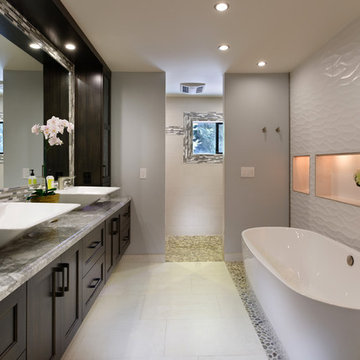
Freestanding bathtub - huge contemporary master white tile porcelain tile freestanding bathtub idea in San Francisco with a vessel sink, flat-panel cabinets, brown cabinets, quartzite countertops and white walls
Freestanding bathtub - huge contemporary master white tile porcelain tile freestanding bathtub idea in San Francisco with a vessel sink, flat-panel cabinets, brown cabinets, quartzite countertops and white walls
 Troy Lighting
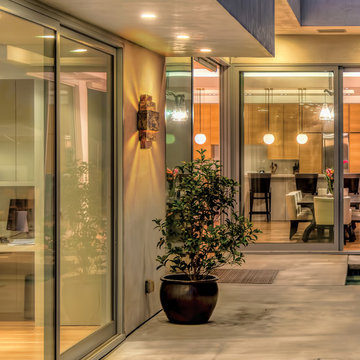
For over 50 years, Troy Lighting has transcended time and redefined handcrafted workmanship with the creation of strikingly eclectic, sophisticated casual lighting fixtures distinguished by their unique human sensibility and characterized by their design and functionality.
Features:
May Only Be Installed As Shown
Suitable for outdoor and indoor locations
Compliant with the Americans with Disabilities Act (ADA) standards
UL certified in compliance with nationally recognized product safety standards
Specifications:
Top to Center - 6.5""
Included backplate measures as 6.5""W x 14.5"" High x 0.75"" Thick
Requires 1 x 12-Watt LED Module (Integrated)
840 Lumens, 90 CRI, 2700K Color Temperature
Compatible with Incandescent Dimming
 Fiorito Interior Design
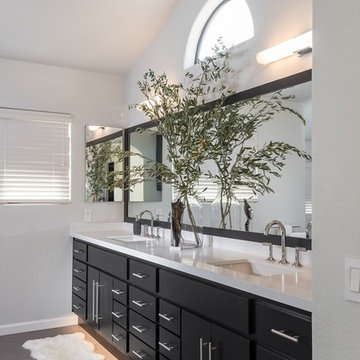
Originally built in the 1980s with terra cotta tile and cheap, polished brass, this bathroom is now a sleek, modern marvel. The juxtaposition of simplicity and luxury is evidenced by the walls clad in a large-format porcelain tile that looks like marble but requires no sealing or maintenance and is easy to clean. Gleaming modern plumbing fixtures also present restraint but with a touch of glamour. The eleven-foot wide vanity with integrated toe kick light is capped with a single-piece framed mirror that coordinates with the furniture below it. A dynamic graphic light fixture presides over this improved space and mirrors the diagonal herringbone floor.
Photo: Bernardo Grijalva


 MEC
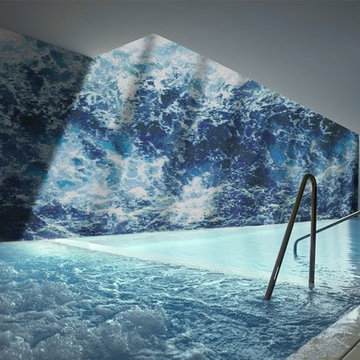
MECDeep Blue Rogue Waves - An homage to sea and its mighty tides, Deep Blue Rogue Waves from MEC’s PIXL mosaic range can add a touch of refreshing liveliness to any space. The blue glass mosaic palette is perfect for any space, especially resorts and bath tub wall.
*Get any pattern resized or recolored to better fit your unique requirements. MEC offers free customization and alteration on all mosaic patterns.
**AddTek mosaic render is visually similar but may have slight variations due to factors like; textural diversity in mosaic tesserae and light conditions.
See the full collection here: http://www.mecartworks.com/pixl/introduction
 GDFStudio
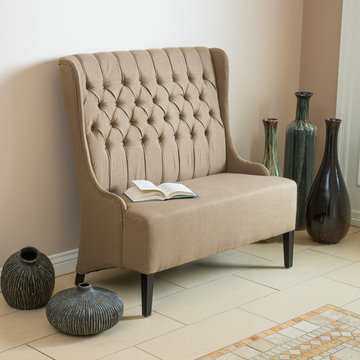
This French inspired loveseat will add elegance to your room. Upholstered in light brown colored fabric, the Helen loveseat features a high wingback backrest, dressed with button tufts and a seat big enough for two. The sofa stands on espresso colored legs and the neutral color will match most color schemes. You can place this seat in your living room or bedroom.
Features:
Constructed from beautiful light brown fabric
French inspired style will add elegance to your living room or bedroom
Features button tufted backrest and wingback accent for added sophistication
Arrives read to use, no assembly required
Neutral colors to match any decor
Product Specifications
Manufactured By
Great Deal Furniture
Sold By
Great Deal Furniture
Width
46.50"
Depth
28"
Height
47"
Color
Light Brown
Great Deal Furniture
 MEC
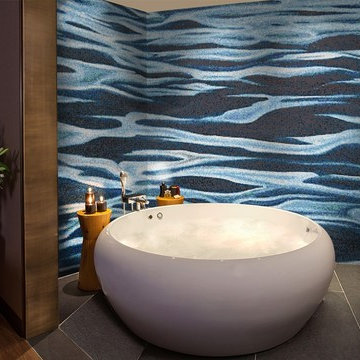
MECBlue Silent Waters - Blue Silent Waters Vertex glass mosaic pattern from MEC’s PIXL range is inspired by a view of a calm ocean surface. The cool blue glass tile tones are perfect for any space, like feature wall murals and swimming pools.
*Get any pattern resized or recolored to better fit your unique requirements. MEC offers free customization and alteration on all mosaic patterns.
**AddTek mosaic render is visually similar but may have slight variations due to factors like; textural diversity in mosaic tesserae and light conditions.
See the full collection here: http://www.mecartworks.com/pixl/introduction
 Albert, Righter & Tittmann Architects, Inc.
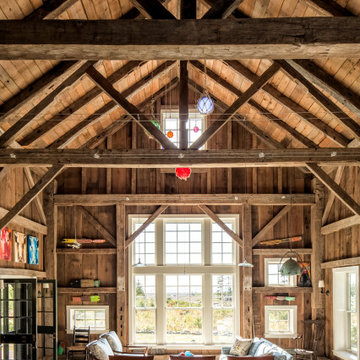
A summer house built around salvaged barn beams.
Not far from the beach, the secluded site faces south to the ocean and views.
The large main barn room embraces the main living spaces, including the kitchen. The barn room is anchored on the north with a stone fireplace and on the south with a large bay window. The wing to the east organizes the entry hall and sleeping rooms.
Sponsored
Columbus, OH
Free consultation for landscape design!
Peabody Landscape Group
Franklin County's Reliable Landscape Design & Contracting
 MEC
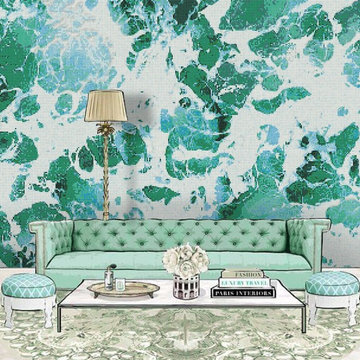
MECCrashing Waves Aqua Green - Inspired by the raging sea and its mighty tides, Crashing Waves Aqua from MEC’s PIXL mosaic range can add a touch of refreshing liveliness to any space. The aqua glass mosaic palette is perfect for any space, especially hotel lobby and home walls.
*Get any pattern resized or recolored to better fit your unique requirements. MEC offers free customization and alteration on all mosaic patterns.
**AddTek mosaic render is visually similar but may have slight variations due to factors like; textural diversity in mosaic tesserae and light conditions.
See the full collection here: http://www.mecartworks.com/pixl/introduction




54