
Search results for "People decide" in Home Design Ideas
 Drury Design
The original intent of this project was to replace the island, hood, countertops, and a few appliances. A primary bath remodel was the main priority. But once the couple realized certain features would enhance the functionality of the kitchen – not to mention completely change the aesthetic – they put the master bath on hold and decided to remodel the entire kitchen first.
Design objectives:
-Omit separate table, plan for a larger island that would seat 7 people
-Simple, clean lines – no rounded corners or weird angles
-Nothing trendy – use modern classic details
-Uncluttered countertops
-Better pantry storage for food & small appliances
-Integrated major appliances
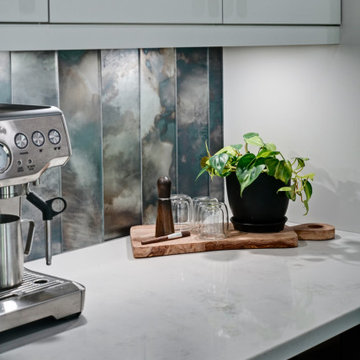
-Coffee bar
-Avoid “1 color on perimeter with second color on island”
-Integrate a harmonious variety of finishes
-Integrate black & handmade metals
Design challenges:
-Island shape to fit within confines of existing half wall between kitchen & family room & bay window/door to backyard
-Narrow kitchen with major walkway
-Planning for 7 seats at the island
-Keep guest social area away from the cook’s zone
-Place appliances according to use
-Point-of-use storage for an avid cook within a relatively small space
-Integrate colors without looking too busy
THE NEW KITCHEN
-While the island is mostly rectangular, the seating area utilizes the bay extension without interfering with the exterior door
-All seating is placed on the outside perimeter of the island, giving the cook dedicated prep space
-The L-shaped seating area & adjacent coffee bar encourage guests to gather on the outside edge of the kitchen where they can still interact with the cook
-Island prep space includes 5 feet of versatile drawer storage, double waste basket and an open paper towel dispenser
-One pantry designated for food; the other for small appliances & bulk storage; creates visual armoire look
-Microwave drawer in island faces refrigerator for easy access & less interference with cook’s zone
-Appliance garages avoid clutter on the countertops
-Off-white upper cabinets make the kitchen look larger while the black bases offer contrast without closing in the space
Once the client committed to remodeling her entire kitchen, she had a good idea of the direction she wanted the space to take. Even so, there were many details that remained open to explore & contemplate. The end result is modern, clean and ultimately transitional – a creative vision anchored in functionality and artistry!
A powder room remodel was added to the project that beautifully compliments the kitchen aesthetic. The entire staircase, all trim & doors were painted in the same tones as the kitchen, transforming the entire first floor into a cohesive & welcoming space. It was a great collaborative partnership!
 Green Home Systems
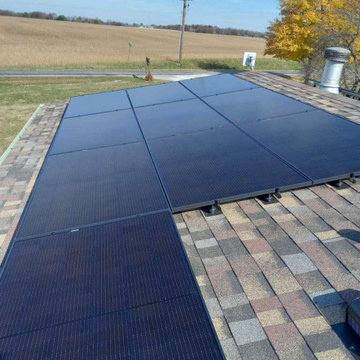
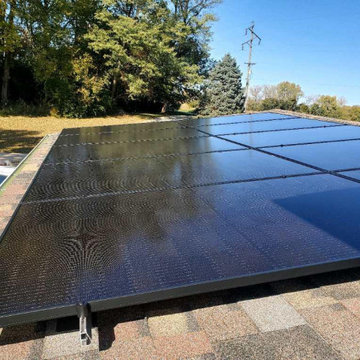
 provides reliable solar power solutions to residential and commercial customers all over the country. Recently, we had the opportunity to work with Bruce D. in Jacksonville, IL to provide a 19kW solar system for his home. We were able to complete this job quickly and efficiently, delivering a high quality product at an affordable price.
At Green Home Systems, our mission is to provide our customers with the best customer service in the industry as well as unparalleled solar solutions at the most economical price. We understand that not everyone can afford large upfront costs associated with installing solar systems and we are proud to offer competitive financing options that make it easier for our customers to go solar without breaking the bank. This was certainly true for Bruce D., who took advantage of our financing options and was able to have his new solar system installed within a couple of weeks time.
Our team worked hard to ensure everything went smoothly when installing Bruce’s new system. We began by inspecting his roof to determine if it was suitable for installation and if there were any potential problems that needed addressing before beginning work. Once we determined everything was in order we then moved on to designing and installing the system itself. Our team of experienced professionals worked diligently to ensure each component was installed properly and securely so that it would be able to withstand years of exposure to the elements without issue.
We also made sure that Bruce was aware of all the financial benefits associated with having a photovoltaic system installed on his home. He was now able to take advantage of numerous tax credits available in Illinois as well as decreased utility bills due to reduced consumption from his local electricity provider. Additionally, he will be able to increase the value of his home by having a solar power system installed which will make it more attractive should he decide he wants to sell it down the line.
In conclusion, we are proud of our work with Bruce D. in Jacksonville, IL and were happy to provide him with an efficient and cost-effective way to add renewable energy sources into his home’s power grid. Our team worked diligently throughout every stage of this project from design through installation until completion and we are thrilled with the results. We look forward to continuing our work throughout Illinois providing reliable solar solutions at competitive prices so that more people can benefit from this clean source of energy!
 Green Home Systems
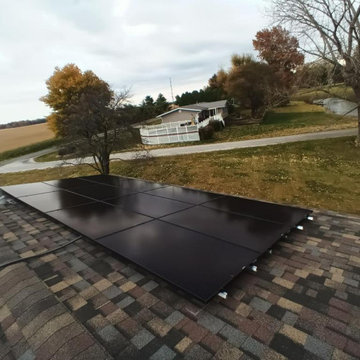
 provides reliable solar power solutions to residential and commercial customers all over the country. Recently, we had the opportunity to work with Bruce D. in Jacksonville, IL to provide a 19kW solar system for his home. We were able to complete this job quickly and efficiently, delivering a high quality product at an affordable price.
At Green Home Systems, our mission is to provide our customers with the best customer service in the industry as well as unparalleled solar solutions at the most economical price. We understand that not everyone can afford large upfront costs associated with installing solar systems and we are proud to offer competitive financing options that make it easier for our customers to go solar without breaking the bank. This was certainly true for Bruce D., who took advantage of our financing options and was able to have his new solar system installed within a couple of weeks time.
Our team worked hard to ensure everything went smoothly when installing Bruce’s new system. We began by inspecting his roof to determine if it was suitable for installation and if there were any potential problems that needed addressing before beginning work. Once we determined everything was in order we then moved on to designing and installing the system itself. Our team of experienced professionals worked diligently to ensure each component was installed properly and securely so that it would be able to withstand years of exposure to the elements without issue.
We also made sure that Bruce was aware of all the financial benefits associated with having a photovoltaic system installed on his home. He was now able to take advantage of numerous tax credits available in Illinois as well as decreased utility bills due to reduced consumption from his local electricity provider. Additionally, he will be able to increase the value of his home by having a solar power system installed which will make it more attractive should he decide he wants to sell it down the line.
In conclusion, we are proud of our work with Bruce D. in Jacksonville, IL and were happy to provide him with an efficient and cost-effective way to add renewable energy sources into his home’s power grid. Our team worked diligently throughout every stage of this project from design through installation until completion and we are thrilled with the results. We look forward to continuing our work throughout Illinois providing reliable solar solutions at competitive prices so that more people can benefit from this clean source of energy!
Find the right local pro for your project
 MODIVO LIGHT
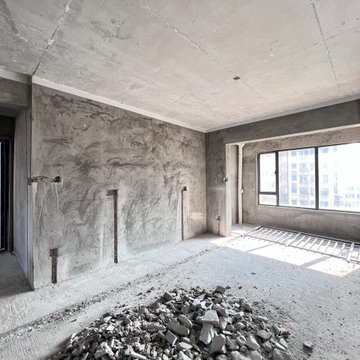
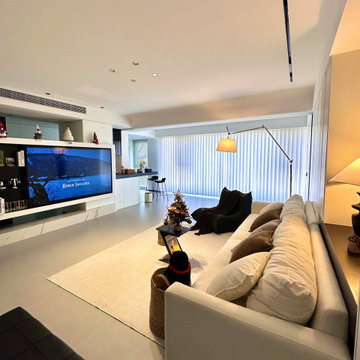
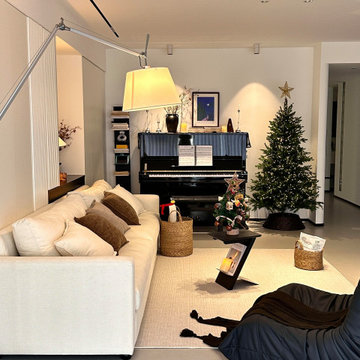
This is our first time decorating a house. Starting from knowing nothing at all to now having the hard decoration completed, we have experienced every emotion along the way—anxiety, doubt, tiredness, hesitation, joy, satisfaction, and touch. We learned and explored on our own, and bit by bit, we finished decorating our home. We’ve accumulated so much experience in this process, and now we want to share it, hoping it can be of a little help to all of you who are doing your own home decoration.
Preparations in Advance
1、Clarify your own ideas: Whether you are looking online, talking to designers, or copying ideas from friends' homes, you should have a clear vision of what your home should look like before designing—such as the style, color scheme, and elements to be used... It is crucial to avoid wanting to install everything that looks good in others' homes in your own. This way, you can clearly put forward your requirements during the design and decoration process, and also avoid frequent revisions to the plan, which may lead to unnecessary rework.
2、Understand your own needs: You need to first figure out the needs of your family, such as how many people live in the house permanently, how many rooms are needed, everyone's living habits, and daily preferences... A home is always for living in, so functionality is always the most important. It is best to list these needs and give priority to meeting them during the design and decoration. This way, you won't find out after decoration that many necessary things are missing, while a bunch of installed things are useless.
3、Determine your budget: There are ways to decorate with more money, and also ways to do it with less. No matter how much money you have, the decorated house can be both beautiful and practical. Therefore, it is essential to decide exactly how much you want to spend on decoration. In every link, such as designing the plan, making a budget table, selecting materials, and construction, you should act in accordance with your own budget.
4、Understand the advantages and disadvantages of your house: There is no perfect house in the world, and every house has its pros and cons. Your design plan should avoid its shortcomings and amplify its advantages. I once wrote an article about the drawbacks of my house ("My house is not perfect, but I still want to find ways to save it"), so we figured out solutions to these problems during the decoration.
5、Learn as much decoration knowledge as possible in advance: Although you can pick up this knowledge in the subsequent decoration process, it is better to learn more beforehand. This will make you much more calm when facing problems.
6、Know your strengths: Before decoration, you must be clear about what you are good at and what you are not. If you are good at design, do the design yourself; if you are skilled at bargaining, go buy building materials on your own; if you have strong hands-on ability, you can even do the decoration and repairs yourself... During the decoration process, you should focus on what you are good at, and leave what you are not good at to others.
 MODIVO LIGHT
This is our first time decorating a house. Starting from knowing nothing at all to now having the hard decoration completed, we have experienced every emotion along the way—anxiety, doubt, tiredness, hesitation, joy, satisfaction, and touch. We learned and explored on our own, and bit by bit, we finished decorating our home. We’ve accumulated so much experience in this process, and now we want to share it, hoping it can be of a little help to all of you who are doing your own home decoration.
Preparations in Advance
1、Clarify your own ideas: Whether you are looking online, talking to designers, or copying ideas from friends' homes, you should have a clear vision of what your home should look like before designing—such as the style, color scheme, and elements to be used... It is crucial to avoid wanting to install everything that looks good in others' homes in your own. This way, you can clearly put forward your requirements during the design and decoration process, and also avoid frequent revisions to the plan, which may lead to unnecessary rework.
2、Understand your own needs: You need to first figure out the needs of your family, such as how many people live in the house permanently, how many rooms are needed, everyone's living habits, and daily preferences... A home is always for living in, so functionality is always the most important. It is best to list these needs and give priority to meeting them during the design and decoration. This way, you won't find out after decoration that many necessary things are missing, while a bunch of installed things are useless.
3、Determine your budget: There are ways to decorate with more money, and also ways to do it with less. No matter how much money you have, the decorated house can be both beautiful and practical. Therefore, it is essential to decide exactly how much you want to spend on decoration. In every link, such as designing the plan, making a budget table, selecting materials, and construction, you should act in accordance with your own budget.
4、Understand the advantages and disadvantages of your house: There is no perfect house in the world, and every house has its pros and cons. Your design plan should avoid its shortcomings and amplify its advantages. I once wrote an article about the drawbacks of my house ("My house is not perfect, but I still want to find ways to save it"), so we figured out solutions to these problems during the decoration.
5、Learn as much decoration knowledge as possible in advance: Although you can pick up this knowledge in the subsequent decoration process, it is better to learn more beforehand. This will make you much more calm when facing problems.
6、Know your strengths: Before decoration, you must be clear about what you are good at and what you are not. If you are good at design, do the design yourself; if you are skilled at bargaining, go buy building materials on your own; if you have strong hands-on ability, you can even do the decoration and repairs yourself... During the decoration process, you should focus on what you are good at, and leave what you are not good at to others.
 MODIVO LIGHT
This is our first time decorating a house. Starting from knowing nothing at all to now having the hard decoration completed, we have experienced every emotion along the way—anxiety, doubt, tiredness, hesitation, joy, satisfaction, and touch. We learned and explored on our own, and bit by bit, we finished decorating our home. We’ve accumulated so much experience in this process, and now we want to share it, hoping it can be of a little help to all of you who are doing your own home decoration.
Preparations in Advance
1、Clarify your own ideas: Whether you are looking online, talking to designers, or copying ideas from friends' homes, you should have a clear vision of what your home should look like before designing—such as the style, color scheme, and elements to be used... It is crucial to avoid wanting to install everything that looks good in others' homes in your own. This way, you can clearly put forward your requirements during the design and decoration process, and also avoid frequent revisions to the plan, which may lead to unnecessary rework.
2、Understand your own needs: You need to first figure out the needs of your family, such as how many people live in the house permanently, how many rooms are needed, everyone's living habits, and daily preferences... A home is always for living in, so functionality is always the most important. It is best to list these needs and give priority to meeting them during the design and decoration. This way, you won't find out after decoration that many necessary things are missing, while a bunch of installed things are useless.
3、Determine your budget: There are ways to decorate with more money, and also ways to do it with less. No matter how much money you have, the decorated house can be both beautiful and practical. Therefore, it is essential to decide exactly how much you want to spend on decoration. In every link, such as designing the plan, making a budget table, selecting materials, and construction, you should act in accordance with your own budget.
4、Understand the advantages and disadvantages of your house: There is no perfect house in the world, and every house has its pros and cons. Your design plan should avoid its shortcomings and amplify its advantages. I once wrote an article about the drawbacks of my house ("My house is not perfect, but I still want to find ways to save it"), so we figured out solutions to these problems during the decoration.
5、Learn as much decoration knowledge as possible in advance: Although you can pick up this knowledge in the subsequent decoration process, it is better to learn more beforehand. This will make you much more calm when facing problems.
6、Know your strengths: Before decoration, you must be clear about what you are good at and what you are not. If you are good at design, do the design yourself; if you are skilled at bargaining, go buy building materials on your own; if you have strong hands-on ability, you can even do the decoration and repairs yourself... During the decoration process, you should focus on what you are good at, and leave what you are not good at to others.
 Green Home Systems
 provides reliable solar power solutions to residential and commercial customers all over the country. Recently, we had the opportunity to work with Bruce D. in Jacksonville, IL to provide a 19kW solar system for his home. We were able to complete this job quickly and efficiently, delivering a high quality product at an affordable price.
At Green Home Systems, our mission is to provide our customers with the best customer service in the industry as well as unparalleled solar solutions at the most economical price. We understand that not everyone can afford large upfront costs associated with installing solar systems and we are proud to offer competitive financing options that make it easier for our customers to go solar without breaking the bank. This was certainly true for Bruce D., who took advantage of our financing options and was able to have his new solar system installed within a couple of weeks time.
Our team worked hard to ensure everything went smoothly when installing Bruce’s new system. We began by inspecting his roof to determine if it was suitable for installation and if there were any potential problems that needed addressing before beginning work. Once we determined everything was in order we then moved on to designing and installing the system itself. Our team of experienced professionals worked diligently to ensure each component was installed properly and securely so that it would be able to withstand years of exposure to the elements without issue.
We also made sure that Bruce was aware of all the financial benefits associated with having a photovoltaic system installed on his home. He was now able to take advantage of numerous tax credits available in Illinois as well as decreased utility bills due to reduced consumption from his local electricity provider. Additionally, he will be able to increase the value of his home by having a solar power system installed which will make it more attractive should he decide he wants to sell it down the line.
In conclusion, we are proud of our work with Bruce D. in Jacksonville, IL and were happy to provide him with an efficient and cost-effective way to add renewable energy sources into his home’s power grid. Our team worked diligently throughout every stage of this project from design through installation until completion and we are thrilled with the results. We look forward to continuing our work throughout Illinois providing reliable solar solutions at competitive prices so that more people can benefit from this clean source of energy!
Sponsored
Columbus, OH

Wannemacher Interiors
Customized Award-Winning Interior Design Solutions in Franklin Cnty OH

 River Valley Landscapes
The property is one of the original farm houses located on the main street of a small town. It has been in the family for many years and our client just inherited the property. They were trying to have balance of preserving the old while realizing modern day living has its benefits too. The house had a large addition added using mostly old style materials, but designed with function and modern day luxuries. Our goal was to carry that theme to the outside.
Our first problem we had to address was how to transition between the first floor elevation changes. The lower room was the husband’s office. He stated in the future he may have clients over and it would be nice to have an area to sit outside. The wife’s main concern was to renew the four corner garden. She also felt it was very important to be able to see it from the kitchen area. Finally there was an old wishing well stuck right outside the kitchen. They both felt it would be neat to be able to incorporate this in some how. They wanted a patio area with a built in grill to accommodate there family and friends. They also wanted to keep a large play area for the kids.
We were able to pull this off successfully. We addressed the first issue by having a small lower level flagstone area. This area is large enough for 1 to 2 people to sit comfortably. It also provides a transition from his office to the larger patio area. We installed a simple small gravel sitting area opposite of the main patio. This provides our client a secluded place to relax or do business. Mrs.... told me she is amazed how much her and her husband enjoys this area. It is so peaceful looking at the small creek over a glass of wine.
We built a natural limestone retaining wall to create the patio terrace. The stone was chosen to extend the houses architectural elements into the landscape. Irregular broken flagstone was used to give it a more casual feel. We installed three Serviceberries into the patio terrace to replace some trees that were taken down during the remodeling. She was very concern that they would block the view of the four corner garden. We new they were crucial to nestle in the terrace, so we placed them for a couple days for her to decide. Fortunately she agreed they not only kept the view open, but helped frame the garden.
The four corner garden was designed to be viewed from afar and experienced up close. We wanted the space to have some formal structure while keeping with the casual farm house feel. Another natural limestone retaining wall was created. This leveled the garden terrace and helped associate it with the rest of the property. The four corner garden is nestled into the existing woods edge. This provides three distinct experiences to entering the garden; a more formal from the driveway, an open feel from the lower lawn, and a more natural / casual experience from the wooded area. The Plymouth brown gravel was used for the center of the garden. This helped highlight the stone post that was found during construction. The gravel also brings the sense of sound into the garden space. Lamb’s ear was chosen as a fun way to get kids interest in horticulture.
The balance of using the new to create the old feel is what makes this project a success. The property has already hosted a local historical society event and won an award for its preservation efforts. When Mrs.... can’t find her husband, she knows he is either reading the newspaper by the grill or resting in the hammock along the wood’s path.
 Drury Design
The original intent of this project was to replace the island, hood, countertops, and a few appliances. A primary bath remodel was the main priority. But once the couple realized certain features would enhance the functionality of the kitchen – not to mention completely change the aesthetic – they put the master bath on hold and decided to remodel the entire kitchen first.
Design objectives:
-Omit separate table, plan for a larger island that would seat 7 people
-Simple, clean lines – no rounded corners or weird angles
-Nothing trendy – use modern classic details
-Uncluttered countertops
-Better pantry storage for food & small appliances
-Integrated major appliances
-Coffee bar
-Avoid “1 color on perimeter with second color on island”
-Integrate a harmonious variety of finishes
-Integrate black & handmade metals
Design challenges:
-Island shape to fit within confines of existing half wall between kitchen & family room & bay window/door to backyard
-Narrow kitchen with major walkway
-Planning for 7 seats at the island
-Keep guest social area away from the cook’s zone
-Place appliances according to use
-Point-of-use storage for an avid cook within a relatively small space
-Integrate colors without looking too busy
THE NEW KITCHEN
-While the island is mostly rectangular, the seating area utilizes the bay extension without interfering with the exterior door
-All seating is placed on the outside perimeter of the island, giving the cook dedicated prep space
-The L-shaped seating area & adjacent coffee bar encourage guests to gather on the outside edge of the kitchen where they can still interact with the cook
-Island prep space includes 5 feet of versatile drawer storage, double waste basket and an open paper towel dispenser
-One pantry designated for food; the other for small appliances & bulk storage; creates visual armoire look
-Microwave drawer in island faces refrigerator for easy access & less interference with cook’s zone
-Appliance garages avoid clutter on the countertops
-Off-white upper cabinets make the kitchen look larger while the black bases offer contrast without closing in the space
Once the client committed to remodeling her entire kitchen, she had a good idea of the direction she wanted the space to take. Even so, there were many details that remained open to explore & contemplate. The end result is modern, clean and ultimately transitional – a creative vision anchored in functionality and artistry!
A powder room remodel was added to the project that beautifully compliments the kitchen aesthetic. The entire staircase, all trim & doors were painted in the same tones as the kitchen, transforming the entire first floor into a cohesive & welcoming space. It was a great collaborative partnership!
 Green Home Systems
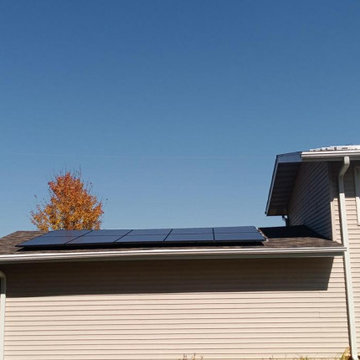
 provides reliable solar power solutions to residential and commercial customers all over the country. Recently, we had the opportunity to work with Bruce D. in Jacksonville, IL to provide a 19kW solar system for his home. We were able to complete this job quickly and efficiently, delivering a high quality product at an affordable price.
At Green Home Systems, our mission is to provide our customers with the best customer service in the industry as well as unparalleled solar solutions at the most economical price. We understand that not everyone can afford large upfront costs associated with installing solar systems and we are proud to offer competitive financing options that make it easier for our customers to go solar without breaking the bank. This was certainly true for Bruce D., who took advantage of our financing options and was able to have his new solar system installed within a couple of weeks time.
Our team worked hard to ensure everything went smoothly when installing Bruce’s new system. We began by inspecting his roof to determine if it was suitable for installation and if there were any potential problems that needed addressing before beginning work. Once we determined everything was in order we then moved on to designing and installing the system itself. Our team of experienced professionals worked diligently to ensure each component was installed properly and securely so that it would be able to withstand years of exposure to the elements without issue.
We also made sure that Bruce was aware of all the financial benefits associated with having a photovoltaic system installed on his home. He was now able to take advantage of numerous tax credits available in Illinois as well as decreased utility bills due to reduced consumption from his local electricity provider. Additionally, he will be able to increase the value of his home by having a solar power system installed which will make it more attractive should he decide he wants to sell it down the line.
In conclusion, we are proud of our work with Bruce D. in Jacksonville, IL and were happy to provide him with an efficient and cost-effective way to add renewable energy sources into his home’s power grid. Our team worked diligently throughout every stage of this project from design through installation until completion and we are thrilled with the results. We look forward to continuing our work throughout Illinois providing reliable solar solutions at competitive prices so that more people can benefit from this clean source of energy!
 River Valley Landscapes
The property is one of the original farm houses located on the main street of a small town. It has been in the family for many years and our client just inherited the property. They were trying to have balance of preserving the old while realizing modern day living has its benefits too. The house had a large addition added using mostly old style materials, but designed with function and modern day luxuries. Our goal was to carry that theme to the outside.
Our first problem we had to address was how to transition between the first floor elevation changes. The lower room was the husband’s office. He stated in the future he may have clients over and it would be nice to have an area to sit outside. The wife’s main concern was to renew the four corner garden. She also felt it was very important to be able to see it from the kitchen area. Finally there was an old wishing well stuck right outside the kitchen. They both felt it would be neat to be able to incorporate this in some how. They wanted a patio area with a built in grill to accommodate there family and friends. They also wanted to keep a large play area for the kids.
We were able to pull this off successfully. We addressed the first issue by having a small lower level flagstone area. This area is large enough for 1 to 2 people to sit comfortably. It also provides a transition from his office to the larger patio area. We installed a simple small gravel sitting area opposite of the main patio. This provides our client a secluded place to relax or do business. Mrs.... told me she is amazed how much her and her husband enjoys this area. It is so peaceful looking at the small creek over a glass of wine.
We built a natural limestone retaining wall to create the patio terrace. The stone was chosen to extend the houses architectural elements into the landscape. Irregular broken flagstone was used to give it a more casual feel. We installed three Serviceberries into the patio terrace to replace some trees that were taken down during the remodeling. She was very concern that they would block the view of the four corner garden. We new they were crucial to nestle in the terrace, so we placed them for a couple days for her to decide. Fortunately she agreed they not only kept the view open, but helped frame the garden.
The four corner garden was designed to be viewed from afar and experienced up close. We wanted the space to have some formal structure while keeping with the casual farm house feel. Another natural limestone retaining wall was created. This leveled the garden terrace and helped associate it with the rest of the property. The four corner garden is nestled into the existing woods edge. This provides three distinct experiences to entering the garden; a more formal from the driveway, an open feel from the lower lawn, and a more natural / casual experience from the wooded area. The Plymouth brown gravel was used for the center of the garden. This helped highlight the stone post that was found during construction. The gravel also brings the sense of sound into the garden space. Lamb’s ear was chosen as a fun way to get kids interest in horticulture.
The balance of using the new to create the old feel is what makes this project a success. The property has already hosted a local historical society event and won an award for its preservation efforts. When Mrs.... can’t find her husband, she knows he is either reading the newspaper by the grill or resting in the hammock along the wood’s path.

 Legendary Escapes Pools
This project began as a wilderness retreat for the homeowners at their rural estate. They already had a large outdoor area complete with a pond, and detached garage in the perfect location to tie into an outdoor entertaining area/kitchen for the swimming pool. The homeowners were hoping that the design team at Legendary Escapes could create something magical for their small grandchildren, and for the grownups to enjoy for summertime relaxation.
When the discussion turned to themes, the cartoon SpongeBob came up, and our team found a direction to go, either to the homeowners delight, possibly mixed with a bit of apprehension at the thought of a cartoony theme as a result. We promised subtle surprise and delight - and the homeowner decided to let the team go with their vision. The pool is a very abundant sized swimming pool, much larger than the average residential swimming pool. The sunledge was also made larger after the pool layout, providing even more space for chairs and play area for small children. One of the special surprises the owners didn't even know about until after they were in were the secret port holes that were re-seated with magnifying glass - and showcased miniature characters behind them, that when viewed through the glass looked giant in size.
The waterfall/slide combination also features a large grotto - themed and decorated with elements that remind visitors to the space of the lessons and themes of the cartoon. The castle is solid, carved concrete - mixed and sculpted on site and hand placed. As the waterfall began to take shape, the outside was created as a sand castle, providing the perfect whimsical backdrop for the slide, and accents including a pair of flipper outfitted legs of what we can only think is mermaid man.
One of the biggest surprises on this project came when Al found an old wooden boat at an auction, which he bought, took back to the job and cut it in half - creating the tail end of a boating incident, much like SpongeBob would have had when he missed the direction of the curve sign while out boating. (The joke in the show is that he can't ever get his drivers license because he doesn't know how to steer.) The other end of the boat became a vertical storage space for firewood or other pool side needs. The two parts of the boat became anchor pieces for what became the "wharf wall" which is the perfect area to lead people into the swimming pool retreat.
The pool has three different entertaining patio levels, including the lower wharf level, swim up bar and raised concrete counter at the deep end of the pool. The middle section of patio is perfect for relaxing and watching kids play in the pool with the deck jets and sun ledge, and the upper area is adjacent to the outdoor kitchen area, also designed and created out of concrete (carved timbers) as the cabinetry and under bar areas.
The pool was completed with ecoFinish on the sun ledge, interior of the spa, grotto and the slide. The main swimming area of the pool was vinyl liner, constructed in the special hybrid way of the team.
With the project complete, the homeowners and family thoroughly enjoyed their backyard retreat. Any hesitation at the initial theme ideas were fully appreciated as they developed along the way, with the final project a subtle blend of function and whimsy, meeting everything that they could have asked for in a backyard entertaining retreat. Their advice is to just trust Al and the team through the process, because the results will be more than you would ever hope for. If our team can help you create a backyard or custom retreat, which includes a pool and plenty of outdoor entertaining options to surprise and delight you and your family, please reach out to start your design discussions.
 Legendary Escapes Pools
This project began as a wilderness retreat for the homeowners at their rural estate. They already had a large outdoor area complete with a pond, and detached garage in the perfect location to tie into an outdoor entertaining area/kitchen for the swimming pool. The homeowners were hoping that the design team at Legendary Escapes could create something magical for their small grandchildren, and for the grownups to enjoy for summertime relaxation.
When the discussion turned to themes, the cartoon SpongeBob came up, and our team found a direction to go, either to the homeowners delight, possibly mixed with a bit of apprehension at the thought of a cartoony theme as a result. We promised subtle surprise and delight - and the homeowner decided to let the team go with their vision. The pool is a very abundant sized swimming pool, much larger than the average residential swimming pool. The sunledge was also made larger after the pool layout, providing even more space for chairs and play area for small children. One of the special surprises the owners didn't even know about until after they were in were the secret port holes that were re-seated with magnifying glass - and showcased miniature characters behind them, that when viewed through the glass looked giant in size.
The waterfall/slide combination also features a large grotto - themed and decorated with elements that remind visitors to the space of the lessons and themes of the cartoon. The castle is solid, carved concrete - mixed and sculpted on site and hand placed. As the waterfall began to take shape, the outside was created as a sand castle, providing the perfect whimsical backdrop for the slide, and accents including a pair of flipper outfitted legs of what we can only think is mermaid man.
One of the biggest surprises on this project came when Al found an old wooden boat at an auction, which he bought, took back to the job and cut it in half - creating the tail end of a boating incident, much like SpongeBob would have had when he missed the direction of the curve sign while out boating. (The joke in the show is that he can't ever get his drivers license because he doesn't know how to steer.) The other end of the boat became a vertical storage space for firewood or other pool side needs. The two parts of the boat became anchor pieces for what became the "wharf wall" which is the perfect area to lead people into the swimming pool retreat.
The pool has three different entertaining patio levels, including the lower wharf level, swim up bar and raised concrete counter at the deep end of the pool. The middle section of patio is perfect for relaxing and watching kids play in the pool with the deck jets and sun ledge, and the upper area is adjacent to the outdoor kitchen area, also designed and created out of concrete (carved timbers) as the cabinetry and under bar areas.
The pool was completed with ecoFinish on the sun ledge, interior of the spa, grotto and the slide. The main swimming area of the pool was vinyl liner, constructed in the special hybrid way of the team.
With the project complete, the homeowners and family thoroughly enjoyed their backyard retreat. Any hesitation at the initial theme ideas were fully appreciated as they developed along the way, with the final project a subtle blend of function and whimsy, meeting everything that they could have asked for in a backyard entertaining retreat. Their advice is to just trust Al and the team through the process, because the results will be more than you would ever hope for. If our team can help you create a backyard or custom retreat, which includes a pool and plenty of outdoor entertaining options to surprise and delight you and your family, please reach out to start your design discussions.
Sponsored
Columbus, OH
Wannemacher Interiors
Customized Award-Winning Interior Design Solutions in Franklin Cnty OH


 Top Price Buyers
What Do I Need To Do To Sell My House In Laveen Arizona
September 20, 2019
By brianpascal
You want to sell your Laveen house, and you want to get top dollar.
Excellent!
But “What do I need to do to sell my house in Laveen“?
Woman holding tablet pc with question marks hiding her face
Here are some tips on how to get your home ready to sell if you’re looking for top dollar that the market will bear:
*NOTE: These instructions are if you’re looking to get full retail value for your house sale. However, if you don’t want to do the things below… or don’t have the time or money to do the things below… you can still sell your Laveen house fast for a fair value in a win-win sale that’ll save you time and expense.
What Do I Need To Do To Sell My House In Laveen Arizona - Cleaning the Floor
2) Cultivate a cohesive, neutral style. You don’t have to paint everything off-white. In fact, some subtle colors can really help change the perception of spaces – for example, a soft yellow will help brighten up a dark kitchen, while a deep dark blue or green will help a bright bedroom to feel like a calm place to sleep (but be careful, dark colors will also make rooms feel small).
Spend the money to get high-quality paint and professional help. Subconsciously people will pay more money for a property with just the right colors and very neat lines – it makes the home feel better built, even though it’s just paint.
Optical illusions are real, and psychologists study this stuff. Don’t believe me?
Look it up. And don’t neglect the outside and just do the inside, or anything else that’s unbalanced.
3) Fix or replace anything that’s broken. Yeah, it might feel like a waste of money to spend an extra couple hundred bucks on a dishwasher that someone else might just pull out and replace again. But really, quite a few buyers will get a home inspection and use the opportunity to negotiate with you. As the seller, you’ll often end up paying more if you try to hide neglected maintenance from the purchaser – and of course you don’t want to be guilty of fraud.
Make sure you stay in compliance with all the laws.
It’s often a good use of money to hire a home inspector to come through before you put the property on the market. If you ask in advance, they’ll often charge you a tiny rate to come back after you’ve done a bunch of minor repairs and deliver you a clean bill of health. Prospective buyers love to see an independent report on the condition of the house – it makes them feel very comfortable with the purchase.
4) Make only the necessary improvements. The biggest mistake people make when getting their house ready to sell is over-improving. They often spend too much money on customized frills that can’t be recovered in the sale.
Paint is about the only safe investment – it’s easy to overspend on almost everything else, and it’s easy to get ripped off by unscrupulous contractors.
It’s important to know what improvements will produce a return on investment to avoid wasting money.
5) Get expert opinions. You should definitely find at least a few decent real estate brokers who will help you price your property, but be honest with them. If you’re going to market the property on your own, don’t make enemies by lying about your intentions. Great brokers are rare, but they make more money for their clients than they earn.
6) Have a really great marketing plan. Again, great brokers earn their value by doing this work and spreading the advertising expenses across many clients. It’s pretty expensive and time-consuming to start from scratch on your own, but if you’re already a marketing expert you’re ahead of the pack.
If you’re not, spend the time listening to what the best brokers do to sell houses in Laveen – just to educate yourself on the options.
What Do I Need To Do To Sell My House In Laveen Arizona - Cash Offer7) Get a cash offer. We buy houses all over the Laveen area, and we do all the work so you don’t have to deal with any of this stuff.
——————————————-
Don’t Want To Do The Things Above Yourself? But Still Want To Sell Your Laveen Arizona House Fast?
While everyone wants to get as much as they possibly can from their house sale… not everyone can do the things or wants to do the things required to sell it at full retail value to an end buyer.
Doing the repairs, cleaning the property up, upgrading the property, marketing the property… those all take money and can take lots of time.
If you have the funds to do these things... AND you can wait the 3-9 months it takes to sell houses in this market… then you’ll be better off financially to do those things then list it on the MLS (the main property listing service that real estate agents use).
If you don’t have the funds to do these things... AND can’t wait months to sell your house… then you may be a perfect fit for our local Laveen house buying service. You’ll submit basic info about your house over here on our website, we’ll evaluate your house, we’ll make you a fair all-cash offer on your house, and you can decide if it’s a fit for you.
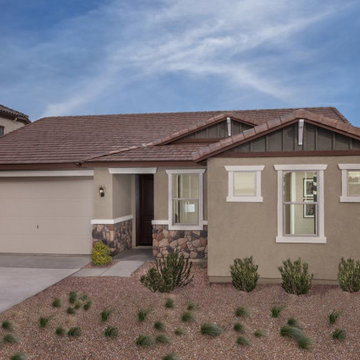
What Do I Need To Do To Sell My House In Laveen Arizona Exterior House Arizona Photo
Then we can close FAST (often times within 7 days) if you need us to.
Take a look at what we’ll pay you not to do anything versus the time, expense and hassle involved with doing it on your own.
So if you’re still asking “what do I need to do to sell my house in Laveen“… now you have 2 solid options.
Either…
Fix the property up and get it all nice and ready with the steps above to sell it at top dollar
Let us do all of the work and we’ll make you a cash offer on your house in AS-IS condition. This saves you time, money, and gets the hassle off of your hands.
If you need to sell a property near Laveen, we can help you.
We buy properties like yours from people who need to sell fast.
We’d like to make you a fair offer on your Laveen house
Give us a call anytime at (602) 560-9260 or
fill out the form on this website today!

 Lindsey Markel
Photo By: Lindsey Neumann
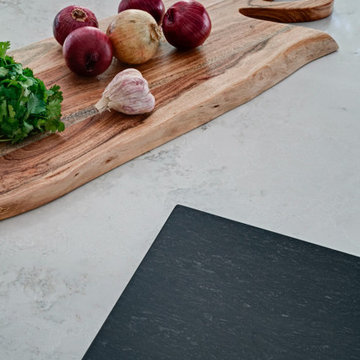
Cabinetry; Dura Supreme, Camden door style, Maple, Natural, Counters; Zodiaq Quartz, Nutmeg, Sink; Blanco Precision, Faucet; Hansgrohe Focus 2-spray, Tile; Gendai Natural, Color Sanna Natural, Hardware; Top Knobs, Hood; Broan Elite
 Legendary Escapes Pools
This project began as a wilderness retreat for the homeowners at their rural estate. They already had a large outdoor area complete with a pond, and detached garage in the perfect location to tie into an outdoor entertaining area/kitchen for the swimming pool. The homeowners were hoping that the design team at Legendary Escapes could create something magical for their small grandchildren, and for the grownups to enjoy for summertime relaxation.
When the discussion turned to themes, the cartoon SpongeBob came up, and our team found a direction to go, either to the homeowners delight, possibly mixed with a bit of apprehension at the thought of a cartoony theme as a result. We promised subtle surprise and delight - and the homeowner decided to let the team go with their vision. The pool is a very abundant sized swimming pool, much larger than the average residential swimming pool. The sunledge was also made larger after the pool layout, providing even more space for chairs and play area for small children. One of the special surprises the owners didn't even know about until after they were in were the secret port holes that were re-seated with magnifying glass - and showcased miniature characters behind them, that when viewed through the glass looked giant in size.
The waterfall/slide combination also features a large grotto - themed and decorated with elements that remind visitors to the space of the lessons and themes of the cartoon. The castle is solid, carved concrete - mixed and sculpted on site and hand placed. As the waterfall began to take shape, the outside was created as a sand castle, providing the perfect whimsical backdrop for the slide, and accents including a pair of flipper outfitted legs of what we can only think is mermaid man.
One of the biggest surprises on this project came when Al found an old wooden boat at an auction, which he bought, took back to the job and cut it in half - creating the tail end of a boating incident, much like SpongeBob would have had when he missed the direction of the curve sign while out boating. (The joke in the show is that he can't ever get his drivers license because he doesn't know how to steer.) The other end of the boat became a vertical storage space for firewood or other pool side needs. The two parts of the boat became anchor pieces for what became the "wharf wall" which is the perfect area to lead people into the swimming pool retreat.
The pool has three different entertaining patio levels, including the lower wharf level, swim up bar and raised concrete counter at the deep end of the pool. The middle section of patio is perfect for relaxing and watching kids play in the pool with the deck jets and sun ledge, and the upper area is adjacent to the outdoor kitchen area, also designed and created out of concrete (carved timbers) as the cabinetry and under bar areas.
The pool was completed with ecoFinish on the sun ledge, interior of the spa, grotto and the slide. The main swimming area of the pool was vinyl liner, constructed in the special hybrid way of the team.
With the project complete, the homeowners and family thoroughly enjoyed their backyard retreat. Any hesitation at the initial theme ideas were fully appreciated as they developed along the way, with the final project a subtle blend of function and whimsy, meeting everything that they could have asked for in a backyard entertaining retreat. Their advice is to just trust Al and the team through the process, because the results will be more than you would ever hope for. If our team can help you create a backyard or custom retreat, which includes a pool and plenty of outdoor entertaining options to surprise and delight you and your family, please reach out to start your design discussions.
Sponsored
Columbus, OH
Wannemacher Interiors
Customized Award-Winning Interior Design Solutions in Franklin Cnty OH
 Legendary Escapes Pools
This project began as a wilderness retreat for the homeowners at their rural estate. They already had a large outdoor area complete with a pond, and detached garage in the perfect location to tie into an outdoor entertaining area/kitchen for the swimming pool. The homeowners were hoping that the design team at Legendary Escapes could create something magical for their small grandchildren, and for the grownups to enjoy for summertime relaxation.
When the discussion turned to themes, the cartoon SpongeBob came up, and our team found a direction to go, either to the homeowners delight, possibly mixed with a bit of apprehension at the thought of a cartoony theme as a result. We promised subtle surprise and delight - and the homeowner decided to let the team go with their vision. The pool is a very abundant sized swimming pool, much larger than the average residential swimming pool. The sunledge was also made larger after the pool layout, providing even more space for chairs and play area for small children. One of the special surprises the owners didn't even know about until after they were in were the secret port holes that were re-seated with magnifying glass - and showcased miniature characters behind them, that when viewed through the glass looked giant in size.
The waterfall/slide combination also features a large grotto - themed and decorated with elements that remind visitors to the space of the lessons and themes of the cartoon. The castle is solid, carved concrete - mixed and sculpted on site and hand placed. As the waterfall began to take shape, the outside was created as a sand castle, providing the perfect whimsical backdrop for the slide, and accents including a pair of flipper outfitted legs of what we can only think is mermaid man.
One of the biggest surprises on this project came when Al found an old wooden boat at an auction, which he bought, took back to the job and cut it in half - creating the tail end of a boating incident, much like SpongeBob would have had when he missed the direction of the curve sign while out boating. (The joke in the show is that he can't ever get his drivers license because he doesn't know how to steer.) The other end of the boat became a vertical storage space for firewood or other pool side needs. The two parts of the boat became anchor pieces for what became the "wharf wall" which is the perfect area to lead people into the swimming pool retreat.
The pool has three different entertaining patio levels, including the lower wharf level, swim up bar and raised concrete counter at the deep end of the pool. The middle section of patio is perfect for relaxing and watching kids play in the pool with the deck jets and sun ledge, and the upper area is adjacent to the outdoor kitchen area, also designed and created out of concrete (carved timbers) as the cabinetry and under bar areas.
The pool was completed with ecoFinish on the sun ledge, interior of the spa, grotto and the slide. The main swimming area of the pool was vinyl liner, constructed in the special hybrid way of the team.
With the project complete, the homeowners and family thoroughly enjoyed their backyard retreat. Any hesitation at the initial theme ideas were fully appreciated as they developed along the way, with the final project a subtle blend of function and whimsy, meeting everything that they could have asked for in a backyard entertaining retreat. Their advice is to just trust Al and the team through the process, because the results will be more than you would ever hope for. If our team can help you create a backyard or custom retreat, which includes a pool and plenty of outdoor entertaining options to surprise and delight you and your family, please reach out to start your design discussions.
 Azenco Outdoor
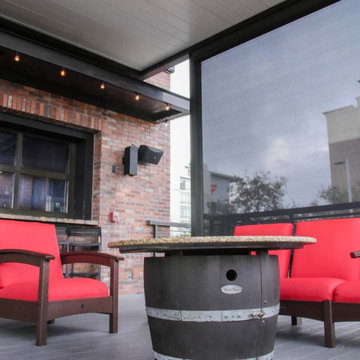
The warmer season, upcoming Super Bowl Sunday, and a raging pandemic. These were the problems plaguing the World of Beer Bar in Tampa Bay, FL, when they got in touch with us for an outdoor bar pergola solution.
Outdoor Project
They wanted to entertain massive crowds of people and watch parties, but the guests could be limited to an outdoor seating space due to the area’s pandemic restrictions. The solution for the restaurant patio cover was the louvered roof system.
The World of Beer Bar decided on a modern pergola with an automated louvered roof to create an outside terrace where their customers can enjoy Super Bowl while maintaining the government’s SOPs due to the pandemic. They loved our R-Blade pergola as it offered a covered outdoor space where they could receive and entertain their guests.
They wanted the industrial patio cover installed on their outdoor terrace to offer rain protection to their customers. But they also wanted a part of the terrace to be uncovered so that their customers can enjoy the beautiful day outdoors.
R-Blade pergola design with the louvered system was the perfect solution for this beer bar’s outdoor space.
Product Choice
Outdoor Terrace - World Of Beer Bar and Kitchen - covered with a louvered roof
Product 4 Pergolas
Model R-BLADE louvered roof
Type Attached to the wall
Size 52’ x 22’ projection – 15’ high
Options Screens
Color Grey Bronze / White louvers
Benefits Stunning 2-story patio
The challenges of this outdoor bar pergola project
Working on this outdoor bar pergola while keeping the pandemic restriction.
4 louvered roofs opening altogether as well as independently
outdoor bar pergola louvered roof with better sealing and less chance of leaks
4 louvered roof that open and close independently - outdoor bar pergola
This industrial patio cover for the outdoor terrace consists of 4 louvered roofs mounted to the bar’s wall. Additionally, the client wanted these roofs to open and close independently so that their customers can enjoy a nice beer and enjoy the Super Bowl watch parties outside when the weather’s good.
Automated screens for wind and rain protection
The R-Blade bioclimatic louvered roof installed at the outdoor terrace comes with outdoor screens, a rain sensor that prompts the pergola to close automatically when it detects rain. Moreover, the outdoor bar pergola has a wind sensor for automatic opening whenever it detects a strong wind force.
While offering the perfect ambiance to this convivial sports bar, it shelters the customers from winds during watch parties and gatherings.
Moreover, our modern louvered roof system is complemented by Azenco’s well-engineered invisible gutter system to drain the rainwater immediately, ensuring that the space under the pergola remains dry.
Grey bronze structure to match the bar’s overall look
We installed grey bronze structures that go very well with the sports bar’s overall look and ambiance. They also asked for white louvers to perfectly contrast with the grey bronze structures giving the outdoor bar pergola a more sophisticated yet friendly vibe.
The pergolas were designed to perfectly blend with the bar’s exterior, offering the perfect place for beer and sports enthusiasts to connect over their favorite teams in the Super Bowl.
Outdoor bar pergola features and Azenco’s solutions
As a result, we created an amazing restaurant patio design for the World of Beer Bar to entertain their guests outside even during the pandemic restrictions.
The louvered system was designed to blend with the sports bar’s look, so the structures were attached to the outdoor wall and crafted in grey bronze while the louvers were white.
Before the renovation, it was just an uncovered terrace on the second story of the patio. But now it’s the perfect outdoor sitting area for customers who come to enjoy the outdoors and watch Super Bowl. The elegant-looking louvers protect the customers from rain or the sun, while the uncovered part gives guests the perfect outdoor experience.
Not to mention that Azenco successfully installed the louvered roof before the Super Bowl 2021 started as the client needed to arrange an outdoor terrace to receive the guests.
Turnaround time
Manufacturing: Custom manufactured adjustable white louvered roof with grey bronze structure. Delivery in 4 weeks.
Mounting On Site: 4 days deal with specific timing and scheduling to ensure that the mounting doesn’t interfere with opening hours.

 FunCycled
Hi Friends!
I’m sooooooooo excited to share our first ever kitchen makeover with you!! Do you like Fixer Upper? If so, you’ll probably enjoy this kitchen makeover. It started back in June with the Interior Design phase. Ann hired me to be the interior designer for her dining room and entry way. The week we finished the entry way, she stopped by our store and said, “what room would you like to design next?”. I felt weird about telling her a room needed a makeover but she promised not to have hurt feelings! So I jumped at the idea of redoing her kitchen! She has a small kitchen but I knew we could breathe new life into it and make it a fun place to have friends over. Ann had other people give her quotes to redo the kitchen but they wanted to rip walls down and make it a major renovation project. Ann didn’t go for it and loved that I wanted to keep the original shape and size, but give it new life again.
To share the pictures of the kitchen after the remodel wouldn’t be the same without showing the before pictures.
Let’s start with the fridge wall, shall we? I didn’t like the placement of the fridge or that the island was all wood. You’ll see in the next few pictures that there is very little kitchen cabinet space so I wanted to make the island look like the rest of the cabinets and add exposed shelving above it. I sent Ann three different design ideas for the kitchen but my favorite design was one that included all retro style appliances from Big Chill. With such a small room, a retro design could incorporate fun appliances. I was elated to find out that she wanted to go with the retro appliances plan!!!
We also added white shiplap to the bottom half of the wall to add even more texture to the space.
I wanted to make the fridge the focal point of the room so I moved it to the middle, then put the island on the left and built exposed shelving to go above it. We also added LED lights under each shelf to brighten up that corner.
Let’s move on to the wall with the stove. The stove needed to be replaced, but I felt like this space also needed more storage. Here it is before:
Storage was tricky because behind the butcher block was a heater that couldn’t be covered. We decided to build a cabinet that looked like a counter but with metal on the bottom to let the heat out but still give her work space and built a custom cabinet to also provide more storage.
Scroll back up and take a look at the door to the left of the stove. The rest of Ann’s house has beautiful mahogany doors and I wanted these to match so we stripped off all the paint, sanded them down and stained them to match. I love the timeless look that gives this kitchen. Refinishing the doors was probably Johns least favorite part of this renovation. Now check out the difference!
Moving on to the sink section. The dark color of the cabinets made this space feel small.The doors and drawers were really basic so John added decorative trim to make it seem more modern and high end. Here’s a close up on those:
John also build the counter top from scratch using solid maple. That was probably the hardest part of the remodel. Not the install, but the build itself. It was definitely worth it though!
We went with a GE retro dishwasher because we wanted white. The hardware is all from Restoration Hardware. What would a kitchen makeover be without a farmhouse sink anyway??
The rug added another deign element that made the kitchen fun and fresh. The tile is from Lowes and we went with a dark gray grout. Since the windows look out to her back yard, I wanted to skip on curtains and leave it open and sunshiney.
Ann already had this antique coffee grinder and I definitely wanted to incorporate it into the kitchen design. Isn’t it awesome?!?
40