
Search results for "Perfect tools" in Home Design Ideas
 Lang's Kitchen & Bath
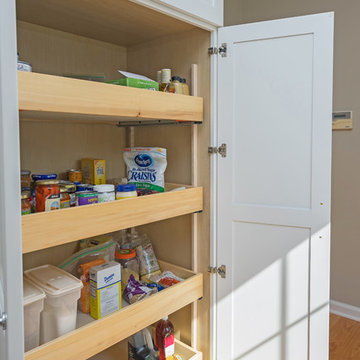
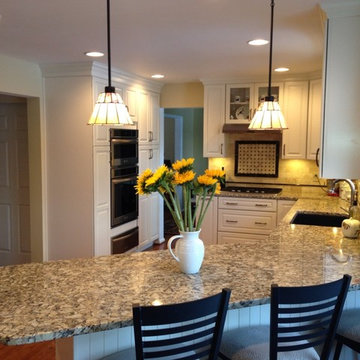
This galley style kitchen design is a bright space featuring Dura Supreme Highland door style in a white finish. The kitchen cabinets are contrasted by a Silestone countertop in charcoal soapstone color with a suede finish, accessorized by Top Knobs polished chrome hardware. A paneled Sub-Zero refrigerator and Asko dishwasher match the cabinetry. A custom wood hood with a Modern Aire hood liner also matches the white cabinets, giving the kitchen a fluid appearance. The kitchen cabinets include ample customized storage solutions, like the pantry cabinet with roll out shelves, narrow pull out spice rack, and tray divider. A large C-Tech undermount sink pairs with a Riobel pull down sprayer faucet and soap dispenser. A Wolf double wall oven and range offer the perfect tools for cooking favorite meals, along with a Sharp microwave drawer. The bright space includes Andersen windows and a large skylight, which offers plenty of natural light. Hafele undercabinet lighting keeps the work spaces well lit, and accents the porcelain tile backsplash. Photos by Linda McManus

 KOZAK Hauling and Junk Removal
#1 Dumpster Rental Hudson, FL - Best Residential Roll-Off Dumpster Service in PASCO FL 727-455-5144
With the help of our New Port Richey FL residential dumpster rental, you’ll be able to spruce up your yard in no time. Clean out your gutters, trim trees, shrubs, and hedges, replace your worn-out deck, and remove the old swing set with our easy-to-load, open-top bins. Our containers can manage brush, tree stumps, yard trimmings, and general waste. Please contact our company before loading dirt into the bin.
Book our small dumpster rental New Port Richey FL homeowners can count on to handle the scope of your outdoor project and create a yard you will be proud of. Increase your curb appeal with a complete landscaping overhaul or clean up after a brutal storm with the added support of our roll-offs. Schedule a delivery online today at https://kozakrolloffdumpsterrentals.com/.../20-yard-roll...
Book the Dumpster Rental New Port Richey, FL Contractors and Homeowners Use for All Projects
Use the local professionals and the best dumpster rental New Port Richey, FL homeowners, contractors, and businesses depend on for a variety of projects. No matter what your project looks like at your residence, office, or construction site, you can depend on our quality services for all of your waste management needs.
Our team at KOZAK Roll Off Dumpster Rental will deliver a heavy-duty dumpster to your location on schedule so you can get your cleanout and decluttering efforts started and completed efficiently. Keep your job site streamlined and on the right track with the help of our professional, friendly, and dependable team.
Our easy-to-load containers are the perfect tool for your landscaping project, garden cleanout, and disposal of any broken or discarded items outside of your home. When you have a driveway-friendly dumpster rental New Port Richey, FL residents trust in your yard or driveway, your trips to the dump are a thing of the past.
We work with business owners and contractors for a broad scope of single-use or ongoing waste removal needs. Our flexible scheduling works on your behalf, saving you time and energy in the process.
We partner directly with the Pinellas County Solid Waste Landfill to ensure that all waste is disposed of responsibly and according to city, county, and state regulations, so you can rest assured that when you work with KOZAK Roll Off Dumpster Rental, we’ll manage the waste in an ethical and eco-conscious manner.
We specialize in: Refrigerator Disposal Garbage Removal Mattress Disposal Foreclosure Clean Outs Construction Waste Removal Yard Waste Removal Trash Removal Appliance Removal
Television Disposal & Recycling Furniture Removal E-Waste Disposal Hot Tub Disposal
#dumpsterrental #dumpster #junkremoval #junkremovalservice #wastemanagement #newportrichey
 DreamMaker Bath & Kitchen Bay Area
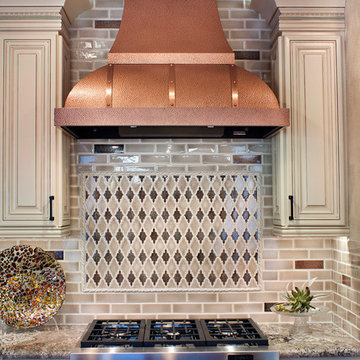
The kitchen now has a focal point and the antique hammered copper hood takes the stage. Diagonally designed hand crafted tile adds elegance and beauty to the scene and the heavy duty stove top will be the perfect tool for preparing meals for large groups of family and friends. Above cabinetry lighting and under cabinetry lighting add stylish ambiance.
J. Hettinger Interiors, Dorene Gomez
Timothy Manning Photography
Find the right local pro for your project
 Lang's Kitchen & Bath
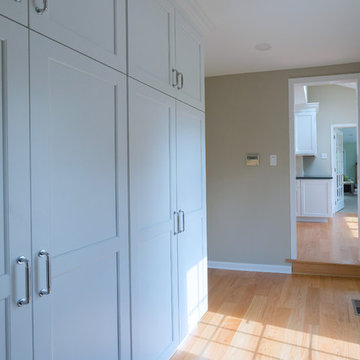
This galley style kitchen design is a bright space featuring Dura Supreme Highland door style in a white finish. The kitchen cabinets are contrasted by a Silestone countertop in charcoal soapstone color with a suede finish, accessorized by Top Knobs polished chrome hardware. A paneled Sub-Zero refrigerator and Asko dishwasher match the cabinetry. A custom wood hood with a Modern Aire hood liner also matches the white cabinets, giving the kitchen a fluid appearance. The kitchen cabinets include ample customized storage solutions, like the pantry cabinet with roll out shelves, narrow pull out spice rack, and tray divider. A large C-Tech undermount sink pairs with a Riobel pull down sprayer faucet and soap dispenser. A Wolf double wall oven and range offer the perfect tools for cooking favorite meals, along with a Sharp microwave drawer. The bright space includes Andersen windows and a large skylight, which offers plenty of natural light. Hafele undercabinet lighting keeps the work spaces well lit, and accents the porcelain tile backsplash. Photos by Linda McManus
 Lang's Kitchen & Bath
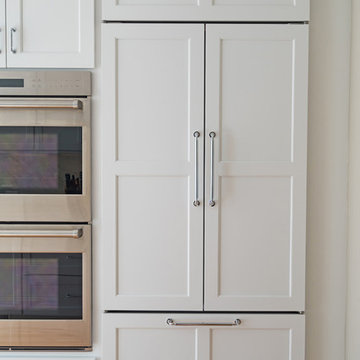
This galley style kitchen design is a bright space featuring Dura Supreme Highland door style in a white finish. The kitchen cabinets are contrasted by a Silestone countertop in charcoal soapstone color with a suede finish, accessorized by Top Knobs polished chrome hardware. A paneled Sub-Zero refrigerator and Asko dishwasher match the cabinetry. A custom wood hood with a Modern Aire hood liner also matches the white cabinets, giving the kitchen a fluid appearance. The kitchen cabinets include ample customized storage solutions, like the pantry cabinet with roll out shelves, narrow pull out spice rack, and tray divider. A large C-Tech undermount sink pairs with a Riobel pull down sprayer faucet and soap dispenser. A Wolf double wall oven and range offer the perfect tools for cooking favorite meals, along with a Sharp microwave drawer. The bright space includes Andersen windows and a large skylight, which offers plenty of natural light. Hafele undercabinet lighting keeps the work spaces well lit, and accents the porcelain tile backsplash. Photos by Linda McManus

 Industrial Projects
Creating a comfortable outdoor living space is a priority for many homeowners and DIY enthusiasts. With rising summer temperatures, installing a shade tarp in your backyard offers an affordable and effective solution for sun protection. We’ve developed this detailed, step-by-step guide to help you confidently install a shade tarp that not only shields you from the sun but also adds aesthetic appeal to your outdoor area.
Benefits of Installing a Backyard Shade Tarp
Before diving into the installation process, let’s explore the key benefits of having a backyard shade tarp:
Provides UV Protection: Keeps your family and guests safe from harmful sun exposure.
Reduces Outdoor Temperatures: Creates a cooler, more enjoyable outdoor space.
Protects Outdoor Furniture: Extends the life of patio furniture by reducing sun damage.
Enhances Outdoor Aesthetics: Adds a modern, stylish look to your yard.
Budget-Friendly: More affordable compared to permanent structures like pergolas.
Materials and Tools You’ll Need
To begin your DIY backyard shade project, gather the following materials and tools:
Materials:
Shade tarp (UV-resistant and breathable)
Sturdy posts or existing structures (trees, fences, walls)
Mounting hardware (eye bolts, D-rings, turnbuckles, snap hooks)
Nylon or polyester rope, or stainless-steel wire
Concrete (if installing new posts)
Tools:
Power drill
Measuring tape
Level
Ladder
Wrench or adjustable spanner
Post hole digger (if installing new posts)
Step 1: Plan Your Shade Tarp Layout
The first step in installing your backyard shade tarp is careful planning. Take time to assess your outdoor area and answer these key questions:
Where is the sun’s path throughout the day?
What size and shape of tarp best suits your space?
Will you anchor the tarp to existing structures or install new posts?
What height do you want the tarp to sit at for maximum shade and airflow?
Pro Tip: Use string or garden hoses to visualize the tarp layout on the ground before making permanent decisions.
Step 2: Measure and Mark Anchor Points
Once you’ve determined the tarp’s location and orientation:
Measure the tarp dimensions.
Mark the exact points where each corner of the tarp will be anchored.
Ensure that the anchor points are at least 5–10% longer than the tarp size to allow for tensioning and slight adjustments.
Consider slope angles for water runoff. Aim for at least a 20-degree angle to prevent water pooling on the tarp.
Step 3: Install Support Posts (If Necessary)
If your backyard lacks existing anchor points like trees or fences, you’ll need to install sturdy support posts:
Dig post holes at least 24 inches deep and 8-12 inches wide for stability.
Set posts in concrete, making sure they remain plumb and level.
Allow the concrete to cure for at least 24–48 hours before applying tension from the tarp.
We recommend using pressure-treated wood, galvanized steel poles, or aluminum posts for longevity and strength.
Step 4: Install Mounting Hardware
With your anchor points ready, it’s time to install the necessary hardware:
Attach eye bolts or pad eyes securely into walls, posts, or other fixed structures.
For added flexibility and adjustability, install turnbuckles or tensioners to fine-tune the tarp’s tightness.
Connect snap hooks, D-rings, or carabiners to make assembly and disassembly easier.
Make sure all hardware is rated for outdoor use to prevent rust and corrosion.
Step 5: Attach and Tension the Shade Tarp
Now it’s time for the most satisfying part—mounting the shade tarp:
Begin by attaching one corner of the tarp to an anchor point.
Gradually attach the remaining corners, moving diagonally for even tension.
Adjust each connection point using your turnbuckles, ropes, or cables.
Pull the tarp tight enough to avoid sagging, but not so tight that it risks tearing.
Check that the tarp maintains the desired slope for rainwater runoff and adjust tension as needed.
Step 6: Final Adjustments and Safety Check
Before enjoying your new shaded area:
Inspect all anchor points and hardware for stability.
Test the tarp’s tension and make adjustments for even distribution.
Ensure that no sharp edges or loose connections remain that could damage the tarp or pose a safety hazard.
Confirm that the tarp is secure in windy conditions by giving it a gentle tug.
If you live in an area with frequent high winds, consider removing the tarp during storms to prevent damage.
Step 7: Enjoy Your Shaded Backyard Oasis
Once installed, your backyard shade tarp provides a comfortable and protective space for outdoor gatherings, relaxation, or family activities. You can decorate underneath with outdoor furniture, string lights, or potted plants to create a personalized outdoor retreat.
Maintenance Tips for Long-Lasting Shade Tarp Performance
To extend the life of your shade tarp, follow these maintenance guidelines:
Regularly check for wear and tear, especially around anchor points and seams.
Clean the tarp periodically with mild soap and water to prevent mildew buildup.
Store the tarp indoors during harsh weather seasons if it's not designed for year-round use.
Tighten hardware as needed to maintain proper tension and avoid sagging.
By following these simple care steps, your shade tarp will continue to deliver years of sun protection and outdoor comfort.
Conclusion: Upgrade Your Outdoor Space with a DIY Shade Tarp
Installing a shade tarp in your backyard is a cost-effective and rewarding DIY project. With careful planning, quality materials, and proper installation techniques, you’ll enjoy cool, shaded outdoor living all season long. This step-by-step guide ensures your project goes smoothly from start to finish.
 Oceanic6
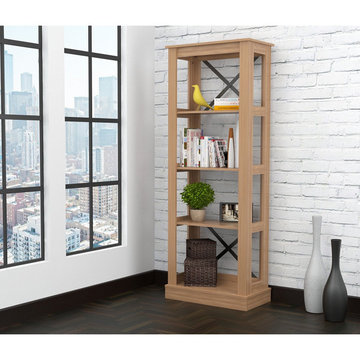
Do you love both books and beautifully looking space. If so, this bookcase is the perfect tool to embellish your room, while providing you with first grade functionality. This bookcase is expertly crafted from solid engineered wood and laminated double-faced durable melamine, which is stain, heat and scratch resistant, and its perfect for those who want a piece that will bring a bit of life into the ambiance of their room. This bookcase also blends its contemporary design with high functionality. It has four shelves, meaning you can store your preferred book collections, favorite photographs, trophies, or even valued collectibles without worry. As for measurements, they are 70.87 Inches for height, 28.35 Inches for width, and 14.37 Inches for depth, and it weighs 59.8 pounds. It would be ideal for your living room, bedroom, office, or classroom. You can match it with other decorations to get an ideal look for your space.
Sponsored
Delaware, OH

Buckeye Basements, Inc.
Central Ohio's Basement Finishing ExpertsBest Of Houzz '13-'21
 Evolution Industries
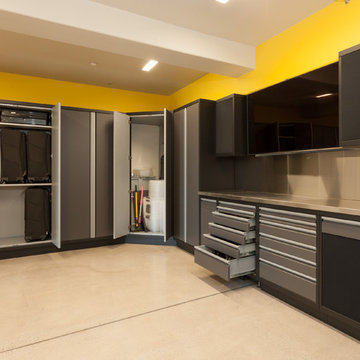
Inspiration for a large transitional attached two-car carport remodel in Sacramento

 Faux Online
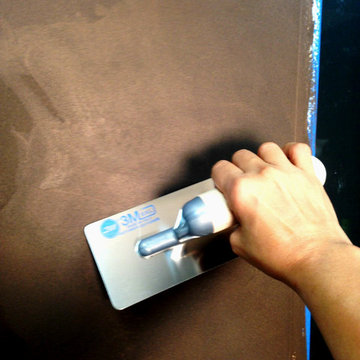
Jenny Jen CEO Faux Online - Decorative Paint Tips Website. The perfect trowel "The Elite Pro" by 3m-srl.it
 Faux Online
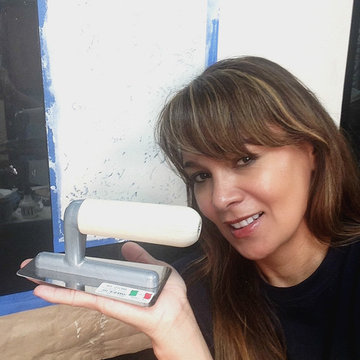
Jenny Jen CEO Faux Online - Decorative Paint Tips Website.
Mini-Trowel by 3m-srl.it. Perfect to keep you consistent with movement in small areas and also perfect for stencils, by 3m-srl.it

 Free Lancing
Effective residential construction project management is crucial in today’s fast-moving building industry. It means overseeing every step of building a home, from planning to finishing, to ensure projects are completed time, within budget, and with high quality. Unlike commercial projects, residential projects require special attention to meet homeowners' unique needs and wishes, requiring a customized approach from the beginning to the end.
In 2025, the construction sector will use advanced technologies like AI and integrated project delivery (IPD) to streamline processes and improve stakeholder collaboration. However, project managers face significant challenges, including managing risks, maintaining quality control, and ensuring effective communication among team members.
A WIP Report (Work-in-Progress Report) is a key tool that helps track a project's budget, progress, and resource use. It provides clear insights, making managing costs easier, avoiding delays, and making informed decisions.
By adopting best practices and using modern construction management tools, project managers can overcome these challenges and deliver successful residential construction projects that meet client expectations and contribute to a sustainable future.
This article provides a brief overview of residential construction project management, highlights its importance, and touches on the challenges faced by project managers while incorporating the latest trends and technologies in the field.
Types of Residential Construction Management
Here are the different types of Residential Construction Management:
Single-Family Homes: These are standalone houses built for individual families. Managing these projects involves overseeing construction from planning to completion, ensuring that the home meets the owner's preferences and budget.
Multi-Family Housing: This includes apartments, condominiums, and townhouses. Projects of this type require managing multiple units, often with shared facilities, and ensuring compliance with local building codes.
Custom Home Building: This involves constructing homes tailored to specific client needs. Close collaboration with architects and designers is required to ensure the house reflects the owner's personality and preferences.
Home Renovation and Remodeling: These projects focus on updating or expanding existing homes. They often involve working with subcontractors for specialized tasks like electrical or plumbing work.
Components of Residential Construction Project Management
Managing a residential construction project requires carefully coordinating people, materials, and timelines. A well-structured approach ensures efficiency, cost control, and high-quality results.
Roles and Responsibilities
A project manager plays a vital role in residential construction. They oversee every step from planning to completion and ensure the project stays on schedule, within budget, and meets quality standards.
Project Manager’s Role in Home Construction
The project manager is responsible for organizing tasks, managing resources, and solving problems that arise during construction. They coordinate between different teams, track progress, and ensure safety regulations are followed.
Collaboration with Contractors, Architects, and Stakeholders
Successful residential construction requires teamwork. Project managers work closely with architects to bring designs to new heights, coordinate with contractors to manage labor and materials, and keep stakeholders (such as homeowners and investors) informed about project updates.
Client Communication and Expectations Management
Clear communication with clients is essential. The project manager keeps homeowners updated on timelines, changes, and challenges. Setting realistic expectations and providing regular updates, they help avoid misunderstandings and keep the project running smoothly.
Project Scope & Planning
Practical project planning sets the foundation for a successful residential construction project. It ensures clear goals, minimizes risks, and keeps the project on track.
Defining Project Objectives and Deliverables:
Clearly outlining what needs to be done and what the final result should look like is essential. This involves setting specific, measurable goals that align with the homeowner's vision and budget.
Managing Homeowner Expectations and Scope Creep:
Homeowners often have changing needs or ideas. Effective project managers must manage these expectations to prevent "scope creep," which can delay projects and increase costs. This involves open communication and setting clear boundaries.
Ensuring Compliance with Zoning Laws and Permits:
Before construction begins, it's crucial to ensure that all necessary permits are obtained and that the project complies with local zoning laws. This step avoids costly fines and delays, ensuring the project moves forward smoothly.
Budgeting & Cost Control
Proper budgeting is essential for keeping residential construction projects financially viable. Effective cost management prevents overspending and ensures profitability.
Accurate Cost Estimation for Residential Projects
A precise cost estimate considers labor, materials, permits, and unexpected expenses. Using historical data and Sage 300 CRE for financial management improves accuracy and helps set realistic budgets.
Budget Allocation and Tracking
Allocating funds efficiently ensures that each phase of the project receives the necessary resources. Tracking expenses through Construction & Financial Dashboards allows for real-time monitoring and early detection of budget deviations.
Preventing Budget Overruns
Uncontrolled costs can derail a project. Regular financial reviews, automated alerts for overspending, and contingency planning help keep expenses in check and prevent financial strain.
Scheduling & Timeline Management
Timely project completion is crucial in residential construction. Effective scheduling minimizes delays and ensures a smooth workflow.
Creating Detailed Project Schedules
A structured schedule outlines all tasks, deadlines, and dependencies. Breaking down the project into phases, planning, execution, and finishing, helps maintain order and clarity.
Preventing Delays & Meeting Deadlines
Delays can result from labor shortages, weather conditions, or supply chain issues. To avoid problems, it’s good to check for risks ahead of time, add extra time to schedules, and keep everyone on the same page.
Using Gantt Charts and Critical Path Methods
CPM for Construction helps identify critical activities that directly impact project completion, while Gantt charts provide a visual timeline of tasks. Both tools optimize scheduling and improve efficiency.
Residential Construction Project Management Phases
Managing a residential construction project effectively requires a structured approach through various phases. Each phase plays a critical role in ensuring the project's success, from initial planning to completion.
Pre-Construction Phase
The pre-construction phase sets the foundation for a smooth and efficient building process. Proper planning at this stage helps prevent costly changes and delays later.
Site Analysis & Approvals: A thorough site analysis assesses soil conditions, topography, and environmental factors. Feasibility studies evaluate project viability, including costs and regulatory compliance. Obtaining zoning approvals, permits, and other legal clearances is crucial before breaking ground.
Selecting Materials and Procurement Strategies: Choosing the right materials impacts durability, sustainability, and cost efficiency. A well-planned procurement strategy, including bulk purchasing and reliable supplier partnerships, ensures timely delivery and cost savings. Using Sage 300 CRE for procurement management helps streamline material sourcing and financial planning.
Construction Phase
The construction phase transforms plans into reality. Effective coordination and strict quality control ensure a successful build.
Resource Allocation and Workflow Coordination: Efficiently managing labor, equipment, and materials is key to maintaining progress. Using CPM for Construction, project managers can allocate resources strategically, prevent bottlenecks, and optimize workflows for timely completion.
Project Closeout & Handover
The final phase of residential construction project management is crucial for ensuring a smooth transition from construction to occupancy. Proper closeout procedures guarantee quality, client satisfaction, and long-term project success.
Final Inspections and Quality Assurance: Before finishing the project, a final inspection checks that everything meets safety rules and quality standards. Any problems need to be fixed quickly. Using Procore helps make inspections and tracking issues easier, ensuring a high-quality final product.
Client Walkthrough and Support: A final check helps homeowners see the finished work, ask questions, and make sure it meets their expectations. This is also a chance to explain important home features and maintenance tips. Good communication here builds trust and strengthens relationships.
Warranty Management and Feedback: Efficient warranty management ensures clients get quick help for any issues after construction. A clear process for tracking requests and keeping in touch with homeowners boosts satisfaction. Collecting feedback helps improve future projects. Using S-Curve Forecasting tracks performance trends and refines management strategies.
Software for Residential Construction Project Management
The integration of technology in residential construction project management has revolutionized the way projects are planned, executed, and monitored. Digital tools streamline operations, reduce costs, and improve communication, making them essential for modern construction firms.
Importance of Digital Tools
Investing in digital tools is crucial for construction firms as it transforms the industry by enhancing efficiency, accuracy, and collaboration across the entire project lifecycle. They also improve project management by streamlining processes, automating tasks, and facilitating real-time stakeholder communication.
Top Construction Management Software for Residential Projects
Several software solutions are available for managing residential construction projects:
Procore: Known for its comprehensive project management features, including document management and collaboration tools.
Sage 300 CRE: Offers robust accounting and financial management capabilities, ideal for large-scale construction projects.
Buildertrend: Specializes in residential construction, providing tools for project scheduling, budgeting, and client communication.
CoConstruct: Focuses on custom home building and remodeling, offering features for estimating, scheduling, and project management.
WIP Reports: Useful for tracking work-in-progress and managing project finances effectively.
Features Comparison and Best Use Cases:
Procore: Best for large projects requiring extensive collaboration and document management.
Sage 300 CRE: Ideal for firms needing robust financial management.
Buildertrend: Suitable for residential builders focusing on client communication and project scheduling.
CoConstruct: Perfect for custom home builders who need detailed estimating and scheduling tools.
WIP Reports: Useful for firms needing to track project finances closely.
How Software Improves Project Efficiency
Construction management software significantly enhances project efficiency in several ways:
Automating Accounting and Job Costing: Software like Sage 300 CRE automates financial tasks, reducing manual errors and improving budget tracking.
Streamlining Document Management and Communication: Tools like Procore centralize documents and facilitate real-time communication among team members, reducing misunderstandings and delays.
Mobile-Friendly Solutions for Real-Time Tracking: Mobile apps from platforms like Buildertrend allow for on-site access to project data, enabling real-time tracking and decision-making.
These digital tools and software solutions are essential for modern residential construction project management, offering benefits such as improved efficiency, enhanced collaboration, and better financial control.
Challenges in Residential Construction Project Management
Residential construction projects face a variety of challenges that can impact their success. Here are some of the key issues project managers encounter:
Managing Subcontractors and Labor Shortages
One of the biggest challenges in residential construction is managing subcontractors and dealing with labor shortages. Subcontractors often have their own schedules and priorities, which can lead to delays if not coordinated properly. Additionally, labor shortages can slow down projects and increase costs due to the need for overtime or hiring temporary workers.
Budget Overruns and Unexpected Costs
Budget overruns are common in residential construction due to factors like material price fluctuations, unexpected site conditions, or changes in project scope. Effective budget management involves regularly monitoring expenses and having contingency plans for unexpected costs.
Changing Construction and Eco Rules
Construction and Eco Rules are always changing, so project managers need to keep up with the latest regulations. This involves following guidelines for saving energy, protecting the environment, and ensuring safety. Ignoring these rules can lead to fines, delays, or even stopping the project.
Best Practices
To ensure your residential construction projects run smoothly and successfully, follow these essential best practices:
Setting Clear Project Goals and Milestones
Clearly defining what you want to achieve is the first step to success. Set specific, measurable, achievable, relevant, and time-bound (SMART) goals. This helps everyone involved understand what needs to be done and by when. For example, instead of saying "build a house," say "build a house with three bedrooms and two bathrooms within the next nine months."
Stakeholder Collaboration
Good communication is key to keeping everyone on the same page. Regular meetings with contractors, suppliers, and homeowners help prevent misunderstandings and ensure that everyone knows what's happening and what's next. This open dialogue also helps resolve issues quickly, preventing small problems from becoming big delays.
Using Data-Driven Insights for Decision-Making
Making decisions based on facts rather than guesses is crucial. Use data and analytics to understand project progress, identify potential issues early, and make informed decisions. For instance, if data shows that a particular material is consistently causing delays, you can plan ahead to avoid those delays in the future.
Proactive Risk Management Strategies
Things don't always go as planned, so being prepared is essential. Identify potential risks early and have a plan to manage them. This might include having backup suppliers, planning for weather conditions, or setting aside extra funds for unexpected expenses. Being proactive can prevent small issues from turning into major problems.
Conclusion
Effective residential construction project management requires careful planning, clear communication, and the right digital tools. From single-family homes to multi-family housing and custom projects, managing timelines, budgets, and quality is essential for success.
By following best practices, using project management software, and staying ahead of industry trends, project managers can ensure smooth execution and client satisfaction despite challenges like labor shortages, budget overruns, and regulatory compliance; modern technology and strategic planning help mitigate risks.
Construction firms can improve efficiency, enhance collaboration, and maintain financial control by adopting advanced tools like Procore, Sage 300 CRE, and Buildertrend. A well-managed project delivers a quality home and builds trust and long-term success in the industry.
FAQs
What is residential construction project management?
It involves overseeing all aspects of building residential properties, from initial planning and design to construction and completion, ensuring projects are completed on time, within budget, and to the desired quality standards.
How can I prevent budget overruns in my construction project?
Accurate cost estimation, continuous budget tracking, and having contingency plans for unexpected expenses are key strategies to prevent budget overruns.
What are the main stages of a residential construction project?
The primary stages include design, pre-construction, procurement, and construction.
How does construction management software improve project efficiency?
It streamlines processes like scheduling, budgeting, and communication, providing real-time data access and collaboration among stakeholders, which enhances overall project efficiency.
How can I ensure my project complies with local building codes and regulations?
Engage professionals familiar with local laws, obtain all necessary permits before starting, and conduct regular inspections to ensure adherence to building codes and regulations.
 Techo-Bloc
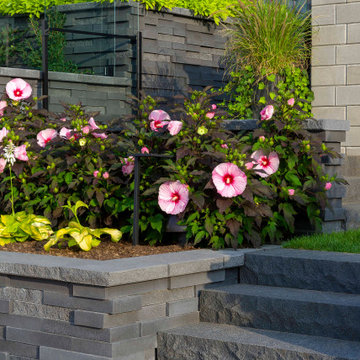
Techo-Bloc has redefined landscape products once again with this eye-catching ultra-modern double-sided retaining wall. The Graphix wall’s varying depths and unique but simple installation process creates a 3 dimensional visual effect. The mix of smooth and chiseled textures add another factor of visual interest to this wall, making it perfect for design lovers and those seeking something sleek and out of the box. Great for retaining soil, building planters, blade walls or vertical elements such as fire, water or outdoor kitchen features. Check out our website to shop the look! Or, check out the estimation tool on our website to get an idea of how much a similar project could cost you! https://www.techo-bloc.com/shop/walls/graphix-wall/
 Muhammad zaid
Building a new home is a momentous occasion. For many, this is a once-in-a-lifetime opportunity to create the home of their dreams. However, selecting the perfect home design and floor plan can feel like a daunting task. After all, you want to ensure that your new home will meet your family's needs and desires for years. That's where trusted services come in. With the latest technology, you can design your entire home and even tour it in 3D. From building your 2D floor plan to furnishing it, you can watch as your dream home is brought to life. In this article, we will explore how you can beautifully decorate your home online.
Select the Main Theme
Embarking on a new home design project can be an exciting yet difficult task. One crucial step is to determine your style preference, as it will guide your decor choices throughout your home. Researching through various platforms and furniture websites can provide inspiration and help gauge pricing for your favorite pieces. One helpful strategy is to create a mood board where you gather your favorite interior design looks and examine any patterns that emerge.
By taking the time to establish your preferred style, you can create a cohesive and inviting atmosphere in your home that reflects your personal taste and style. If you want to create a design while traveling, you may need to use a USA VPN to access some online services with advanced home design tools. It will allow you to bypass geo-blocks.
Create a Layout
The global home design market reached $115 billion in 2022. When designing living spaces, several factors must be considered, including the arrangement of social and private areas and accommodating the changing needs of families over time. Parents with young children usually prefer bedrooms and bathrooms to be clustered together while families with teenagers often request more segregated spaces in two-story home designs.
Home design is an intricate art form that involves creating an interior space that is both visually appealing and functional. Whether you are starting afresh with a new home or looking to revamp an existing one, home design offers ample opportunities to unleash your creativity. It does not matter if you lack professional architecture expertise, as anyone can undertake the planning and execution of a home design project.
The initial steps involve analyzing your existing home layout and then conceptualizing your desired vision for the remodel. This is the cornerstone on which your entire project will be built, and it sets the tone for the aesthetic of your home's interior.
Utilize online home design software to generate realistic images of your new home and easily gather feedback from others. This allows you to make necessary adjustments to perfect your design. With the help of professional software, realizing your ideal home design is now made easy and achievable without requiring any specialized training or knowledge. You can access online tools using VeePN for a secure connection. Start by creating a blueprint of your floor plan.
Furnish Your Space
If you need to decorate house, selecting the right flooring and paint or wallpaper for the walls is key. Using online services, you can speed up this process. With intuitive tools such as dragging and dropping items, you can create a truly unique and personalized home design that is sure to impress.
When selecting a color scheme for your design, it is crucial to consider the benefits and drawbacks of using neutral tones versus incorporating a pop of color. While a neutral palette can simplify the design process and provide a timeless look, it may lack individuality or a focal point. Whereas, a splash of color can introduce a dynamic quality, offer intrigue, and contribute to an energetic ambiance. Additionally, combining a range of price points and textures can add dimension to your design. Consider juxtaposing high-end decor with refurbished furniture and incorporating cozy textures like plush rugs and fluffy cushions, to achieve both sophistication and comfort in your space.
Create a 3D Tour
Home design is a craft that involves creating an attractive home interior, irrespective of whether you're starting from scratch or remodeling an existing home. While anyone can undertake a home design project, you don't necessarily need to be a professional architect. The first step to kick-starting your project entails creating an outline of your abode's current status, and then proceeding to blueprint your preferred design. As you piece everything together, you'll be able to turn your creative vision into a tangible reality. The satisfaction derived from transforming your space into the home of your dreams is truly priceless.
As the market size of the interior design industry is projected to grow by over 4% in the next five years, it is clear that such services are in high demand. Home design involves creating an interior space that is both pleasing and functional. With the help of online tools, you can easily create realistic images of your dream home while gathering feedback from others to perfect your vision. As you piece everything together, be sure to consider neutral color palettes, mix price points, and textures, and add accent colors for depth and vibrancy. With a bit of planning and creativity, you can achieve your ideal design in no time!
Sponsored
Columbus, OH
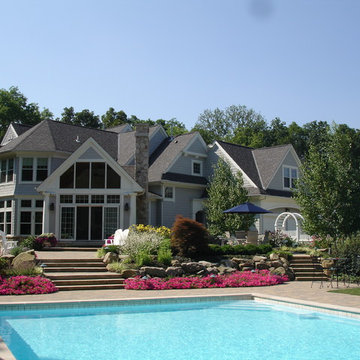
Free consultation for landscape design!

Peabody Landscape Group
Columbus' Reliable Landscape Design & Contracting
 Techo-Bloc
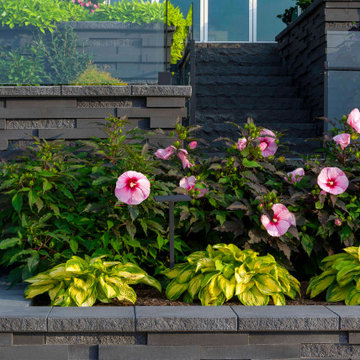
Techo-Bloc has redefined landscape products once again with this eye-catching ultra-modern double-sided retaining wall. The Graphix wall’s varying depths and unique but simple installation process creates a 3 dimensional visual effect. The mix of smooth and chiseled textures add another factor of visual interest to this wall, making it perfect for design lovers and those seeking something sleek and out of the box. Great for retaining soil, building planters, blade walls or vertical elements such as fire, water or outdoor kitchen features. Check out our website to shop the look! Or, check out the estimation tool on our website to get an idea of how much a similar project could cost you! https://www.techo-bloc.com/shop/walls/graphix-wall/
 Faux Online
The Stilight Trowel by 3m-srl.it. Stainless Steel, Light, Flexible, the perfect wood grip and it shines like crazy! I love it.
 Rustico Tile & Stone
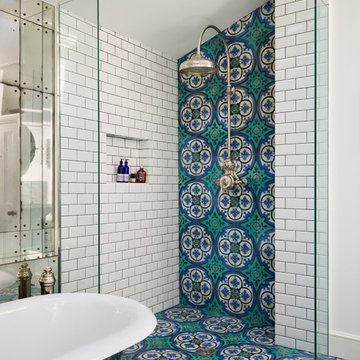
Philadelphia Encaustic-style Cement Tile - custom made and provided by Rustico Tile and Stone. Wholesale prices and worldwide shipping for Cement Tiles.
Rustico Tile and Stone offers 2 types of this Concrete Tile. Our MeaLu Collection features this specific tile and other in-stock, ready-to-ship Cement tiles. Or customize your tile with designs from our Traditional Collection.
Learn more by calling or emailing us today! (512) 260-9111 / info@rusticotile.com
Bathroom design and installation completed by Drummonds UK - "Makers of Bathrooms"
 User
UserFredrik Karlsson
Example of a large danish formal painted wood floor living room design in Gothenburg with a wall-mounted tv and beige walls
Example of a large danish formal painted wood floor living room design in Gothenburg with a wall-mounted tv and beige walls

 Wanda Ely Architect Inc.
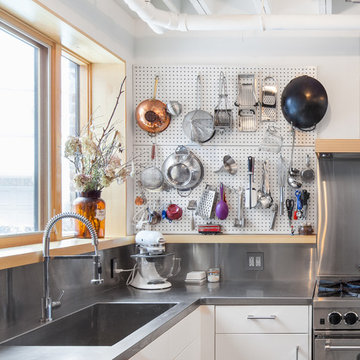
Drawing from one of the owner's experience as a chef, the kitchen is inspired by a commercial kitchen. Walls of durable metal pegboard embody the project's authentic approach in which the tools of everyday life are displayed as objects, while simultaneously making kitchen utensils convenient to use.
Photo by Scott Norsworthy


9