
Search results for "Physical surface" in Home Design Ideas
 Living By Laura
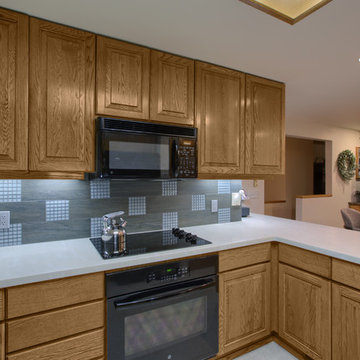
This kitchen remodel was interesting because the owners loved their previous kitchen but wanted to update well-worn laminate and vinyl surfaces.
We installed "Whisper" Corian in the kitchen area. The surface is forgiving, doesn't break every glass that falls on it and hides seams. We spent the extra few dollars with the fabricator to set the pattern one-way across the kitchen instead of turning with the "run" of the countertops. You can't see they physical seams and you cannot see the pattern change at the seams.
Other items upgraded in the space were: The backsplash in a blue-gray porcelain with glass accent. The kitchen sink to an under-counter model. The dishwasher, cooktop and oven were upgraded, however black appliances topped stainless for this remodel.
Interesting fact: the glass in the proper cooking area is not the same color as the glass in back of the bar sink. They look the same, but the bar backsplash is more complimentary to its sink. The difference is undetectable looking across the kitchen.
The "office" area was updated to go underneath the countertop with a pull-out shelf. The shelf allows papers, and needed items to be stored below the counter surface.
This design is practical and casually elegant for the kitchen command center. The two peninsulas were done in "Cosmos" granite. By adding granite to the top-cap of the bar, these areas blend into the living area. The glass sink is new along with the glass tile but the Grohe faucet is a re-use from the original kitchen. They loved that faucet so why change something that you like that still works beautifully after nearly 25 years? The vinyl floor was upgraded to vinyl tile. This choice is softer and warm underfoot compared to other hard surfaces including porcelain tile.
 Living By Laura
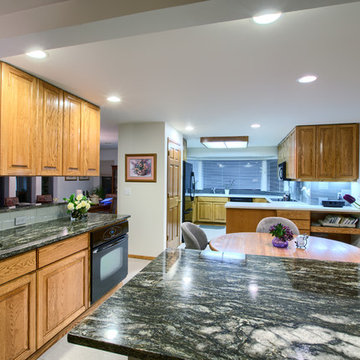
This kitchen remodel was interesting because the owners loved their previous kitchen but wanted to update well-worn laminate and vinyl surfaces.
We installed "Whisper" Corian in the kitchen area. The surface is forgiving, doesn't break every glass that falls on it and hides seams. We spent the extra few dollars with the fabricator to set the pattern one-way across the kitchen instead of turning with the "run" of the countertops. You can't see they physical seams and you cannot see the pattern change at the seams.
Other items upgraded in the space were: The backsplash in a blue-gray porcelain with glass accent. The kitchen sink to an under-counter model. The dishwasher, cooktop and oven were upgraded, however black appliances topped stainless for this remodel.
Interesting fact: the glass in the proper cooking area is not the same color as the glass in back of the bar sink. They look the same, but the bar backsplash is more complimentary to its sink. The difference is undetectable looking across the kitchen.
The "office" area was updated to go underneath the countertop with a pull-out shelf. The shelf allows papers, and needed items to be stored below the counter surface.
This design is practical and casually elegant for the kitchen command center. The two peninsulas were done in "Cosmos" granite. By adding granite to the top-cap of the bar, these areas blend into the living area. The glass sink is new along with the glass tile but the Grohe faucet is a re-use from the original kitchen. They loved that faucet so why change something that you like that still works beautifully after nearly 25 years? The vinyl floor was upgraded to vinyl tile. This choice is softer and warm underfoot compared to other hard surfaces including porcelain tile.
 Living By Laura
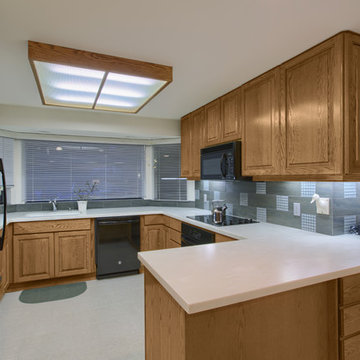
This kitchen remodel was interesting because the owners loved their previous kitchen but wanted to update well-worn laminate and vinyl surfaces.
We installed "Whisper" Corian in the kitchen area. The surface is forgiving, doesn't break every glass that falls on it and hides seams. We spent the extra few dollars with the fabricator to set the pattern one-way across the kitchen instead of turning with the "run" of the countertops. You can't see they physical seams and you cannot see the pattern change at the seams.
Other items upgraded in the space were: The backsplash in a blue-gray porcelain with glass accent. The kitchen sink to an under-counter model. The dishwasher, cooktop and oven were upgraded, however black appliances topped stainless for this remodel.
Interesting fact: the glass in the proper cooking area is not the same color as the glass in back of the bar sink. They look the same, but the bar backsplash is more complimentary to its sink. The difference is undetectable looking across the kitchen.
The "office" area was updated to go underneath the countertop with a pull-out shelf. The shelf allows papers, and needed items to be stored below the counter surface.
This design is practical and casually elegant for the kitchen command center. The two peninsulas were done in "Cosmos" granite. By adding granite to the top-cap of the bar, these areas blend into the living area. The glass sink is new along with the glass tile but the Grohe faucet is a re-use from the original kitchen. They loved that faucet so why change something that you like that still works beautifully after nearly 25 years? The vinyl floor was upgraded to vinyl tile. This choice is softer and warm underfoot compared to other hard surfaces including porcelain tile.
Find the right local pro for your project
 Living By Laura
This kitchen remodel was interesting because the owners loved their previous kitchen but wanted to update well-worn laminate and vinyl surfaces.
We installed "Whisper" Corian in the kitchen area. The surface is forgiving, doesn't break every glass that falls on it and hides seams. We spent the extra few dollars with the fabricator to set the pattern one-way across the kitchen instead of turning with the "run" of the countertops. You can't see they physical seams and you cannot see the pattern change at the seams.
Other items upgraded in the space were: The backsplash in a blue-gray porcelain with glass accent. The kitchen sink to an under-counter model. The dishwasher, cooktop and oven were upgraded, however black appliances topped stainless for this remodel.
Interesting fact: the glass in the proper cooking area is not the same color as the glass in back of the bar sink. They look the same, but the bar backsplash is more complimentary to its sink. The difference is undetectable looking across the kitchen.
The "office" area was updated to go underneath the countertop with a pull-out shelf. The shelf allows papers, and needed items to be stored below the counter surface.
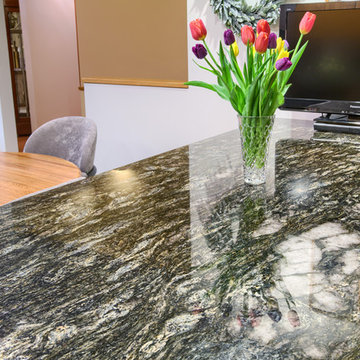
This design is practical and casually elegant for the kitchen command center. The two peninsulas were done in "Cosmos" granite. By adding granite to the top-cap of the bar, these areas blend into the living area. The glass sink is new along with the glass tile but the Grohe faucet is a re-use from the original kitchen. They loved that faucet so why change something that you like that still works beautifully after nearly 25 years? The vinyl floor was upgraded to vinyl tile. This choice is softer and warm underfoot compared to other hard surfaces including porcelain tile.
 Tile Doctor Ltd
Recently I was called to a house in the very small town of Marton in Warwickshire which is known for its proximity to the medieval “Marton Bridge”, which lies just to the north, crossing the River Leam.
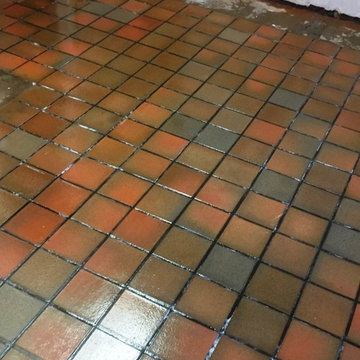
The entire downstairs flooring of my client’s house consisted of Quarry tiles apart from one room where the tiles had been covered by screed and then linoleum. Quarry tiles are a classic hard wearing tile used for both internal and external commercial and residential flooring due to its ability to withstand heavy usage. Reception areas, outdoor patios and porches, for example, are commonly tiled using Quarry.
My client wanted to restore the covered floor back to its original state so that it would match the rest of the downstairs. Realising that this would be a complex and physically demanding task, my client decided to call in Tile Doctor to carry out the restoration.
Removing the Linoleum covering was a relatively straightforward process, so I was able to do this relatively quickly. The main issue concerned removing the screed, which is far more difficult to remove, requiring a lot of physical scraping. Thus I opted to call in some extra manpower in the form of the Nottinghamshire Tile Doctor, Steve Carpenter. With the two of us armed with scrapers we set about removing the screed, taking extra care not to damage the Quarry tile underneath.
Once Steve and I had scraped off as much of the screed as physically possible, I applied a strong dilution of Tile Doctor Remove & Go, a stripper with cleaning properties that is particularly effective at breaking down coatings such as adhesives, plasters and sealers. The product was left to dwell for ten minutes before I worked it into the stone with a scrubbing pad.
After cleaning the tiles, I noticed a layer of grout haze on the surface of the exposed Quarry tiles, so I applied Tile Doctor Grout Clean-Up to remove it. Once the cleaning process was complete I gave the floor a thorough rinse with clean water, before soaking up the resulting residue with a wet-vac machine. The first day of work was a gruelling 12 hours long, but I was very pleased with the results and left the floor to dry overnight.
On day two I returned to finish the job by sealing the newly uncovered Quarry tiles, but not before using a damp meter to check that they were completely dry. Any excess moisture left on unsealed tiles can potentially effect the performance of any sealers that are applied. I sealed the tiles using Tile Doctor Colour Grow, an impregnating, colour-enhancing sealer which gave the surface an aesthetically pleasing shine, as well as durable protection against dirt and wear for the future.
After two long days of work the job was done and the transformation was fantastic and highly rewarding to see, the house now has a fantastic looking Quarry tiled floor running throughout the entirety of the lower level.
Mick Gayton
Warwickshire Tile Doctor
 Innovative Design Build
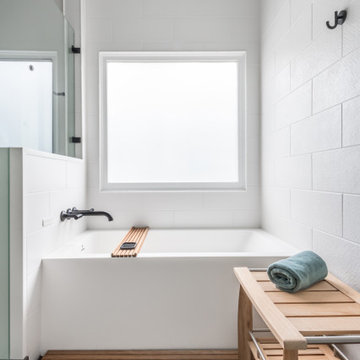
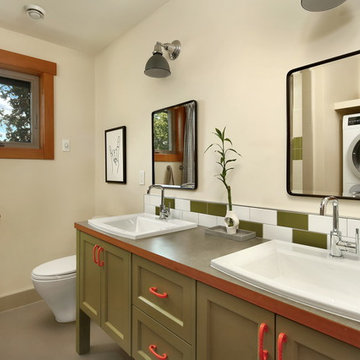
Our clients need a complete update to their master bathroom. Storage and comfort were the main focus with this remodel. Design elements included built in medicine cabinets, cabinet pullouts and a beautiful teak wood shower floor. Textured tile in the shower gives an added dimension to this luxurious new space.
 Living By Laura
This kitchen remodel was interesting because the owners loved their previous kitchen but wanted to update well-worn laminate and vinyl surfaces.
We installed "Whisper" Corian in the kitchen area. The surface is forgiving, doesn't break every glass that falls on it and hides seams. We spent the extra few dollars with the fabricator to set the pattern one-way across the kitchen instead of turning with the "run" of the countertops. You can't see they physical seams and you cannot see the pattern change at the seams.
Other items upgraded in the space were: The backsplash in a blue-gray porcelain with glass accent. The kitchen sink to an under-counter model. The dishwasher, cooktop and oven were upgraded, however black appliances topped stainless for this remodel.
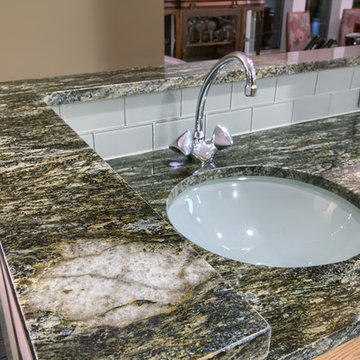
Interesting fact: the glass in the proper cooking area is not the same color as the glass in back of the bar sink. They look the same, but the bar backsplash is more complimentary to its sink. The difference is undetectable looking across the kitchen.
The "office" area was updated to go underneath the countertop with a pull-out shelf. The shelf allows papers, and needed items to be stored below the counter surface.
This design is practical and casually elegant for the kitchen command center. The two peninsulas were done in "Cosmos" granite. By adding granite to the top-cap of the bar, these areas blend into the living area. The glass sink is new along with the glass tile but the Grohe faucet is a re-use from the original kitchen. They loved that faucet so why change something that you like that still works beautifully after nearly 25 years? The vinyl floor was upgraded to vinyl tile. This choice is softer and warm underfoot compared to other hard surfaces including porcelain tile.

 Bellingham Bay Builders
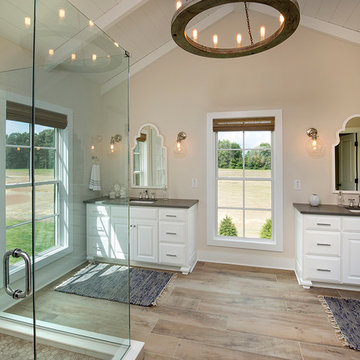
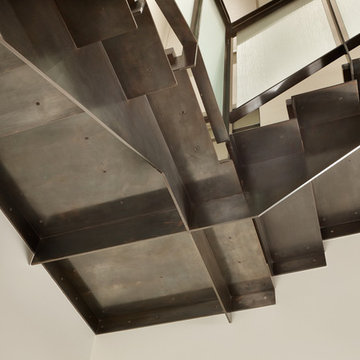
The owners of this home came to us with a plan to build a new high-performance home that physically and aesthetically fit on an infill lot in an old well-established neighborhood in Bellingham. The Craftsman exterior detailing, Scandinavian exterior color palette, and timber details help it blend into the older neighborhood. At the same time the clean modern interior allowed their artistic details and displayed artwork take center stage.
We started working with the owners and the design team in the later stages of design, sharing our expertise with high-performance building strategies, custom timber details, and construction cost planning. Our team then seamlessly rolled into the construction phase of the project, working with the owners and Michelle, the interior designer until the home was complete.
The owners can hardly believe the way it all came together to create a bright, comfortable, and friendly space that highlights their applied details and favorite pieces of art.
Photography by Radley Muller Photography
Design by Deborah Todd Building Design Services
Interior Design by Spiral Studios

 J Design Group - Interior Designers Miami - Modern
J Design Group
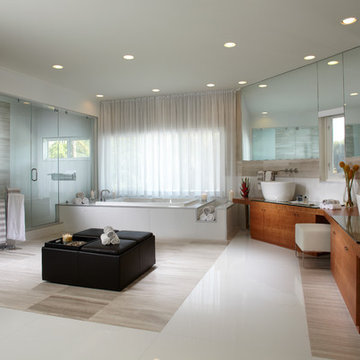
The Interior Design of your Bathroom is a very important part of your home dream project.
There are many ways to bring a small or large bathroom space to one of the most pleasant and beautiful important areas in your daily life.
You can go over some of our award winner bathroom pictures and see all different projects created with most exclusive products available today.
Your friendly Interior design firm in Miami at your service.
Contemporary - Modern Interior designs.
Top Interior Design Firm in Miami – Coral Gables.
Bathroom,
Bathrooms,
House Interior Designer,
House Interior Designers,
Home Interior Designer,
Home Interior Designers,
Residential Interior Designer,
Residential Interior Designers,
Modern Interior Designers,
Miami Beach Designers,
Best Miami Interior Designers,
Miami Beach Interiors,
Luxurious Design in Miami,
Top designers,
Deco Miami,
Luxury interiors,
Miami modern,
Interior Designer Miami,
Contemporary Interior Designers,
Coco Plum Interior Designers,
Miami Interior Designer,
Sunny Isles Interior Designers,
Pinecrest Interior Designers,
Interior Designers Miami,
J Design Group interiors,
South Florida designers,
Best Miami Designers,
Miami interiors,
Miami décor,
Miami Beach Luxury Interiors,
Miami Interior Design,
Miami Interior Design Firms,
Beach front,
Top Interior Designers,
top décor,
Top Miami Decorators,
Miami luxury condos,
Top Miami Interior Decorators,
Top Miami Interior Designers,
Modern Designers in Miami,
modern interiors,
Modern,
Pent house design,
white interiors,
Miami, South Miami, Miami Beach, South Beach, Williams Island, Sunny Isles, Surfside, Fisher Island, Aventura, Brickell, Brickell Key, Key Biscayne, Coral Gables, CocoPlum, Coconut Grove, Pinecrest, Miami Design District, Golden Beach, Downtown Miami, Miami Interior Designers, Miami Interior Designer, Interior Designers Miami, Modern Interior Designers, Modern Interior Designer, Modern interior decorators, Contemporary Interior Designers, Interior decorators, Interior decorator, Interior designer, Interior designers, Luxury, modern, best, unique, real estate, decor
J Design Group – Miami Interior Design Firm – Modern – Contemporary
Contact us: (305) 444-4611
www.JDesignGroup.com
 Casa Dega Design
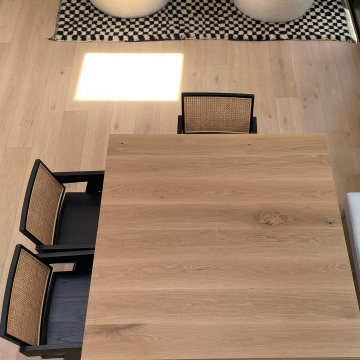
The Big Bang dining table is based on our classic Vega table, but with a surprising new twist. Big Bang is extendable to accommodate more guests, with center storage for two fold-out butterfly table leaves, tucked out of sight.
Collapsed, Big Bang measures 50”x50” to accommodate daily life in our client’s small dining nook, but expands to either 72” or 94” when needed. Big Bang was originally commissioned in white oak, but is available in all of our solid wood materials.
Several coats of hand-applied clear finish accentuate Big Bangs natural wood surface & add a layer of extra protection.
The Big Bang is a physical theory that describes how the universe… and this table, expanded.
Material: White Oak
Collapsed Dimensions: 50”L x 50”W x 30”H
Extendable Dimensions: (1) 72" or (2) 94"
Tabletop thickness: 1.5”
Finish: Natural clear coat
 Montana Timber Products
Where: Colorado
What: Residential
Product: ranchwood™ color: Southern
Solution: Wire Brushed, Shiplap, fascia, soffit
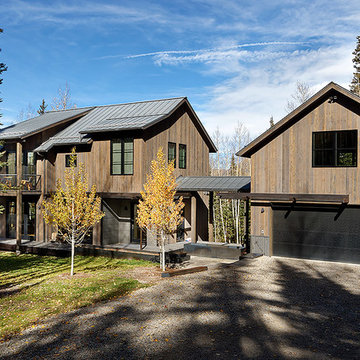
This Colorado home feature's Montana Timber Products prefinished rustic ranchwood™ siding, featuring Wire Brushed texture in the color Southern, applied as fascia and soffit.
ranchwood™ is Montana Timber Products' flagship rustic natural wood siding, a reclaimed barn wood alternative that is milled from new, rough stock, kiln dried, chemical free wood.
ranchwood™ is put through a texturizing and coloring process that creates aesthetically beautiful rustic wood siding and authentic reclaimed barn wood and reclaimed lumber alternatives.
Typically less expensive than authentic reclaimed barn wood, ranchwood™ offers uncompromising rustic wood beauty.
Circle Sawn and Wire Brushed are Montana Timber Products' common cedar siding texturizing options.
The Circle Sawn texture commonly seen on rustic reclaimed barn wood is created from the large circular saw blades used in more traditional milling practices.
The Wire Brushed option adds physical and aesthetic depth to the wood grain.
In addition to the aesthetic beauty added from the texturing process, greater surface area is created, which allows the Seal-Once, a 100% NO VOC waterproofer with a 10 year limited warranty against water ingress and safe for interior and exterior use, pets and children.
If environmentally friendly and the renewable aspect of natural wood siding is important to you, be sure to do your homework when choosing your siding, flooring, interior accents, trim, beams, timbers, or other wood siding products. Some companies choose to use degenerative chemicals to achieve the desired look and texture of rustic wood siding. This is not the case with Montana Timber Products.
Vintage wood, reclaimed barn wood and reclaimed barn wood alternatives are very popular building materials due to their aesthetic beauty, traditional look, and chemical free finish.
 Casa Dega Design
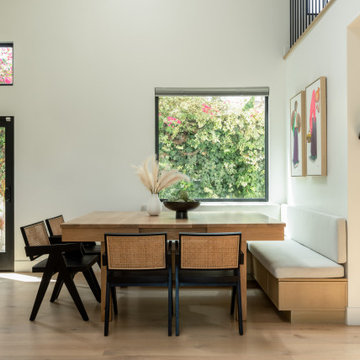
The Big Bang dining table is based on our classic Vega table, but with a surprising new twist. Big Bang is extendable to accommodate more guests, with center storage for two fold-out butterfly table leaves, tucked out of sight.
Collapsed, Big Bang measures 50”x50” to accommodate daily life in our client’s small dining nook, but expands to either 72” or 94” when needed. Big Bang was originally commissioned in white oak, but is available in all of our solid wood materials.
Several coats of hand-applied clear finish accentuate Big Bangs natural wood surface & add a layer of extra protection.
The Big Bang is a physical theory that describes how the universe… and this table, expanded.
Material: White Oak
Collapsed Dimensions: 50”L x 50”W x 30”H
Extendable Dimensions: (1) 72" or (2) 94"
Tabletop thickness: 1.5”
Finish: Natural clear coat
Build & Interior design by SD Design Studio, Furnishings by Casa Fox Studio, captured by Nader Essa Photography.
Sponsored
Columbus, OH

Hope Restoration & General Contracting
Columbus Design-Build, Kitchen & Bath Remodeling, Historic Renovations

 Katz Novoa Architects
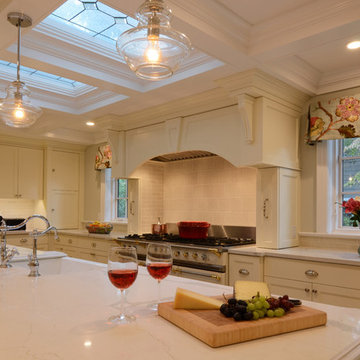
The Clients: two passionate chefs. The Commission: to help them design the perfect Kitchen in which to prepare myriad delectable dishes that they love to plan and execute. The Main Requirements: enough storage to accommodate countless spices, cooking equipment and implements; lots of natural light; and a traditionally detailed, but not overdone design.
We nearly doubled the size of the original galley kitchen by pushing out toward the backyard; laid out the appliances so as to maximize efficiency and work surface area; and designed custom built pull-outs for spice jars, and storage for special cookware, small appliances, cutlery and utensils.
The inspiration for the cabinetry design was the Clients’ impeccable selections of appliances and finishes, and their request for tasteful, simple detailing. The focal point, the heart of this Kitchen, is the beautiful porcelain French stove and custom-designed hood cover. Leaded glass panels in the coffered ceiling add charm and hide roof skylights included in the design to maximize natural light. The large island with porcelain farm sink offers the Clients ample work surface as well as informal seating and storage. A desk / hutch cabinet provides a “central control station” for the family’s activities, as well as display for the Clients’ formal dishes and stemware.
Other improvements included a much-needed Walk-In Pantry achieved by enclosing an existing side porch, and enhanced flow between the Kitchen and Family Room. We accomplished this by removing an existing column and beam which previously blocked the physical and visual connection between the two spaces.
We are delighted with the transformation of the original little galley into our Clients’ dream Kitchen … and our Clients are thrilled that their new Kitchen has cut in half their time spent in epic cooking sessions on the weekends!
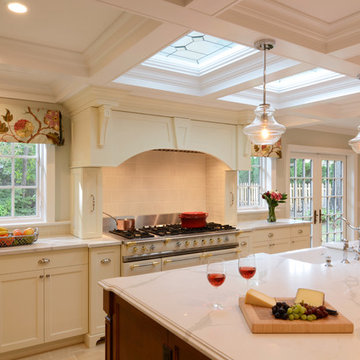 Katz Novoa Architects
The Clients: two passionate chefs. The Commission: to help them design the perfect Kitchen in which to prepare myriad delectable dishes that they love to plan and execute. The Main Requirements: enough storage to accommodate countless spices, cooking equipment and implements; lots of natural light; and a traditionally detailed, but not overdone design.
We nearly doubled the size of the original galley kitchen by pushing out toward the backyard; laid out the appliances so as to maximize efficiency and work surface area; and designed custom built pull-outs for spice jars, and storage for special cookware, small appliances, cutlery and utensils.
The inspiration for the cabinetry design was the Clients’ impeccable selections of appliances and finishes, and their request for tasteful, simple detailing. The focal point, the heart of this Kitchen, is the beautiful porcelain French stove and custom-designed hood cover. Leaded glass panels in the coffered ceiling add charm and hide roof skylights included in the design to maximize natural light. The large island with porcelain farm sink offers the Clients ample work surface as well as informal seating and storage. A desk / hutch cabinet provides a “central control station” for the family’s activities, as well as display for the Clients’ formal dishes and stemware.
Other improvements included a much-needed Walk-In Pantry achieved by enclosing an existing side porch, and enhanced flow between the Kitchen and Family Room. We accomplished this by removing an existing column and beam which previously blocked the physical and visual connection between the two spaces.
We are delighted with the transformation of the original little galley into our Clients’ dream Kitchen … and our Clients are thrilled that their new Kitchen has cut in half their time spent in epic cooking sessions on the weekends!
 William Hoffman Architect
Entrance Transition Spaces
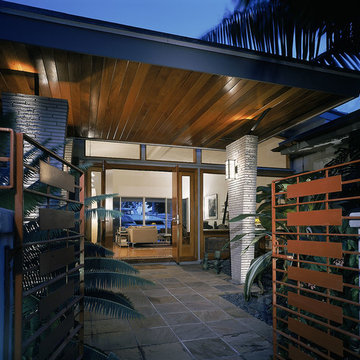
The outdoor space between the street and the front door is the start of the entrance to your home. This sequence of spaces differentiates between public and private areas. The street is the start of an intimacy gradient that extends to your front door and into your home. This transition from the street to the inside of your home should be a tranquil experience, slowing you down after experiencing automobile traffic on the interstate highway and the challenges of the day. Creating an entrance transition from the street to the front door and inside your house can create a space with a feeling of calm. Having your front door open directly to the street, you overlook the opportunity to create a graceful arrival to your home. The experience of entering your home and passing through an outdoor room between the street and the front door influences the way you feel once inside. If the transition is too abrupt, there is no feeling of arrival and once inside the quality of an intimate privacy doesn’t exist. The important thing is that an actual physical outdoor space exists between the street and the front door. The essential quality of creating this place is defining the space and to create a sense of enclosure, with a change in surroundings and view, while emphasizing a variation in the light, sound, path direction and surface texture. Below are some considerations you may want to think about in the design phase of the project:
• Define a space or path extending from the street to the front door. Think about the transition as an actual space or outdoor room rather than just going from point “A” to “B”. Create a sense of enclosure with a gate or garden wall.
• As this space is shaped, think about changes in level and direction in the walking surface at points of significance.
• Activate all the senses as you pass through this outdoor entrance room. Create calming sounds with chimes or water. Introduce smells with fragrant flowers and bushes. Provide a Zen view at a change in direction or stopping point on the path. Vary the amount of light with a trellis. Change the texture and size of the paths surface material.
• Change the scale of the path. Create a space at the street and just outside the front door for greeting or saying goodbye to guests. Create a space in the middle of the path as a point of reflection while looking towards a Zen view.
If done well, the outdoor entrance room you created between the front door and the street will feel comfortable arriving and leaving. This will be a remarkable addition to your home.
Photo credit: Bill Sanders
Sponsored
Columbus, OH
Hope Restoration & General Contracting
Columbus Design-Build, Kitchen & Bath Remodeling, Historic Renovations
 Santa Barbara Home Design
Design Consultant Jeff Doubét is the author of Creating Spanish Style Homes: Before & After – Techniques – Designs – Insights. The 240 page “Design Consultation in a Book” is now available. Please visit SantaBarbaraHomeDesigner.com for more info.
Jeff Doubét specializes in Santa Barbara style home and landscape designs. To learn more info about the variety of custom design services I offer, please visit SantaBarbaraHomeDesigner.com
Jeff Doubét is the Founder of Santa Barbara Home Design - a design studio based in Santa Barbara, California USA.
 Naturescape Landscape & Irrigation LLC
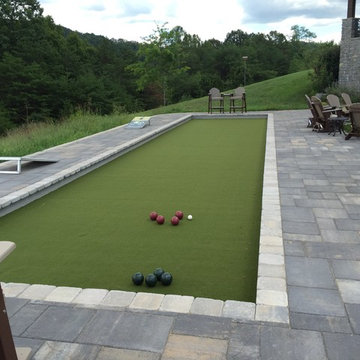
Patio - large craftsman backyard stone patio idea with no cover
 Katz Novoa Architects
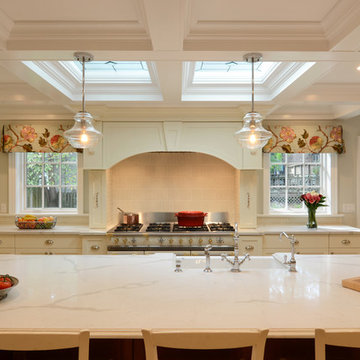
The Clients: two passionate chefs. The Commission: to help them design the perfect Kitchen in which to prepare myriad delectable dishes that they love to plan and execute. The Main Requirements: enough storage to accommodate countless spices, cooking equipment and implements; lots of natural light; and a traditionally detailed, but not overdone design.
We nearly doubled the size of the original galley kitchen by pushing out toward the backyard; laid out the appliances so as to maximize efficiency and work surface area; and designed custom built pull-outs for spice jars, and storage for special cookware, small appliances, cutlery and utensils.
The inspiration for the cabinetry design was the Clients’ impeccable selections of appliances and finishes, and their request for tasteful, simple detailing. The focal point, the heart of this Kitchen, is the beautiful porcelain French stove and custom-designed hood cover. Leaded glass panels in the coffered ceiling add charm and hide roof skylights included in the design to maximize natural light. The large island with porcelain farm sink offers the Clients ample work surface as well as informal seating and storage. A desk / hutch cabinet provides a “central control station” for the family’s activities, as well as display for the Clients’ formal dishes and stemware.
Other improvements included a much-needed Walk-In Pantry achieved by enclosing an existing side porch, and enhanced flow between the Kitchen and Family Room. We accomplished this by removing an existing column and beam which previously blocked the physical and visual connection between the two spaces.
We are delighted with the transformation of the original little galley into our Clients’ dream Kitchen … and our Clients are thrilled that their new Kitchen has cut in half their time spent in epic cooking sessions on the weekends!
5