
Search results for "Powerful visual" in Home Design Ideas
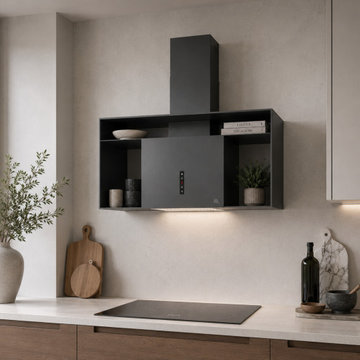
 Futuro Futuro Kitchen Range Hoods
The 36-inch Knox Black Wall Range Hood by Futuro Futuro was selected as a statement piece to anchor this contemporary kitchen design. Its sculptural gunmetal-black finish introduces a refined architectural element, complementing the clean lines, sophisticated materials, and modern aesthetic of the space.
Beyond its visual impact, the Knox delivers exceptional performance with powerful, quiet ventilation designed for everyday living. Integrated features such as touch-sensitive controls, LED lighting, and a thoughtfully designed display shelf add both functionality and personalization, allowing the hood to serve as more than an appliance—it becomes a defining design feature.
Crafted in Italy with meticulous attention to detail, this range hood reflects the balance of form and function that guided the overall kitchen design: timeless elegance, innovative technology, and a luxurious yet welcoming atmosphere. https://futurofuturo.com/36-inch-knox-black-wall-range-hood/
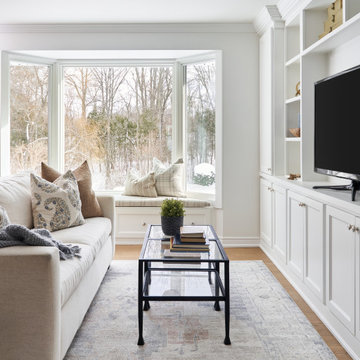
 Sarah Hassaan Interiors
Project Summerhayes is a thoughtfully curated transformation of the heart of the home, the kitchen and family room. These spaces were designed to support daily living while feeling warm, welcoming, and deeply personal.
From the outset, our approach focused on intentional design choices that balance visual impact with comfort and functionality. Each element was carefully selected to enhance the flow of the space while creating an atmosphere that feels both refined and inviting.
Every layer, detail, and finish was chosen with purpose, resulting in interiors that feel lived-in, loved, and uniquely reflective of the family who calls this house home. The transformation highlights the power of considered design where beauty and function work together seamlessly.
We’re delighted to share Project Summerhayes with you.
 We The People Construction
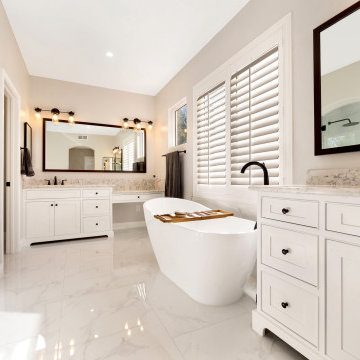
This bathroom remodel project artfully combines classic elements with modern touches, resulting in an elegant and sophisticated retreat. The design team has masterfully crafted a space that exudes both style and function, making it the perfect sanctuary for relaxation and rejuvenation.
The focal point of this spacious bathroom is the luxurious marble countertop, featuring dual sinks and sleek faucets. The countertop sits atop a glossy wooden vanity that provides ample storage, blending form and function in perfect harmony. The large mirror, adorned with contemporary light fixtures, reflects the abundance of natural light that flows into the space, creating an airy atmosphere.
Adding to the charm and privacy of the bathroom is a set of white plantation shutters that separate the bathing area from the rest of the space. The pristine white bathtub, accompanied by a wooden tray for added convenience, invites relaxation and indulgence. The wooden tray not only adds functionality but also lends a touch of warmth to the otherwise cool-toned space.
Adjacent to the bathtub, a walk-in shower with a glass door showcases clean lines and minimalistic design. A black faucet with a matching handle adds an unexpected touch of contrast to the predominantly white space, creating visual interest and breaking the monochromatic palette.
The elegant combination of materials and textures, along with the thoughtful layout, makes this bathroom remodel a testament to the power of timeless design. The result is a space that exudes luxury and tranquility, a true oasis for homeowners seeking solace in the comfort of their own home.
Find the right local pro for your project
 StoneUnlimited Kitchen and Bath Remodeling
Sip into Style: Maple Latte Remodel
Kitchens are often the centerpiece of our homes, a place where culinary creativity meets family gatherings. Yet, many kitchens fall victim to outdated designs and worn-out finishes. If you’re feeling uninspired by your current space, it’s time to consider a remodel that can elevate your kitchen from drab to fab.
Let’s explore how we transformed this client’s kitchen into a posh, stylish retreat that featured a combination of stunning materials and thoughtful design choices that truly elevated the space.
Creating an Open Concept
One of the most significant changes anyone can make in a home remodel is to modify or remove walls. Even though there were two points of entry into this client’s kitchen, the space was closed off. Opening up the wall instantly created a more open and inviting layout that allowed for the installation of a large island. Eliminating the barrier between the kitchen and the adjacent living area, provides a seamless flow that is perfect for entertaining guests or simply keeping an eye on the kids while cooking dinner.
A Showstopping Island
At the heart of this kitchen remodel is an expansive 9 ft. island, designed to be both functional and aesthetically pleasing. The island features a stunning White Pearl natural quartzite countertop that radiates elegance. With its unique veining and shimmering finish, this stone serves as a beautiful focal point and adds a touch of luxury to the space. A beverage cooler and dishwasher are tucked underneath, concealed from the view of the living area. Three 12” deep and 36” wide cabinets line the front of the island providing additional hidden storage. This multifunctional design makes the island an essential part of daily life in the kitchen, making it a cozy spot for casual dining or morning coffee.
Complementary Perimeter Countertops
To enhance the overall look, the perimeter countertops are topped with Silestone Eternal Charcoal. This material offers a striking contrast to the lighter island, featuring rich, dark hues that ground the space and create depth. The durability and easy maintenance of Silestone make it an ideal choice for busy kitchens, ensuring that the surfaces remain beautiful and functional for years to come.
Beautiful Cabinetry
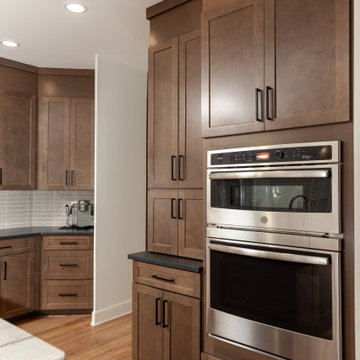
The cabinetry in this remodel plays a pivotal role in both style and storage. We opted for Waypoint Cabinetry in a Maple Latte finish, which adds warmth and sophistication to the kitchen. The soft, neutral tones of the cabinetry complement the countertops beautifully and create a cohesive look throughout the space. The cabinets are thoughtfully designed to provide ample storage, with pull-out shelves and organizers that maximize accessibility.
Finishing Touches
No remodel is complete without the right finishing touches. We chose sleek, modern matte black Top Knobs hardware that enhances the cabinetry's clean lines while adding a touch of contemporary flair. The 2 ½” x 10” San Marcos Tortora stylish backsplash tile, a striking black hood with brushed gold accents and brushed gold large pendant lighting tie together the colors and textures of the room, adding visual interest.
The Result: A Dream Kitchen
The result of this kitchen remodel is nothing short of spectacular. The combination of the open layout, stunning island, and thoughtful materials creates a space that is both functional and beautiful.
Whether you’re considering a full kitchen remodel or simply looking for inspiration, this project highlights the transformative power of thoughtful design and quality materials. If you’re ready to create your dream kitchen, don’t hesitate to contact us so that we can help bring your vision to life. Happy remodeling!
Cabinetry: Waypoint Living Spaces: Maple Latte Stain Finish
Countertops: Stone Showcase - Atlanta Natural Quartzite White Pearl &
Engineered Quart Silestone by Cosentino Eternal Charcoal
Tile: San Marcos Tortora B&F Ceramics Design Showroom Inc.
Faucets: Delta Faucet
 TVL Creative Ltd.
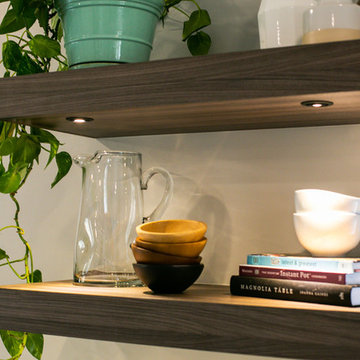
This 1950s home was sporting elements of the original kitchen and the dark space was not meeting our client’s needs. The original kitchen didn’t have much to offer in the way of functionality, so our first order of business was to create a design that would exponentially increase the usability of the kitchen. We brought in functional cabinetry, introduced uninterrupted work surfaces, and added plenty of lighting to brighten up their kitchen. They also wanted to open the new kitchen to the living room and create space for a larger dining table, so we started by removing the existing cabinetry that was visually cut the living space in two and minimized the power of the dramatic vaulted ceiling. We also extended the wood flooring into the kitchen as well to create seamless transitions between spaces. We fell in love with the idea of a two-toned cabinetry design for this kitchen and ultimately went head over heels for clean white painted base cabinets and a textured wood-look melamine on the uppers. This gave us a crisp backdrop that allowed us to bring is fun forms like the black light fixture over the table and the gorgeous silhouettes on the hardware. We played a lot with directionality in this space. The elongated open shelves and rectangular backsplash tiles give us wonderfully clean horizontal lines, but to balance those out we brought in a vertical grain pattern on the wall cabinets and added long black cabinetry pulls that emphasize the verticality of the space. The clients have a green thumb and wanted to make sure we created a home for their growing plant collection. The open shelving gives us plenty of opportunities for foliage and to showcase fun kitchen accessories. This design feels like home and brings together the clean lines and crisp finishes our clients were looking for.
 Tile Merchant
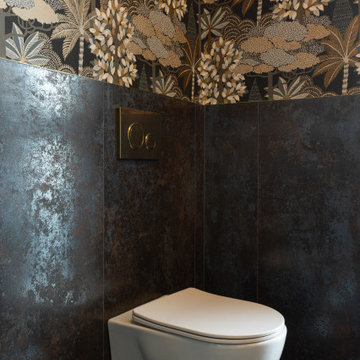
Bathroom Inspiration: Milkyway Metallic-Finish Porcelain Tiles for a Dramatic, Modern & Textured Design Statement
Looking to elevate your bathroom with a bold and contemporary touch? The Milkyway Travertine-Effect Matt Porcelain Tile delivers a striking metallic finish combined with a textured matt surface — perfect for homeowners and designers seeking a dramatic, design-led look.
This wow-factor collection features three expressive colours, each bringing its own personality to the space:
• Silver – soft metallic elegance with a modern twist
• Azul – rich blue tones that add depth and artistic flair
• Anthracite – deep, moody sophistication for a truly bold statement
Whether your vision is minimalist luxury or moody contemporary, the Milkyway range offers a powerful way to transform any bathroom into a visually captivating, spa-inspired retreat.
 Wiles Design Group
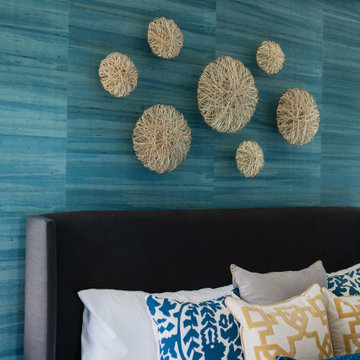
This home was redesigned to reflect the homeowners' personalities through intentional and bold design choices, resulting in a visually appealing and powerfully expressive environment.
In this meticulously designed bedroom, the bold blue palette infuses a sense of tranquility, perfectly complementing the luxurious bedding. An eye-catching art installation above the bed adds a touch of elegance, while hints of greenery bring in a refreshing natural element.

 Waitkus Design
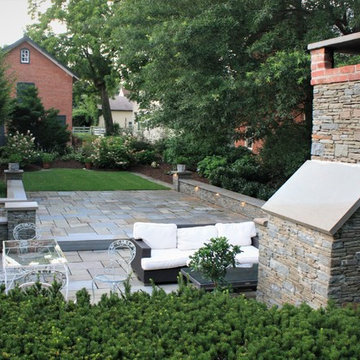
Exquisite setting, visually powerful, intellectual elegance, and timeless design are a few phrases that we feel are brought to life in this site! Stone seating walls, a brick and stone fireplace, and bluestone patio are the trifecta of site functions that engage the homeowners and their guests.
 Phoenix Home Remodeling
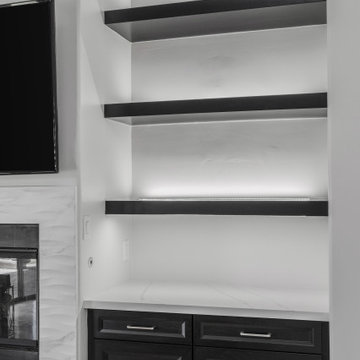
A clean, cohesive upgrade was the goal for Jennifer & Gary’s fireplace wall remodel, creating better balance and visual impact in the living room.
The original fireplace, TV, and surrounding structure were preserved, while everything around them was rebuilt for a more streamlined look.
Cabinetry and shelving were replaced with Waypoint 570F Painted Black base cabinets, finished with satin nickel Alvar hardware. Calacatta Ultra quartz countertops were added to match the kitchen remodel.
Three floating shelves on each side were added above the cabinets, with LED strip lighting. All lighting was connected to a new switch installed near the living room entry, and updated wiring powered each location.
The tile surrounding the fireplace was replaced with 12x36 Marbelous Silk tiles, laid in a horizontal straight stack pattern and framed with Schluter Jolly Black trim and Arctic White grout.
The TV was repositioned slightly lower, and the gas valve was raised to accommodate the new countertop height. A recessed ceiling light was also updated to a matching LED trim.
 Sergey Amiryan
Today I present you a new project - a cozy and stylish kitchen-living room, created for a couple who loves electronic music and parties in their home.
The clients' dream was a special table space with a DJ console and powerful acoustics and I made their dreams come true. Now the parties in their home will be unforgettable! ??
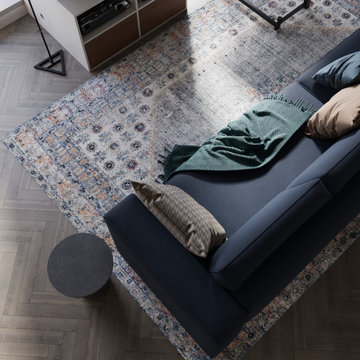
The main character of this apartment is the light beige walls and exquisite finishing panels made of MDF with walnut veneer. This material adds warmth and elegance to the interior. The cabinet furniture also uses elements with walnut veneer, creating a harmonious combination of textures and shades.
The main accent is the blue color, which gives the interior a marine harmony. The kitchen is completely made of "Fenix" material of "blu shaba" color, and in the living room you can cozy up on the blue sofa, which will accommodate all the guests. ??
A dark wood parquet is chosen for the floor, which gives the interior additional depth and warmth.
In creating this interior I tried to reflect not only the unique style of my clients but also their common vision of coziness and comfort.
I am sure that every corner of this kitchen-living room will remind them of how important it is to make their home their own and unique.
 TVL Creative Ltd.
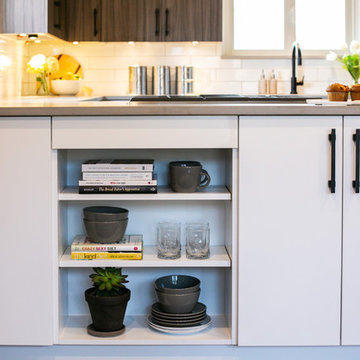
This 1950s home was sporting elements of the original kitchen and the dark space was not meeting our client’s needs. The original kitchen didn’t have much to offer in the way of functionality, so our first order of business was to create a design that would exponentially increase the usability of the kitchen. We brought in functional cabinetry, introduced uninterrupted work surfaces, and added plenty of lighting to brighten up their kitchen. They also wanted to open the new kitchen to the living room and create space for a larger dining table, so we started by removing the existing cabinetry that was visually cut the living space in two and minimized the power of the dramatic vaulted ceiling. We also extended the wood flooring into the kitchen as well to create seamless transitions between spaces. We fell in love with the idea of a two-toned cabinetry design for this kitchen and ultimately went head over heels for clean white painted base cabinets and a textured wood-look melamine on the uppers. This gave us a crisp backdrop that allowed us to bring is fun forms like the black light fixture over the table and the gorgeous silhouettes on the hardware. We played a lot with directionality in this space. The elongated open shelves and rectangular backsplash tiles give us wonderfully clean horizontal lines, but to balance those out we brought in a vertical grain pattern on the wall cabinets and added long black cabinetry pulls that emphasize the verticality of the space. The clients have a green thumb and wanted to make sure we created a home for their growing plant collection. The open shelving gives us plenty of opportunities for foliage and to showcase fun kitchen accessories. This design feels like home and brings together the clean lines and crisp finishes our clients were looking for.
 Livita Ltd | Interior Design Company
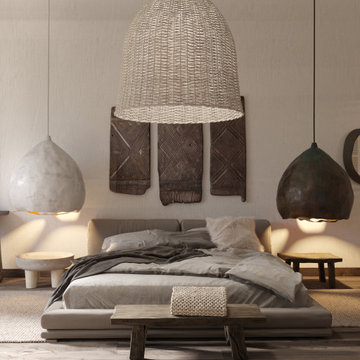
The top interior design is all about creating meaningful, powerful, and sensual experiences for ourselves and our clients. It is more than creating luxury interiors of residences or choosing the right cushion color for your living room. It is about creating experiences that address, protect, and respond to the need of humans.
 Ames & Associates Inc.
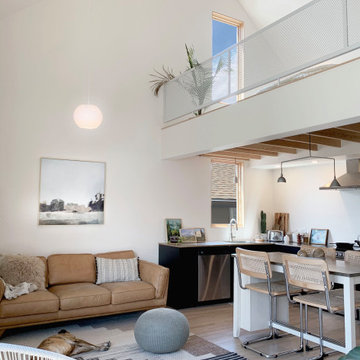
The Alley Lofts provide a model for living large within a small footprint – spatially, economically, and ecologically. These small but well-appointed lofts provide a minimalist, modern, and sustainable rental option at home amongst their gritty backstreet context.
Located on a former backyard infill lot in central Missoula, this new duplex is surrounded by a dense mix of bulky apartment buildings, mother-in-law units, and single-family residences. The lofts’ simple two and a half story gabled form ties in visually with its neighbors, while the minimal detailing, dark stained fir siding, and custom steel elements give hints of the richness within.
Plenty of storage is crucial for livability, thus two oversized garages and a bonus room occupy the first floor. Upstairs, the efficient +/- 600 square foot studio apartments feel much larger than they are. Lofted, open floor plans with vaulted ceilings allow for a sharing of light, views, and air between spaces. Oversized juliet balconies open the interiors to the mountain views, while the second floor living configuration maintains privacy from the busy alley. A mix of natural woods, warm white walls, and matte black accents create a balanced, calming interior palette. Clean energy from the 6kW rooftop solar array powers a highly-efficient, all-electric heating and cooling system. Preliminary energy modeling projects the lofts will approach net zero.
Sponsored
Columbus, OH

Snider & Metcalf Interior Design, LTD
Leading Interior Designers in Columbus, Ohio & Ponte Vedra, Florida
 Wiles Design Group
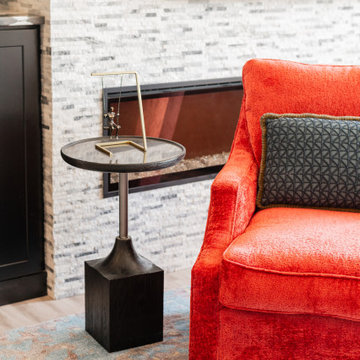
This home was redesigned to reflect the homeowners' personalities through intentional and bold design choices, resulting in a visually appealing and powerfully expressive environment.
Elegance meets vibrancy in this living room design, featuring a soothing neutral palette and a gracefully curved sofa. Two striking orange chairs provide a bold pop of color, while a captivating fireplace and exquisite artwork add a touch of sophistication to this harmonious space.

 Industrial Projects
Creating a comfortable outdoor living space is a priority for many homeowners and DIY enthusiasts. With rising summer temperatures, installing a shade tarp in your backyard offers an affordable and effective solution for sun protection. We’ve developed this detailed, step-by-step guide to help you confidently install a shade tarp that not only shields you from the sun but also adds aesthetic appeal to your outdoor area.
Benefits of Installing a Backyard Shade Tarp
Before diving into the installation process, let’s explore the key benefits of having a backyard shade tarp:
Provides UV Protection: Keeps your family and guests safe from harmful sun exposure.
Reduces Outdoor Temperatures: Creates a cooler, more enjoyable outdoor space.
Protects Outdoor Furniture: Extends the life of patio furniture by reducing sun damage.
Enhances Outdoor Aesthetics: Adds a modern, stylish look to your yard.
Budget-Friendly: More affordable compared to permanent structures like pergolas.
Materials and Tools You’ll Need
To begin your DIY backyard shade project, gather the following materials and tools:
Materials:
Shade tarp (UV-resistant and breathable)
Sturdy posts or existing structures (trees, fences, walls)
Mounting hardware (eye bolts, D-rings, turnbuckles, snap hooks)
Nylon or polyester rope, or stainless-steel wire
Concrete (if installing new posts)
Tools:
Power drill
Measuring tape
Level
Ladder
Wrench or adjustable spanner
Post hole digger (if installing new posts)
Step 1: Plan Your Shade Tarp Layout
The first step in installing your backyard shade tarp is careful planning. Take time to assess your outdoor area and answer these key questions:
Where is the sun’s path throughout the day?
What size and shape of tarp best suits your space?
Will you anchor the tarp to existing structures or install new posts?
What height do you want the tarp to sit at for maximum shade and airflow?
Pro Tip: Use string or garden hoses to visualize the tarp layout on the ground before making permanent decisions.
Step 2: Measure and Mark Anchor Points
Once you’ve determined the tarp’s location and orientation:
Measure the tarp dimensions.
Mark the exact points where each corner of the tarp will be anchored.
Ensure that the anchor points are at least 5–10% longer than the tarp size to allow for tensioning and slight adjustments.
Consider slope angles for water runoff. Aim for at least a 20-degree angle to prevent water pooling on the tarp.
Step 3: Install Support Posts (If Necessary)
If your backyard lacks existing anchor points like trees or fences, you’ll need to install sturdy support posts:
Dig post holes at least 24 inches deep and 8-12 inches wide for stability.
Set posts in concrete, making sure they remain plumb and level.
Allow the concrete to cure for at least 24–48 hours before applying tension from the tarp.
We recommend using pressure-treated wood, galvanized steel poles, or aluminum posts for longevity and strength.
Step 4: Install Mounting Hardware
With your anchor points ready, it’s time to install the necessary hardware:
Attach eye bolts or pad eyes securely into walls, posts, or other fixed structures.
For added flexibility and adjustability, install turnbuckles or tensioners to fine-tune the tarp’s tightness.
Connect snap hooks, D-rings, or carabiners to make assembly and disassembly easier.
Make sure all hardware is rated for outdoor use to prevent rust and corrosion.
Step 5: Attach and Tension the Shade Tarp
Now it’s time for the most satisfying part—mounting the shade tarp:
Begin by attaching one corner of the tarp to an anchor point.
Gradually attach the remaining corners, moving diagonally for even tension.
Adjust each connection point using your turnbuckles, ropes, or cables.
Pull the tarp tight enough to avoid sagging, but not so tight that it risks tearing.
Check that the tarp maintains the desired slope for rainwater runoff and adjust tension as needed.
Step 6: Final Adjustments and Safety Check
Before enjoying your new shaded area:
Inspect all anchor points and hardware for stability.
Test the tarp’s tension and make adjustments for even distribution.
Ensure that no sharp edges or loose connections remain that could damage the tarp or pose a safety hazard.
Confirm that the tarp is secure in windy conditions by giving it a gentle tug.
If you live in an area with frequent high winds, consider removing the tarp during storms to prevent damage.
Step 7: Enjoy Your Shaded Backyard Oasis
Once installed, your backyard shade tarp provides a comfortable and protective space for outdoor gatherings, relaxation, or family activities. You can decorate underneath with outdoor furniture, string lights, or potted plants to create a personalized outdoor retreat.
Maintenance Tips for Long-Lasting Shade Tarp Performance
To extend the life of your shade tarp, follow these maintenance guidelines:
Regularly check for wear and tear, especially around anchor points and seams.
Clean the tarp periodically with mild soap and water to prevent mildew buildup.
Store the tarp indoors during harsh weather seasons if it's not designed for year-round use.
Tighten hardware as needed to maintain proper tension and avoid sagging.
By following these simple care steps, your shade tarp will continue to deliver years of sun protection and outdoor comfort.
Conclusion: Upgrade Your Outdoor Space with a DIY Shade Tarp
Installing a shade tarp in your backyard is a cost-effective and rewarding DIY project. With careful planning, quality materials, and proper installation techniques, you’ll enjoy cool, shaded outdoor living all season long. This step-by-step guide ensures your project goes smoothly from start to finish.
 Wiles Design Group
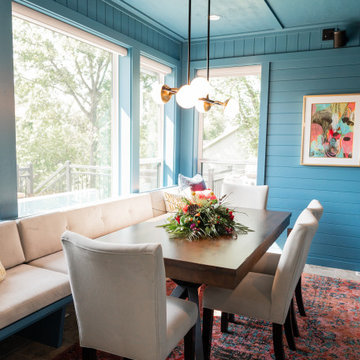
This home was redesigned to reflect the homeowners' personalities through intentional and bold design choices, resulting in a visually appealing and powerfully expressive environment.
This captivating dining room design features a striking bold blue palette that mingles with elegant furniture while statement lights dangle gracefully above. The rust-toned carpet adds a warm contrast, completing a sophisticated and inviting ambience.
 The Decorating Therapist
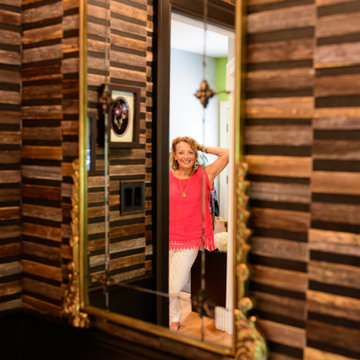
It's all about the art of the mix. From richly textured natural wallcovering to whimsical tributes to the homeowner's beloved pets, every element of this bespoke powder room contributes to a layered story of personality, craftsmanship, and luxury. Unexpected combinations of premium materials, artisan finishes, and curated accessories create visual intrigue while balancing sophistication with playful charm.
This jewel-box powder room demonstrates that exceptional luxury interior design isn't defined by square footage—it's defined by imagination, thoughtful curation, and fearless creativity. By embracing bold textures, organic materials, distinctive details, and meaningful personal touches, the space delivers a dramatic design statement that is both unforgettable and deeply personal. The result is a one-of-a-kind interior that celebrates individuality while showcasing the transformative power of bespoke, story-driven design.
Sponsored
Columbus, OH
Snider & Metcalf Interior Design, LTD
Leading Interior Designers in Columbus, Ohio & Ponte Vedra, Florida
 Drury Design
THE SETUP
The original primary bathroom was characterized by a disjointed and segmented layout. The shower featured a bulky glass-block enclosure that overwhelmed the space visually. There was a considerable amount of open, unused space, and despite having a his and hers vanity, the arrangement lacked personal space for each user, as they shared the conjoined space between the sinks. The toilet was inconveniently located right by the door, with a half-wall partition meant to provide privacy but instead contributing to a cramped and unbalanced feel. Overall, the bathroom’s layout and design were fragmented, failing to make the most of the available space and lacking adequate storage solutions.
Design objectives:
- Reconfigure the layout to enhance functionality and flow.
- Create an elegant, upscale aesthetic that is light and bright.
- Incorporate specialized storage solutions for female hair care needs.
- Increase overall storage capacity.
- Develop a spa-like shower experience.
- Provide a significant wow factor to the space.
THE REMODEL
Design challenges to be solved:
- Repositioning the toilet to a more suitable location.
- Designing hair care storage solutions without cluttering the elegant space.
- Balancing an upscale, elegant design with a feminine touch in the color palette.
- Increasing the brightness of the room without adding windows.
- Completely replacing the existing shower to create a spa-like experience.
- Planning new storage solutions without adding bulkiness or clutter to the cabinetry.
THE RENEWED SPACE
Design solutions:
Toilet Relocation: Moved the toilet by the window, creating a better overall layout that also opened up two full walls for cabinetry and storage solutions.
Specialized Vanity Storage: The left side of the left vanity is the wife’s. Open shelves facing across the vanity can be used for decorative or daily needs items. Pull-out docking drawers with power outlets and metal basins handle hot hair appliances.
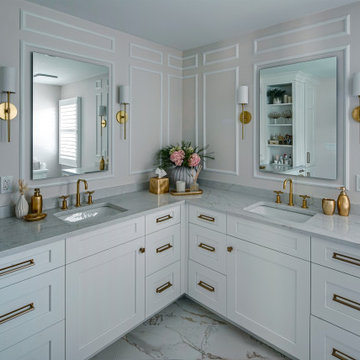
Bright and Elegant Color Scheme: White cabinets, countertops, floors, and shower walls keep the space bright. The just-off-white wall color with a hint of pink adds a feminine touch. Thin wainscoting with white trim offers traditional-leaning elegance.
Layered Lighting Strategy: Ceiling can lights, sconces, lighted mirrors, and toe-kick lighting were installed. Natural light-rated bulbs keep the space bright and natural-feeling.
Spa-Like Shower: An extra-large shower was created using the same floor tile materials for continuity. Equipped with a Kohler Anthem system with a shower head, hand-held, and four body sprays. His and Hers niches for separate body care product storage.
Enhanced Storage Solutions: Added a linen cabinet within the vanity area for efficient storage of towels and bathroom essentials.
This elegant bathroom feels incredibly spacious now. The color palette and lights keep the room bright and cheery. Gold fixtures, the herringbone pattern on the floor, and exquisite trim work add an elegant touch. With the husband and wife having their own vanity wall sections joined at the corner, each user truly has their own space within the space. The clients are very happy with the final result.
 StoneUnlimited Kitchen and Bath Remodeling
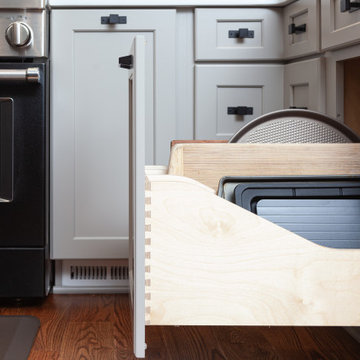
Choosing to abandon uniformity in your kitchen can be a great choice if you're looking to opt out of a monochrome aesthetic. Two-toned kitchen cabinets add visual interest and contrast while drawing focus to different features within the space. Designs utilizing two-toned cabinets have become very popular in recent years and it's not a trend that will be fading out any time soon.
Our clients opted for a combination of Earl Grey and Macchiato Classic cabinetry in their two-toned kitchen. The large island with its second faucet, sink, microwave drawer and lower storage is the focal point of the room and a great work surface for food prep and entertaining. A vertical pull out PowerDock was installed into the top of the island for plugging in kitchen tools, phones and laptops. Dolomite Marble subway tile and Brunello quartz countertops brighten up the kitchen and balance out the tone of the cabinets creating a light and airy feel. The addition of contrasting touches such as the Honey Bronze, Flat Black hardware and Champaign Bronze faucets, accessories the room beautifully. The subdued and sophisticated style of this two-toned kitchen is exquisite and shows the various ways that two-tone cabinets can be versatile and appealing.
Some of the other areas that were remodeled in this home included the complete overhaul of the existing stair well, a guest bath and laundry area.
The guest bath has beautiful vanity cabinets in Celest finish, Monochrome Lotus Deco tile and very reflective Midnight Dots in the shower floor and niche. The combination of all three give a striking white, blue and black design that will inspire and show that you can use pattern and texture in small spaces. A twenty four inch wall mounted shower seat can be lifted and secured when in use and tucked away to allow access out of the shower. A pocket door from the guest bathroom provides a second access point to the hallway with the laundry that has also been revamped with the same style and finish of cabinetry.
 Wiles Design Group
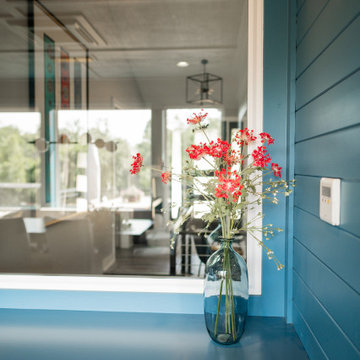
This home was redesigned to reflect the homeowners' personalities through intentional and bold design choices, resulting in a visually appealing and powerfully expressive environment.
This captivating dining room design features a striking bold blue palette that mingles with elegant furniture while statement lights dangle gracefully above. The rust-toned carpet adds a warm contrast, completing a sophisticated and inviting ambience.
51