
Search results for "Problem" in Home Design Ideas


 AJM Construction & Repairs
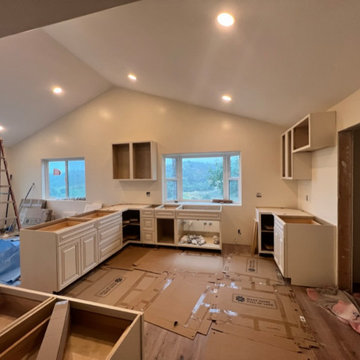
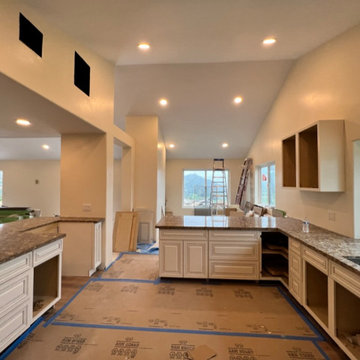
We started as a kitchen remodel but discovered there was mold in the majority of the exterior walls as well as the attic. The mold was caused by a number of problems but namely because the waterproof paper wrap on the house had deteriorated and was moisture to pass through the stucco and into the wood framing. In addition there was a leaking air conditioner condenser in the attic that was draining saturating the wood above the master bedroom. The mold was causing health problems it became clear we needed to replace a large majority of the framing and prevent future problems.
So we went from a kitchen addition/remodel to rebuilding the majority of the home and adding 800sqft; including a new bedroom, expanding the master bedroom and bath as well as a walk-in closet.
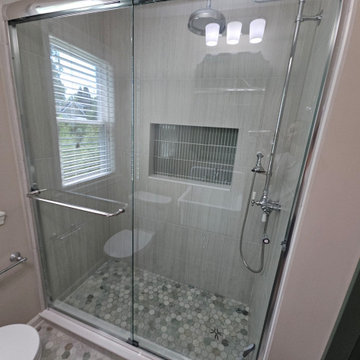
In anticipating for aging in place, we installed a walk-in shower with a bench and grab bars to allow for future wheelchair access and reduce trip hazards.
Find the right local pro for your project

 Jay Sifford
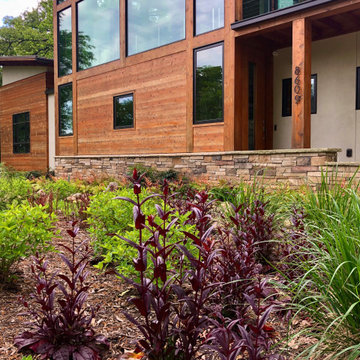
Colors, shapes and textures were borrowed from the house and introduced into the garden in order to ground this contemporary house into the landscape.



 Dream Kitchens
CONTACT
These home owners initially contacted their Designer to identify the reason that the floor in their upstairs bedroom suffered from a noticeable slant. The floor problem actually impacted a small bathroom and adjoining study also.
Early on, the decision was made to re-design the footprint for the 3 rooms in conjunction with repairing the uneven floor. The approach was to gut all three spaces of walls and floors and start from scratch. The new spaces were designed with the clients needs for accessibility in mind.
DESIGN
The design effort included identifying the products to be used throughout the spaces. This included everything from the flooring to the wall paint. Kohler plumbing fixtures and Adelphi cabinetry were decided on first. A radiant heat grid was included for the bathroom floor. Lighting, paint and tile soon followed. Wood flooring was installed throughout the adjoining spaces.
The master bedroom was redesigned to allow for entry from the study or the master bath via pocket doors. The study was given an access to the master bath also. The hardwood flooring ties the bedroom and study together and gives each room a very spacious feel. The original master bedroom was changed to incorporate a large walk-in closet that features custom storage throughout. The study that also doubles as the IT center for the home was updated with custom book cases and cabinetry from Adelphi Cabinets.
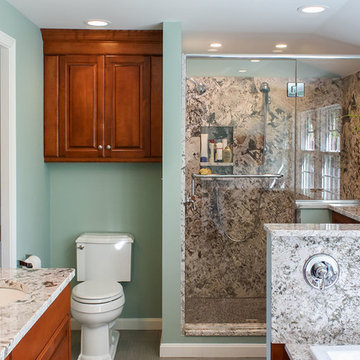
When discussing the reapportioning of the entire space for the individual rooms the bathroom was given priority. The previous small bathroom did not include a window for natural light. The new design corrected that in a big way by incorporating an existing bedroom window into the new space. The decision was made early on to allow for the inclusion of a large shower with full granite walls and custom plate glass surround. The shower system includes both fixed and hand held shower heads. A thermostatic control system was included to eliminate scalding. A large bench seat of matching granite allows for relaxing while getting squeaky clean. A separate air massage tub from Kohler centered under the new windows allows for a relaxed moment while being caressed by all those tiny bubbles. His and her side by side vanity sinks allows for efficient use of the space. The Caxton sinks and coordinated toilet were selected to match the color of the tub and do so beautifully!
CONSTRUCTION
We started the project not knowing what we were going to find. The slanting floor upstairs was not evident in the ceiling of the first floor
Once the demolition had been completed it was evident that the floor joists were at the heart of the problem. The home had been framed with floor joists that had been strung together to increase their length. Over time and with the house settling, the strung together joists started to droop from their connection point. This was concealed on the first floor by a large HVAC duct running through the garage. This was corrected by the addition of two laminated beams in the ceiling of the first floor (luckily in the garage) that re-supported the offending joists.
THE END
The project was a huge success in terms of problem solving and designing with budget and time frame in mind. The overall impact of the new space is impressive both visually and from a practicality point of view. The new master suite with upscale bathroom and study adds significant value to the home and the home owners quality of life!

 CARNEMARK design + build
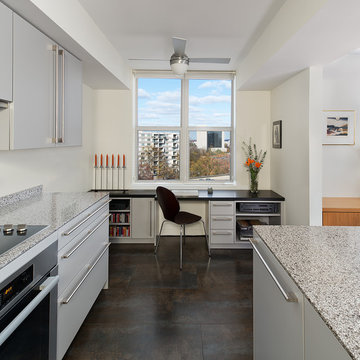
WORK IT. The reconfigured kitchen even made room for an efficient workspace with storage below. Neutral finishes—matte flannel gray cabinets with terrazzo tops and oversized porcelain floor tiles—help make the space appear larger. The striking mottled shades of gray and brown tile also flow into the foyer and laundry room which add to the sense of style and space.
 AJM Construction & Repairs
We started as a kitchen remodel but discovered there was mold in the majority of the exterior walls as well as the attic. The mold was caused by a number of problems but namely because the waterproof paper wrap on the house had deteriorated and was moisture to pass through the stucco and into the wood framing. In addition there was a leaking air conditioner condenser in the attic that was draining saturating the wood above the master bedroom. The mold was causing health problems it became clear we needed to replace a large majority of the framing and prevent future problems.
So we went from a kitchen addition/remodel to rebuilding the majority of the home and adding 800sqft; including a new bedroom, expanding the master bedroom and bath as well as a walk-in closet.
In anticipating for aging in place, we installed a walk-in shower with a bench and grab bars to allow for future wheelchair access and reduce trip hazards.
 AJM Construction & Repairs
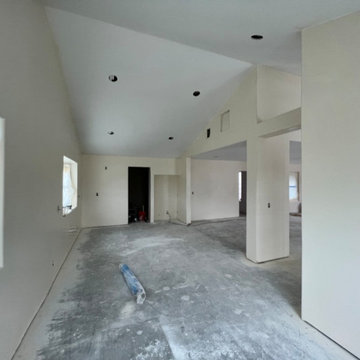
We started as a kitchen remodel but discovered there was mold in the majority of the exterior walls as well as the attic. The mold was caused by a number of problems but namely because the waterproof paper wrap on the house had deteriorated and was moisture to pass through the stucco and into the wood framing. In addition there was a leaking air conditioner condenser in the attic that was draining saturating the wood above the master bedroom. The mold was causing health problems it became clear we needed to replace a large majority of the framing and prevent future problems.
So we went from a kitchen addition/remodel to rebuilding the majority of the home and adding 800sqft; including a new bedroom, expanding the master bedroom and bath as well as a walk-in closet.
In anticipating for aging in place, we installed a walk-in shower with a bench and grab bars to allow for future wheelchair access and reduce trip hazards.

 Adcock-Smith Design
Aaron Dougherty Photography
Mid-sized trendy open concept medium tone wood floor and brown floor family room library photo in Dallas with gray walls, a standard fireplace, a tile fireplace and a wall-mounted tv
Mid-sized trendy open concept medium tone wood floor and brown floor family room library photo in Dallas with gray walls, a standard fireplace, a tile fireplace and a wall-mounted tv



 Rain Garden Nursery LandscapeMakeoverDesignStaging
Scott Buley, HTT&T, High Tech Turf & Trees
Design ideas for a landscaping in Portland.
Design ideas for a landscaping in Portland.
 Tile Doctor Ltd
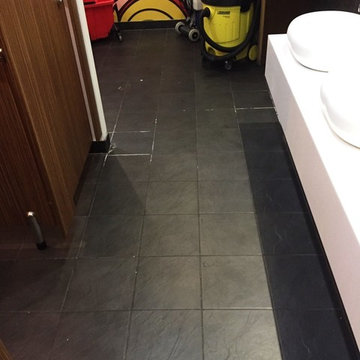
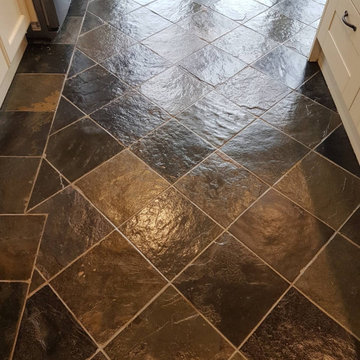
Pictured below is a Slate tiled kitchen floor that had been installed in the kitchen of a property in Harrogate around fifteen years prior. I discovered that the tiles had never been cleaned and resealed since installation and this explained why they were now looking dull and un-interesting. They had lost all character and it wasn’t until I started cleaning them that I realised the must be of the multicoloured Brazilian Slate variety.
As well as looking dull and unattractive, there was also some water damage to some tiles caused by a leak, this had resulted in some shaling and efflorescence staining. This had occurred some time ago and the floor had now dried out fully, so I was not expecting any further efflorescence issues going forward.
Brazil, I understand is the world’s 2nd biggest producer of Slate, it is also exceptionally durable and reasonably priced so its not surprising you see a lot of it over in the UK. Like any natural stone however it is porous and without a sealer to protect it and bring out those natural colours it soon ends up like the example on this pad.
I cleaned the floor with a strong dilution of Tile Doctor Pro-Clean using my usual method of spraying the cleaning solution onto the Slate and grout and then leaving it for a ten minutes to soak in and get to work breaking down the dirt and old sealers. Although I doubted there was much sealer left on the floor after all this time you need to be sure to remove all of it to get the best result. The floor was then scrubbed with a rotary floor buffer fitted with a black scrubbing pad, then after rinsing with water and extracting the soil I inspected the floor.
I detected there was still some sort of sealer present in some of less used parts of the floor, it was proving stubborn to remove so I suspect it may have been an old fashioned wax based product that was used. Not a problem though we Tile Doctors have a solution to every problem, so I spot treated the stubborn areas with Tile Doctor Wax Away to see if I was right. After scrubbing that in followed by another rinse and extraction with the wet vacuum I was pleased to see I was right and was happy all the old seal had now been removed. I gave the floor another rinse at the end of the day and dried it as much as possible with the wet vacuum, then left it to dry off fully overnight.
I came back the next day and checked the floor was dry with a damp meter. The readings were good, so I was able to crack on and seal the tiles using several coats of Tile Doctor Seal and Go. Each coat was applied leaving time to dry between each layer. This gave the floor a uniform appearance which disguised the damaged tiles. It will also help to stop more cracking and reduce the appearance of the efflorescence. The sealer really brought out the natural colours in the Brazilian Slate and the floor looked transformed.
I’m sure you will agree it was a vast improvement, certainly my client was very happy and couldn’t believe the difference I had managed to achieve. Before leaving I recommended, they should invest in some Tile Doctor Neutral Tile Cleaner which would ensure the newly applied seal was prematurely eroded away which is a problem with many of the stronger products you find in supermarkets.
Nigel Stoker
North West Yorkshire Tile Doctor

 Tile Doctor Ltd
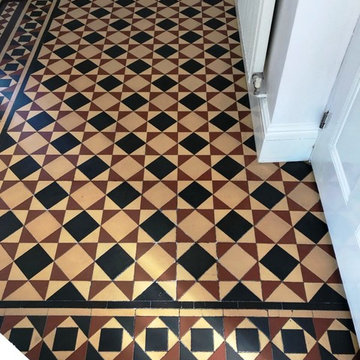
I was recently contacted by the owner of this Minton Victorian tiled floor in Kidderminster. The tiles had been covered over with carpet which I suspect was due to some the tiles being missing. Now uncovered it was stained with glue and carpet underlay was still stuck to the tiles in places. The owner was keen to have the floor fully restored including replacing damaged and missing tiles. We can replace missing or damaged tiles however the problem with old Victorian floors is finding matching replacements due to the unique patterns that many have. Fortunately, due to the popularity of Victorian tiles there are several suppliers who sell reproductions and occasionally you can find originals on ebay.
I went over to survey the floor an could see the tiles were certainly in need of some love and care. As part of the visit I carried out a test clean on a patch of the floor and the results were very satisfactory, so the owner asked me to go ahead.
On the day of arrival my first job was to spray the floor with neat Tile Doctor Remove and Go, this is a powerful cleaner/stripper which set to work on removing the glue and carpet underlay, this product will also remove any old sealer. I then left the solution to dwell and worked the chemical in with my buffer and a black pad removing the slurry with a wet and dry vacuum.
The tiles were then treated to an acid wash using Tile Doctor Acid Gel to further clean them and counter any potential efflorescence problem which is a problem with floors of this age that were installed without a damp-proof membrane. The product was scrubbed into the tile and grout, rinsed off with water and then extracted with the wet vacuum.
Once the floor was clean, I checked the colour of the tiles so I could cut and replace the missing section. I had managed to source some tiles that were a close match and set about cutting all the tiles to size and then fitted them using a flexible rapid set adhesive. The newly laid tiles needed to set, and the floor needed to dry out before we could apply the sealer.
The floor was left to dry overnight, on my return in the morning I tested the floor with a damp meter to check the moisture levels and ensure it was dry enough for sealing. I was satisfied it was dry so was able to proceed and seal the floor. Five coats of Tile Doctor Seal and Go Extra were applied which takes a lot of time as you need to wait for the previous coat to dry before applying the next. This product is a semi-gloss breathable sealer which gives a nice sheen to the tiles and fully protects them. It really allowed the colours and detail of the pattern to shine through and being breathable it will cope with any moisture rising though the floor.
The client was very happy with the overall finish and was really pleased that the Victorian tiles were now restored to their original appearance. It a fact that original features like these are in demand and add a lot of value to a property.
Mark Conway
Worcestershire Tile Doctor


32