
Search results for "Problem" in Home Design Ideas




Find the right local pro for your project

 Almesedoors
FINISH: PRIMED
The advantages of this approach – of this type of interior door finish – are fairly obvious. Pick a color, any color that suits your projects best. Mix and apply. Re- coat whenever you feel it is necessary to do so. Touch it up. It gives you, the proud owner of these interior doors, complete freedom of choice, and the significant savings, especially where it comes to bulk orders, can be a true source of joy.
As Kurt Vonnegut mentions in one of his novels (Bluebeard, unless I’m mistaken … check it out when you get a chance), the thrill of laying on colors is a large part of the artist’s professional satisfaction. In other words, a keen pleasure.
When back in the remote past visual arts became a field dominated by professionals rather than hobbyists, the main problem of “just laying on paint” became obvious: you can’t.
The medium of choice back then was egg tempera, a permanent, fast-drying substance consisting of colored pigments mixed with a water-soluble binder medium, usually glutinous material such as egg yolk. Portraits and ornaments were executed in this medium, and the wood panel was the surface of choice. One of tempera’s interesting features is that it is not as easily absorbed by wood as other mediums. Some sort of primer was necessary, of course, but pretty much any substance that dried evenly could be used.
The drawbacks of tempera, or pintura al temple, as the Spanish call it, only became obvious with the advent of the Renaissance, when the leading representatives of the trade turned to oil (and interior doors suddenly became a great deal less crude, but that’s a story for another day).
Oil painting is the process of “painting with pigments with a medium of drying oil as the binder.” Commonly used types include linseed (highly preferable in art, though not necessarily in interior doors, mind you), poppy seed, walnut, and safflower.
Today, five hundred years later, it is safe to say that oil is more versatile than pintura al temple – by orders of magnitude. Specifically, the contrasts achieved through the former are much greater, the darks are far deeper, and three- dimensional, highly realistic images are much easier to achieve. Next time you visit a museum, take a closer look at pintura al temple portraits. All of them, without exception, come off as a bit “flat” as opposed to their latter-day counterparts.
Also, where glazing is concerned …
Glazing: a painting technique in which a transparent layer, with just a touch of pigment, is laid over a previously painted surface, allowing light to travel through the glaze and be reflected back off of the opaque layer below. Gentle shadows, subtle changes of color, smooth transitions – all these can be achieved through glazing, which was used by all artists up until the middle of the Nineteenth Century, when artist tubes were invented, revolutionizing the field, and other techniques began to be explored.
Tempera enthusiasts (it takes all kinds to make a world) will assure you that glazing is not just possible in pintura al temple but is actually the basis of the whole enterprise. Well, what are you going to do? They’re enthusiasts.
Anyway, la peinture à l'huile, as the French call it, re-introduced the ancient problem of most surface’s propensity to absorb dipingere, as the Italians call the stuff. Wood or canvas, it is all the same: you’re not going to get very far without a good primer.
Experiments were conducted, and soon rabbit skin glue emerged as the least expensive and most effective solution. It was easy to apply. It dried evenly. It made the application of the l’huile stuff on top of it a walk in the park.
There were drawbacks. Today, rabbit skin glue is considered to be a major cause of cracking by most modern conservators. (Remember, when you visited the Metropolitan Museum of Art – and did you see those interior doors? … some of them are quite something … - most “old masters” pictures are completely covered with a cobweb of cracks? There you go). Because the glue is hygroscopic, it continually absorbs moisture from the atmosphere, causing the glue to swell and shrink as ambient humidity levels change. Over many humidity cycles, this repeated flexing causes the brittle oily layers to crack.
To combat this problem, modern primers are made of acrylic materials which are guaranteed not to cause any damage to the dipingere. No bubbling, no cracks. Your interior doors are safe.

 Bear Valley Plumbing & Heating
Your pipes are one of the most important parts of your plumbing system. They connect each part of your entire plumbing system together, so if they start to have problems, it will effect the entire system. If you’re starting to see leaks in your pipes or lower water pressure, you may have pipes that are perfect candidates for repiping.
Many older homes still have galvanized pipes in their plumbing systems, and this can start to create problems. In more recent years, copper pipes have become a preferred choice for home plumbing. Our Big Bear water pipe experts can repair or replace all or part of your plumbing’s pipe system, so your plumbing will be more efficient, and you won’t have nearly as many problems arising.
All of our Big Bear water pipe experts are professionally trained and extensively experienced. So at every single job, we can guarantee your complete satisfaction with our work. All of our repairs will be thorough and accurate, and we’ll always be professional, courteous, and respectful. We know you’ll be looking forward to getting back to your home life, so we’ll get the work done as quickly as possible, but we’ll never sacrifice quality for speed.



 Deck Remodelers.com
This Florham Park, NJ space may not be huge, but it has absolutely everything the homeowners wanted, designed and built to complement their modern farmhouse-style home.
The outdoor living room features a full stone floor-to-ceiling Rstone fireplace, an Equinox louvered roof, and Phantom screens, all giving this space a cozy farm-house vibe, while allowing the homeowners to use this outdoor room year-round. The gorgeous see-through Vertiseck privacy panels flank the fireplace and keeps the space from feeling boxed in.
Steps from the outdoor living room lead to a pavered patio, complete with kitchen and a lounge area with a custom stone fire table. Everything is perfectly scaled for the space.
Want yours? Contact Deck Remodelers, the most awarded outdoor builder in all of North America: 973.729.2125. Be sure to follow us on Instagram for the latest: https://www.instagram.com/deckremodelers/
 Dream Kitchens
CONTACT
These home owners initially contacted their Designer to identify the reason that the floor in their upstairs bedroom suffered from a noticeable slant. The floor problem actually impacted a small bathroom and adjoining study also.
Early on, the decision was made to re-design the footprint for the 3 rooms in conjunction with repairing the uneven floor. The approach was to gut all three spaces of walls and floors and start from scratch. The new spaces were designed with the clients needs for accessibility in mind.
DESIGN
The design effort included identifying the products to be used throughout the spaces. This included everything from the flooring to the wall paint. Kohler plumbing fixtures and Adelphi cabinetry were decided on first. A radiant heat grid was included for the bathroom floor. Lighting, paint and tile soon followed. Wood flooring was installed throughout the adjoining spaces.
The master bedroom was redesigned to allow for entry from the study or the master bath via pocket doors. The study was given an access to the master bath also. The hardwood flooring ties the bedroom and study together and gives each room a very spacious feel. The original master bedroom was changed to incorporate a large walk-in closet that features custom storage throughout. The study that also doubles as the IT center for the home was updated with custom book cases and cabinetry from Adelphi Cabinets.
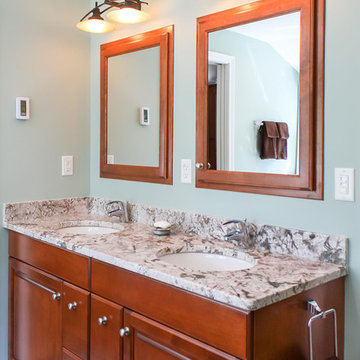
When discussing the reapportioning of the entire space for the individual rooms the bathroom was given priority. The previous small bathroom did not include a window for natural light. The new design corrected that in a big way by incorporating an existing bedroom window into the new space. The decision was made early on to allow for the inclusion of a large shower with full granite walls and custom plate glass surround. The shower system includes both fixed and hand held shower heads. A thermostatic control system was included to eliminate scalding. A large bench seat of matching granite allows for relaxing while getting squeaky clean. A separate air massage tub from Kohler centered under the new windows allows for a relaxed moment while being caressed by all those tiny bubbles. His and her side by side vanity sinks allows for efficient use of the space. The Caxton sinks and coordinated toilet were selected to match the color of the tub and do so beautifully!
CONSTRUCTION
We started the project not knowing what we were going to find. The slanting floor upstairs was not evident in the ceiling of the first floor
Once the demolition had been completed it was evident that the floor joists were at the heart of the problem. The home had been framed with floor joists that had been strung together to increase their length. Over time and with the house settling, the strung together joists started to droop from their connection point. This was concealed on the first floor by a large HVAC duct running through the garage. This was corrected by the addition of two laminated beams in the ceiling of the first floor (luckily in the garage) that re-supported the offending joists.
THE END
The project was a huge success in terms of problem solving and designing with budget and time frame in mind. The overall impact of the new space is impressive both visually and from a practicality point of view. The new master suite with upscale bathroom and study adds significant value to the home and the home owners quality of life!
 Daniel Bosler Foto
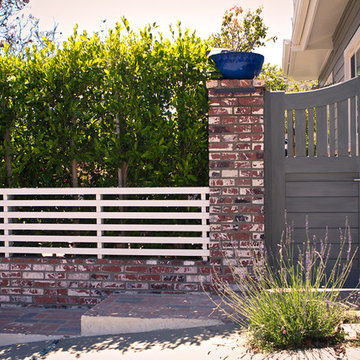
Side entrance gate to front secluded patio.
©Daniel Bosler Photography
Photo of a small traditional front yard landscaping in Orange County.
Photo of a small traditional front yard landscaping in Orange County.


 Five Star Tree Care
Once the endless winter has finally subsided, it is time to start thinking about your spring tree care! Once the last of the snow and ice has finally melted away, your trees and garden will be released once again. It is finally time to prepare for your spring tree care. If you want to maximize your tree’s new growth, you are going to want to follow Five Star Tree Services spring checklist! You can also start planning for new trees as well. We are going to give you all the information you need to know in order to properly take care of your trees this spring.
Inspect Your Trees
When all the ice and snow has left your trees, this is a good time to inspect for any damage done from the harsh winter. There aren’t any leaves that will get in your way, making it easier to see anything amiss, like damage or diseases. If you hire an arborist to do this initial spring inspection, you can guarantee that they will analyze every tree on your property very carefully to make sure they can provide you with the most accurate report. This report will make you aware of any and all tree problems on your property. The arborist will also go over all possible ways that you can fix these problems and explain them to you.
Preemptive Pruning
In order to properly prepare your trees for their spring growth, you will need to prune them. A trained arborist will be able to identify dead branches and cut them off. They will also deal with damaged branches, weak branches, and any unsafe branches and make sure they remove them before they become a problem or hazard. We recommend that you prune or hire an arborist to prune your trees in the early spring. If you wait and prune your trees after their spring growth, they are more likely to be attacked by pests and diseases. When done properly, your spring pruning is going to have a major positive impact on the overall health of your trees.
Cleanup the Gardens
Part of your spring cleaning is not limited to your home. You also need to clean your gardens too! This is an important part of your checklist routine. When all the snow and ice melt away and exposes your gardens and lawn once again, it is important to clean up your yard from any and all fallen leaves, branches, and anything else that isn’t supposed to be there. Once you do this, the sunlight will be able to get to the ground and will aid in penetrating and warming up the ground faster below the surface. Developing tree roots will have a positive effect from the sunlight. Which results in better tree growth in the spring.
Fertilization of Your Trees
After the winter has subsided, it usually takes most of the nutrients out of the soil. Which is why you should be taking advantage of fertilizing your trees in the spring. It is important to feed your trees in order to provide them with the adequate nutrients they need in order for them to be healthy and grow during the spring. When trees are properly fertilized, this helps them fight off diseases and pests.
Add Some Mulch
There are many marvelous benefits to mulching in the spring. This improves the soil quality that’s around your tree. It also helps to keep the soil fertilized and moist. Mulch is also a fantastic way to prohibit weeds from developing and growing in your gardens. This is very important for newly planted and young trees. We recommend that you add 2-4 inches of mulch around each tree in the early spring.
Plant Some New Trees!
There are many reasons why people plant trees. One major reason is to combat deforestation and provide more oxygen. If you are looking for other reasons to plant some trees, consider planting shade trees. These trees allow you to take shelter under them in the summer from the glaring sun. But did you know that they can also benefit you by maximizing your energy savings during the winter? Making it so that you can actually increase the overall value of your home when you plant new trees.
How Five Star Tree Services Can Help
When you are looking to add more magnificent trees to your yard, you need to make sure they are planted properly. One of the first important steps is to pick the right placement for your new tree. You also need to consider what trees are right for your property. Without any experience planting trees, we highly recommend that you contact your local Toronto Tree Planting Services for assistance! Our team is highly knowledgeable and will be able to help you with anything you require for your trees, both new and pre-existing. Make sure to contact Five Star Tree Service for all your tree needs. Contact us at (416) 990-3355 or go to our website to learn more!
 safe ZOnea
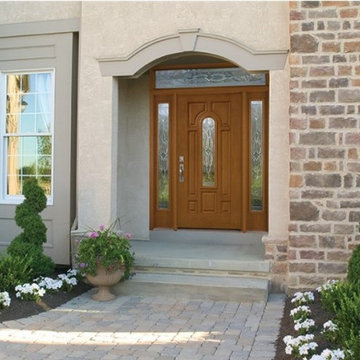
 When it comes to home improvement projects, the contractor you choose can make all the difference. A skilled, reputable general contractor delivers quality work and a smooth experience, while a poor choice can lead to problems, frustration, and wasted money. For Chicago homeowners planning exterior improvements from siding to doors and beyond — understanding how to choose a good general contractor is essential. This guide covers what to look for and how to make a smart choice for your home improvement projects.
The role of a general contractor
A general contractor plays a central role in home improvement projects, overseeing and coordinating the work to bring a project to completion. For projects that involve multiple aspects or trades, a general contractor manages the process, ensuring the various pieces come together properly. This coordination and oversight are valuable, particularly for larger or more complex projects that involve numerous details and steps.
Working with a good general contractor offers several benefits. It provides a single point of responsibility for a project, brings expertise and coordination to the work, and helps ensure the project is completed properly. For homeowners, a quality general contractor can make the difference between a smooth, successful project and a stressful, problematic one. Homeowners planning projects often look for a general contractor chicago near me to handle their improvements. Understanding the role a general contractor plays helps homeowners appreciate the value of choosing a good one for their home improvement projects, especially larger or more involved ones.
Why the choice matters
The choice of general contractor has an enormous impact on a home improvement project. From the quality of the work to the smoothness of the process to the ultimate result, the contractor shapes every aspect of the project. A skilled, reputable contractor delivers quality results and a professional experience, while a poor choice can lead to shoddy work, delays, cost overruns, and frustration.
The stakes are significant, as home improvement projects represent substantial investments and affect a home that homeowners live in and value. A project done poorly can create problems that are costly to fix and diminish rather than enhance a home. This is why choosing the right contractor is so important — it's one of the most consequential decisions in any home improvement project. Homeowners do well to approach the choice carefully rather than simply hiring the first or cheapest option. Understanding why the choice of contractor matters helps homeowners give this decision the attention it deserves, recognizing its impact on the success of their project and their satisfaction with the result.
What to look for in a contractor
Choosing a good general contractor involves looking for several important qualities. Experience and a solid reputation are key indicators of a contractor's ability to deliver quality work. A contractor with a track record of successful projects and satisfied customers is generally a safer choice than an unknown quantity. Researching a contractor's reputation and past work helps in assessing their quality.
Beyond experience and reputation, other important qualities include quality workmanship, clear communication, professionalism, and reliability. A good contractor communicates clearly, provides a clear understanding of the project and its costs, treats customers professionally, and follows through reliably. These qualities contribute to both a quality result and a positive experience. Homeowners considering exterior projects, such as new vinyl siding chicago installation, do well to evaluate contractors on these factors. Understanding what to look for in a contractor helps homeowners identify professionals likely to deliver quality work and a good experience for their projects.
Considering the specific project
When choosing a contractor, it's also important to consider the specific project and whether the contractor is well-suited to it. Different projects have different requirements, and a contractor experienced in the particular type of work is often a better choice. Whether the project involves siding, doors, a broader remodel, or other work, a contractor familiar with that type of project brings relevant expertise.
For exterior projects in particular, experience with the specific work and the demands of the Chicago climate is valuable. Siding, doors, and other exterior improvements must withstand local conditions, so a contractor who understands these demands can deliver better results. Considering whether a contractor is well-suited to your specific project helps ensure a good outcome. Homeowners planning to update their exterior doors chicago or undertake other exterior work benefit from choosing a contractor experienced in that area. Understanding the importance of matching the contractor to the project helps homeowners make choices that lead to quality results for their specific improvements.
Understanding the project scope and cost
Before committing to a contractor, understanding the full scope and cost of a project is important. A reputable contractor should provide a clear explanation of what the project involves, the materials to be used, the timeline, and the total cost. Understanding these details upfront helps homeowners avoid surprises and make informed decisions. Vague estimates or a lack of clarity are warning signs worth heeding.
Understanding the scope also means being clear about what you want and ensuring the contractor's proposal matches your needs and expectations. A clear, detailed understanding of the project protects both the homeowner and the contractor and sets the stage for a successful outcome. Taking the time to ensure you understand exactly what you're getting before work begins is worthwhile. Understanding the importance of clarity about scope and cost helps homeowners enter home improvement projects with confidence and avoid the misunderstandings that can lead to problems. Clear expectations are the foundation of a smooth, successful project.
Making your decision
With these considerations in mind the role of a general contractor, why the choice matters, what to look for, matching the contractor to the project, and understanding scope and cost homeowners are well-equipped to make a smart decision. The goal is to choose a contractor who combines experience, quality workmanship, clear communication, and reliability, and who is well-suited to the specific project, at a fair and clearly understood price.
Taking the time to research and compare contractors, rather than rushing the decision, pays off in the quality of the work and the smoothness of the project. A home improvement project is a significant investment, and the right contractor makes all the difference to the outcome. Understanding how to evaluate and choose a general contractor empowers Chicago homeowners to make decisions that lead to successful projects and results they'll be happy with. The right choice is the foundation of a home improvement project that enhances a home for years to come.
The bottom line
Choosing the right general contractor is essential to successful home improvement projects, as the contractor shapes the quality of the work, the smoothness of the process, and the ultimate result. For Chicago homeowners undertaking exterior projects like siding, doors, and more, the key factors include experience and reputation, quality workmanship, clear communication, suitability to the specific project, and clarity about scope and cost. By evaluating contractors on these factors and taking the time to make an informed choice, homeowners can find a professional who delivers quality results and a positive experience. The right contractor is the foundation of home improvements that enhance a home for years to come.

 Neu Construction, Inc
Now the owner contacted a window company to fix the mess. They only sold windows. They subcontracted the installation out. The installers installed the windows - without correcting the dry rot.
Neu Construction, Inc removed the entire wall, rebuilt the wall, REINSTALLED the windows and used Hardi Plank siding. If you think that it is expensive to hire a professional - try hiring an amateur.
 AJM Construction & Repairs
We started as a kitchen remodel but discovered there was mold in the majority of the exterior walls as well as the attic. The mold was caused by a number of problems but namely because the waterproof paper wrap on the house had deteriorated and was moisture to pass through the stucco and into the wood framing. In addition there was a leaking air conditioner condenser in the attic that was draining saturating the wood above the master bedroom. The mold was causing health problems it became clear we needed to replace a large majority of the framing and prevent future problems.
So we went from a kitchen addition/remodel to rebuilding the majority of the home and adding 800sqft; including a new bedroom, expanding the master bedroom and bath as well as a walk-in closet.
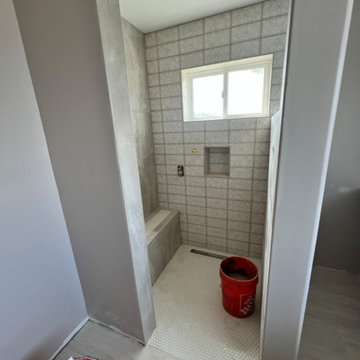
In anticipating for aging in place, we installed a walk-in shower with a bench and grab bars to allow for future wheelchair access and reduce trip hazards.
 Tile Doctor Ltd
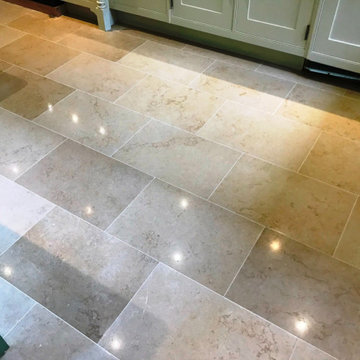
The owner of this recently purchased property in the Berkshire village of Twyford had inherited a Jerusalem limestone floor that had been installed throughout the ground floor including the Kitchen. The previous owner hadn’t maintained the stone floor very well and as a result it had become dull, patchy and the new owner was finding it impossible to keep clean. The floor was becoming a problem for them and they had been considering ripping it all up and getting it replaced. However due to the size of the floor and potential cost of replacing it they searched for other solutions and contacted Tile Doctor to see if it could be renovated.
I scheduled an appointment with the owners to survey the floor and it wasn’t long before I realised that we could achieve a great result by polishing the Limestone using a set of diamond burnishing pads. To prove how well I thought the floor would clean up I offered to complete a demo within the small utility room. This was arranged and completed a week later, as I expected once I had finished the demo the floor looked fantastic, more importantly the client was ecstatic with the results and couldn’t wait to book us in to complete the rest of the house.
It was a large floor so I estimated the process would take 4-5 days to complete and would need to work in sections starting with the kitchen then progressing into the study and cloakroom, dining room and finishing off with the entrance hall. Thankfully I had an empty house to work in which helped as I could start sealing the area I worked on the prior day.
The limestone had become quite pitted in the high traffic area, these pits had filled up with soil and become unsightly. My first task was to deep clean the dirt filled pits and grout, to do this I used a strong dilution of Tile Doctor Pro Clean and a stiff nylon brush making sure I could get into the pits releasing the dirt, then vacuuming up all the chemical slurry as I went along.
The next task was to fill these pits I used a two-part epoxy filler that matched the colour of the stone. Once the filler had dried, I worked through the hand burnishing blocks from 100 grit to 400 and I smoothed out the areas that had been filled.
Now the holes/pits had been filled I continued with the restoration of the floor by moving onto the burnishing process using diamond encrusted floor burnishing pads. This involves honing the Limestone with a set of burnishing pads starting at 400-grit. The pads are applied to the floor with a heavy floor buffing machine using water to lubricate the process. The pad is run over each tile around three times and the fine slurry this process generates is rinsed off afterwards with water and then extracted with a wet vacuum. You then move onto the 800-grit and then 1500-grit slowly building back the appearance of the stone.
As I had worked in sections/rooms at a time I was able to allow a full day drying time before sealing. Happy with the depth of colour from the pad system I opted to seal the floor with two coats of Tile Doctor Ultra-Seal. I had a range of sealers to choose from an in this case I felt Ultra-Seal would be most suited as it doesn’t change the natural appearance of the Limestone yet will provide years of protection and make it much easier to keep clean.
The owners were over the moon with how the limestone now looked and relieved that their problem floor had been restored. For aftercare cleaning I recommended Tile Doctor Stone Soap which is designed for maintaining the patina on polished stone floors.
Dennis Buckland
Berkshire Tile Doctor

 Ike's Carter Pool Companies
Example of a large beach style backyard custom-shaped natural hot tub design in Miami with decking



 Adcock-Smith Design
Aaron Dougherty Photography
Family room library - mid-sized contemporary open concept medium tone wood floor and brown floor family room library idea in Dallas with gray walls, a standard fireplace, a tile fireplace and a wall-mounted tv
Family room library - mid-sized contemporary open concept medium tone wood floor and brown floor family room library idea in Dallas with gray walls, a standard fireplace, a tile fireplace and a wall-mounted tv

28