
Search results for "Proceed" in Home Design Ideas
 Dixie Belle Paint Company
Materials Needed:
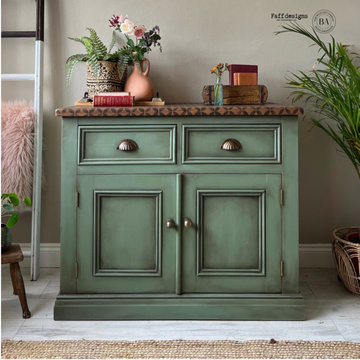
Side Console
Dixie Belle White Lightning Cleaner
Dixie Belle Weeping Willow Chalk Paint
Dixie Belle Best Dang Wax (Clear)
Dixie Belle Chocolate Chalk Mineral Paint
Dixie Belle Retro Lattice Stencil
Dixie Belle Coffee Bean Chalk Mineral Paint
Dixie Belle Synthetic Paintbrush
Clean, lint-free cloths
Before You Begin:
Ensure that your side console is clean and free from any dust, dirt, or grease. If necessary, sand the surface lightly to create a smooth painting surface.
Step 1: Clean with White Lightning
Use Dixie Belle White Lightning Cleaner to thoroughly clean the side console. This will remove any lingering residues and prepare the surface for painting. Follow the instructions on the cleaner, and make sure the surface is completely dry before proceeding.
Step 2: Paint with Weeping Willow
Stir the Weeping Willow Chalk Paint well before use. Apply an even coat of Weeping Willow paint to the entire side console using a paintbrush or foam roller. Allow the first coat to dry completely before applying a second coat if needed. The chalk paint dries relatively quickly, but follow the recommended drying time on the product.
Step 3: Apply Best Dang Wax with Chocolate Chalk Paint
After the Weeping Willow paint has dried, use a clean cloth or brush to apply a layer of Best Dang Wax (Clear) over the painted surface. For added depth and dimension, mix a small amount of Chocolate Chalk Mineral Paint into the wax. Apply the wax mixture evenly, focusing on details and edges. Allow the wax to dry and buff it to a desired sheen using a clean, lint-free cloth.
Step 4: Stencil the Top with Retro Lattice
Secure the Retro Lattice Stencil to the top of the side console using painter's tape to prevent it from moving during the stenciling process. Using a brush or foam roller, apply Coffee Bean Chalk Mineral Paint over the stencil, ensuring even coverage. Carefully remove the stencil while the paint is still wet to reveal the pattern. Allow the painted design to dry completely.
Step 5: Finishing Touches
Inspect the entire side console for any touch-ups or additional detailing. If needed, apply extra coats of paint or wax to achieve the desired finish. Once satisfied with the results, allow the piece to cure fully according to the paint manufacturer's recommendations.
Step 6: Enjoy Your Upcycled Side Console
Place your revamped side console in its designated space and revel in the transformation. The combination of Weeping Willow, Best Dang Wax, and the Retro Lattice stencil has turned a simple side console into a unique and visually appealing piece of upcycled furniture, adding charm and character to your living space.
 Main Line Kitchen Design
Call Today and begin our process:
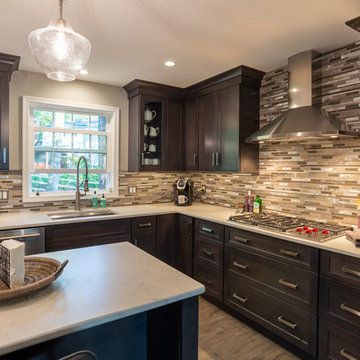
First, we cover any questions you have over the phone. Usually we can give you a close approximation of what you are likely to spend on your kitchen by simply asking you a few important questions. If you would like to proceed, we charge you a $150 deposit. For this deposit our expert designer will measure your kitchen, transfer the measurements to their computer and create your individual kitchen design. And at a second 2 hour appointment they will go over the detailed 3D designs with you.
At our second meeting we display and go over our completed designs and make changes to them on our laptops with you present. Depending on your and our availability, this meeting can take place within the following week. Pricing for the cabinetry you select is just the click of a button and if you are able to provide us preferences in counter tops, fixtures, appliances, flooring, and back splash, we can give you reliable pricing estimates for each area as well as estimates for the construction costs.
We are glad to work with a contractor you have selected or with one of the many we regularly refer on the basis of the quality of their work and with no remuneration to Main Line Kitchen Design.
Unless you require printouts of our work, everything to this point is included in our initial $150 deposit.
 User
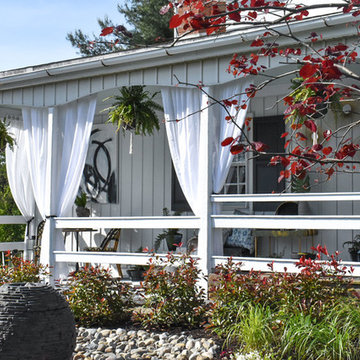
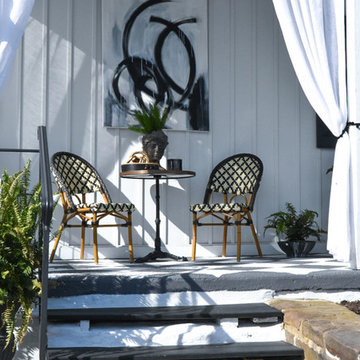
User44th Annual Bucks County Designer Showhouse + Gardens on historic Peppermint Farm. All proceeds benefit the Doylestown VIA.
Designed by Lotus + Lilac Design Studio
Items available for sale at Lotus + Lilac Shoppe- online designer furnishings + artisan made goods shoppe
Paint donated by Benjamin Moore
Outdoor sconce donated by Ferguson Lighting
Find the right local pro for your project
 RBD Contracting Inc.
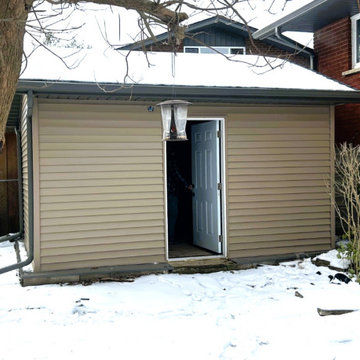
Our team successfully removed the previous metal structure for the homeowner. Following the debris clearance, we commenced the foundation footings. Once the foundation was completed, we proceeded with the construction of the wall framing and floor, allowing for the installation of the roof trusses. After boarding the framing and roof, we wrapped the structure in Tyvek weatherproofing and began the indoor work, including electrical, insulation, and drywall. The project was completed with the installation of new siding, eavestroughs, shingles, and a door, providing our clients with the multi-functional space they desired.
 Simply Perfect
Advice on interior design is available everywhere—from TV shows and websites to books, magazines and apps.
We love seeing people become engaged in design and educated on the wide range of possibilities. But we hope you’ll proceed with caution.
It’s not that style errors are a matter of life and death. It’s just that it’s easy to choose designs that aren’t necessarily reflective of your own personality and character. And since you’re typically stuck with your interior design decisions for years, styles that don’t quite fit can tend to grate on you.
Interiors that give one person comfort may unleash chaos in someone else. This goes beyond favorite colors or hot trends, right to the heart of interior design, where you find questions of composition, balance, repetition, space and more.
The goal is to find that unique combination of design elements that gives you comfort, support and balance.
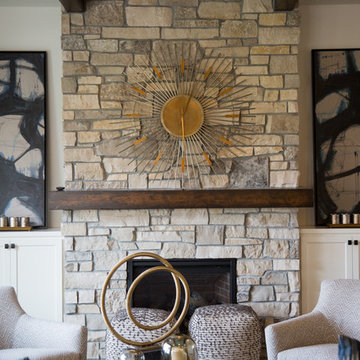
In one home, that perfect balance was struck through the use of symmetry. A pair of comfortable swivel chairs sit beneath matching indigo patterned paintings. Matching bookcases below the paintings contain similar, but not identical, arrangements of books, vases and bowls. Woods and bronzes help warm up the simple white bookcase shelving.
Two matching poufs in front of the fireplace provide additional seating. The sofa is accented with a pair of pillows with a blue pattern that echoes the artwork.
The effect of the symmetry is to achieve order and simplicity, which I promote at every opportunity. After all, your home interiors should be the setting or the backdrop of your life—not center stage.
Antique bronze and blue are complementary colors. Together, they offer a rich palette of richness and depth, which brings out the beauty of wood and stone.
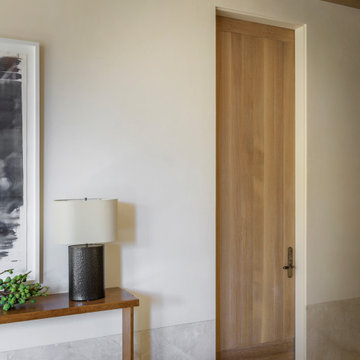
In the home office, a unique, whitewash-stained wooden desk rests on metal, Sawhorse-inspired legs for a warm, rustic look. The black leather chair features a contemporary silhouette with an antique brass frame. An adjustable desk lamp has bronze accents.
The bookcase combines a sleek, black metal frame with concrete shelves, for another unusual pairing. It’s kept uncluttered for an orderly, peaceful look. Items on the shelves include a bronze-accented lamp and a pair
of high gloss-finished wooden bookends.
The elegant artwork behind the desk is a simple midnight-blue and bronze with mottled white. Deep blues are again picked up in the rug, which adds a stately vibe with a modern pattern and satisfying texture.
Within the framework of symmetry, the living room repeats the blue-and-bronze color scheme.
A large midcentury brass clock above the fireplace keeps the natural stone visible, rather than hidden behind a painting or television, while its straight lines and color create a beautiful contrast.
The sofa is a soft, neutral blue. The pattern on the round brass side table features echoes the darker blue-patterned rug, as well as the rug in the office, tying the rooms together.
Indigo blue books adjacent to bronze vases on the shelves repeat the color scheme. The soapstone-topped coffee table echoes the shape of the fireplace. A pair of tall, matching floor lamps with long wooden bases, brass pulls and simple linen shades combine both the colors and symmetry found throughout the home.

 Ash and Line
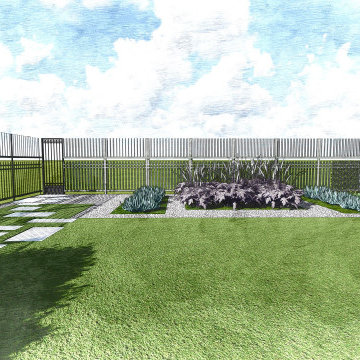
A dear client who resides in Mcallen-TX requested a Full Backyard Design including a pool, outdoor kitchen, firepit, edible garden, art, and a secluded area for quiet reading and privacy among other structures and hardscape.
We proceeded with the design process virtually due to his location being away from The Woodlands, TX. The client filled a questionnaire with specific questions regarding his site nature, style, and needs. He sent photos of the existing landscape, survey, and photos from the house interior that would help us match his modern style to his outdoor space.
We were very pleased to present our planting and construction drawings with 3D walk-thru video in a videoconference. All plans were sent to this client to start the building process at his own pace. He certainly loved the modern space we were able to create for him!
"You envision it, we create it" is our EZ MOTTO
 Tile Doctor Ltd
If you want a polished stone floor to keep its appearance, then it will need a regular maintenance plan in place, without it the stone will lose its polish and start to look dull and un-inviting which was the story with this Travertine tiled floor installed throughout much of the grout floor of this house in the village of Great Wilbraham near Cambridge.
I was able to find out from the owner that the floor was last treated six years ago with Lithofin Stain Stop which is a solvent based impregnating sealer which like all sealers will wear off after a few years. Naturally this depends on the amount of wear the floor receives and what tends to happen is this process occurs more rapidly in the high traffic areas leading to an uneven appearance.
The best course of action now would be to remove what was left of the sealer and re-polish and seal the floor.
During my inspection of the floor I had noticed a number of irregular holes in one of the Travertine tiles which needed filling with a colour matching filler; this worked out quite well and as you can see from the photographs below the result looked entirely natural.
After protecting the clients skirting boards with protective film we proceeded to burnish the floor through with a set of Tile Doctor Diamond encrusted honing pads.
During the application of the first coarse pad we also added a strong dilution of Tile Doctor Pro-Clean combined with NanoTech Ultra-Clean to aid the removal of sealer residues from the pores of the Travertine. The floor was then rinsed and the soiled solution extracted using a wet vacuum.
With the sealer remove we were now able to concentrate on building up the polish on the stone by applying the remaining pads from Medium, Fine through to Very Fine, each lubricated with a little water and ensuring to rinse in-between the application of each pad.
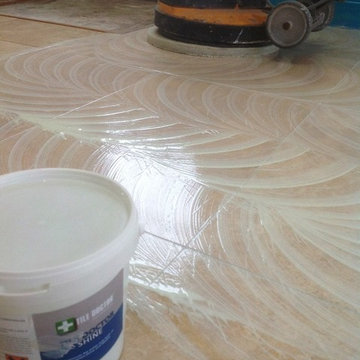
With the floor now clean and the polish restored the last step was to protect it so it would keep its appearance for as long as possible. There are a number of solutions for this but for a long durable shine I opted to work Tile Doctor Shine Powder into the Travertine.
The powder is applied liberally to the floor and then ground in using a slow speed floor rotary machine fitted with a white or tan buffing pad lubricated with water.
The shine on the floor has now been restored and the client has a beautiful and durable finish to their Travertine tiles.
Mick Conlon
Cambridge Tile Doctor
 The Shape Of Things To Come
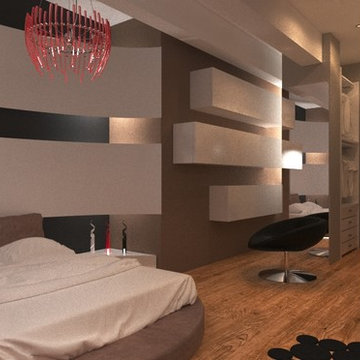
That was a challenge!!! A big space that the client wanted to use it as a warehouse and laundry room. I decided to proceed with my idea to present it to my client , to make it the main bedroom. The result was astonishing!!! She loved it!!! The space had a lot of corners so I made it our benefit!!! Hidden spaces combined with mirrors and led lighting are making an incredible game with reflections !!
 Spaces Designed, Interior Design Studio, LLC
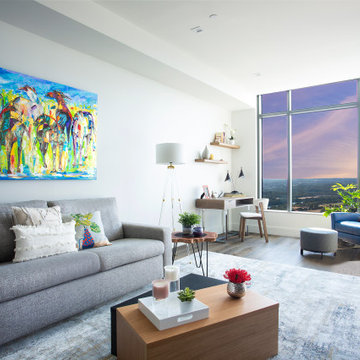
Cozy Chic - While the entire condo is under 1000 sq ft, there's no dearth of chicness. The ultra-modern kitchen has enough room to host an intimate gathering with a large island while it looks sharp with stainless appliances against a backdrop of a darker backsplash. The living room with its vibrant color palette, luxurious rug and comfortable seating continues the theme of intimate conversations in a chic setting.
The artwork in the living room and the bedroom reflects the playful personalities of the owners accompanied by hints of old fashioned charm. The glam bathroom adds a touch of royalty to the entire proceedings with hand-selected mirror, wall paper and sconce lights in the right shades of gold.
The project reflects Spaces Designed's philosophy of designing spaces to not only meet the needs of it's clients but also their personalities and sensibilities. Every space, small or large, has it's own purpose and character - our role is to identify that and meticulously craft the outcome.
 Linda Edelwich Realtor
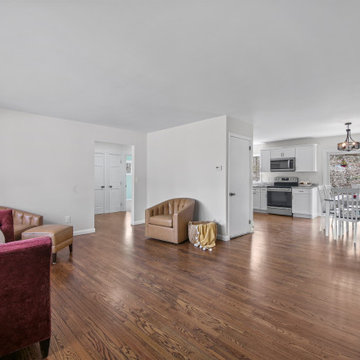
LAKE LIFE LUXURY AWAITS! Discover absolute move-in perfection in this meticulously renovated 3-bedroom, 2-full-bath one floor living RANCH HOME just a short stroll from pristine Andover Lake, where you'll simply bring your keys and kayaks to start living your dream. This exceptional property showcases designer upgrades throughout, including a brand-new kitchen with stunning granite countertops, completely renovated bathrooms, refinished hardwood floors, new boiler 2025 and a new roof installed Fall 2023. Architectural highlights include a distinctive hip roof, elegant brick facade, extra-large bay window in the fireplaced living room, and an attached 2-car garage complemented by a spacious basement offering tremendous expansion possibilities. Step outside to entertain on your new paver patio nestled on a beautifully private treed lot before taking the 2.7-mile walking path around the lake-a perfect daily exercise routine. ENJOY the tranquil Andover Lake lifestyle with optional membership granting access to swimming, sailing, kayaking, and year-round fishing in crystal-clear waters where motorboats are prohibited, preserving the lake's unspoiled serenity. This lake community cherishes lakefront living while offering surprising convenience to schools, shopping, dining, and major highways. Your lakeside sanctuary awaits in this turnkey property where every detail has been thoughtfully addressed for your immediate enjoyment. This is true 1 floor living.
 Main Line Kitchen Design
Call Today and begin our process:
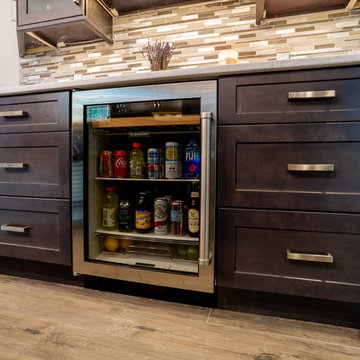
First, we cover any questions you have over the phone. Usually we can give you a close approximation of what you are likely to spend on your kitchen by simply asking you a few important questions. If you would like to proceed, we charge you a $150 deposit. For this deposit our expert designer will measure your kitchen, transfer the measurements to their computer and create your individual kitchen design. And at a second 2 hour appointment they will go over the detailed 3D designs with you.
At our second meeting we display and go over our completed designs and make changes to them on our laptops with you present. Depending on your and our availability, this meeting can take place within the following week. Pricing for the cabinetry you select is just the click of a button and if you are able to provide us preferences in counter tops, fixtures, appliances, flooring, and back splash, we can give you reliable pricing estimates for each area as well as estimates for the construction costs.
We are glad to work with a contractor you have selected or with one of the many we regularly refer on the basis of the quality of their work and with no remuneration to Main Line Kitchen Design.
Unless you require printouts of our work, everything to this point is included in our initial $150 deposit.
 User
User44th Annual Bucks County Designer Showhouse + Gardens on historic Peppermint Farm. All proceeds benefit the Doylestown VIA.
Designed by Lotus + Lilac Design Studio
Items available for sale at Lotus + Lilac Shoppe- online designer furnishings + artisan made goods shoppe
Paint donated by Benjamin Moore
Outdoor sconce donated by Ferguson Lighting
 Amanda Martocchio Architecture
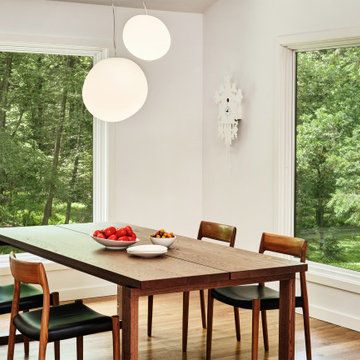
Time had stood still at this 1970s ranch in Armonk when the owners invited us to collaborate with them to transform it into a modern, light-filled home for their young family. The budget was lean, so economy was a primary consideration for every design decision. The challenge was to identify the modest home’s virtues – vaulted ceilings and a lovely backyard – and accentuate them by strategically optimizing available funds.
We were tasked with rectifying a dysfunctional interior stair, connecting to the outdoors with new large windows, and updating the exterior. We focused our attention on a finite set of architectural moves which would have the biggest impact and improve our clients’ daily experience of the home. Detailing was kept simple, using common grade materials and standard components. All exterior walls were revamped with new windows and siding. Although these materials were not particularly costly, thoughtful layout of boards, battens, and openings produced a cohesive, rigorous composition at each facade.
Since the budget would not cover the homeowners’ complete wish list, some items were bracketed for subsequent phases. The challenge was to establish a framework that would allow future work – including a new roof and kitchen renovation – to proceed smoothly.
The homeowners, both scientists, were enthusiastic collaborators, contributing their outstanding design sensibilities to selection of fixtures and finishes. Construction ended just in time for the arrival of their baby – and with that, the transformation of their family home was complete.
 Main Line Kitchen Design
Call Today and begin our process:
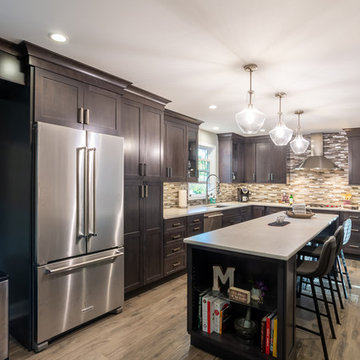
First, we cover any questions you have over the phone. Usually we can give you a close approximation of what you are likely to spend on your kitchen by simply asking you a few important questions. If you would like to proceed, we charge you a $150 deposit. For this deposit our expert designer will measure your kitchen, transfer the measurements to their computer and create your individual kitchen design. And at a second 2 hour appointment they will go over the detailed 3D designs with you.
At our second meeting we display and go over our completed designs and make changes to them on our laptops with you present. Depending on your and our availability, this meeting can take place within the following week. Pricing for the cabinetry you select is just the click of a button and if you are able to provide us preferences in counter tops, fixtures, appliances, flooring, and back splash, we can give you reliable pricing estimates for each area as well as estimates for the construction costs.
We are glad to work with a contractor you have selected or with one of the many we regularly refer on the basis of the quality of their work and with no remuneration to Main Line Kitchen Design.
Unless you require printouts of our work, everything to this point is included in our initial $150 deposit.
 Jessica Cain
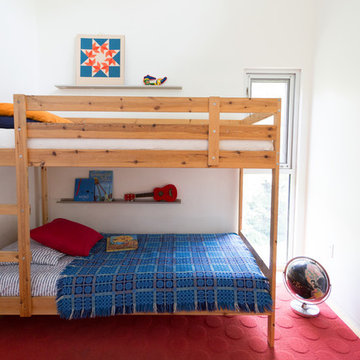
Photo: Jessica Cain © 2017 Houzz
Inspiration for a small contemporary boy kids' room remodel in Kansas City with white walls
Inspiration for a small contemporary boy kids' room remodel in Kansas City with white walls
 Grandin Road
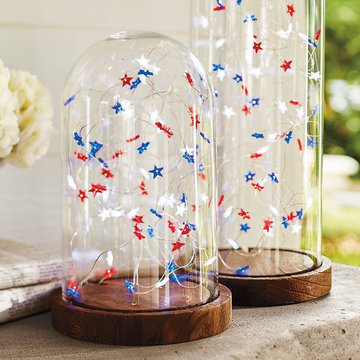
You’ll feel fancy and want to drape this strand of Americana Stars Micro Lights everywhere during the summer party season. That’s fine, and you can, because this brilliant, 13-foot-long strand of 40 LED lights runs on batteries, no outlet needed. You can decorate your entertaining space with them wherever you want color, brightness, and fun without worrying about a cord reaching an outlet. And yes, you can use them indoors or outdoors, to illuminate the proceedings as you like. Use more to create an even more dazzling effect. Requires three AA batteries, not included.
 T. Morgan Construction, Inc.
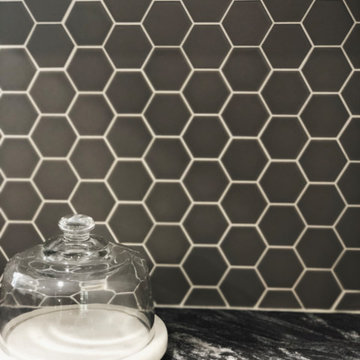
This first floor remodel was a GAME - CHANGER for this house. We took down more than 3 walls and installed a massive support beam. The first floor of this home went from cramped and disconnected to the perfect space for family gatherings. After the space was opened up, we proceeded with a gorgeous kitchen remodel with a modern geometric theme. The hardwood floors transition uniquely and beautifully into the hexagonal floor tile. The back splash is simple and lovely, also following the geometric theme with the hex tile. The last hexagonal touch to this kitchen is its unique hardware. This remodel had several modern touches, without overwhelming the "homey" feeling of a fireplace and hardwoods. All in all, this remodel created the perfect place for entertaining and raising a family.
 Simply Perfect
Advice on interior design is available everywhere—from TV shows and websites to books, magazines and apps.
We love seeing people become engaged in design and educated on the wide range of possibilities. But we hope you’ll proceed with caution.
It’s not that style errors are a matter of life and death. It’s just that it’s easy to choose designs that aren’t necessarily reflective of your own personality and character. And since you’re typically stuck with your interior design decisions for years, styles that don’t quite fit can tend to grate on you.
Interiors that give one person comfort may unleash chaos in someone else. This goes beyond favorite colors or hot trends, right to the heart of interior design, where you find questions of composition, balance, repetition, space and more.
The goal is to find that unique combination of design elements that gives you comfort, support and balance.
In one home, that perfect balance was struck through the use of symmetry. A pair of comfortable swivel chairs sit beneath matching indigo patterned paintings. Matching bookcases below the paintings contain similar, but not identical, arrangements of books, vases and bowls. Woods and bronzes help warm up the simple white bookcase shelving.
Two matching poufs in front of the fireplace provide additional seating. The sofa is accented with a pair of pillows with a blue pattern that echoes the artwork.
The effect of the symmetry is to achieve order and simplicity, which I promote at every opportunity. After all, your home interiors should be the setting or the backdrop of your life—not center stage.
Antique bronze and blue are complementary colors. Together, they offer a rich palette of richness and depth, which brings out the beauty of wood and stone.
In the home office, a unique, whitewash-stained wooden desk rests on metal, Sawhorse-inspired legs for a warm, rustic look. The black leather chair features a contemporary silhouette with an antique brass frame. An adjustable desk lamp has bronze accents.
The bookcase combines a sleek, black metal frame with concrete shelves, for another unusual pairing. It’s kept uncluttered for an orderly, peaceful look. Items on the shelves include a bronze-accented lamp and a pair
of high gloss-finished wooden bookends.
The elegant artwork behind the desk is a simple midnight-blue and bronze with mottled white. Deep blues are again picked up in the rug, which adds a stately vibe with a modern pattern and satisfying texture.
Within the framework of symmetry, the living room repeats the blue-and-bronze color scheme.
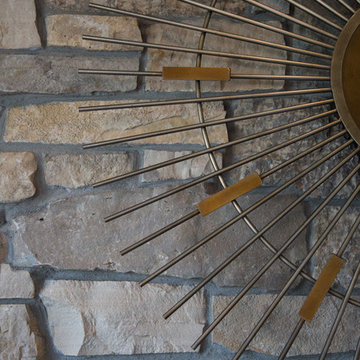
A large midcentury brass clock above the fireplace keeps the natural stone visible, rather than hidden behind a painting or television, while its straight lines and color create a beautiful contrast.
The sofa is a soft, neutral blue. The pattern on the round brass side table features echoes the darker blue-patterned rug, as well as the rug in the office, tying the rooms together.
Indigo blue books adjacent to bronze vases on the shelves repeat the color scheme. The soapstone-topped coffee table echoes the shape of the fireplace. A pair of tall, matching floor lamps with long wooden bases, brass pulls and simple linen shades combine both the colors and symmetry found throughout the home.
 Linda Edelwich Realtor
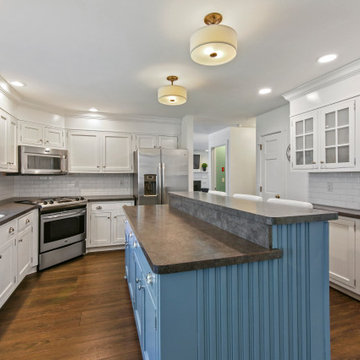
Nestled on 2.57 private acres in a highly sought-after neighborhood adjacent to Glastonbury line, this meticulously maintained custom home welcomes you through gracious double doors into a residence that emanates coastal charm. Richly toned floors contrast beautifully w/crisp neutral walls throughout, while the front-to-back living room serves as a stunning centerpiece w/its elegant gas-fireplace & French doors on either side opening to a screened porch-creating a delightful cross-breeze when open. No popcorn ceilings here! Open floor plan features a versatile home office with built-ins, flowing seamlessly into a gourmet kitchen showcasing a stylish island, custom cabinetry, & stainless-steel appliances adjacent to an expansive dining area w/stylish twin chandeliers. Practical luxury continues with a generous walk-in pantry & custom drop zone with shiplap detailing and shoe cubbies near the three-car garage with soaring ceilings. Upstairs, discover a sumptuous primary suite featuring a stylishly remodeled bathroom w/walk-in shower. Also complemented by a spacious walk-in closet & window flanked by custom built-ins, while two additional bedrooms share another beautifully updated bathroom & convenient 2nd-floor laundry. Additional space w/an unfinished walk-up attic & 880sf of finished extra living space in the walk-out lower level, complete with built in sauna, laminate flooring and ample storage-all crowned by the property's signature wrap-around porch. Roof '17
11