
Search results for "Proceed" in Home Design Ideas
 Classic Kitchens Designs & Renovations Ltd.
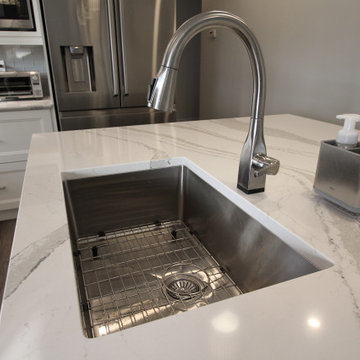
We started with a cool older bungalow that really needed updating, and the eating area to be connected to the kitchen itself, which required the removal of a loadbearing wall and installation of a new support beam. From there, we proceeded to install new waterproof luxury vinyl plank flooring and beautiful cabinetry painted in the customers chosen Benjamin Moore colours with the island with seating area done in a complimentary colour. Stunning Cambria "Brittanica" quartz countertops were then installed, followed by a grey glass subway style backsplash to tie it all together. We also revised the lighting to work with the great new layout and provide more light where it is needed. The end result is transformational and we are pleased that the customers absolutely love it!
 Simply Perfect
Advice on interior design is available everywhere—from TV shows and websites to books, magazines and apps.
We love seeing people become engaged in design and educated on the wide range of possibilities. But we hope you’ll proceed with caution.
It’s not that style errors are a matter of life and death. It’s just that it’s easy to choose designs that aren’t necessarily reflective of your own personality and character. And since you’re typically stuck with your interior design decisions for years, styles that don’t quite fit can tend to grate on you.
Interiors that give one person comfort may unleash chaos in someone else. This goes beyond favorite colors or hot trends, right to the heart of interior design, where you find questions of composition, balance, repetition, space and more.
The goal is to find that unique combination of design elements that gives you comfort, support and balance.
In one home, that perfect balance was struck through the use of symmetry. A pair of comfortable swivel chairs sit beneath matching indigo patterned paintings. Matching bookcases below the paintings contain similar, but not identical, arrangements of books, vases and bowls. Woods and bronzes help warm up the simple white bookcase shelving.
Two matching poufs in front of the fireplace provide additional seating. The sofa is accented with a pair of pillows with a blue pattern that echoes the artwork.
The effect of the symmetry is to achieve order and simplicity, which I promote at every opportunity. After all, your home interiors should be the setting or the backdrop of your life—not center stage.
Antique bronze and blue are complementary colors. Together, they offer a rich palette of richness and depth, which brings out the beauty of wood and stone.
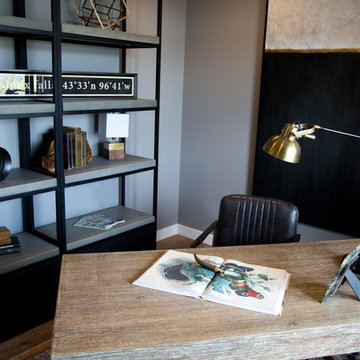
In the home office, a unique, whitewash-stained wooden desk rests on metal, Sawhorse-inspired legs for a warm, rustic look. The black leather chair features a contemporary silhouette with an antique brass frame. An adjustable desk lamp has bronze accents.
The bookcase combines a sleek, black metal frame with concrete shelves, for another unusual pairing. It’s kept uncluttered for an orderly, peaceful look. Items on the shelves include a bronze-accented lamp and a pair
of high gloss-finished wooden bookends.
The elegant artwork behind the desk is a simple midnight-blue and bronze with mottled white. Deep blues are again picked up in the rug, which adds a stately vibe with a modern pattern and satisfying texture.
Within the framework of symmetry, the living room repeats the blue-and-bronze color scheme.
A large midcentury brass clock above the fireplace keeps the natural stone visible, rather than hidden behind a painting or television, while its straight lines and color create a beautiful contrast.
The sofa is a soft, neutral blue. The pattern on the round brass side table features echoes the darker blue-patterned rug, as well as the rug in the office, tying the rooms together.
Indigo blue books adjacent to bronze vases on the shelves repeat the color scheme. The soapstone-topped coffee table echoes the shape of the fireplace. A pair of tall, matching floor lamps with long wooden bases, brass pulls and simple linen shades combine both the colors and symmetry found throughout the home.
 Spaces Designed, Interior Design Studio, LLC
Cozy Chic - While the entire condo is under 1000 sq ft, there's no dearth of chicness. The ultra-modern kitchen has enough room to host an intimate gathering with a large island while it looks sharp with stainless appliances against a backdrop of a darker backsplash. The living room with its vibrant color palette, luxurious rug and comfortable seating continues the theme of intimate conversations in a chic setting.
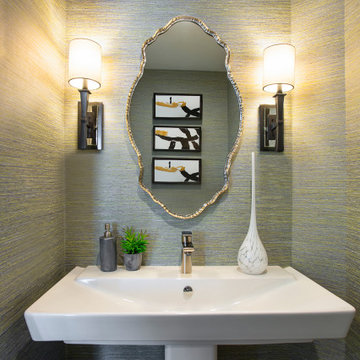
The artwork in the living room and the bedroom reflects the playful personalities of the owners accompanied by hints of old fashioned charm. The glam bathroom adds a touch of royalty to the entire proceedings with hand-selected mirror, wall paper and sconce lights in the right shades of gold.
The project reflects Spaces Designed's philosophy of designing spaces to not only meet the needs of it's clients but also their personalities and sensibilities. Every space, small or large, has it's own purpose and character - our role is to identify that and meticulously craft the outcome.
Find the right local pro for your project
 Main Line Kitchen Design
Call Today and begin our process:
First, we cover any questions you have over the phone. Usually we can give you a close approximation of what you are likely to spend on your kitchen by simply asking you a few important questions. If you would like to proceed, we charge you a $150 deposit. For this deposit our expert designer will measure your kitchen, transfer the measurements to their computer and create your individual kitchen design. And at a second 2 hour appointment they will go over the detailed 3D designs with you.
At our second meeting we display and go over our completed designs and make changes to them on our laptops with you present. Depending on your and our availability, this meeting can take place within the following week. Pricing for the cabinetry you select is just the click of a button and if you are able to provide us preferences in counter tops, fixtures, appliances, flooring, and back splash, we can give you reliable pricing estimates for each area as well as estimates for the construction costs.
We are glad to work with a contractor you have selected or with one of the many we regularly refer on the basis of the quality of their work and with no remuneration to Main Line Kitchen Design.
Unless you require printouts of our work, everything to this point is included in our initial $150 deposit.
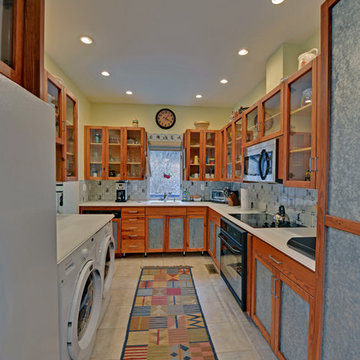
 Envision Web
Stuart Wade, Envision Virtual Tours
Envision Virtual Tours and High Resolution Photography is your best choice to find just what you are looking for in the Ellijay, Ga. area .Ellijay, Georgia, known as the “Apple Capital” of Georgia, is located between the Ellijay and Cartecay Rivers where they join to make the Coosawattee River and is the county seat of Gilmer County, Georgia. The origin of the city’s name is not certain but thought to be the English derivative of an Indian word(s) meaning “many waters”, “place of green things” or “new ground”. Some histories say it may have been named for an Indian chief.
Inhabited for countless years by the Cherokee people indigenous to the North Georgia, the area was first mentioned as a village and trade center before the onslaught of white settlers inhabited the region. During the 1830’s both white settlers and Indians occupied Ellijay. During the original land lottery in 1832, Martin Scalf acquired the 160 acre lot where the town now stands. In 1833, Clemonds Quinland bought 10 acres from Scalf, retained one acre for himself and donated the rest of the purchase to the County. A plan for twenty town lots, streets and a public square was created and the streets were oriented to allow maximum sunlight exposure to the buildings.
Proceeds from lot sales were used to build a jail and courthouse and pay other city expenses. During this same year, Gilmer County was appropriated $800.00 from the State to build a school, and a three-acre lot was donated for the city cemetery. On December 29, l834, Ellijay was incorporated and designated as the County seat of Gilmer County. By 1837, the town had twenty dwellings, three stores and one attorney. Most of these early buildings were of log construction.
Many roads led to Ellijay by 1849. The population had grown to 150 by 1850 and the town at five stores. Some wood-frame buildings were being constructed at this time and in 1854, a new courthouse was built in the center of the square, replacing the earlier building. The County’s first newspaper was the Ellijay Courier, started in 1875, and during this time period, Ellijay was a stop on the stagecoach line. The railroad bridge over the Cartecay River was completed in 1884 and the town now had rail service.
With the arrival of the railroad and subsequent tracks to White Path, Ellijay began to grow much faster. Many hotels were constructed and land was donated for a depot east of town. More industries, such as a cheese factory and the Shippen Brothers Lumber Mill, located in Ellijay. By 1898, the city had expanded its limits in every direction and now included the depot.
By 1900, all the buildings on the town square were brick. This included the recently completed Hyatt Hotel. Most of the other buildings in town were still of log construction, but new wood-frame buildings were being built. The Shippen Brothers Lumber Company production was expanding and exporting their lumber to Europe. Within the next few decades, this company grew to be one of the largest employers in Ellijay, often with five to six million feet of lumber in the yard at one time.
The population of Ellijay grew to 659 by 1910, and began to acquire many new modern conveniences such as electric lights and power, a telephone company and many new businesses.
Then in 1912, a fire ravaged the city, destroying 23 buildings. As a result, many new buildings were constructed under new and stricter fire and safety guidelines. The population, however, decreased slightly at this time to 632 in 1920.
During the 1920’s the town’s population began to grow again and, by this time, apples were being shipped out of the county and new storage facilities were built. Chickens were also shipped to markets outside of Ellijay and Gilmer County.
From the mid 1930’s to 1950, Ellijay received much assistance from the Federal WPA Programs. The old courthouse was removed from the center of town square and the Hyatt Hotel was remodeled to be the new courthouse. A park was created on the site of the old courthouse and the streets around the square were paved. A new street was built at this time entering town from the northeast. Other new roads, bridges, sidewalks and gutters were constructed to improve the city. A school and gymnasium were also built and other structures improved.
This growth began to impact the city’s infrastructure and in the l950’s and l960’s, a period of upgrading water systems, roads, and power supplies began. New low-rent housing appeared in l960 and a new hospital was built in l957. Georgia Highway 5 was widened in l962, new buildings around the square replaced old ones and some were remodeled. In 1974, the hospital was enlarged.
Currently, Ellijay attracts tourists who love the small-town feel and friendly atmosphere. Hotels and restaurants, unique shops, antiques and art galleries lend their charms to those who visit. A new courthouse constructed to resemble the old one, new streetscaping, family-oriented downtown events and the beautification of the square have stepped up the social and economic activity and have made Ellijay a popular destination.
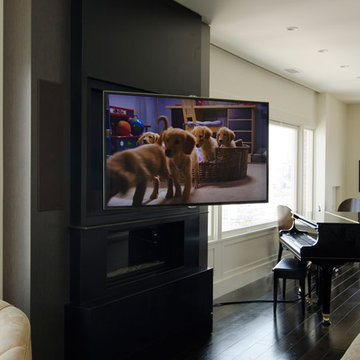
 CH Burnham Inc.
This subtle sensibility defines the project. While evident in each detail, from the cabinetry to the fireplace surround, there were a few special elements. Starting in the gallery, we built a life size, playable tic- tac- toe board. This was achieved by using felt wrapped metal panels and CNC cut X’s and O’s imbedded with rare earth magnets. This ‘board’ was the outcome of what to do with the space below the I –beams. Originally rusted and flaking with a great patina, we were required to fire proof these beams if they were to remain exposed. This meant applying a fire proof, or intumescent paint, which covered the very elements that made the feature so appealing. This is where Willem Racke stepped in. In not more than a couple days, they recreated the patina and nuance that inspired the deviation.
Another unique aspect of the project which pays homage to the building was executed by Maidenstone. Together with C.H. Burnham Inc., we searched America for a lot that matched the fabrication process and color of the original brick façade. Jana and Geof ended up discovering the match. Visible in some of the earlier photographs, this required more than a simple brick installation. As you can see, they taped off each individual brick to craft the look. Using a piping bag much like your favorite pastry chef, they installed the grout and then proceeded to carve and age it to match the original.
 United Home Experts
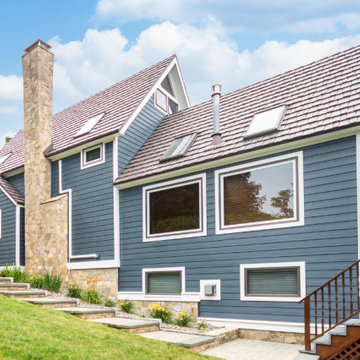
This beautiful, lakeside, colonial located in Hopkinton, MA underwent one of the most beautiful siding transformations of the year using our GorillaPlank™ Siding System.
Built in 1940, this lakeside home in Hopkinton, MA had old scalloped cedar shakes that had become old and worn out. The homeowners considered painting again, but did not want the costly expense of having to paint again, so they decided it was time to renovate and modernize their living space with a low-maintenance siding that closely resembled the appearance of wood.
Everlast Composite Siding was the siding of choice using our GorillaPlank™ Siding System.
Before installing the GorillaPlank™ Siding System, our expert team of installers went to work by stripping down the existing cedar shingles and clapboards down to the sheathing.
After verifying the underlying condition of the sheathing, our team went ahead and set staging to protect the beautiful metal roofs, then proceeded to install the moisture barrier to protect the sheathing, and then installed insulation for added protection and comfort.
Their house is now featuring Everlast Composite Siding in the 7” exposure of one of the newest colors, Blue Spruce!
 Dan Duckham Architect
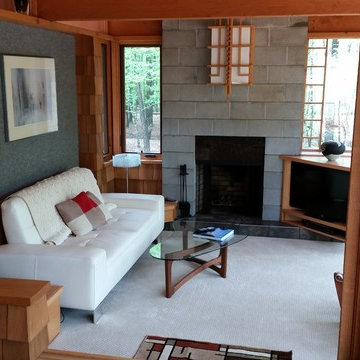
The clients own what was originally the Palmer House, in Lutz, Florida. They also own 35 acres in Pine Mountain, Georgia, near Callaway Gardens, which attracted them to the area. The project, a small vacation cabin, he intended to build himself.
The location chosen on the property looks into the woods but also has a pastoral view of an adjacent pasture, including cattle and a watering pond.
Construction is proceeding slowly but surely. A small house that will "live big".
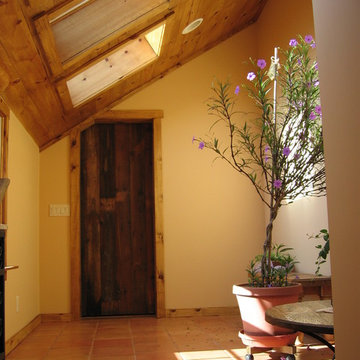
 O'Connor Contracting LLC
This classic post-and-beam barn suffered from multiple problems, including foundation issues and decades of wear and tear throughout. O'Connor Contracting jacked up the building to fix the foundation, then proceeded to completely renovate and reinvigorate the structure. The result was a stunning remodel that blends traditional craftsmanship with the latest in low-maintenance materials.
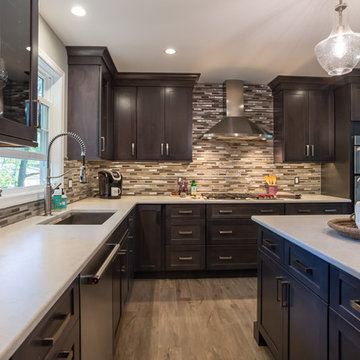 Main Line Kitchen Design
Call Today and begin our process:
First, we cover any questions you have over the phone. Usually we can give you a close approximation of what you are likely to spend on your kitchen by simply asking you a few important questions. If you would like to proceed, we charge you a $150 deposit. For this deposit our expert designer will measure your kitchen, transfer the measurements to their computer and create your individual kitchen design. And at a second 2 hour appointment they will go over the detailed 3D designs with you.
At our second meeting we display and go over our completed designs and make changes to them on our laptops with you present. Depending on your and our availability, this meeting can take place within the following week. Pricing for the cabinetry you select is just the click of a button and if you are able to provide us preferences in counter tops, fixtures, appliances, flooring, and back splash, we can give you reliable pricing estimates for each area as well as estimates for the construction costs.
We are glad to work with a contractor you have selected or with one of the many we regularly refer on the basis of the quality of their work and with no remuneration to Main Line Kitchen Design.
Unless you require printouts of our work, everything to this point is included in our initial $150 deposit.
 Tile Doctor Ltd
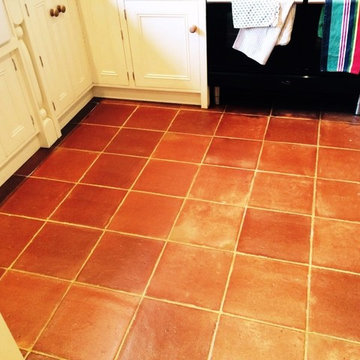
This customer in Henfield was contemplating digging up her Terracotta kitchen floor and replacing it, the tiles were ingrained with dirt which had proved impossible to remove and as a consequence were left looking flat, dull and very un-appealing. Additionally she had an elderly dog that had been ill several times in the corner area and she really struggled to make it look decent again. Following a quick test I was able to persuade her to try a clean and re-seal first.
The first step was to deep clean the floor to remove the ingrained dirt and any previous sealers. As well as the dog I had two rugby playing sons to deal with so to make it easier for the family I split the floor up into areas and worked on one area at a time.
The tiles were first soaked in a strong solution of Tile Doctor Pro-Clean before scrubbing it into the tile and grout with a black pad fitted to a buffing machine. The tiles were rinsed, the now dirty cleaning solution extracted and the process repeated until I was happy that the Pro-Clean had done its trick and the floor was as clean as it could be.
The Terracotta tiles now looked clean but completely washed out so I assured the customer that once the tiles had been sealed the colour would return and more. Unsealed Terracotta marks easily so given I left the customer dust sheets to walk on.
I returned after two days to ensure any moisture had left the tile and proceeded to seal with six coats of Tile Doctor Pro-Seal which is highly recommended for use in food preparation areas and gives a high gloss finish whilst providing maximum stain protection. As each coat takes 40 minutes to dry I took the opportunity to clean her slate front door step as well.
The customer was very happy with the finished floor and I’m glad to report she has decided to keep the floor.
 Pennsylvania Landscape & Nursery Association
Realty Landscaping Corp./Real Winter, Inc. http://www.realtylandscaping.com
2014 PLNA Awards for Landscape Excellence Winner
Category: Commercial $75,000 & Over
Award Level: Silver
Project Description:
Located in a highly commercialized area of lower Bucks County, the property that was once a declining horse track is now revitalized as Pennsylvania's #1 casino. Parx Casino is owned and operated by Greenwood Gaming & Entertainment, Inc. and includes high stakes
gaming, horse racing, premium entertainment and multiple restaurants and amenities. It's doors are open 24 hours a day. In the midst of an economic downturn, Parx brought in many much needed jobs, stimulating the local economy.
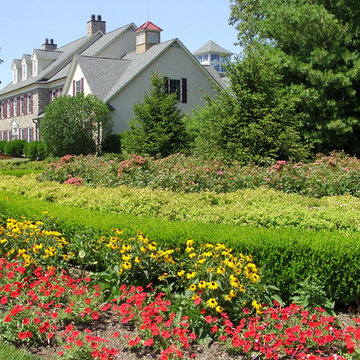
The construction of the Parx Casino project began in 2008. The main portion our landscape installation ran the course of 2009 and into 2010. We originally were contracted to install a landscape that was already designed. The owner however was not totally satisfied with the design that he had commissioned, so we made a few recommendations to them. We took a leap of faith and installed one section of the landscape as a mock-up for a concept that we envisioned. Hoping to stir some interest and excitement and help the client draw in huge numbers of patrons, our concept included a high energy, formal and contemporary layout based upon low hedging and bright panels of color to match the Parx Casino logo. Lines were clean to compliment the building theme and layout. We were given the owners blessing right away and proceeded to redesign the majority of the newly re-developed site.
There were a number of demanding deadlines and site related challenges. The site is very windy and open. Large volumes of vehicular and pedestrian traffic pulse through the site's veins continuously. The scale of the building and property is immense. In order to complete a project of this magnitude, a large labor force was utilized. Overnight and overtime hours were sometimes a necessity. Our veteran supervisory team ensured a good quality product on demand. Great quantities of the highest quality plant materials were needed to soften the huge expanse of asphalt, concrete and building facade. Massive 20 foot evergreen trees were brought in as a wind break, softening the building and obscuring the view to the valet security areas. Views were kept open from the main road to allow visitors a clear view of building entrances and mega-sized digital signage. A hardy mix of evergreen, deciduous and herbaceous plant materials were used to stir seasonal interest year round. Bright colors light the way down the main boulevard, drawing in the masses toward the casino entrances. We installed an automatic overhead and drip irrigation system to help keep the windy site from drying out. To supply the expansive landscape with water, we provided a large pump, which pushed thousands of gallons of water through a 4” main. The two-wire system features a smart controller and pressure regulating heads.
The installation project as a whole was very successful. We took a plan that was given to us, made it our own, and turned our vision into reality. The client so satisfied that they've contracted us to maintain the landscape we implemented ever since. The casino shows no signs of slowing down. Thousands of patrons test their luck daily at Parx. The local economy, strengthened. The Lower Bucks strip is once again the place to be.
Plant Schedule
Trees:
6- X Cupressocyparis leylandii 8-10’ ht.
2- Ilex opaca 18-20’ ht.
37- Picea abies 20-22’ ht.
9- Picea abies 16-18’ ht.
35- Picea abies 12-14’ ht.
4- Pyrus calleryana ‘Aristocrat’ 4-4 ½” cal.
Shrubs:
1,171- Berberis thunbergii var. atropurpurea ‘Cr. Pygmy’ 3 gal.
2,954- Boxwood microphylla ‘Winter Gem’ 18-24” ht.
41- Chaemacyparis obtusa ‘Crippsii’ 3-4’ ht.
104- Chaemacyparis pisifera ‘Filifera Aurea’ 7 gal.
124- Ilex glabra 36-42” ht.
496- Juniperus conferta ‘Blue Pacific’ 3 gal.
223- Prunus cistena 5-6’ ht.
281- Pyracantha coccinea ‘Rutgers’ 3 gal.
463- Rosa ‘Meidrifora’ 3 gal.
143- Rosa ‘Radrazz’ 3 gal.
1,045- Rosa ‘Radcon’ 3 gal.
362- Spiraea japonica ‘Lemon Princess’ 10 gal.
113- Spiraea japonica ‘Lemon Princess’ 3 gal.
217- Spiraea japonica ‘Little Princess’ 10 gal.
369- Spirea japonica ‘Little Princess’ 3 gal.
246- Spiraea x bumulda ‘Goldflame’ 10 gal.
106- Taxus baccata ‘Repandens’ 18-24” ht.
Photo Credit:
Matthew P. Aubel, Realty Landscaping Corp./Real Winter, Inc.
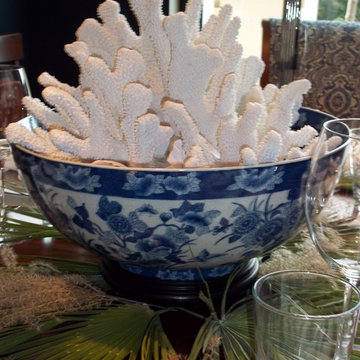
 Kathy Evans for Ethan Allen Mount Pleasant, SC
Share the Table dining event hosted by Ethan Allen. Proceeds benefit selected local charities.
Example of an eclectic dining room design in Charleston
Example of an eclectic dining room design in Charleston
 Division 9 Inc.
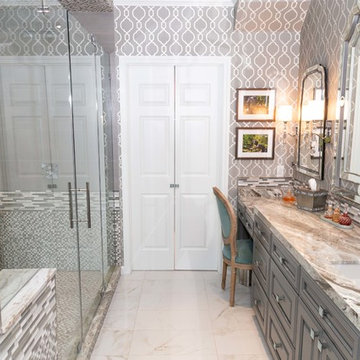
One of the top factors that can influence the value of a property is the Master Bathroom. During the complete makeover on this project, we proceeded with the complete demolition of the existing master bathroom, including floors, vanity, plumbing, lighting fixtures, toitel and tub.
In collaboration with the prestigious designer, Roberto Lugo, the D9 team worked on the layout for the Master Bathroom. With the plan of optimizing the space, we gave ample room to the vanity and the shower to allow them to include all the requested features from the homeowner.
To create an inspiring and elegant atmosphere the combination of selected colors, textures and materials played a key role. The Master Bathroom was given elegance by the unique look of the gray toned Marble countertops, combined with the sophistication and detailed finish of the bathroom cabinets, and the neutral gray paint used to finish the raised-cabinets.
The shower enclosure presents a double shower with two Marble benches and four shower fixtures with hinged door.
 De Young Properties
With overwhelming support by the community who dug deep and donated, the 2018 Central Valley St. Jude Dream Home Giveaway successfully raised $957,100 for St. Jude Children’s Research Hospital! Since 2007, De Young Properties has been a major donor and builder of 12 St. Jude Dream Homes, helping to raise $11,628,545 to help the kids of St. Jude fight cancer and other life-threatening childhood diseases. One hundred percent of the proceeds will be donated to St. Jude Children’s Research Hospital, which works around the clock to develop cures to save the lives of boys and girls, including children in the San Joaquin Valley.
“We strongly believe in our responsibility to help others, which is why the St. Jude’s Dream Home Giveaway is so important to us and our entire De Young team. We are grateful to our community’s continued support of our business – a community that has given so much to us, which is why we are so passionate about giving back. In fact, we are even more passionate today than we were in 2007 when we first partnered with St. Jude Children’s Research Hospital. We are honored to be a donor and builder of our 12th St. Jude Dream Home in this war against childhood cancer. St. Jude Children’s Research Hospital positively affects the lives of families across the country, in addition to giving us the opportunity to change the life of a local family,” said Paula De Young of De Young Properties. “This amazing pediatric research center, that not only treats life threatening cases in children, also freely gives guidance to doctors around the world and here in the Central Valley. We count ourselves fortunate to be able to help such an important cause”
The 2018 St. Jude Dream Home is one of the most popular De Young floorplans, the Residence 210 with a beautiful Cottage elevation, and will offer three bedrooms, two full bathrooms, a formal dining room, spacious den and an open-air courtyard with a gorgeous stone accented fireplace.
With celebrity designer, Michael Moloney, donating his design talent and resources once again as Design Ambassador for this year’s St. Jude Dream Home, the home boasts a long list of special features, including fashionable quartz and granite counters from Granite Mountain Stone Design, premium designer maple cabinetry and professional closet design from KraftMaid Cabinetry and stainless steel Bosch appliances with a gas range, washer, dryer and built-in refrigerator. In addition, premium-grade wood-look porcelain tile floors by Shaw Floors, spacious 10’ ceilings, professional and water efficient front and back yard landscaping, and Energy Star approved Eagle Brand Cool Roof Tile.
The prime Clovis location of the St. Jude Dream Home is in the De Young Trailside at Loma Vista community which is within walking distance to Reagan Educational Center and located within the greater 3,300-acre Loma Vista master-planned community designed by the City of Clovis. In addition, it is a short drive from Clovis Community Medical Center and a variety of entertainment and dining options including the Sierra Vista Mall, The Square at Campus Pointe, Old Town Clovis and even Wild Water Adventure Park. Easy access to Highway 168 and Herndon Avenue can provide a fast work commute during the week and a family outing to Shaver or Huntington lakes on the weekend and even more.
De Young Properties would like to once again thank everyone in the community who contributed their hard-earned dollars to this worthy cause. They are appreciative of everyone who donated, volunteered or purchased a ticket to win this year’s St. Jude Dream Home, and feel privileged to be able to help such an important cause.
 Main Line Kitchen Design
Call Today and begin our process:
First, we cover any questions you have over the phone. Usually we can give you a close approximation of what you are likely to spend on your kitchen by simply asking you a few important questions. If you would like to proceed, we charge you a $150 deposit. For this deposit our expert designer will measure your kitchen, transfer the measurements to their computer and create your individual kitchen design. And at a second 2 hour appointment they will go over the detailed 3D designs with you.
At our second meeting we display and go over our completed designs and make changes to them on our laptops with you present. Depending on your and our availability, this meeting can take place within the following week. Pricing for the cabinetry you select is just the click of a button and if you are able to provide us preferences in counter tops, fixtures, appliances, flooring, and back splash, we can give you reliable pricing estimates for each area as well as estimates for the construction costs.
We are glad to work with a contractor you have selected or with one of the many we regularly refer on the basis of the quality of their work and with no remuneration to Main Line Kitchen Design.
Unless you require printouts of our work, everything to this point is included in our initial $150 deposit.
 RAJ Kitchen and Bath, LLC
 “Full apartment design”.
IF you have not yet seen this apartment conversion before, we strongly urge you to go to the bottom left of this page and click on the short 2-minutes video. It would put a lot of things into perspective when you come back and continue reading this.
It is true we were literally handed the keys and told a list of things that they wanted to have happen and we were to go into the apartment, look at the space and come up with a design that would satisfy all of that need. UNTIL we showed up! The unit had really seen some better days but we knew we had to look past that and come up with a concept that would work for them.
The immediate challenges were centered around 3 big ideas:
1. Adding a second bedroom to the already small footprint
2. Figuring out a way to make the kitchen bigger, better and brighter
3. Creating a master room walk in closet
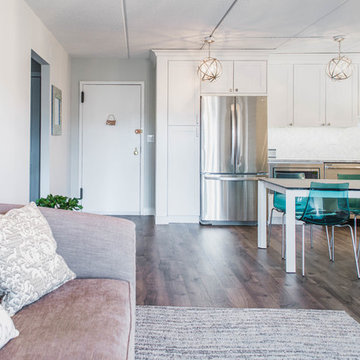
It’s always difficult to add new rooms into existing footprint without expanding out or up and not incurring any opportunity cost. In this case, that was exactly what we had to do. Item one and two above had to be tackled as one. We went ahead and switched out the location of the dining room and eliminating an area where there was a “nook” type eat-in area. By doing so, we were able to cut right into that footprint and change the layout of the kitchen.
That one move allowed us to dig into the kitchen design because it was now the main focal point in the apartment. It was no longer an option to keep it in that tiny hole where it was, so we had to ensure that this design was functional and aesthetically pleasing at the same time. By adding the table into the space where an Island typically would go, we were able to both cut cost and still provide a dining experience. The Table serves as an Island as well when cooking.
We then proceeded to block in the existing doorway to the dining room. By doing this, we were able to create a full room which allowed us to put a door on the other side and called that room Bedroom #2. This was easier to do because all of the mechanicals were already in that space (light, heater and windows). By shifting things around, we also achieved a huge wall to wall closet from inside. PERFECT!
Then we moved into the Single bedroom. We thought it was a big room with a small closet, so by creatively adding an L shaped wall and steal some footprint into the bedroom side, we were able to put a door on that new room and design it for the walk-in closet. Even after this, the bedroom still holds a queen size bed with 2 night stands, a TV on the wall, a sitting chair and plenty of room to walk around. This was done by rethinking the location for the bed and night stands.
The bathroom was gutted to make sure there was no leaks and rebuild from the ground up. We kept all of the plumbing where it was, added a new vanity, medicine cabinet, tiles and lighting and it was done.
From there, the rest of the unit had new flooring all throughout, paint, and lighting. After completion and walk through, this project was handed over back to the clients.
Execution and collaboration between all the trades were: Reggie and his team from Premier Interiors and Rohan from RD Mechanical Services.
p.s. Please see our website to see the video.
 Tile Doctor Ltd
Shipley is a town in West Yorkshire that was heavily shaped by the Industrial Revolution and the Victorian period. It became particularly well-known for its textile industry and some of the original mills in which textiles were manufactured still survive in the town today. Being in West Yorkshire, Shipley is also part of what is commonly known as ‘Brontë country’ – once home to the famous Brontë sisters.
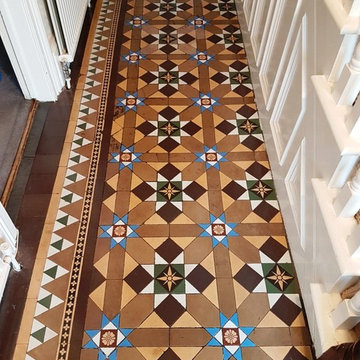
Many Victorian era properties still survive in the area too and all too often the original Victorian tiled floors contained within are not well maintained. I recently visited a customer in Shipley who had a Victorian tiled hallway that was in need of a deep clean and seal. What’s more, the customer told me that there were around 20 loose tiles in the hallway that would need to be reinstalled.
On the first day, I started by refitting the 20 loose tiles in the hallway. The problem however was a lot worse than originally thought and, in the end, I had to take up 108 tiles, so I could rebuild the base of the floor, and then relay them. This process took up most of the day but at least the adhesive and grout would be set in time for cleaning the next day.
On day two I focused on deep cleaning the tiles and removing any remaining sealer by applying a strong dilution of Tile Doctor Pro-Clean. Pro-Clean is a strong alkaline heavy-duty tile and grout cleaner that serves the purpose of both cleaning the stone and when used in a strong dilution will strip off sealers.
I applied the Pro Clean liberally across the length of the hallway and left it to soak into the tiles for about twenty minutes. This allows the product time to breakdown the sealer and dirt before being scrubbed in with a black scrubbing pad.
Special attention had to be paid to parts of the floor which had suffered paint splashes from previous decoration. I was also surprised to find that there were even some chewing gum stains marking the tiles. These were removed using the combination of a steam cleaner, more Pro-Clean and the careful use of a handheld scraper.
The floor was then given a thorough rinse with fresh water and then dried as much as possible with a wet vacuum. It was then also left to dry off overnight.
Upon returning to the property the next day I checked for any moisture issues with a damp tester. Thankfully, the floor proved dry and I could proceed with sealing the tiles which was done using four coats of Tile Doctor Seal and Go that leaves a deep satin finish that the customer had requested.
Nigel Stoker
North West Yorkshire Tile Doctor
 O'Connor Contracting LLC
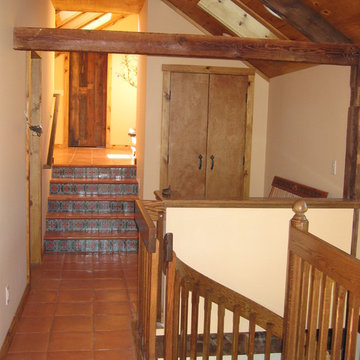
O'Connor Contracting raised the entire building to fix the foundation, then proceeded to completely renovate and reinvigorate the structure. The result was a stunning remodel that blends traditional craftsmanship with the latest in low-maintenance materials.
 Southern Scape, LLC
Ca. 1919 Craftsman Style Home, Revisioned by the South’s Leading Designers
Twenty‐two leading interior designers from three different states completely restored this historic home on Franklin’s historic Main Street as part of the O’More Show House, which was opened to the public from May 12‐27, 2016 and presented by leading sponsor, PARKS.
This is the third O’More Show House event in recent years, with participating designers having ties to O’More College of Design in downtown Franklin and proceeds benefiting the College’s School of Interior Design. The 2016 home, a 5,200 square‐foot ca. 1919 brick and stucco Craftsman‐style cottage, is a significant contributing property to the National Register‐listed Hincheyville Historic District. The owners have undertaken a total renovation of the home’s interior while leaving the street‐view exterior intact.
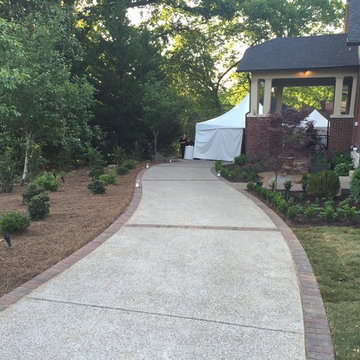
We were recommended to project managers and O'More College for the entire landscape design and installation: landscaping, irrigation, lighting, paver walks and patios, paver-raised porch with steps, paver banding in driveway!
13