
Search results for "Process involves" in Home Design Ideas
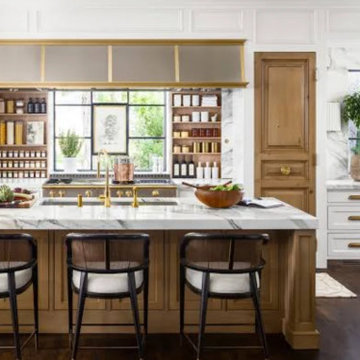
 highland
Renovating a home can completely transform the way a space looks, feels, and functions, but successful improvements require thoughtful planning rather than rushing into expensive changes. These renovation tips and tricks house ideas can help homeowners organize projects, control costs, select practical materials, and create rooms that remain useful for years. Start by identifying what genuinely needs improvement, such as outdated finishes, poor lighting, inefficient storage, damaged surfaces, or an inconvenient layout. Create a realistic budget that includes materials, labor, permits where applicable, and a contingency amount for unexpected issues. Taking measurements, collecting inspiration, and deciding priorities before work begins can prevent unnecessary purchases and make the renovation process much easier to manage.
One of the most useful renovation tips and tricks house projects can benefit from is improving the layout before focusing on decoration. A beautiful room will still feel inconvenient if furniture blocks walkways or storage is insufficient. Consider how people actually use each space and whether doors, windows, lighting, electrical outlets, and storage are positioned effectively. In kitchens, for example, practical work zones and accessible storage can make everyday tasks easier. In bedrooms and living rooms, built-in shelving, multifunctional furniture, and organized storage can reduce clutter without making the space feel crowded. Whenever possible, repair or improve the existing structure before replacing everything, because thoughtful upgrades can deliver significant results without creating unnecessary renovation costs.
Choosing materials carefully is another important part of renovation tips and tricks house planning. Look beyond appearance and consider durability, maintenance, safety, and suitability for the room. High-moisture areas require materials that can handle regular exposure to water, while frequently used floors and work surfaces should be selected for durability. Neutral foundations can also provide flexibility because wall colors, textiles, artwork, and accessories can be changed later without another major renovation. Lighting deserves equal attention: combine general illumination with task and accent lighting to make rooms more functional and visually comfortable. Energy-efficient lighting, improved insulation, weather sealing, and efficient fixtures may also contribute to better long-term household performance.
Before beginning major work, divide the project into manageable stages. A useful approach is to complete structural or repair work first, followed by electrical or plumbing updates when necessary, then walls, flooring, cabinetry, fixtures, and finally decorative details. This order can reduce the chance of damaging newly finished surfaces. Keep a record of measurements, product specifications, receipts, and important project decisions so replacements or future repairs are easier. For specialized work involving structural changes, electrical systems, plumbing, gas, or other regulated areas, consult appropriately qualified professionals and follow local requirements. Among the most practical renovation tips and tricks house owners can follow is to avoid changing too many things simultaneously; completing priority areas systematically makes budgets, timelines, and quality easier to control.
Finally, focus on improvements that combine appearance with everyday usefulness. Fresh paint, updated hardware, better organization, improved lighting, refreshed flooring, and carefully selected fixtures can make a noticeable difference without requiring a complete transformation. Outdoor areas can also benefit from simple maintenance, improved lighting, seating, planting, or repaired surfaces that extend the usable living space. Before declaring the project finished, inspect each room for functionality, storage, lighting, ventilation, safety, and finishing quality. The best renovation tips and tricks house approach is not necessarily about spending more it is about making informed choices that solve real problems and create a home that feels comfortable, practical, and personal.
One of the most useful renovation tips and tricks house projects can benefit from is improving the layout before focusing on decoration. A beautiful room will still feel inconvenient if furniture blocks walkways or storage is insufficient. Consider how people actually use each space and whether doors, windows, lighting, electrical outlets, and storage are positioned effectively. In kitchens, for example, practical work zones and accessible storage can make everyday tasks easier. In bedrooms and living rooms, built-in shelving, multifunctional furniture, and organized storage can reduce clutter without making the space feel crowded. Whenever possible, repair or improve the existing structure before replacing everything, because thoughtful upgrades can deliver significant results without creating unnecessary renovation costs.
Choosing materials carefully is another important part of renovation tips and tricks house planning. Look beyond appearance and consider durability, maintenance, safety, and suitability for the room. High-moisture areas require materials that can handle regular exposure to water, while frequently used floors and work surfaces should be selected for durability. Neutral foundations can also provide flexibility because wall colors, textiles, artwork, and accessories can be changed later without another major renovation. Lighting deserves equal attention: combine general illumination with task and accent lighting to make rooms more functional and visually comfortable. Energy-efficient lighting, improved insulation, weather sealing, and efficient fixtures may also contribute to better long-term household performance.
Before beginning major work, divide the project into manageable stages. A useful approach is to complete structural or repair work first, followed by electrical or plumbing updates when necessary, then walls, flooring, cabinetry, fixtures, and finally decorative details. This order can reduce the chance of damaging newly finished surfaces. Keep a record of measurements, product specifications, receipts, and important project decisions so replacements or future repairs are easier. For specialized work involving structural changes, electrical systems, plumbing, gas, or other regulated areas, consult appropriately qualified professionals and follow local requirements. Among the most practical renovation tips and tricks house owners can follow is to avoid changing too many things simultaneously; completing priority areas systematically makes budgets, timelines, and quality easier to control.
Finally, focus on improvements that combine appearance with everyday usefulness. Fresh paint, updated hardware, better organization, improved lighting, refreshed flooring, and carefully selected fixtures can make a noticeable difference without requiring a complete transformation. Outdoor areas can also benefit from simple maintenance, improved lighting, seating, planting, or repaired surfaces that extend the usable living space. Before declaring the project finished, inspect each room for functionality, storage, lighting, ventilation, safety, and finishing quality. The best renovation tips and tricks house approach is not necessarily about spending more it is about making informed choices that solve real problems and create a home that feels comfortable, practical, and personal.

 Sans Soucie Art Glass
Glass Front Entry Doors that Make a Statement! Your front entry door is your home's initial focal point and glass front doors by Sans Soucie with frosted, etched glass designs create a unique, custom effect while providing privacy AND light thru exquisite, quality designs! Available any size, all glass front doors are custom made to order and ship worldwide at reasonable prices. Exterior entry door glass will be tempered, dual pane (an equally efficient single 1/2" thick pane is used in our fiberglass doors). Selling both the glass inserts for front doors as well as entry doors with glass, Sans Soucie art glass doors are available in 8 woods and Plastpro fiberglass in both smooth surface or a grain texture, as a slab door or prehung in the jamb - any size. From simple frosted glass effects to our more extravagant 3D sculpture carved, painted and stained glass .. and everything in between, Sans Soucie designs are sandblasted different ways creating not only different effects, but different price levels. The "same design, done different" - with no limit to design, there's something for every decor, any style. The privacy you need is created without sacrificing sunlight! Price will vary by design complexity and type of effect: Specialty Glass and Frosted Glass. Inside our fun, easy to use online Glass and Entry Door Designer, you'll get instant pricing on everything as YOU customize your door and glass! When you're all finished designing, you can place your order online! We're here to answer any questions you have so please call (877) 331-339 to speak to a knowledgeable representative! Doors ship worldwide at reasonable prices from Palm Desert, California with delivery time ranges between 3-8 weeks depending on door material and glass effect selected. (Doug Fir or Fiberglass in Frosted Effects allow 3 weeks, Specialty Woods and Glass [2D, 3D, Leaded] will require approx. 8 weeks).

 Living Gardens Landscape Design
Inspiration for a small contemporary full sun front yard gravel landscaping in Orange County for spring.
Find the right local pro for your project

 Gerhard’s Kitchen, Bath & Lighting Store
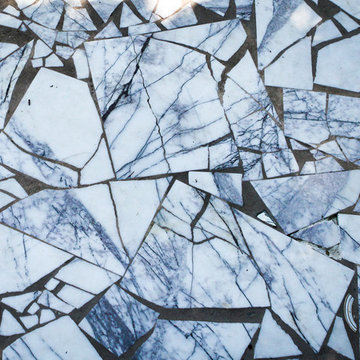
Backsplash: Oriental White Echelon by Olympia Tile + Stone. http://j.mp/1mUoZN6
 Caela McKeever
Photo: Caela McKeever © 2017 Houzz
Inspiration for an eclectic home design remodel in Seattle
Inspiration for an eclectic home design remodel in Seattle



 John
Coco coir is a versatile and sustainable growing medium that is gaining popularity among gardeners. Made from the fibrous husk of coconuts, it’s an eco-friendly alternative to peat moss and can greatly enhance the quality of your soil. In gardening, it is often utilized in systems like Coco Coir Hydroponic, where it helps create an efficient water and nutrient delivery system.
What is Coco Coir?
Coco coir is a natural fiber extracted from coconut husks. It has a neutral pH, excellent water retention, and is reusable, making it a favorite among gardeners who prefer organic and sustainable practices. It is available in different forms such as blocks, bricks, or loose coir, each requiring some preparation before use in gardening.
Benefits of Using Coco Coir in Gardening
Coco coir offers several advantages for gardening. Here are the benefits of using coco coir in gardening:
Holds up to 10 times its weight in water, ensuring plants have consistent moisture.
Promotes oxygen flow to plant roots, leading to healthier root systems.
Coco coir is a renewable and eco-friendly alternative to peat moss.
It can be washed, rehydrated, and reused, reducing waste.
Naturally pH neutral, making it suitable for various plants without major adjustments.
Enhances the texture and moisture retention of garden soil.
How to Prepare Coco Coir for Planting
Preparing coco coir for planting involves a few essential steps. First, you need to hydrate the coir block, as it typically comes in a compressed form. Place the block in a large container and add warm water, allowing the block to expand and absorb the water. Once fully expanded, the coir should be fluffed up by breaking it apart with your hands or a tool to ensure it becomes loose and airy. After the coir has been fluffed, it is important to drain any excess water, as overly wet coir can lead to root suffocation. Finally, since coco coir is inert and does not contain nutrients, it’s a good idea to add organic compost or liquid fertilizer to enrich the coir before planting.
Do You Need to Soak Coco Coir Before Planting?
Yes, soaking coco coir before planting is necessary. Since it comes in a compressed form, it needs to be broken down and hydrated for proper use. The soaking process allows the coir to expand and release the fibers, making it usable as a growing medium. After soaking, the coir should be fluffed to ensure the water is evenly distributed. Draining any excess water is crucial because overly wet coir may impede plant root health.
How to Prepare Coco Peat for Planting
Coco peat, a fine, powdery form of coco coir, is highly beneficial for seed starting and improving water retention in soil. To prepare coco peat, it first needs to be hydrated, similar to how you prepare coir blocks. Slowly add water to the peat in a container and allow it to absorb and fluff up. Once hydrated, coco peat can be used on its own or mixed with other growing media such as perlite or vermiculite for added aeration and drainage. It is advisable to check the pH level of your final mix, as coco peat generally has a neutral pH, but adjustments may be necessary depending on the plants being grown.
Can You Use Just Coco Coir for Plants?
Yes, coco coir can be used by itself to grow plants, especially in hydroponic systems or as a seed-starting medium. However, because coco coir does not naturally contain nutrients, you will need to provide regular fertilizer to support plant growth. This makes it particularly suitable for plants grown in controlled environments, such as hydroponics, where nutrient solutions can be carefully managed. In traditional soil-based gardening, mixing coco coir with other organic materials like compost is recommended to provide essential nutrients and improve the overall soil structure.
How to Use Coco Coir in Hydroponics
Coco coir is widely used in hydroponic systems due to its water retention and aeration properties. To use coco coir in hydroponics, it first needs to be soaked and hydrated, as discussed earlier. Once the coir is fully prepared, it can be placed in the hydroponic system. Since coco coir does not contain natural nutrients, you will need to supply a balanced nutrient solution tailored for hydroponic plants. Regular monitoring of water and nutrient levels is essential to prevent nutrient imbalances or root rot. One of the benefits of coco coir in hydroponics is its reusability. After completing a growing cycle, the coir can be washed, rehydrated, and used again in future plantings.
Using Coco Coir as a Soil Amendment
Coco coir is also an excellent soil amendment, as it improves the texture and moisture retention of garden soil. To use coco coir in this way, mix loose coir with your existing garden soil at a ratio of one part coco coir to two parts soil. This will help retain moisture without compacting the soil, improving both water drainage and root growth. For optimal results, you can also add organic compost to the mix, ensuring that the nutrient levels are sufficient for plant growth. Coco coir works particularly well in raised beds, where it helps maintain proper soil structure over time.
Advantages of Using Coco Coir Over Peat Moss
While peat moss has been traditionally used as a growing medium, coco coir offers several advantages over it. Coco coir is a renewable resource, as it is a byproduct of coconut processing, while peat moss is harvested from peat bogs that take centuries to regenerate. Coco coir is also more durable, as it can be reused multiple times without breaking down, while peat moss disintegrates after a single use. Another key benefit is its neutral pH, whereas peat moss is more acidic and may require balancing to meet the needs of specific plants.
Conclusion
Coco coir is a highly versatile and sustainable growing medium that benefits both novice and experienced gardeners alike. Whether you are using it for hydroponics, as a soil amendment, or as a standalone medium for growing plants, knowing how to properly prepare and use it is key to maximizing its benefits. By following the steps detailed above, you can improve water retention, aeration, and overall plant health in your garden, all while contributing to eco-friendly gardening practices.

 Lori Ramsay Design
Blue and white ocean inspired bath with New Ravenna blue glass tile and glass mosaic shower pan. White all drawer vanity with Drawer Doc electrical outlets maximize storage and functionality.

 MARGARITA BRAVO
We gave this Englewood master bath a hyper-modern makeover with statement art; hand-made mosaic micro tiles; and a sleek, glass, walk-in shower. All materials were custom-made and imported from Italy:
Project designed by Denver, Colorado interior designer Margarita Bravo. She serves Denver as well as surrounding areas such as Cherry Hills Village, Englewood, Greenwood Village, and Bow Mar.
For more about MARGARITA BRAVO, click here: https://www.margaritabravo.com/
To learn more about this project, click here:
https://www.margaritabravo.com/portfolio/englewood-master-bath-renovation/

 T.A. French - Custom Builder
Example of a mid-sized transitional dark wood floor and brown floor double front door design in Austin with gray walls and a black front door

 ROJO Architecture
Mark Borosch Photography
Example of a mid-sized minimalist staircase design in Tampa
Example of a mid-sized minimalist staircase design in Tampa

 Charlen's Abstracts
This 30" x 24" abstract acrylic painting has been done in shades of cobalt blue, sky blue, citrine, chartreuse, white, soft sea green, and royal blue. Finished in gloss varnish to protect the piece from dust and UV light for years to come. Can be hung vertically or horizontally. Gorgeous vivid rich colors in a great contemporary style.
 Dwellify
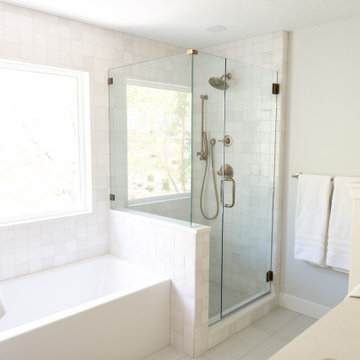
In this primary bathroom remodel, a once uninspiring space was completely transformed into a fresh and modern bathroom that excelled in both aesthetics and functionality. To achieve this, the room was opened up by removing parts of the walls surrounding the shower and toilet. The introduction of a half pony wall struck a perfect balance, offering privacy while allowing light to flow freely throughout the room. Unique and stylish tiles were meticulously chosen for the shower and bathtub, injecting a sense of intentionality into the overall design. A beautiful new vanity became the centerpiece, complemented by a large mirror and new vanity lighting to complete the look. The addition of gold fixtures throughout the room added a touch of luxury, elevating the bathroom into a space that marries both form and function seamlessly.


 Dordevic Architecture + Construction
Chilipics Photography
Staircase - large modern wooden l-shaped open staircase idea in Atlanta
Staircase - large modern wooden l-shaped open staircase idea in Atlanta

 HS3D VISUALIZATION PVT. LTD.
The 3D rendering of the Noble Pine house was created using advanced computer graphics software and techniques. Highly skilled 3D artists meticulously crafted the virtual model of the house, incorporating design elements, materials, textures, and lighting to achieve a realistic and visually appealing representation. The rendering process involved a combination of architectural expertise, artistic vision, and technical proficiency to bring the Noble Pine house to life in the virtual realm.
swetarastogi06@gmail.com
Can you provide details on exterior design elements showcased in the 3D rendering of the Noble Pine house?
Certainly! The exterior design elements showcased in the 3D rendering of the Noble Pine house may include:
Architectural style: The 3D rendering may depict the specific architectural style of the Noble Pine house, such as modern, contemporary, traditional, or a blend of different styles.
Building materials: The rendering may showcase the type and finish of the building materials used for the exterior of the Noble Pine house, such as brick, stone, wood, or stucco, along with their color and texture.
Roof design: The 3D rendering may feature the design and color of the roof, including the shape, slope, and materials used, such as shingles, tiles, or metal.
Windows and doors: The rendering may showcase the design, size, and placement of windows and doors, including their style, framing, and glazing.
Landscaping: The rendering may include landscaping elements, such as trees, shrubs, flowers, and pathways, that enhance the exterior aesthetics of the Noble Pine house.
Outdoor features: The 3D rendering may depict outdoor features, such as a porch, deck, patio, or balcony, along with their design, materials, and furnishings.
Lighting: The rendering may showcase the placement and type of outdoor lighting fixtures used to illuminate the exterior of the Noble Pine house, enhancing its visual appeal and safety.
These are just some of the exterior design elements that may be showcased in the 3D rendering of the Noble Pine house, providing a visual representation of the overall aesthetic and style of the house.
swetarastogi06@gmail.com
What are the unique features or highlights of the Noble Pine house as depicted in the 3D rendering? 3- 4 lines
The unique features or highlights of the Noble Pine house, as depicted in the 3D rendering, may include:
Architectural design: The 3D rendering may showcase the unique architectural design elements of the Noble Pine house, such as intricate rooflines, decorative details, or innovative use of materials, setting it apart from other houses.
Interior layout: The rendering may highlight the interior layout of the Noble Pine house, showcasing its functional and well-designed spaces, such as open-concept living areas, cozy nooks, or unique room configurations.
Amenities: The 3D rendering may depict the special amenities of the Noble Pine house, such as a pool, spa, home theater, or custom-built features, that add luxury, comfort, and convenience to the living experience.
Landscape design: The rendering may showcase the unique landscape design of the Noble Pine house, including features like a lush garden, serene water feature, or a well-designed outdoor entertainment area, enhancing the overall ambiance and curb appeal.
These unique features or highlights depicted in the 3D rendering of the Noble Pine house are designed to capture attention, create interest, and set the house apart from others, making it a standout property in its design and functionality.
swetarastogi06@gmail.com
Can you provide details on exterior design elements showcased in the 3D rendering of the Noble Pine house? 3-4 lines
Certainly! The 3D rendering of the Noble Pine house may showcase various exterior design elements, including:
Architectural style: The rendering may depict the architectural style of the Noble Pine house, such as a modern, contemporary, traditional, or a unique blend of different styles, reflecting the overall aesthetic and character of the house.
Building materials: The rendering may showcase the type and finish of the building materials used for the exterior of the Noble Pine house, such as brick, stone, wood, or stucco, along with their color, texture, and placement, adding visual interest and durability.
Roof design: The 3D rendering may feature the design and color of the roof, including the shape, slope, and materials used, such as shingles, tiles, or metal, contributing to the overall style and functionality of the house.
Windows and doors: The rendering may depict the design, size, and placement of windows and doors, including their style, framing, and glazing, enhancing the architectural aesthetics, natural light, and ventilation of the house.
These exterior design elements showcased in the 3D rendering of the Noble Pine house are carefully crafted to create a visually appealing, cohesive, and harmonious exterior appearance, reflecting the unique design vision and personality of the house.

 Heidi Pribell Interiors
 puts a fresh twist on classic design serving the major Boston metro area. By blending grandeur with bohemian flair, Heidi creates inviting interiors with an elegant and sophisticated appeal. Confident in mixing eras, style and color, she brings her expertise and love of antiques, art and objects to every project.

 Siding & Windows Group Ltd
Beautiful Modern Home Remodel, Siding done by Siding & Windows Group Ltd. We installed HardiePanel Vertical 4x8 Smooth Boards in ColorPlus Technology Color Cobble Stone on the sides of the home and Custom Metal trim.

 TotalCare Orlando
Powder room - mid-sized transitional mosaic tile floor and multicolored floor powder room idea in Orlando with a one-piece toilet, brown walls, a console sink and solid surface countertops
69