
Search results for "Progression systems" in Home Design Ideas
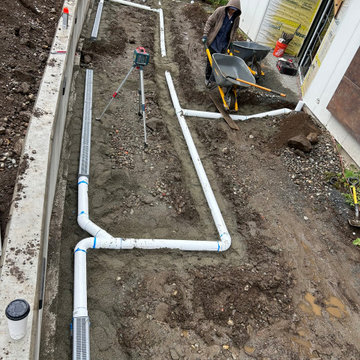

 The Garden District
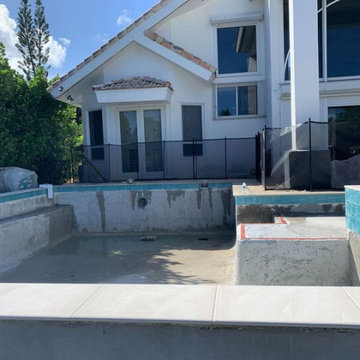
 Beautiful view of the new pool and pergola
Example of a large trendy backyard tile and l-shaped hot tub design in Miami
Example of a large trendy backyard tile and l-shaped hot tub design in Miami
 AVCRAFTERS, Inc
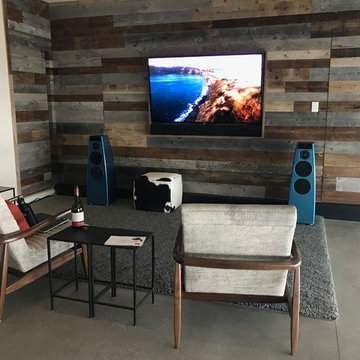
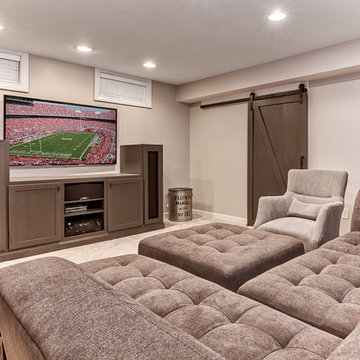
We framed the TV to blend in with the reclaimed wood accent wall. The technology that we used was Savant Control System and Lutron Homeworks System.
Example of a small minimalist family room design in Denver
Example of a small minimalist family room design in Denver
Find the right local pro for your project
 CuttingEdge Built LLC
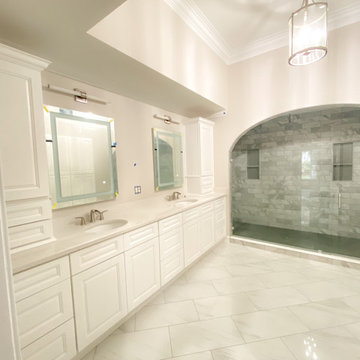
In the original floor plan, there was a jacuzzi tub, window, and skylight where this new double 10-foot shower now exists. The shower walls were lined with Carrara marble-style 4x16 subway tiles and the shower floor was adorned with gray round penny glass tile. To create that extra glam and sparkle, we used a translucent grout with an iridescent finish on the shower floor which reflects and refracts light and gives the glass tile the appearance to be different shades of colors. Two shower systems were installed with massaging jets on each end of the shower and a large rain showerhead in the middle of the shower ceiling. We enclosed this massive shower with a frameless hinged shower door with chrome hardware.
Also in the original floor plan, there was a separate shower and vanity where the new large double vanity with extra storage now sits. The white vanity has raised-panel doors and drawers. An LED mirror and LED vanity light fixture were installed above each sink.
The floor tile is a 12x24 Carrara marble-style porcelain tile installed in a diagonal pattern to visually enlarge the space. The quartz countertop is named 'White Sands' and appears as though it has tiny white pebbles with silver gems, and the walls were painted with Sherwin-Williams Drift of Mist.
 Progressive Design Build
Challenge
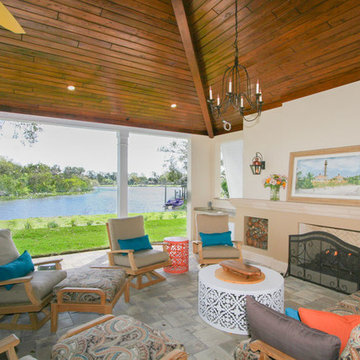
This 2001 riverfront home was purchased by the owners in 2015 and immediately renovated. Progressive Design Build was hired at that time to remodel the interior, with tentative plans to remodel their outdoor living space as a second phase design/build remodel. True to their word, after completing the interior remodel, this young family turned to Progressive Design Build in 2017 to address known zoning regulations and restrictions in their backyard and build an outdoor living space that was fit for entertaining and everyday use.
The homeowners wanted a pool and spa, outdoor living room, kitchen, fireplace and covered patio. They also wanted to stay true to their home’s Old Florida style architecture while also adding a Jamaican influence to the ceiling detail, which held sentimental value to the homeowners who honeymooned in Jamaica.
Solution
To tackle the known zoning regulations and restrictions in the backyard, the homeowners researched and applied for a variance. With the variance in hand, Progressive Design Build sat down with the homeowners to review several design options. These options included:
Option 1) Modifications to the original pool design, changing it to be longer and narrower and comply with an existing drainage easement
Option 2) Two different layouts of the outdoor living area
Option 3) Two different height elevations and options for the fire pit area
Option 4) A proposed breezeway connecting the new area with the existing home
After reviewing the options, the homeowners chose the design that placed the pool on the backside of the house and the outdoor living area on the west side of the home (Option 1).
It was important to build a patio structure that could sustain a hurricane (a Southwest Florida necessity), and provide substantial sun protection. The new covered area was supported by structural columns and designed as an open-air porch (with no screens) to allow for an unimpeded view of the Caloosahatchee River. The open porch design also made the area feel larger, and the roof extension was built with substantial strength to survive severe weather conditions.
The pool and spa were connected to the adjoining patio area, designed to flow seamlessly into the next. The pool deck was designed intentionally in a 3-color blend of concrete brick with freeform edge detail to mimic the natural river setting. Bringing the outdoors inside, the pool and fire pit were slightly elevated to create a small separation of space.
Result
All of the desirable amenities of a screened porch were built into an open porch, including electrical outlets, a ceiling fan/light kit, TV, audio speakers, and a fireplace. The outdoor living area was finished off with additional storage for cushions, ample lighting, an outdoor dining area, a smoker, a grill, a double-side burner, an under cabinet refrigerator, a major ventilation system, and water supply plumbing that delivers hot and cold water to the sinks.
Because the porch is under a roof, we had the option to use classy woods that would give the structure a natural look and feel. We chose a dark cypress ceiling with a gloss finish, replicating the same detail that the homeowners experienced in Jamaica. This created a deep visceral and emotional reaction from the homeowners to their new backyard.
The family now spends more time outdoors enjoying the sights, sounds and smells of nature. Their professional lives allow them to take a trip to paradise right in their backyard—stealing moments that reflect on the past, but are also enjoyed in the present.
 Universal Appliance and Kitchen Center
Available at Universal Appliance and Kitchen Center | uakc.com
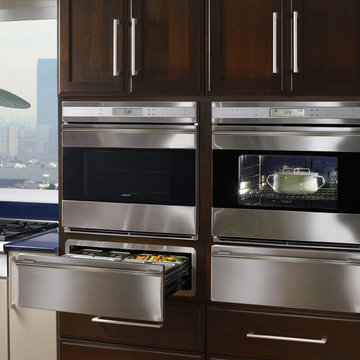
The E series made Wolf precision performance accessible for more cooks. Now three distinct new styles make the E series ideal for more kitchen designs than ever. The new 30" E series transitional single oven features an all-stainless touch control panel and slim, tubular handle - a design meant to coordinate beautifully with similarly-styled Wolf microwaves and warming drawers. Inside, dual convection fans and ten cooking modes control heat and airflow more precisely than less sophisticated single-convection systems. Uniform heat throughout the oven and the efficiency of circulating air around the food produce faster, more consistent and more predictably delicious results for your baking, roasting and broiling. The E series oven controls are a favorite of Wolf chefs for their intuitive usability whether setting the temperature, mode or timer. Meanwhile, dual interior halogen lights and a large viewing window help you keep tabs on cooking progress without having to disturb your dish by opening the door. Other standard convenience features include self-clean and timed cook settings, along with one full-extension, easy-glide rack and one full-extension, door-glide rack that put even the largest, heaviest dishes safely within reach.
Appearance:
Cobalt Blue Porcelain Oven Interior
Large Viewing Double-Pane Window
Tubular Handle
Unframed Classic Stainless Design
Capacity:
4.5 Cu Ft Oven Capacity
Dimensions:
27 7/8" H x 24 3/4" D x 30" W
Manufacturers Warranty:
2 Year Parts & Labor
5 Year Parts-Electric Elements, Electronic Control
Oven Features:
10 Cooking Modes
3 Oven Racks w/ 6 Level Guide
Convection Bake, Roast, Broil
Conventional Bake, Roast, Broil
Dehydrate & Proof Modes
Dual Convection System with Two Fans
Full Extension Bottom Rack
Hidden Bake Element
Recessed Broil Element
Self Clean Porcelain Oven
Temperature Probe
Convenience Features:
Delay Start Option
Dual Interior Halogen Lighting
Sabbath Mode
Additional Features:
Balanced Door Hinge
Standard or Flush Inset Application Installation

Sponsored
Columbus, OH

Hope Restoration & General Contracting
Columbus Design-Build, Kitchen & Bath Remodeling, Historic Renovations
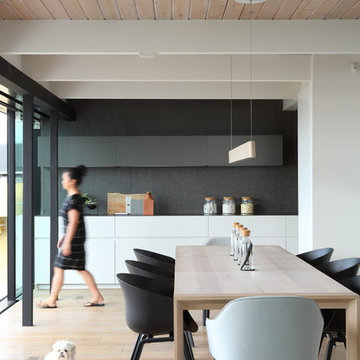
 Gaile Guevara
PHOTOGRAPHY
Ema Peter Photography
PROJECT TYPE
- Renovation | Single Detached
- Complete Gut down to studs
- Replace All Windows and Doors
- New Kitchen & 2 Bathrooms
- New Envelope Facade and Deck
DESIGN TEAM
Interiors & Creative Director | Gaile Guevara
Design Team | Kristin Swanepoel, Foojan Kasvari, Laura Melling
BUILDER
Alair Homes | David Babikaiff
Site Manager | Jason Zavitz
LANDSCAPE
Cyan Horticulture
GENERAL
Area: Burnaby North
Location: Capitol Hill BN
City: Burnaby
Property Type: Residential Detached
Bedrooms: 2
Bathrooms: 2
Year Built: 1964 | 50 Years Old
Floor Area: 2,721 sq. ft.
SOURCE GUIDE
New Glazing system by Keller Windows
Appliances | Miele Package provided by Midland Appliances
Millwork Package by Minimal provided by Tidal Living
Plumbing Fixtures
Hardwood Flooring | by Kentwood Couture - Avalon installed by Frontier Flooring
Tile | Mutina Italy provided by Stonetile

 LA Home Contractor
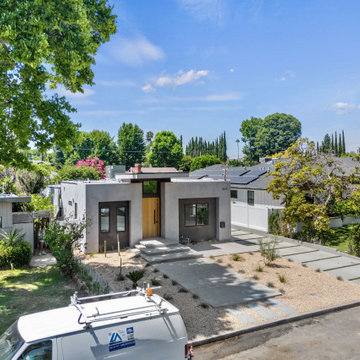
FULL HOUSE REMODEL – COMPLETE SCOPE OF WORK
1. Pre-Construction Phase
• Initial site inspection and measurements
• Architectural design and layout planning (if required)
• Structural engineering (if load-bearing walls are modified)
• Preparation of plans for city approval
• Permit application and plan check
• Obtain required building permits
• Scheduling of inspections
• Homeowner responsible for permit fees unless otherwise stated.
2. Site Preparation & Protection
• Protect flooring and non-work areas
• Install plastic dust barriers with zipper access
• Cover windows and furniture as needed
• Temporary utility setup if required
• Daily job site cleanup
• Final professional cleaning upon completion
3. Demolition
• Remove existing flooring (tile, wood, carpet, etc.)
• Remove cabinets, countertops, vanities
• Remove interior walls per plans
• Remove drywall where required
• Remove plumbing fixtures
• Remove electrical fixtures
• Haul away all debris
4. Structural & Framing
• Install structural beams if required
• Reframe modified walls
• Install new partitions per approved plans
• Repair or replace damaged framing
• Subfloor repair or replacement as needed
• Install blocking for cabinets and accessories
5. Plumbing (Up to Code)
• Replace old water supply lines (Copper Type L or PEX)
• Replace or modify drain lines (ABS)
• Relocate plumbing fixtures as needed
• Install new shut-off valves and cleanouts
• Water heater replacement if included
• Call for rough and final plumbing inspections
6. Electrical (Up to Code)
• Upgrade electrical panel if required
• Rewire entire house as needed
• Install new outlets and switches
• Install GFCI/AFCI protection per code
• Install recessed lighting and fixtures
• Install smoke and carbon monoxide detectors
• Dedicated circuits for appliances
• Call for rough and final electrical inspections
7. HVAC
• Replace or upgrade HVAC system if included
• Install new ducting and registers
• Install thermostat or mini-split system if applicable
8. Insulation
• Install wall insulation per code requirements
• Install ceiling insulation per code requirements
9. Drywall & Plaster
• Install new drywall
• Tape and mud (Level 4 or 5 finish)
• Texture to match existing or smooth finish
• Patch all affected areas
10. Flooring
• Install tile flooring
• Install engineered wood / hardwood / laminate / vinyl
• Install baseboards
• Floor leveling if required
11. Kitchen Remodel
• Install new cabinets
• Install countertops
• Install backsplash
• Install sink and faucet
• Install appliances (owner supplied unless specified)
12. Bathroom Remodel(s)
• Install new tub or shower system
• Waterproofing system installation
• Install tile on floors and walls
• Install vanity and toilet
• Install shower valve and fixtures
• Install shower glass if included
13. Doors & Windows
• Replace interior and entry doors
• Replace windows if included
• Install hardware
14. Interior & Exterior Paint
• Surface preparation
• Prime and paint walls, ceilings, and trim
• Exterior painting if included
15. Exterior Work (If Included)
• Stucco repair
• Roofing repair or replacement
• Concrete work or pavers
• Drainage improvements
16. Final Phase
• Final inspections
• Punch list completion
• Final cleaning
• Final walk-through with homeowner
Standard California Contract Terms (Summary)
• All work performed in compliance with California Building Code.
• Change orders must be approved in writing.
• Unforeseen conditions may require additional cost.
• One-year labor warranty unless otherwise stated.
• Progress payments per agreed payment schedule.
• Contractor is licensed and insured.
 Scott Simpson Design + Build
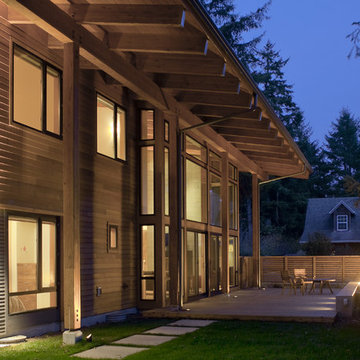
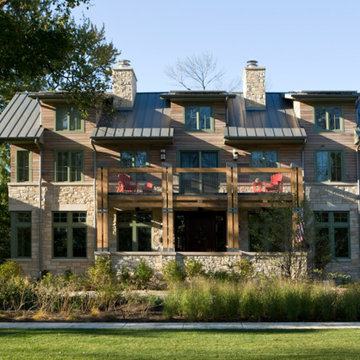
The original homeowner’s plan was to do an extensive renovation to the existing structure. Scott Simpson and Tom Kenny, owners of Scott Simpson Builders, collaborated with the homeowners and the architect, John Holbert, and decided to do new construction to utilize as many green technologies and building practices as possible. As the project progressed, more and more elements were employed to make this home a unique, environmentally sensitive structure.
GREENER BUILDING
Green technologies used in construction include:
--8,000 kw of photovoltaic cells.
--Installation of a net meter system by which excess energy can be sold back to the electric company.
--Solar panels to heat home’s floors through a radiant system and to heat the home’s water.
--Low VOC water-based urethane used to seal concrete basement floor and low VOC finishes throughout.
--Roof was made from Galvalume-an aluminum that reflects solar energy off the roof and reduces the need for air conditioning.
--The installation of an 8,000 gallon tank under the driveway to harvest rain water and re use it to water drought resistant trees and grasses. This is the FIRST rain water harvest system to be installed in the Village of Wilmette.
--Green roof located over garage.
--Benches used are Gabians, traditionally used for erosion control. The bricks used in the benches were recycled from the original brick home on the site.
--A rain garden was installed in the backyard as part of the storm water management system.
Innovative and creative solutions include:
--Creating mantles from trees that had to be removed from the property prior to construction.
--Stone for the fireplaces was made from Chilton Stone from Sussex, Wisconsin.
--1,500 s.f. of Villeroy & Boch tile through out house sourced and reused from a local convent that was converted into condominiums.
--Exterior siding from recycled pickle barrels.
--Recycled barn wood used throughout for closet doors and cabinetry.
--Grade school gymnasium floor recycled and used for children’s basement playroom.
--Decorative beams, hardwood flooring originated from timbers from the Thomas Edison factory in New London, Wisconsin.
--Shelving in the living room was built by Amish cabinetmakers, Lambright Woodworking, using reclaimed walnut.
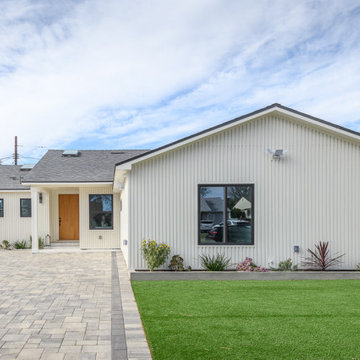 LA Home Contractor
FULL HOUSE REMODEL – COMPLETE SCOPE OF WORK
1. Pre-Construction Phase
• Initial site inspection and measurements
• Architectural design and layout planning (if required)
• Structural engineering (if load-bearing walls are modified)
• Preparation of plans for city approval
• Permit application and plan check
• Obtain required building permits
• Scheduling of inspections
• Homeowner responsible for permit fees unless otherwise stated.
2. Site Preparation & Protection
• Protect flooring and non-work areas
• Install plastic dust barriers with zipper access
• Cover windows and furniture as needed
• Temporary utility setup if required
• Daily job site cleanup
• Final professional cleaning upon completion
3. Demolition
• Remove existing flooring (tile, wood, carpet, etc.)
• Remove cabinets, countertops, vanities
• Remove interior walls per plans
• Remove drywall where required
• Remove plumbing fixtures
• Remove electrical fixtures
• Haul away all debris
4. Structural & Framing
• Install structural beams if required
• Reframe modified walls
• Install new partitions per approved plans
• Repair or replace damaged framing
• Subfloor repair or replacement as needed
• Install blocking for cabinets and accessories
5. Plumbing (Up to Code)
• Replace old water supply lines (Copper Type L or PEX)
• Replace or modify drain lines (ABS)
• Relocate plumbing fixtures as needed
• Install new shut-off valves and cleanouts
• Water heater replacement if included
• Call for rough and final plumbing inspections
6. Electrical (Up to Code)
• Upgrade electrical panel if required
• Rewire entire house as needed
• Install new outlets and switches
• Install GFCI/AFCI protection per code
• Install recessed lighting and fixtures
• Install smoke and carbon monoxide detectors
• Dedicated circuits for appliances
• Call for rough and final electrical inspections
7. HVAC
• Replace or upgrade HVAC system if included
• Install new ducting and registers
• Install thermostat or mini-split system if applicable
8. Insulation
• Install wall insulation per code requirements
• Install ceiling insulation per code requirements
9. Drywall & Plaster
• Install new drywall
• Tape and mud (Level 4 or 5 finish)
• Texture to match existing or smooth finish
• Patch all affected areas
10. Flooring
• Install tile flooring
• Install engineered wood / hardwood / laminate / vinyl
• Install baseboards
• Floor leveling if required
11. Kitchen Remodel
• Install new cabinets
• Install countertops
• Install backsplash
• Install sink and faucet
• Install appliances (owner supplied unless specified)
12. Bathroom Remodel(s)
• Install new tub or shower system
• Waterproofing system installation
• Install tile on floors and walls
• Install vanity and toilet
• Install shower valve and fixtures
• Install shower glass if included
13. Doors & Windows
• Replace interior and entry doors
• Replace windows if included
• Install hardware
14. Interior & Exterior Paint
• Surface preparation
• Prime and paint walls, ceilings, and trim
• Exterior painting if included
15. Exterior Work (If Included)
• Stucco repair
• Roofing repair or replacement
• Concrete work or pavers
• Drainage improvements
16. Final Phase
• Final inspections
• Punch list completion
• Final cleaning
• Final walk-through with homeowner
Standard California Contract Terms (Summary)
• All work performed in compliance with California Building Code.
• Change orders must be approved in writing.
• Unforeseen conditions may require additional cost.
• One-year labor warranty unless otherwise stated.
• Progress payments per agreed payment schedule.
• Contractor is licensed and insured.
 Hudson Place Realty
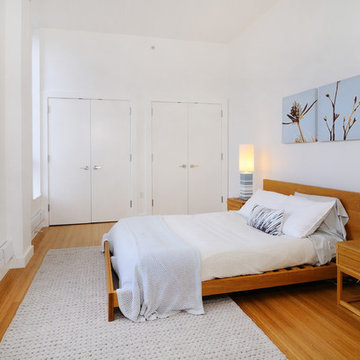
Property marketed by Hudson Place Realty - Urban chic meets progressive bldg. design in this award winning GOLD LEED certified building. Penthouse features a one of a kind 1300 sq. ft. ipe’ wood wrap around deck w/6 person hot tub that offers a fabulous view of the Empire State Building, 23’ ceilings, gas fireplace, a sleek Italian Valcucine kitchen, 6 burner Wolf range vented to the outside, Viking wine cooler, filtered fresh air & central air conditioning, a planted green roof for residences with dazzling NYC & Hudson River views, bike & private storage.
Sponsored
Columbus, OH
Hope Restoration & General Contracting
Columbus Design-Build, Kitchen & Bath Remodeling, Historic Renovations
 Pinnacle Design & Remodeling
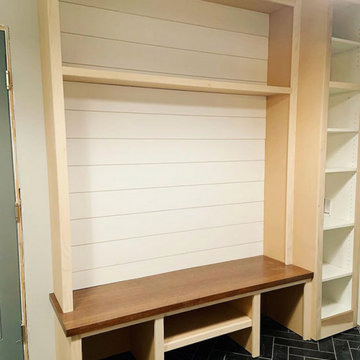
New built-in locker system!
Laundry room - mid-sized transitional slate floor and black floor laundry room idea in Minneapolis with an utility sink, shaker cabinets, white cabinets, wood countertops, a side-by-side washer/dryer and brown countertops
Laundry room - mid-sized transitional slate floor and black floor laundry room idea in Minneapolis with an utility sink, shaker cabinets, white cabinets, wood countertops, a side-by-side washer/dryer and brown countertops

 Progressive Design Build
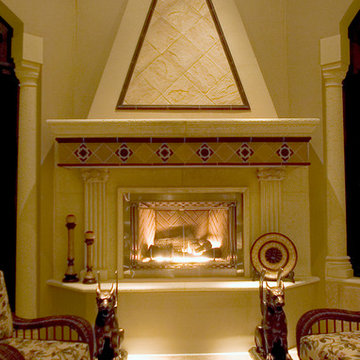
The goal for this husband and wife team was to create a functional home for their family. Because they love to entertain, they wanted to see how they could accommodate guests and extended family—improving the layout and functionality of their Bonita Bay home of more than eight years.
Having worked with remodeling contractors in the past, they were reluctant to proceed. They had experienced a remodeling fiasco that drug on beyond their expected completion dates and went well over budget. This time, they hired a local architect, an interior designer, and Progressive Design Build as the general contractor. The three teams worked together to formulate a clear vision and plans for the renovation. Once this husband and wife team knew exactly what they wanted to achieve and had a design plan in hand, they set about creating a modern and functional outdoor living space. The three teams worked together to finalize the design and the budget—no headaches, not delays.
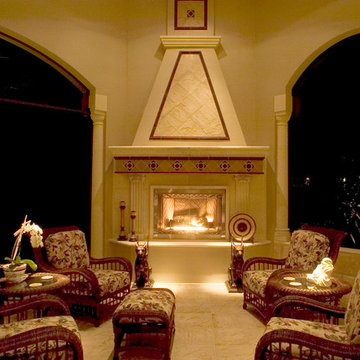
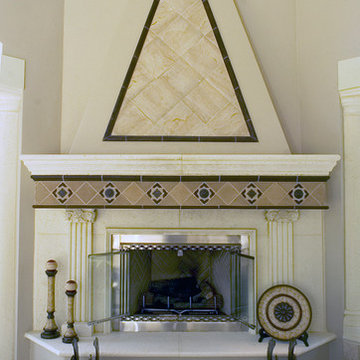
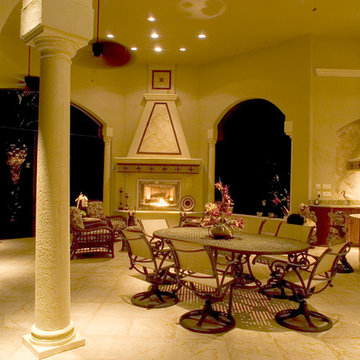
After six months (two months finalizing the design and budget, and four months to build), this project finished on time and on budget and resulted in a beautiful outdoor living space that consisted of a massive outdoor kitchen with a separate dining area and sitting area, 20-foot tall vaulted ceilings, a beautiful glass fireplace and cost stone balustrades. It was finished with cast stone columns, huge stucco arches, a high tech lighting system and porcelain tile floors.
 Progressive Design Build
The goal for this husband and wife team was to create a functional home for their family. Because they love to entertain, they wanted to see how they could accommodate guests and extended family—improving the layout and functionality of their Bonita Bay home of more than eight years.
Having worked with remodeling contractors in the past, they were reluctant to proceed. They had experienced a remodeling fiasco that drug on beyond their expected completion dates and went well over budget. This time, they hired a local architect, an interior designer, and Progressive Design Build as the general contractor. The three teams worked together to formulate a clear vision and plans for the renovation. Once this husband and wife team knew exactly what they wanted to achieve and had a design plan in hand, they set about creating a modern and functional outdoor living space. The three teams worked together to finalize the design and the budget—no headaches, not delays.
After six months (two months finalizing the design and budget, and four months to build), this project finished on time and on budget and resulted in a beautiful outdoor living space that consisted of a massive outdoor kitchen with a separate dining area and sitting area, 20-foot tall vaulted ceilings, a beautiful glass fireplace and cost stone balustrades. It was finished with cast stone columns, huge stucco arches, a high tech lighting system and porcelain tile floors.
 Progressive Design Build
The goal for this husband and wife team was to create a functional home for their family. Because they love to entertain, they wanted to see how they could accommodate guests and extended family—improving the layout and functionality of their Bonita Bay home of more than eight years.
Having worked with remodeling contractors in the past, they were reluctant to proceed. They had experienced a remodeling fiasco that drug on beyond their expected completion dates and went well over budget. This time, they hired a local architect, an interior designer, and Progressive Design Build as the general contractor. The three teams worked together to formulate a clear vision and plans for the renovation. Once this husband and wife team knew exactly what they wanted to achieve and had a design plan in hand, they set about creating a modern and functional outdoor living space. The three teams worked together to finalize the design and the budget—no headaches, not delays.
After six months (two months finalizing the design and budget, and four months to build), this project finished on time and on budget and resulted in a beautiful outdoor living space that consisted of a massive outdoor kitchen with a separate dining area and sitting area, 20-foot tall vaulted ceilings, a beautiful glass fireplace and cost stone balustrades. It was finished with cast stone columns, huge stucco arches, a high tech lighting system and porcelain tile floors.
 Progressive Design Build
The goal for this husband and wife team was to create a functional home for their family. Because they love to entertain, they wanted to see how they could accommodate guests and extended family—improving the layout and functionality of their Bonita Bay home of more than eight years.
Having worked with remodeling contractors in the past, they were reluctant to proceed. They had experienced a remodeling fiasco that drug on beyond their expected completion dates and went well over budget. This time, they hired a local architect, an interior designer, and Progressive Design Build as the general contractor. The three teams worked together to formulate a clear vision and plans for the renovation. Once this husband and wife team knew exactly what they wanted to achieve and had a design plan in hand, they set about creating a modern and functional outdoor living space. The three teams worked together to finalize the design and the budget—no headaches, not delays.
After six months (two months finalizing the design and budget, and four months to build), this project finished on time and on budget and resulted in a beautiful outdoor living space that consisted of a massive outdoor kitchen with a separate dining area and sitting area, 20-foot tall vaulted ceilings, a beautiful glass fireplace and cost stone balustrades. It was finished with cast stone columns, huge stucco arches, a high tech lighting system and porcelain tile floors.
 Progressive Design Build
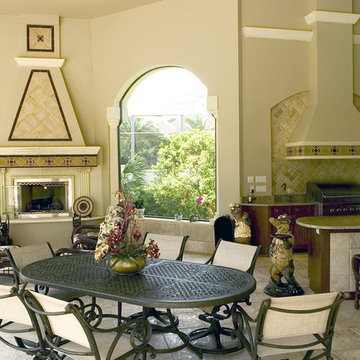
The goal for this husband and wife team was to create a functional home for their family. Because they love to entertain, they wanted to see how they could accommodate guests and extended family—improving the layout and functionality of their Bonita Bay home of more than eight years.
Having worked with remodeling contractors in the past, they were reluctant to proceed. They had experienced a remodeling fiasco that drug on beyond their expected completion dates and went well over budget. This time, they hired a local architect, an interior designer, and Progressive Design Build as the general contractor. The three teams worked together to formulate a clear vision and plans for the renovation. Once this husband and wife team knew exactly what they wanted to achieve and had a design plan in hand, they set about creating a modern and functional outdoor living space. The three teams worked together to finalize the design and the budget—no headaches, not delays.
After six months (two months finalizing the design and budget, and four months to build), this project finished on time and on budget and resulted in a beautiful outdoor living space that consisted of a massive outdoor kitchen with a separate dining area and sitting area, 20-foot tall vaulted ceilings, a beautiful glass fireplace and cost stone balustrades. It was finished with cast stone columns, huge stucco arches, a high tech lighting system and porcelain tile floors.
15