
Search results for "Quick running" in Home Design Ideas
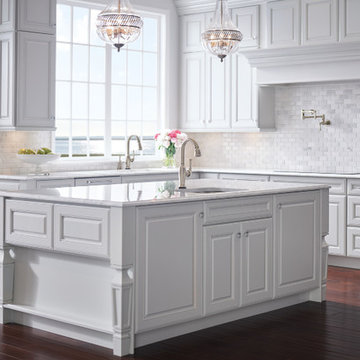
 Focal Point Hardware
This Brizo Kitchen Faucet Features:
Finish: Stainless
Length: 11.5
Height: 15.91
Width: 6.53
SmartTouch Technology with TempID – tap on/off functionality with temperature indicating LED light
MagneDock Technology – magnetic docking system
Diamond Seal Technology
Euro-motion Diamond Valve with InnoFlex waterways
Touch-Clean nozzles – swipe away mineral deposits
Two-button, four-function wand: spray, stream, volume control and pause
1-hole installation
Spout swivels 360°
Accommodates up to 3" deck thickness
Comes with standard fittings
Optional A/C adapter EP73954
Maximum 1.8 gpm @ 60 PSI, 6.8 L/Min @ 414 kPa
One, two, three, or four hole mount(escutcheon optional)
Control mechanism shall be full-motion valve cartridge
Rotating spout
Red/blue indicator markings
Four-function wand; Aerated stream, full spray, volume control, and pause (64003LF)
Two-function wand; Aerated stream and full spray(64903LF)
Dual integral check valves in sprayer
LED indicator light signals on-off, water temperature and when batteries run low
Uses 6 AA (included) or 6 C (optional) batteries
Optional (EP73954) 120V AC adapter available(3 prong grounded outlet required)
Quick connect hoses
Note: See 63903LF-* for matching bar/prep

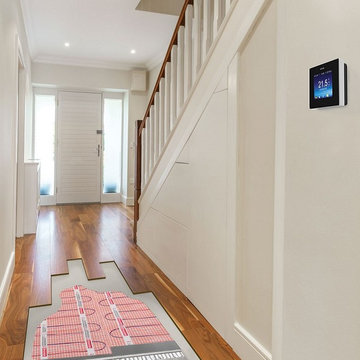
 Flooring Supply Shop
WARMUP STICKYMAT HEATING MAT
NADWM StickyMatt Use under tile, stone & LVT
The Warmup StickyMat is designed for use within an adhesive layer under tiles or within a leveling compound under other floor finishes.
The fixed spacing and self-adhesive mat makes installation of regularly shaped rooms quick and easy, whilst ensuring precision is maintained.
The NADWM floor heating mats are comprised of a low-profile twin conductor cable applied to a sturdy fiberglass mesh. The mats are self-adhesive on both sides and allow freedom of design and speed of installation thanks to the pre-spaced format of the heating cable.
ADVANTAGES
• The NADWM mats have been specifically designed to provide Primary Heating under a variety of floors. The cable has been pre assembled onto the mat to allow for an easy ’tape-down’ installation. At 132°F peak cable temperature, the NADWM system heats up fast and has been tested and proven to provide 70°F ambient temperature at 4ft in height in 1 hour.
• The NADWM mats come with double-sided tape on both sides for a flexible installation over all subfloors. Warmup’s StickyMAT range also provides for a pressure-sensitive adhesive on the mesh to ensure a very low installation profile.
• Using the 4iE® Programmable Thermostat, the product can be programmed to suit the user’s needs. The 4iE® monitors the systems’ power usage and will optimize comfort and consumption costs. The 4iE® controller combines the efficiency of built in floor and room sensors.
• The cable on the NADWM mats is insulated with ETFE advanced fluoropolymers both on the conductors and the outer jacket for maximum protection. The system is fully grounded with a 10ft lead cable for connection to power.
Specifications;
Operating voltage - 120V, 208V & 240V; 50/60Hz
Width 20” (500mm)
Mat thickness - 1/8” (3mm)
Inner / Outer Insulation - Advanced fluoropolymer (ETFE)
Output rating - 14W/sq ft
Coil tail length - 10ft (3m)
Approvals - cULus
The StickyMatTM System is ideal for installations within regularly shaped areas, where mats can be quickly rolled out across the floor in parallel runs, cut and turned.
WARRANTY & MAINTENANCE
When installed according to the installation manual and proper testing has been performed throughout, the system requires no maintenance for the duration of its warrantied life.
The NADWM mat is warrantied for 30 years against manufacturer’s defects and is protected by Warmup’s SAFETYnet guarantee. See www.warmup.com for full warranty details.
Find the right local pro for your project
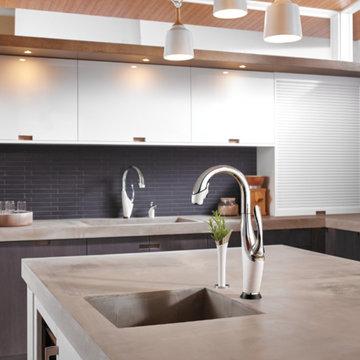 Focal Point Hardware
This Brizo Kitchen Faucet Features:
Finish: Chrome
Length: 13.53
Height: 16.75
Width: 6.5
SmartTouch Technology with TempID – tap on/off functionality with temperature indicating LED light
MagneDock Technology – magnetic docking system
Diamond Seal Technology
Two-function wand: spray and stream
1-hole installation
Spout swivels 360˚
Accommodates up to 3" deck thickness
Comes with standard fittings
Optional A/C adapter EP73954
Single handle, 2-function pull-down kitchen faucets for mounting on single, two, and three hole sinks (with optional accessory order).
SmartTouch on/off functionality
On-off indicator light also signals when batteries run low
16 3/4" (426 mm) high, 10 1/4 (260 mm) long, spout swings 360˚
Lever handle. Control mechanism shall be full-motion valve cartridge
Touch-Clean sprayhead
Quick connect hoses
Pull-down wand operates in an aerated or spray mode via ergonomic button
MagneDock magnetic docking
Thin deck mounting aid to help secure product if used on thin sinks
Spacer for mounting nut to reduce number of turns required for installation
Mounting wrench to assist in tightening mounting nut securely
Hose travels inside mounting shank so it will not interfere with deck edges
Maximum 1.80 gpm @ 60 psi, 6.8 L/min @ 414 kPa
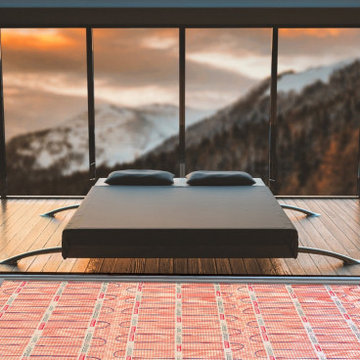 Flooring Supply Shop
WARMUP STICKYMAT HEATING MAT
NADWM StickyMatt Use under tile, stone & LVT
The Warmup StickyMat is designed for use within an adhesive layer under tiles or within a leveling compound under other floor finishes.
The fixed spacing and self-adhesive mat makes installation of regularly shaped rooms quick and easy, whilst ensuring precision is maintained.
The NADWM floor heating mats are comprised of a low-profile twin conductor cable applied to a sturdy fiberglass mesh. The mats are self-adhesive on both sides and allow freedom of design and speed of installation thanks to the pre-spaced format of the heating cable.
ADVANTAGES
• The NADWM mats have been specifically designed to provide Primary Heating under a variety of floors. The cable has been pre assembled onto the mat to allow for an easy ’tape-down’ installation. At 132°F peak cable temperature, the NADWM system heats up fast and has been tested and proven to provide 70°F ambient temperature at 4ft in height in 1 hour.
• The NADWM mats come with double-sided tape on both sides for a flexible installation over all subfloors. Warmup’s StickyMAT range also provides for a pressure-sensitive adhesive on the mesh to ensure a very low installation profile.
• Using the 4iE® Programmable Thermostat, the product can be programmed to suit the user’s needs. The 4iE® monitors the systems’ power usage and will optimize comfort and consumption costs. The 4iE® controller combines the efficiency of built in floor and room sensors.
• The cable on the NADWM mats is insulated with ETFE advanced fluoropolymers both on the conductors and the outer jacket for maximum protection. The system is fully grounded with a 10ft lead cable for connection to power.
Specifications;
Operating voltage - 120V, 208V & 240V; 50/60Hz
Width 20” (500mm)
Mat thickness - 1/8” (3mm)
Inner / Outer Insulation - Advanced fluoropolymer (ETFE)
Output rating - 14W/sq ft
Coil tail length - 10ft (3m)
Approvals - cULus
The StickyMatTM System is ideal for installations within regularly shaped areas, where mats can be quickly rolled out across the floor in parallel runs, cut and turned.
WARRANTY & MAINTENANCE
When installed according to the installation manual and proper testing has been performed throughout, the system requires no maintenance for the duration of its warrantied life.
The NADWM mat is warrantied for 30 years against manufacturer’s defects and is protected by Warmup’s SAFETYnet guarantee. See www.warmup.com for full warranty details.
 SabaRehman Abdulrehman
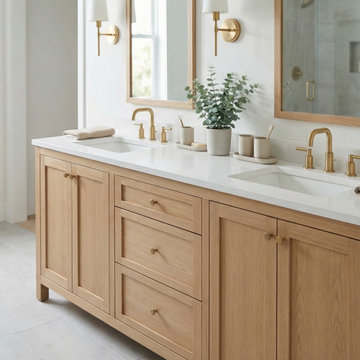
Morning routines shouldn’t involve a traffic jam at the sink. The 2025 Houzz Bathroom Trends Study found that 65 percent of U.S. renovators now choose a double-sink vanity to skip the wait. Designers agree: Titan Builders dubbed 2025 “the year of bigger, storage-packed double vanities,” forecasting dual-basin setups in family, guest, and even powder baths. As KBIS 2025 launches land, prototypes for 2026 layer in spa-grade wood, built-in outlets, and planet-friendly finishes. In this guide, we rank six standout models and show you how to size, install, and enjoy a clutter-free, two-sink future.
Methodology and selection criteria
A well-planned double-sink vanity keeps busy morning routines calm and clutter-free.
Before we crowned any winners, we mapped the entire 2024–2026 double-sink (dual-basin) market. That meant parsing KBIS exhibitor releases, scraping bestseller lists from Home Depot, Lowe’s, and Wayfair, and reviewing designer short lists in trade magazines. The sweep produced 110 candidate vanities, giving us visibility into every style, price tier, and material in play.
We then scored each model against six weighted factors that continue to matter long after installers leave:
- Build quality – 25 percent.Solid hardwood frames, dovetail drawers, and furniture-grade plywood backs, never particleboard in disguise.
- Design versatility – 20 percent.Lines and finishes that suit modern, classic, or farmhouse baths without dating quickly.
- Sustainability – 15 percent.FSC-certified wood, CARB 2 compliance, and low-VOC finishes for healthier air.
- Storage efficiency – 15 percent.Deep drawers, tilt-outs, or power cubbies that corral countertop clutter.
- Value for money – 15 percent.Fair street price for the materials, stone tops, sinks, and soft-close hardware included.
- Brand reputation and warranty – 10 percent.Manufacturers with responsive support and at least a one-year parts guarantee.
- Footprint: 72 W × 22 D × 36 H in. (183 × 56 × 91 cm)
- Crated weight: 506 lb / 230 kg
- Street price: about $2,575 with marble top and basins, Q4 2025
- Footprint: 48 W × 22 D in. (122 × 56 cm)
- Height: 34.8 in. (88 cm) with backsplash
- Sliding barn door plus 3 drawers
- Pre-drilled 8-in. faucet spacing, sinks included
- Footprint: 60 W × 21 D × 34 H in. (152 × 53 × 86 cm)
- Integrated power: 4 AC + 2 USB, UL-listed
- Crated weight: 300 lb / 136 kg
- Street price: about $2,349 at Home Depot, Q4 2025
- Footprint: 72 W × 22 D in. (183 × 56 cm)
- Height: 34 in. (86 cm) plus 4 in. backsplash
- Counter: 1 in. Carrara marble, apron-front sinks included
- Hardware: oil-rubbed bronze, soft-close doors and drawers
- Footprint: 60 W × 22 D × 34 H in. (152 × 56 × 86 cm)
- Construction: solid poplar and plywood, waterfall quartz top
- Integrated slim power bank, soft-close doors and drawers
- Target price: just under $2,300 with top and basins
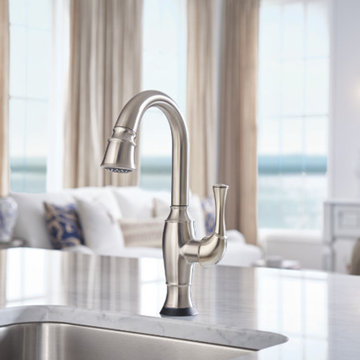 Focal Point Hardware
This Brizo Kitchen Faucet Features:
Finish: Stainless
Length: 11.06
Height: 14.88
Width: 6.53
SmartTouch Technology with TempID – tap on/off functionality with temperature indicating LED light
MagneDock Technology – magnetic docking system
Diamond Seal Technology
Euro-motion Diamond Valve with InnoFlex waterways
Touch-Clean nozzles – swipe away mineral deposits
Two-function pull-down wand: spray and stream
1-hole installation
Spout swivels 360°
Accommodates up to 3" deck thickness
Comes with standard fittings
Optional A/C adapter EP73954
Maximum 1.8 gpm @ 60 PSI, 6.8 L/Min @ 414 kPa
One, two, three, or four hole mount (escutcheon optional)
Control mechanism shall be full-motion valve cartridge
Rotating spout
Red/blue indicator markings
Four-function wand; Aerated stream, full spray, volume control, and pause (64003LF)
Two-function wand; Aerated stream and full spray (64903LF)
Dual integral check valves in sprayer
LED indicator light signals on-off, water temperature and when batteries run low
Uses 6 AA (included) or 6 C (optional) batteries
Optional (EP73954) 120V AC adapter available (3 prong grounded outlet required)
Quick connect hoses
Note: See 63903LF-* for matching bar/prep

 Integrity Design + Build
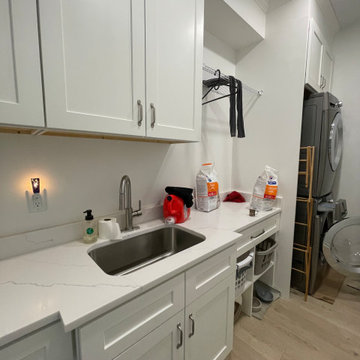
High-Functionality Laundry & Utility Room in Charlottesville, VA
Description:
As part of our extensive whole-home interior overhaul in Charlottesville, Integrity Design + Build transformed this narrow footprint into a high-performance laundry and utility hub. This project demonstrates how thoughtful space planning can turn a secondary room into one of the most hardworking areas of the home.
To maximize the long, galley-style layout, we installed a seamless run of white shaker-style cabinetry paired with durable white quartz countertops. The design features a deep, integrated utility sink with a high-arc faucet, perfect for everything from soaking linens to quick clean-ups. To save precious floor space, we utilized a stacked washer and dryer configuration, allowing for additional countertop workspace and specialized storage nooks, including a dedicated area for pet needs.
Key Design Features:
Space-Saving Stacked Units: Maximizes vertical square footage in a compact layout.
Custom Task Lighting: Bright under-cabinet LEDs ensure a well-lit workspace for sorting and folding.
Integrated Utility Sink: A high-end undermount stainless steel sink that blends utility with a clean, modern aesthetic.
Optimized Storage: A mix of closed cabinetry and open nooks designed to house laundry baskets and supplies.
Cohesive Flooring: The wide-plank white oak-style flooring continues from the main living areas, ensuring a unified feel throughout the home.
Whether you are looking to optimize a mudroom or execute a full-scale home renovation in Charlottesville, Integrity Design + Build specializes in creating spaces that are as beautiful as they are functional.
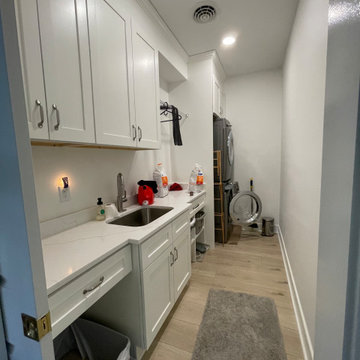 Integrity Design + Build
High-Functionality Laundry & Utility Room in Charlottesville, VA
Description:
As part of our extensive whole-home interior overhaul in Charlottesville, Integrity Design + Build transformed this narrow footprint into a high-performance laundry and utility hub. This project demonstrates how thoughtful space planning can turn a secondary room into one of the most hardworking areas of the home.
To maximize the long, galley-style layout, we installed a seamless run of white shaker-style cabinetry paired with durable white quartz countertops. The design features a deep, integrated utility sink with a high-arc faucet, perfect for everything from soaking linens to quick clean-ups. To save precious floor space, we utilized a stacked washer and dryer configuration, allowing for additional countertop workspace and specialized storage nooks, including a dedicated area for pet needs.
Key Design Features:
Space-Saving Stacked Units: Maximizes vertical square footage in a compact layout.
Custom Task Lighting: Bright under-cabinet LEDs ensure a well-lit workspace for sorting and folding.
Integrated Utility Sink: A high-end undermount stainless steel sink that blends utility with a clean, modern aesthetic.
Optimized Storage: A mix of closed cabinetry and open nooks designed to house laundry baskets and supplies.
Cohesive Flooring: The wide-plank white oak-style flooring continues from the main living areas, ensuring a unified feel throughout the home.
Whether you are looking to optimize a mudroom or execute a full-scale home renovation in Charlottesville, Integrity Design + Build specializes in creating spaces that are as beautiful as they are functional.
 TKS Design Group
Download our free ebook, Creating the Ideal Kitchen. DOWNLOAD NOW
Lakefront property in the northwest suburbs of Chicago is hard to come by, so when we were hired by this young family with exactly that, we were immediately inspired by not just the unusually large footprint of this 1950’s colonial revival but also the lovely views of the manmade lake it was sited on. The large 5-bedroom home was solidly stuck in the 1980’s, but we saw tons of potential. We started out by updating the existing staircase with a fresh coat of paint and adding new herringbone slate to the entry hall.
The powder room off the entryway also got a refresh - new flooring, new cabinets and fixtures. We ran the new slate right through into this space for some consistency. A fun wallpaper and shiplap trim add a welcoming feel and set the tone for the home.
Next, we tackled the kitchen. Located away from the rest of the first floor, the kitchen felt a little isolated, so we immediately began planning for how to better connect it to the rest of the first floor. We landed on removing the wall between the kitchen and dining room and designed a modified galley style space with separate cooking and clean up zones. The cooking zone consists of the refrigerator, prep sink and cooktop, along with a nice long run of prep space at the island. The cleanup side of the kitchen consists of the main sink and dishwasher. Both areas are situated so that the user can view the lake during prep work and cleanup!
One of the home’s main puzzles was how to incorporate the mudroom and area in front of the patio doors at the back of the house. We already had a breakfast table area, so the space by the patio doors was a bit of a no man’s land. We decided to separate the kitchen proper from what became the new mudroom with a large set of barn doors. That way you can quickly hide any mudroom messes but have easy access to the light coming in through the patio doors as well as the outdoor grilling station. We also love the impact the barn doors add to the overall space.
The homeowners’ first words to us were “it’s time to ditch the brown,” so we did! We chose a lovely blue pallet that reflects the home’s location on the lake which is also vibrant yet easy on the eye. Countertops are white quartz, and the natural oak floor works well with the other honey accents. The breakfast table was given a refresh with new chairs, chandelier and window treatments that frame the gorgeous views of the lake out the back.
We coordinated the slate mudroom flooring with that used in the home’s main entrance for a consistent feel. The storage area consists of open and closed storage to allow for some clutter control as needed.
Next on our “to do” list was revamping the dated brown bar area in the neighboring dining room. We eliminated the clutter by adding some closed cabinets and did some easy updates to help the space feel more current. One snag we ran into here was the discovery of a beam above the existing open shelving that had to be modified with a smaller structural beam to allow for our new design to work. This was an unexpected surprise, but in the end we think it was well worth it!
We kept the colors here a bit more muted to blend with the homeowner’s existing furnishings. Open shelving and polished nickel hardware add some simple detail to the new entertainment zone which also looks out onto the lake!
Next we tackled the upstairs starting with the homeowner’s son’s bath. The bath originally had both a tub shower and a separate shower, so we decided to swap out the shower for a new laundry area. This freed up some space downstairs in what used to be the mudroom/laundry room and is much more convenient for daily laundry needs.
We continued the blue palette here with navy cabinetry and the navy tile in the shower. Porcelain floor tile and chrome fixtures keep maintenance to a minimum while matte black mirrors and lighting add some depth the design. A low maintenance runner adds some warmth underfoot and ties the whole space together.
We added a pocket door to the bathroom to minimize interference with the door swings. The left door of the laundry closet is on a 180 degree hinge to allow for easy full access to the machines. Next we tackled the master bath which is an en suite arrangement. The original was typical of the 1980’s with the vanity outside of the bathroom, situated near the master closet. And the brown theme continued here with multiple shades of brown.
Our first move was to segment off the bath and the closet from the master bedroom. We created a short hall from the bedroom to the bathroom with his and hers walk-in closets on the left and right as well as a separate toilet closet outside of the main bathroom for privacy and flexibility.
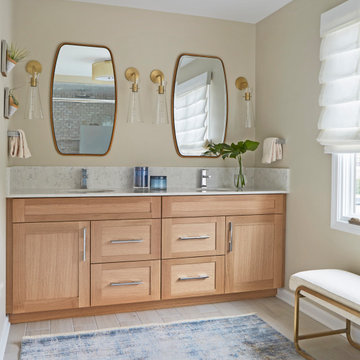
The original bathroom had a giant soaking tub with steps (dangerous!) as well as a small shower that did not work well for our homeowner who is 6’3”. With other bathtubs in the home, they decided to eliminate the tub and create an oversized shower which takes up the space where the old tub was located. The double vanity is on the opposite wall and a bench is located under the window for morning conversations and a place to set a couple of towels.
The pallet in here is light and airy with a mix of blond wood, creamy porcelain and marble tile, and brass accents. A simple roman shade adds some texture and it’s top-down mechanism allows for light and privacy.
This large whole house remodel gave our homeowners not only the ability to maximize the potential of their home but also created a lovely new frame from which to view their fabulous lake views.
Designed by: Susan Klimala, CKD, CBD
Photography by: Michael Kaskel
For more information on kitchen and bath design ideas go to: www.kitchenstudio-ge.com

 Noelle Johnson Landscape Consulting
Victoria agave with a queen butterfly.
This is an example of a southwestern landscaping in Phoenix.
This is an example of a southwestern landscaping in Phoenix.
 Orren Pickell Building Group
**Project Overview**
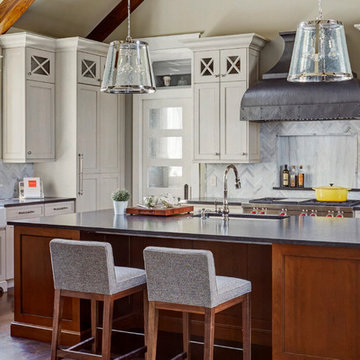
This new construction home built next to a serene lake features a gorgeous, large-scale kitchen that also connects to a bar, home office, breakfast room and great room. The homeowners sought the warmth of traditional styling, updated for today. In addition, they wanted to incorporate unexpected touches that would add personality. Strategic use of furniture details combined with clean lines brings the traditional style forward, making the kitchen feel fresh, new and timeless.
**What Makes This Project Unique?*
Three finishes, including vintage white paint, stained cherry and textured painted gray oak cabinetry, work together beautifully to create a varied, unique space. Above the wall cabinets, glass cabinets with X mullions add interest and decorative storage. Single ovens are tucked in cabinets under a window, and a warming drawer under one perfectly matches the cabinet drawer under the other. Matching furniture-style armoires flank the wall ovens, housing the freezer and a pantry in one and custom designed large scale appliance garage with retractable doors in the other. Other furniture touches can be found on the sink cabinet and range top cabinet that help complete the look. The variety of colors and textures of the stained and painted cabinetry, custom dark finish copper hood, wood ceiling beams, glass cabinets, wood floors and sleek backsplash bring the whole look together.
**Design Challenges*
Even though the space is large, we were challenged by having to work around the two doorways, two windows and many traffic patterns that run through the kitchen. Wall space for large appliances was quickly in short supply. Because we were involved early in the project, we were able to work with the architect to expanded the kitchen footprint in order to make the layout work and get appliance placement just right. We had other architectural elements to work with that we wanted to compliment the kitchen design but also dictated what we could do with the cabinetry. The wall cabinet height was determined based on the beams in the space. The oven wall with furniture armoires was designed around the window with the lake view. The height of the oven cabinets was determined by the window. We were able to use these obstacles and challenges to design creatively and make this kitchen one of a kind.
Photo by MIke Kaskel
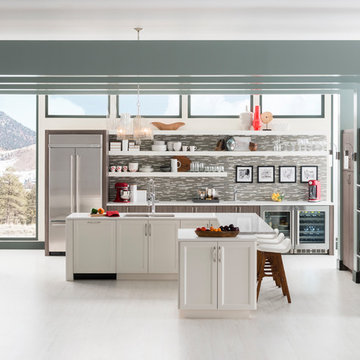
 UltraCraft Cabinetry
Door Style: Piper Door in Kona (Vertical) and Oakland Park Door in Maple, Melted Brie
Photographer: The ShadowLight Group
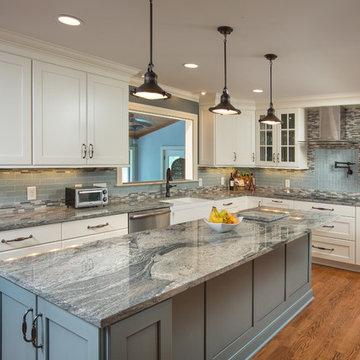
Example of a large trendy eat-in kitchen design in Raleigh with flat-panel cabinets, medium tone wood cabinets, multicolored backsplash, stainless steel appliances, two islands, an undermount sink, quartz countertops and mosaic tile backsplash
Example of a large trendy eat-in kitchen design in Raleigh with flat-panel cabinets, medium tone wood cabinets, multicolored backsplash, stainless steel appliances, two islands, an undermount sink, quartz countertops and mosaic tile backsplash
Sponsored
Columbus, OH

Trish Takacs Design
Award Winning & Highly Skilled Kitchen & Bath Designer in Columbus
 Home Improvement
In the world of wigs, convenience and realism are two of the most sought-after qualities. Women want wigs that not only look natural but also require minimal effort to wear and style. Enter wear and go wigs combined with bleached knots—a powerful duo that transforms the wig-wearing experience. These wigs offer a flawless, natural hairline and are ready to wear immediately, making them ideal for busy lifestyles without sacrificing beauty.
What Are Wear and Go Wigs?
Wear and go wigs are pre-styled wigs designed for instant wear. Unlike traditional wigs that require lace trimming, knot bleaching, or customization, wear and go wigs come ready for action right out of the box.
Key Features:
- Pre-plucked hairline and baby hairs
- Glueless design with adjustable straps and combs for secure fit
- Available in various textures such as straight, curly, and wavy
- Made with 100% human hair for authentic look and feel
- Often pre-styled into trendy cuts and shapes
- Time Saver: Perfect for women with busy schedules who want instant glam
- User-Friendly: No professional installation needed—ideal for beginners
- Protective Styling: Allows your natural hair to rest and grow healthy
- Versatile: Can be styled further with heat tools or left as is
- Reusable: Durable with proper care, lasting several months
- Lightened knots on lace for a natural scalp appearance
- Available in lace front, full lace, and 360 lace varieties
- Made with high-quality 100% human hair
- Pre-plucked hairline often accompanies bleached knots
- Customizable with parting styles and baby hairs
- Ultra-Realistic: Mimics the natural scalp for an undetectable hairline
- Styling Freedom: Allows for multiple parting options and updos
- Comfortable: Breathable lace cap keeps the scalp cool
- Protective: Keeps your natural hair shielded from heat and damage
- Long-Lasting: When cared for properly, can maintain a fresh look for months
 Brewster Home Fashions
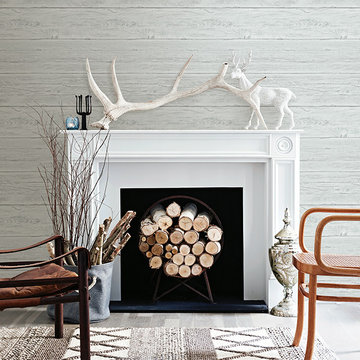
Wood wallpaper as you've never seen it before. This beautiful aqua colorway is reminiscent of beach glass in a nod to the shiplap wood origin.
Inspiration for a non-pasted industrial wood look washable and strippable living room remodel for adults in Boston
Inspiration for a non-pasted industrial wood look washable and strippable living room remodel for adults in Boston

 Total System Service
As a manager of a building or property, you quickly learn the art of mediation. One minute you may be working with a vendor to keep the building’s operating system running efficient and smooth; the next moment you may be calming a tenant down after finding the change in the system disrupted his office’s workflow. Give and take; it’s the only way to make sure every day runs perfectly.
Overall, you have two goals to strive for in everything you do.
1. Keep the building running properly, upgrading systems as appropriate, and striving to do all you can on a pre-established budget.
2. Keep the building occupants happy, with as little disruption as possible.
While some changes are minor, barely registering on a building occupant’s mind, with HVAC challenges, that’s rarely the case. If a HVAC contractor is replacing an air handler, for instance, and disconnects one and moves to the next unit, it may cause major disruptions to sensitive areas of a building. And if the occupant wasn’t prepared for the disruption, you can have a mighty unhappy customer on your hand.
Anytime you are working on HVAC projects throughout your building, there are strategies you can put into place to keep things running smooth.
Communicate with occupants
Communication is key to any good relationship, and as a property manager, this rule is a great place to start. If you will be working with the HVAC equipment, block out the timeframe for work to be done, and understand the potential consequences of the process. Then communicate this process with every point of contact you have throughout the building. The more detail you can provide, the less surprises you’ll have throughout the process. You can also work with your building’s occupants before the process begins, finding out if there are better timeframes than others.
Establish a realistic schedule
As a property manager, its easy to provide your expectations for the HVAC project at hand, and request that the proposal be written in such a way that work is completed on your timeframe. Unfortunately, many contractors want your business and will agree to anything upfront in order to win the bid, knowing full well the work will take longer than specified. Instead of projecting your timeframes into the proposal process, ask for HVAC project bids to establish realistic schedules of how long the process will take, and what areas of your property will be most effected throughout the schedule. This will help you avoid crises between you and the contractor, and you and your tenants.
Plan for the whole system
If one small piece of your HVAC system is weak, its easy to fix that one small piece. But how will that impact your overall system? Will it cause weak spots in different parts of the building – maybe a corner office will have reduced air flow, and therefore be colder in the winter and warmer in the summer? When retrofitting new pieces with older existing systems, its easy to reduce the efficiency of your entire system. Before agreeing to certain repairs, make sure you understand how it will impact your entire system overall. An easy way of handling this problem is by working with the same HVAC contractor again and again, He will understand your system’s potential, and know when to make repairs, and when to replace.
Have points of contact available for immediate assistance
In many cases, problems arise because connections can’t be made. Can the HVAC contractor get a hold or you or another person that can make decisions at a moments notice if a problem arises? Do you have access to decision makers throughout the building that may be impacted by this change? Many projects have been put on hold simply because a person in authority can’t be found to give the go-ahead to move forward. If you have access to these people during the time of the project, you’ll be able to complete the project in record time.
Test
Finally, if you can test things in stages, or test when the potential for problems is the smallest, you reduce the chances of bigger emergency issues falling into your lap. If you’ll be installing a new terminal unit, can you make the switch on a Saturday morning when the building is largely unoccupied? If you’re replacing a large system, can you replace and test in phases so the entire project isn’t released at once?
Most issues can be avoided with just a little strategy from the beginning. If you’ve never had a HVAC maintenance team to help you stay on track with your building’s heating and cooling, now may be the time to find out how easy a team approach makes the process.
 Mission Kitchen & Bath
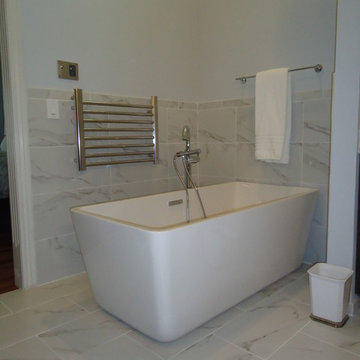
When people think of remodeling their homes, they often immediately consider starting with rooms like the dining area, living room, or basement – rooms where the most amount of people spend the most amount of time. While those rooms are important, recent remodeling trends are pointing toward the popularity of re-creating a more private place – the master bath.
In fact, we are in the midst of The Year of the Master Bath. Current home improvement practices show that, not only is redoing your master bath a fun and stylish choice, but it also is a wise way to add value to your home.
For homes built in the 1990’s with master baths over 200 square feet in size, now is the ideal time to remodel and upgrade to a more efficient, stylish, and worth-while setup. Most homes built during this time period were completed with a typical master bath that included a large jetted tub, and a separate small shower. Both of these elements are quickly becoming recognizable as features of the past, and are being replaced by new and improved technologies.
For instance, many homeowners have taken it upon themselves to remove the large jetted bath, and replace it with a free standing tub. These free standing tubs allow for the room to open up in a more modern fashion, and provide endless style and aesthetic choices. Homeowners are also expanding their small showers to create a luxury environment. By pushing out walls to make more shower space, adding skylights and hinged doors, or even designing an accent tile pattern, homeowners are able to take their simple shower and turn it into a relaxing space that rivals even the best spa.
The remodeling of a master bath even allows for homeowners to get creative with storage space and style. Many emerging trends include higher vanity height, and even additional built-in towers with extra outlets so that no one is without power while curling their hair or charging a razor.
When you take the time to customize your master bath, you will add a level of value to your home that you can experience each and every day, and that will also add to your home’s worth in the long run. Join in on The Year of the Master Bath, and enjoy your improved space for decades to come!
 Globe Electric
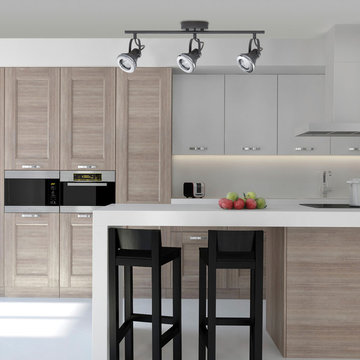
The Novogratz family are known for fun innovative designs. Incorporating quality products with unique design and construction, they bring a breath of fresh air to everything they do. The Novogratz have partnered with Globe to bring you a collection of quality, innovative and unique products that showcase the best of both companies. Novogratz x Globe’s Lawrence 3-Light Track Lighting with gray finish and chrome accents is ideal for use in kitchens, bedrooms, living rooms, hallways, dining rooms – anywhere you want the ability to direct light exactly where needed without multiple light fixtures. Each of the three track heads are independently adjustable so you can direct and focus your light where you need it the most. The chrome trim brings a new look to a classic design. Includes all mounting hardware for quick and easy installation and requires three 50W equivalent GU10 halogen light bulbs. Since 1932, Globe Electric has been committed to our consumers and products. Every day we strive to develop and sustain the creative energy that has kept us going for more than 80 years. As family run businesses, Globe Electric and Novogratz have a lot in common. The Globe Electric team is a large family much like the Novogratz team - we both work towards providing products that deliver beautiful appeal, stellar performance, easy installation, and exceptional value.
 Mission Kitchen & Bath
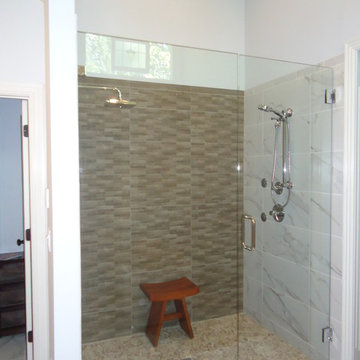
When people think of remodeling their homes, they often immediately consider starting with rooms like the dining area, living room, or basement – rooms where the most amount of people spend the most amount of time. While those rooms are important, recent remodeling trends are pointing toward the popularity of re-creating a more private place – the master bath.
In fact, we are in the midst of The Year of the Master Bath. Current home improvement practices show that, not only is redoing your master bath a fun and stylish choice, but it also is a wise way to add value to your home.
For homes built in the 1990’s with master baths over 200 square feet in size, now is the ideal time to remodel and upgrade to a more efficient, stylish, and worth-while setup. Most homes built during this time period were completed with a typical master bath that included a large jetted tub, and a separate small shower. Both of these elements are quickly becoming recognizable as features of the past, and are being replaced by new and improved technologies.
For instance, many homeowners have taken it upon themselves to remove the large jetted bath, and replace it with a free standing tub. These free standing tubs allow for the room to open up in a more modern fashion, and provide endless style and aesthetic choices. Homeowners are also expanding their small showers to create a luxury environment. By pushing out walls to make more shower space, adding skylights and hinged doors, or even designing an accent tile pattern, homeowners are able to take their simple shower and turn it into a relaxing space that rivals even the best spa.
The remodeling of a master bath even allows for homeowners to get creative with storage space and style. Many emerging trends include higher vanity height, and even additional built-in towers with extra outlets so that no one is without power while curling their hair or charging a razor.
When you take the time to customize your master bath, you will add a level of value to your home that you can experience each and every day, and that will also add to your home’s worth in the long run. Join in on The Year of the Master Bath, and enjoy your improved space for decades to come!
 Quality Edge
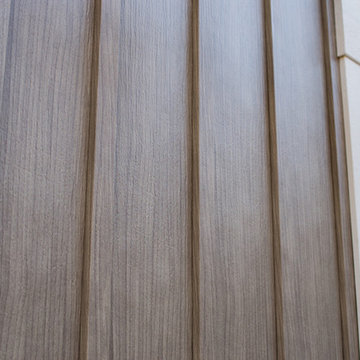
TruCedar Steel Siding shown in 10" Board & Batten in Napa Vine.
Beige two-story metal exterior home idea in Grand Rapids
Beige two-story metal exterior home idea in Grand Rapids
25