
Search results for "Quitting process" in Home Design Ideas
 Nicole Arnold Interiors
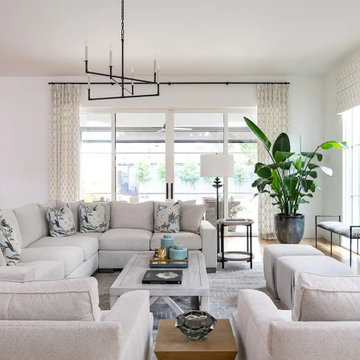
As this family was moving to Dallas, they needed the guidance of a designer to provide finishing touches to the building process as well as someone to fully furnish their new home. Their desire was to have a new start in an updated transitional and slightly modern style, quite different from their previous home’s modern farmhouse décor. We brought in clean lines, warm textures and an abundance of neutrals to keep a light and airy feel throughout most of the home, reserving some moody tones for the study and a little drama in the guest bath. This home’s new, elevated aesthetic is a perfect balance of beauty, function, light and elegance. It just flows with feelings of comfort and ease!
 Nicole Arnold Interiors
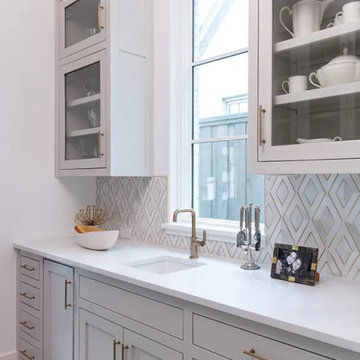
As this family was moving to Dallas, they needed the guidance of a designer to provide finishing touches to the building process as well as someone to fully furnish their new home. Their desire was to have a new start in an updated transitional and slightly modern style, quite different from their previous home’s modern farmhouse décor. We brought in clean lines, warm textures and an abundance of neutrals to keep a light and airy feel throughout most of the home, reserving some moody tones for the study and a little drama in the guest bath. This home’s new, elevated aesthetic is a perfect balance of beauty, function, light and elegance. It just flows with feelings of comfort and ease!
 Tile Doctor Ltd
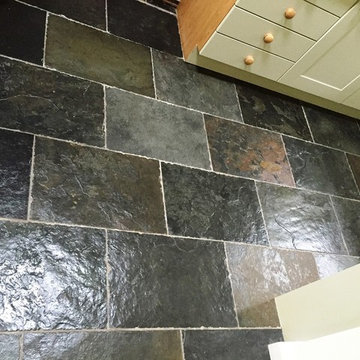
This small rough Chinese Slate floor in the kitchen of a house in the village of Cheadle near Stockport in Greater Manchester had not had any sealer put on it for many years and was very grubby (dishevelled as described by the customer) looking even after the customer had tried to clean it.
Sealers do take a lot of punishment, especially in a high traffic area such as a small kitchen and will wear off over time and once this happens the floor will start to lose its appearance as dirt becomes ingrained in the stone and it can no longer be cleaned effectively.
As we have to apply a liberal amount of water with this sort of work, the first step was to remove the Kicker boards at the bottom of the Kitchen units and silicone the Kitchen units that were fixed; this stops water seeping in and blowing the MDF allowing us to concentrate on cleaning the Slate without causing any damage.
I started the cleaning process by applying a strong dilution of Tile Doctor Pro-Clean to get rid of the built up dirt and any remaining sealer, leaving it to soak into the Slate before scrubbing the floor with a black scrub pad fitted to buffing machine running at slow speed. Tile Doctor Pro-Clean is a strong alkaline cleaner/stripper that is safe to use on natural stone, we do have stronger products available if required but in this case a strong dilution of Pro-Clean was sufficient to tackle any remaining sealer.
This process gave the Slate and grout lines a good deep clean and after rinsing the floor with water which was then extracted using a wet vacuum I repeated the process on stubborn areas until satisfied the floor was as clean and free of old sealer. Last stage of the cleaning process was to give the floor a final rinse and then get it as dry as possible using the wet vacuum to soak up the moisture.
The floor was quite small so I was able to leave the floor to dry off over lunch time and then on my return managed to get it fully dry with a little heat from a heat gun. The customer wanted a mat finish so once dry I applied Tile Doctor Colour Grow sealer which impregnates into the pores of the natural stone protecting it from within and enhancing the natural colours of the Slate at the same time.
For general cleaning of Sealed stone floors, we recommend the use of a PH Neutral Cleaner as anything with a strong PH will degrade the life of the sealer over time.
Steve Keary
Greater Manchester Tile Doctor
Find the right local pro for your project
 Nicole Arnold Interiors
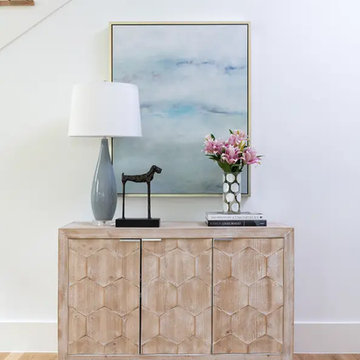
As this family was moving to Dallas, they needed the guidance of a designer to provide finishing touches to the building process as well as someone to fully furnish their new home. Their desire was to have a new start in an updated transitional and slightly modern style, quite different from their previous home’s modern farmhouse décor. We brought in clean lines, warm textures and an abundance of neutrals to keep a light and airy feel throughout most of the home, reserving some moody tones for the study and a little drama in the guest bath. This home’s new, elevated aesthetic is a perfect balance of beauty, function, light and elegance. It just flows with feelings of comfort and ease!

 Quarry Mill
Cambrian Creek real thin stone veneer from the Quarry Mill creates a beautiful and traditional oven surround in this luxury kitchen. Cambrian Creek is a classic real stone veneer cut into the dimensional (sawn-height) style. The stone is natural dolomitic limestone with the timeless colors of gold, buff and the occasional grey. The quarrying and production process for Cambrian Creek is quite impressive. The stone is cut from the ground in blocks roughly the size of a car. Then, the blocks get sawn or sliced as it is called into large sheets of stone in heights of 2.25”, 5” and 7.75”. The sheets are fed into the splitter where the hydraulic press breaks them every four inches. At this stage, the stone is considered building stone or full veneer. Finally, the pieces are run through the saw to create the beautiful thin veneer.
 Nicole Arnold Interiors
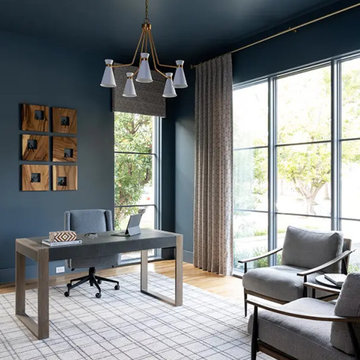
As this family was moving to Dallas, they needed the guidance of a designer to provide finishing touches to the building process as well as someone to fully furnish their new home. Their desire was to have a new start in an updated transitional and slightly modern style, quite different from their previous home’s modern farmhouse décor. We brought in clean lines, warm textures and an abundance of neutrals to keep a light and airy feel throughout most of the home, reserving some moody tones for the study and a little drama in the guest bath. This home’s new, elevated aesthetic is a perfect balance of beauty, function, light and elegance. It just flows with feelings of comfort and ease!
 Tile Doctor Ltd
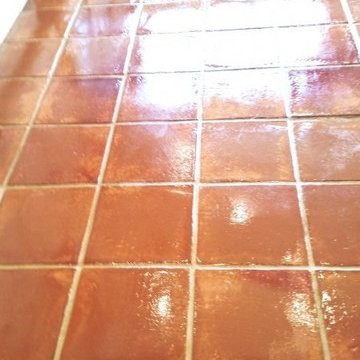
Sealers really do bring out the best in Terracotta tiles, however the catch is they will wear off over time and if you want to maintain that appearance you have to work out a regular maintenance plan. If you don’t maintain the sealer you will find that the sealer near the most heavily used areas such as doors etc. will wear away first and once that happens dirt will become ingrained in the tile and becomes difficult to clean resulting in a patchy appearance.
The remaining sealer on this Terracotta tiled kitchen floor at a house in the town of Wickford, Essex was no longer effective and had worn completely off in places. The solution was to strip off the old sealer, clean the Terracotta tile and gout and then re-seal with a fresh seal.
I started by giving the floor a deep clean with Tile Doctor Pro Clean diluted 2 parts water to 1 part cleaner. This is quite a strong dilution designed to allow the removal of the sealer and was left to dwell on the floor for ten minutes before working it into the floor using a scrubbing machine fitted with a black pad. Surprisingly the sealer was proving difficult to shift in certain areas and I had to repeat the process a few times and made sure to give the grout a good scrubbing as well.
I managed to get rid of most of the sealer using this process and for the remaining stubborn areas I used a stronger product called Tile Doctor Remove and Go which is a very effective coatings remover that is safe to use on tiles. This did the trick and the floor was now free of sealers and the grout was looking much better too, the resultant slurry was removed using a wet vacuum and I then rinsed the floor several times with water before leaving it to dry for weekend.
Tile Doctor Colour Grow which is an impregnating sealer that seeps into the pores of the tile to block them and prevent contaminates becoming ingrained in there and it also enhances the natural colours. Once this was dry I followed up with a number of coats of Tile Doctor Seal and Go which is topical sealer that will protect the surface and adds a nice sheen to the floor and is a popular choice for Terracotta and Quarry tiles.
I’m not sure my photographs do this post any justice however hopefully you can see that floor was quite transformed, the grout is much cleaner and the colours in the Terracotta have really come to life.
Nick Murphy
South Essex Tile Doctor
 Quarry Mill
This residential home uses the Quarry Mill's Cambrian Creek thin stone veneer to complement the grill and pool area. Cambrian Creek is a classic real stone veneer cut into the dimensional (sawn-height) style. The stone is natural dolomitic limestone with the timeless colors of gold, buff and the occasional grey. The quarrying and production process for Cambrian Creek is quite impressive. The stone is cut from the ground in blocks roughly the size of a car. Then, the blocks get sawn or sliced as it is called into large sheets of stone in heights of 2.25”, 5” and 7.75”. The sheets are fed into the splitter where the hydraulic press breaks them every four inches. At this stage, the stone is considered building stone or full veneer. Finally, the pieces are run through the saw to create the beautiful thin veneer.
 Tile Doctor Ltd
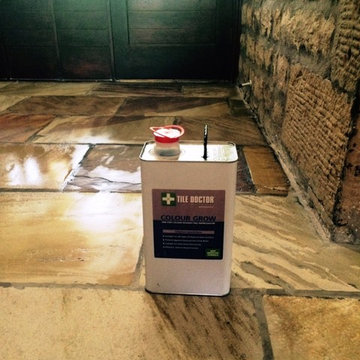
Here we have a six year old Indian Sandstone tiled floor located a property on the outskirts of Lancaster. Measuring 100 metres squared, the very large floor had under floor heating in the concrete sub base. The type of stone used inside the property is what we commonly refer to as ‘patio Sandstone’, a material which is usually used outside because of its very rough texture. It’s not particularly comfortable to walk across in bare feet, hence why many people consider it be impractical for internal flooring.
Nonetheless, the property owner was keen to make the rough textured floor as feet-friendly as possible for people walking over it. At Tile Doctor we have developed a process known as milling, which utilises diamond encrusted pads combined with a weighted rotary machine to smooth the rough surface, leaving it looking and feeling a lot nicer and more practical to live with. The milling process is only done once, but while the Sandstone will still need cleaning and sealing in the future, it won’t be nearly as difficult as when it was rough.
The job would take over two weeks to complete due to the fact that the existing grout needed to be removed and replaced with a flexible floor grout: a very time consuming process.
As mentioned, the surface of the Sandstone was very rough, and so needed to be milled down to make it a lot smoother to look after and make it easy to clean and seal. This was achieved by using Tile Doctor’s 50 Grit diamond encrusted burnishing pads, fitted to a weighed rotary machine and run along the entire surface area of the floor. Through this process the stone became much smoother and more aesthetic – completing one of our main objectives for the customer.
Next, we started breaking out the already loose and badly applied grout with our grout removal tools. The builder who had installed the floor had used a sand/cement-based grout which wasn’t flexible. As a result, it started to crumble and loosen quite quickly after exposure to the underfloor heating. We removed this and replaced it with a far more flexible grout.
Once the whole area had been successfully milled and the grout replaced, the Sandstone floor was left to dry out over the weekend. Upon our return to the property, we cleaned off any dust and resin left over from the milling and grouting processes, before leaving it to dry for a further 24 hours.
The next day we returned to seal the whole floor with two coats of our impregnating sealer Tile Doctor Colour Grow. The sealer fills the pores of the Sandstone to prevent ingrained dirt and stains, while also emphasising the natural colours in the stone. It also provides a robust matte finish, which is what the customer wished for.
It wasn’t the easiest of processes to get the Indian Sandstone into a condition where it would be both suitable for internal flooring and aesthetically pleasing, but the results proved to be very much worth the time and effort invested. The customer was very pleased with the transformation.
Russell Taylor
Lancashire Tile Doctor

 Kathleen Jennison
An Arts & Crafts Bungalow is one of my favorite styles of homes. We have quite a few of them in our Stockton Mid-Town area. And when C&L called us to help them remodel their 1923 American Bungalow, I was beyond thrilled.
As per usual, when we get a new inquiry, we quickly Google the project location while we are talking to you on the phone. My excitement escalated when I saw the Google Earth Image of the sweet Sage Green bungalow in Mid-Town Stockton. "Yes, we would be interested in working with you," I said trying to keep my cool.
But what made it even better was meeting C&L and touring their home, because they are the nicest young couple, eager to make their home period perfect. Unfortunately, it had been slightly molested by some bad house-flippers, and we needed to bring the bathroom back to it "roots."
We knew we had to banish the hideous brown tile and cheap vanity quickly. But C&L complained about the condensation problems and the constant fight with mold. This immediately told me that improper remodeling had occurred and we needed to remedy that right away.
The Before: Frustrations with a Botched Remodel
The bathroom needed to be brought back to period appropriate design with all the functionality of a modern bathroom. We thought of things like marble countertop, white mosaic floor tiles, white subway tile, board and batten molding, and of course a fabulous wallpaper.
This small (and only) bathroom on a tight budget required a little bit of design sleuthing to figure out how we could get the proper look and feel. Our goal was to determine where to splurge and where to economize and how to complete the remodel as quickly as possible because C&L would have to move out while construction was going on.
The Process: Hard Work to Remedy Design and Function
During our initial design study, (which included 2 hours in the owners’ home), we noticed framed images of William Morris Arts and Crafts textile patterns and knew this would be our design inspiration. We presented C&L with three options and they quickly selected the Pimpernel Design Concept.
We had originally selected the Black and Olive colors with a black vanity, mirror, and black and white floor tile. C&L liked it but weren’t quite sure about the black, We went back to the drawing board and decided the William & Co Pimpernel Wallpaper in Bayleaf and Manilla color with a softer gray painted vanity and mirror and white floor tile was more to their liking.
After the Design Concept was approved, we went to work securing the building permit, procuring all the elements, and scheduling our trusted tradesmen to perform the work.
We did uncover some shoddy work by the flippers such as live electrical wires hidden behind the wall, plumbing venting cut-off and buried in the walls (hence the constant dampness), the tub barely balancing on two fence boards across the floor joist, and no insulation on the exterior wall.
All of the previous blunders were fixed and the bathroom put back to its previous glory. We could feel the house thanking us for making it pretty again.
The After Reveal: Cohesive Design Decisions
We selected a simple white subway tile for the tub/shower. This is always classic and in keeping with the style of the house.
We selected a pre-fab vanity and mirror, but they look rich with the quartz countertop. There is much more storage in this small vanity than you would think.
The Transformation: A Period Perfect Refresh
We began the remodel just as the pandemic reared and stay-in-place orders went into effect. As C&L were already moved out and living with relatives, we got the go-ahead from city officials to get the work done (after all, how can you shelter in place without a bathroom?).
All our tradesmen were scheduled to work so that only one crew was on the job site at a time. We stayed on the original schedule with only a one week delay.
The end result is the sweetest little bathroom I've ever seen (and I can't wait to start work on C&L's kitchen next).
Thank you for joining me in this project transformation. I hope this inspired you to think about being creative with your design projects, determining what works best in keeping with the architecture of your space, and carefully assessing how you can have the best life in your home.

 Cure Design Group
The furniture was recently purchased so we really needed to get the job done in bedding, color, patterns, and infusing some key pieces/accessories to work in conjunction with the youthful furniture selection.
The inspiration to her design came from a Designers Guild wallpaper that resembled the color of the sky…from there we changed the wall color to a soft gray, added new bedding and pillows, gave the window treatments a neutral texture, changed out overhead lighting and lamps and infused some current accessories.
The change was exactly what was needed! But….we weren’t quite finished. We decided at that point that some extra storage was needed as well as an opportunity to bring that outdoor woodsy feeling into her room. We then changed her nightstand to more of a dresser wrapped in the gloss white and drawers in reclaimed wood.
What a difference!!! But, collectively we still I felt we needed one more change to give her room that “wow” factor. I then decided to change the drama of her existing headboard to one that was spectacular!! And it worked!!!
We are still in the process of changing out her desk, but for the most part we are there!!!

 Sullivan Building & Design Group
As part of an overall renovation of an old farmhouse the bathrooms are always a little more di cult to plan. In this case our client wanted to create a real “masculine” overall feel but with enough class to make it comfortable for a woman. Bold forms and solid lines needed to be o set by subtle softness in the design.
THE RESULTS
The overall bathroom is both handsome and bold. We custom built the walnut vanity from wall to wall of the existing space. We used wall mounted faucets with just a bit of a rounded profile to soften the square edges of the soapstone tops and walnut mirror.
The shower is a combination of very bold blackened steel framed glass around a clean white subway tile background. The black and white theme is quite typical in this period home. Our client was an active participant in the overall design process and was thrilled with the result.
This bathroom is a total remake of a small bathroom that existed in an old stone farmhouse in which the whole house was totally renovated. As this was a bachelor pad of sorts there was a real desire to blend bold forms and dark colors with a touch of class and sophistication. Bold walnut vanity with soft baskets for storage blended perfectly with black metal shower frame and clean white subway tile. A very cozy modern bath with a charming old world feel.

 New Vista Renovation
Congratulations to the family that allowed us to transform their kitchen space! We managed to complete this remodel - just in time for them to bring a beautiful baby girl into this world!
It was quite an amazing experience to design and remodel this home with our new Medallion Cabinetry product line. The main area of cabinetry features our Gold Line in Park Place door style, in the color Sea Salt with Pewter Highlight. Their new 7ft island is our Appaloosa Peppercorn with matching island legs.
New Vista managed this project from start to finish, including all permits required by the local building department.
The previous 20ft wall had been located from the area of the remaining post to the window to the right of the sink, shown in these photos. Proper removal of this wall did require a structurally sound weight load transfer in the attic. Safety comes first!
Also included: Granite counters, new appliances, brick style backsplash, flooring, gas line/plumbing/electrical relocation, can lighting and new plumbing fixtures.
Our CAD drawings are proving to be incredibly helpful in the design process of our remodels, allowing customers to really SEE what they can do with the space they have!
This project had closed without any change orders and the total time encompassed exactly 8wks - from demolition to final inspection!

 INSPIRED KITCHEN DESIGN
Elaine says there are many factors to remember during the IKEA design and installation process.
She explains: “First, it’s important to stay calm, and be flexible. Our kitchen was quite large and the IKEA store representative who completed the order made many mistakes. So, I made many trips to IKEA to buy extra parts.”
She continues: “Also, go early to IKEA and don’t wait until the last minute. I couldn’t get to IKEA until the last day of the IKEA kitchen sale but that wasn’t a good idea!”
From a product standpoint, she says that she would not recommend the IKEA push openers for cabinet doors.
“I wanted a flush look on the tall cabinets and wall cabinets without any knobs or pulls. IKEA’s push openers were not strong enough for the horizontal wall cabinet doors that swing open from the bottom,” she says.
Ultimately though, Elaine says she couldn’t be happier with the results of her modern, white IKEA kitchen.
“My initial concern was whether the kitchen would look as nice as I had envisioned. I have to say that the actual kitchen has exceeded my expectations and looks better than anticipated!” she concludes.

 Nicole Arnold Interiors
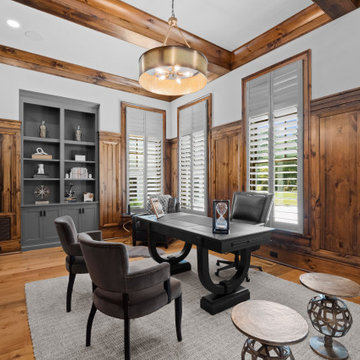
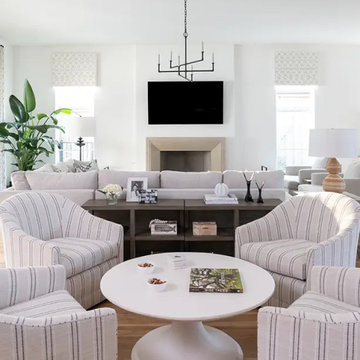
As this family was moving to Dallas, they needed the guidance of a designer to provide finishing touches to the building process as well as someone to fully furnish their new home. Their desire was to have a new start in an updated transitional and slightly modern style, quite different from their previous home’s modern farmhouse décor. We brought in clean lines, warm textures and an abundance of neutrals to keep a light and airy feel throughout most of the home, reserving some moody tones for the study and a little drama in the guest bath. This home’s new, elevated aesthetic is a perfect balance of beauty, function, light and elegance. It just flows with feelings of comfort and ease!
 Riverside Builders, Inc.
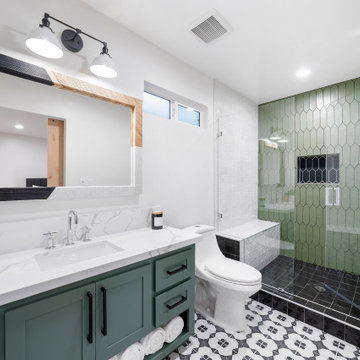
Inspiration for a mid-sized transitional 3/4 ceramic tile, black floor and single-sink bathroom remodel in Sacramento with shaker cabinets, green cabinets, a one-piece toilet, an undermount sink, quartz countertops, white countertops, a floating vanity and white walls
 Nicole Arnold Interiors
As this family was moving to Dallas, they needed the guidance of a designer to provide finishing touches to the building process as well as someone to fully furnish their new home. Their desire was to have a new start in an updated transitional and slightly modern style, quite different from their previous home’s modern farmhouse décor. We brought in clean lines, warm textures and an abundance of neutrals to keep a light and airy feel throughout most of the home, reserving some moody tones for the study and a little drama in the guest bath. This home’s new, elevated aesthetic is a perfect balance of beauty, function, light and elegance. It just flows with feelings of comfort and ease!
 Quarry Mill
This stunning kitchen highlights Cambrian Creek natural thin veneer from the Quarry Mill. Cambrian Creek is a classic real stone veneer cut into the dimensional (sawn-height) style. The stone is natural dolomitic limestone with the timeless colors of gold, buff and the occasional grey. The quarrying and production process for Cambrian Creek is quite impressive. The stone is cut from the ground in blocks roughly the size of a car. Then, the blocks get sawn or sliced as it is called into large sheets of stone in heights of 2.25”, 5” and 7.75”. The sheets are fed into the splitter where the hydraulic press breaks them every four inches. At this stage, the stone is considered building stone or full veneer. Finally, the pieces are run through the saw to create the beautiful thin veneer.
 Sullivan Building & Design Group
As part of an overall renovation of an old farmhouse the bathrooms are always a little more di cult to plan. In this case our client wanted to create a real “masculine” overall feel but with enough class to make it comfortable for a woman. Bold forms and solid lines needed to be o set by subtle softness in the design.
THE RESULTS
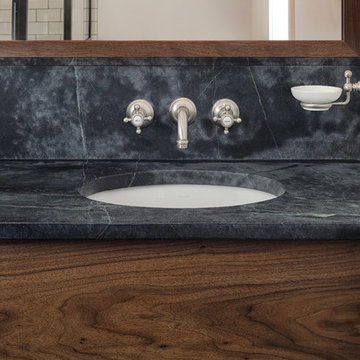
The overall bathroom is both handsome and bold. We custom built the walnut vanity from wall to wall of the existing space. We used wall mounted faucets with just a bit of a rounded profile to soften the square edges of the soapstone tops and walnut mirror.
The shower is a combination of very bold blackened steel framed glass around a clean white subway tile background. The black and white theme is quite typical in this period home. Our client was an active participant in the overall design process and was thrilled with the result.
This bathroom is a total remake of a small bathroom that existed in an old stone farmhouse in which the whole house was totally renovated. As this was a bachelor pad of sorts there was a real desire to blend bold forms and dark colors with a touch of class and sophistication. Bold walnut vanity with soft baskets for storage blended perfectly with black metal shower frame and clean white subway tile. A very cozy modern bath with a charming old world feel.
8